Fair Scheduler allocates resources fairly to each job on YARN based on weight.
Definitions
Configuration Set: Specifies the resource assignment among active resource pools during a specified period.
Execution Plan: Specifies when the configuration set will be active.
Placement Rule: Automatically allocates jobs submitted by different users to specified resource pools.
User Limits: Specifies the maximum number of applications that can be submitted by a user at a time.
Directions
Creating a resource pool
1. Log in to the EMR console and click Details of the target Hadoop cluster in the cluster list to enter the cluster details page.
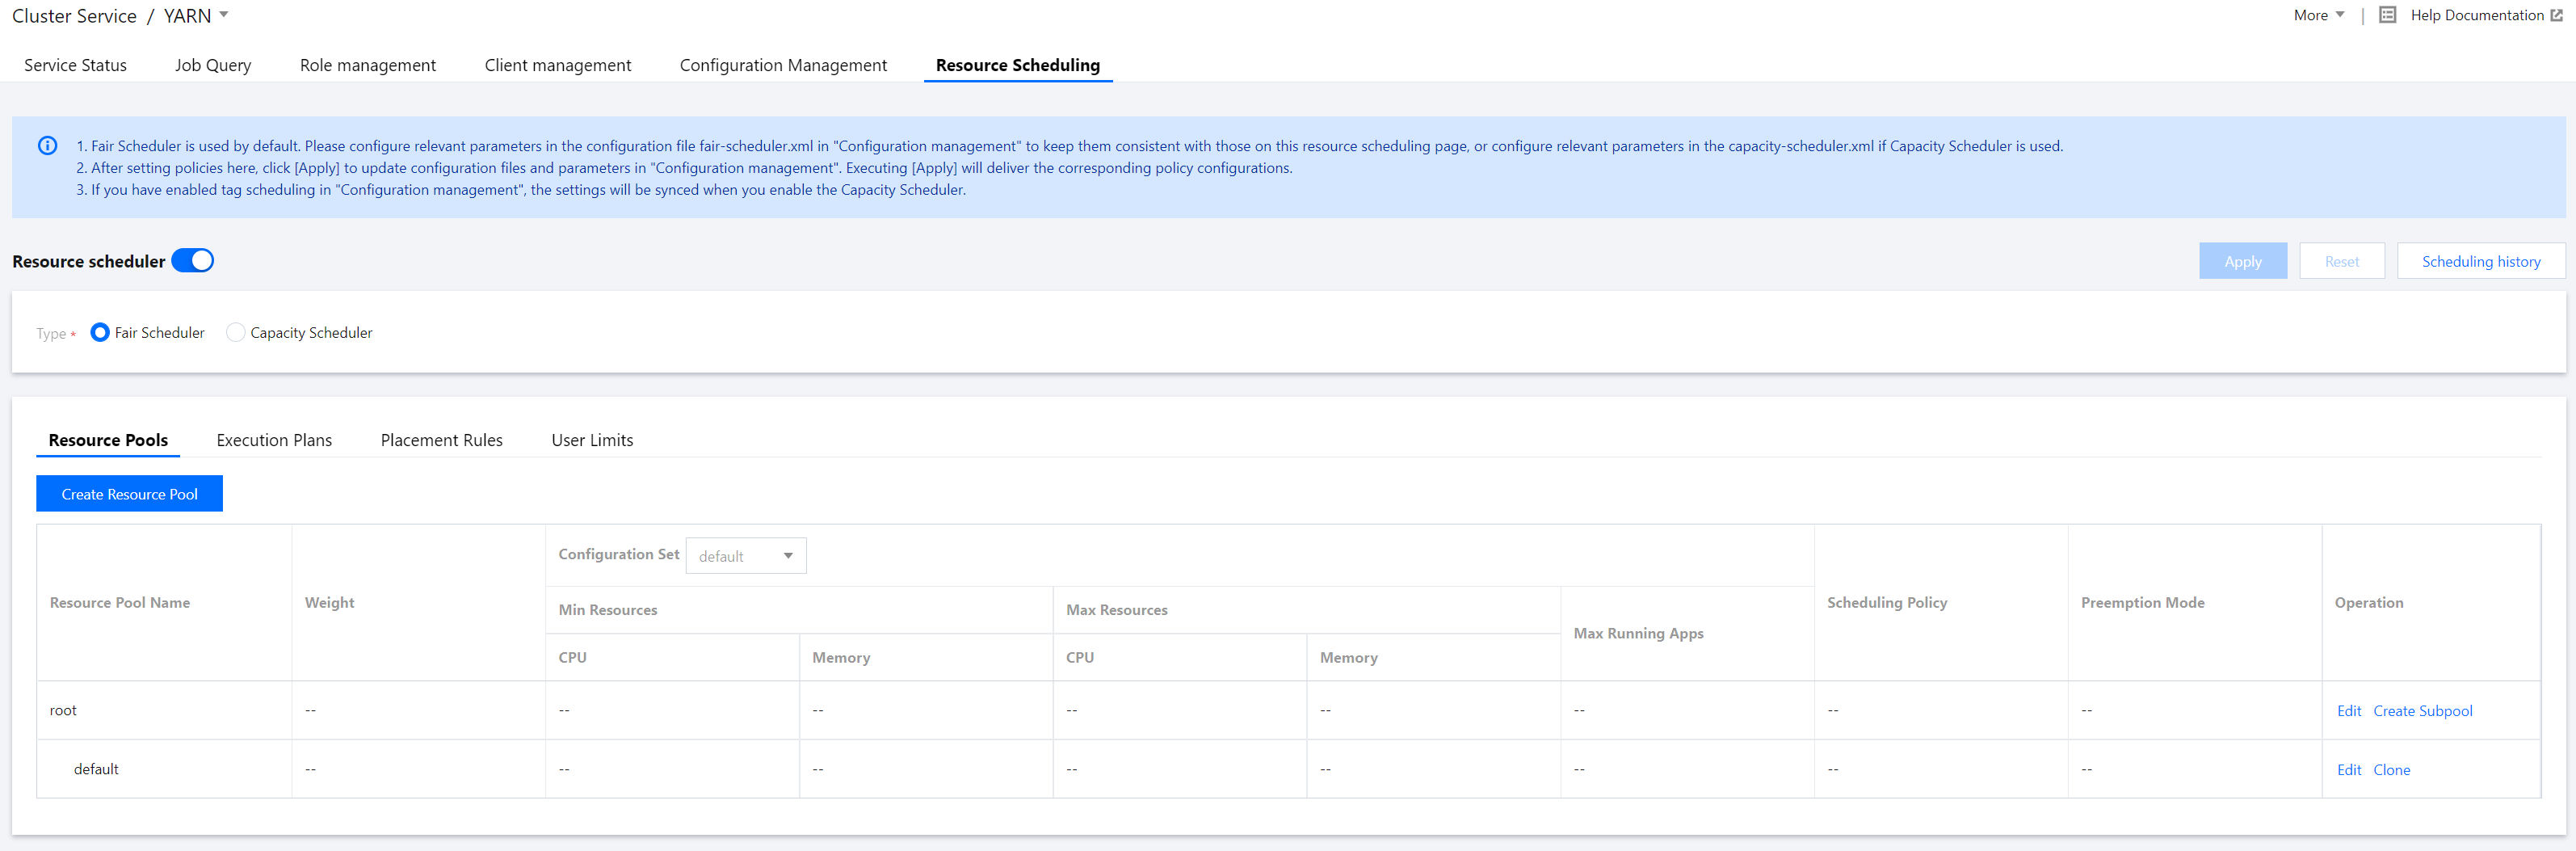
2. On the cluster details page, select Cluster services and click Operation > Resource scheduling in the top-right corner of the YARN component block to enter the Resource scheduling page.
3. Toggle on Resource scheduler and configure the scheduler.
4. Create a resource pool for Fair Scheduler.
Select Fair Scheduler. On the displayed page, click Create resource pool. You can edit, clone, and delete an existing resource pool as well as create a subpool for it.
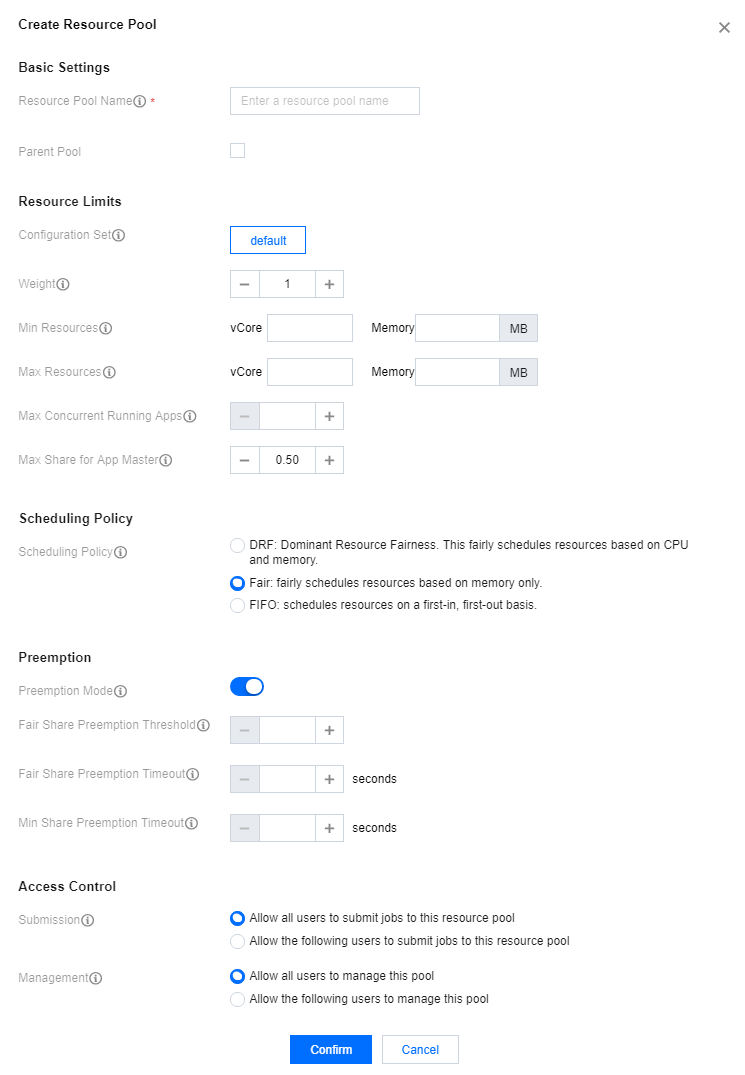
Fields and parameters:
Field
Parameter
Description
Resource Pool Name
name
Name of the resource pool or queue. It can contain only letters, digits, hyphens, and underscores and cannot start with a hyphen or underscore.
Parent Pool
The value of `type` is `parent`.
Means that although the resource pool has no subpools, it is not a leaf node. A parent pool cannot have subpools in Hadoop v2.8 and later.
Configuration Set
None
YARN does not have this parameter, which means a collection of scheduled tasks.
Weight
weight
Percentage of resources in the parent pool. A greater weight means more resources allocated.
Min Resources
minResources
The minimum amount of resources guaranteed. When the minimum amount of resources guaranteed for a queue is not met, it has a higher priority than other queues at the same level to obtain resources.
Max Resources
maxResources
The maximum amount of resources that can be used. The amount of resources available for each queue cannot exceed this value.
Max Concurrent Running Apps
maxRunningApps
The maximum number of concurrent running applications allowed. This limitation can prevent intermediate outputs generated by excessive concurrent running map tasks from filling up the disks.
Max Share for App Master
maxAMShare
The maximum percentage of resources that can be used to run Application Master. This attribute only applies to leaf queues.
Scheduling Policy
schedulingPolicy
You can set a scheduling policy for any queue. Valid values include `Fifo`, `Fair`, and `Drf`. If the value is `Fifo` or `Fair`, only memory is taken into account in resource allocation. If `Drf`, both memory and the number of cores are taken into account.
Preemption Mode
allowPreemptionFrom
This field applies only to Hadoop v3.x and later. In v2.x, you can only configure `yarn.scheduler.fair.preemption` to set the preemption mode.
Fair Share Preemption Threshold
fairSharePreemptionThreshold
The fair share preemption threshold for the queue. If the queue waits `fairSharePreemptionTimeout` without receiving `fairSharePreemptionThreshold*fairShare` resources, it is allowed to preempt resources from other queues. If this field is not set, the queue will inherit the value from its parent queue.
Fair Share Preemption Timeout
fairSharePreemptionTimeout
Number of seconds the queue is under its fair share threshold before it will try to preempt resources from other queues. If this field is not set, the queue will inherit the value from its parent queue.
Min Share Preemption Timeout
minSharePreemptionTimeout
Number of seconds the queue is under its minimum share before it will try to preempt resources from other queues. If this field is not set, the queue will inherit the value from its parent queue.
Submission
aclSubmitApps
List of users that can submit apps to the queue
Management
aclAdministerApps
List of users that can manage the queue
Configuring an execution plan
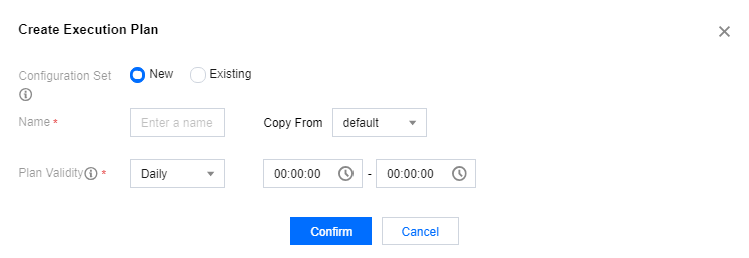
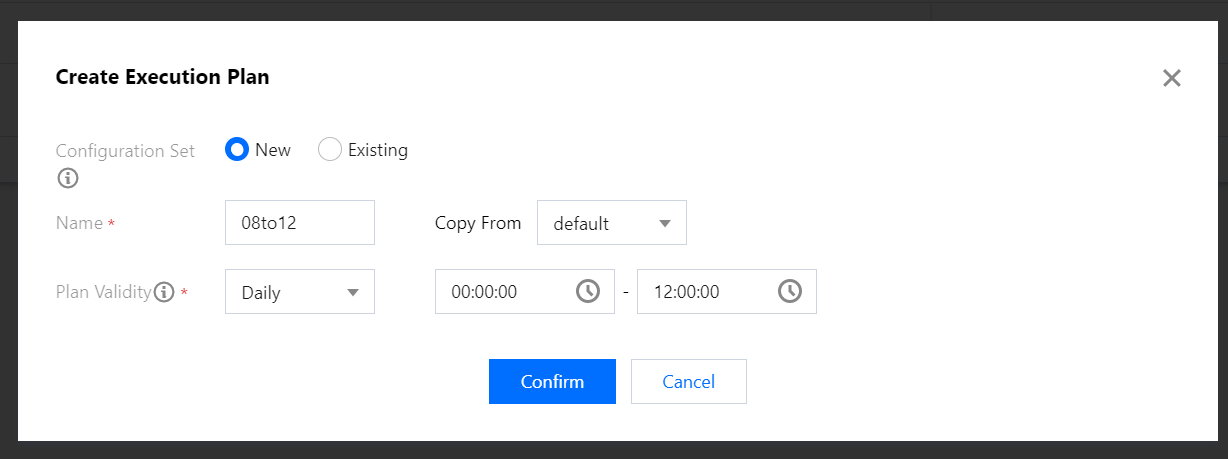
1. In the Policy settings section, click Execution plans > Create execution plan to create an execution plan.
Configuration set status indicates whether the execution plan is enabled, which defaults to "Enabled". When you don't want to enable an execution plan but still want to retain the configuration set, you can set the plan status to "Disabled".
2. In the Create execution plan window, select/enter the Configuration set, Name, and Plan validity.
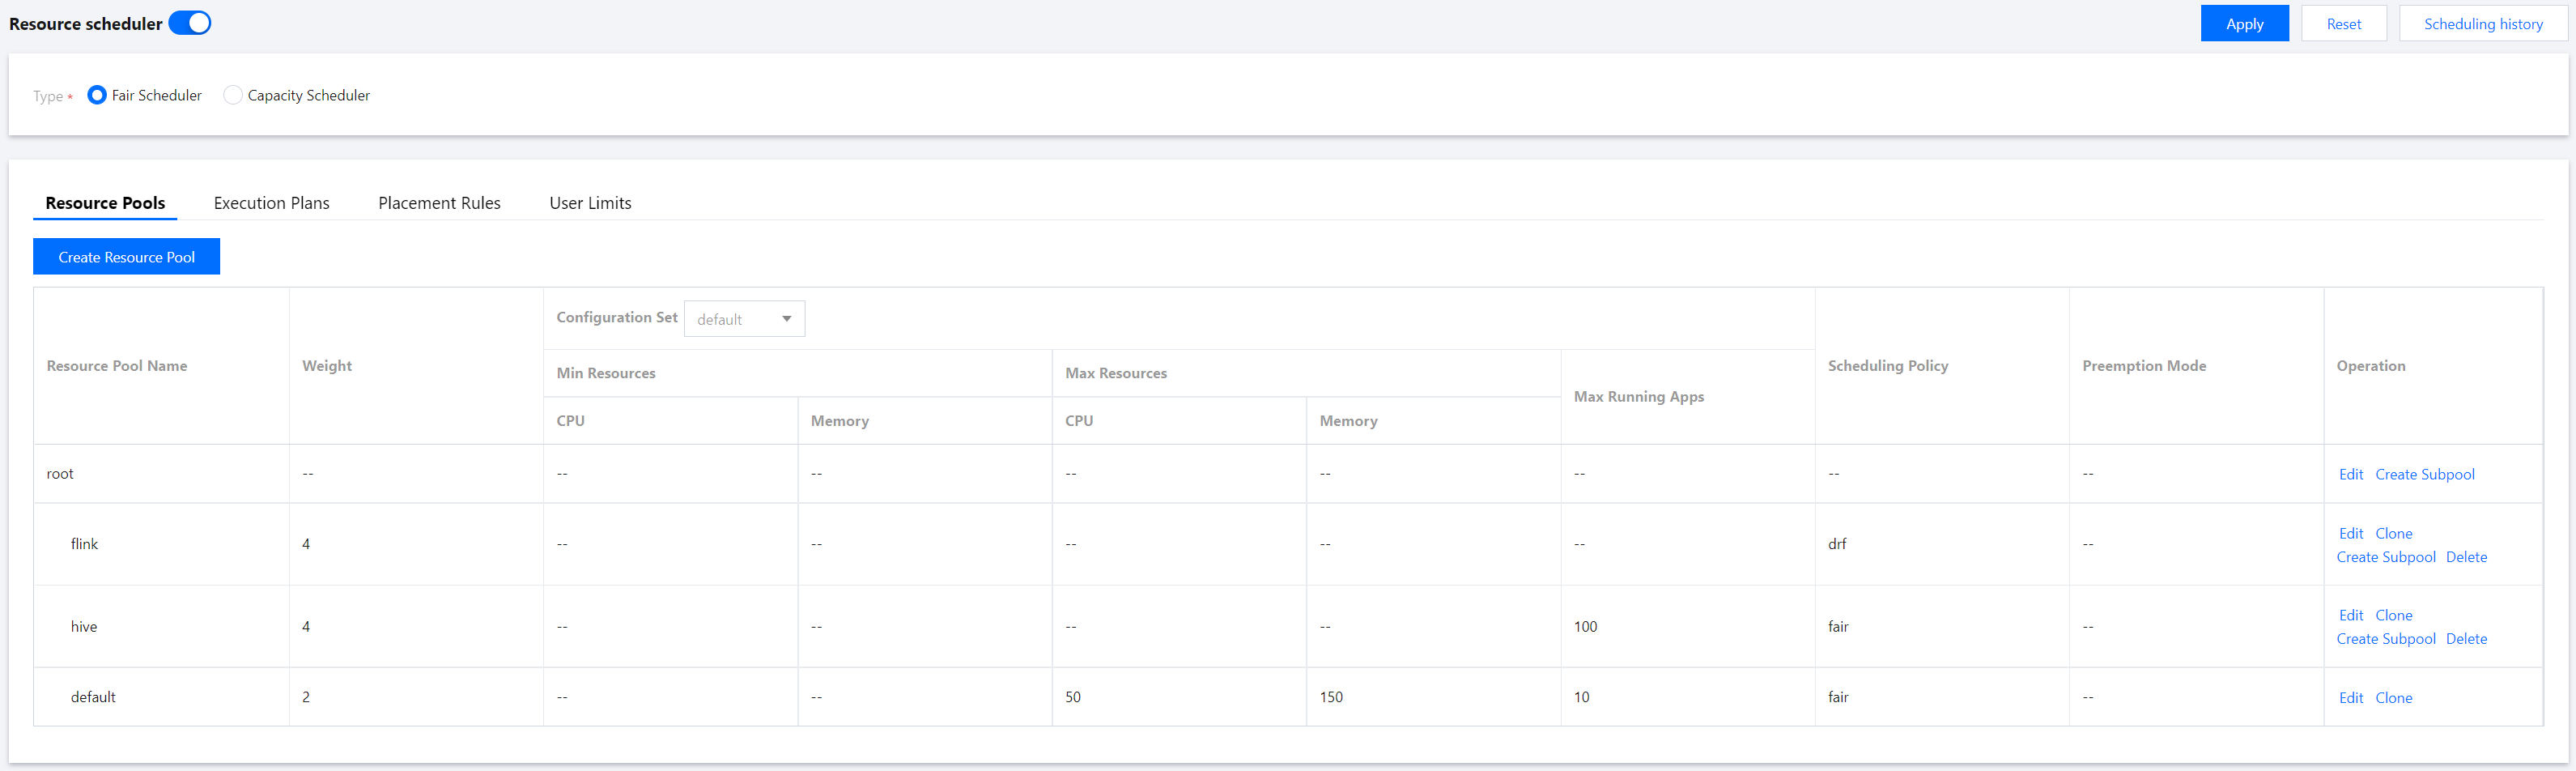
Sample configuration set
1. Log in to the EMR console and click Details of the target Hadoop cluster in the cluster list to enter the cluster details page.
2. On the cluster details page, select Cluster services and click Operation > Resource scheduling in the top-right corner of the YARN component block to go to the Resource scheduling page.
3. Toggle on Resource scheduler and select Fair Scheduler.
4. Click Create resource pool and configure parameters as needed.
5. On the Resource Scheduling page, click Execution Plans > Create Execution Plan and adjust the Plan Validity as needed.
Note
If scheduled scale-out is configured for the EMR cluster, we recommend you set the Plan Validity to a time period after the scheduled scale-out.
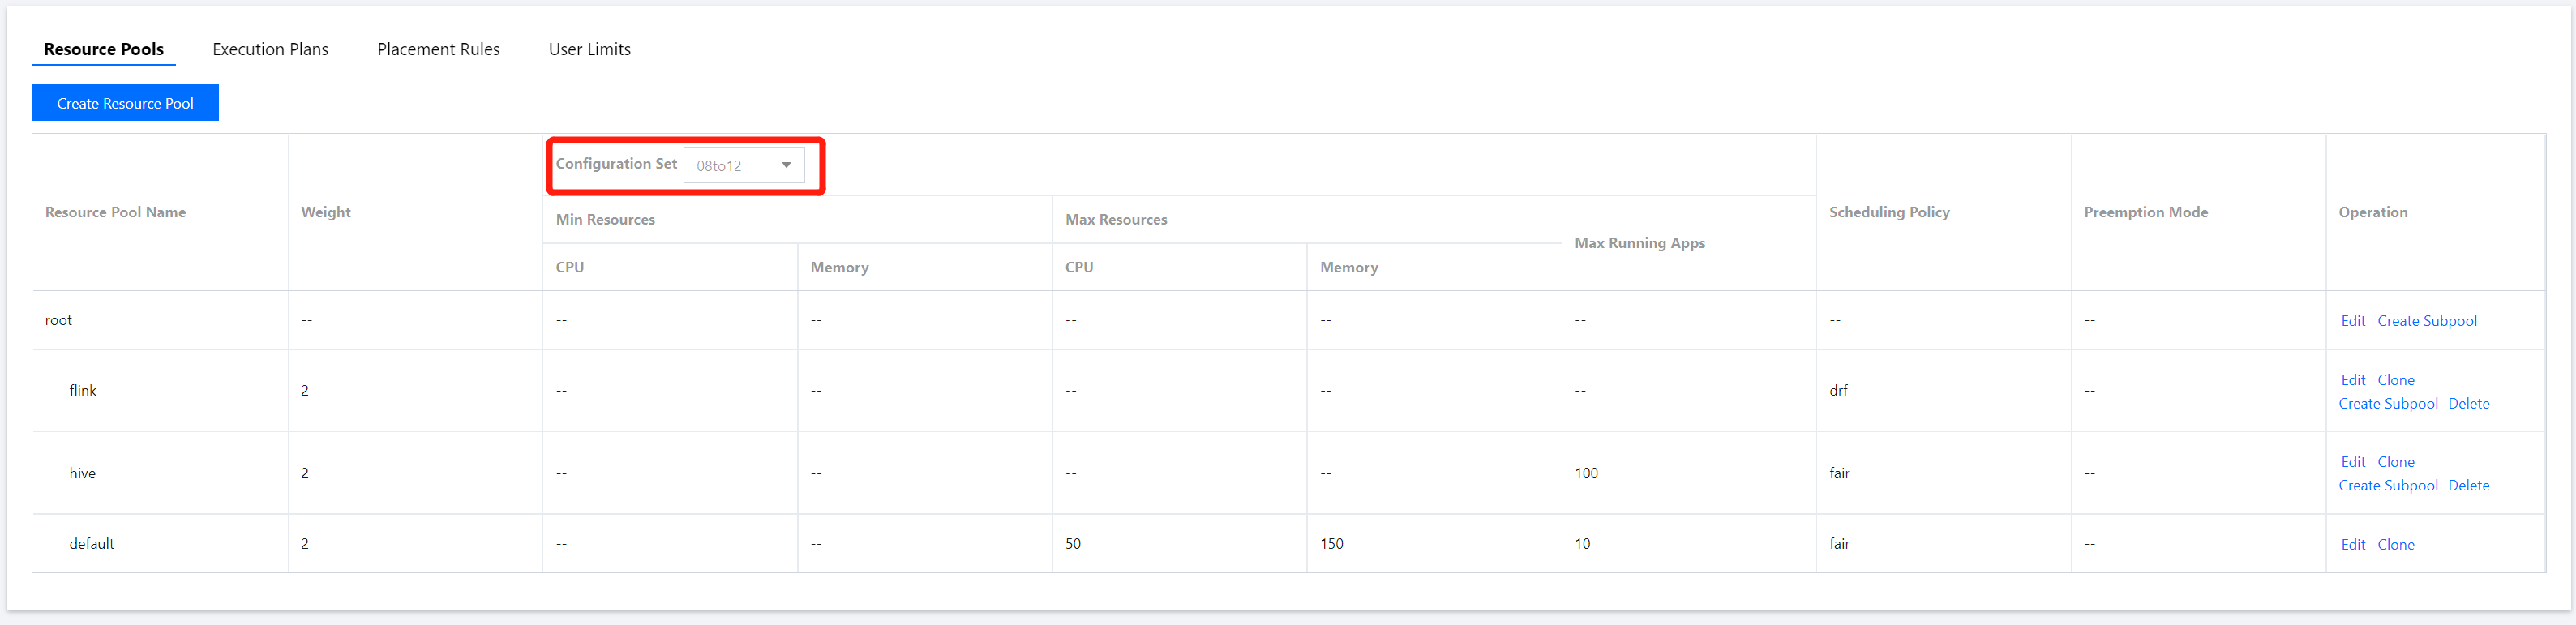
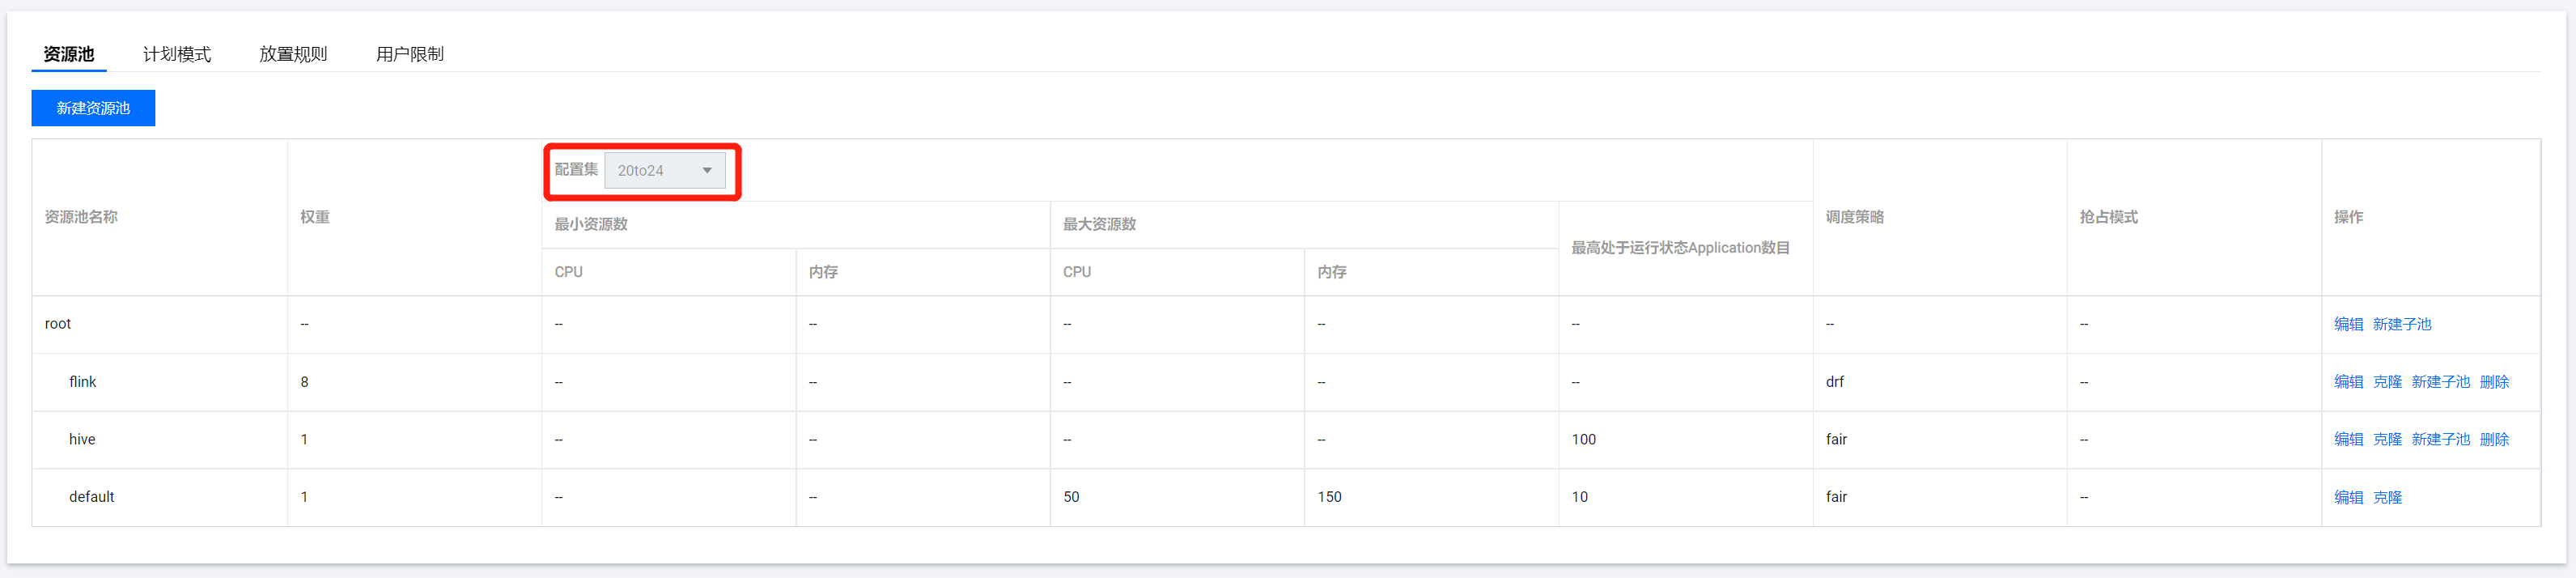
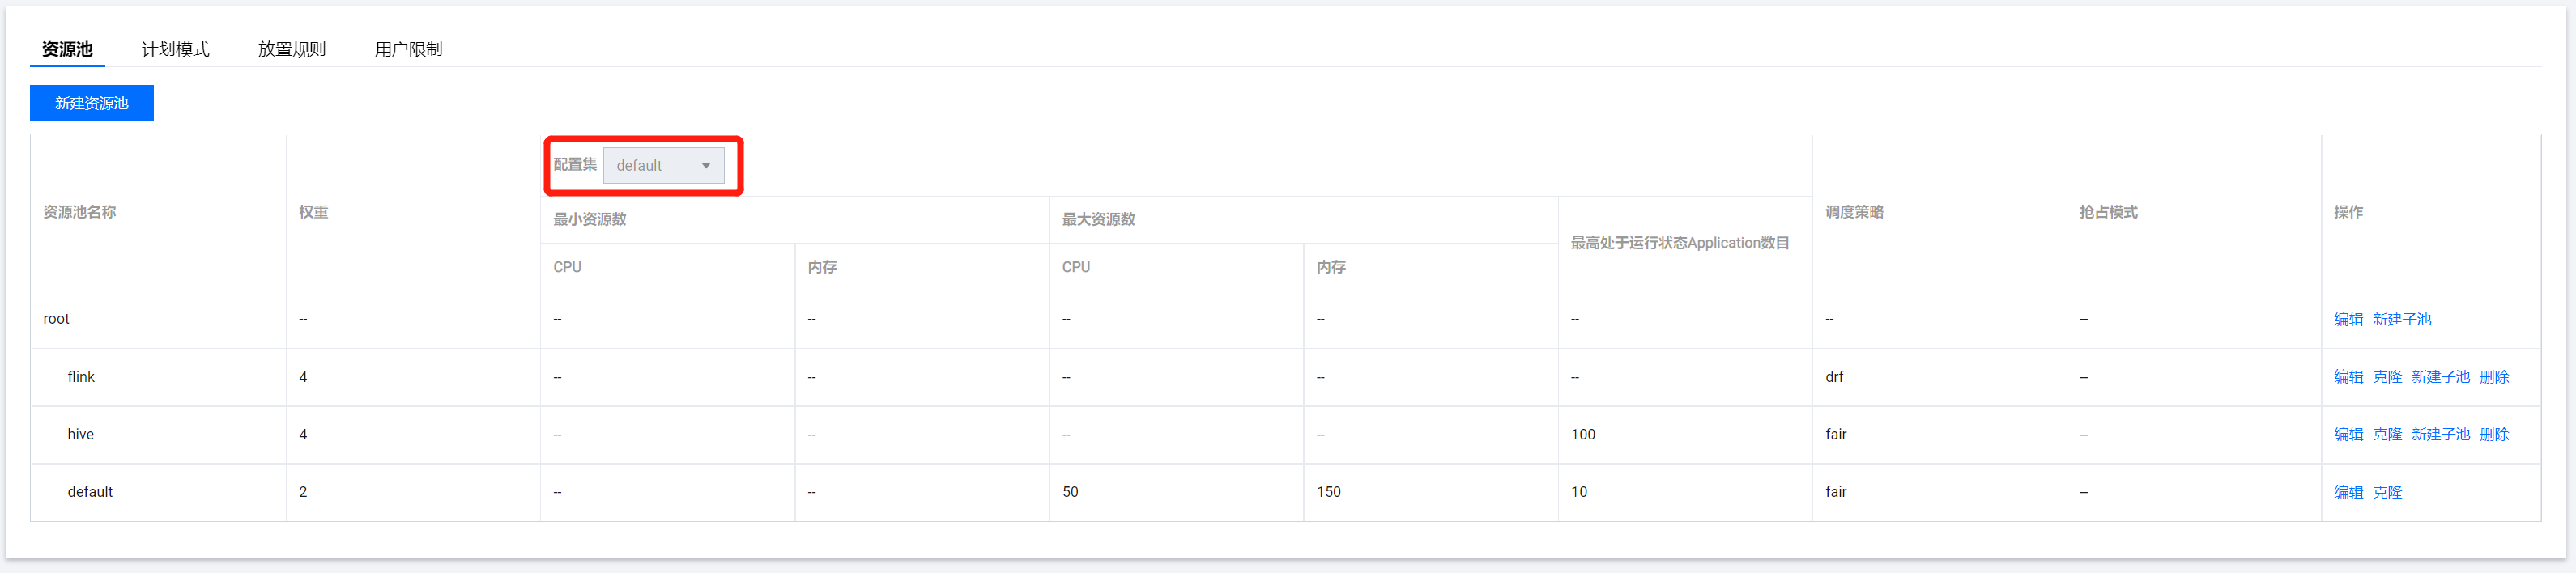
6. On the Resource Scheduling page, click Resource Pools and select an item from the Configuration Set drop-down list.
Note
The resource limits of a resource pool can be configured by configuration set.
7. Select the created resource pool from Configuration Set and adjust the Resource Limits as needed.
8. After the resource pool adjustment, click Apply to make the settings effective.
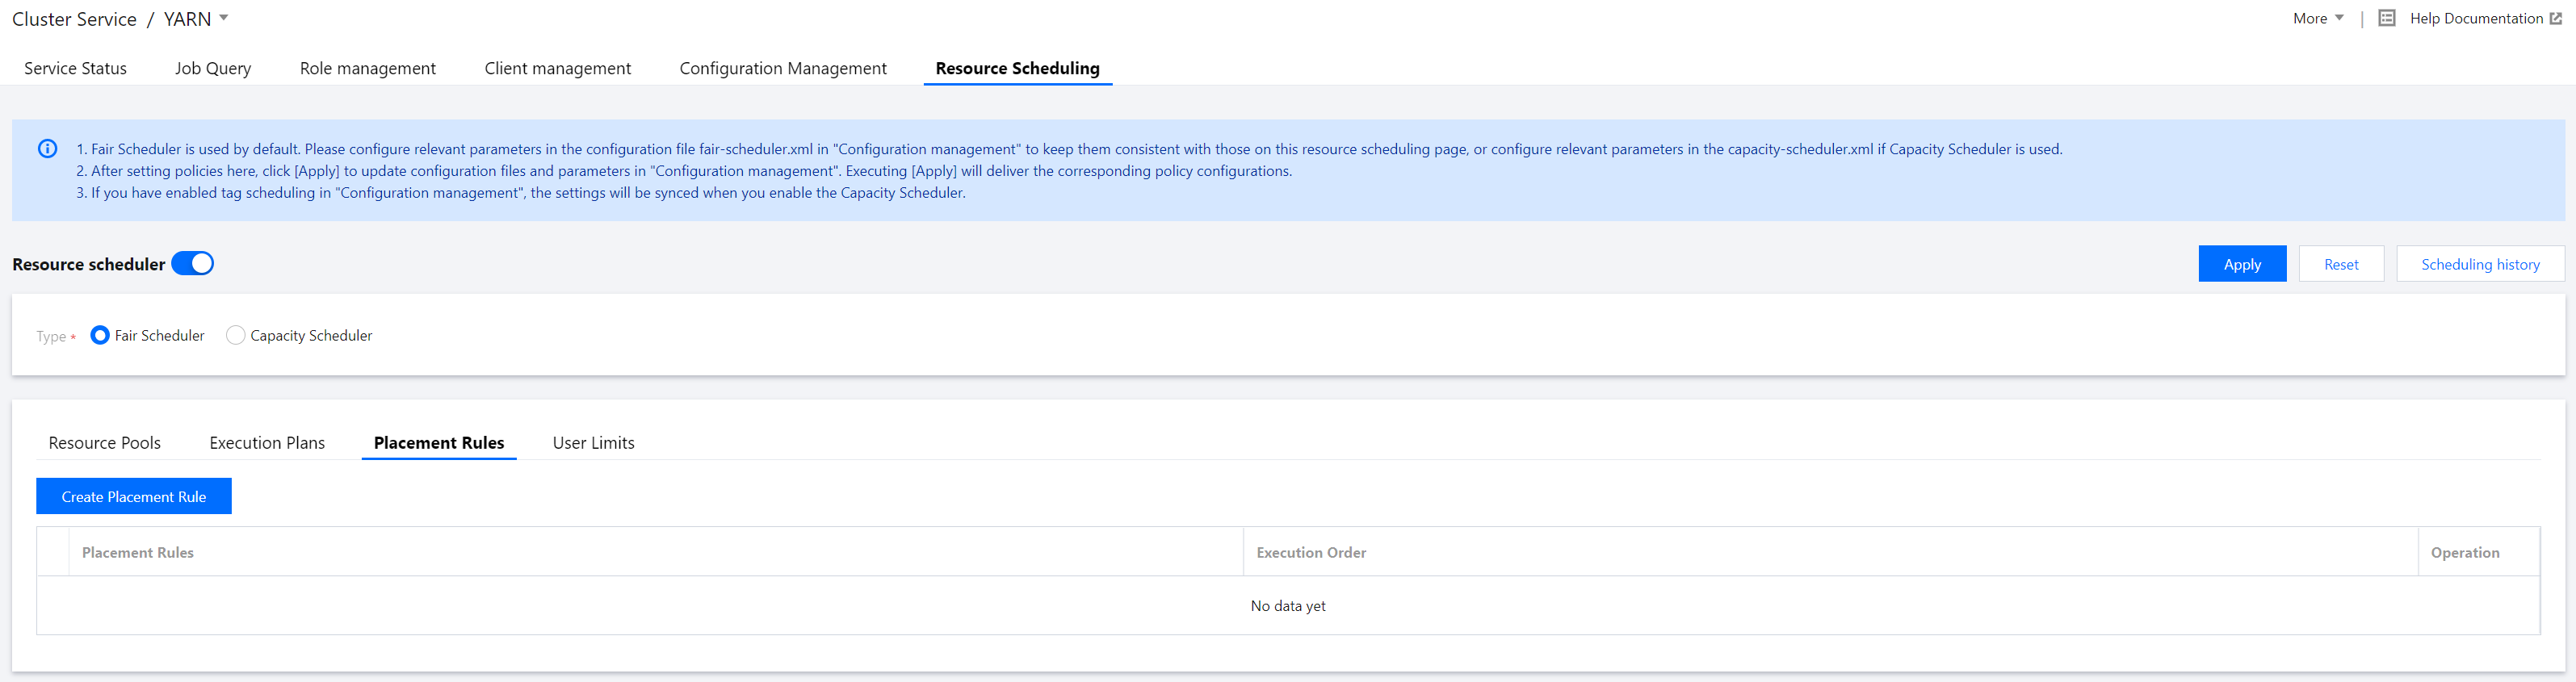
Configuring a placement rule
In the Policy settings section, click Placement rules > Create placement rule to create a placement rule.
Set Placement type and Pool name.
Configuration rule type description:root.[pool name]: The rule always needs to be met and applies when other rules do not match. Therefore, it needs to be placed after others.
root.[pool name].[username]: The rule checks whether the pool name exists in the resource pool, and if so, a resource pool with the same name as the username will be created (when Create one if the pool does not exist is selected).
root.[primary group]: The rule uses the resource pool matching the user's primary group. On Linux, the user's default primary group has the same name as the username. The names of the user's primary group and resource pool are used for match.
root.[primary group].[username]: The rule first uses the resource pool matching the user's primary group and then the subpool matching the username. If the selected pool does not exist but a pool is created, a subpool with the same name as the username will be created under the pool.
root.[secondarygroup]: The rule matches the user's secondary groups and uses the resource pool matching one of the secondary groups.
root.[secondarygroup].[username]: The rule first matches the user's secondary groups and then the resource pool matching the username.
root.[username]: The rule matches the resource pool with the same name as the username (not recommended).
Specified at runtime: The rule mainly uses the resource pool specified at runtime.
Placement rules are matched in the order of 1, 2, 3... If a rule is matched, rules after it will not be matched.
Configuring user limits
In the Policy settings section, click User limits > Create user limit to create a user limit.