以腾讯云子账号登录
下载
聚焦模式
字号
本文提供一个示例,通过配置 CAM 用户同步,在成员账号(member_1)中创建一个与身份中心用户(user1)同名的 CAM 子账号(user1)。
通过 CAM 用户同步的子账号,不授予任何权限,需要在成员账号的 CAM 控制台对用户授权。
操作步骤
步骤一:企业员工录入
1. 进入集团账号管理 > 身份中心。
2. 在左侧导航栏,选择用户管理 > 用户,单击新建用户。
3. 在新建用户面板,设置用户基本信息,详细操作请参见 新建用户。
说明:
本示例用户名设置为 user1。
步骤二:配置 CAM 用户同步
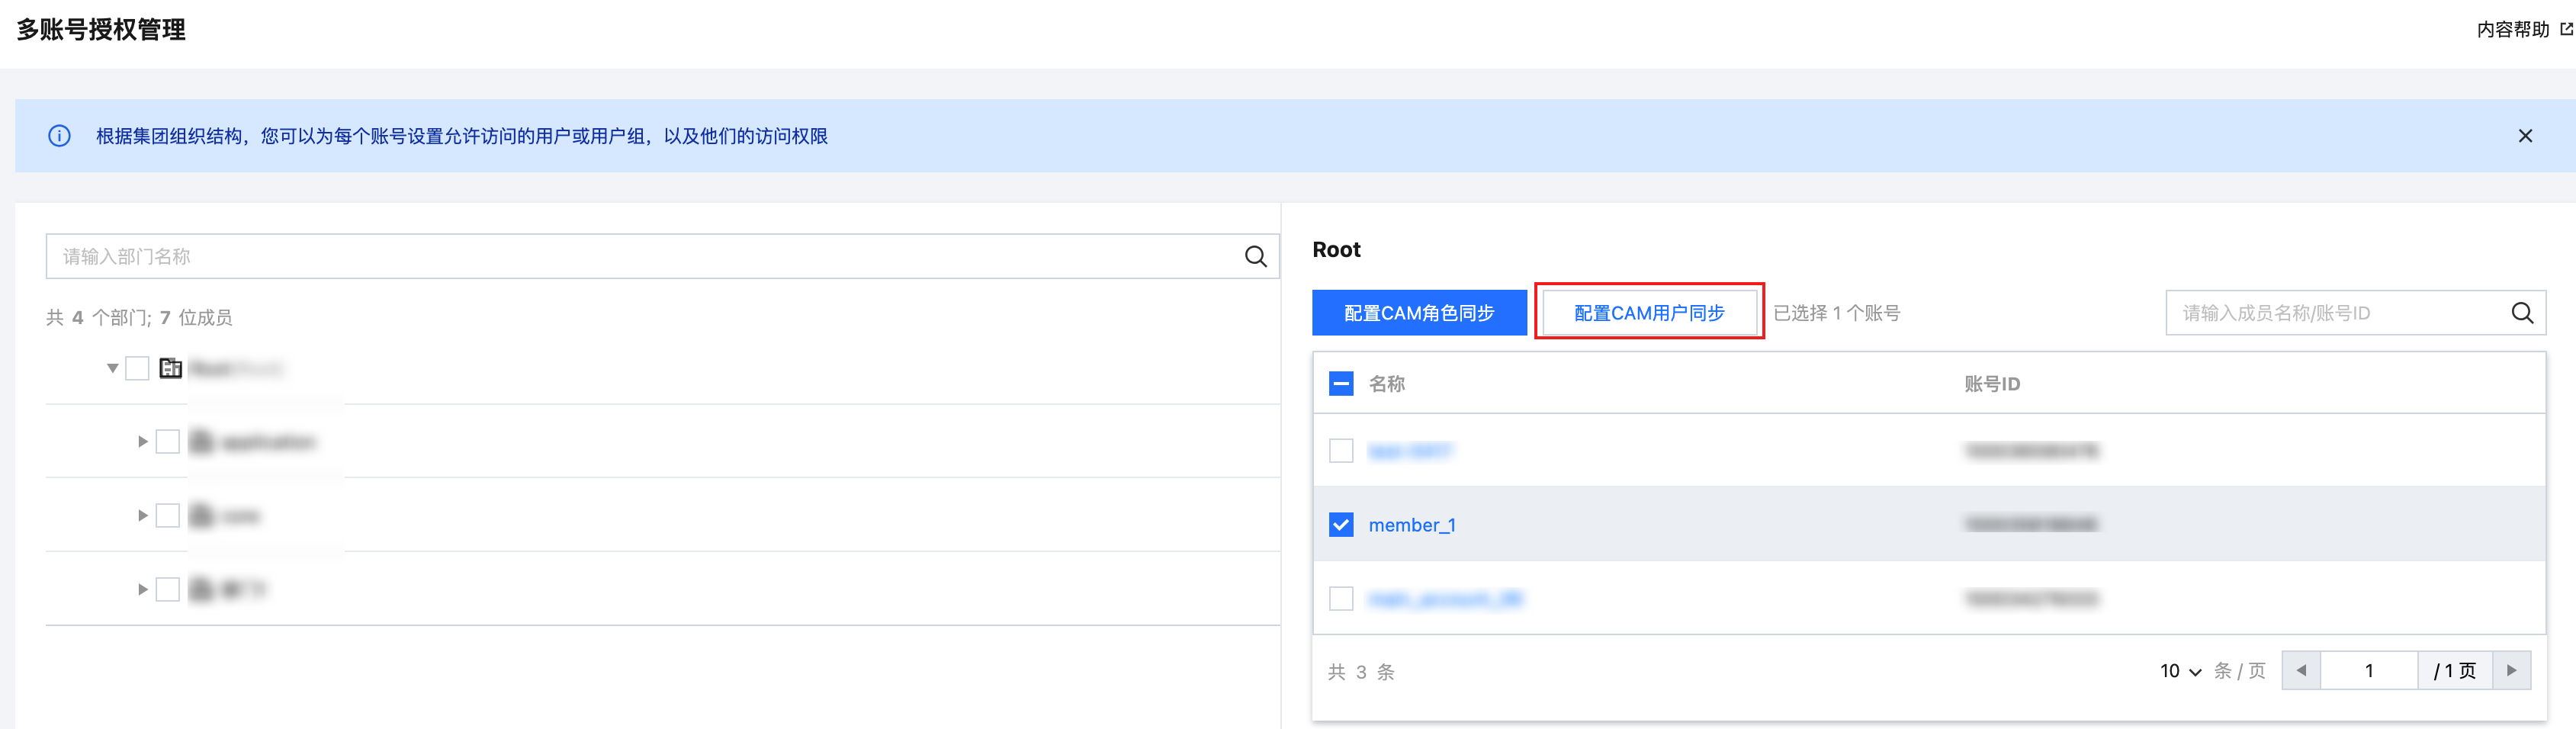
1. 在左侧导航栏,单击 CAM 同步 > 多账号授权管理。
2. 在多账号授权管理页面,选择目标账号。
说明:
本示例中,选择成员账号(member_1)。
3. 单击配置 CAM 用户同步。
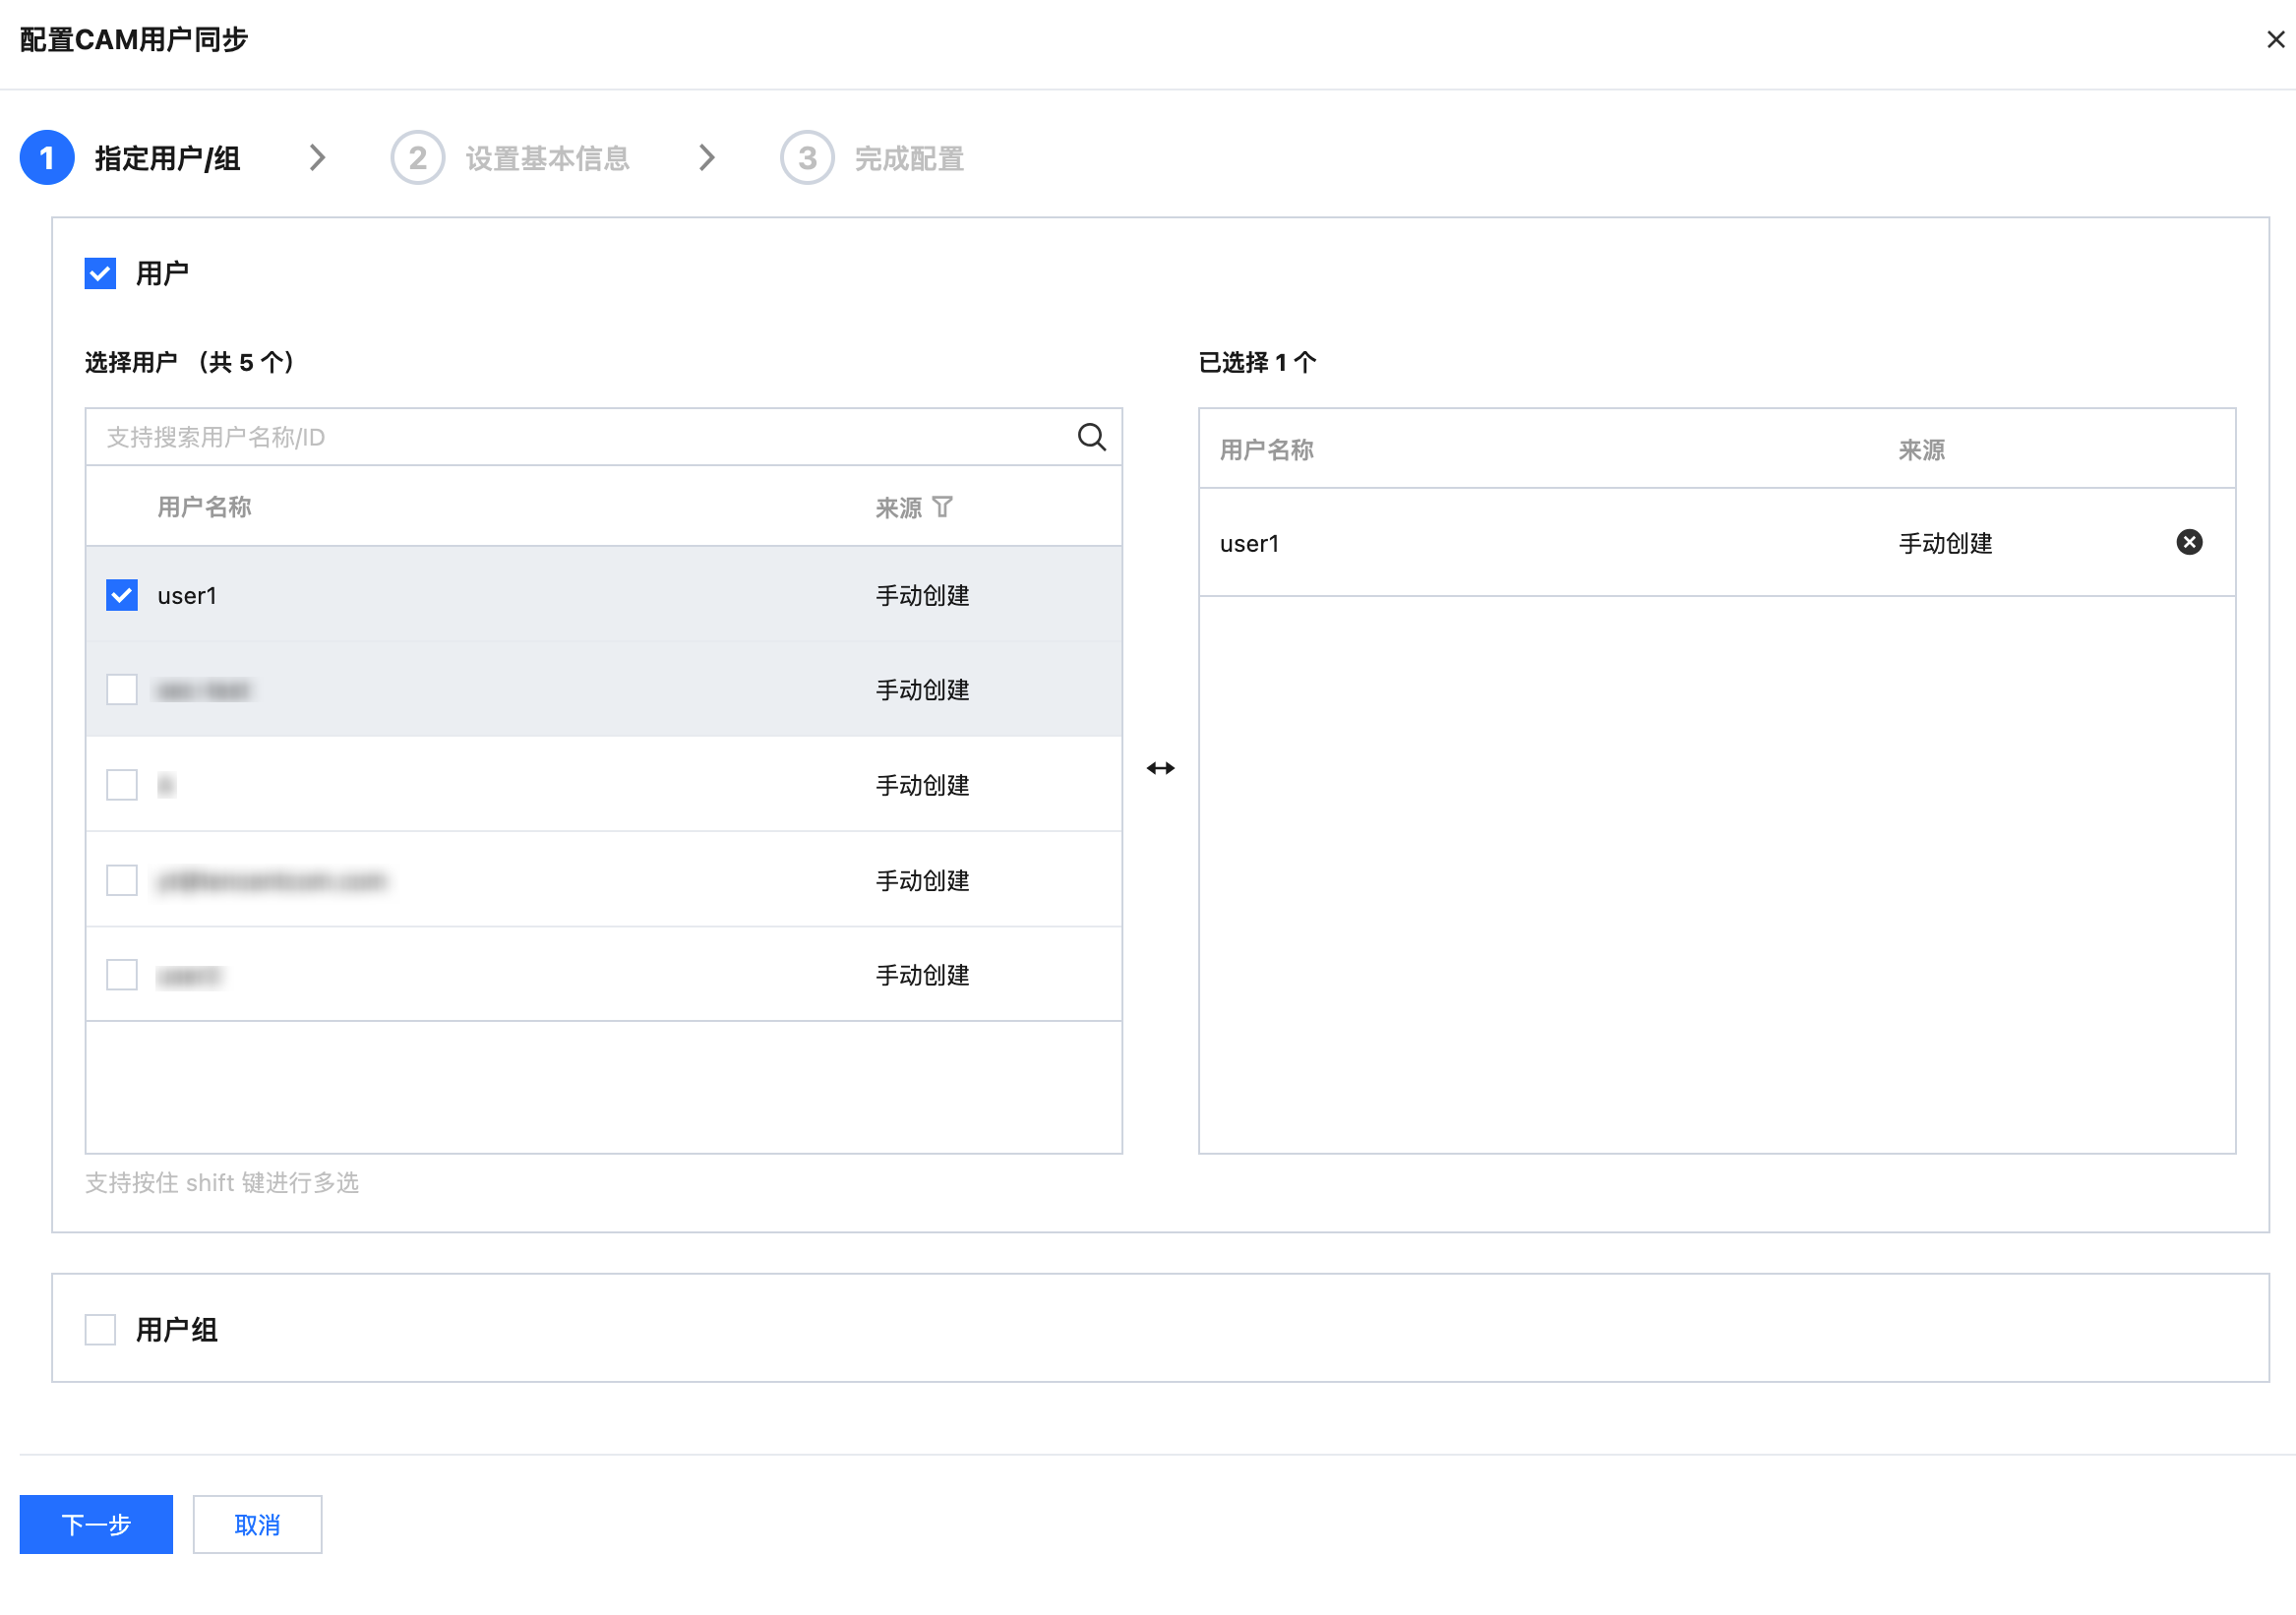
4. 在配置 CAM 用户同步面板,选择目标用户或用户组,单击下一步。
说明:
本示例中,选择身份中心用户(user1)。
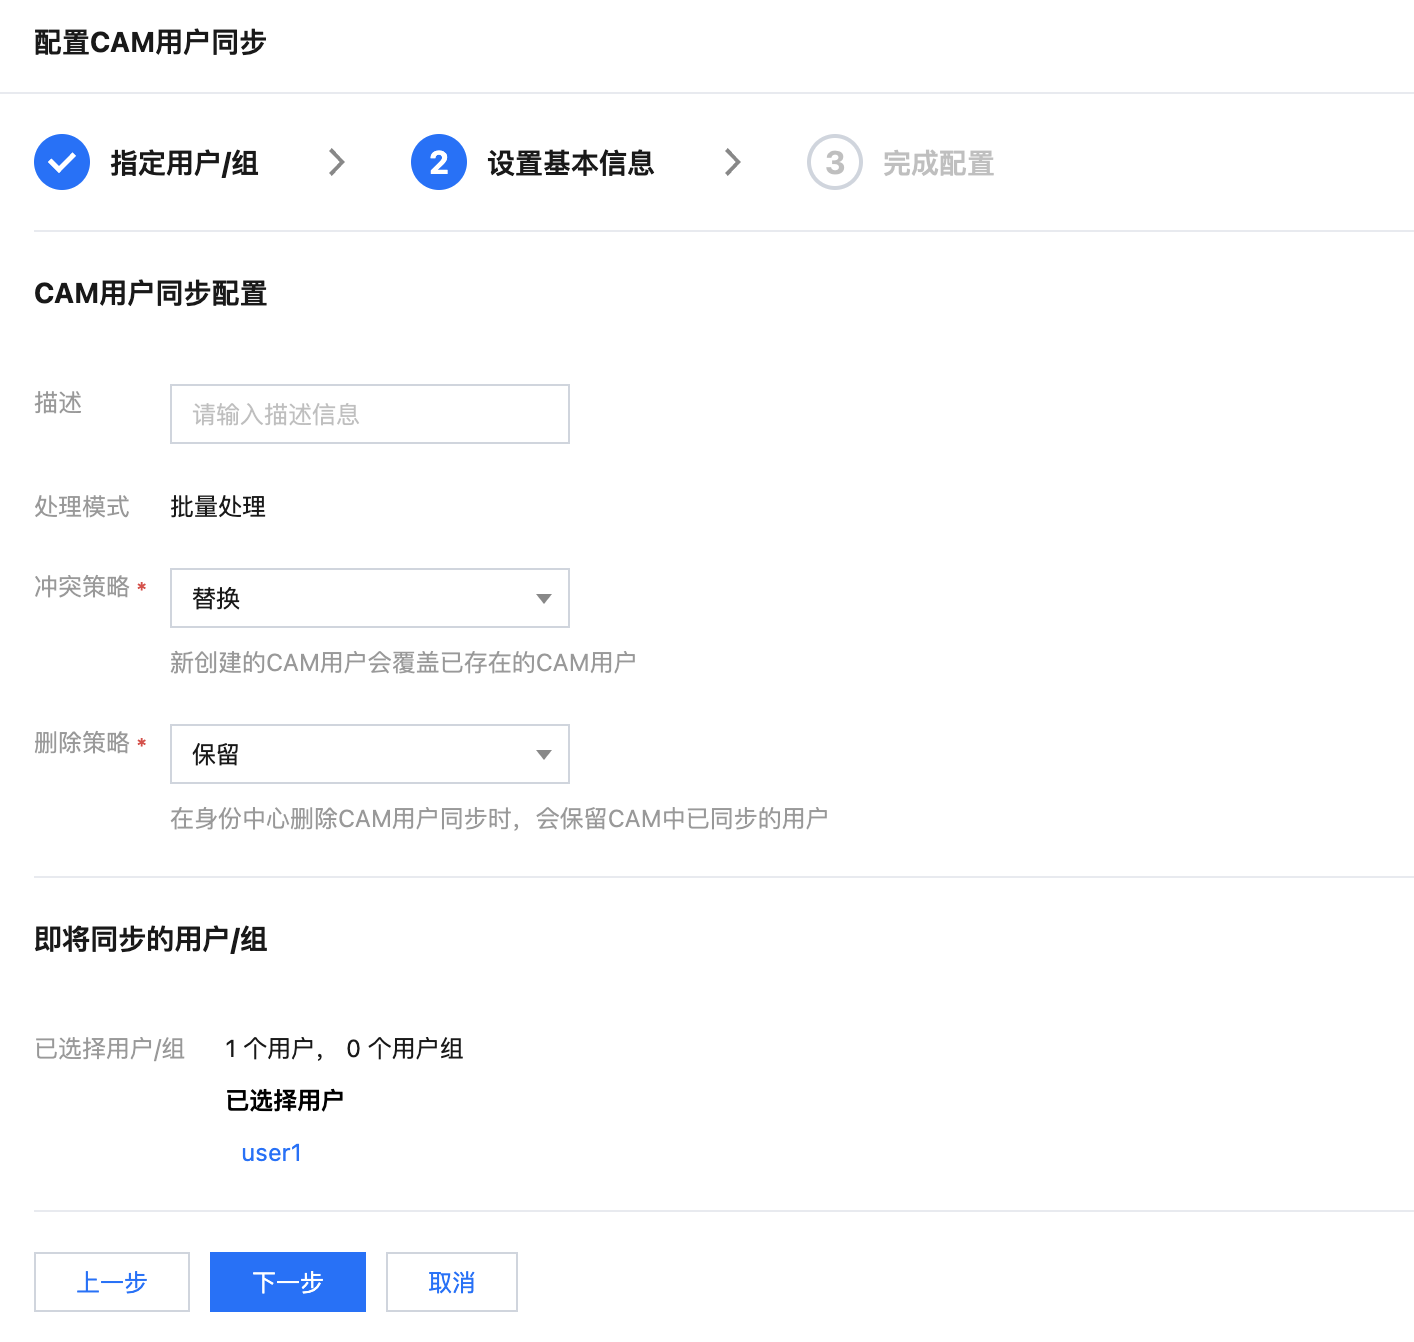
5. 设置基本信息,基本信息的具体说明,请参见 配置 CAM 用户同步。填写完成后,单击下一步。
6. 单击提交,提示配置成功后,单击完成。
7. 配置成功后:
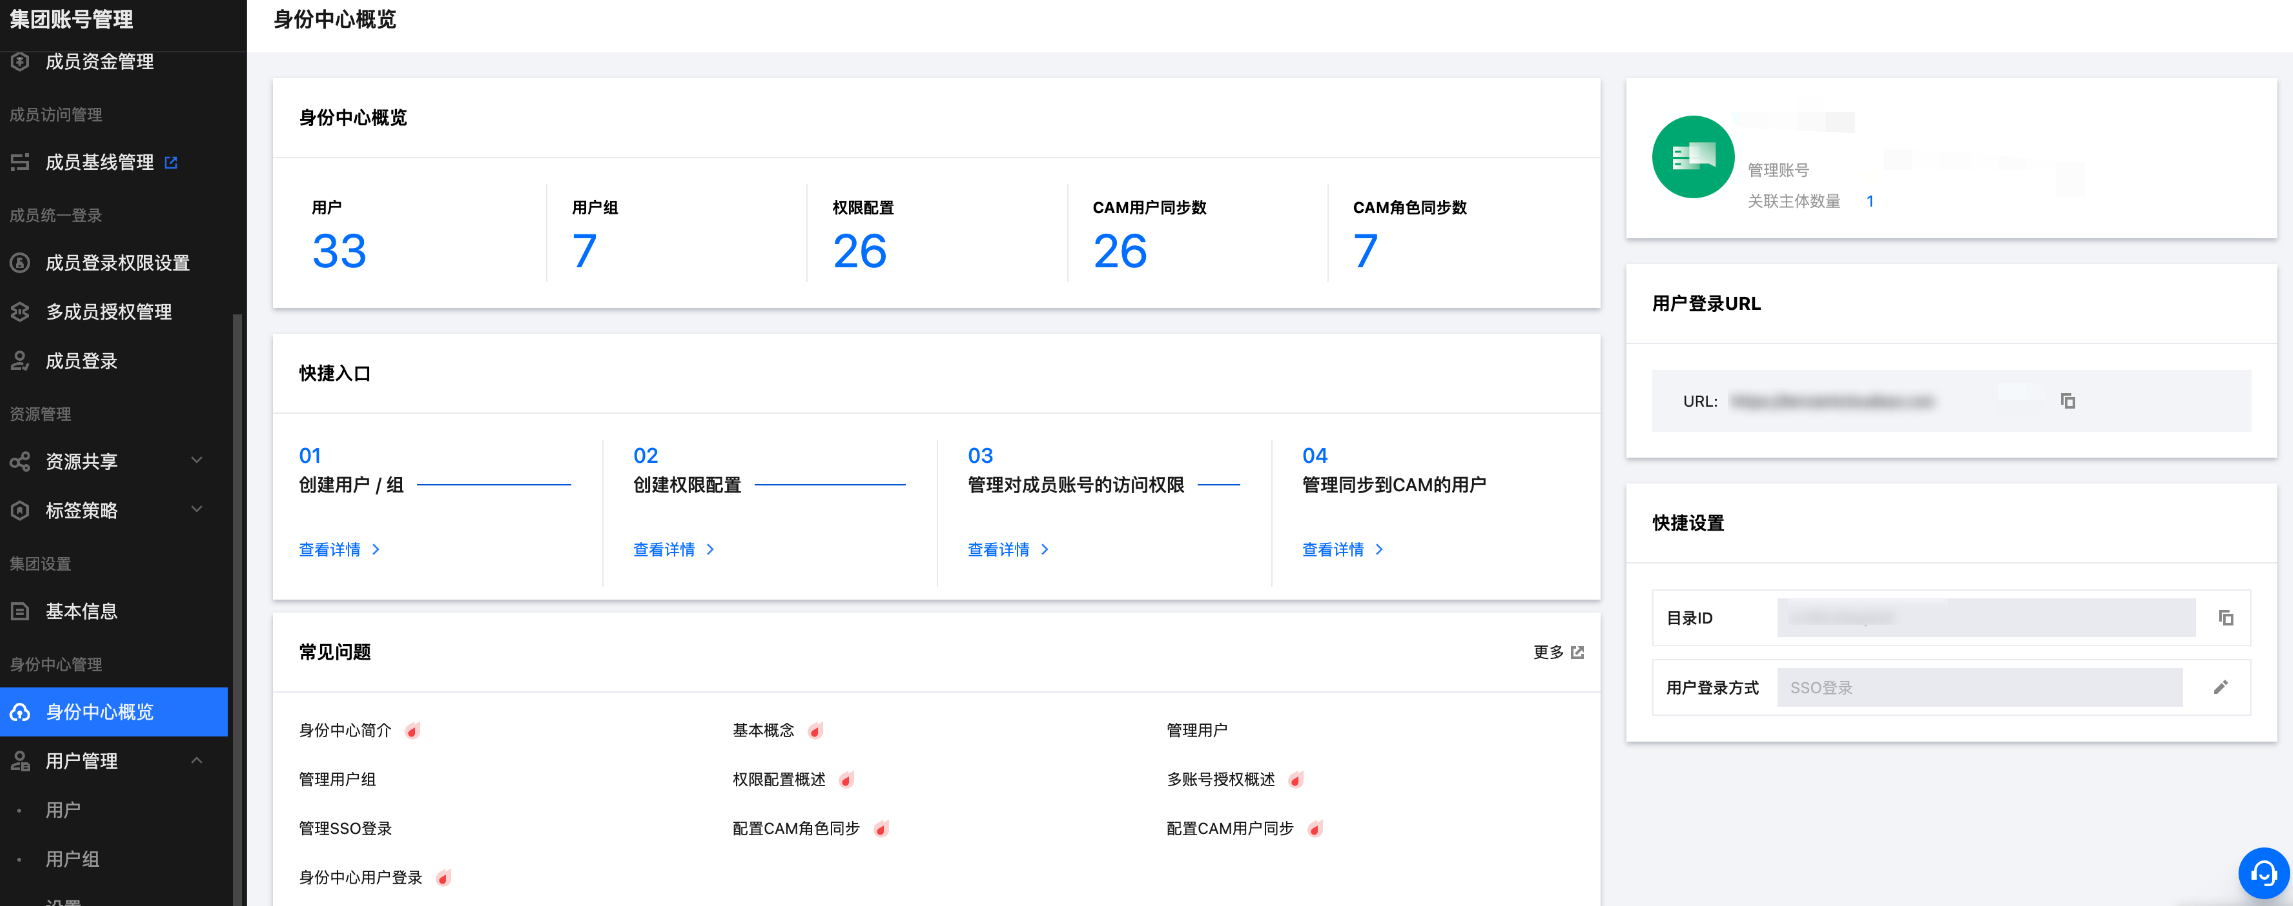
可在 CAM 同步 > 用户同步管理中,查看用户同步列表。

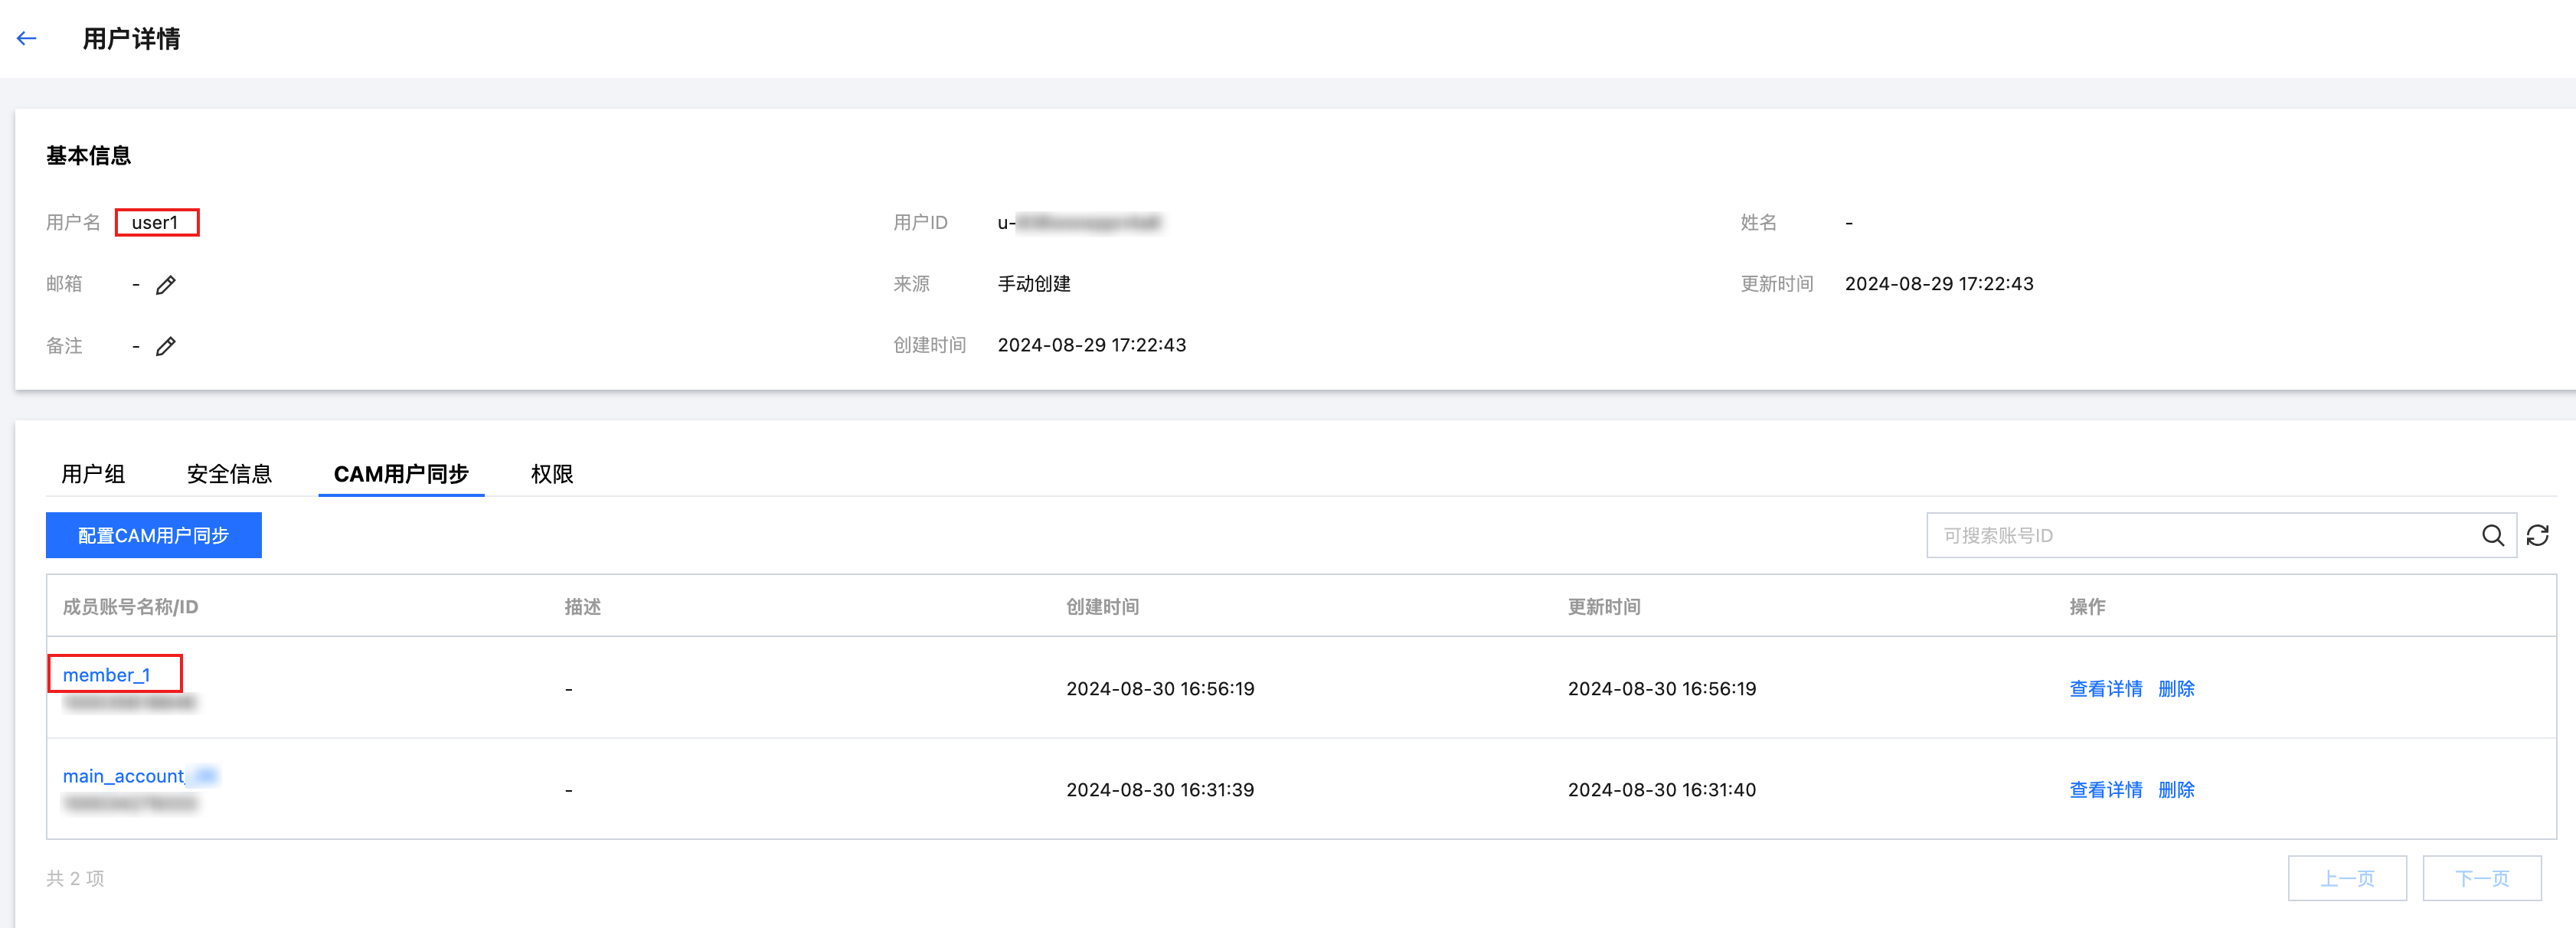
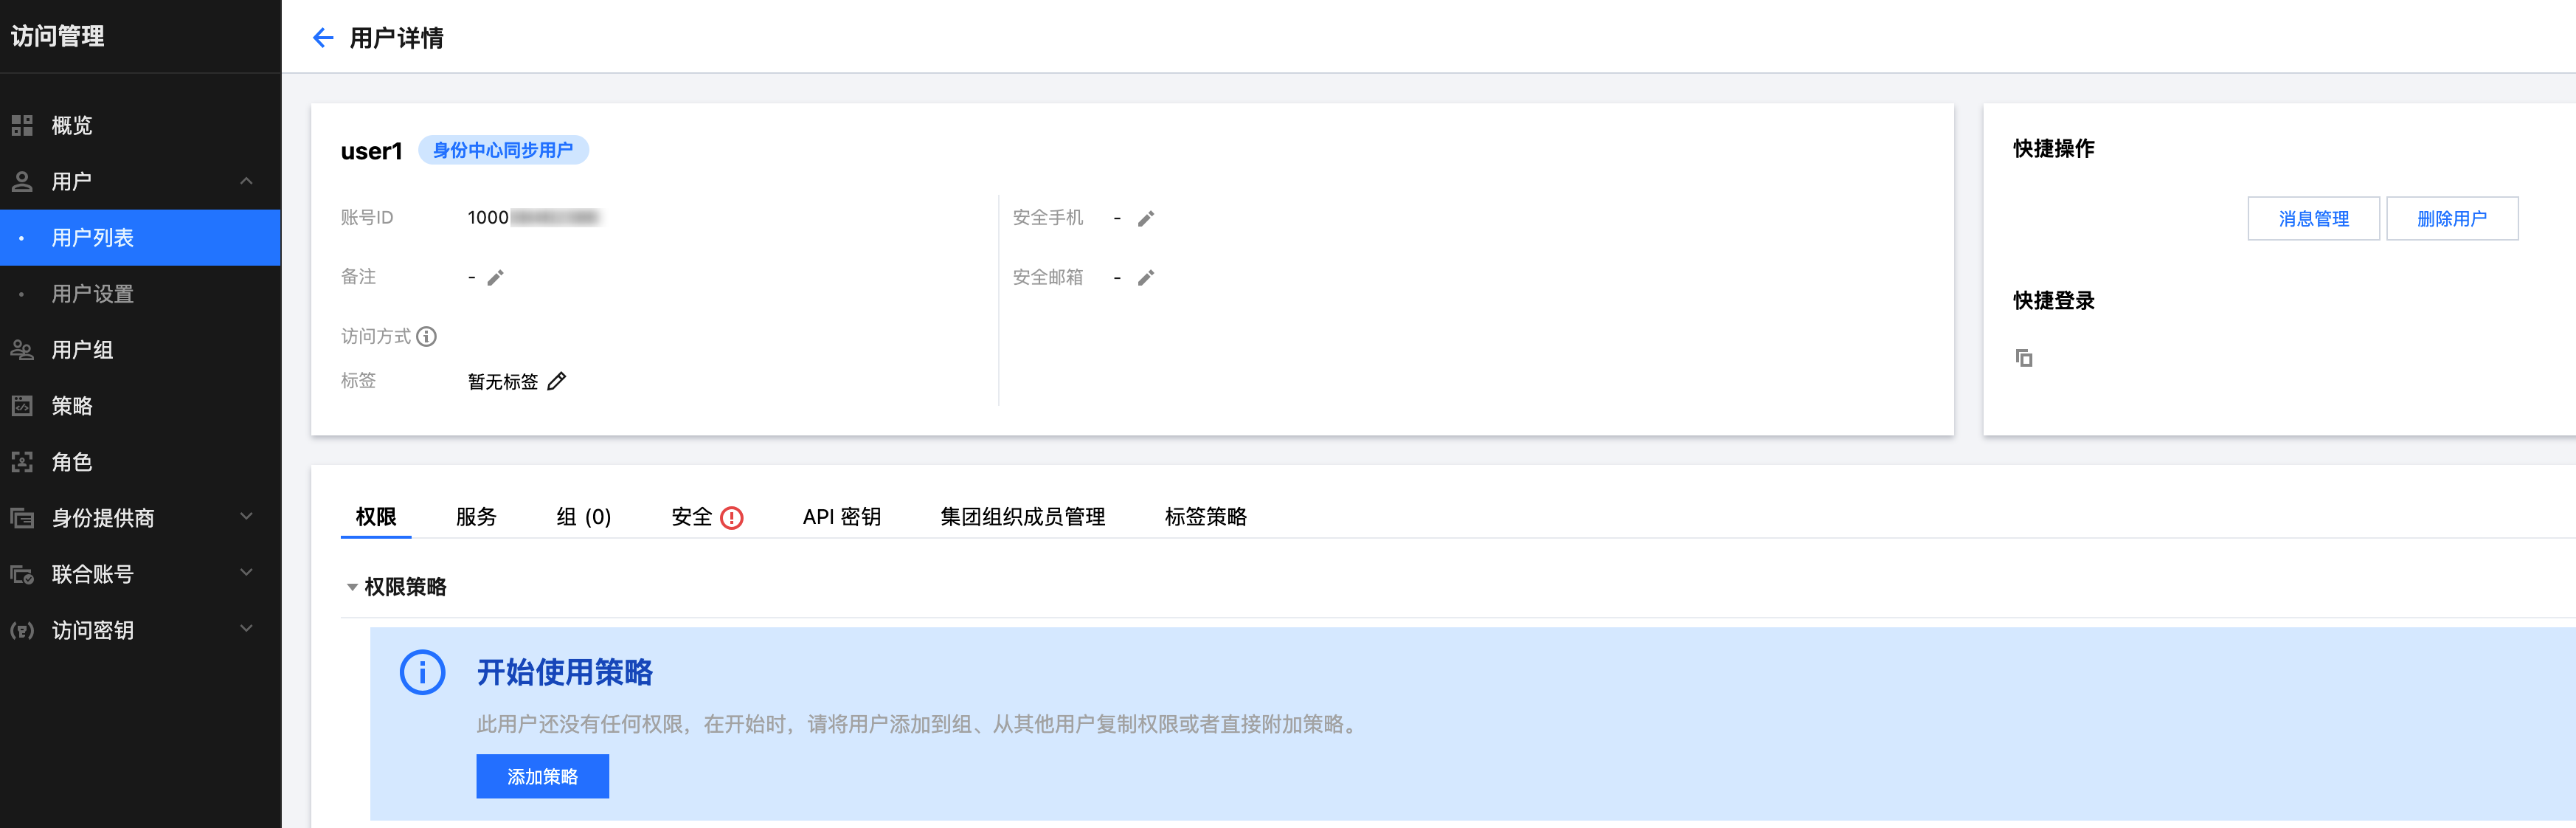
或在用户管理 > 用户,user1 的用户详情页的 CAM 用户同步页签中查看。
CAM 中的效果
1. 配置成功后,系统会自动在成员账号(member_1)中同步创建一个与身份中心用户(user1)同名的 CAM 子用户(user1)。
说明:
CAM 中的用户类型为身份中心同步用户。

2. 单击目标用户名称,可查看关联策略。
注意:
同步创建的子用户无任何权限,需要您在 CAM 中为用户(user1)配置权限策略。
步骤三:子账号登录
获取用户登录 URL
1. 在左侧导航栏,单击身份中心概览。
2. 在概览页面的右侧,查看或复制用户登录 URL。
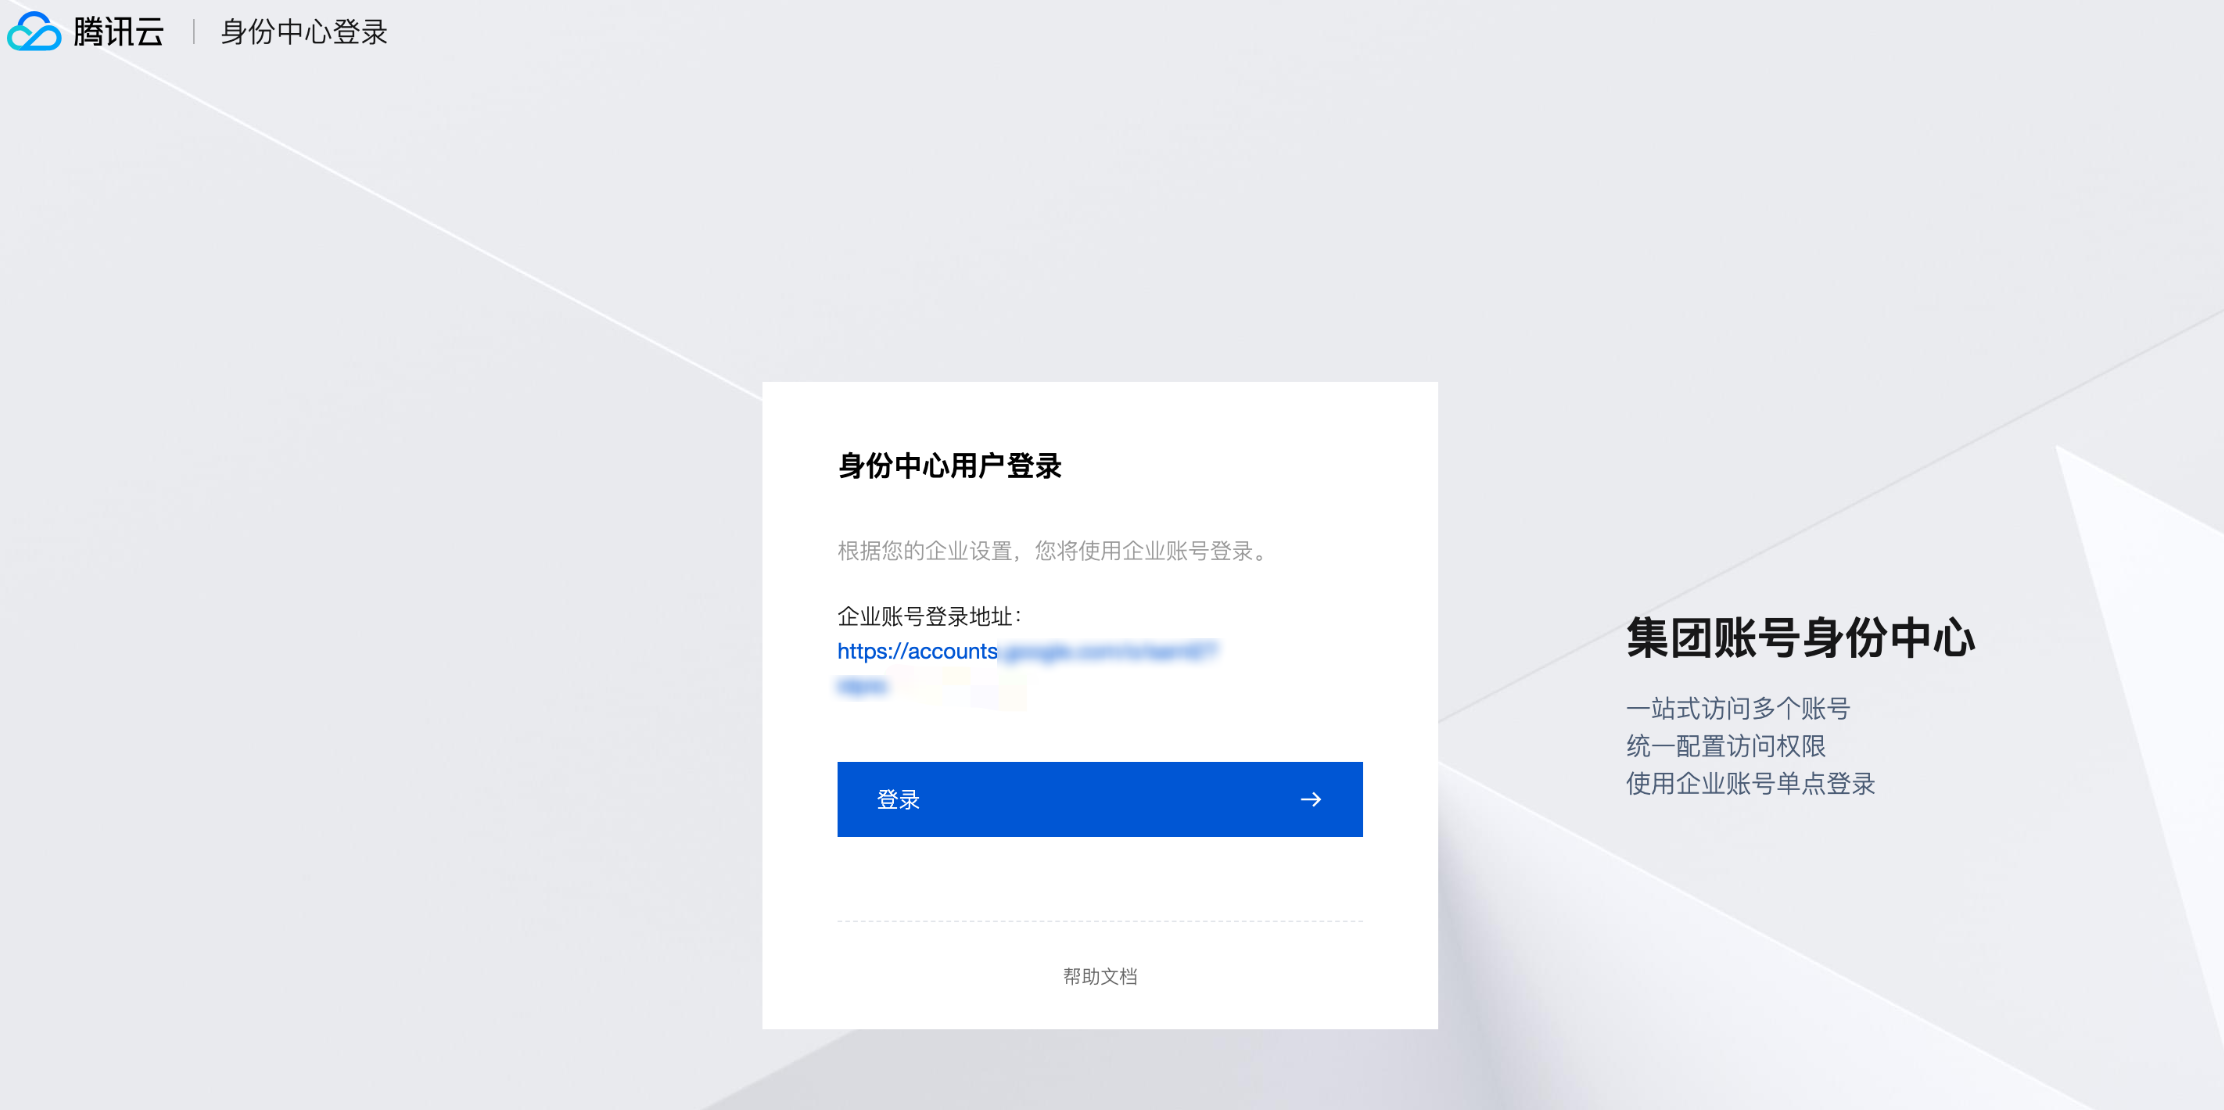
在浏览器中访问用户 URL
1. 在身份中心登录页面,单击登录。本示例使用 SSO 登录方式。
说明:
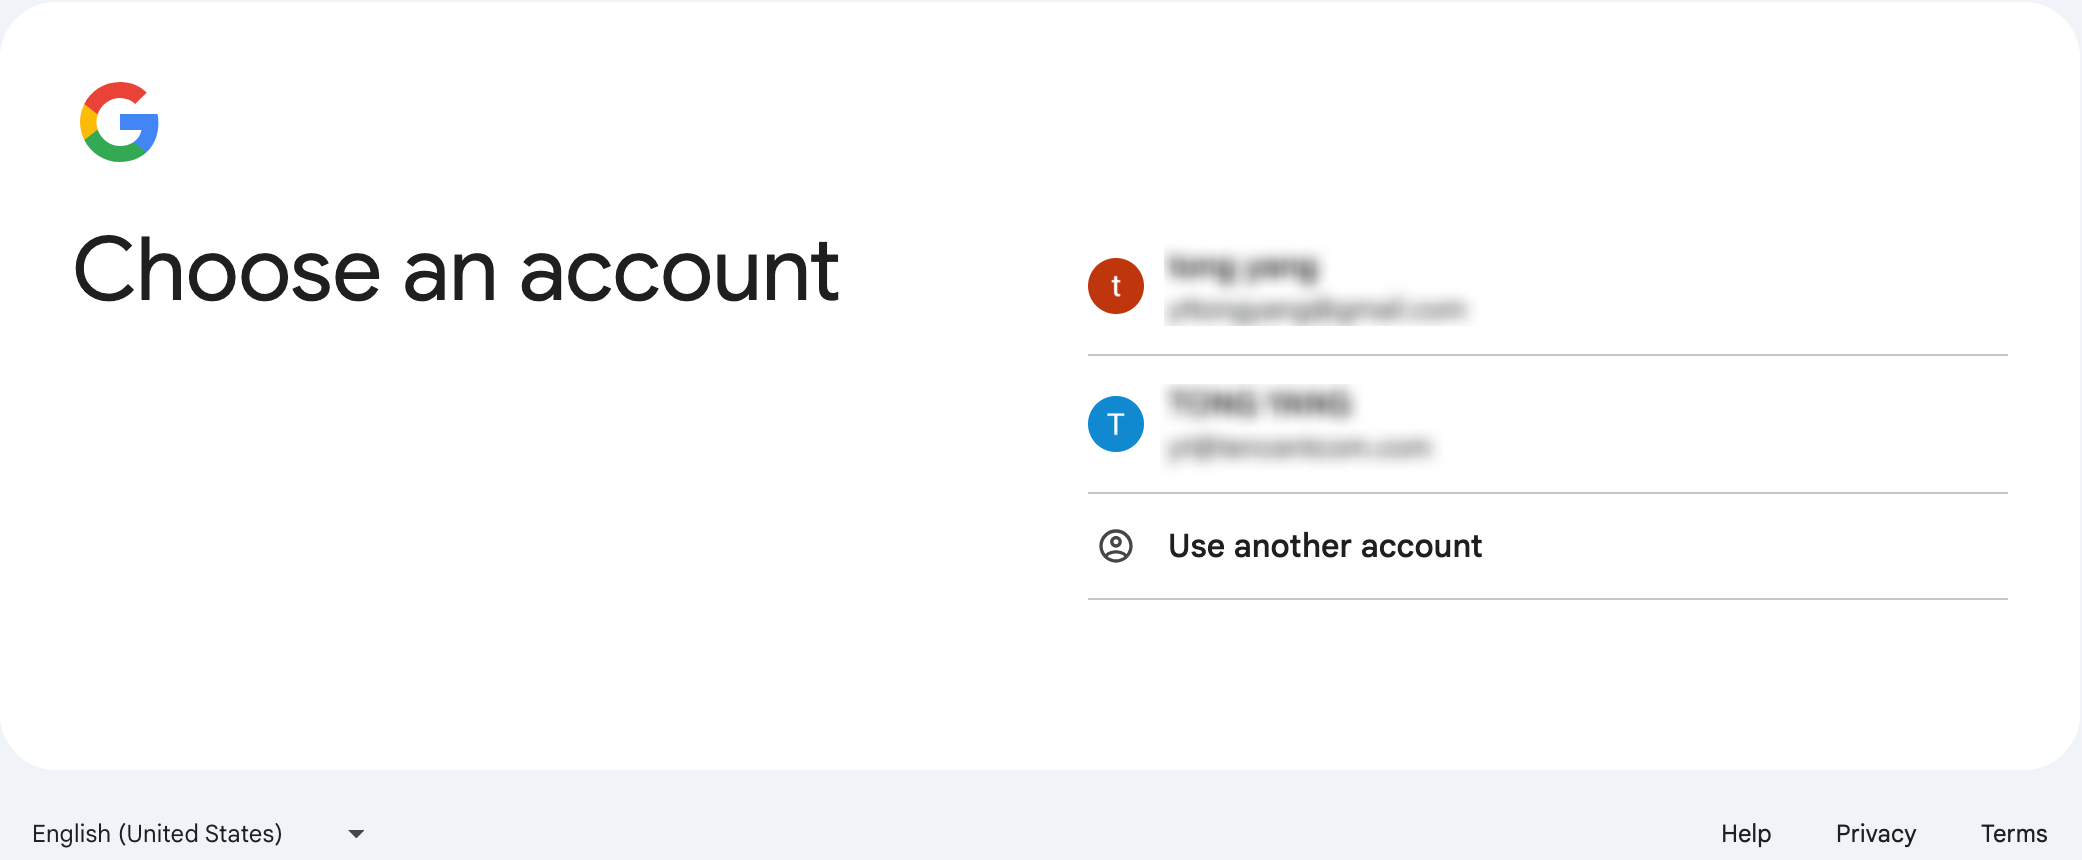
2. 系统自动跳转到企业 IdP 的登录页面,本示例使用的是谷歌 IdP。
3. 验证通过后,进入以 CAM 用户登录页签,选择成员账号(member_1)登录。
文档反馈