tencent cloud

Chat

News and Announcements
Release Notes
Announcements
Product Introduction
Overview
Basic Concepts
Scenarios
Features
Account System
User Profile and Relationship Chain
Message Management
Group Related
Official Account
Audio/Video Call
Use Limits
Purchase Guide
Billing Overview
Pricing
Purchase Instructions
Renewal Guide
Service Suspension Explanation
Refund Policy
Development Guidelines
Demo Zone
Activate Service
Free Demos
Quick Run
Download
SDK and Demo Source Code
Update Log
Chat Interaction (UI Included)
TUIKit Introduction
Getting Started
Full-feature Integration
Single-function Integration
Build with AI
Build Basic Interfaces
More Features
Customizing Appearance
Internationalization
Push Service
Overview
Noun explanation
Activate the Service
Quick Start
Manufacturer Channel
Statistics
Troubleshooting Tool
Client APIs
REST API
Push Callback
Advanced Features
Release Notes
Error Codes
FAQS
Desk
Overview
Quick Start
Integration Guide
Admin Operation Manual
Agent Manual
More Practices
Live Streaming Setup Guide
AI Chatbot
Super Large Entertainment and Collaboration Community
Discord Implementation Guide
How to Integrate Chat into Games
WhatsApp Channel-style Official Account Integration Solution
Send Red Packet
Firewall Restrictions
No UI Integration
Quick Start
SDK Integration
Initialization
Login and Logout
Message
Conversation
Group
Community Topic
User Profile and Relationship Chain
Offline Push
Cloud Search
Local Search
Official Channel Management
Client APIs
JavaScript
Android
iOS & macOS
Swift
Flutter
Electron
Unity
React Native
C APIs
C++
Server APIs
Secure authentication with UserSig
RESTful APIs
Webhooks
Console Guide
New Console Introduction
Creating and Upgrading an Application
Basic Configuration
Feature Configuration
Account Management
Group Management
Official Channel Management
Webhook Configuration
Usage
Viewing Guide for Resource Packages
Real-Time Monitor
Auxiliary Development Tools
Access Management
Advanced Features
FAQs
uni-app FAQs
Purchase
SDK
Account Authentication
User Profile and Relationship Chain
Message
Group
Audio-Video Group
Nickname and Profile Photo
Security Compliance Certification
Service Level Agreement
Security Compliance Certification
Chat Policies
Privacy Policy
Data Privacy and Security Agreement
Migration
Migration Solutions
Migration Solutions Lite
Error Codes
Contact Us

Unity

PDF
Focus Mode
Font Size
Last updated: 2025-10-13 11:21:51
Currently, the message push plugin in Unity only supports push to Android (including manufacturer channels) and iOS devices.
iOS
Android
Before integrating the message push plug-in, you must apply for an APNs Push Certificate from Apple and then upload the Push Certificate to the Chat console. Afterward, follow the quick integration procedure to complete the setup.

Operation Steps

Step 1: Apply for an APNs Certificate

Enable Remote App Push

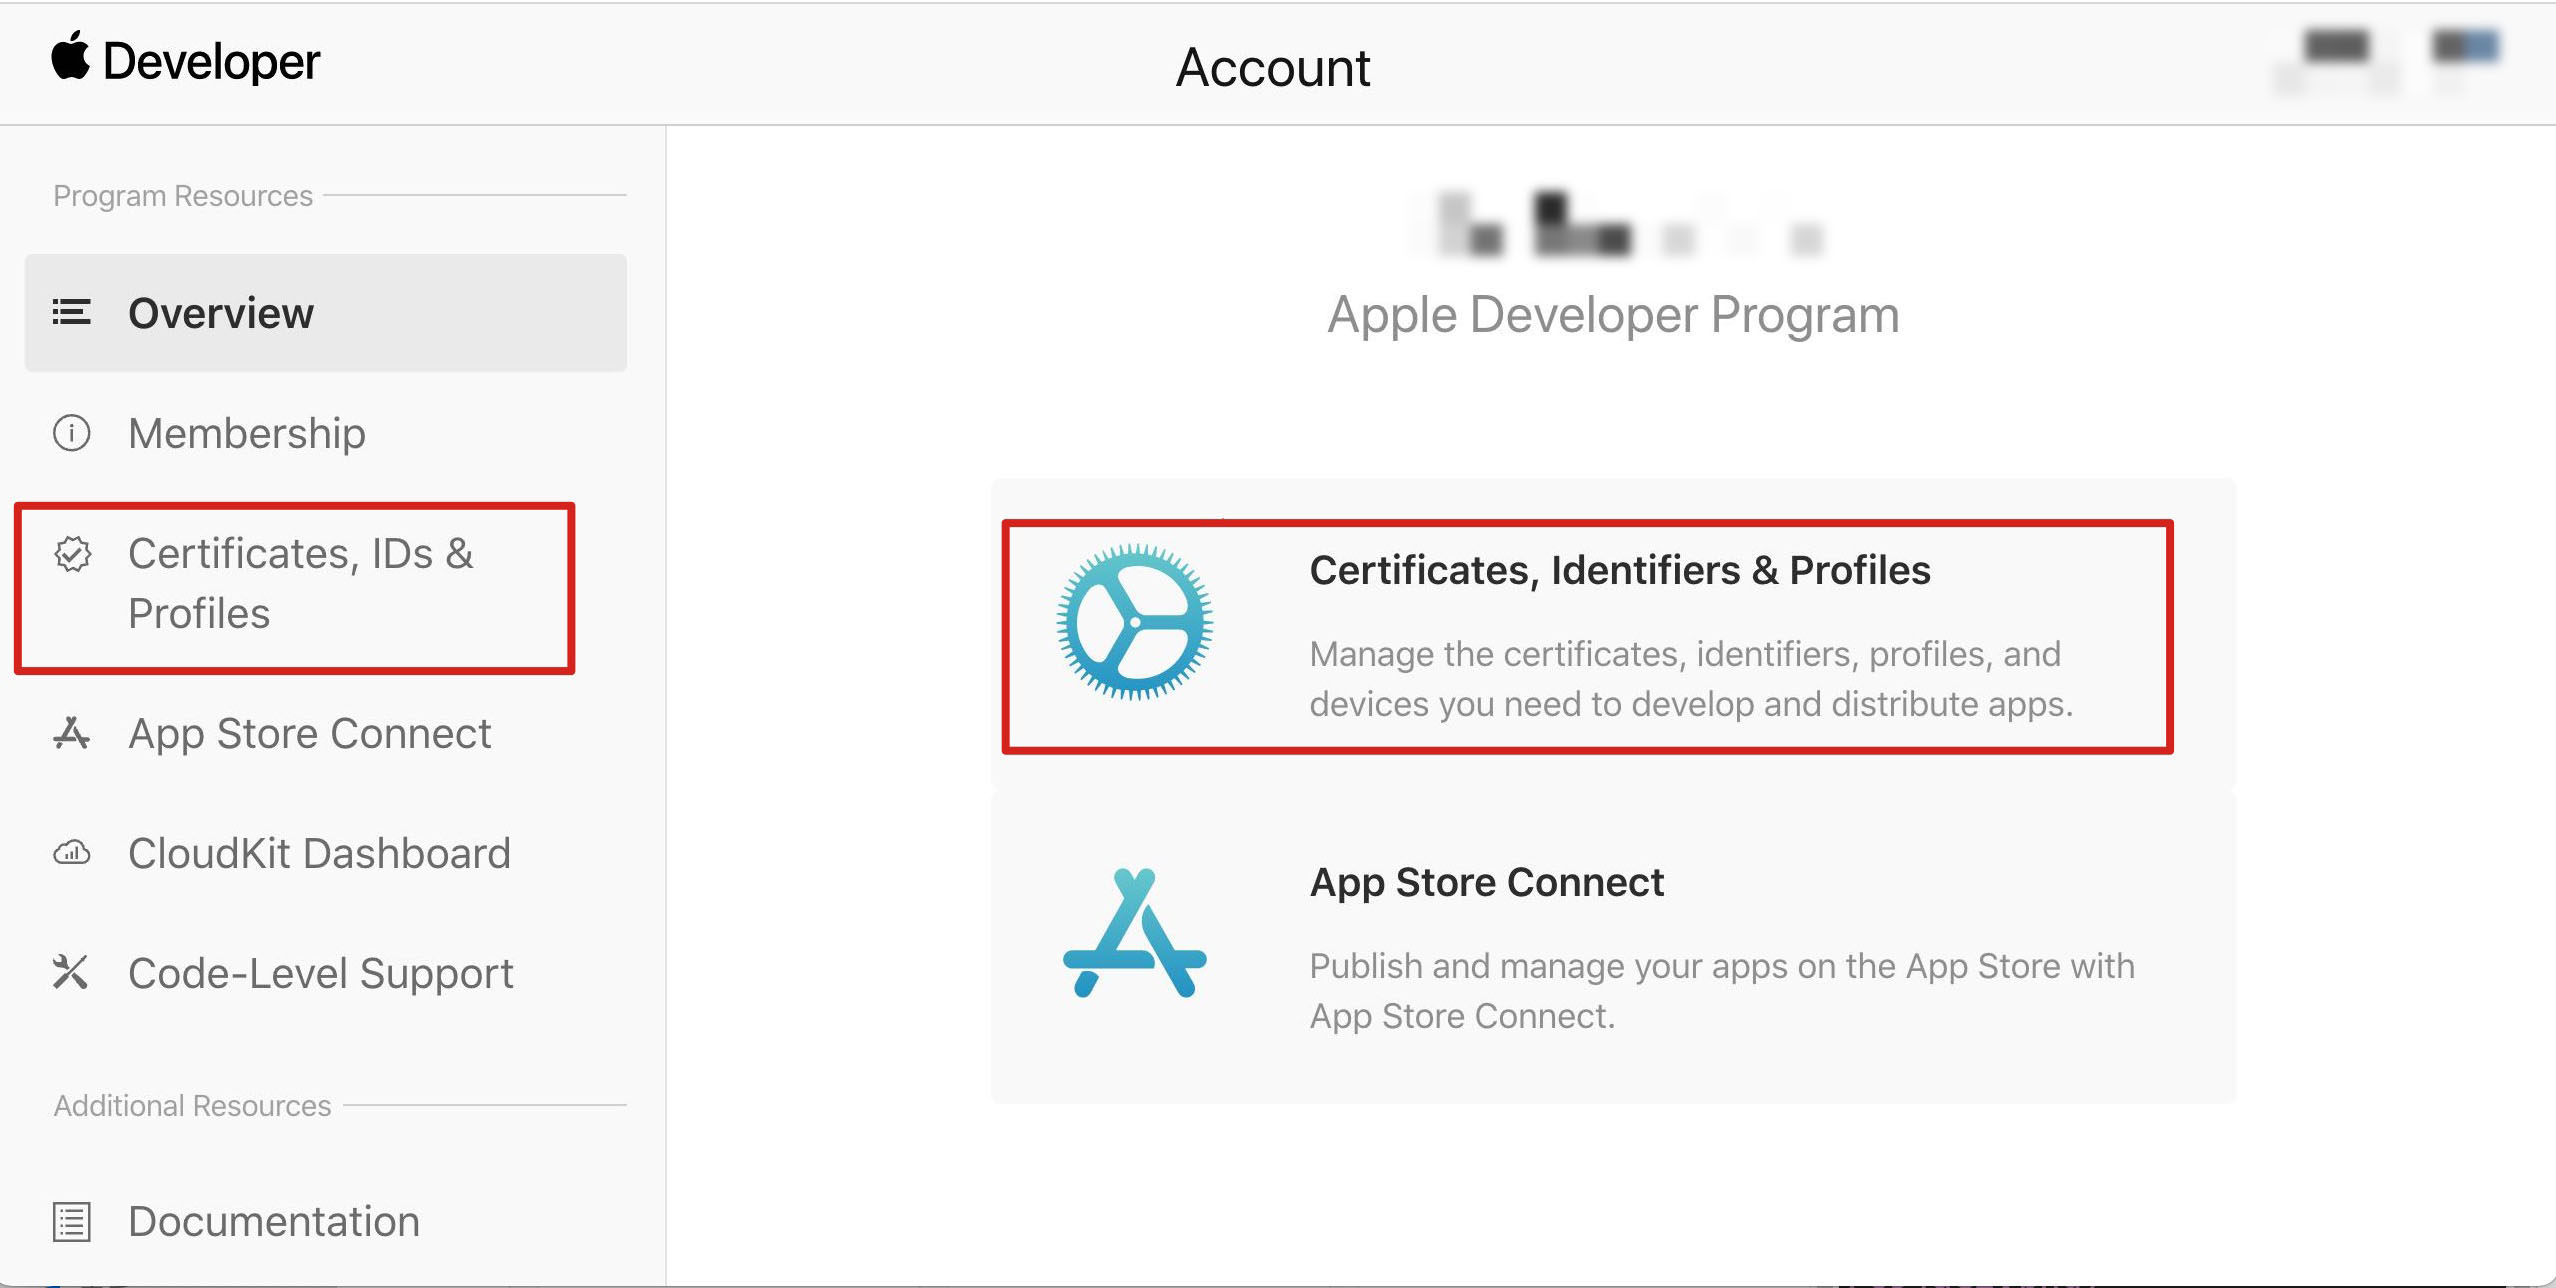
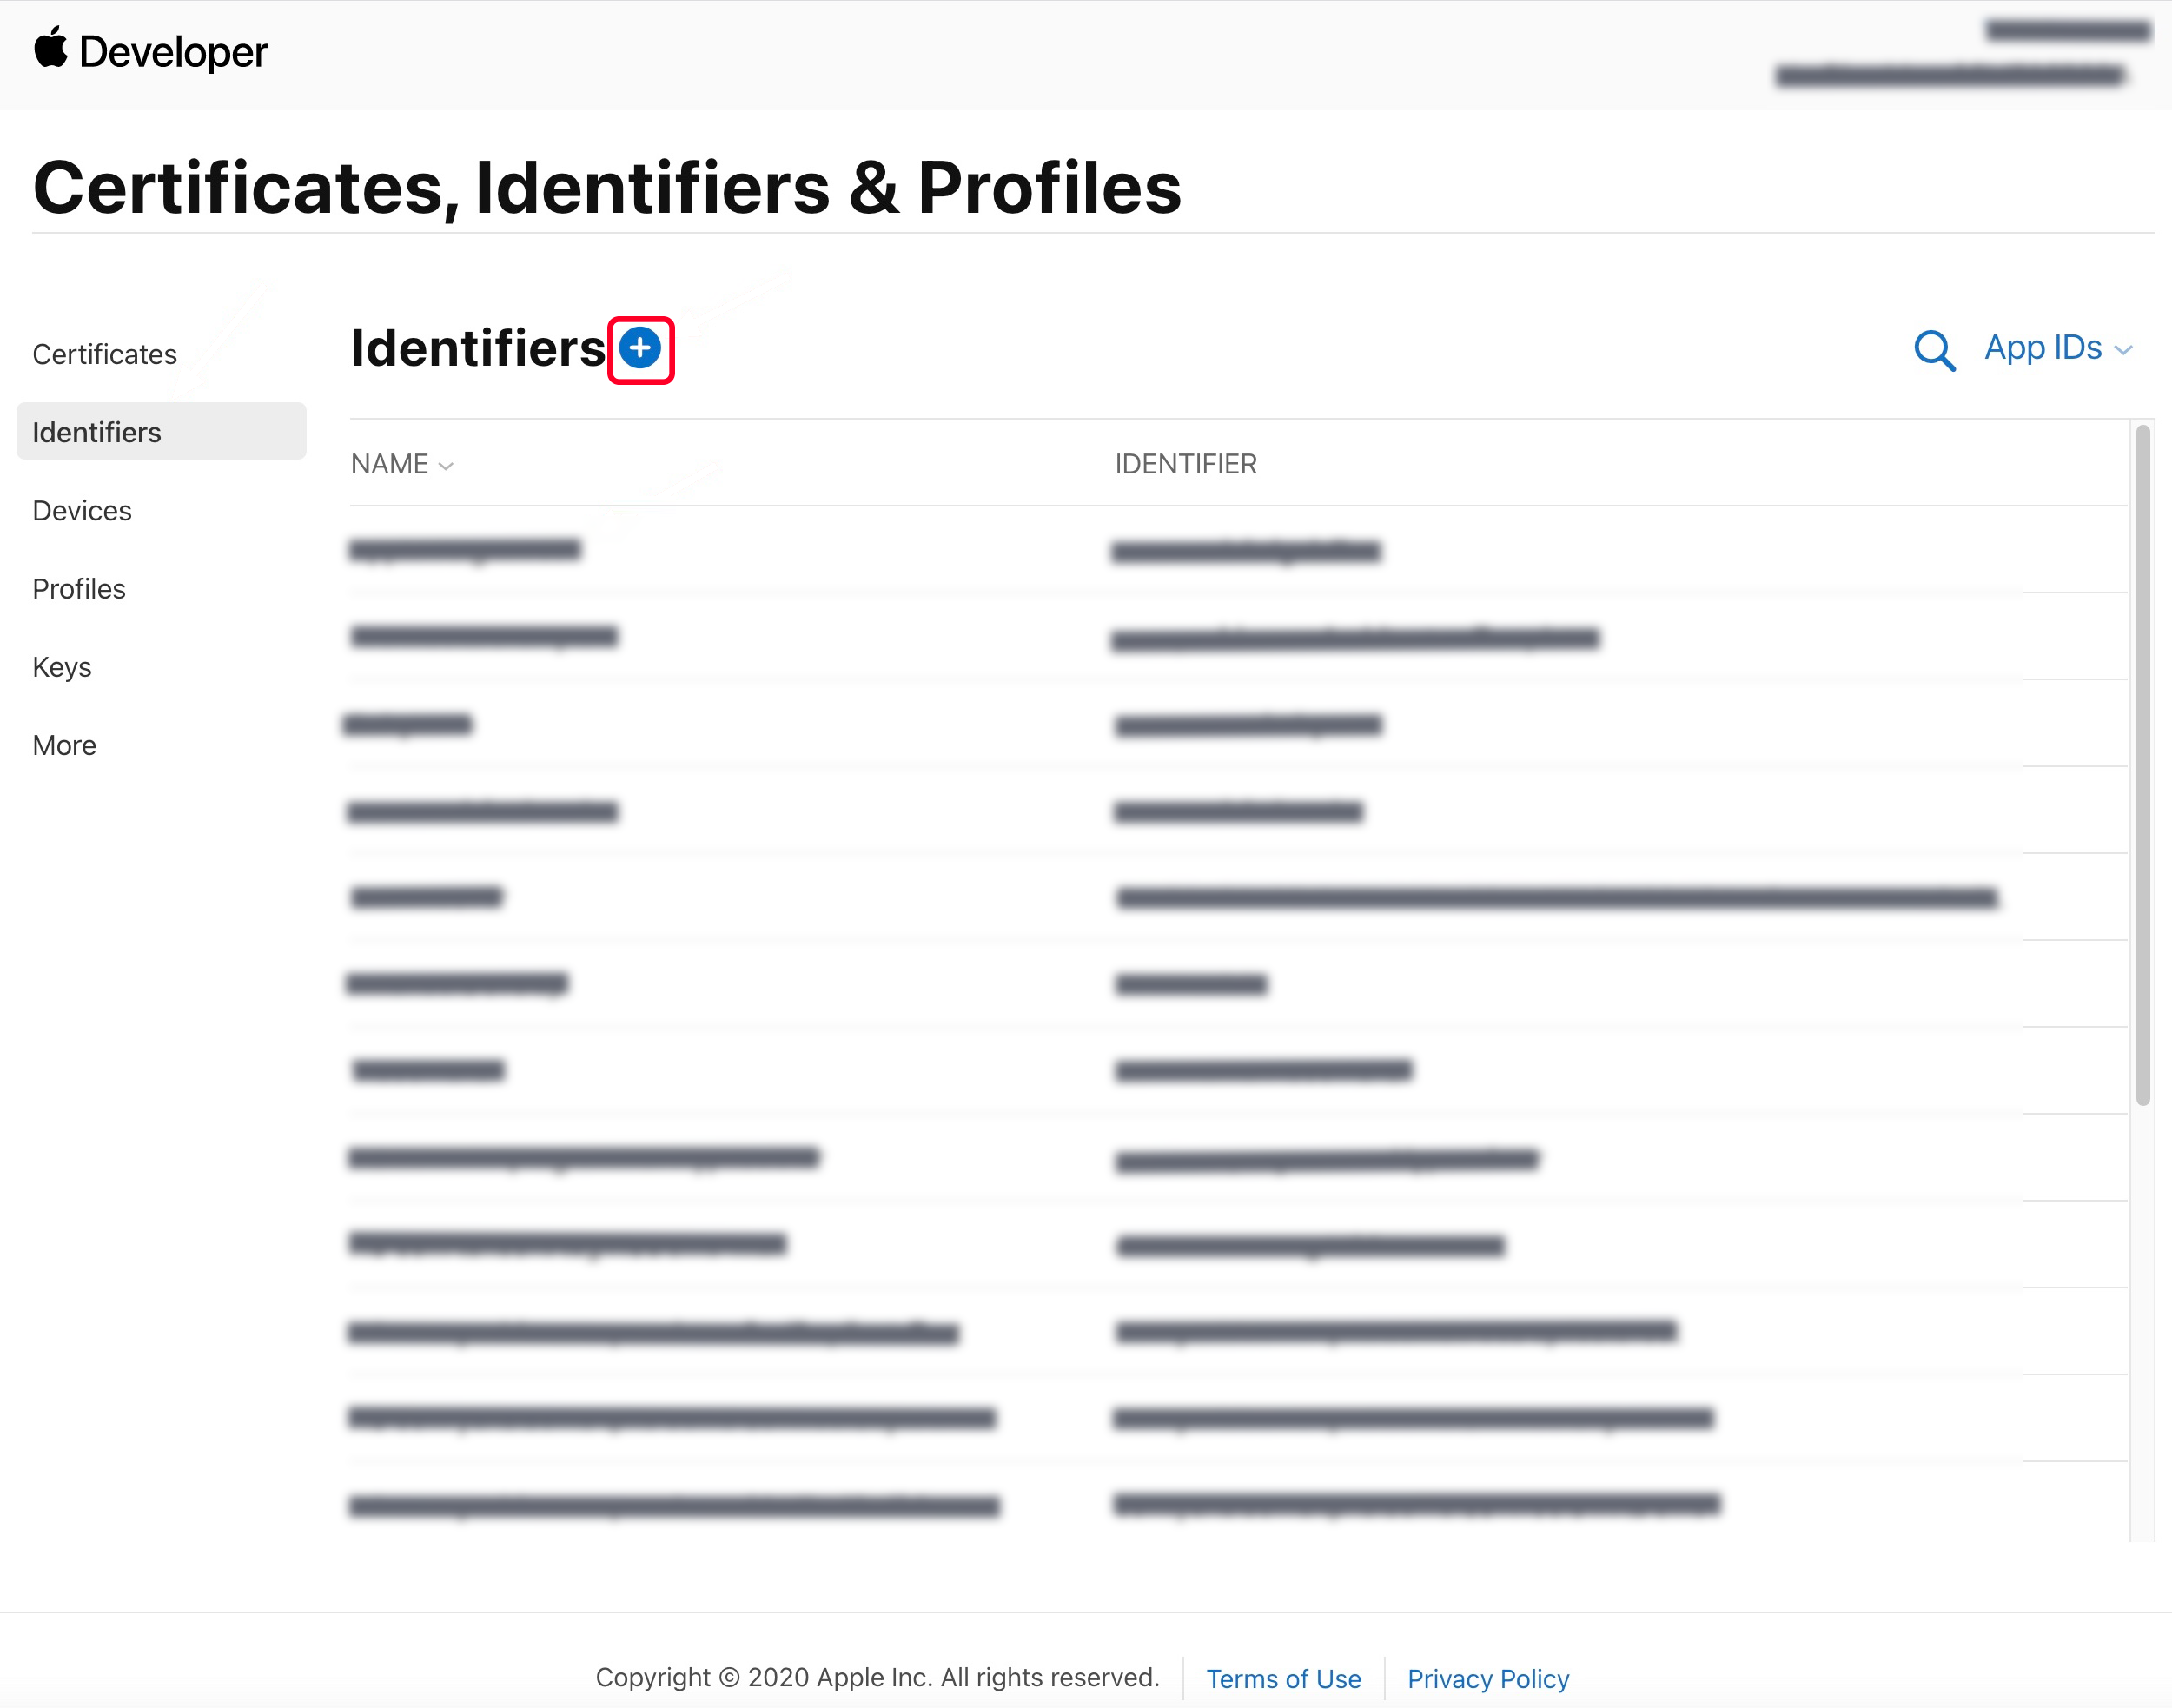
1. Log in to the Apple Developer Center website, click Certificates, Identifiers & Profiles or Certificates, IDs & Profiles in the sidebar, and enter the Certificates, IDs & Profiles page.


2. Click + on the right of Identifiers.


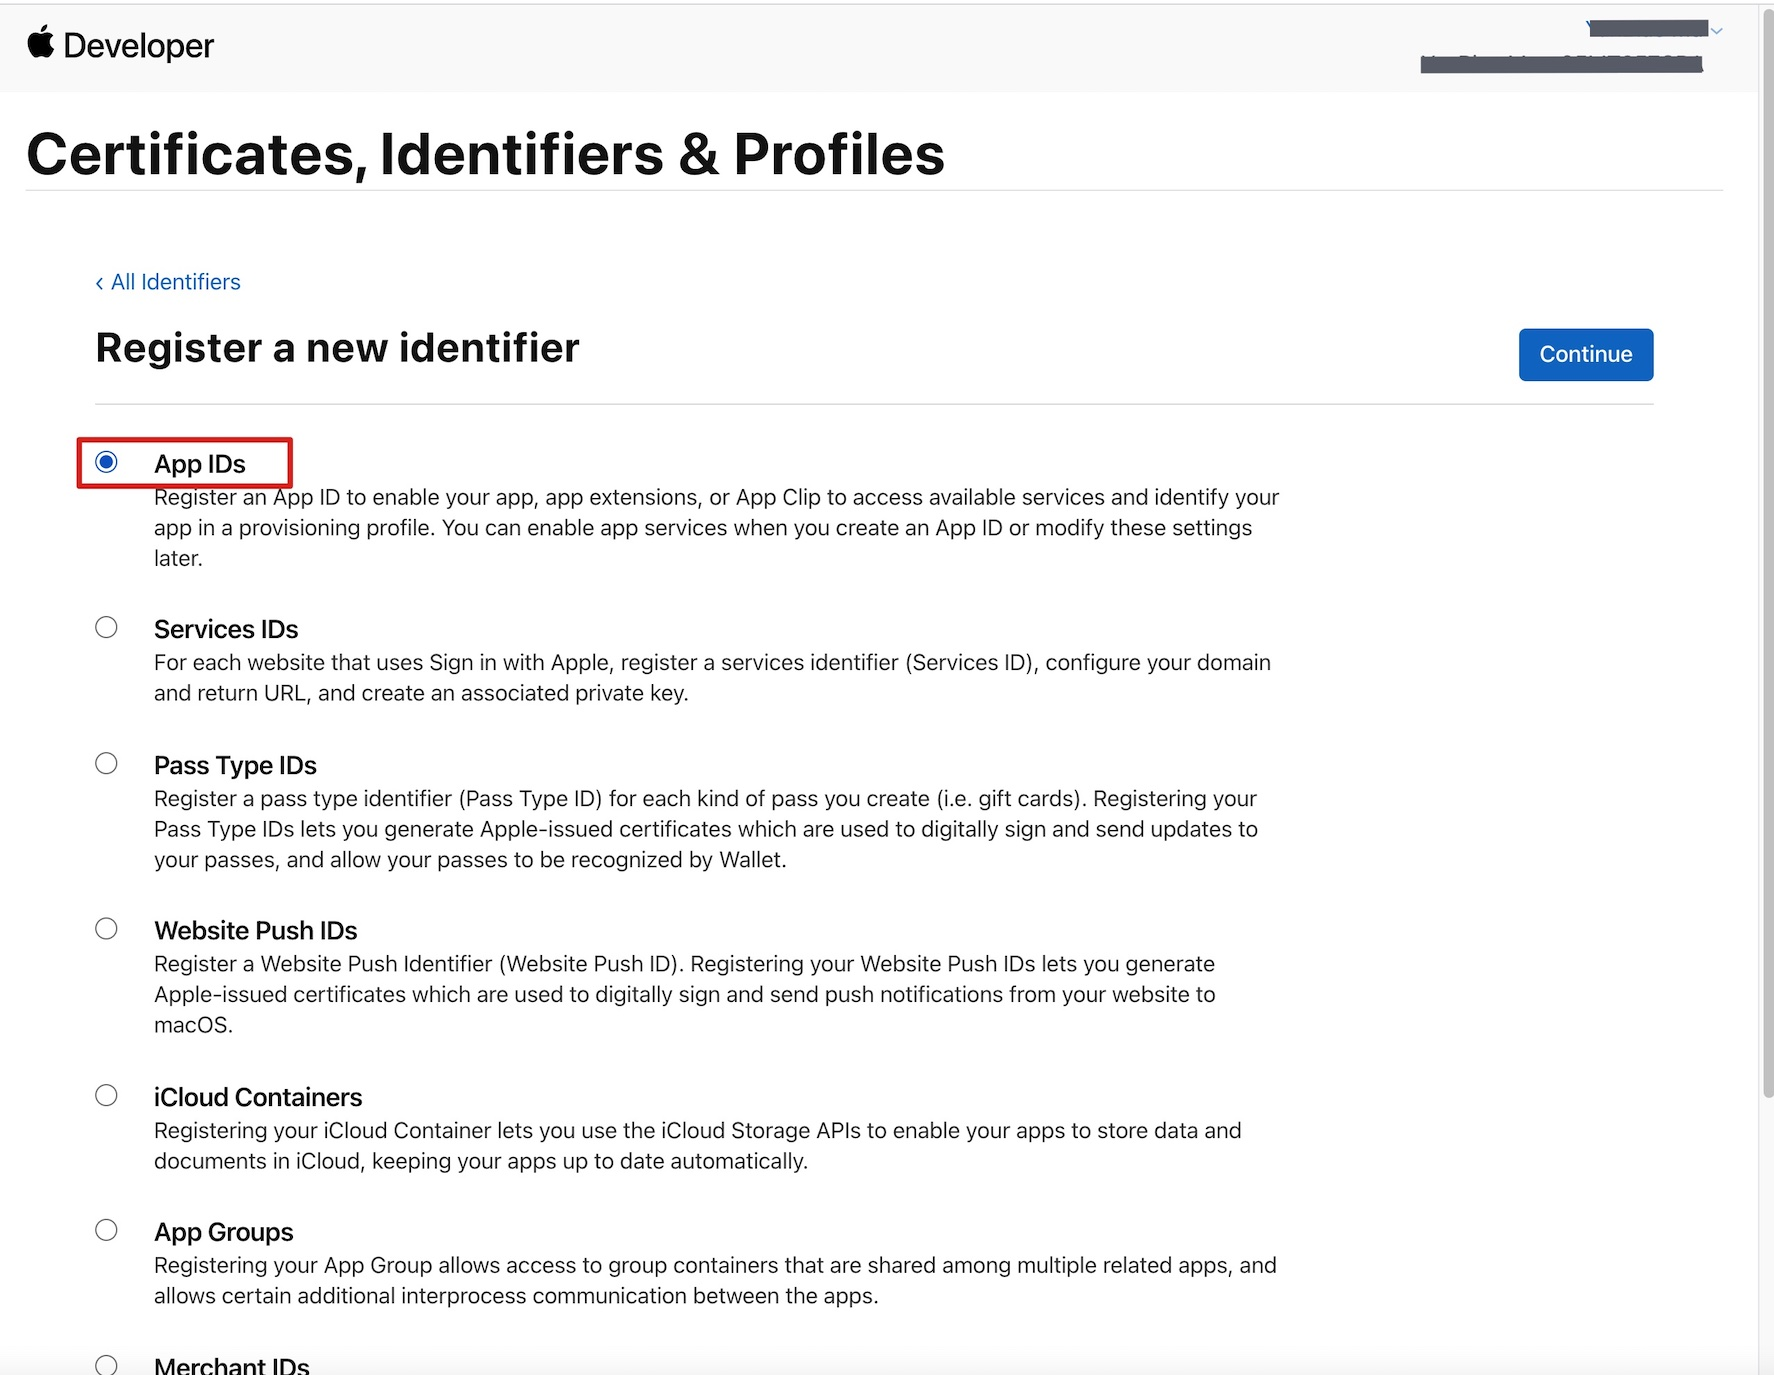
3. You can refer to the following procedure to create a new AppID, or add the Push Notification Service to your original AppID.
Note
Note: The Bundle ID of your App cannot use wildcard *, otherwise the Remote Push Service will be unavailable.
4. Check App IDs, click Continue to proceed to the next step.


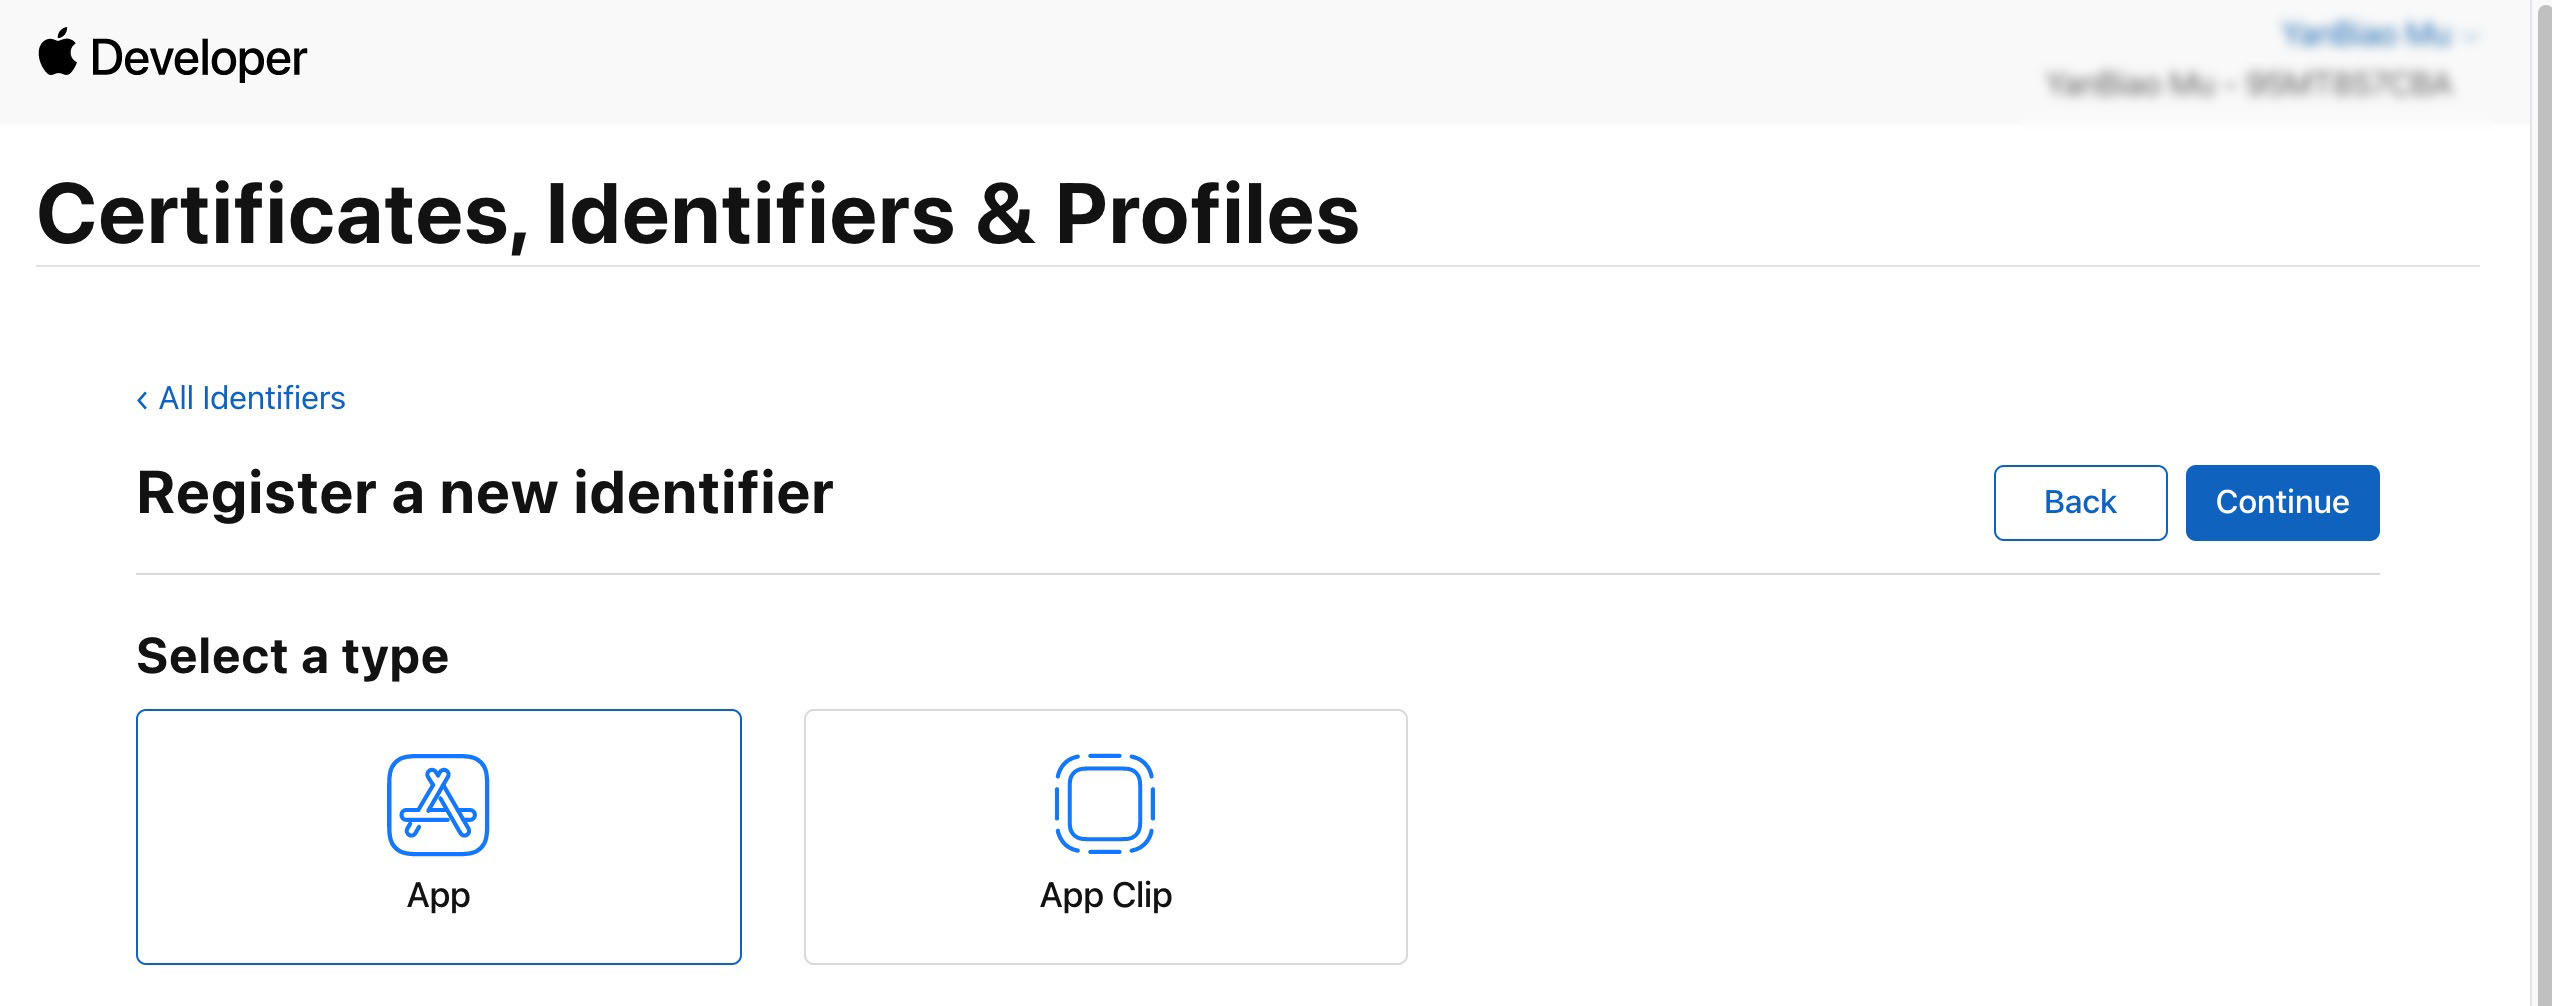
5. Select App, click Continue to proceed to the next step.


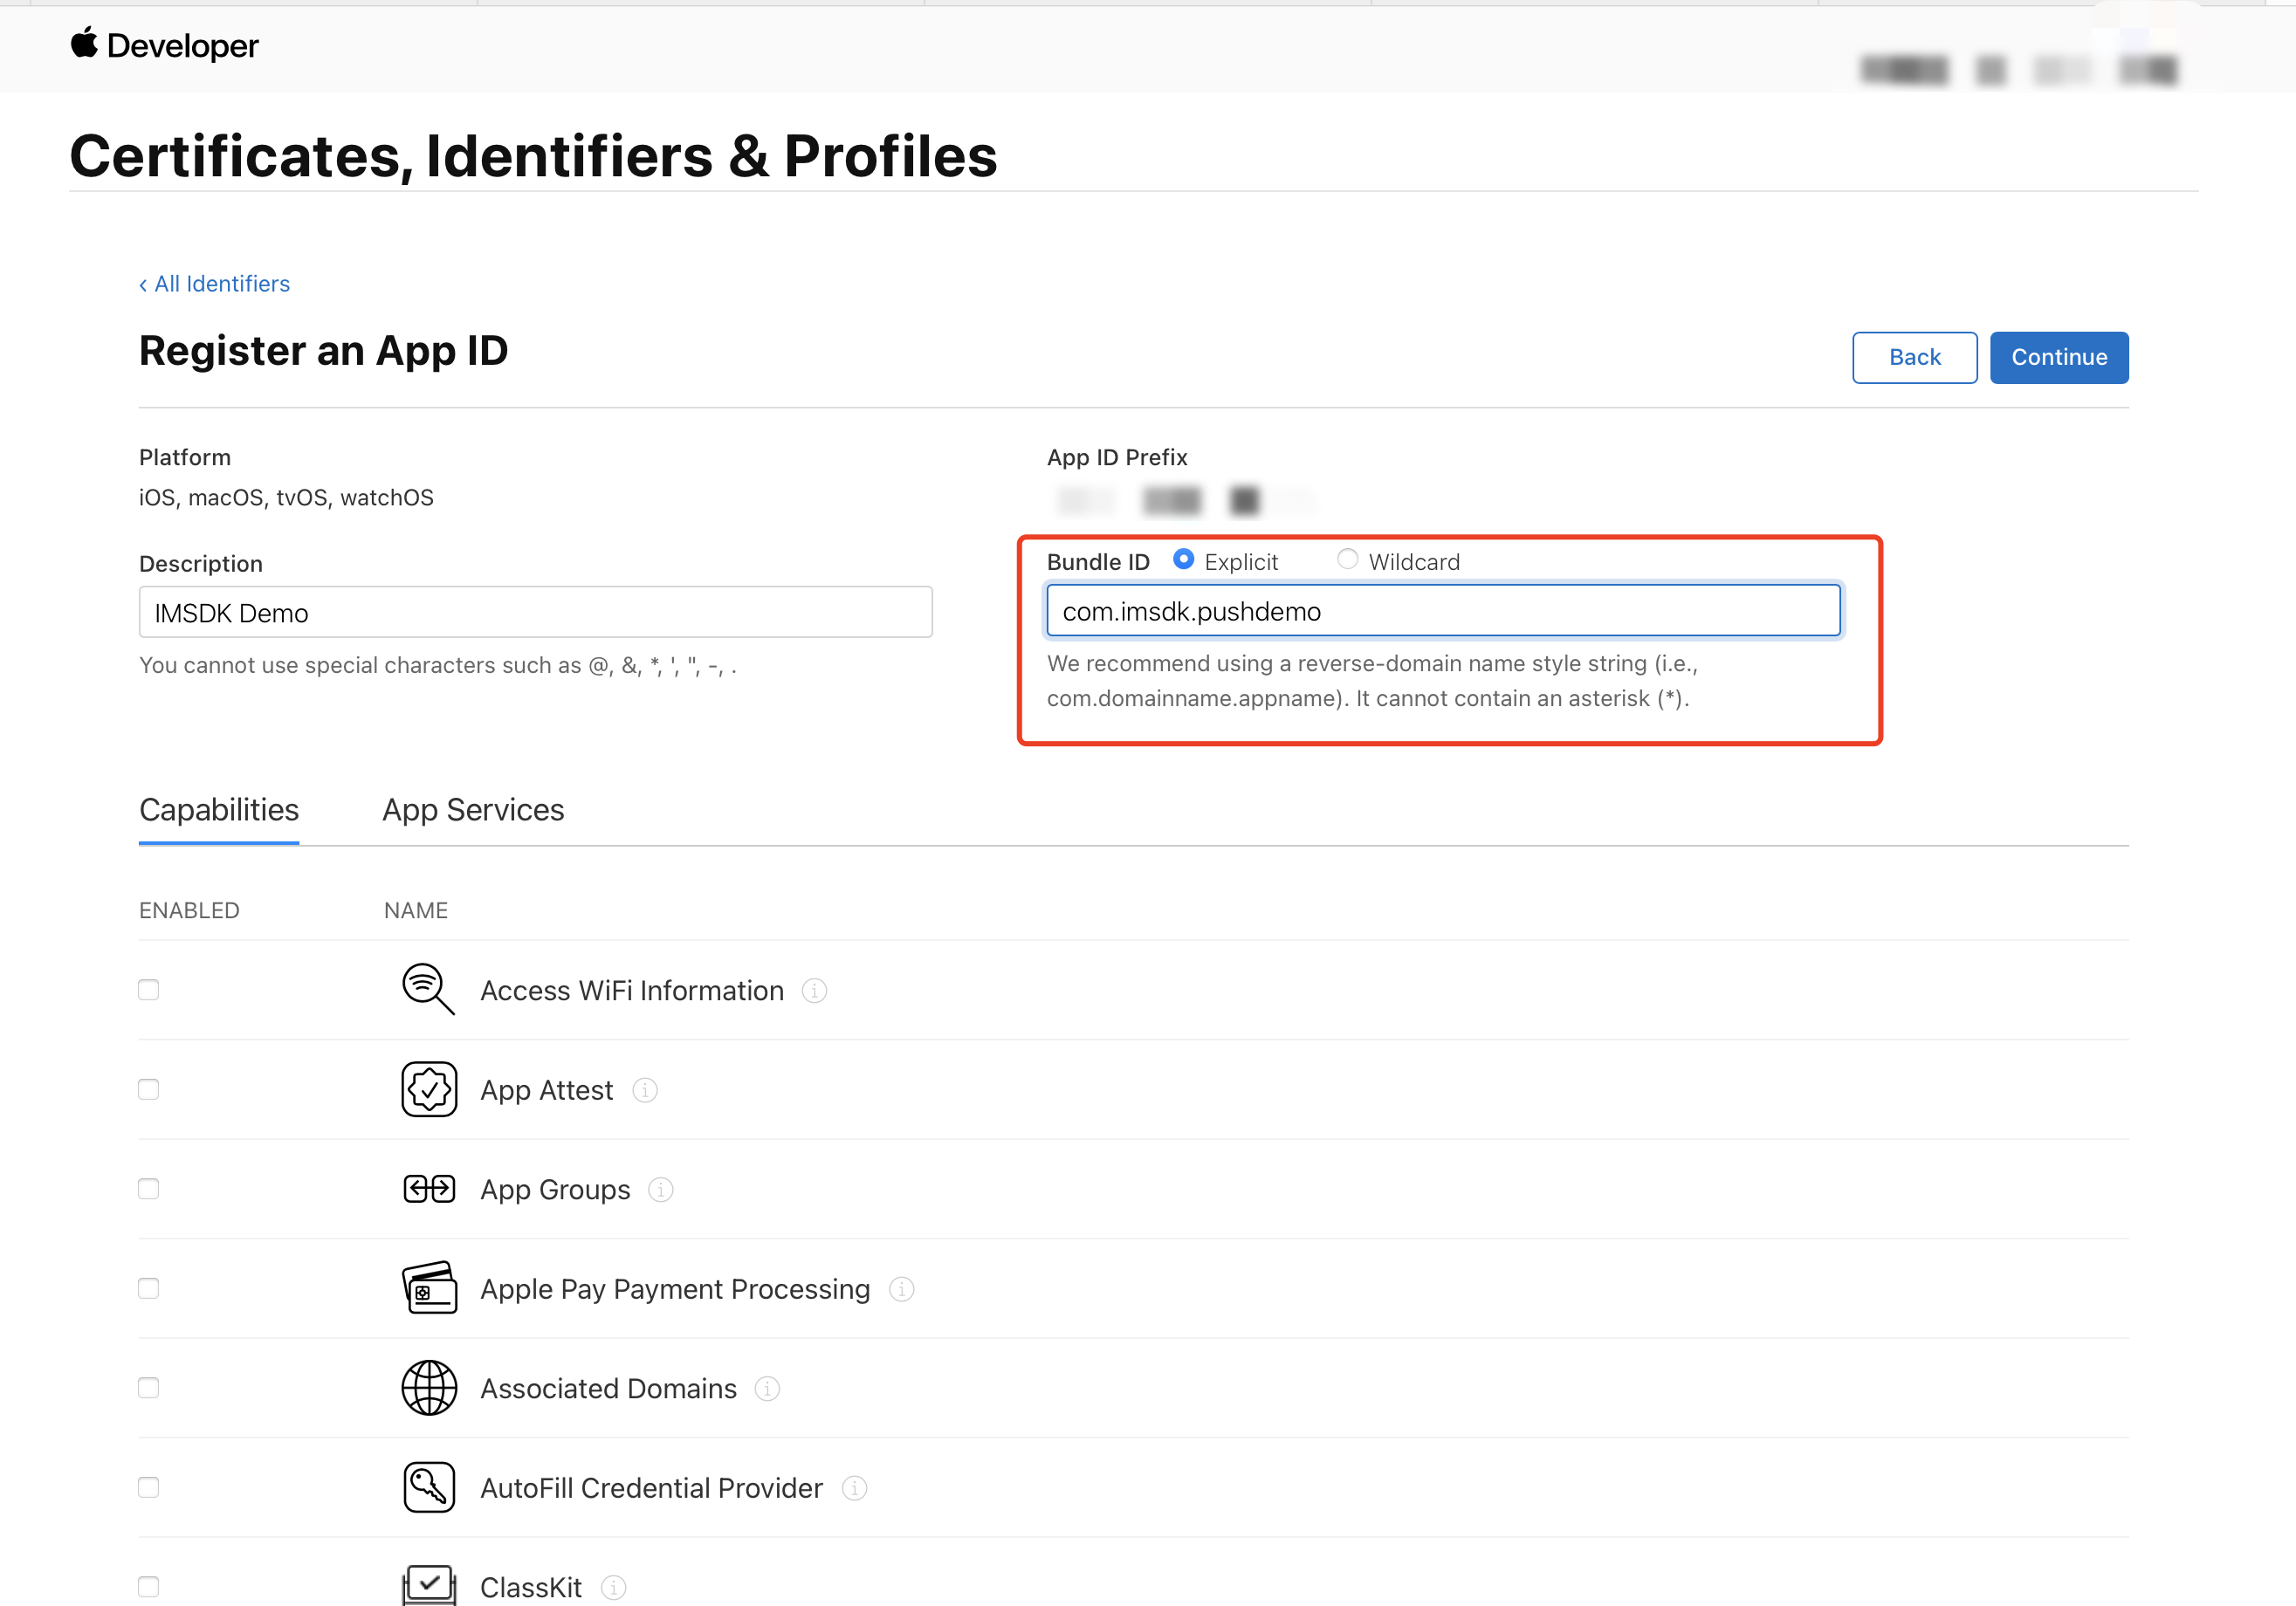
6. Configure Bundle ID and other info, then click Continue to proceed to the next step.


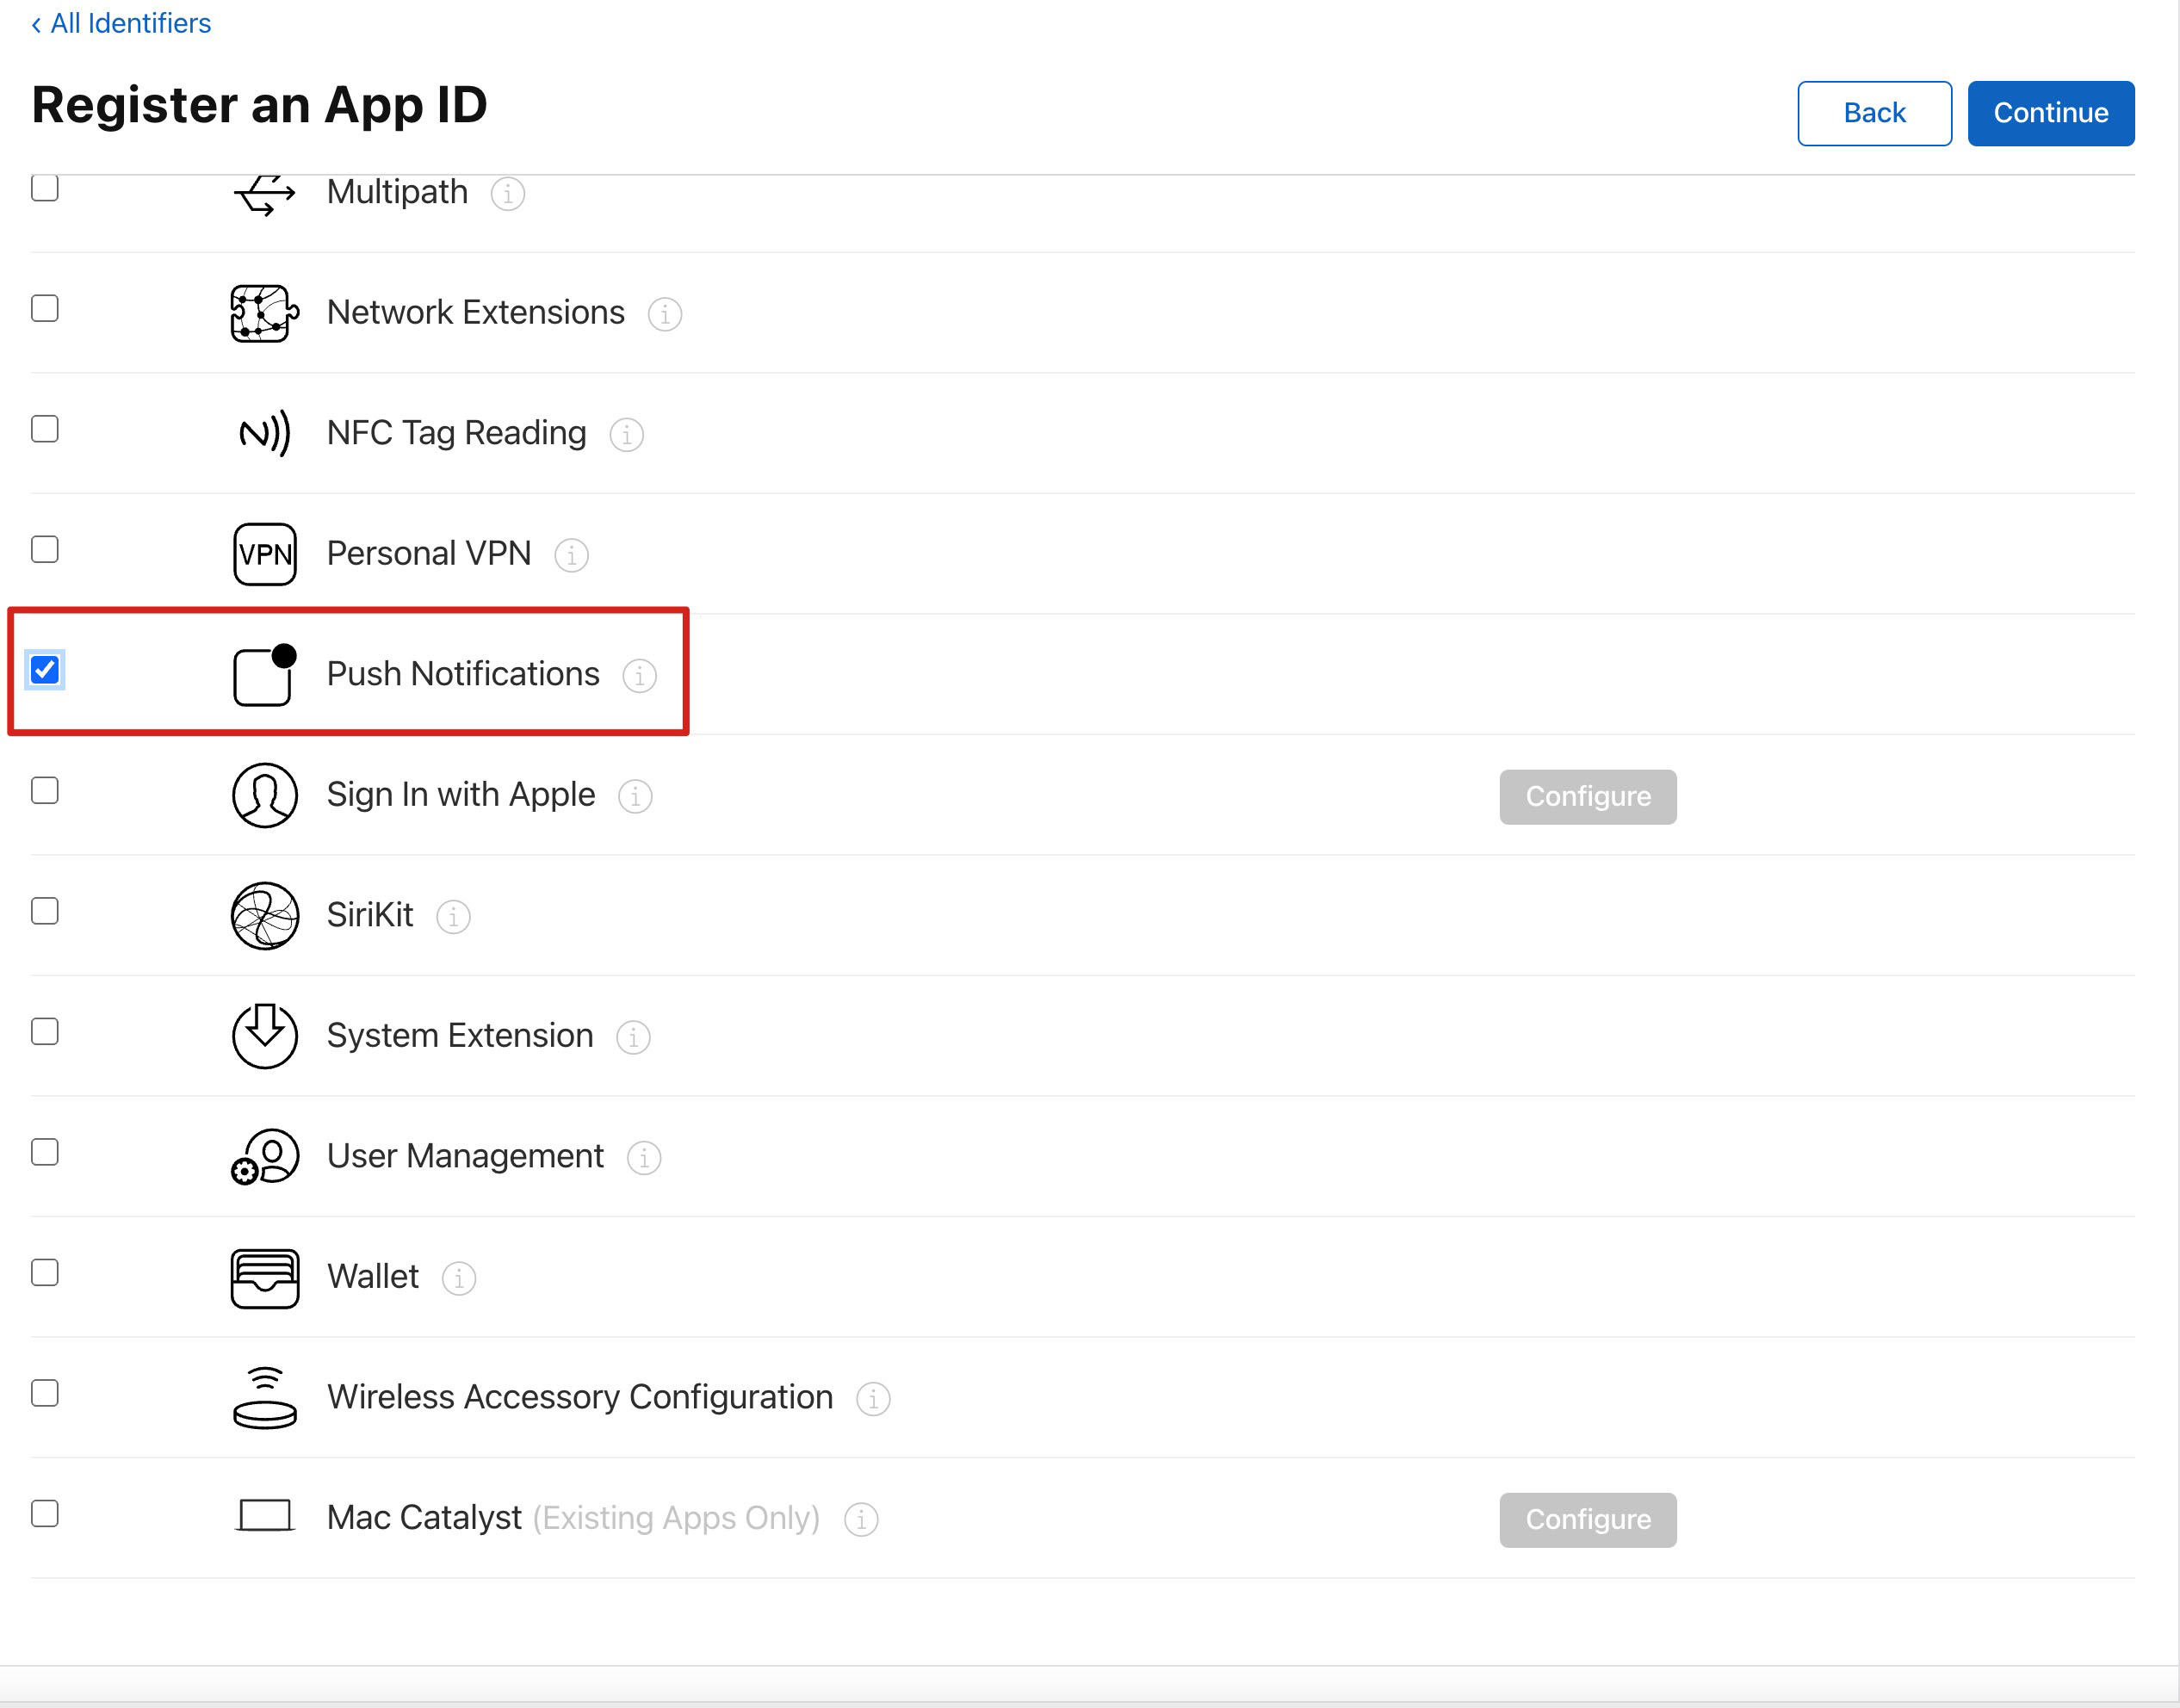
7. Check Push Notifications and enable Remote Push Service.


Generating a Certificate

1. Select your AppID, choose Configure.


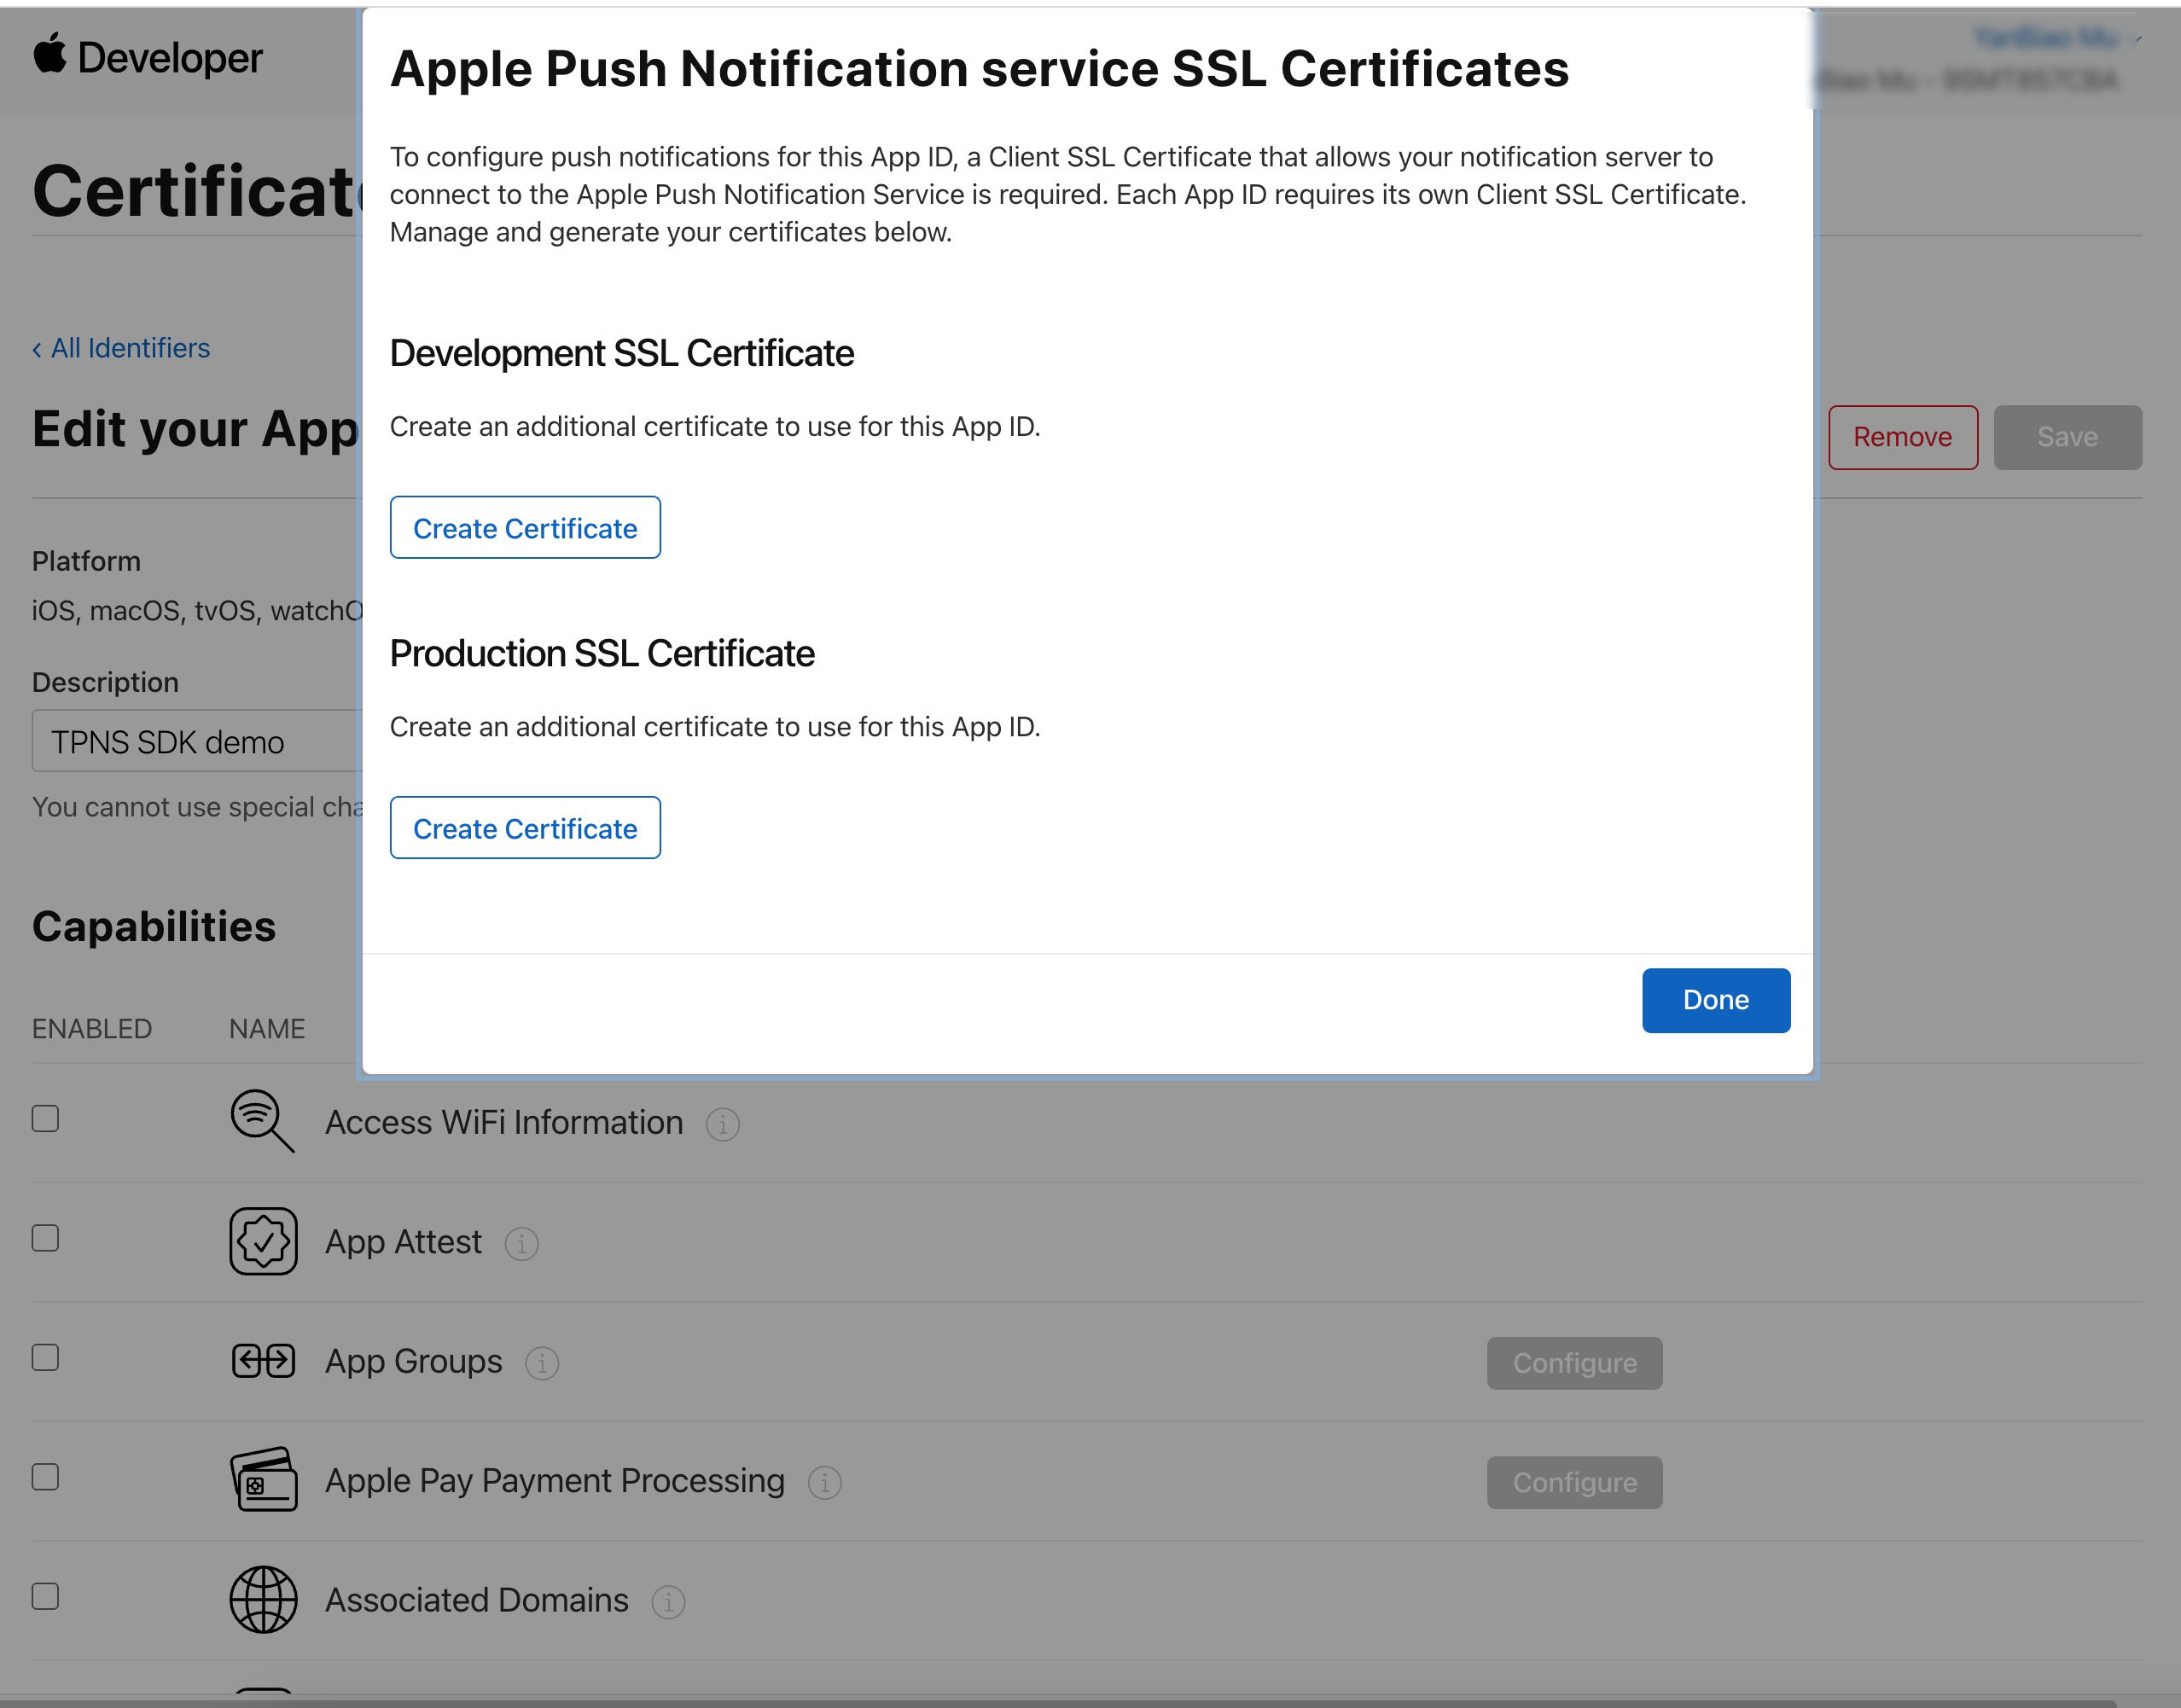
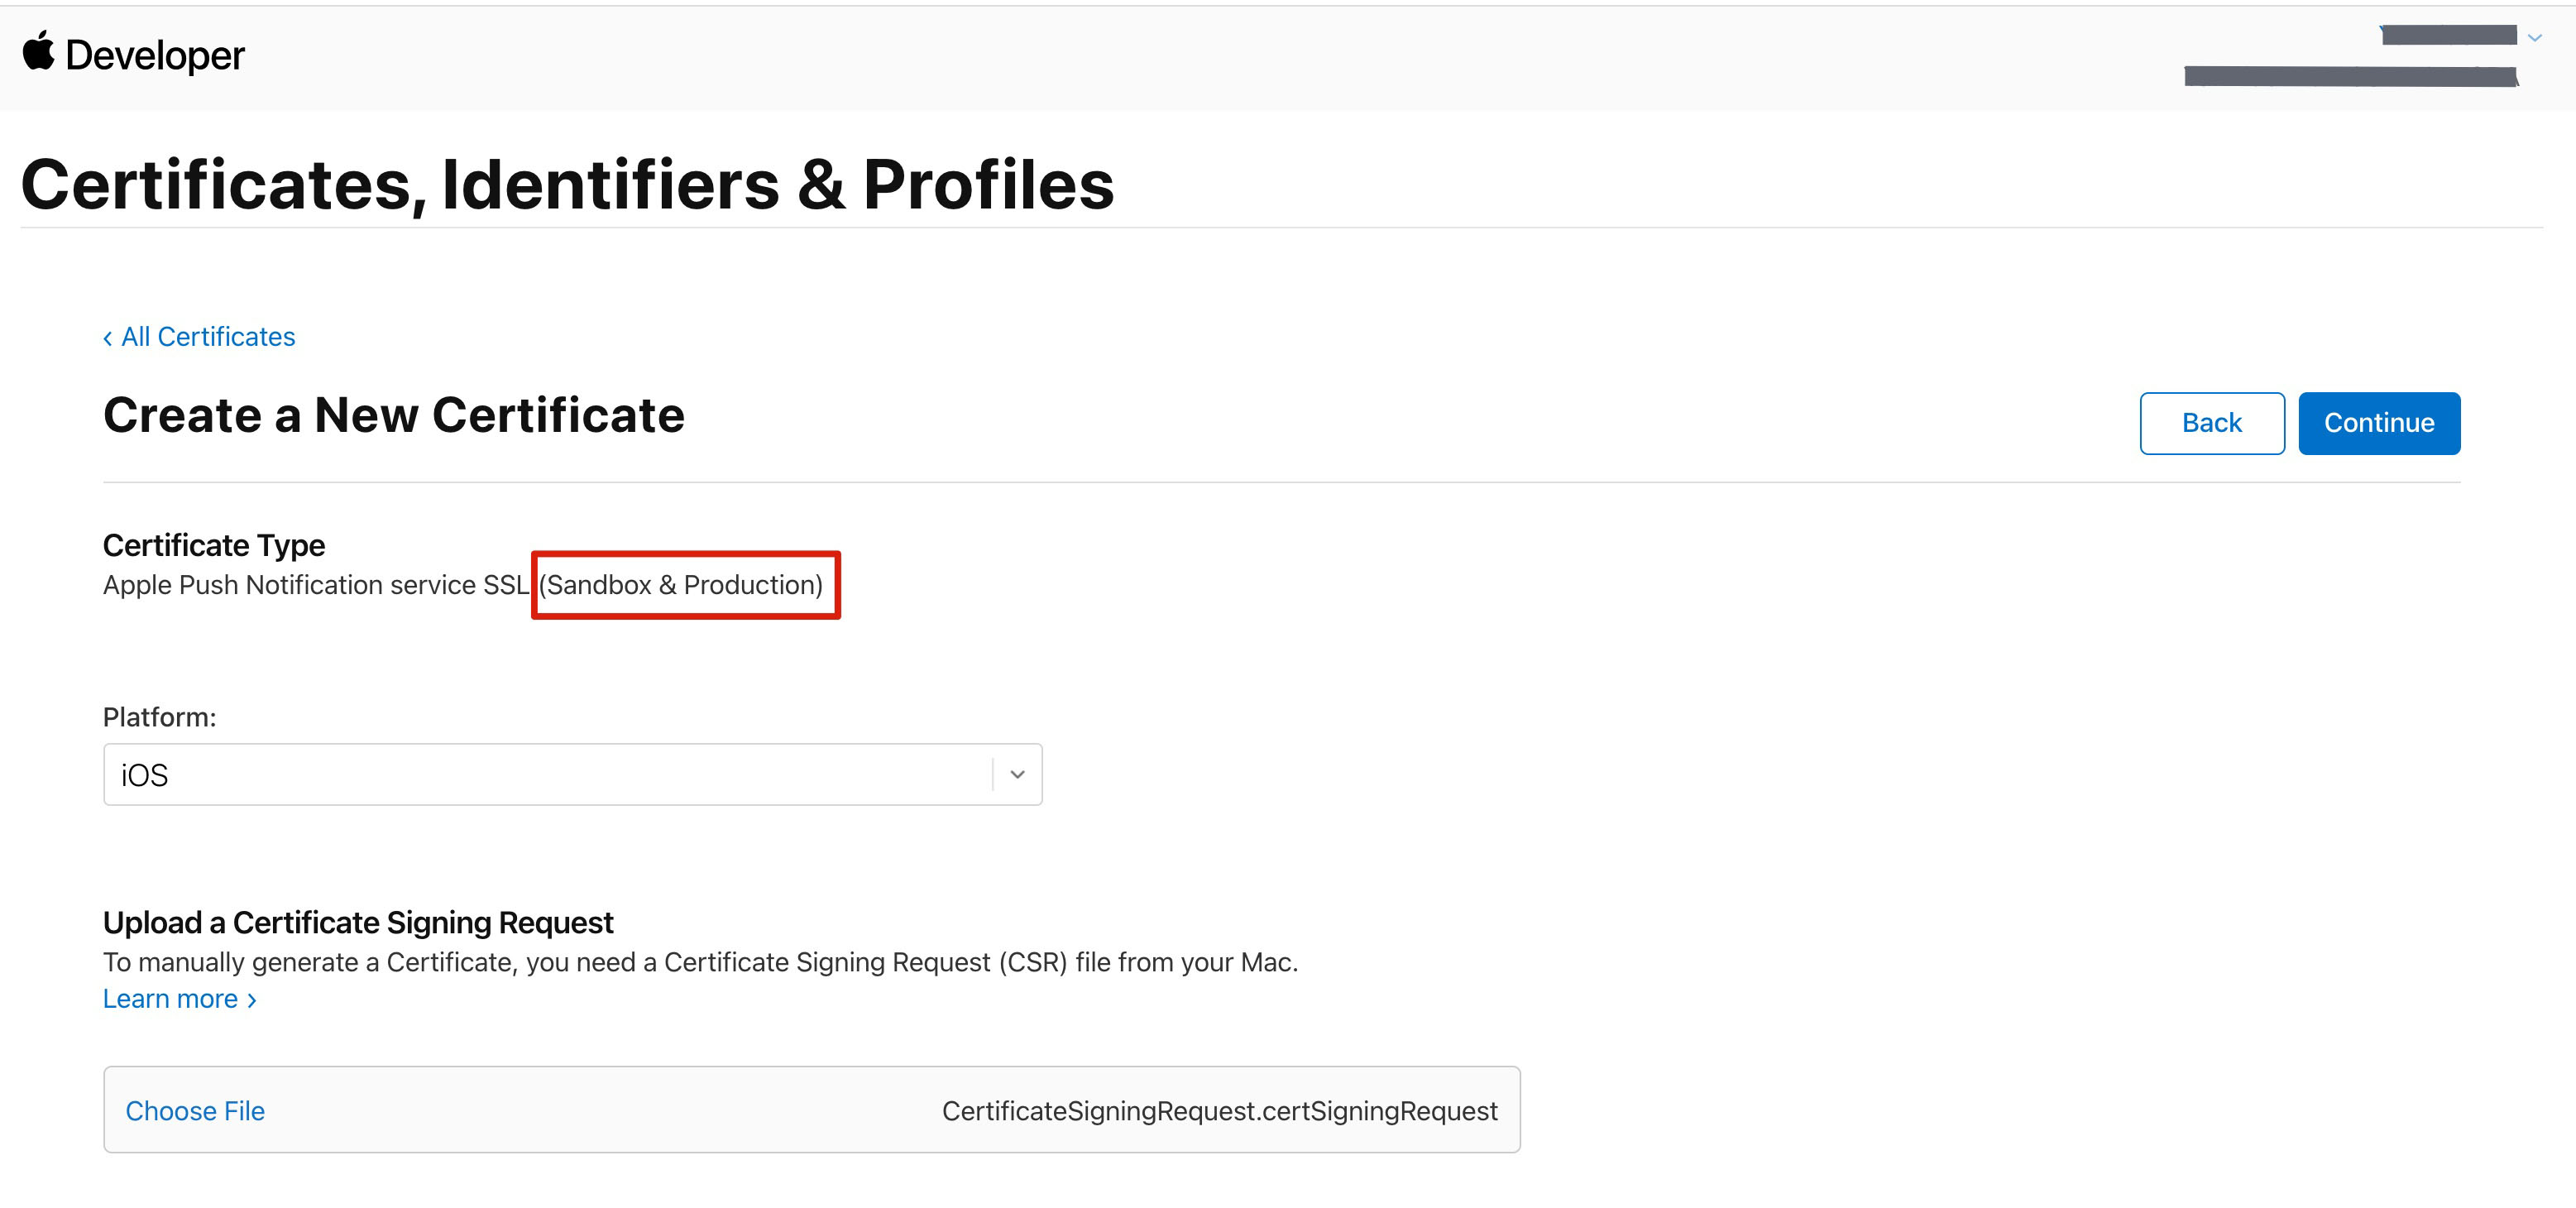
2. In the Apple Push Notification service SSL Certificates window, you can see two SSL Certificates, respectively for remote push certificates in development environment (Development) and production environment (Production), as shown below:


3. 
First select
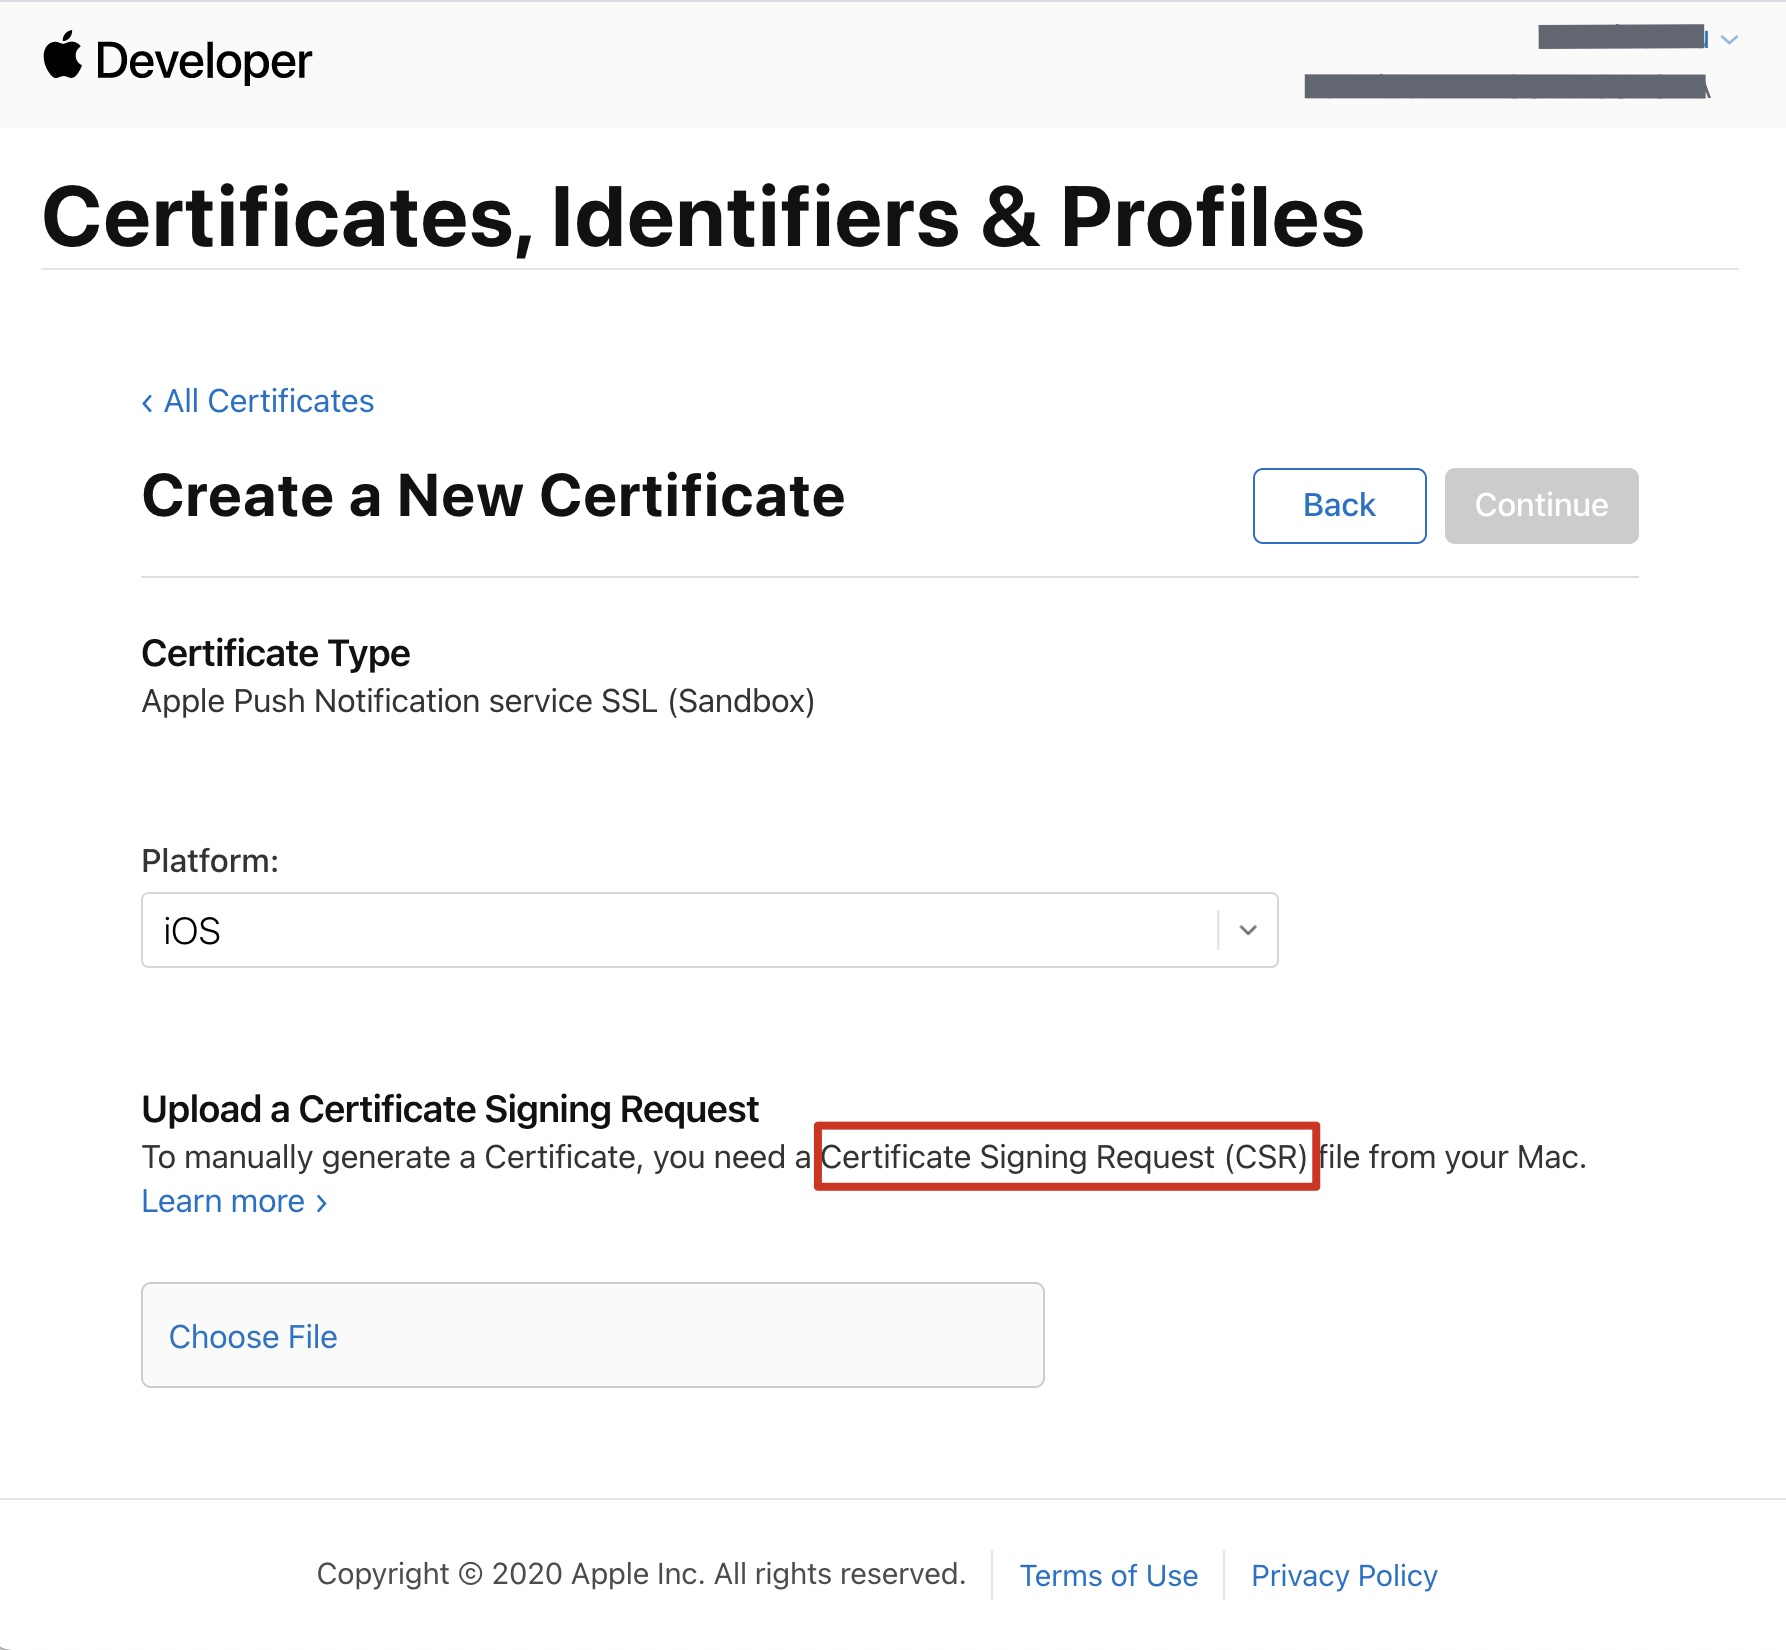
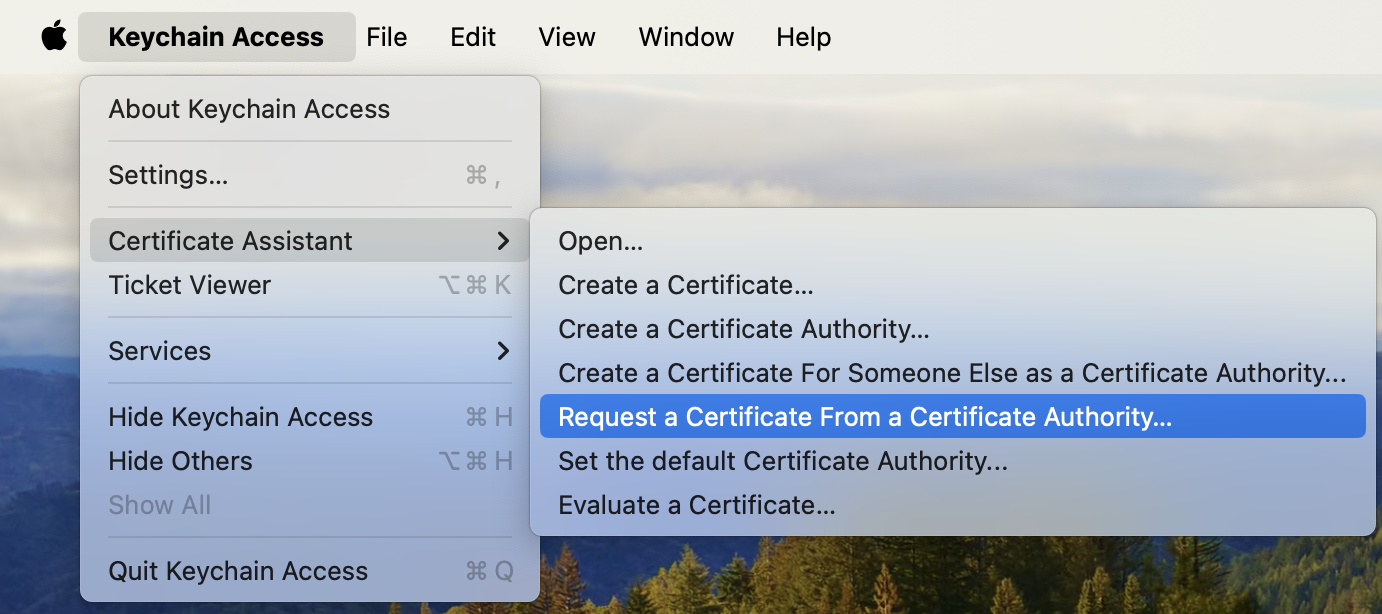
the development environment (Development) Create Certificate, the system will prompt you to provide a Certificate Signing Request (CSR).


4. On your Mac, open Keychain Access, select Keychain Access > Certificate Assistant > Request a Certificate From a Certificate Authority (Keychain Access - Certificate Assistant - Request a Certificate From a Certificate Authority).

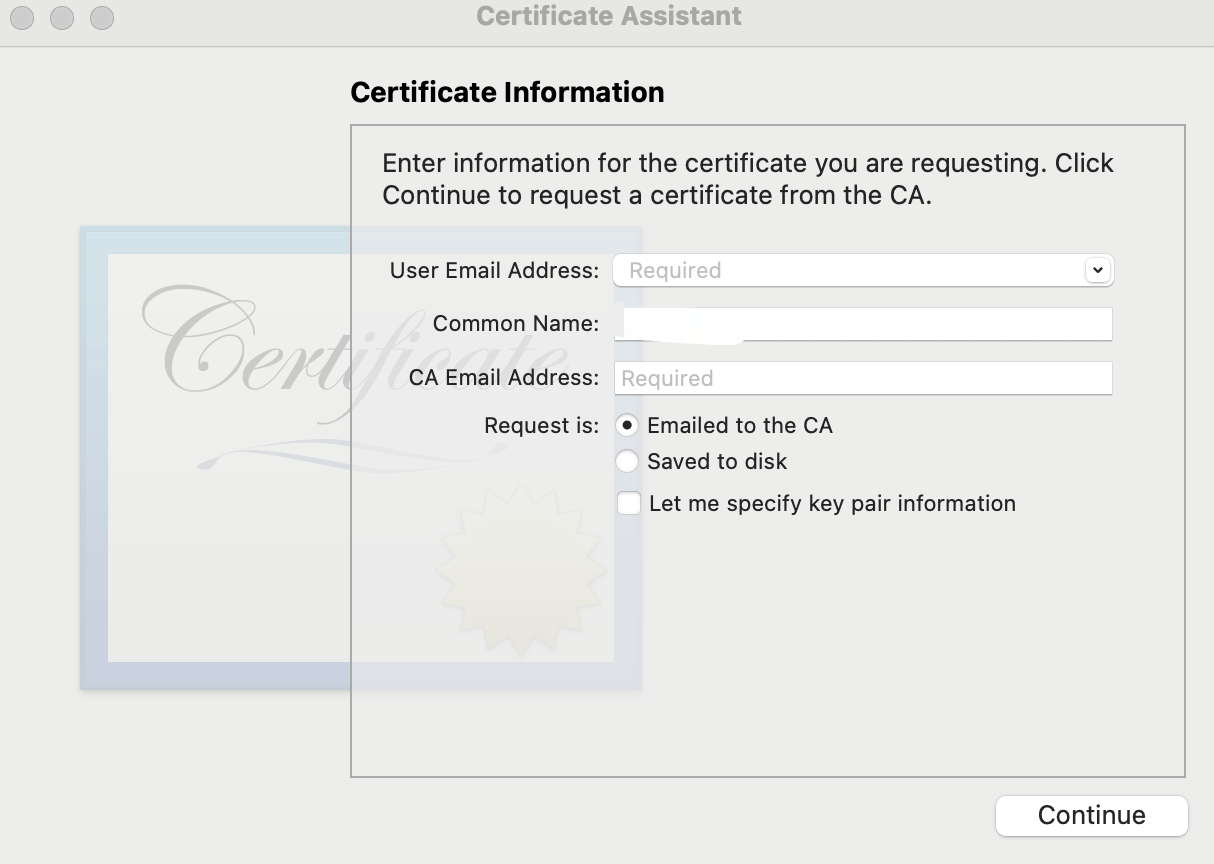
5. Enter the user email address (your mailbox), common name (Your Name or company name), select save to disk, click continue, and the system will generate a *.certSigningRequest file.

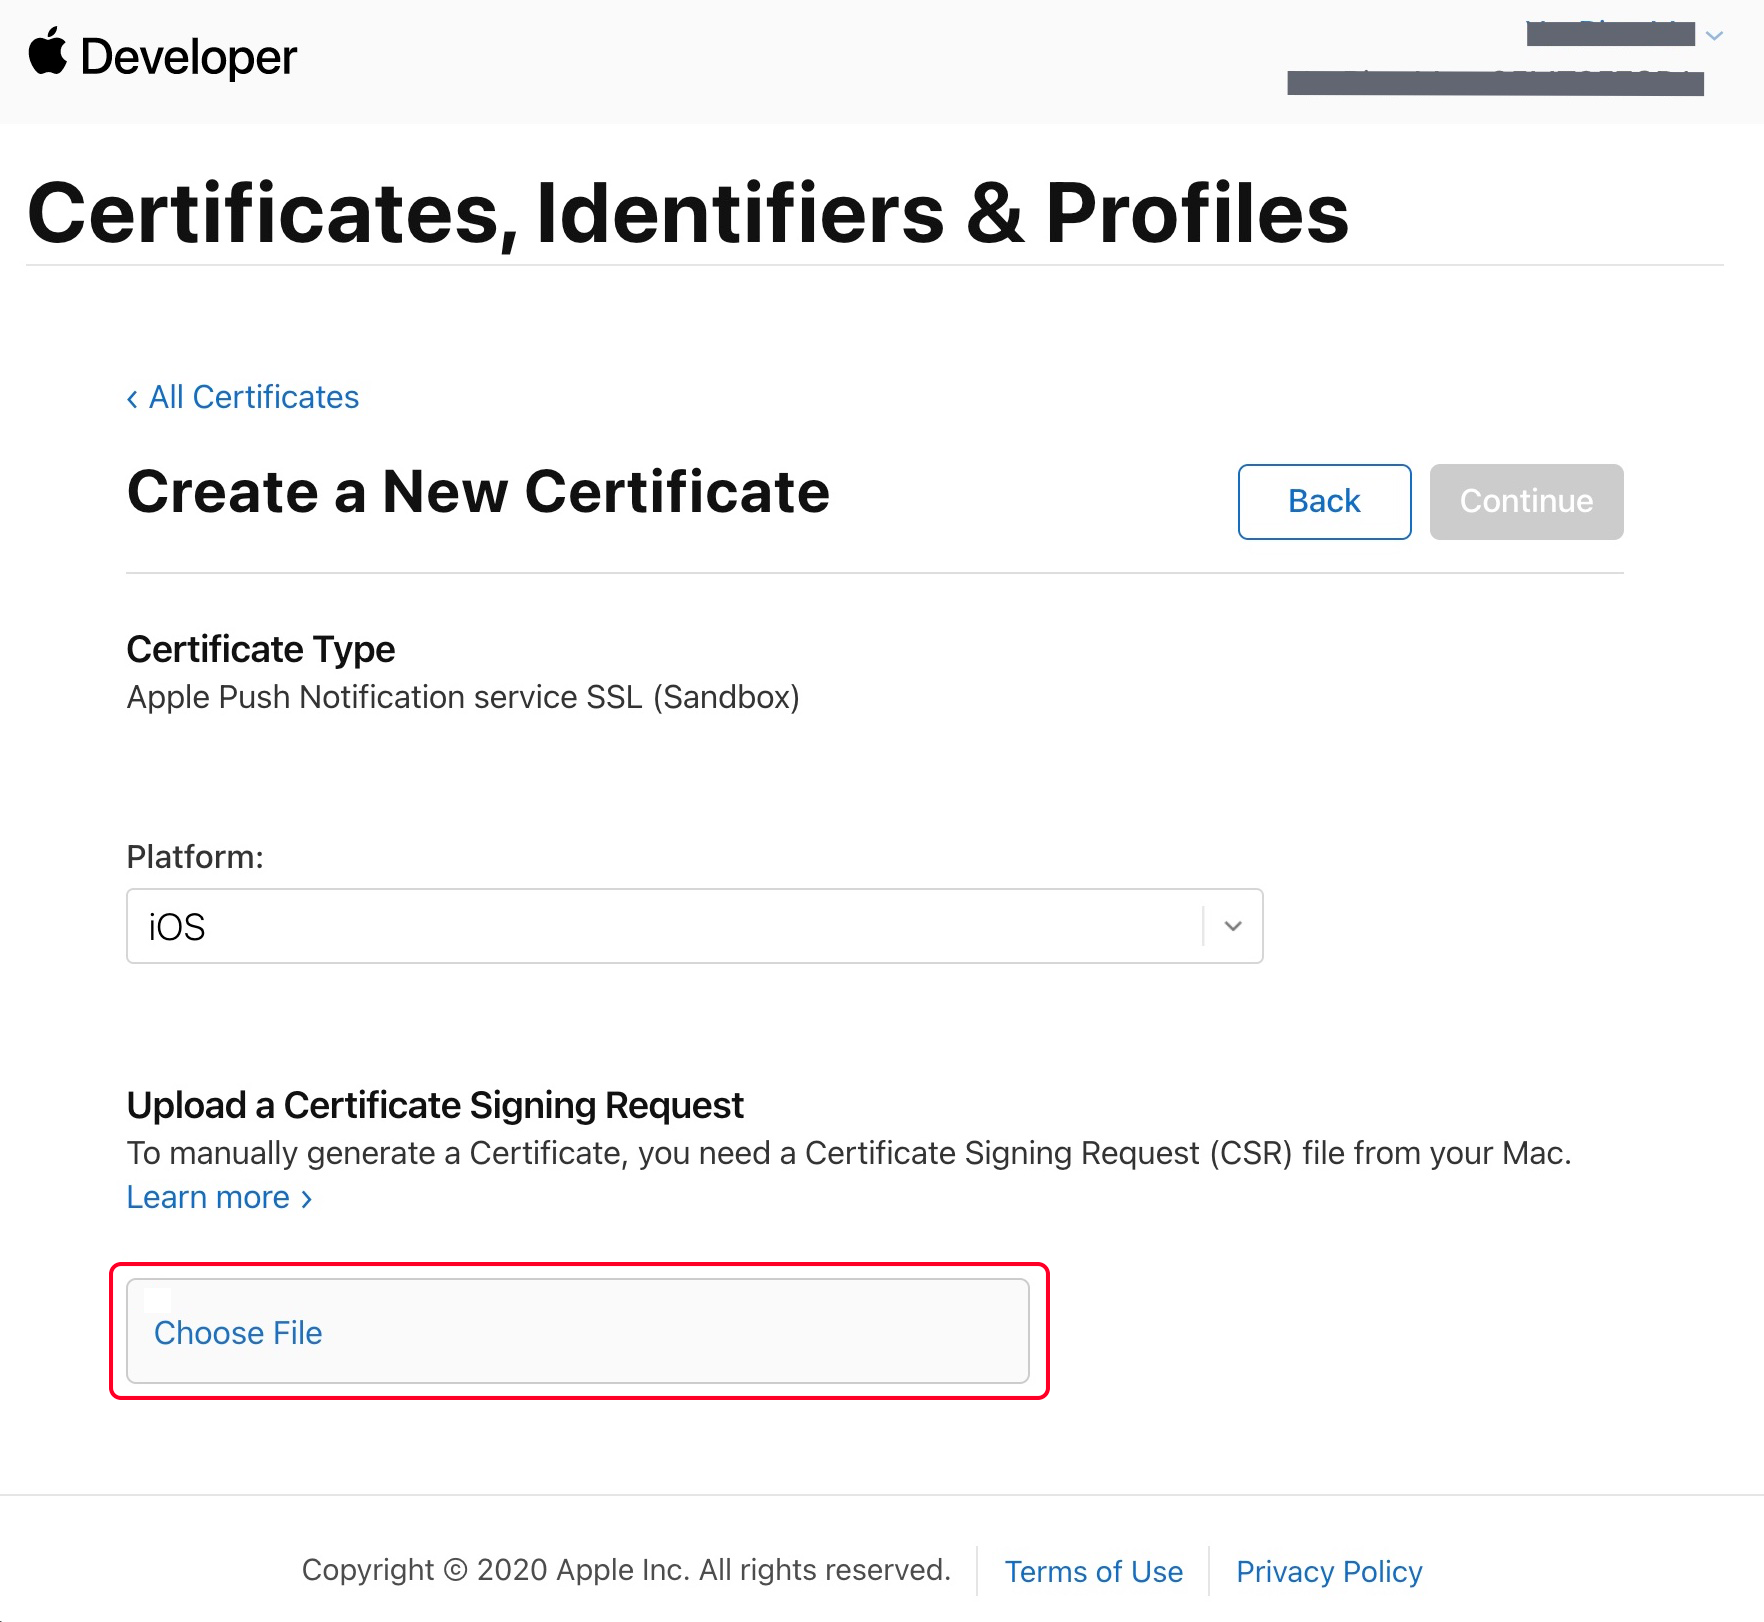
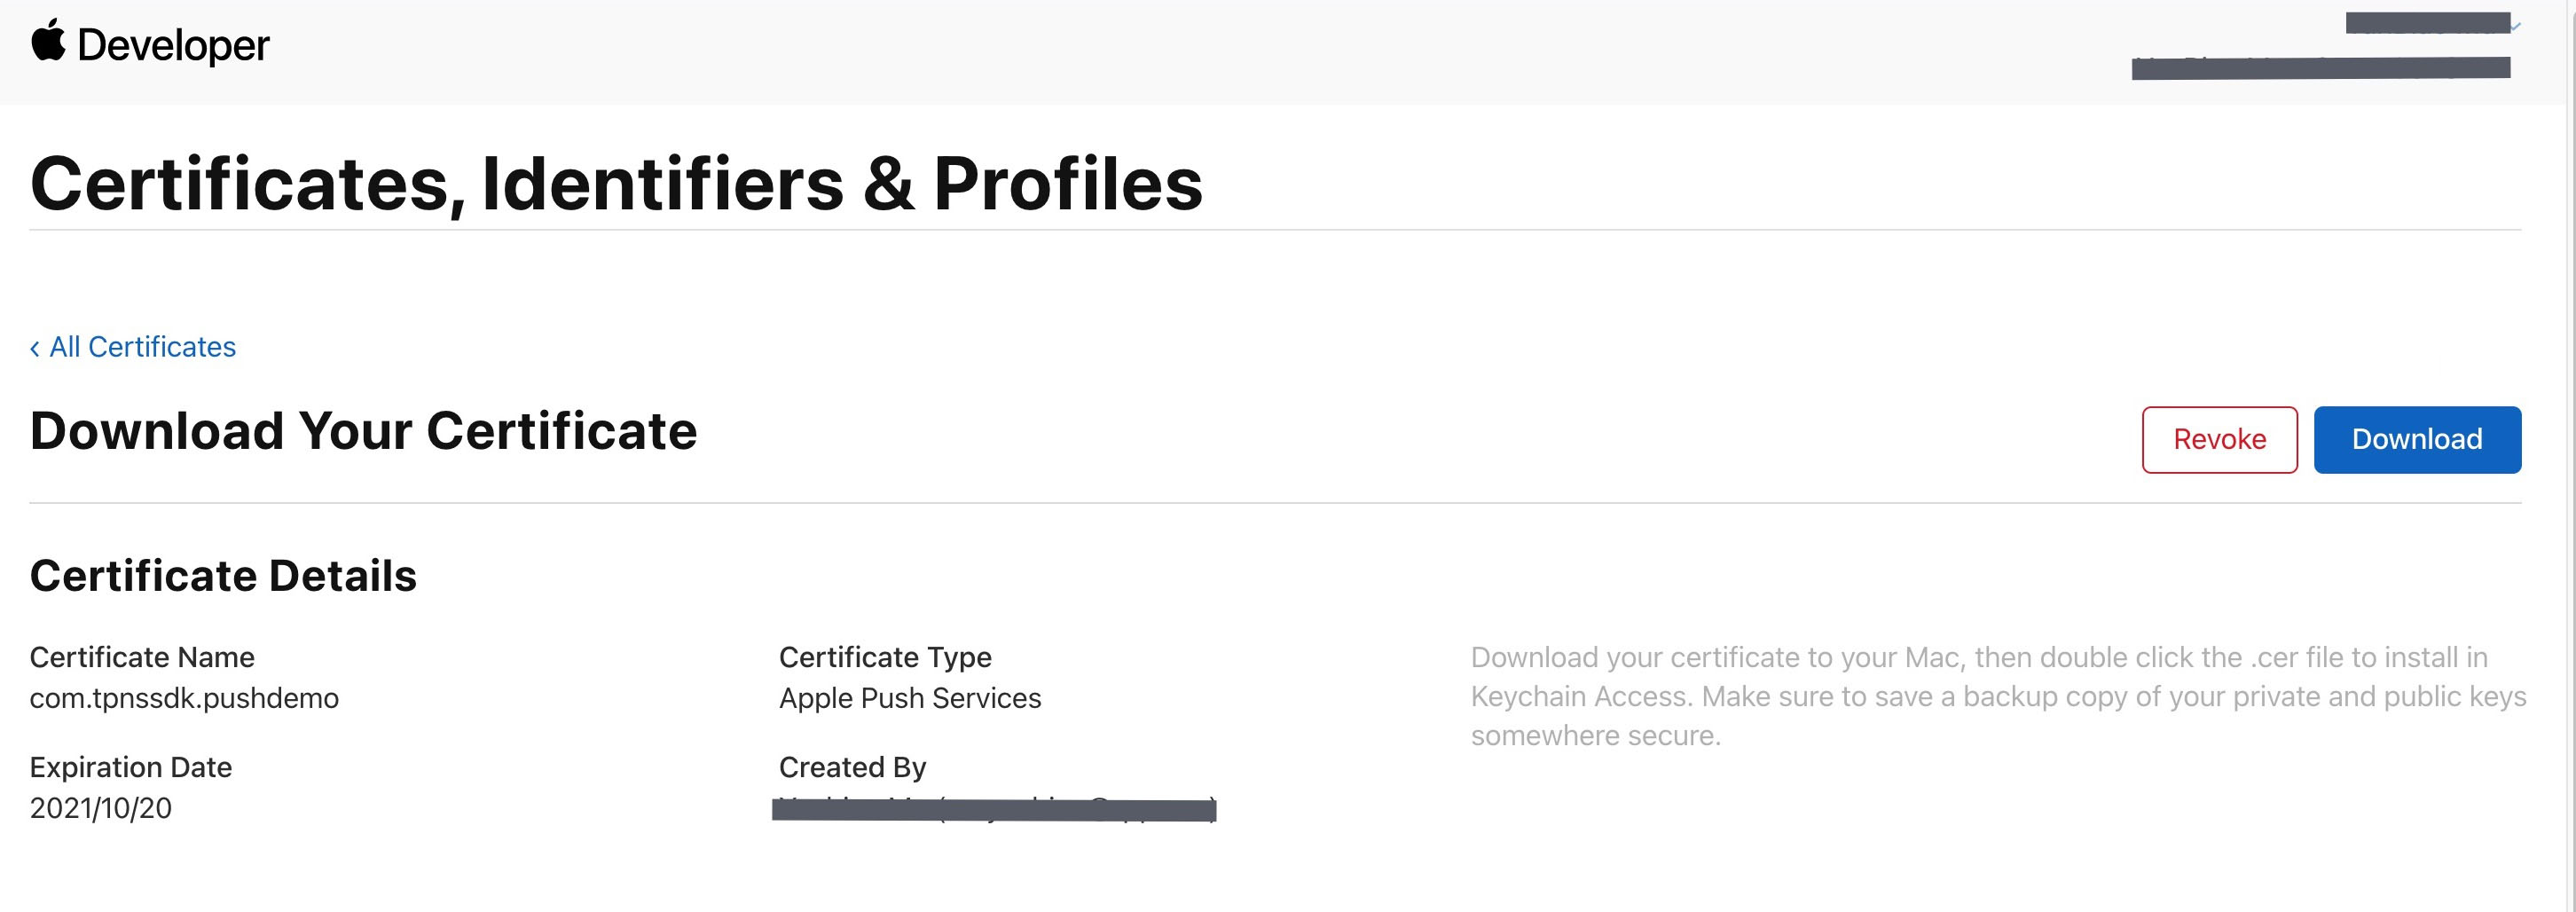
6. Go back to the webpage on the Apple Developer website in Step 3, click Choose File to upload the generated *.certSigningRequest file.


7. Click Continue to generate the push certificate.


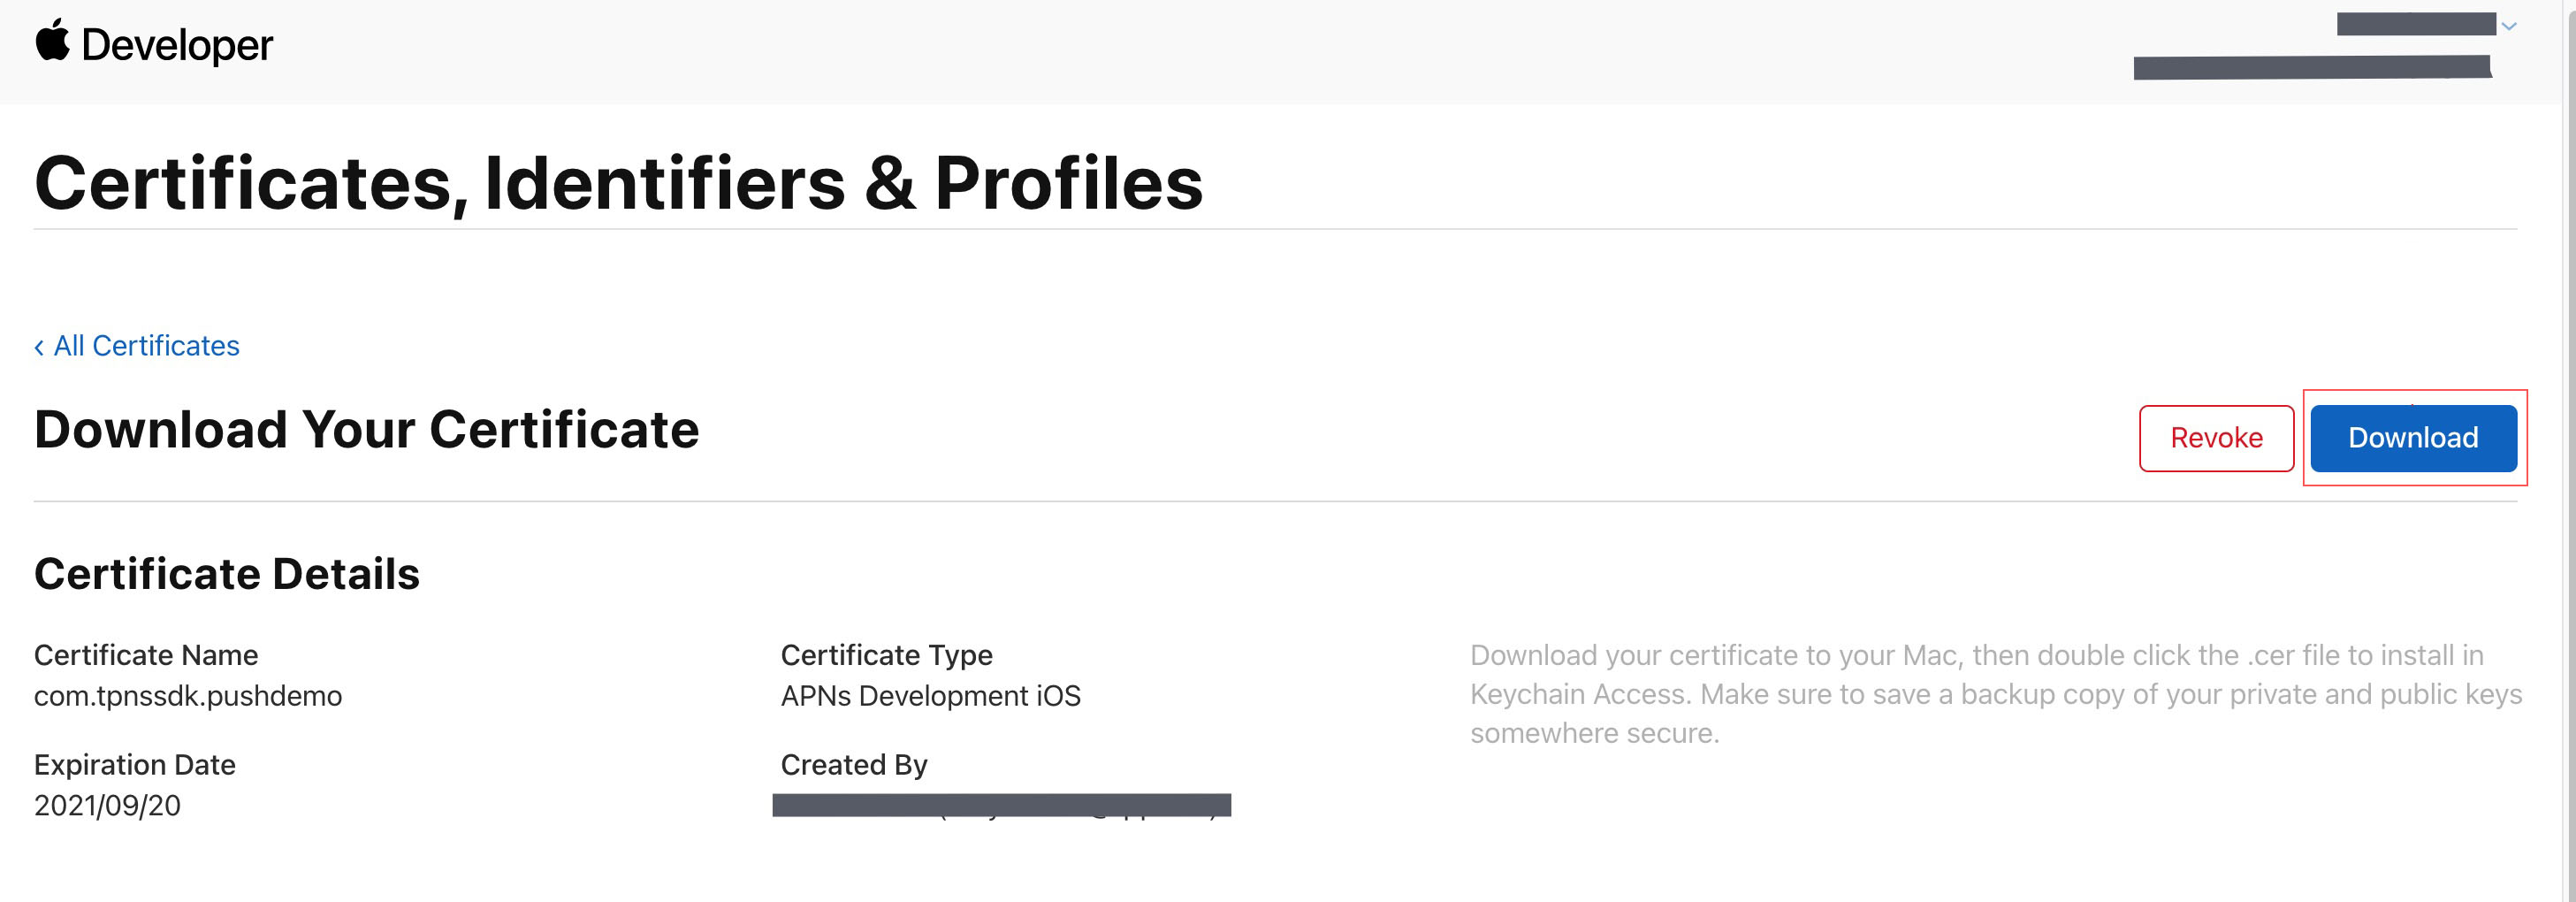
8. Click Download to download the Development SSL Certificate for the development environment locally.


9. Repeat steps 1 - 8 to download the Production SSL Certificate for the production environment to local.
Note
The certificate in the production environment is a merged certificate of development (Sandbox) and production (Production), which can be used as both a development and production environment certificate.


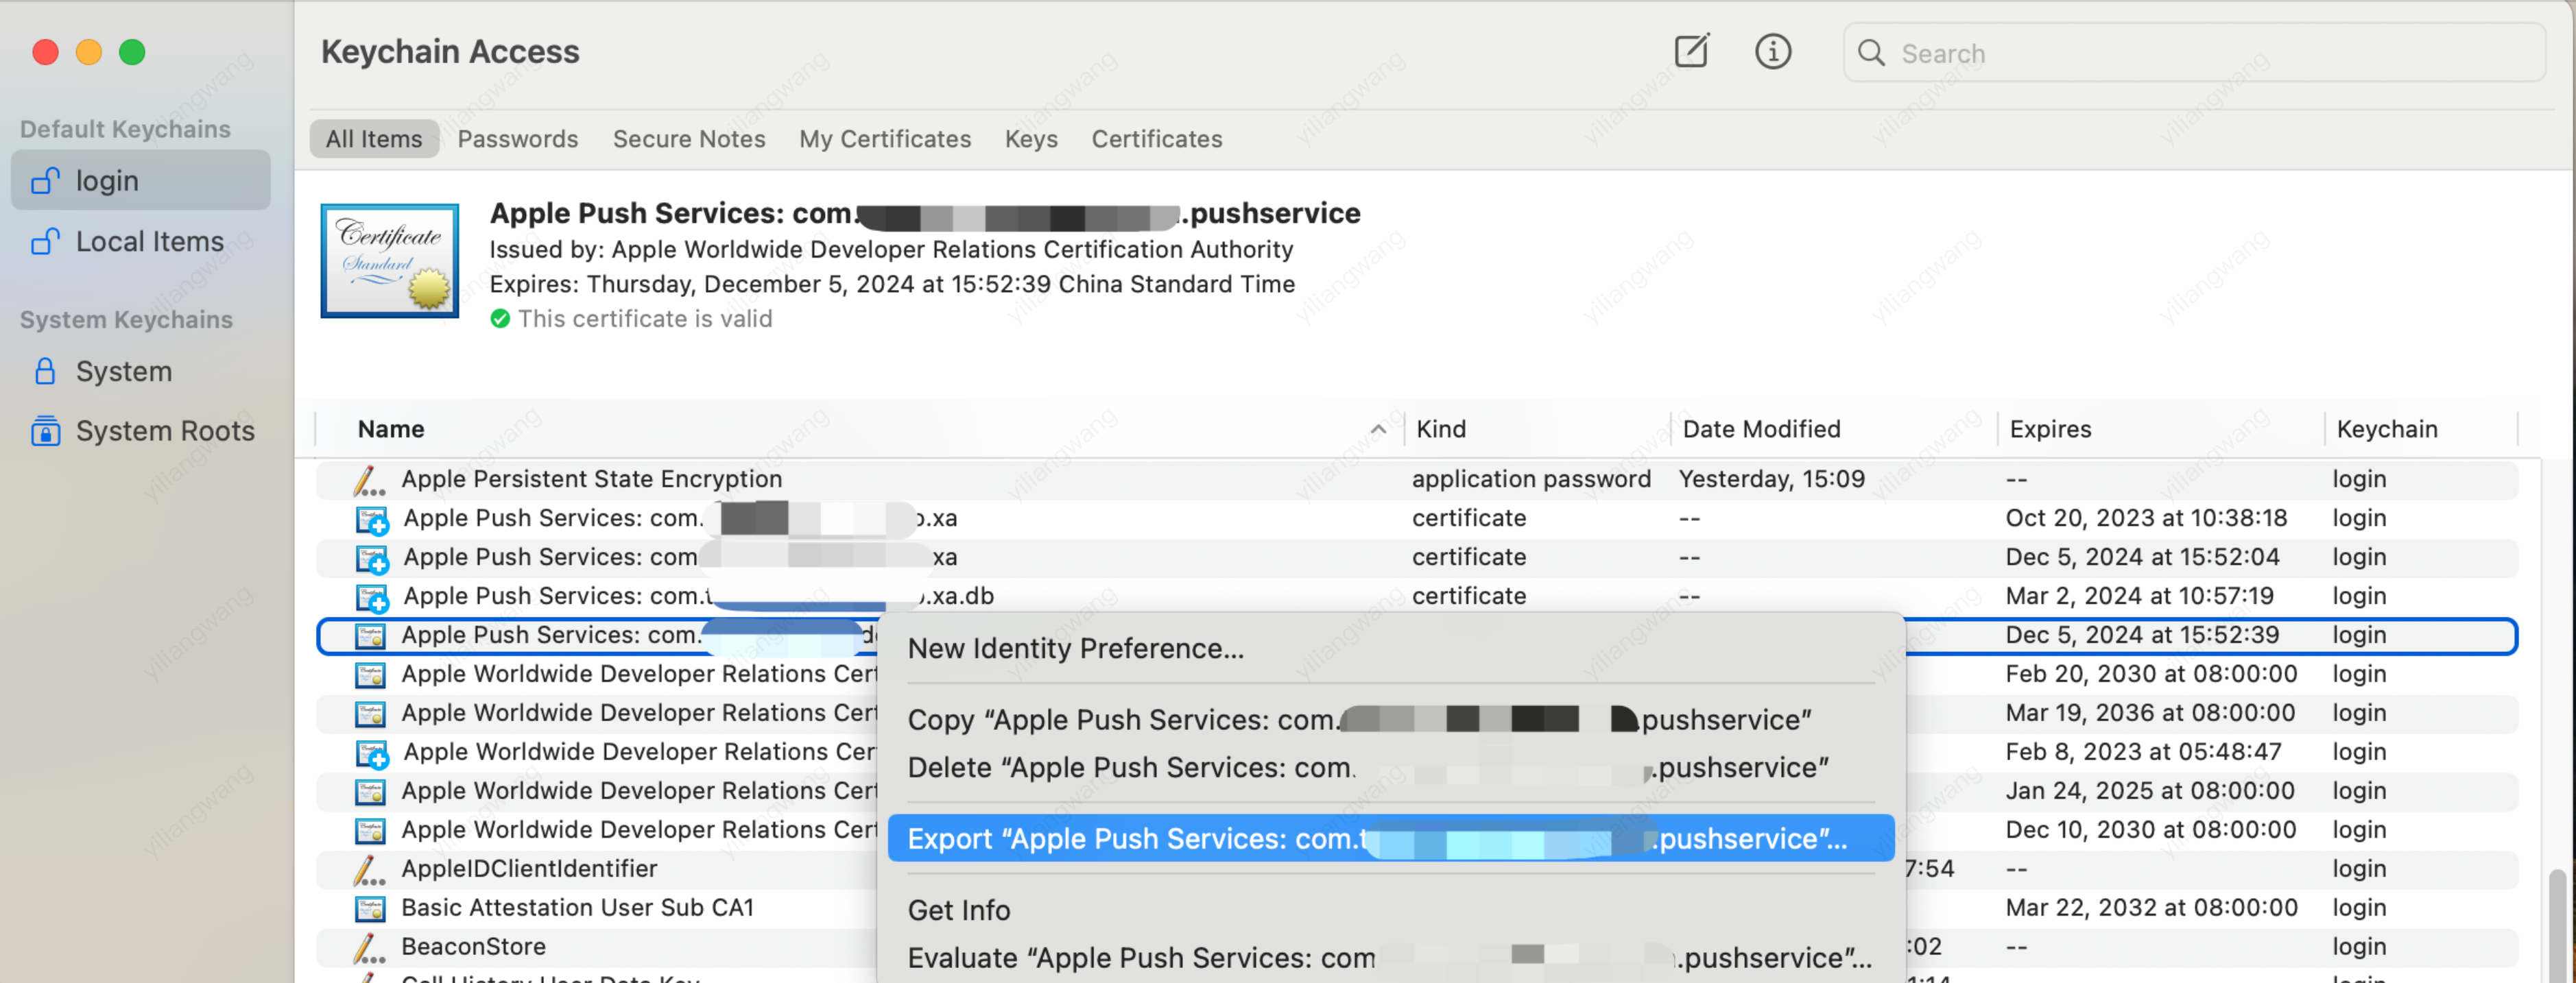
10. Double-click to open the downloaded SSL Certificate for the development and production environment, and the system will import it into the keychain.
11. Open the keychain access app, go to Login > My Certificates, right-click to export the newly created P12 files for the development environment (Apple Development IOS Push Service) and production environment (Apple Push Services).

Note
When saving the P12 file, ensure to set a password for it.

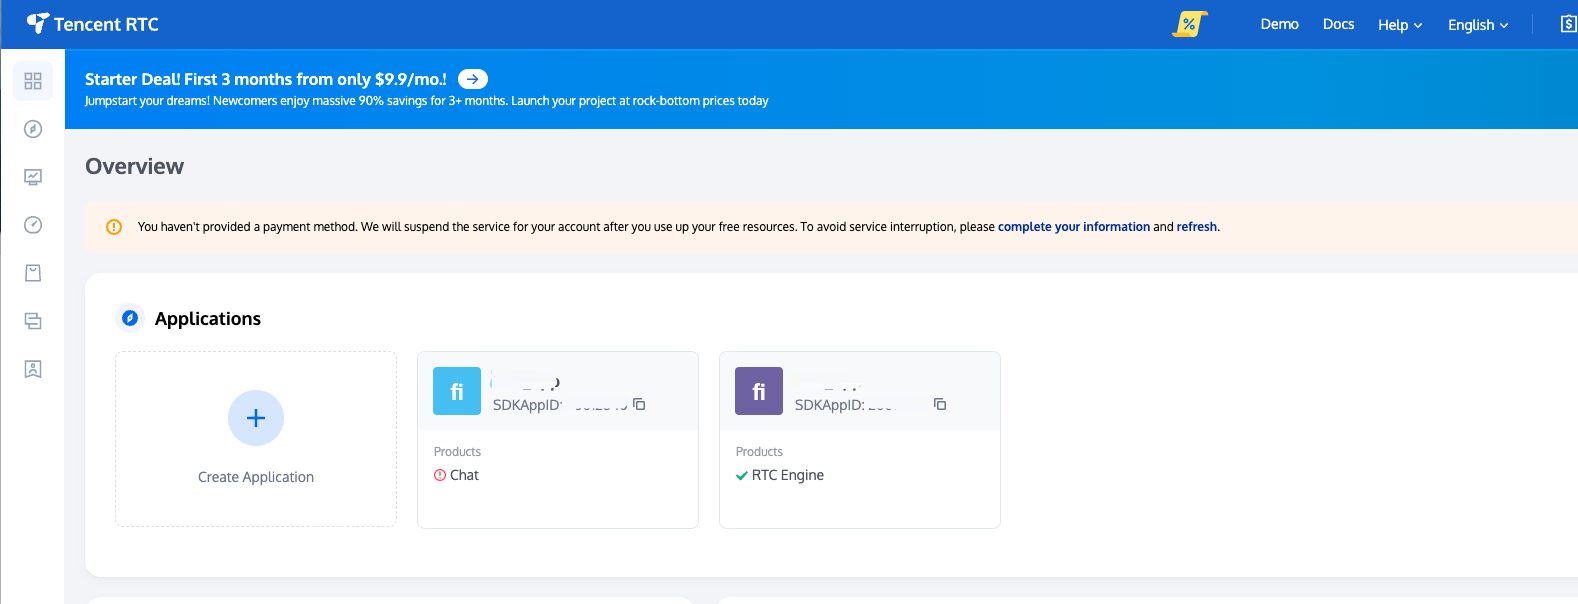
Step 2: Upload Certificate to Console

1. Log in to the Chat console.
2. Click the target application card to enter the basic configuration page.

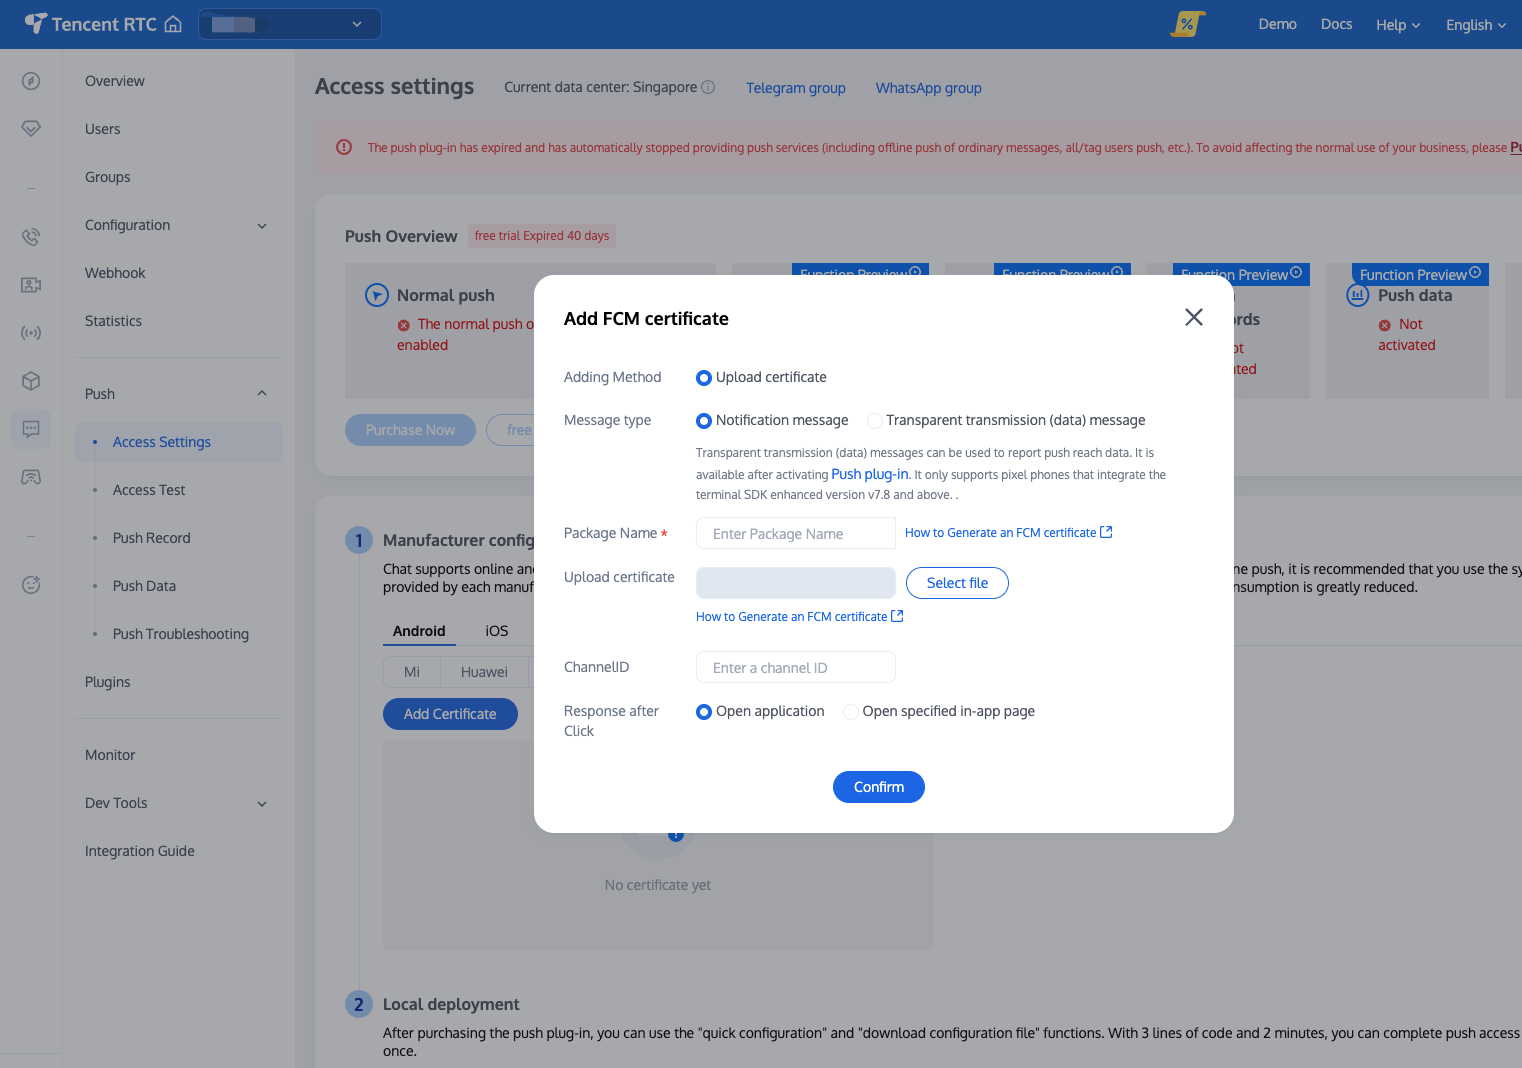
3. Click iOS Native Offline Push Settings on the right add certificate.
4. Select certificate type, upload iOS certificate (.p12), set certificate password, click confirm.

Note
Upload certificate name should be in English (do not use parentheses or other special characters).
Upload certificate needs to be set with password. Passwordless will not receive push notifications.
Set the certificate for App Store release to production environment, otherwise unable to receive push notifications.
Uploaded p12 certificate must be your own real and valid applied certificate.
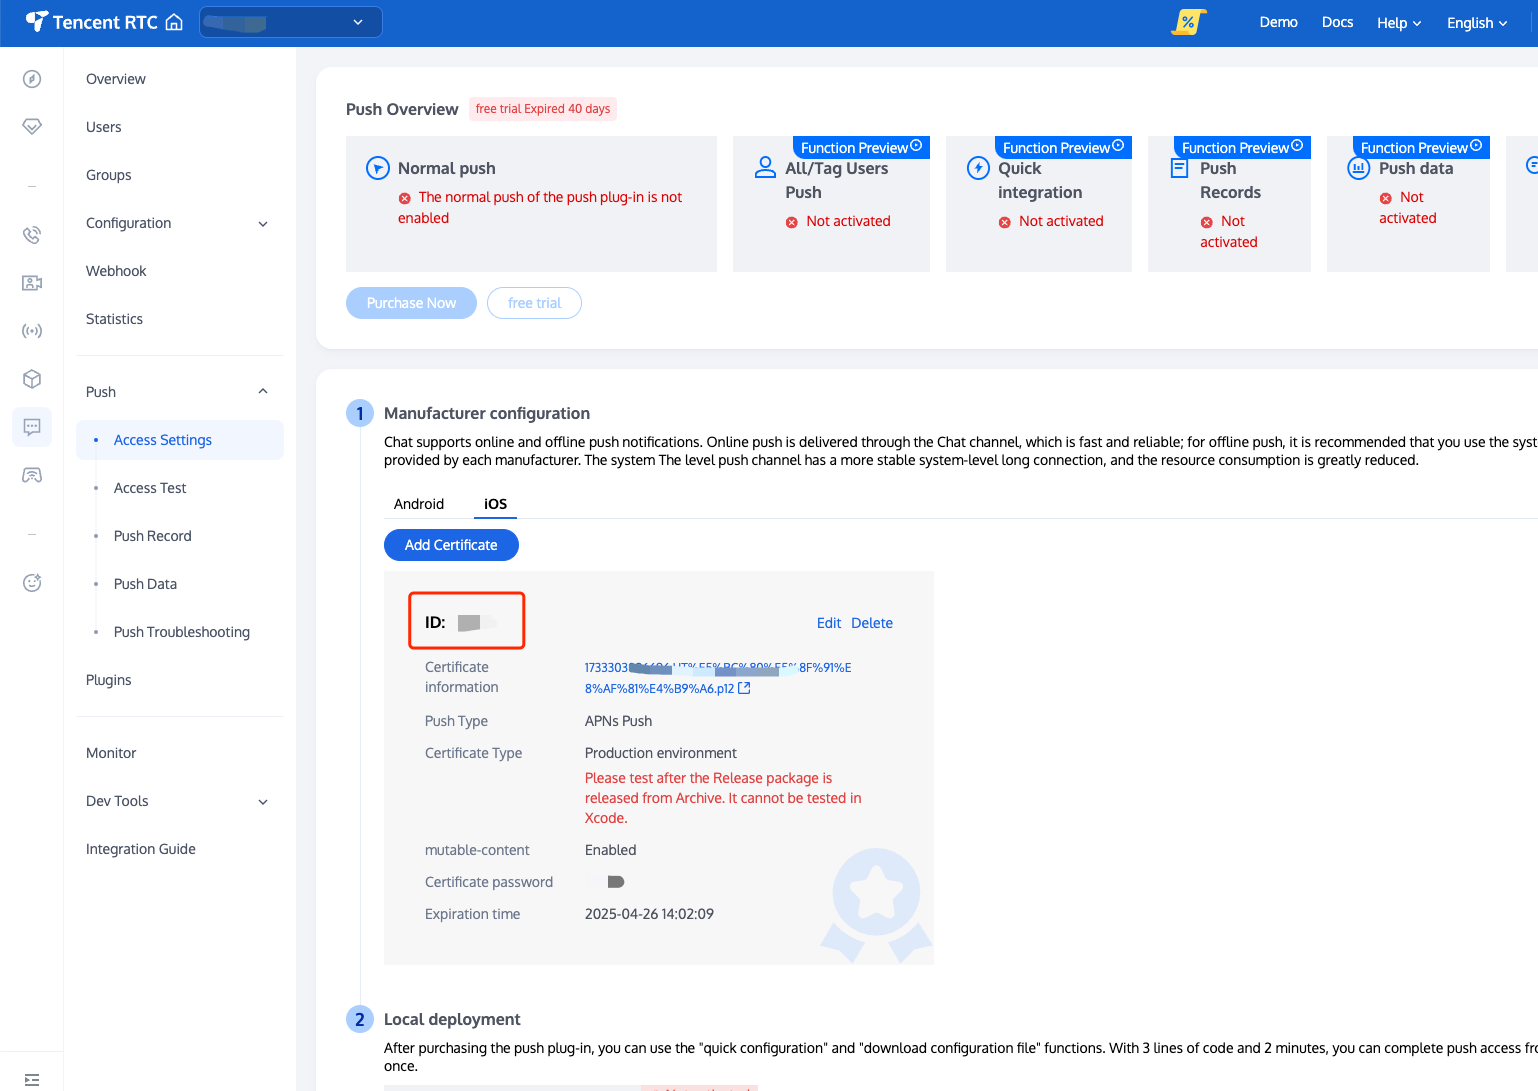
5. After generation of pending certificate information, record the cert ID.


Operation Steps

Step 1: Register Application to Manufacturer Push Platform

Offline push requires registering your own application to various manufacturers' push platforms to obtain AppID and AppKey parameters such as, enabling offline push functionality. Currently supported domestic mobile manufacturers include: Xiaomi, Huawei, honor, OPPO, VIVO, Meizu, with overseas support for Google FCM.

Step 2: Chat Console Configuration

Log in to Tencent Cloud Chat console, go to Push Management > Access Setting feature section, add push certificates from various manufacturers, and configure the AppId, AppKey, AppSecret and other parameters obtained from step 1 for the added certificates.
Note:
Note: For the click subsequent actions option, if you need to use the click redirect capacity provided by this Plugin, keep default values unchanged, usually `open a specified page within the app` with default configuration.
If you need to use the report statistics feature, keep this item unchanged.
Xiaomi
Huawei
OPPO
vivo
Meizu
Honor
Google FCM
Vendor Push Platform
Chat Console Configuration


Vendor Push Platform
Chat Console Configuration


Note:
Client ID corresponds to AppID, and Client Secret corresponds to AppSecret.


Receipt configuration

Receipt Address:
Singapore : https://apisgp.im.qcloud.com/v3/offline_push_report/huawei
Korea: https://apikr.im.qcloud.com/v3/offline_push_report/huawei
USA: https://apiusa.im.qcloud.com/v3/offline_push_report/huawei
Germany: https://apiger.im.qcloud.com/v3/offline_push_report/huawei
Indonesia: https://apiidn.im.qcloud.com/v3/offline_push_report/huawei
China: https://api.im.qcloud.com/v3/offline_push_report/huawei
Vendor Push Platform
Chat Console Configuration


Vendor Push Platform
Chat Console Configuration


Receipt configuration
Receipt Address:
Singapore :https://apisgp.im.qcloud.com/v3/offline_push_report/vivo
Korea:https://apikr.im.qcloud.com/v3/offline_push_report/vivo
USA: https://apiusa.im.qcloud.com/v3/offline_push_report/vivo
Germany: https://apiger.im.qcloud.com/v3/offline_push_report/vivo
Indonesia: https://apiidn.im.qcloud.com/v3/offline_push_report/vivo
China: https://api.im.qcloud.com/v3/offline_push_report/vivo
Vendor Push Platform
Chat Console Configuration


Receipt configuration
Receipt Address:
Singapore : https://apisgp.im.qcloud.com/v3/offline_push_report/meizu
Korea: https://apikr.im.qcloud.com/v3/offline_push_report/meizu
USA: https://apiusa.im.qcloud.com/v3/offline_push_report/meizu
Germany: https://apiger.im.qcloud.com/v3/offline_push_report/meizu
Indonesia: https://apiidn.im.qcloud.com/v3/offline_push_report/meizu
China: https://api.im.qcloud.com/v3/offline_push_report/meizu

Vendor Push Platform
Chat Console Configuration


Receipt configuration

Receipt Address:
Singapore : https://apisgp.im.qcloud.com/v3/offline_push_report/honor
Korea: https://apikr.im.qcloud.com/v3/offline_push_report/honor
USA: https://apiusa.im.qcloud.com/v3/offline_push_report/honor
Germany: https://apiger.im.qcloud.com/v3/offline_push_report/honor
Indonesia: https://apiidn.im.qcloud.com/v3/offline_push_report/honor
China: https://api.im.qcloud.com/v3/offline_push_report/honor

Vendor Push Platform
Chat Console Configuration


Help and Support

Was this page helpful?

Help us improve! Rate your documentation experience in 5 mins.

Feedback