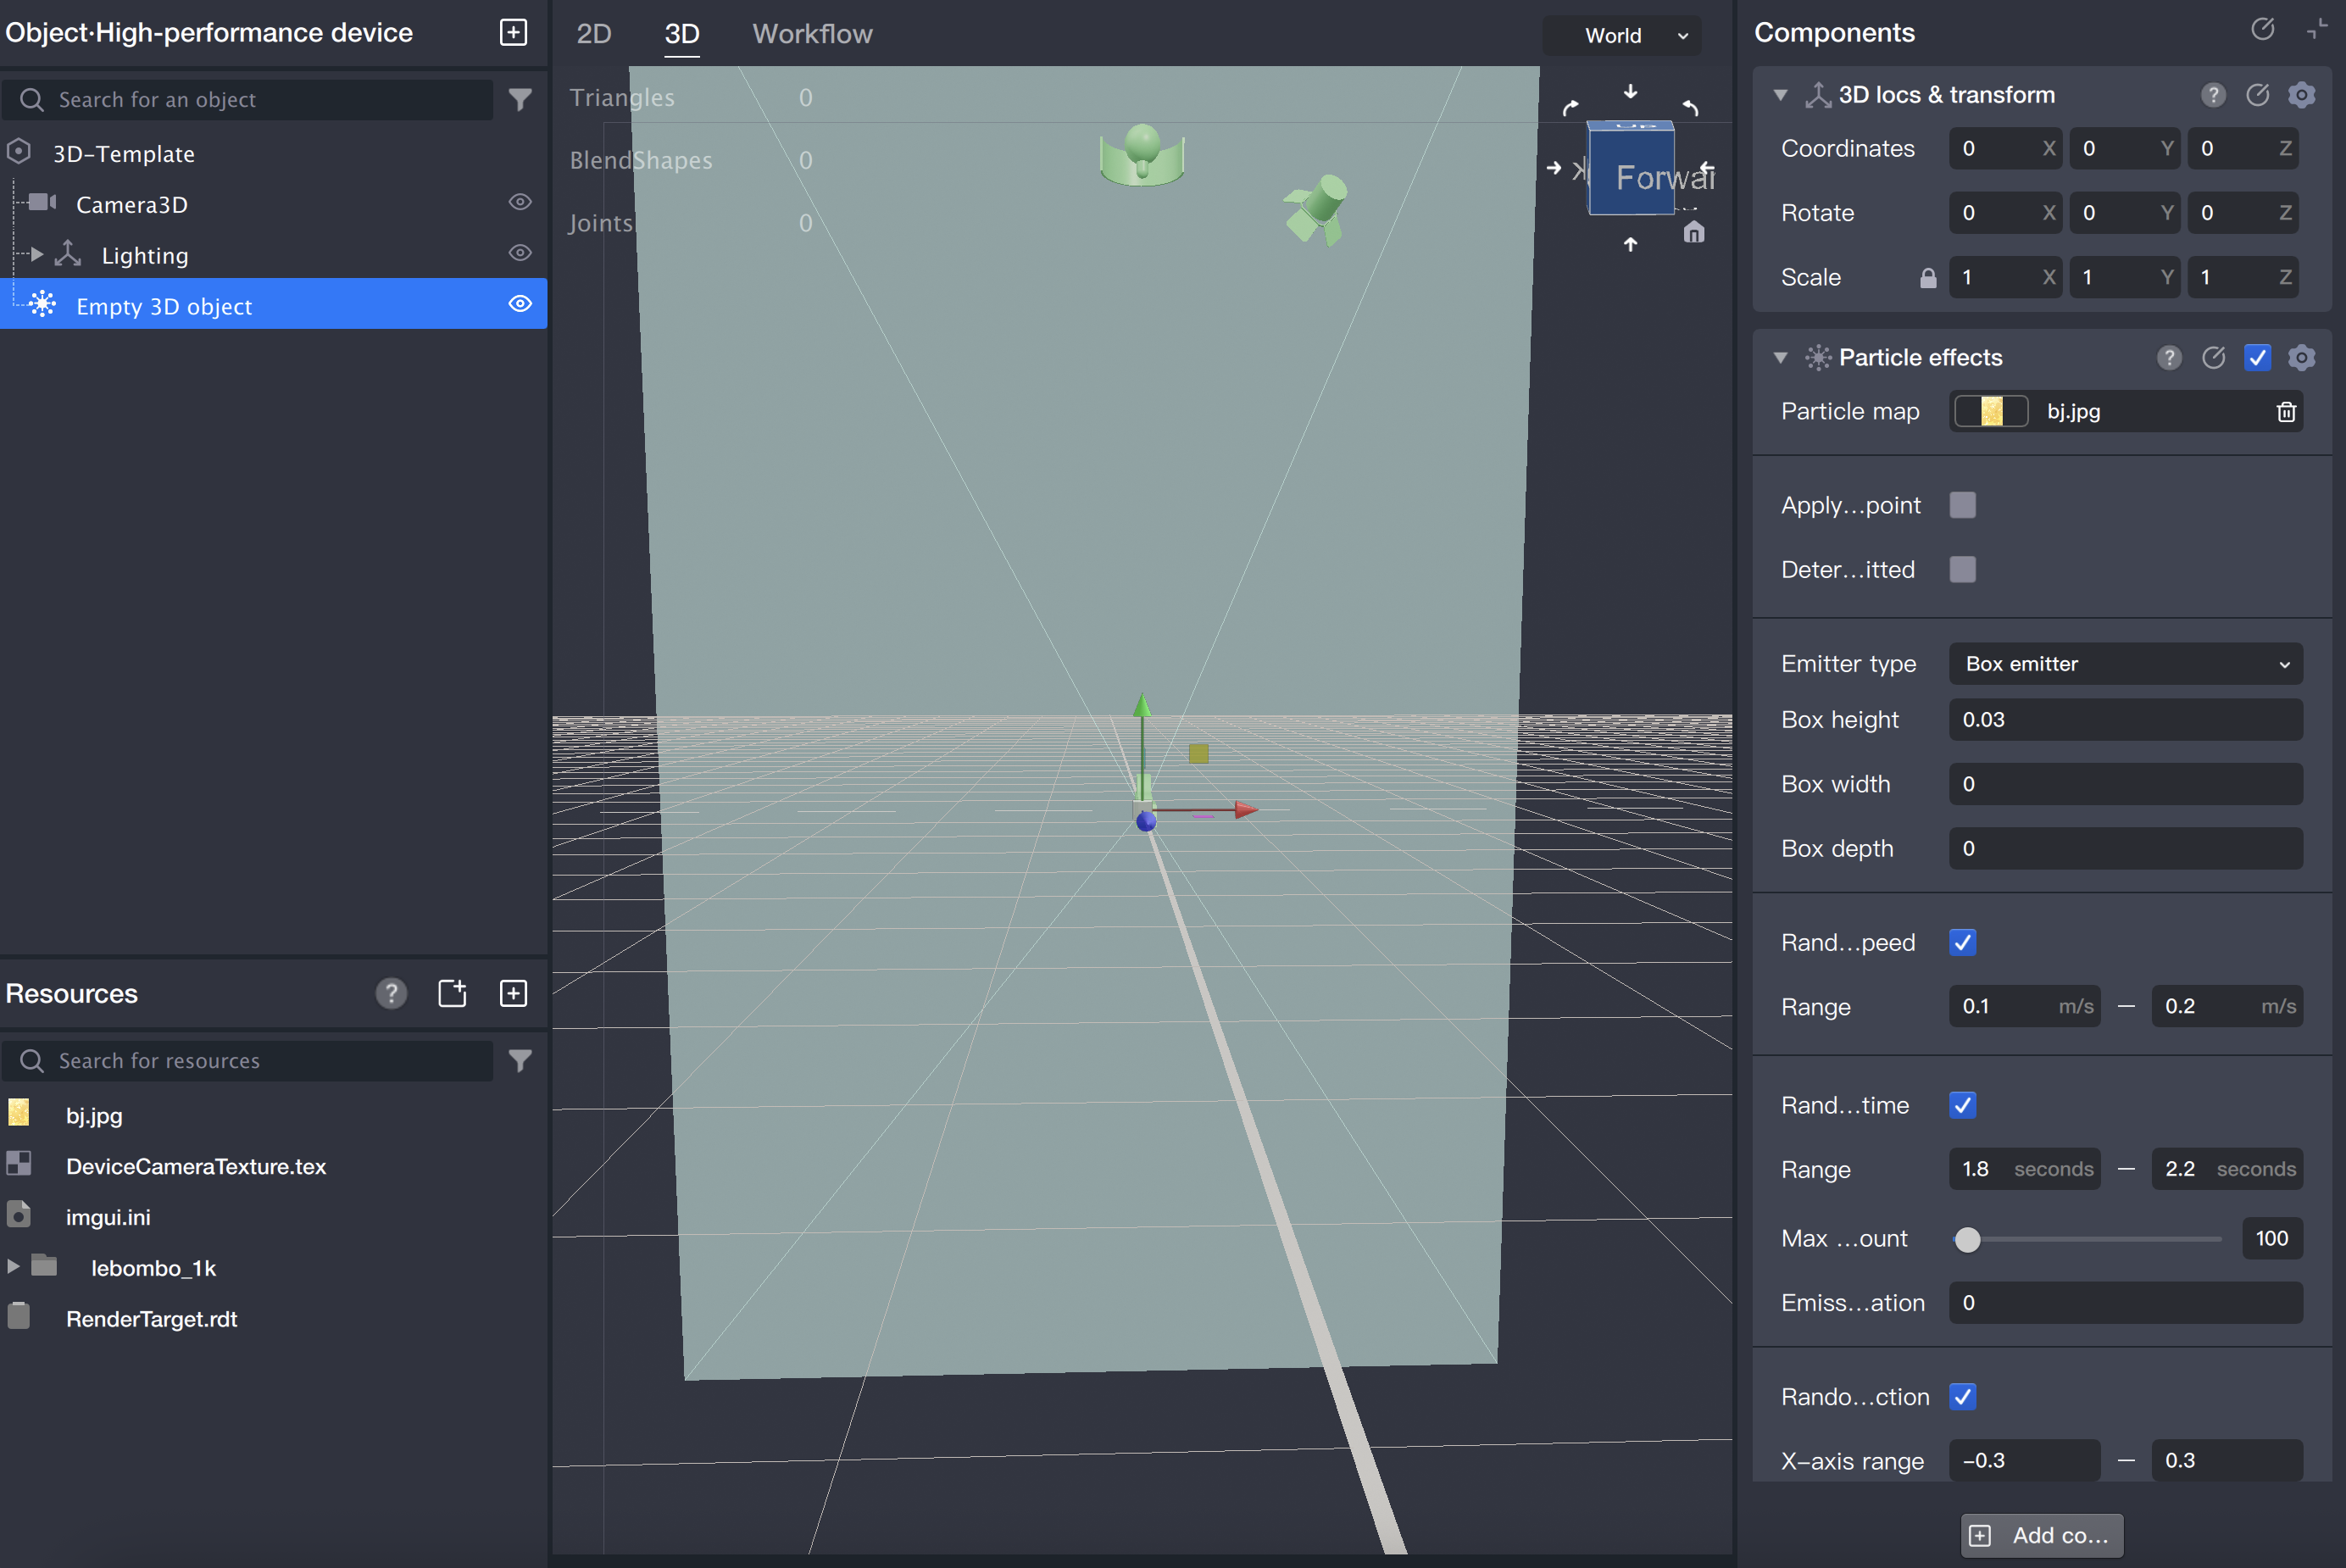
You can add the particle effect component to any 3D object. For better organization, we recommend creating a new empty 3D object, renaming it, and then attaching the particle effect component.
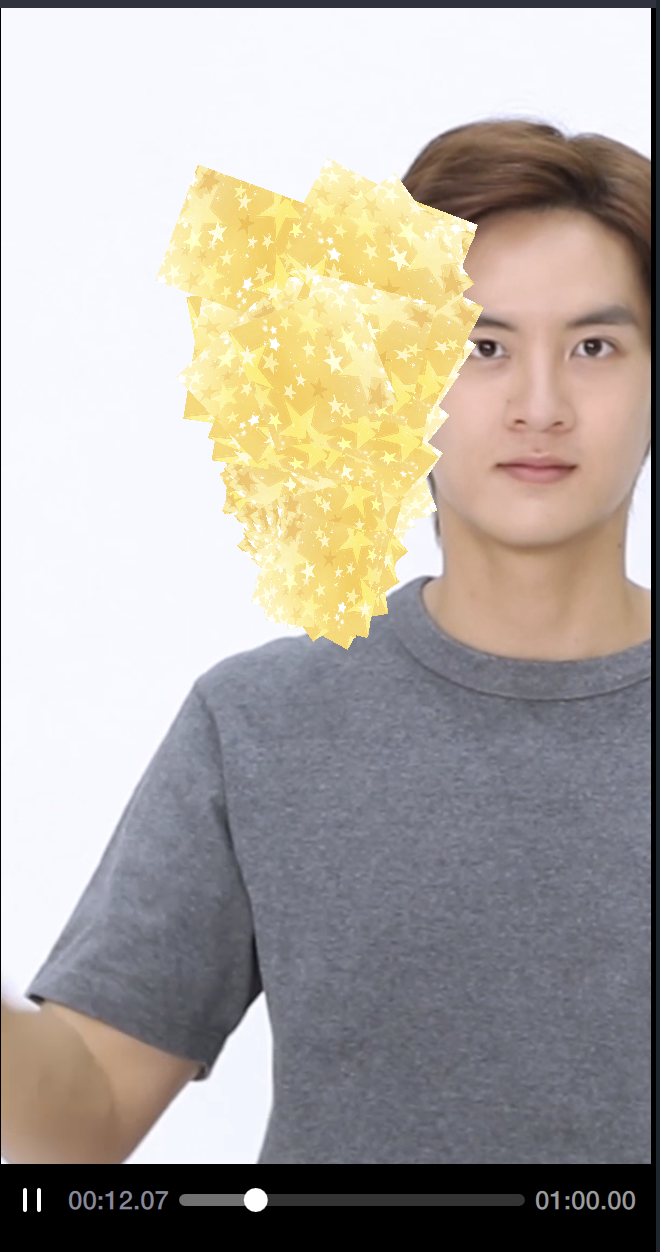
All particle effect component parameters have default values, except for the texture. Once you assign a texture, the initial particle effect will be immediately visible.
Parameter Descriptions
Transform Only Affects Emission Point: Use this option when working with animation or 3D head features. If unchecked, the "3D Position and Transform" properties apply to all particles. If checked, "3D Position and Transform" only affect the emitter's center and emission direction, while each particle maintains its own movement and gravity settings.
Enable Particle Emission Logic: Typically used with flow control functionality. When enabled, the particle object's appearance and disappearance depend on whether particles are actively being emitted.
Lifetime, Maximum Particle Count: The emission rate (particles per second) is calculated as Maximum Particle Count divided by Average Lifetime.
Emission Duration: If set to 0 or less, particles emit continuously. If set above 0, emission occurs for the specified number of seconds, then pauses until all particles disappear, and resumes emission. This cycle repeats, so the actual number of active particles may be less than the maximum.
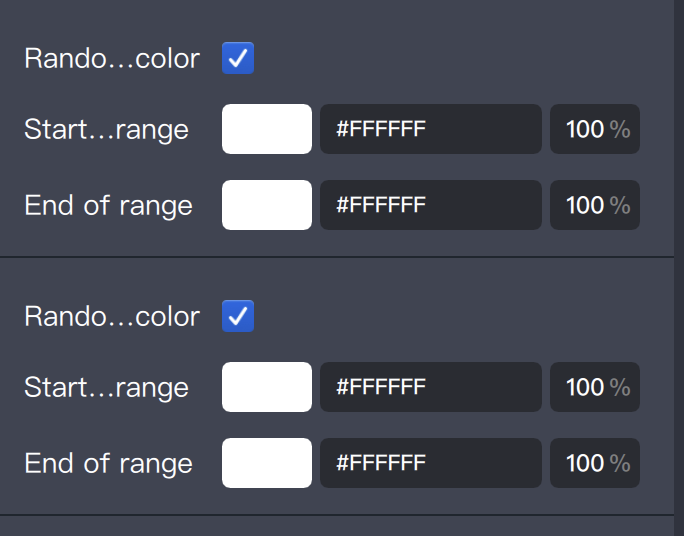
Start Color, End Color: These colors are blended with the particle texture. If "Dynamic Opacity" is enabled, the alpha values are ignored and controlled by the dynamic opacity curve.
Click the color swatch to open the palette and adjust color or opacity.
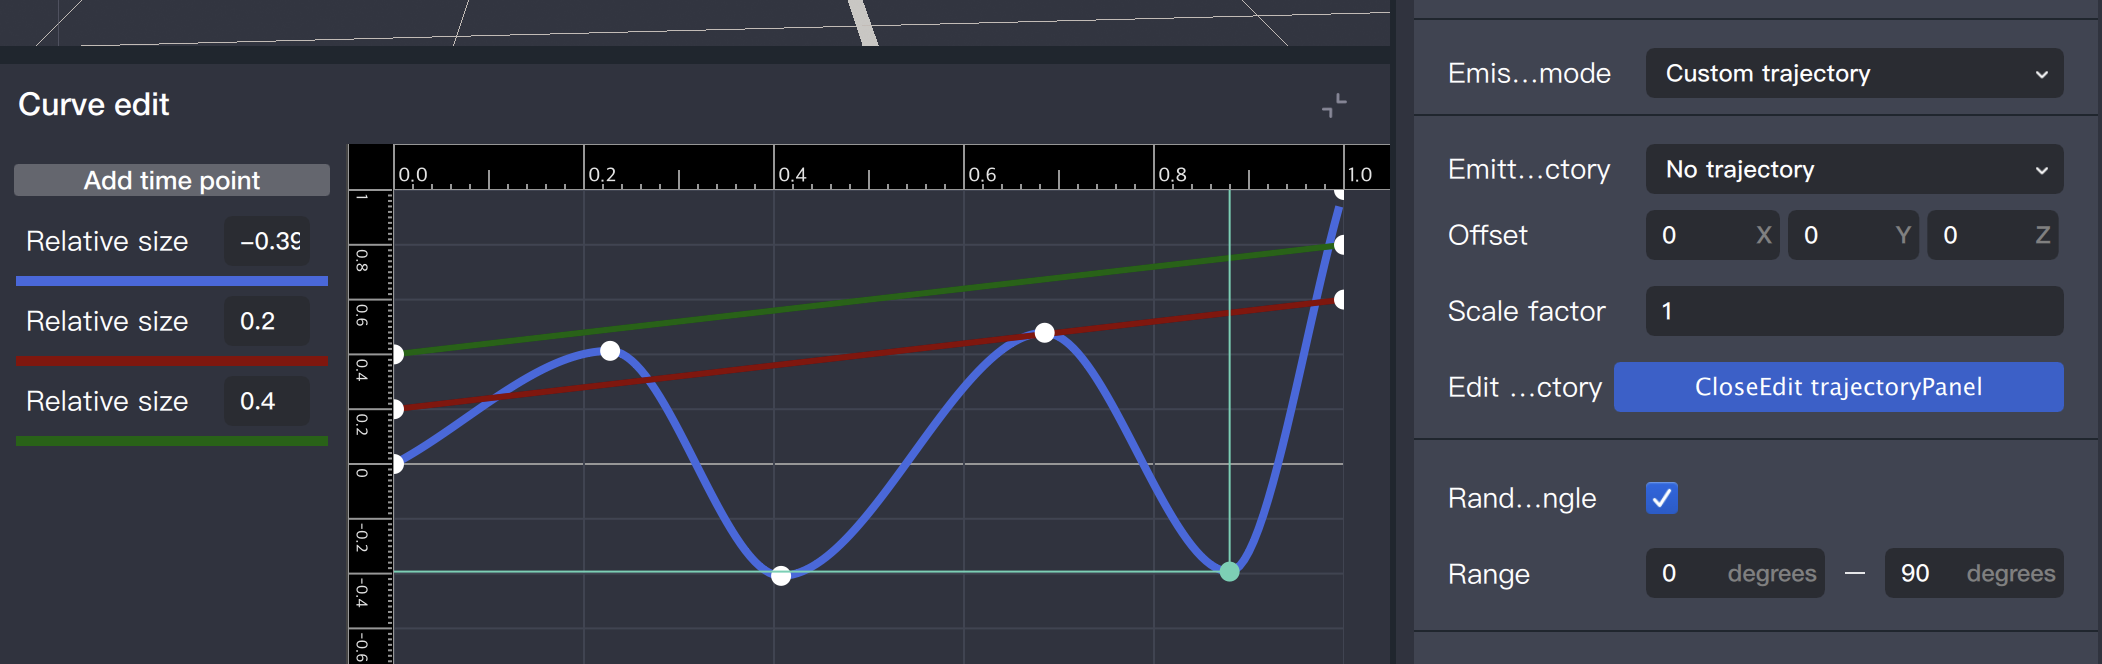
Emission Mode: Choose between "Gravity Mode" and "Custom Trajectory." In Custom Trajectory mode, particles follow a user-defined path. For details on configuring paths, see the Custom Particle Trajectory section.
Use Sprite Sheet: Enable this option to use a sprite sheet texture, allowing particles to display animated sequence frames. For details, see the Particle Sprite Sheet section.
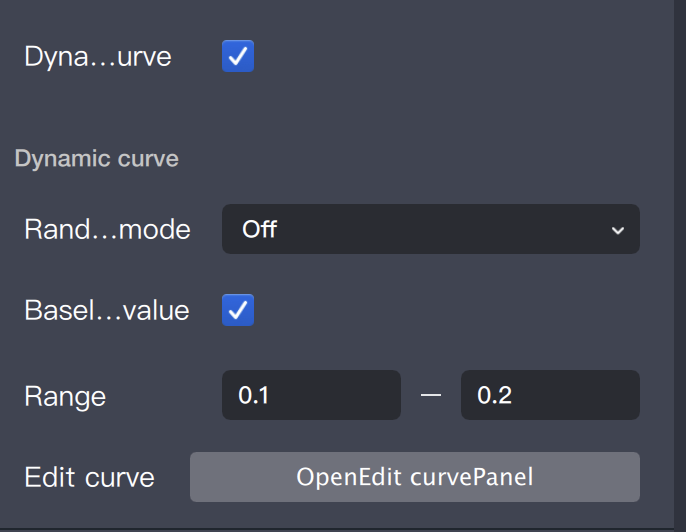
Dynamic Size Curve: Enable to make particle size follow a custom curve throughout its lifetime. When enabled, Start Size and End Size parameters are ignored. For configuration details, see Custom Size and Opacity Curve.
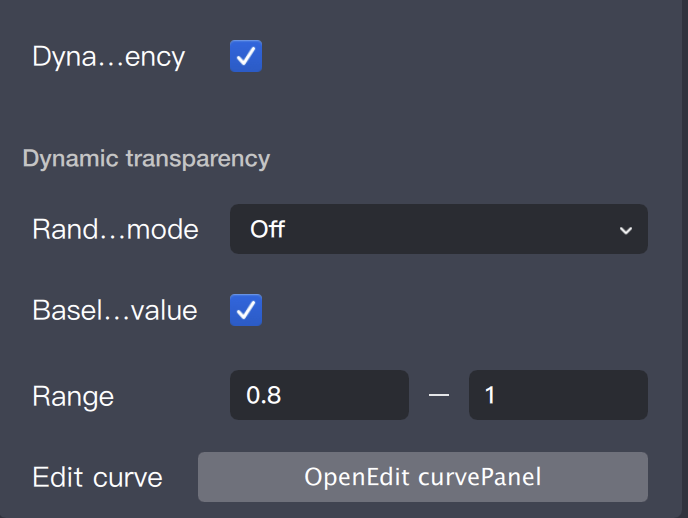
Dynamic Opacity: Enable to make particle opacity follow a custom curve throughout its lifetime. When enabled, alpha values in Start Color and End Color are ignored. For configuration details, see Custom Size and Opacity Curve.
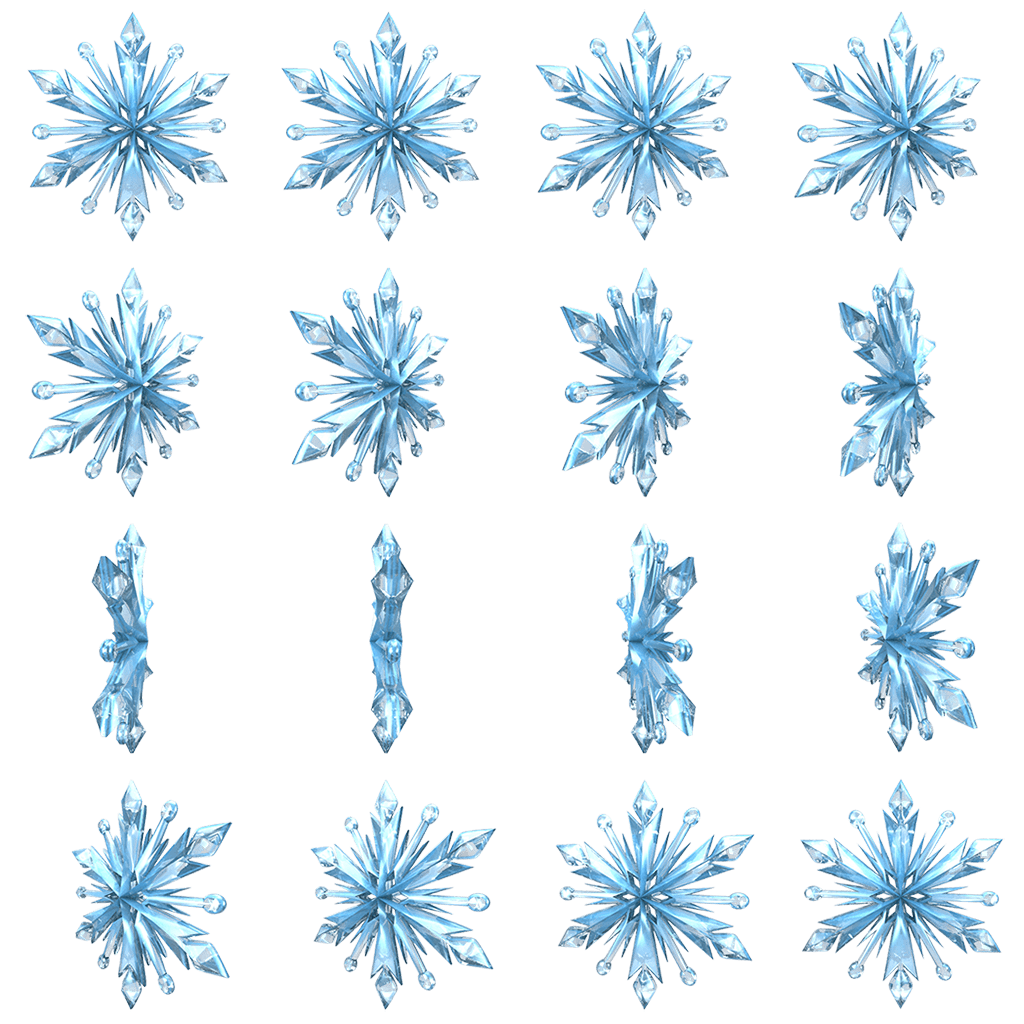
Particle Sprite Sheet
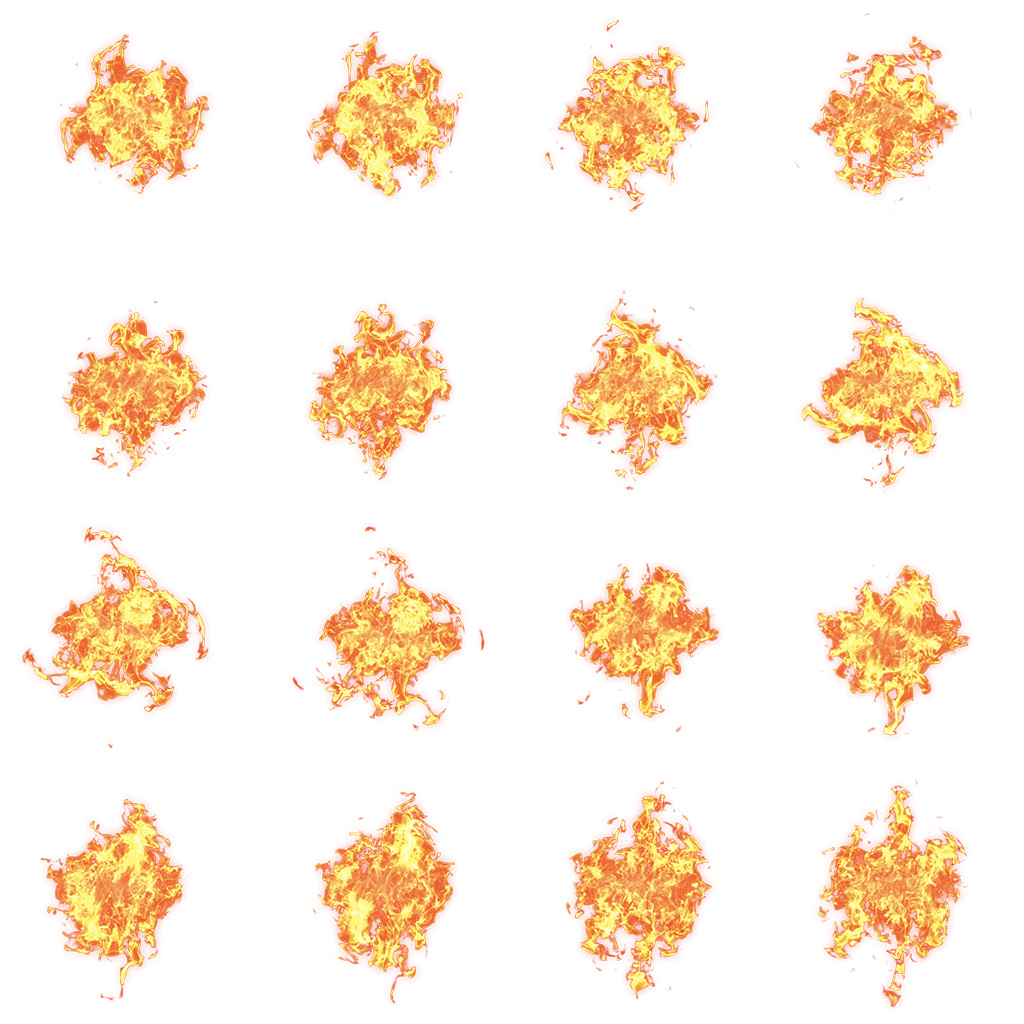
Sprite sheets allow particles to animate by displaying sequential frames from a combined image. A sprite sheet merges multiple images into a single texture. Example:
To use a sprite sheet, check the "Use Sprite Sheet" option to reveal related settings:
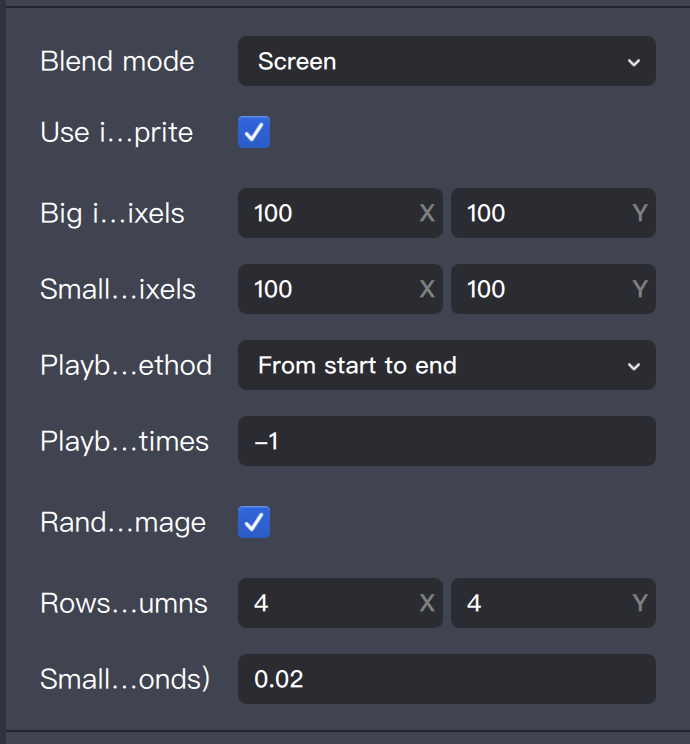
Main Image Pixels: Pixel dimensions of the entire sprite sheet image.
Sub-image Pixels: Width and height of each frame within the sprite sheet.
Sub-image Rows and Columns: Number of rows and columns of frames. For instance, the snowflake example above has 4 rows by 4 columns. Enter these values based on your actual image.
Playback Mode: Choose between Head-to-Tail Loop and Repeat Loop. Playback count works as in 2D stickers and music. -1 means infinite loop; values 0 or higher indicate the loop count equals the value plus 1 (0 = 1 loop, 1 = 2 loops).
Enable Random Initial Frame: If enabled, each particle randomly selects its initial frame. If disabled, all particles start from the top-left frame.
Example effect:
Custom Particle Trajectory
Custom Trajectory emission mode allows you to define the particle movement path, ideal for effects like zigzag or anti-gravity motion.
In the curve editor, the blue, red, and green lines represent the X, Y, and Z coordinate curves. The horizontal axis is time, and the vertical axis is value. The editor uses a normalized coordinate system; set appropriate offset and scale parameters as needed. The actual particle position at any time is calculated as: Offset + Curve Value × Scale.
Note:
After editing the curve, refresh the preview to see changes.
Example effect:
Custom Size and Opacity Curve
The particle component supports custom curves for size and opacity changes, with similar parameter structures for both:
Base Value represents the value corresponding to 1.0 on the curve. When "Enable Random Base Value" is enabled, each particle's base value is randomly chosen within the specified range.
Random Mode offers three options: None, Binary Random, and 0-1 Random.
None: Particle size or opacity strictly follows the curve.
Binary Random: At each moment, the value may be either the curve value or the base value.
0-1 Random: The value is randomly chosen between 0 and the base value, independent of the curve.
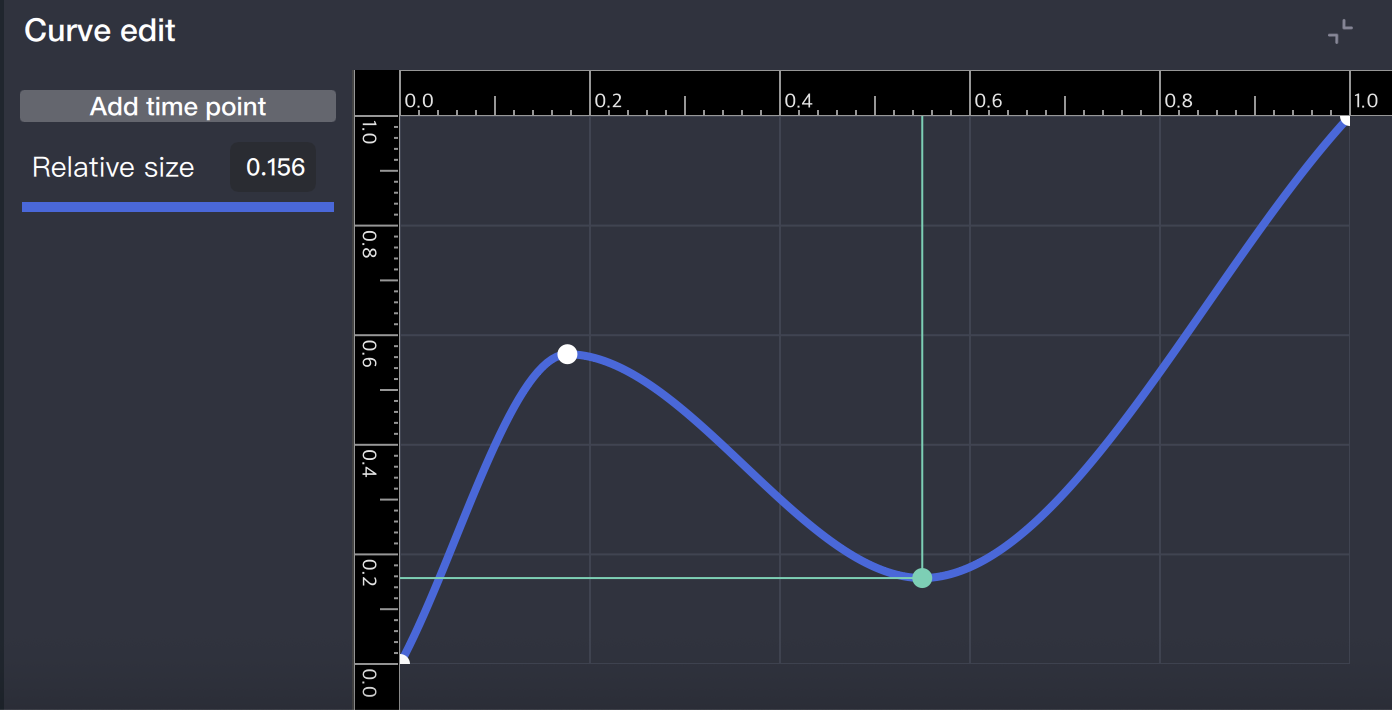
The curve editor for both parameters consists of a single curve:
The curve coordinate system is normalized: the horizontal axis represents time, and the vertical axis represents the value. The actual size or opacity at any given time is calculated as Base Value × vertical axis value at that time, combined with random mode as configured.
Note:
After editing the curve, refresh the preview to view updates.
Example effect:
Particle Configuration Example
Creating a Fire-Breathing Effect
1. Use a 3D template to create a "3D Head" object, then add a particle object as its child node.
2. Apply the following flame texture to the particle object:
Configure the particle component parameters as follows:
Enable both "Transform Only Affects Emission Point" and "Enable Particle Emission Logic".
Set speed random range to 0.5–0.6.
Set maximum particle count to 300.
Set direction random X to -0.1–0.1, Y to 0–0, Z to 1–1.
Set start size random to 0.03–0.04, end size random to 0.05–0.06.
For blend mode and sprite sheet settings, refer to the image below:
3. Adjust the particle object's "3D Position and Transform" so that it aligns with the mouth of the head object.
4. Optionally, create a flow control object to make the particle effect appear when the mouth opens and disappear when the mouth closes. For detailed setup, see "General Capabilities/Flow Management".
5. Refresh the preview interface. The result should look like this: