1. Log in to the Cloud Firewall console, select Access Control in the left navigation pane, and then select Enterprise security groups.
2. On the Enterprise security groups page, click Add rule.
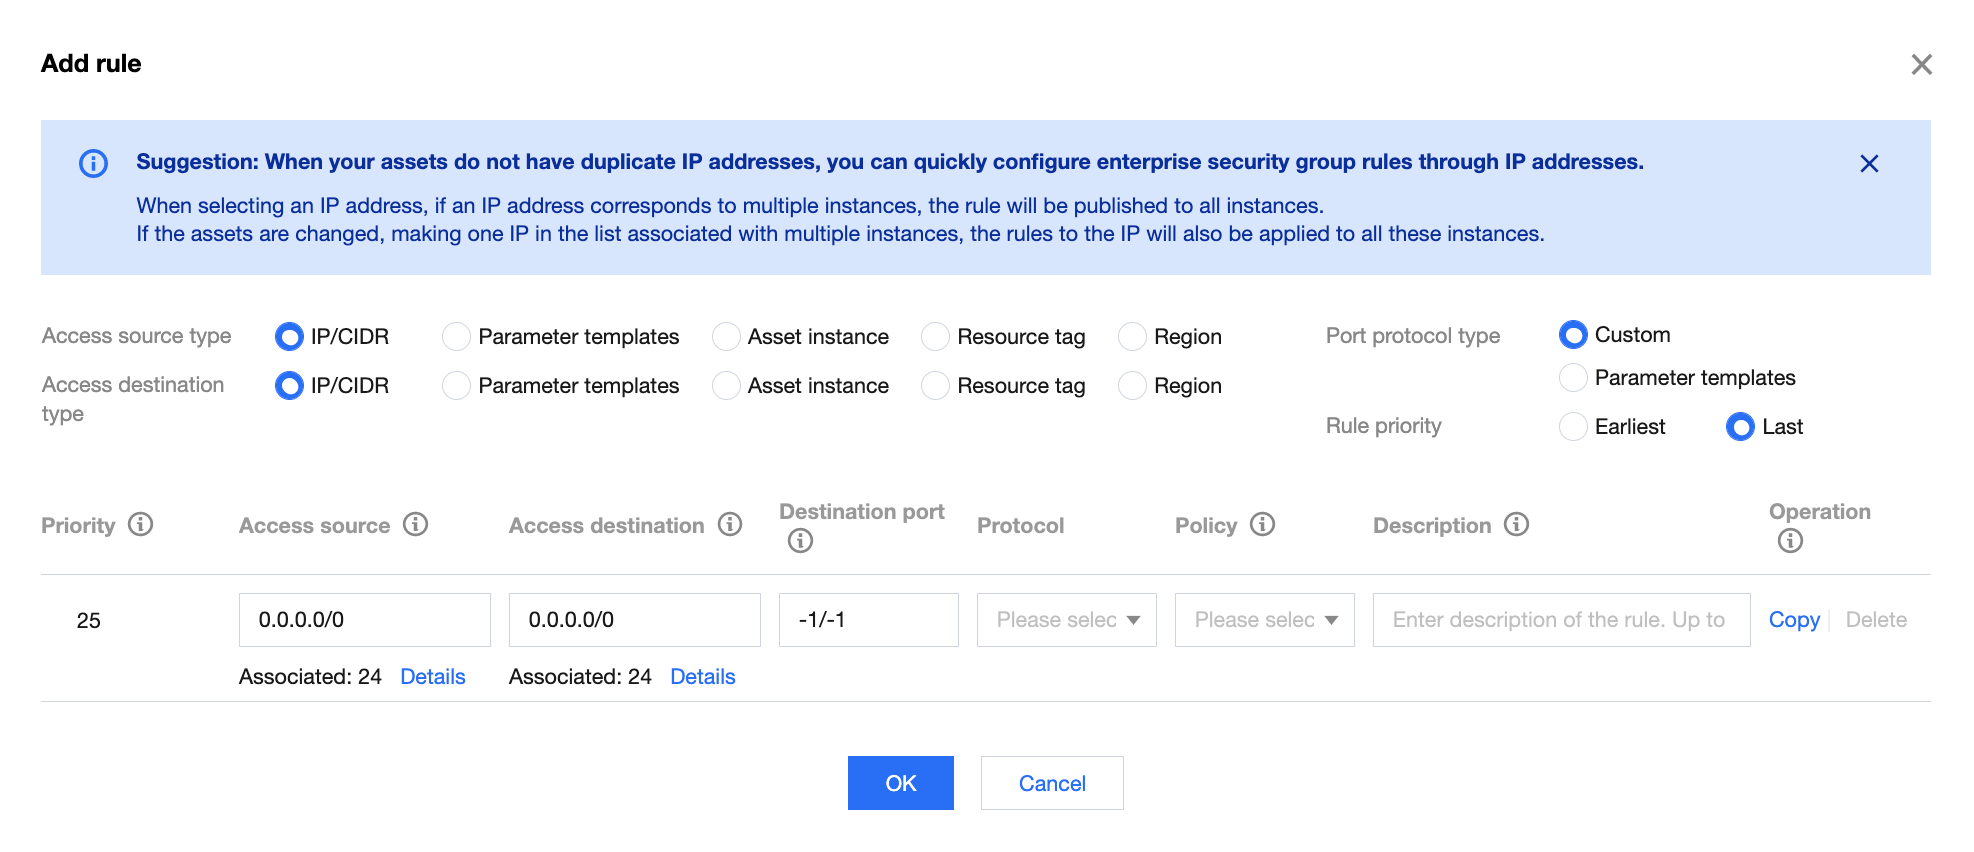
3. In the Add rule window displayed, configure the parameters and click OK.
Parameters
Priority: The execution order of access control rules. The rule with the highest priority is evaluated first. If a given rule is matched, rules with lower priorities will not be evaluated. When you modify the priority of a given rule, the priorities of the original rule with that priority and all the subsequent rules will increase by 1. When you delete a given rule, the priorities of all the subsequent rules will decrease by 1.
Access source: It can be an IP/CIDR, parameter template, asset instance, asset group, resource tag, region, and other types.
Access destination: It can be an IP/CIDR, parameter template, asset instance, asset group, resource tag, region, and other types.
Note
You can select any type for the access source and access destination as listed above. But you cannot select region for the access source and access destination at the same time.
Destination port: Supports single port numbers (e.g., "80"), port ranges (e.g., "80/80", "-1/-1", "1/65535"), and discrete port numbers separated with commas (15 at most).
Protocol: The current CFW edition supports UDP, TCP, and ICMP.
Policy:
Allow: Allow the matched traffic but do not record the hit logs of enterprise security groups.
Block: Block the matched traffic and record the hit logs of enterprise security groups.
Description**: The rule description with up to 50 characters. You can use a pair of # to insert special settings. Your current CFW edition supports #Only publish to source# and #Only publish to destination#.
Note
When the access destination address is an instance, subnet, or private network address, an identical inbound rule can be automatically assigned using "Auto two-way publishing". To cancel auto two-way publishing, you can add keywords to the description: #Only publish to source# (the security group rules are only published to the source); #Only publish to destination# (the security group rules are only published to the destination).
4. Once added, the rules will be displayed in the rule list.
5. Once the rules are added and published successfully, you can view security groups on the CFW security group details page or the Security group page on the VPC console, which are associated with instances automatically.
Viewing security group details
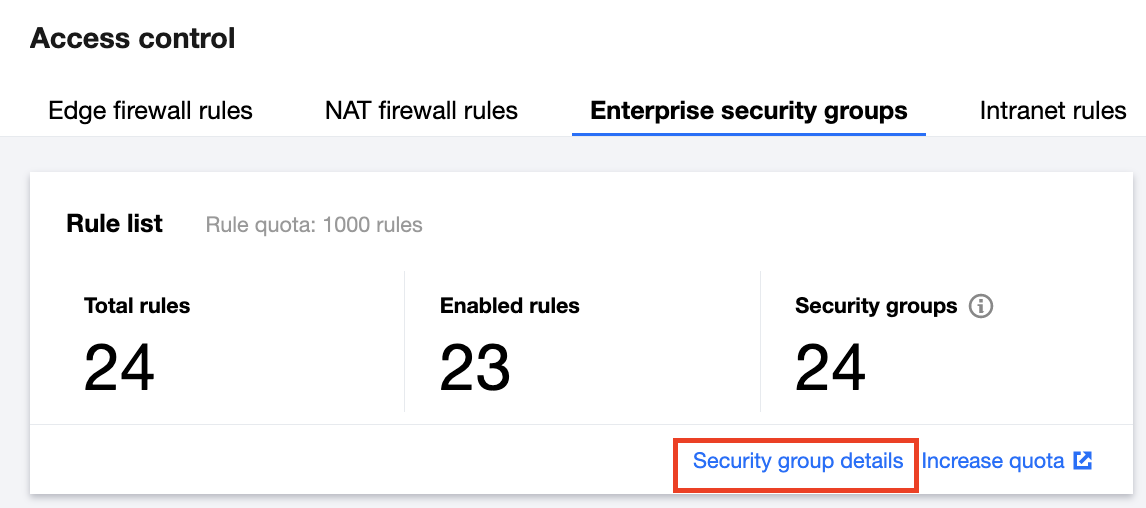
1. Log in to the Cloud Firewall console, select Access Control in the left navigation pane, and then select Enterprise security groups.
2. On the Enterprise security group page, click Security group details.
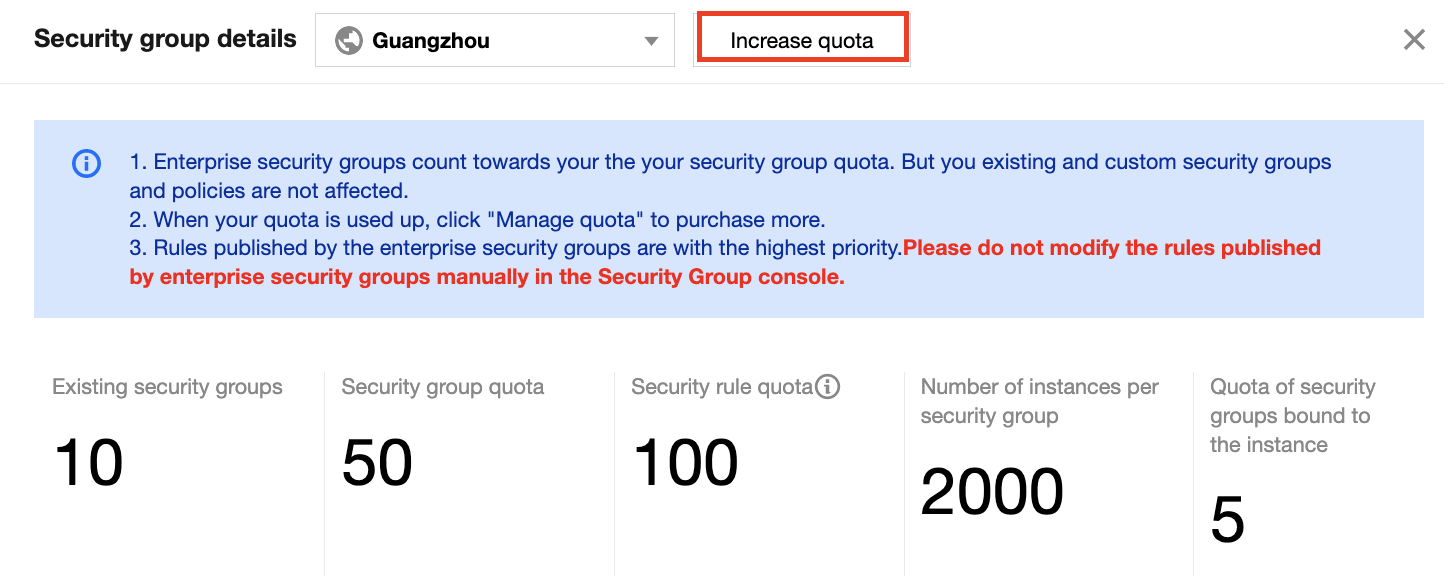
3. On the Security group details page, you can view the regions of instances and quota information. The quota can be increased as needed.
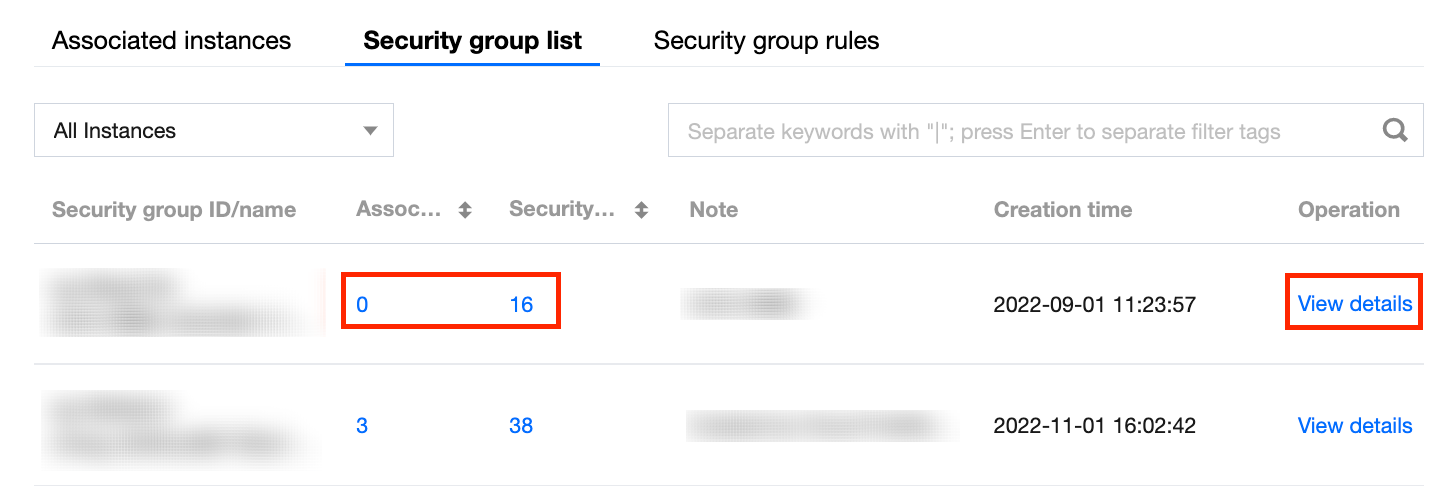
4. At the bottom of the Security group details page, you can view associated instances, security group lists, and security group rules.
Associated instances: Display information of all instances in a region, such as instance name, instance type, network, and IP address. Click the number in the "Security group" or "Security group rule" column to go to the security group list or rule details page of an instance. Click View details to go to the instance details page.
Security group list: It displays all the security group lists for the current region, the instances associated with each security group, the number of security group rules, the creation time, and other information. Click the number in the "Associated instance" or "Security group rule" column to go to the security group list or rule details page of an instance. Click View details to go to the security group details page in the VPC console.
Security group rules: Display the inbound and outbound rules of all security groups in the current region. Click
to view the rule details, or check whether the enterprise security group rules are published successfully.
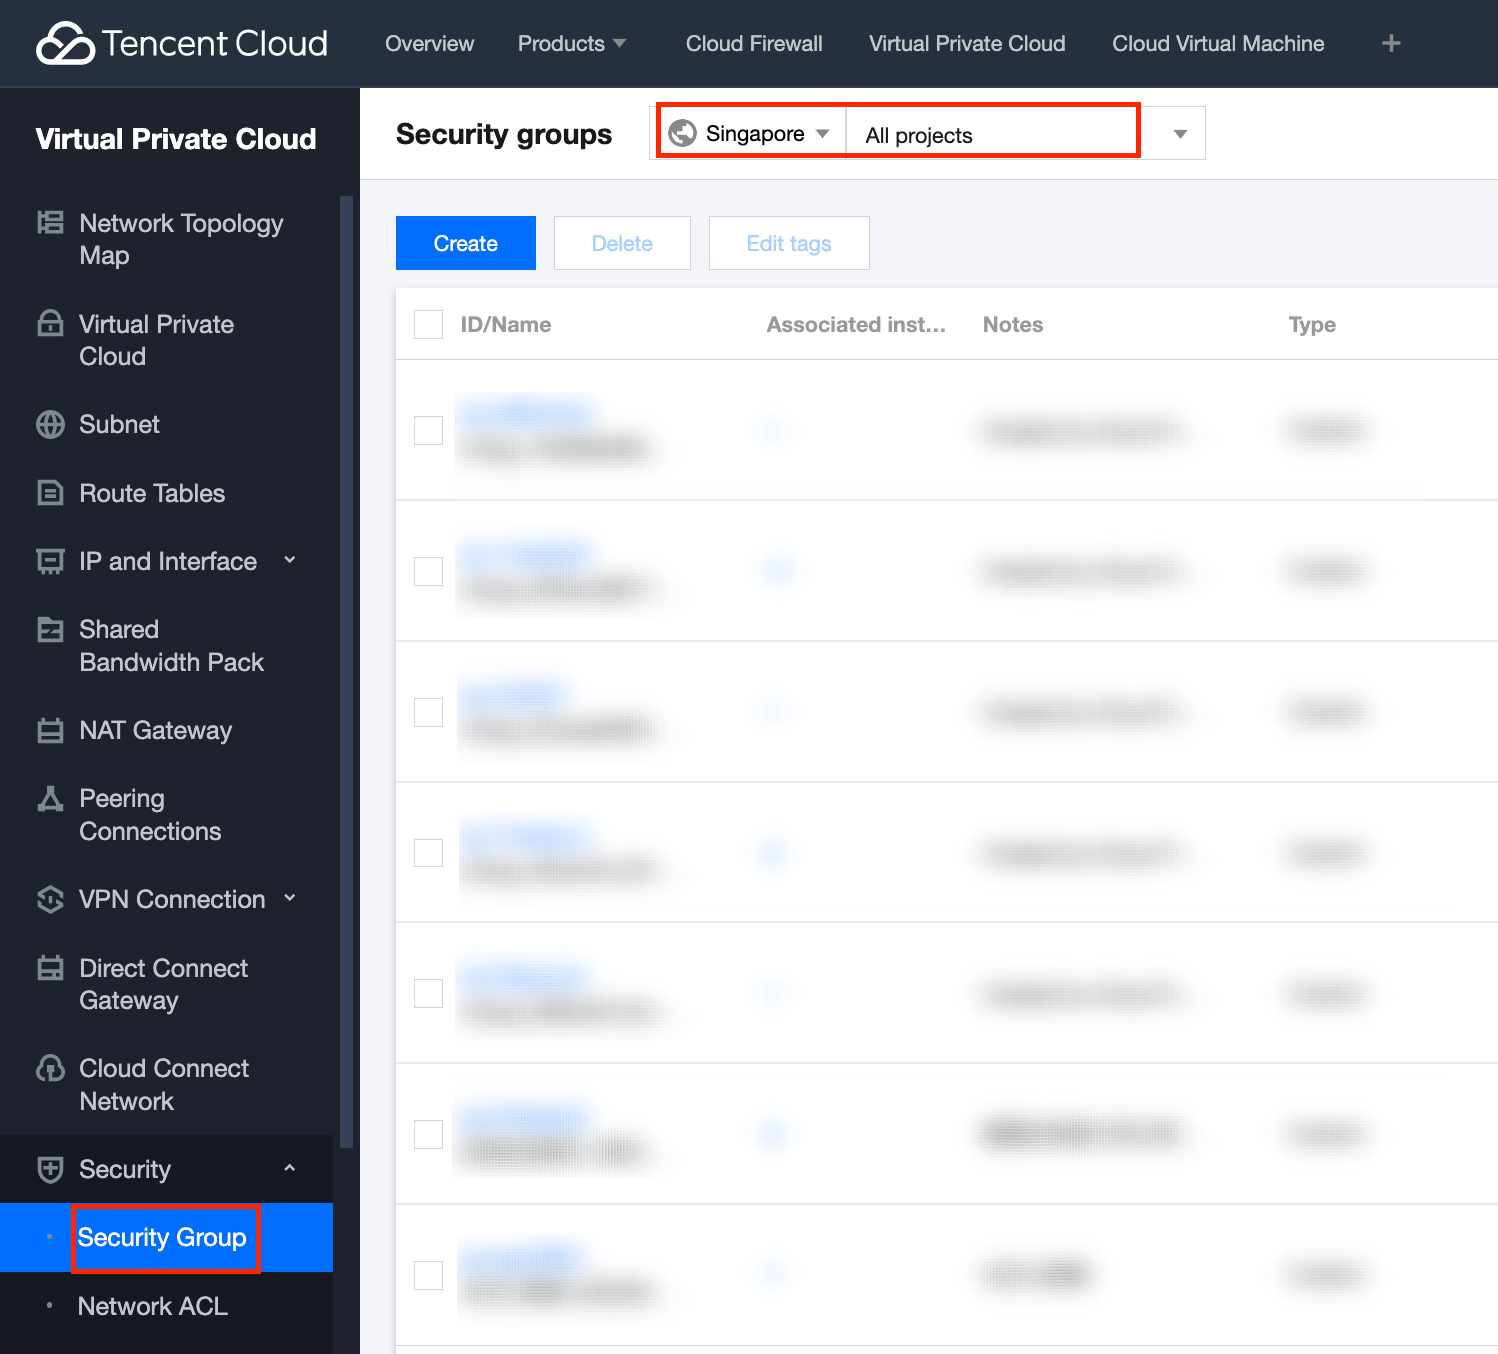
5. Log in to the VPC console, click Security -> Security groups in the left navigation pane, and select the regions and items.
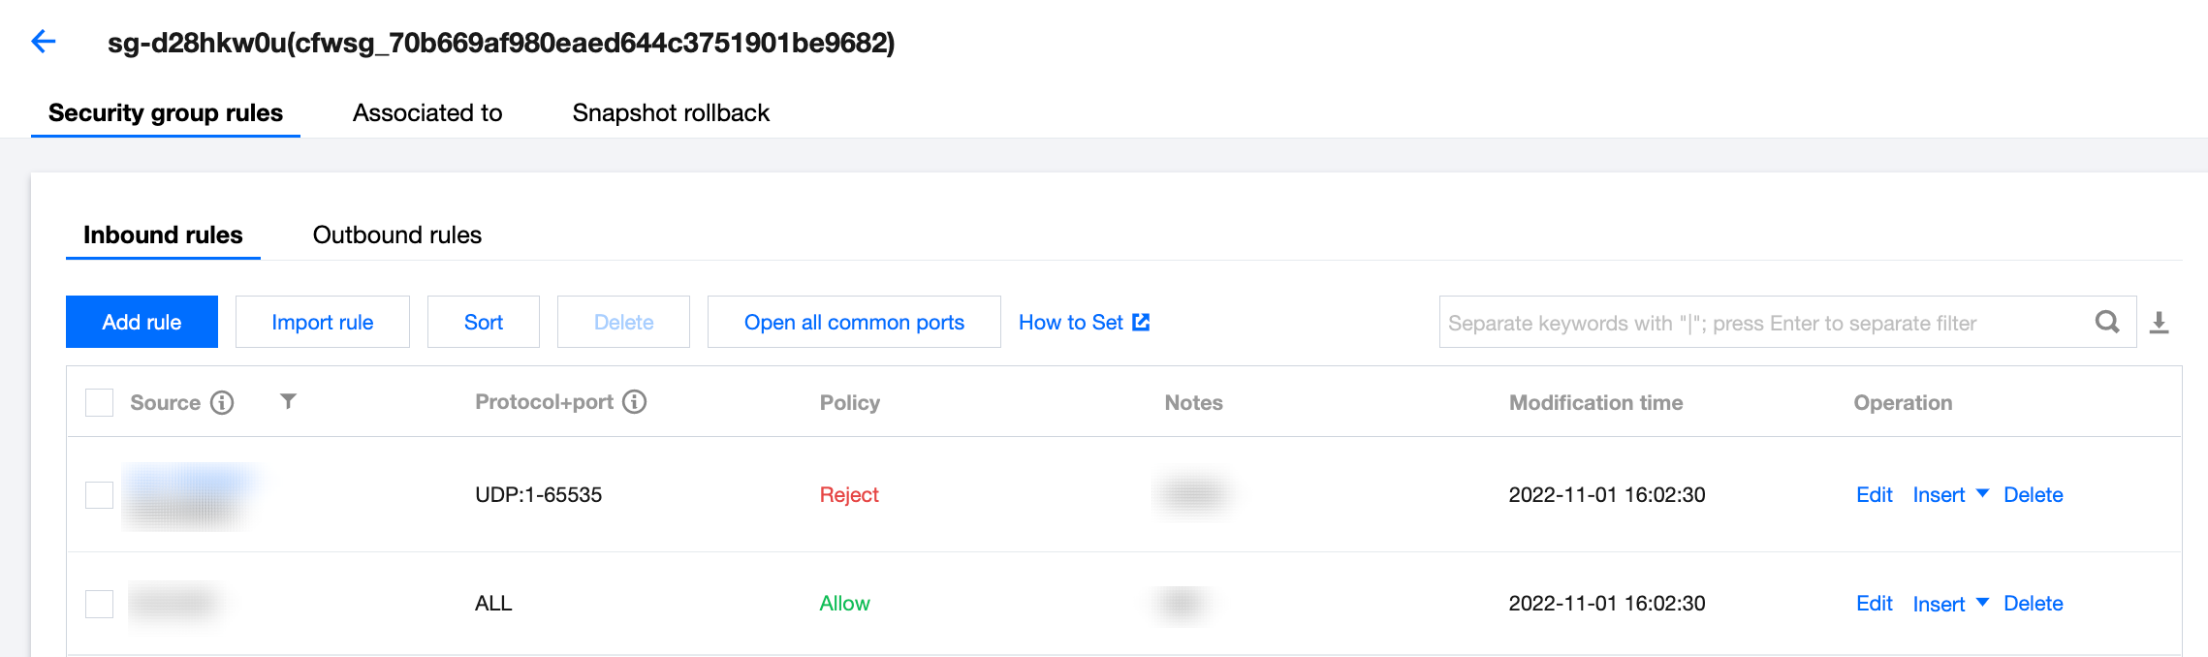
6. Click the ID/name of a security group to view its inbound rules, outbound rules, and associated instances.
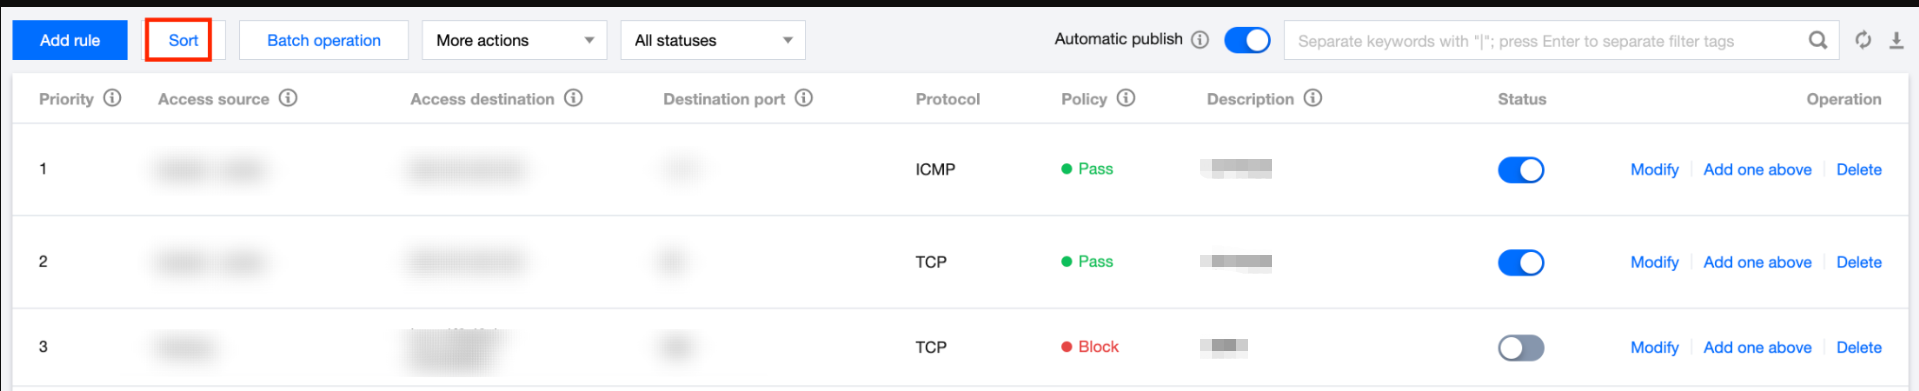
Managing rules
After setting enterprise security group rules, you can modify, insert, delete, or sort the rules on the Enterprise security group page.
On the Enterprise security groups page, you can disable or enable rules. Once you disable a rule, it will no longer be matched.
Inserting rules
On the Enterprise security groups page, select a rule, click Insert, enter parameters, and click OK to add a rule above the current rule. The new rule has higher priority than the current rule.