tencent cloud

Feedback

Honeypot Service

Last updated: 2024-01-24 16:17:26
    The network honeypot service must be associated with a probe to run properly. The Probes page is displayed by default after you enter the network honeypot console. You are advised to create a probe first, and then create a honeypot and associate it with the probe.

    Creating a honeypot

    1. Log in to the Cloud Firewall console and click Network Honeypots in the left navigation pane.
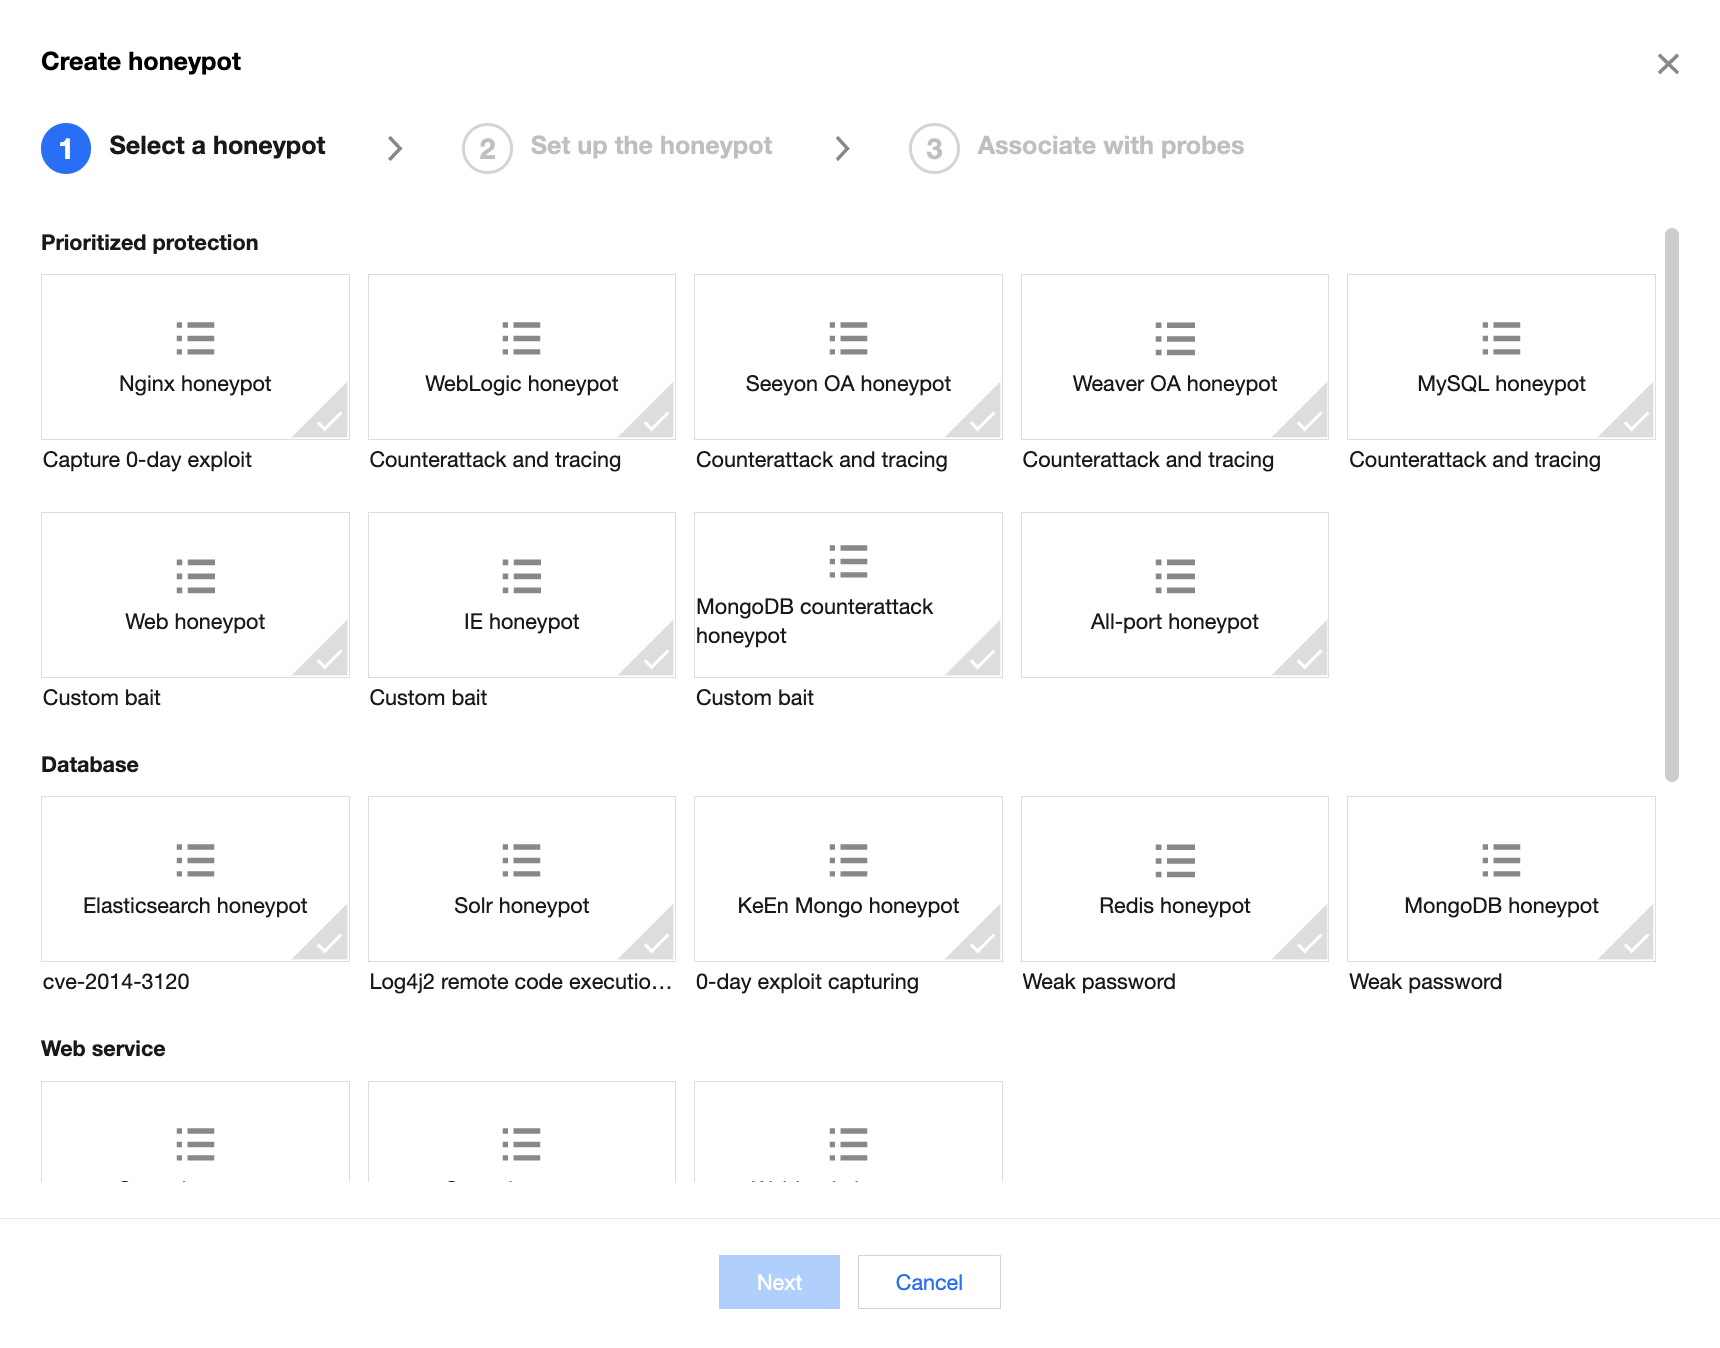
    2. On the Network honeypots page, select Honeypots, and then click Create honeypot.
    
    
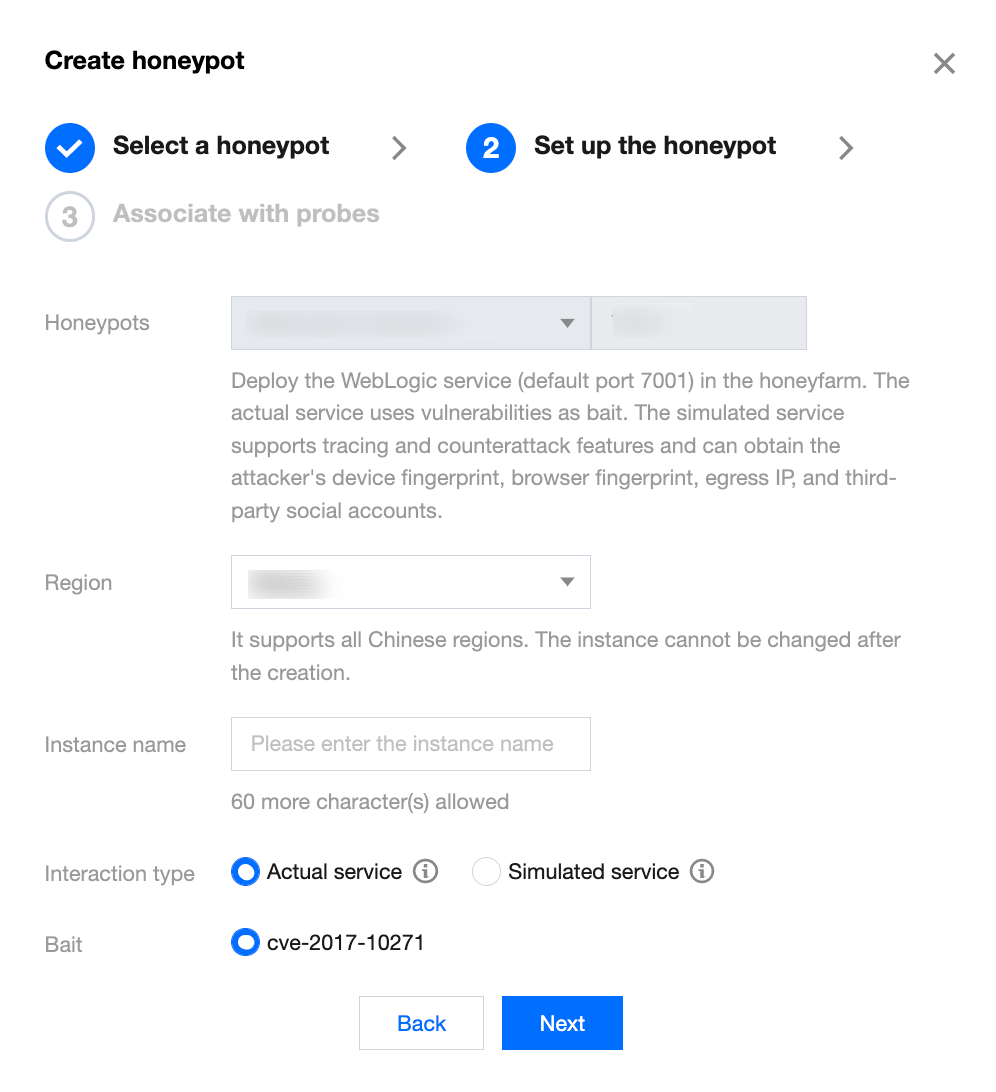
    3. In the Create honeypot service window displayed, configure the parameters, and then click OK.
    Note
    Parameters to be configured vary with the honeypot service selected. For more information, please see Parameters.
    
    Parameters
    Region: All regions in China are available. The region cannot be modified after the instance is created.
    Instance name: Custom instance name.
    Honeypot service: Honeypots include ELASTICSEARCH, MYSQL, NGINX, SALTSTACK, SSH, STRUSTS, WEBLOGIC, and WEB honeypots. Except for the WEB honeypot, all the other honeypots have built-in baits and vulnerabilities.
    Interaction type
    Real service: High interaction. Real services and baits run on the backend, which actually respond to every request of attackers to deceive attackers, allowing you time to deploy protection measures.
    Fake service: Medium interaction. Fake services and baits run on the backend, which generate simulated responses to some requests of attackers and induce attackers to continue their operations, allowing you time to deploy protection measures.
    Bait
    ELASTICSEARCH honeypot: cve-2014-3120.
    SALTSTACK honeypot: cve-2020-11651.
    SSH honeypot: weak token.
    STRUSTS honeypot: cve-2017-12611.
    WEBLOGIC honeypot: cve-2017-10271.
    Other honeypots: none.
    Custom bait
    MYSQL honeypot, SSH honeypot: You can select a login token and set a password.
    WEB honeypot: You can select an existing SSH or MySQL honeypot as a custom bait. If you have no SSH or MySQL honeypot, create one and associate it with a probe.
    Other honeypots: none.
    Associated probe: You can add an existing probe or create one.
    Add existing: Click Add existing, and then select the required probe instance and port number.
    
    
    Create: Click Create, configure the parameters, and click OK to add the probe to the Create honeypot service window.
    

    Managing honeypots

    Filtering/Sorting
    On the Network honeypots page, click the search box to filter honeypot service events by keywords such as Honeypot ID or Honeypot name.
    Click Honeypots, Region, or Interaction type in the header of the honeypot list to filter honeypot service events.
    Click Associated probes or Hit count in the header of the honeypot list to sort honeypot service events in ascending or descending order.
    Enabling honeypots
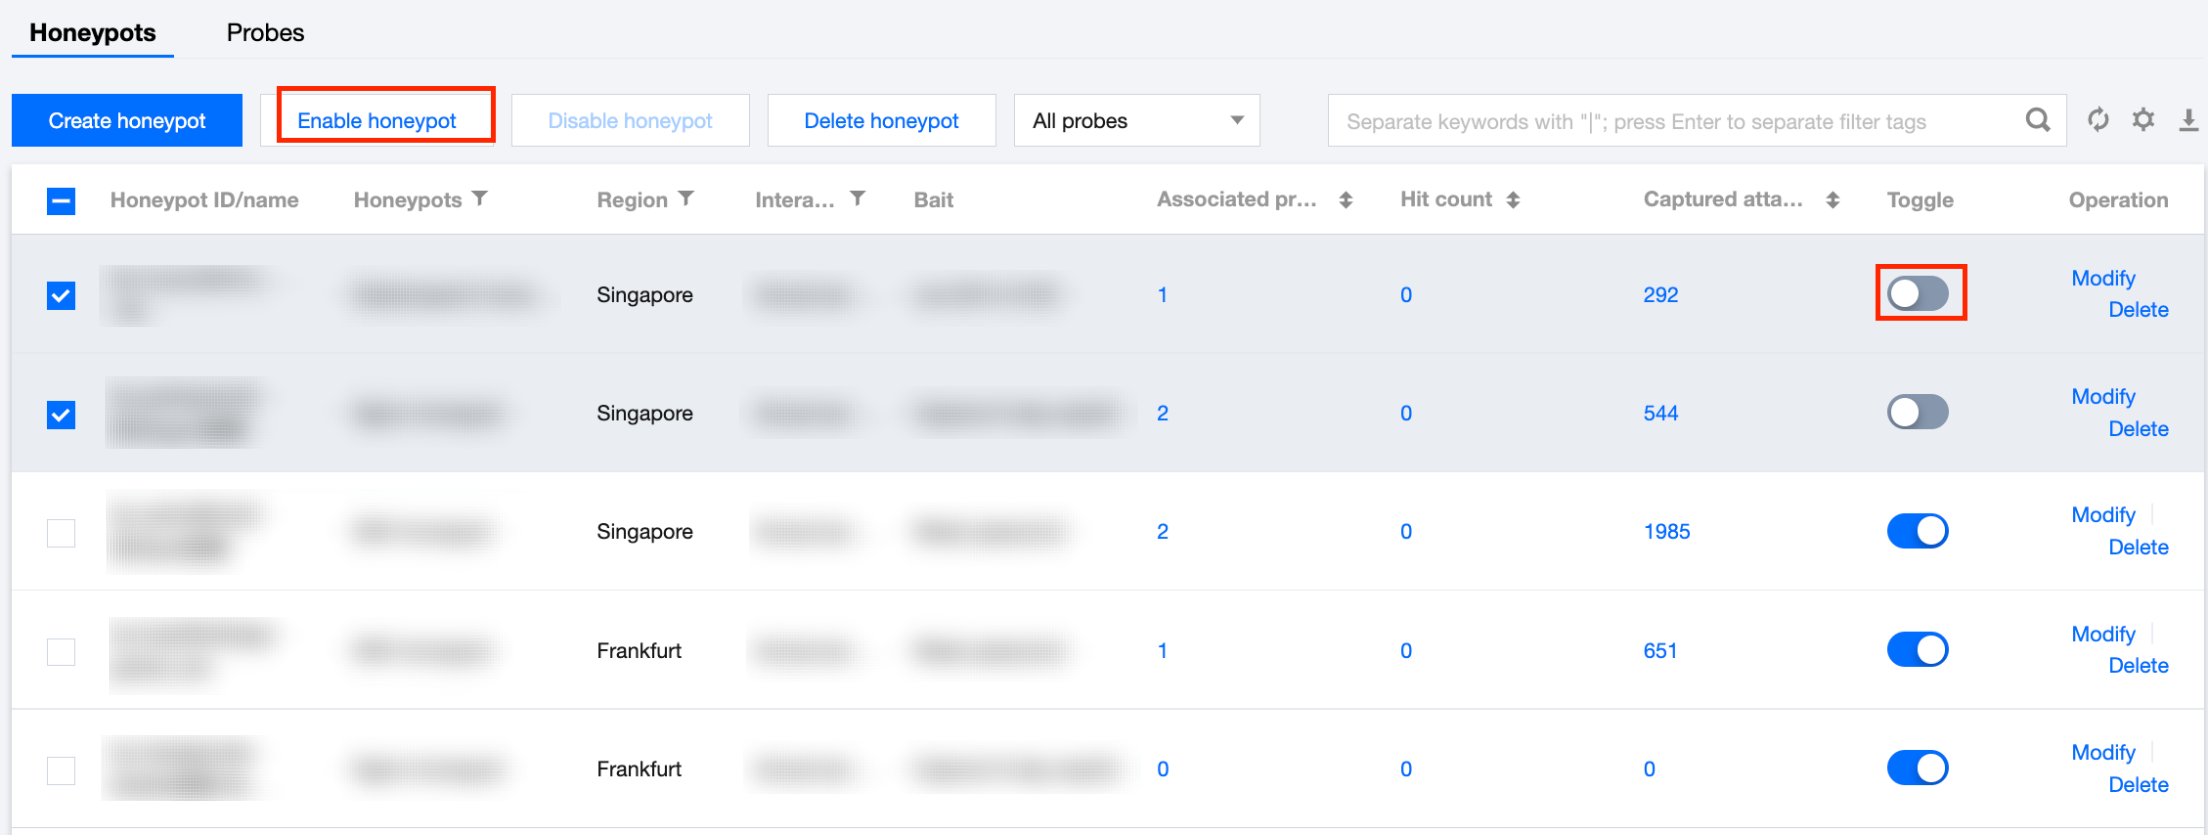
    1.1 On the Network honeypots page, you can enable honeypots individually or in batch as follows.
    Select a honeypot ID and click
    
    or Enable honeypot.
    Select multiple honeypot IDs and click Enable honeypot.
    1.2 In the confirmation window displayed, click OK to enable the honeypot(s).
    Note
    When a honeypot is enabled, the traffic of associated probes will be forwarded to it.
    Disabling honeypots
    1.1 On the Network honeypots page, you can disable honeypots individually or in batch as follows.
    Select a honeypot ID and click
    
    or Disable honeypot.
    Select multiple honeypot IDs and click Disable honeypot.
    1.2 In the confirmation window displayed, click OK to disable the honeypot(s).
    Note
    When a honeypot is disabled, the traffic of associated probes will not be forwarded to it.

    Editing honeypots

    1. On the Network honeypots page, select Honeypots, and then click Edit.
    2. In the Modify honeypot service window displayed, modify the instance name and associated probes, and then click OK to save the modification.

    Deleting honeypots

    1. On the Network honeypots page, you can delete honeypots individually or in batch as follows.
    Select a honeypot ID and click Delete or Delete honeypot.
    Select multiple honeypot IDs and click Delete honeypot.
    2. In the confirmation window displayed, click OK to delete the honeypot(s).
    Note
    After a honeypot is deleted, the virtual environment in which the service runs and related resources will be deleted, and traffic forwarding by associated probes will be automatically canceled. Please proceed with caution.
    
    Contact Us

    Contact our sales team or business advisors to help your business.

    Technical Support

    Open a ticket if you're looking for further assistance. Our Ticket is 7x24 avaliable.

    7x24 Phone Support