WeData SQL Exploration feature, oriented to data developers and business analysts, provides a convenient and quick data query and analysis IDE. It supports connecting to big data engines such as EMR and DLC for data exploration. Currently covered data source ranges include EMR-Hive, EMR-Kyuubi, EMR-Trino, EMR StarRocks, DLC, and TCHouse-X.
Note:
Currently, SQL exploration is in open beta stage. You can try the data exploration experience resource group for free. When finished, it will be billed based on usage of queries.
2. Click Project List in the left menu and find the target project for Notebook Exploration.
3. After selecting a project, click to enter the Data Development module.
4. Click SQL Exploration in the left menu.
Database Tables
Database Table Filtering
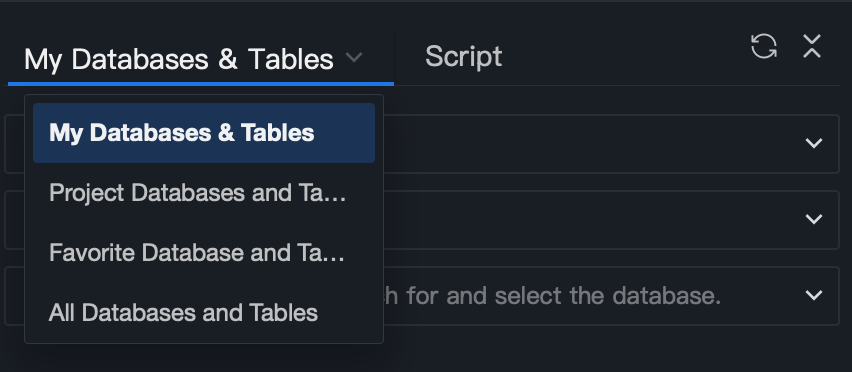
Database tables support filtering through three ways: all databases and tables, project database table, and favorite.
Filter Criteria
Filtered Result
all databases and tables
View all database tables in the data source
project database table
View database tables in the data source that belong to the current project
Favorite database tables
View user favorite database tables in the data source
Database Table Query
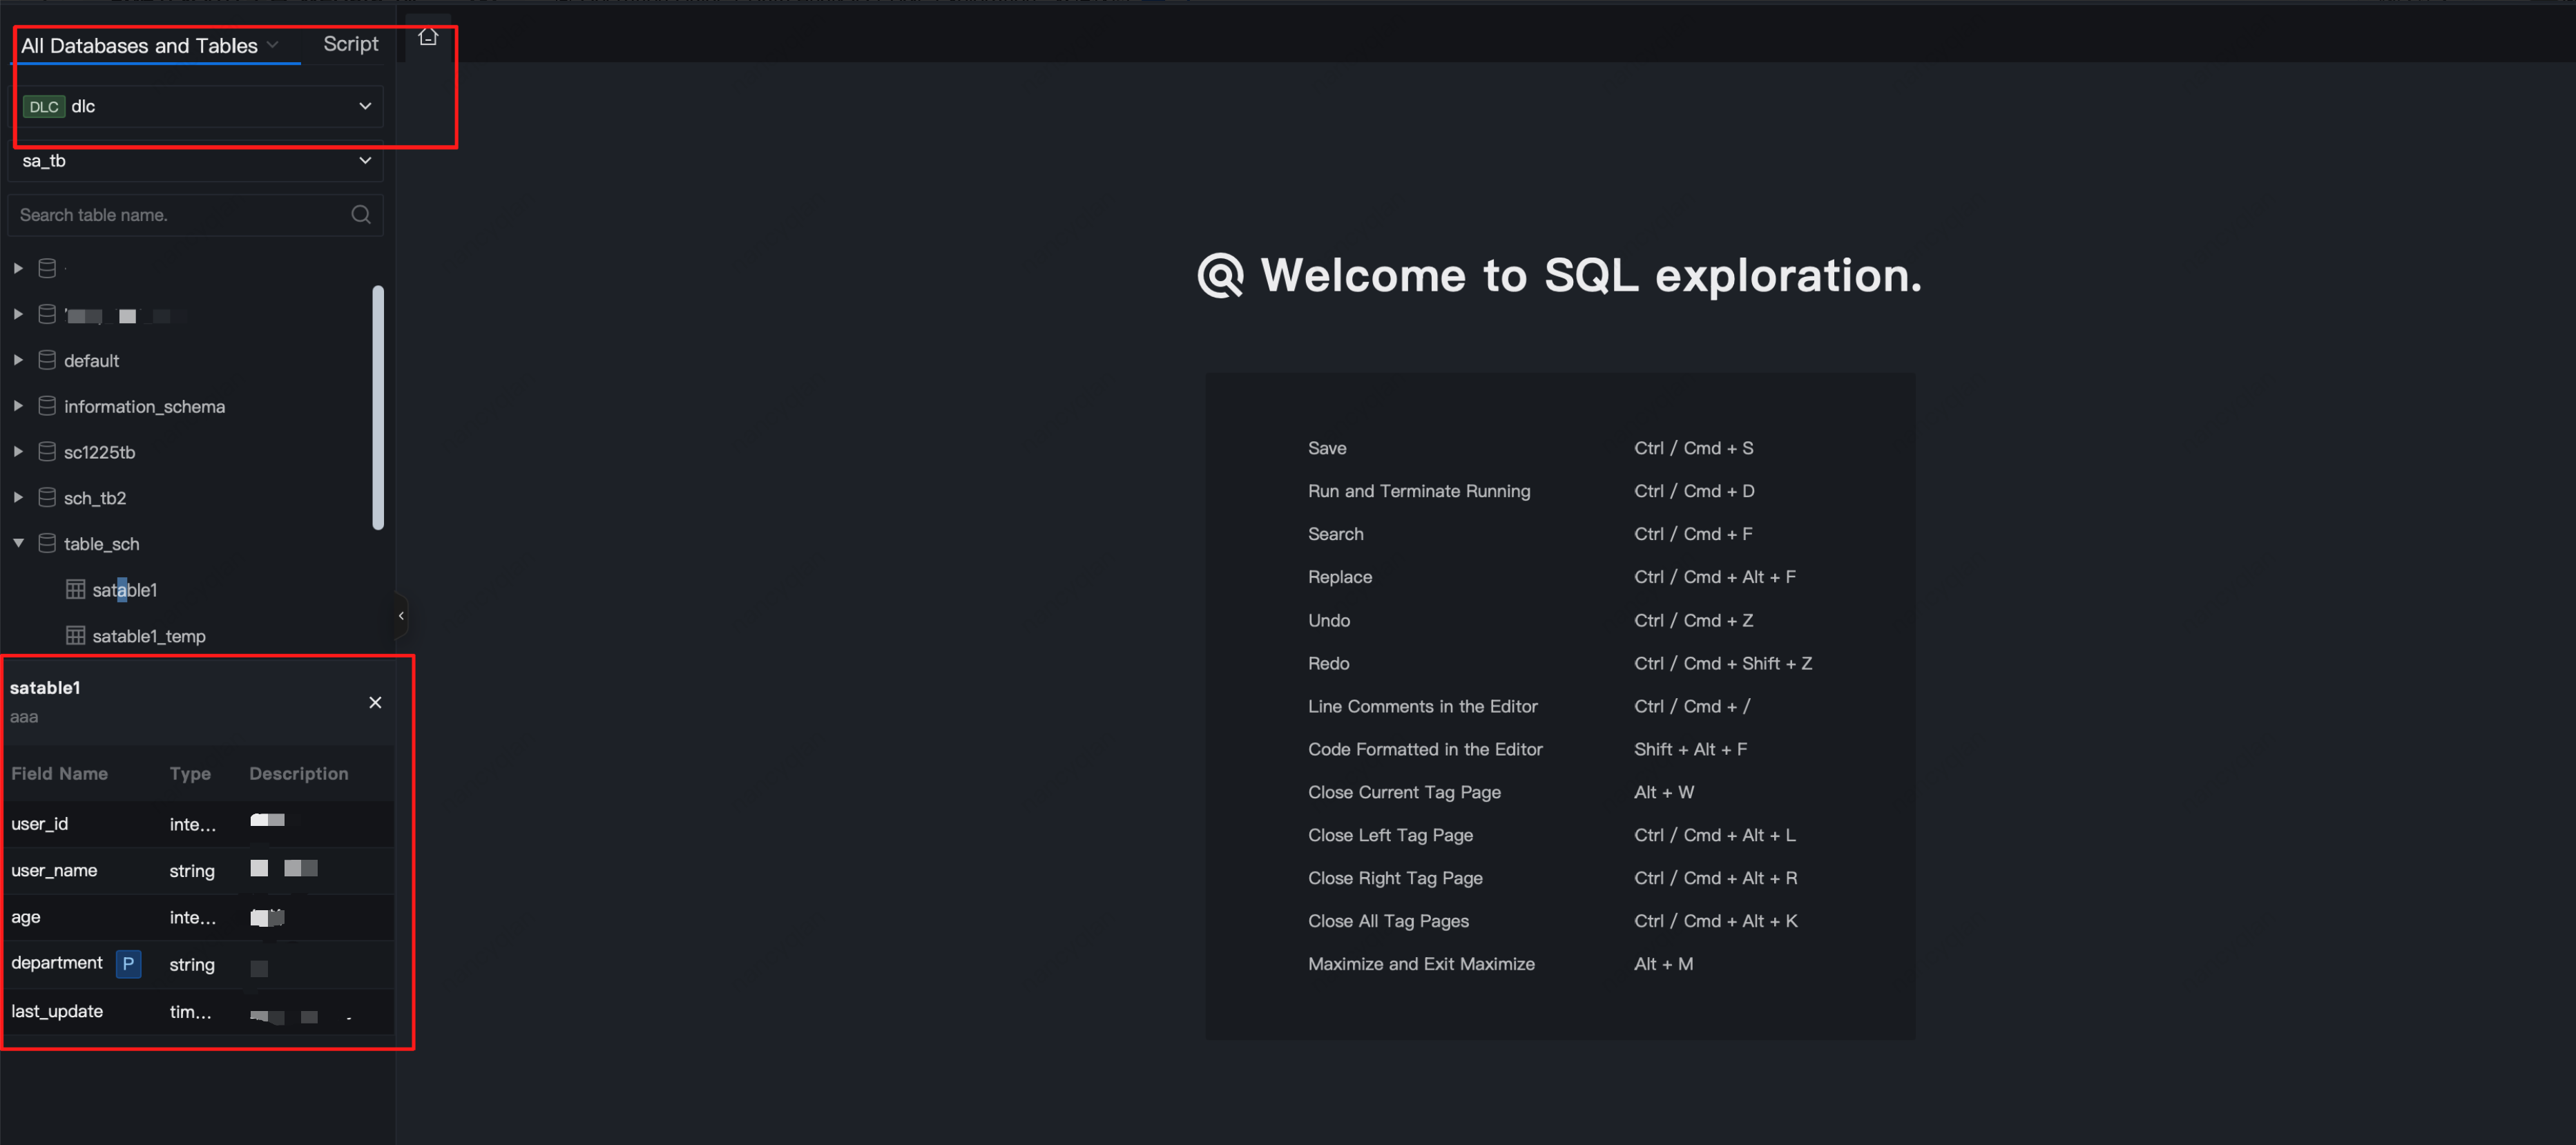
1. Select criteria and data source, the database and table information under the specified criteria and data source will be displayed below.
2. Support entering table name for search.
3. Click data table name to quickly query field name, field type, and description.
Quick Actions
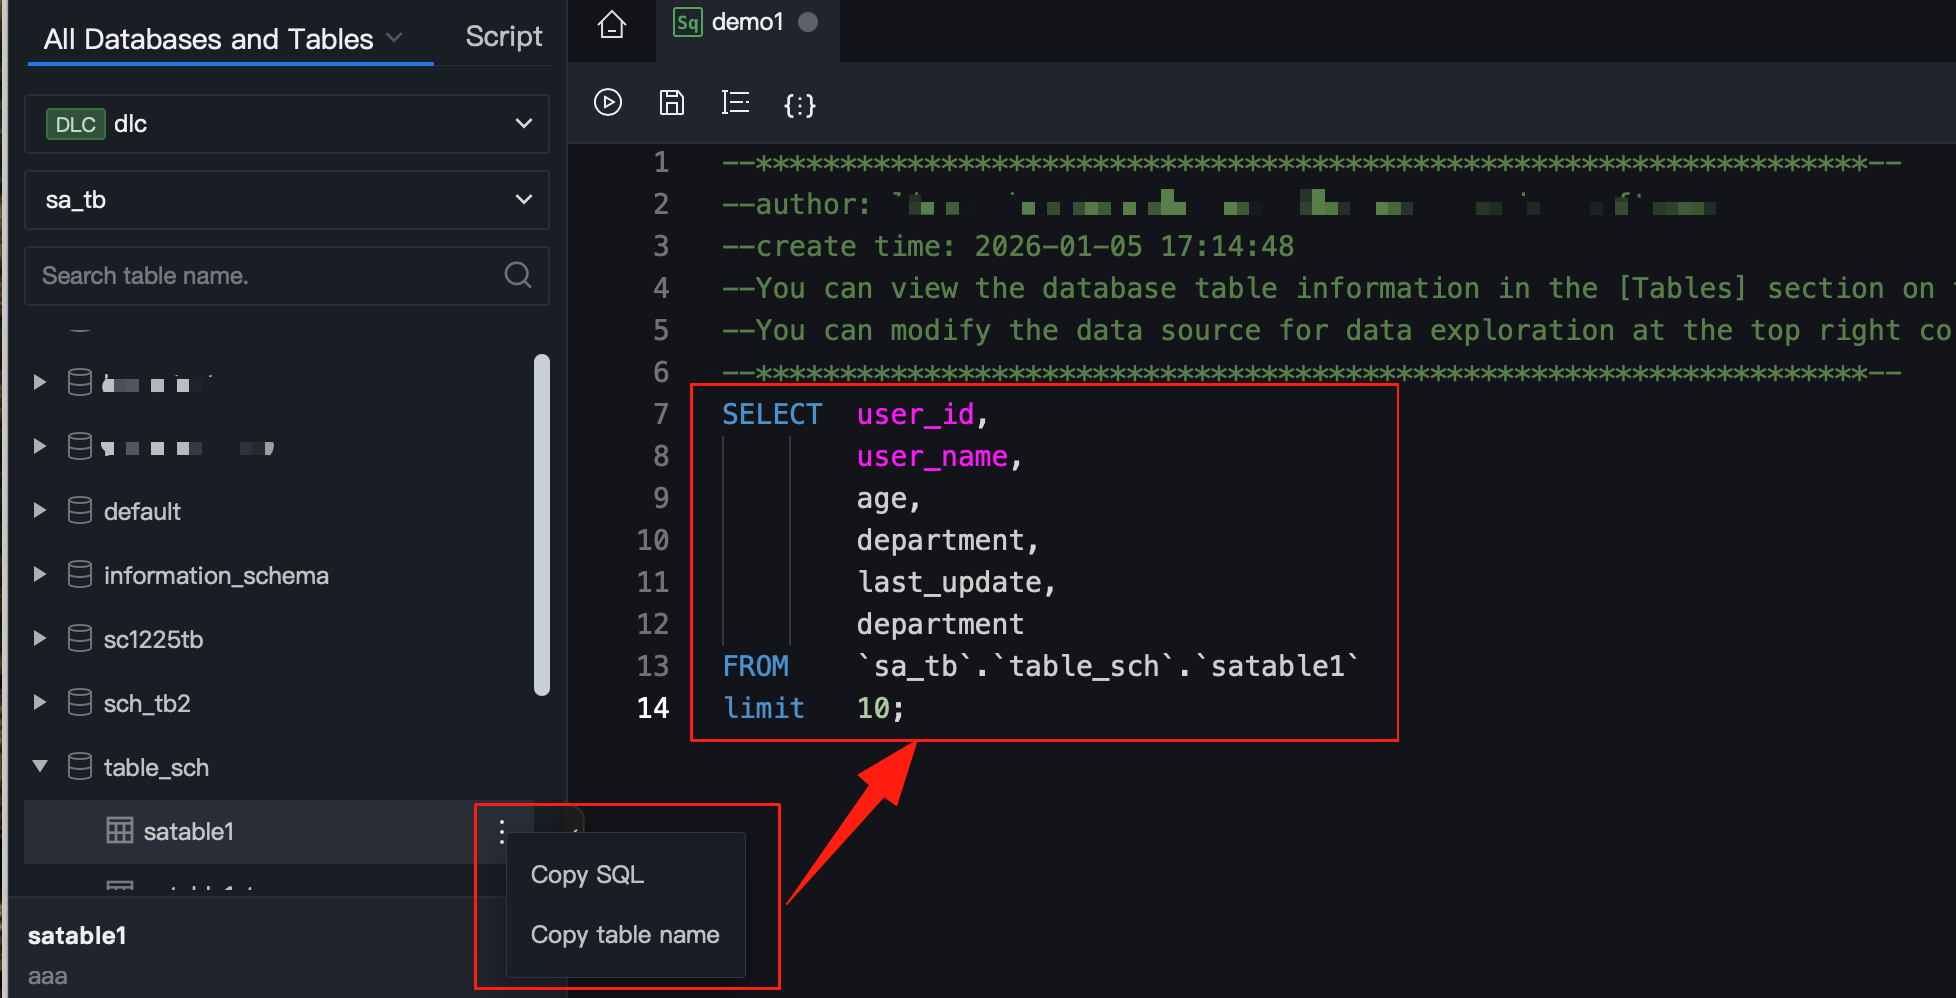
1. In the directory on the left, select a data table, click More > Copy SQL > Copy table name to copy the query statement and table name of the data table.
2. In the script editing area on the right, you can quickly paste copied content.
Script
Creating a Folder
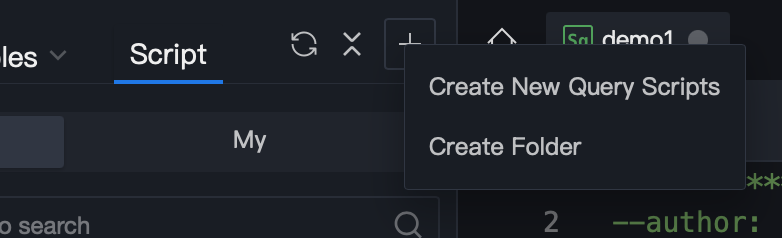
Method 1: Switch to the "Script" tab, click "+", and select create folder.
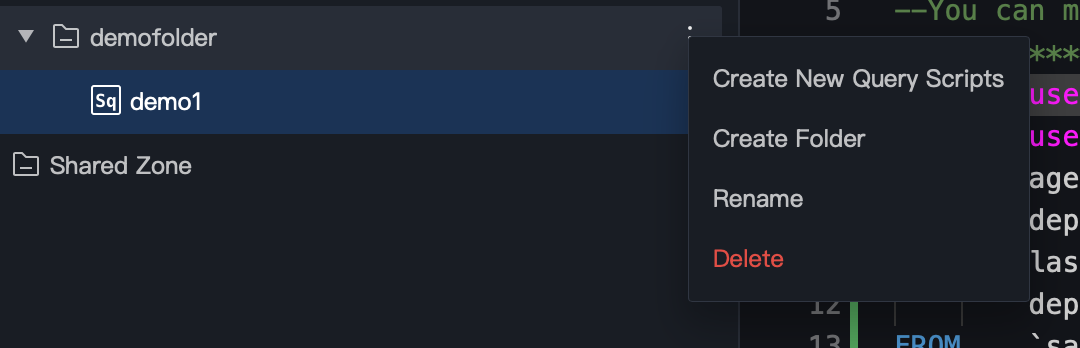
Method Two: Click the More button in the directory tree and select create folder.
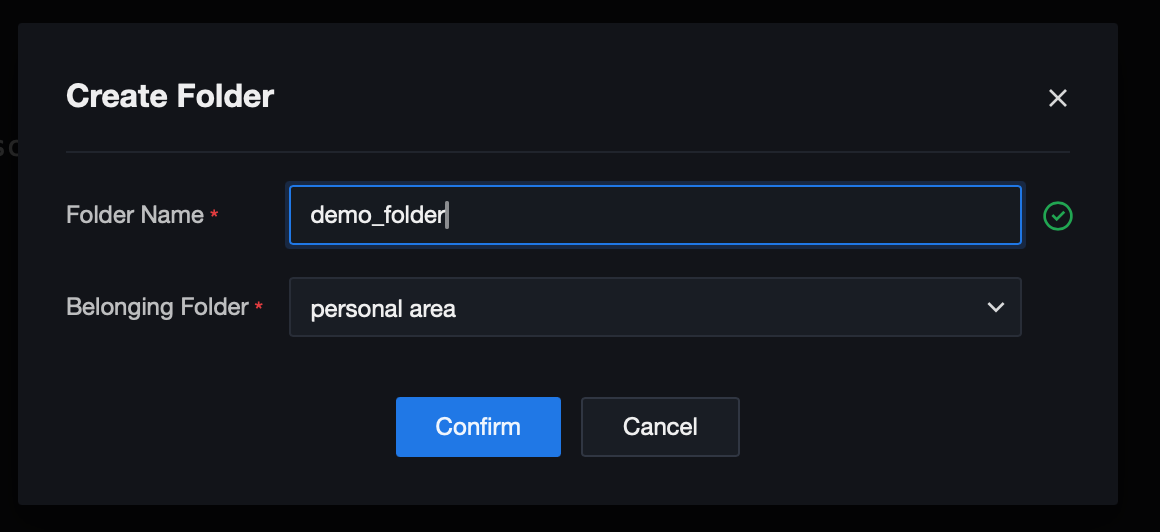
Fill in the folder name, select the folder, and click OK to create the instance successfully.
Creating a New Query Script
Method 1: Click "+", and select new query script.
Method Two: Click the More button in the directory tree and select new query script.
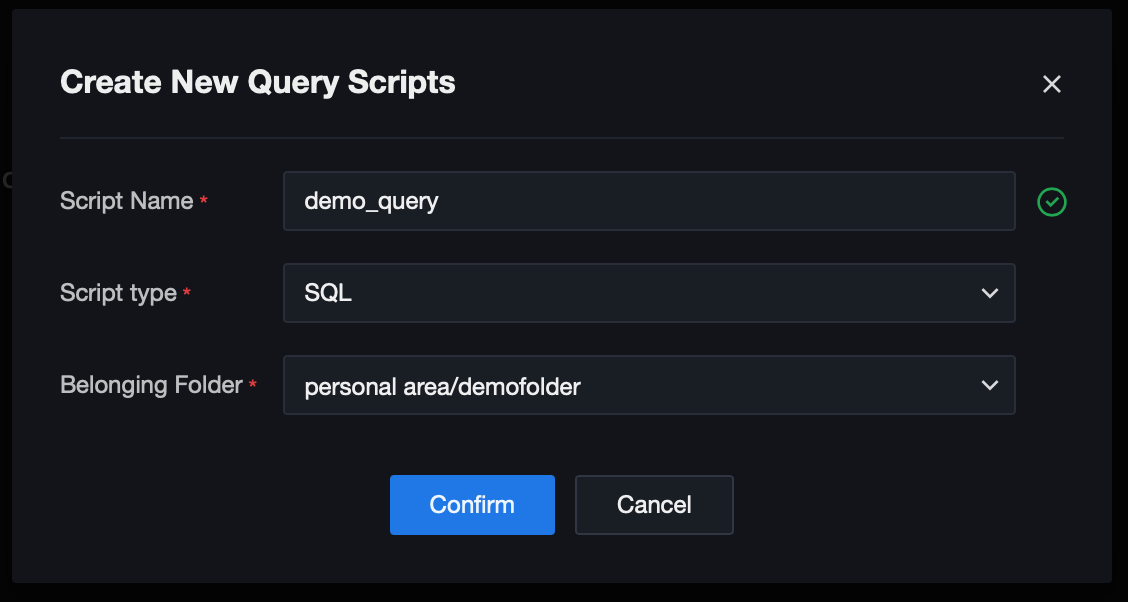
Fill in the script name, select the script type and folder, then click OK to create the instance successfully.
Running a Query Script
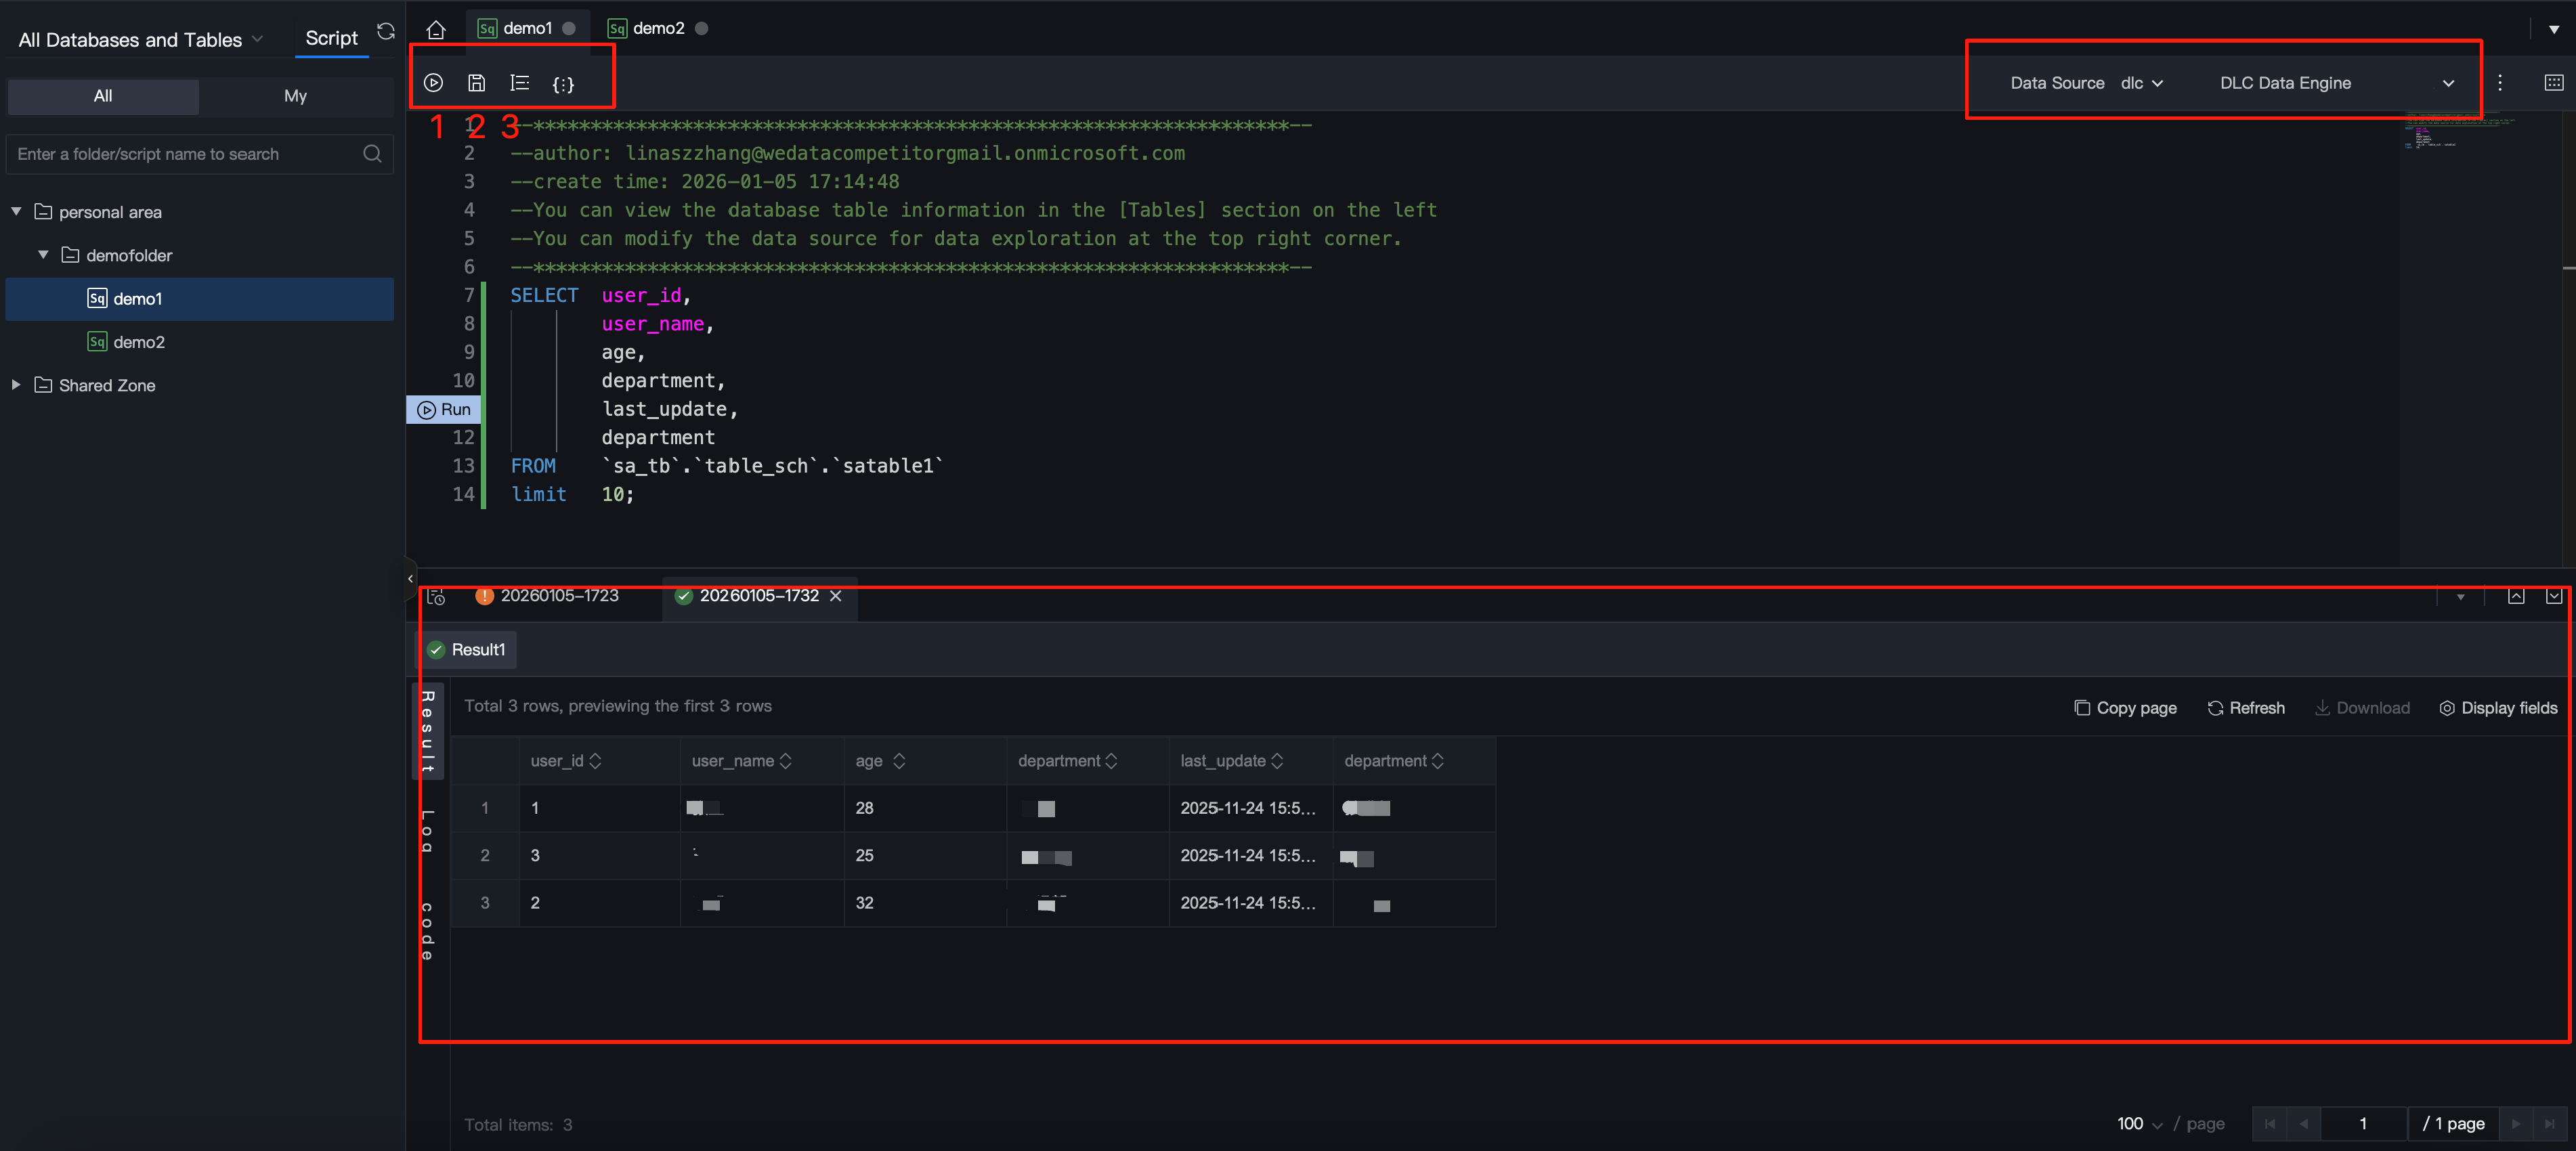
1. Configure data source, computational resource and execution resource for the current query script.
Configuration Item
Description
Data Source
Current supported data sources include EMR-Hive, EMR-Kyuubi, EMR-Trino, DLC, and TCHouse-X.
Note:
Note: EMR-Hive, EMR-Kyuubi, and EMR-Trino data sources currently only support system data source. Custom data source is not supported.
computational resource
Engine computational resource for data read/write
When selecting EMR-Hive or EMR-Kyuubi data source, the dropdown option shows the queue information of the EMR cluster where it resides.
When selecting EMR-Trino data source, no need to select computing resources;
When selecting DLC Data Source, the dropdown option shows the computing resources bound to the DLC engine.
execution resource
Computing resources for execution of the current query script currently only support selecting "data exploration experience resource group".
Note:
Note: During the beta testing stage, users can use the "data exploration experience resource group" for free, with supported performance parameters of 20 concurrency per root account. Commercial billing will apply after completion.
2. Enter the SQL statement in the code editing area. Currently supports SQL statements including DDL, DML and DQL.
3. Click the Format button (Flag 3) to format the current code segment.
4. Click the Run button (Flag 1) to execute the current script. The execution result will be returned in the lower area (Flag 4). If there are multiple SQL statements, they will be divided into multiple entries and returned.
5. Click the Save button (Flag 2) to save current script content, making it easy to quickly open and query next time.