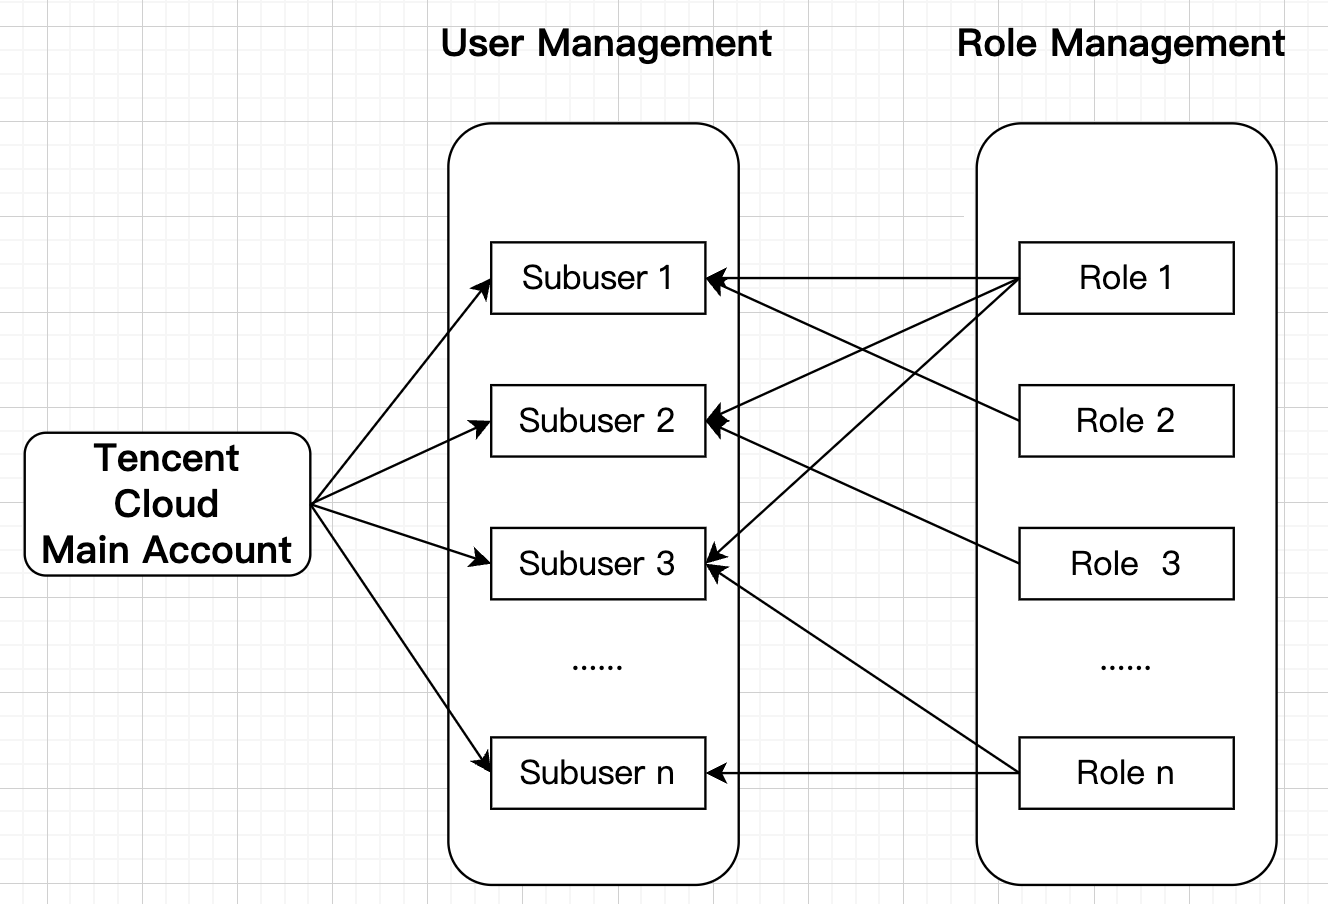
A Tencent Cloud root account can create multiple sub-users and assign different role permissions to each sub-user, enabling permission control within the TCADH platform, as shown in the diagram below:
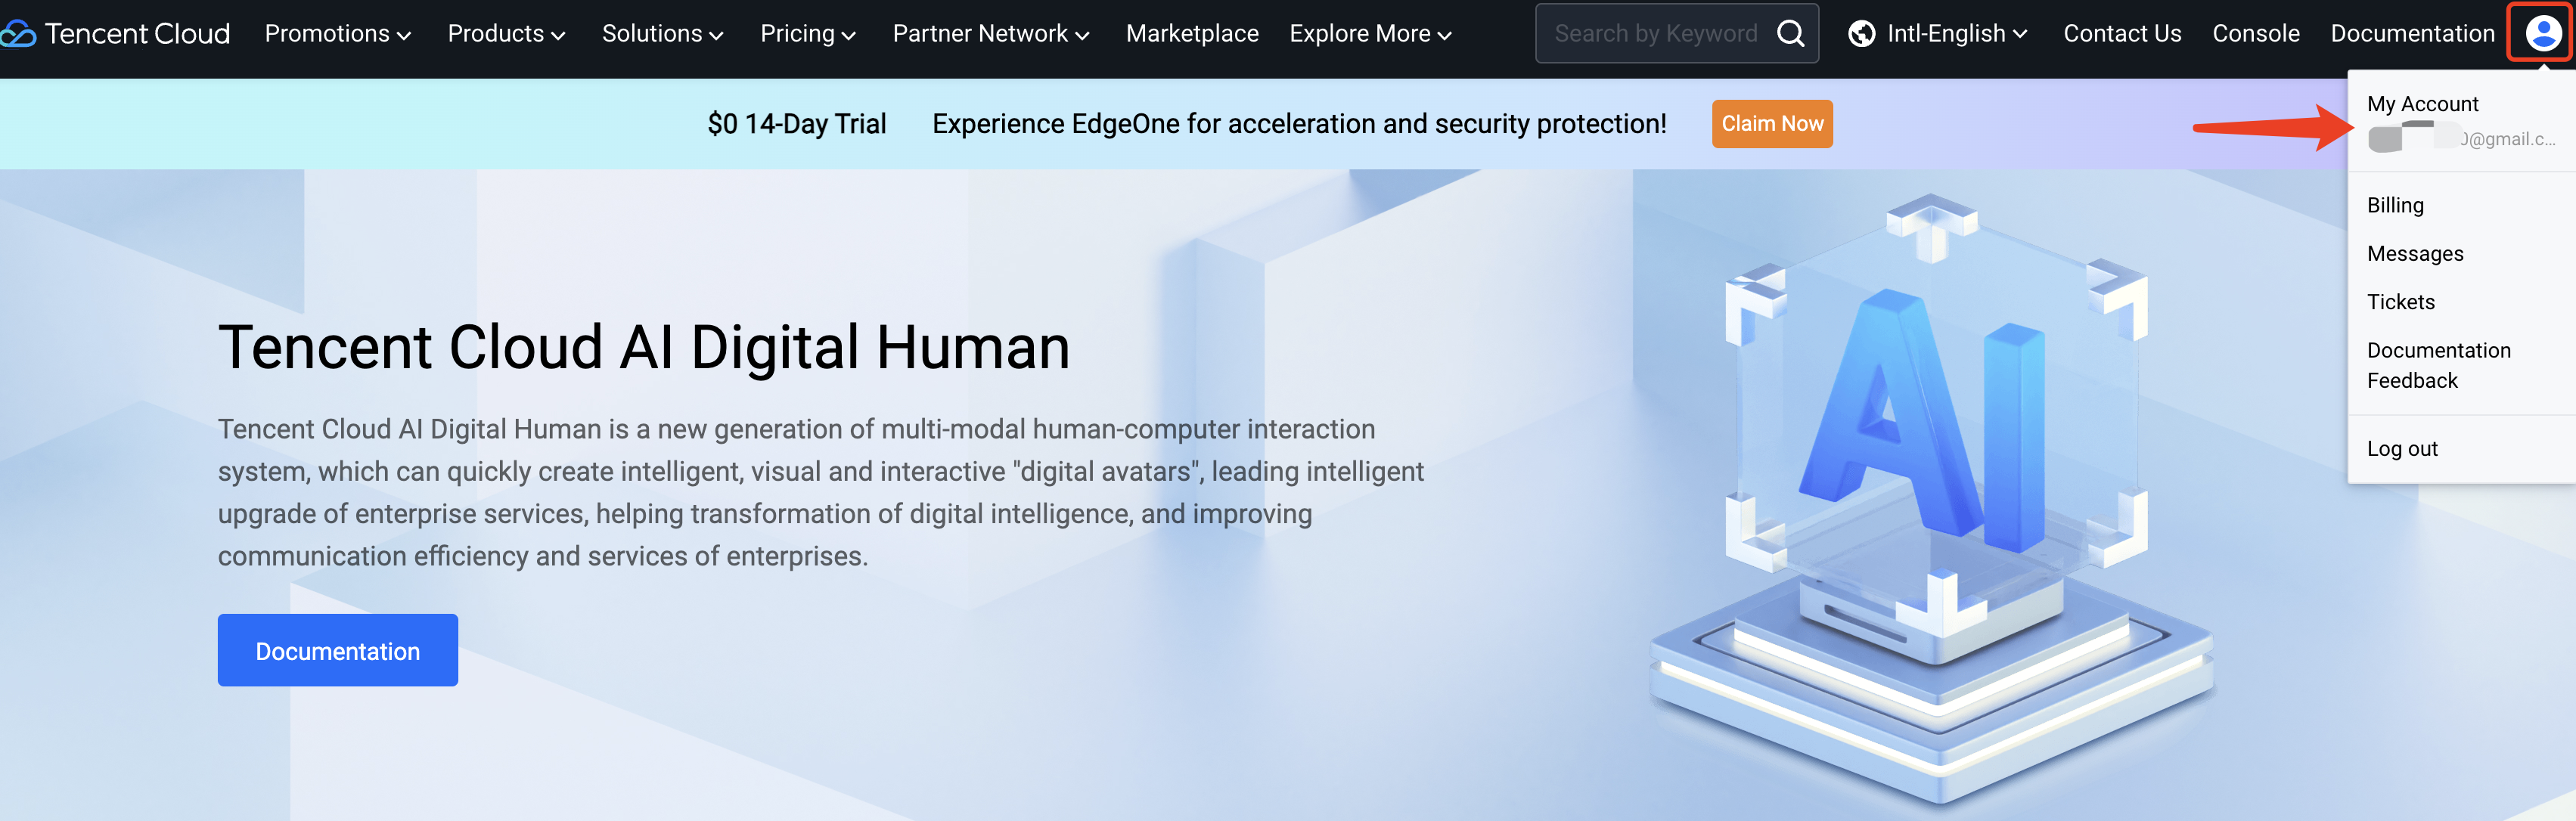
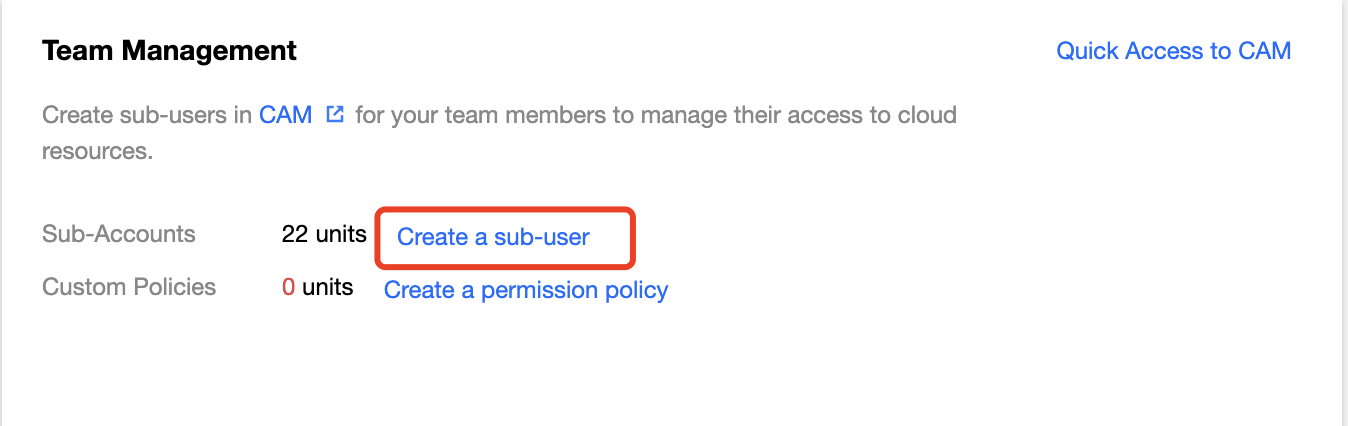
Permission management entry: Access the Tencent Cloud Intelligent Console of the TCADH platform via the root account, and then navigate to Account in the upper-right corner, as shown in the diagram below: In the lower-left corner of the page, under Team Management, select Quickly Create Sub-users.
I. User Management
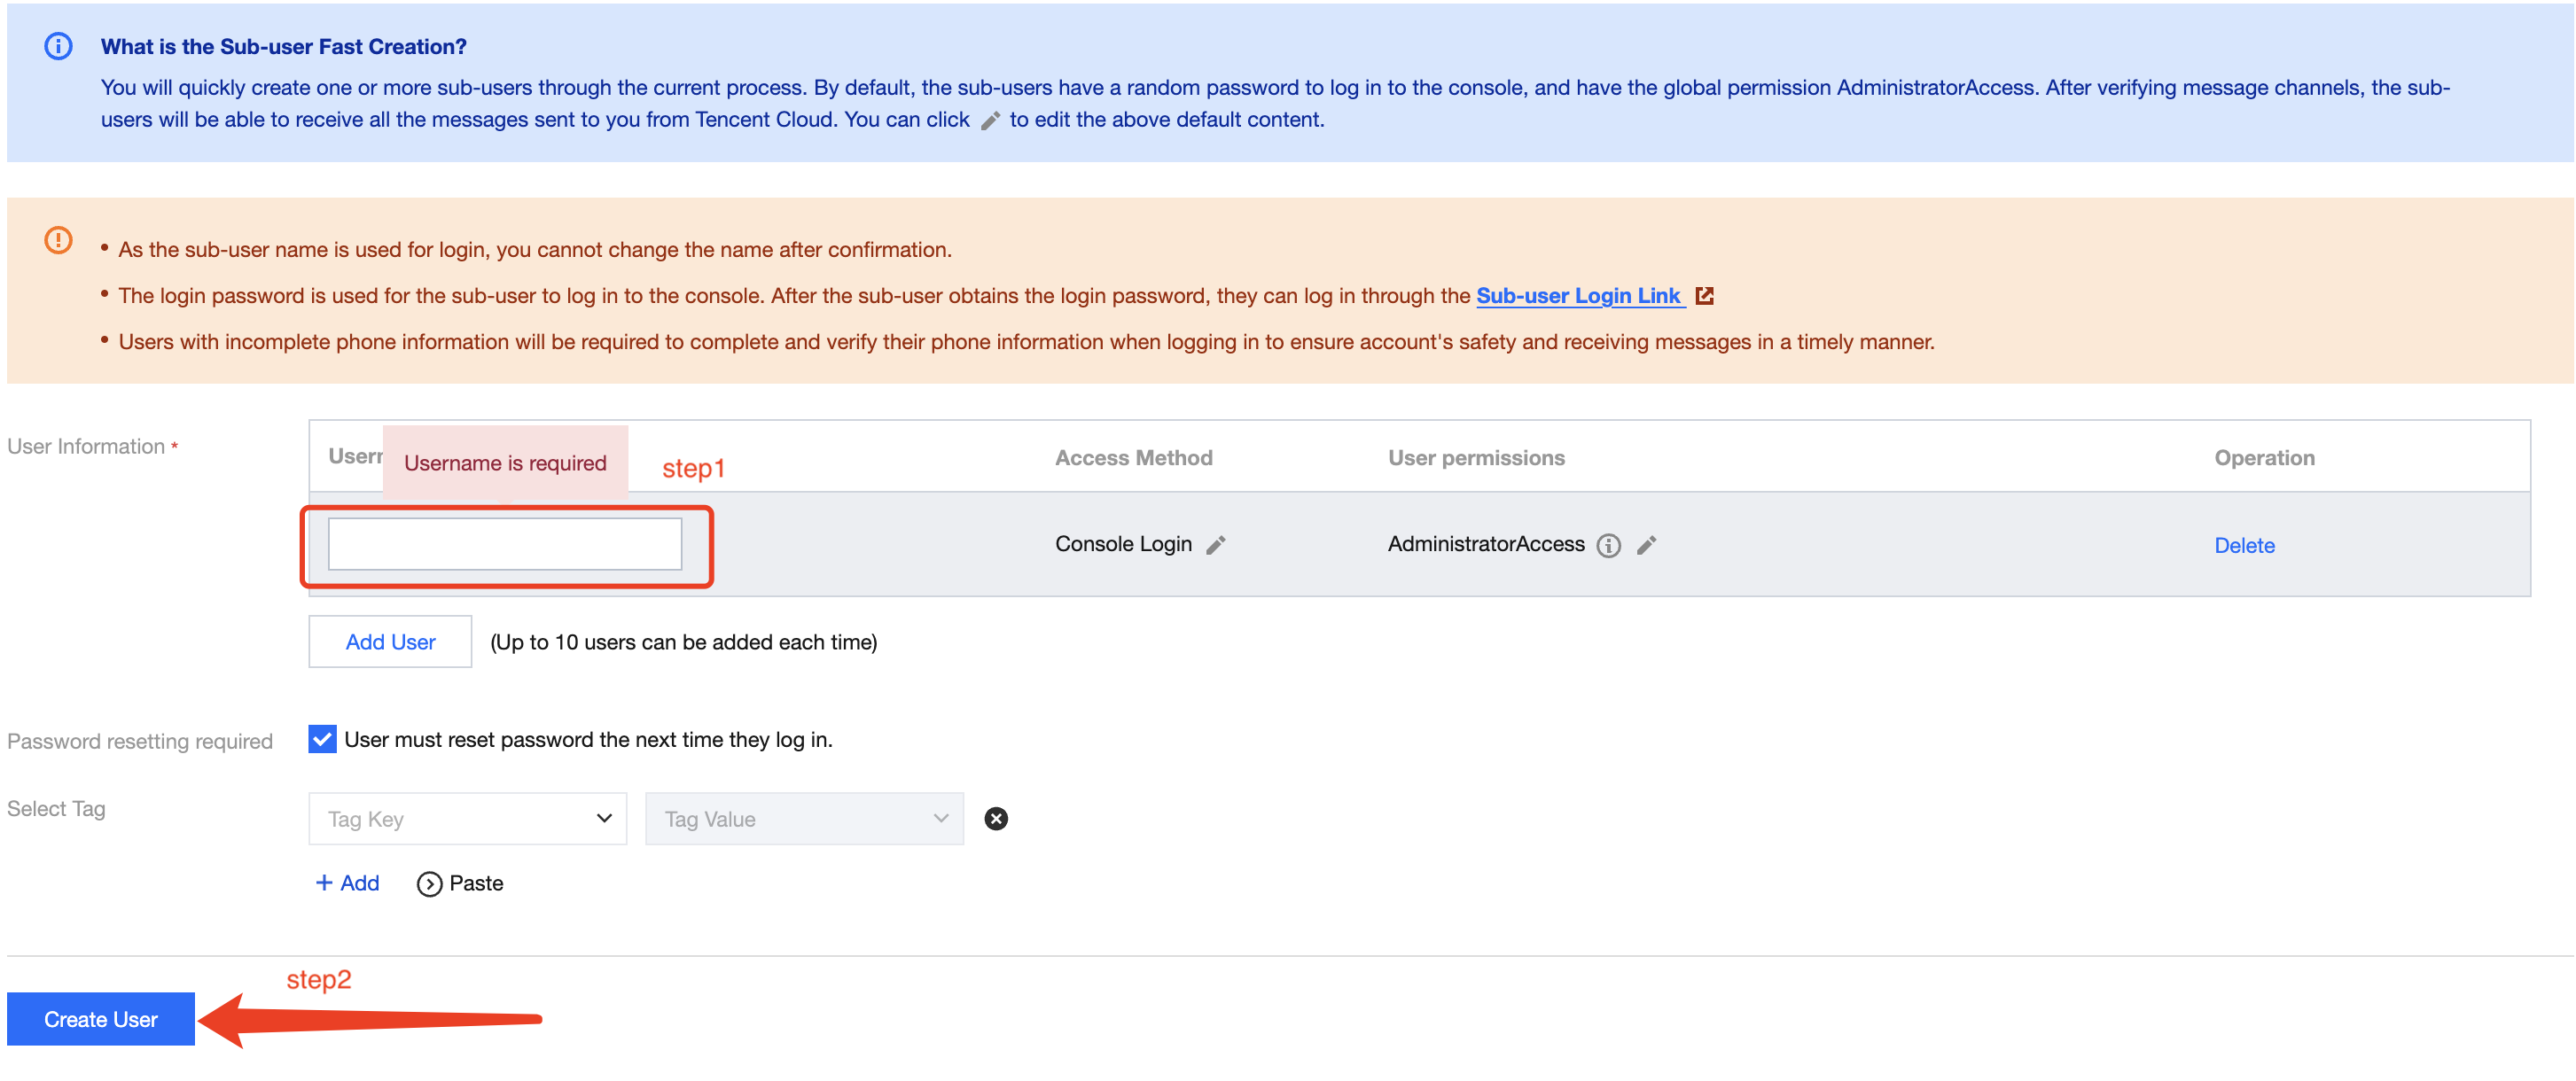
1. Adding a User
The main steps for adding a user are as follows:
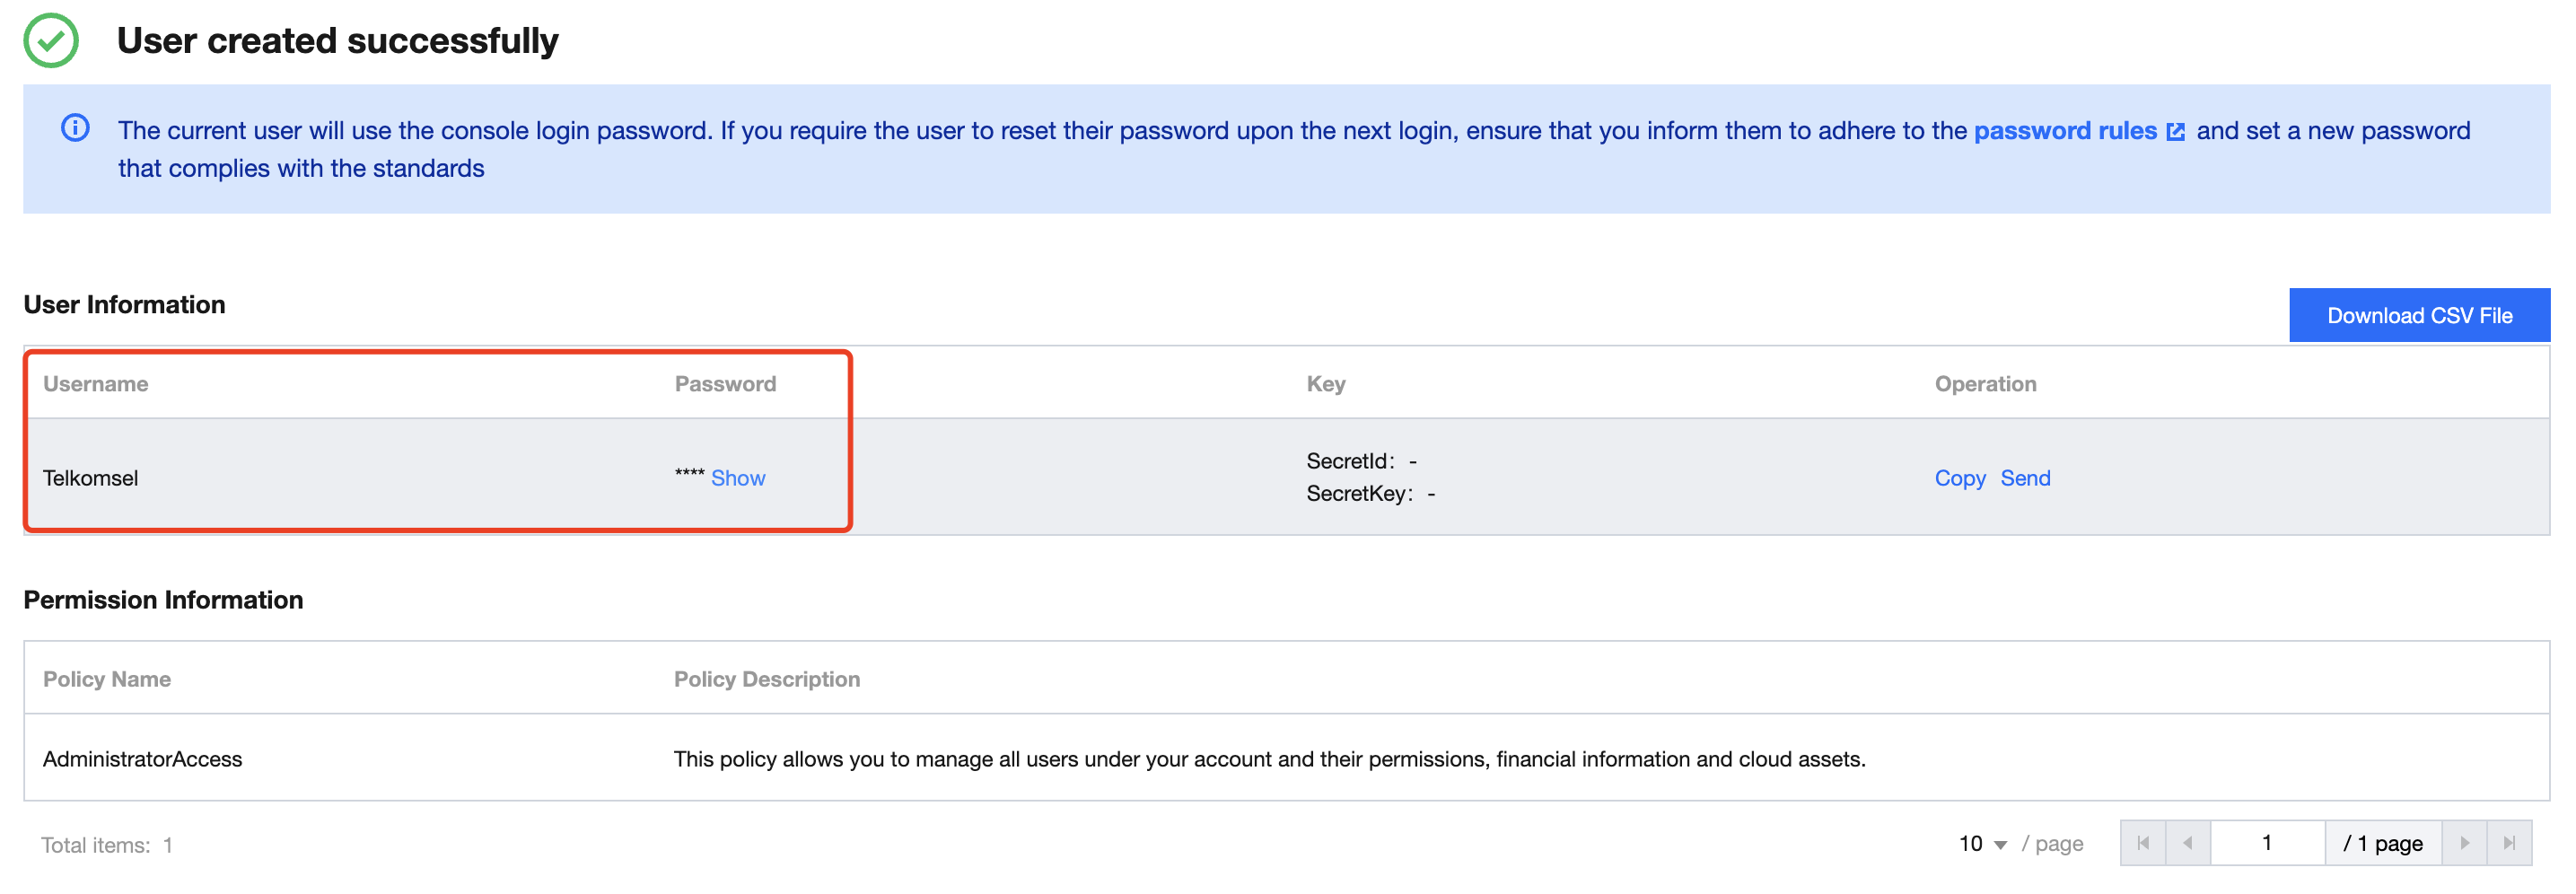
After creation, make sure to save the username and password.
2. Confirming Sub-user Addition
Return to the User List page and refresh it to view the created sub-user.
Once the sub-user has been successfully added, you can assign a role to the user.
II. Sub-account Management
1. Authorizing a Sub-account
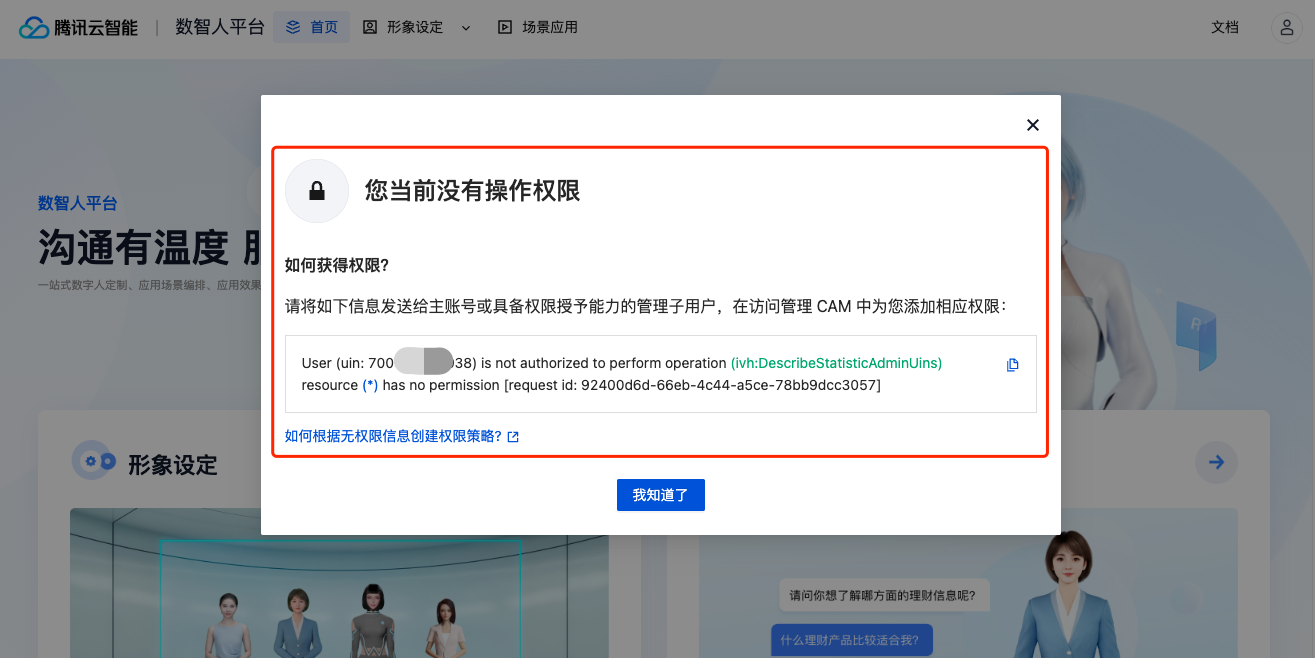
If a sub-account is created without being assigned any permissions, the following prompt will appear when the sub-account attempts to log in:
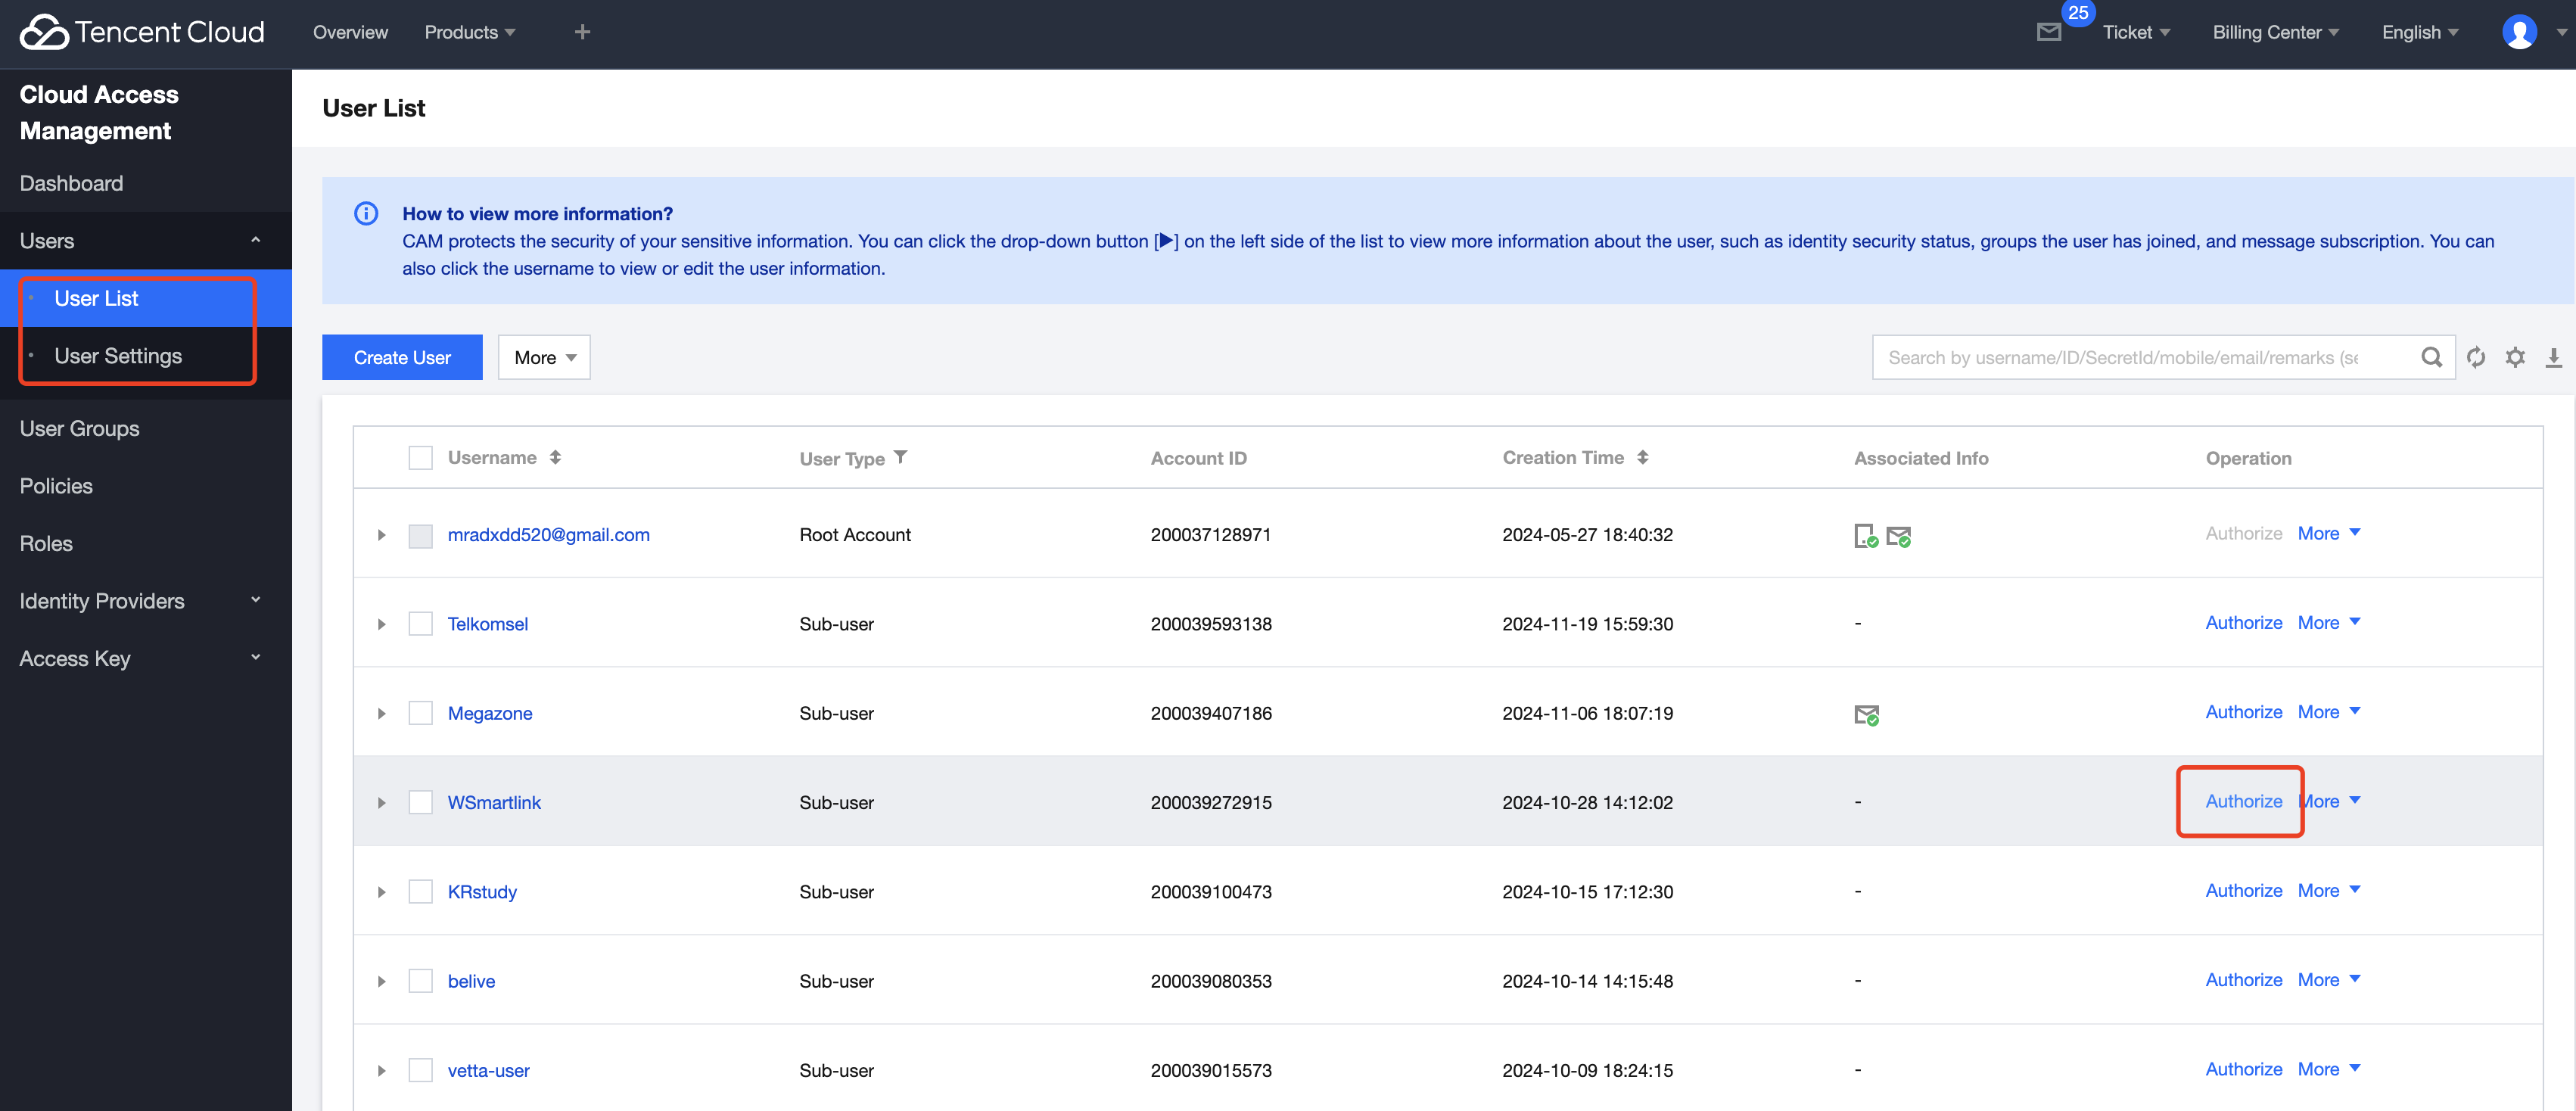
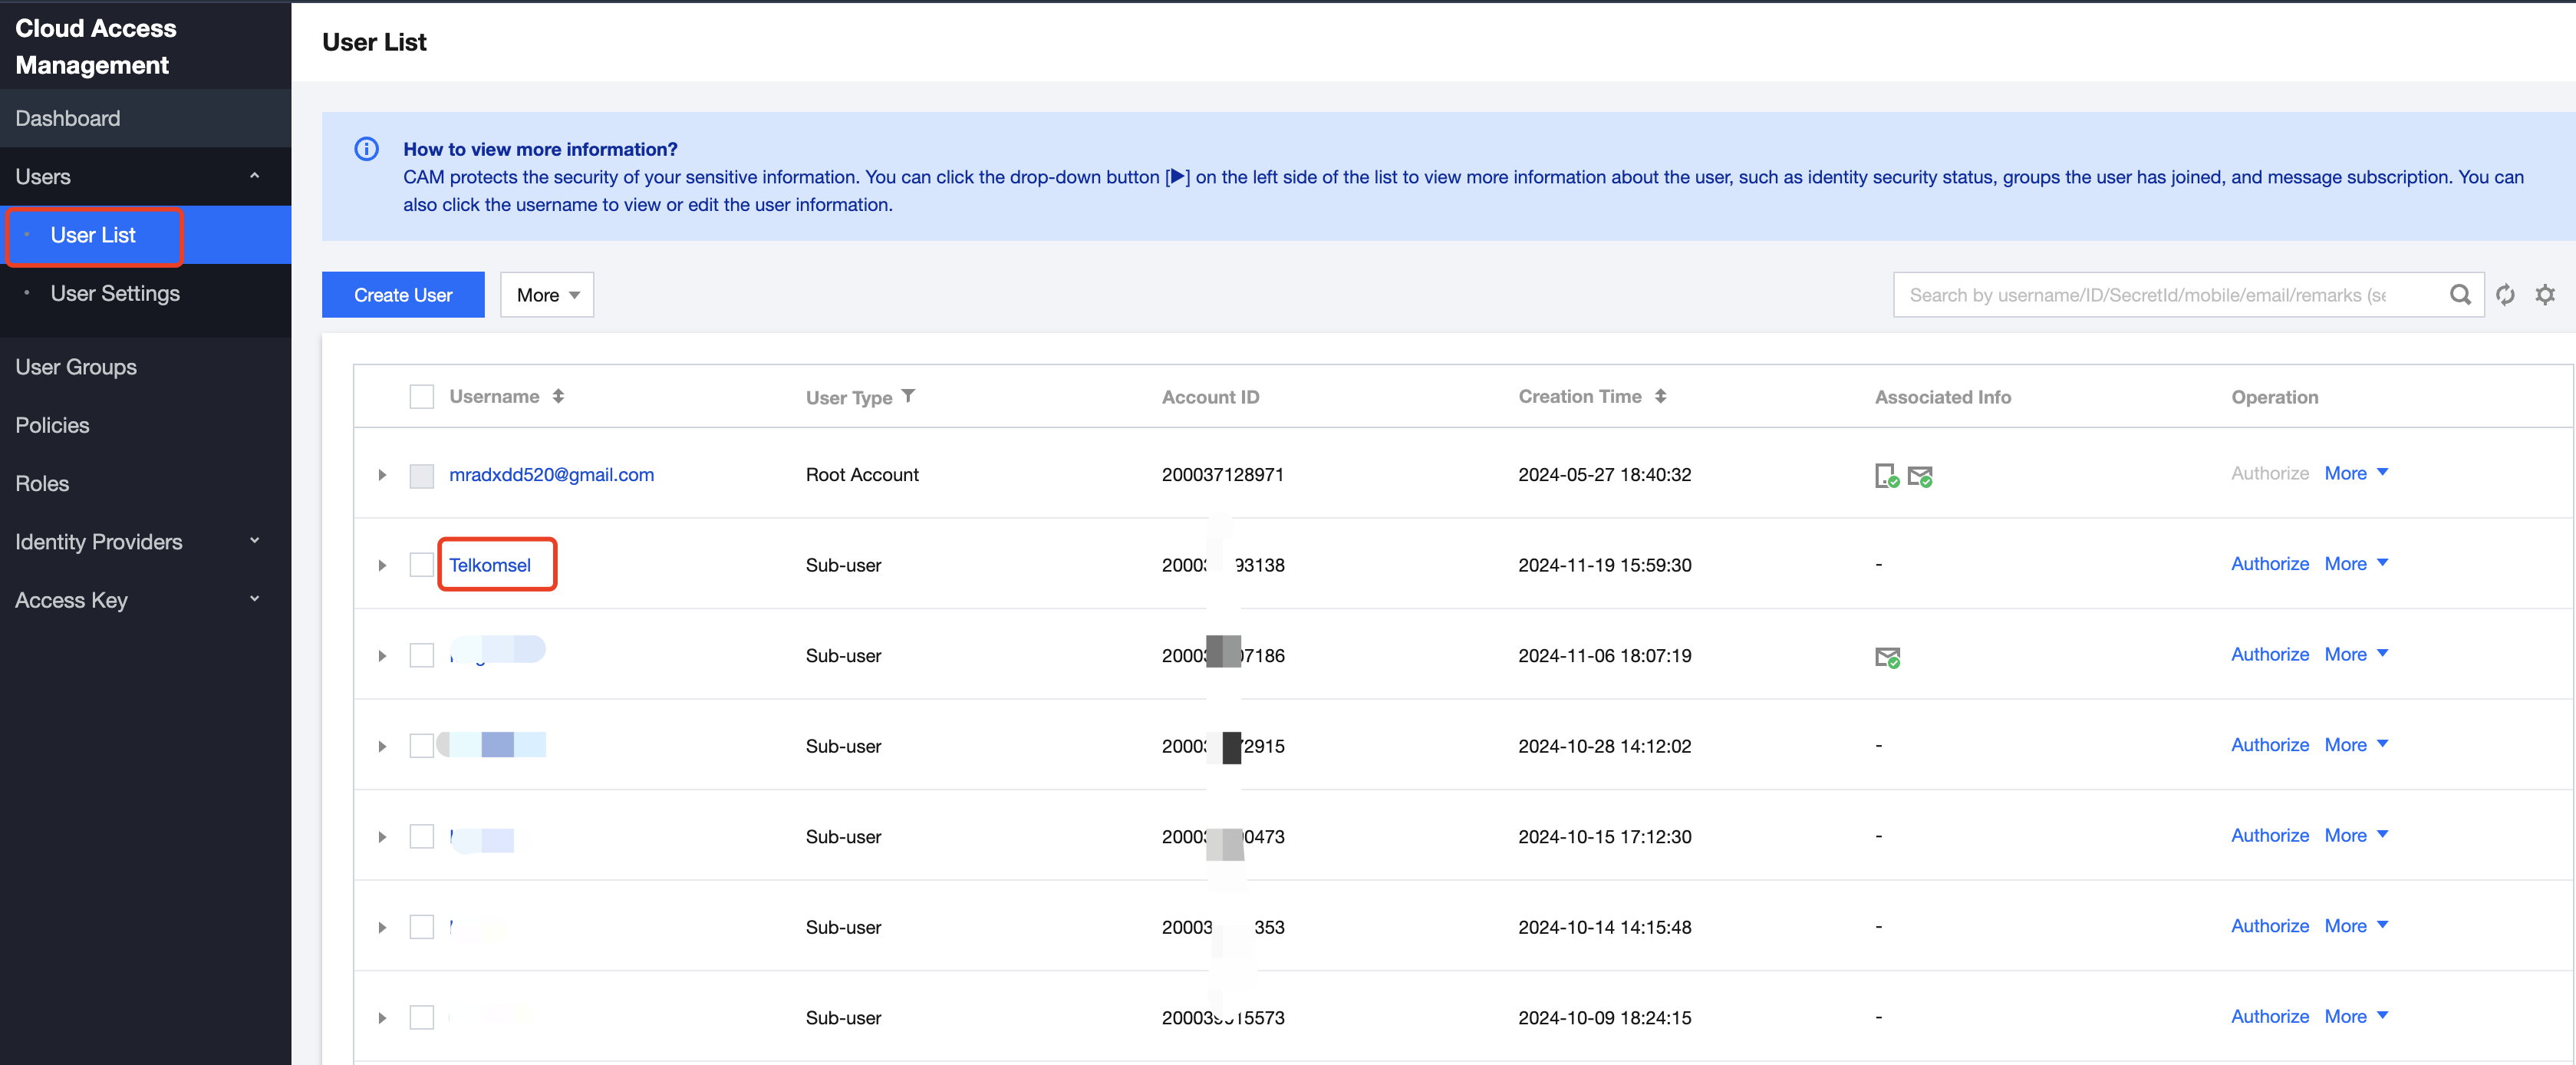
Select user > User List, and then select the sub-account you want to authorize, as shown in the diagram below:
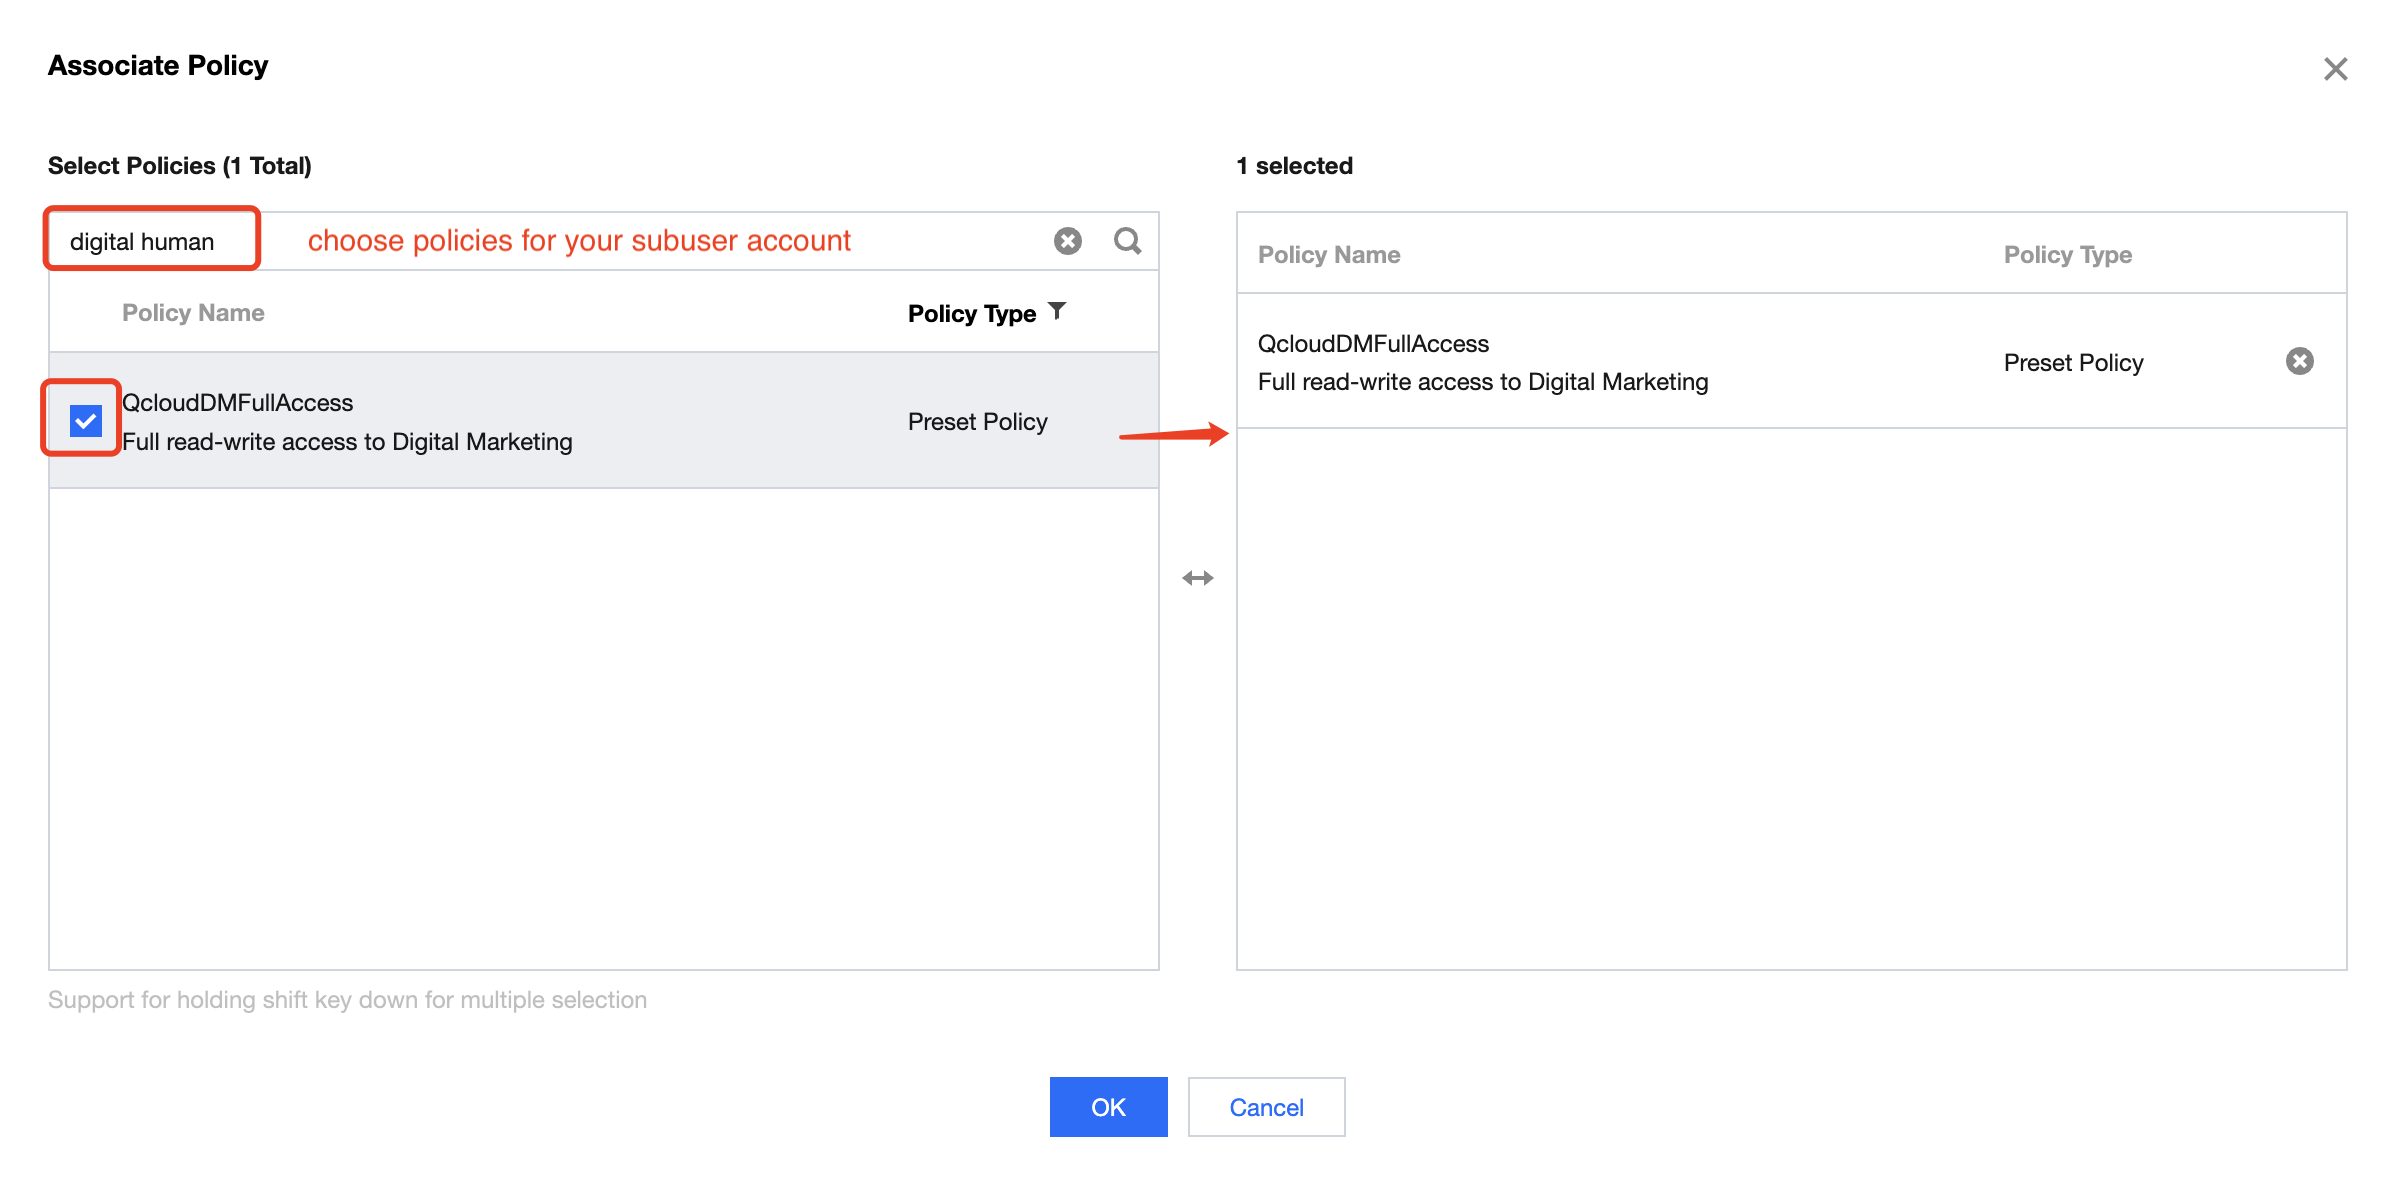
After you click Authorization, search for Digital Human in the policies selection. Select the appropriate policy to authorize the account, and then click OK to complete the process, as shown in the diagram below:
Note:
Full read-write access = Ability to view account assets + Create digital human projects.
Read-only access = Ability to view account assets only.
Once authorization is completed, the sub-account will have the corresponding permissions to use the TCADH platform.
2. Revoking Sub-account Authorization
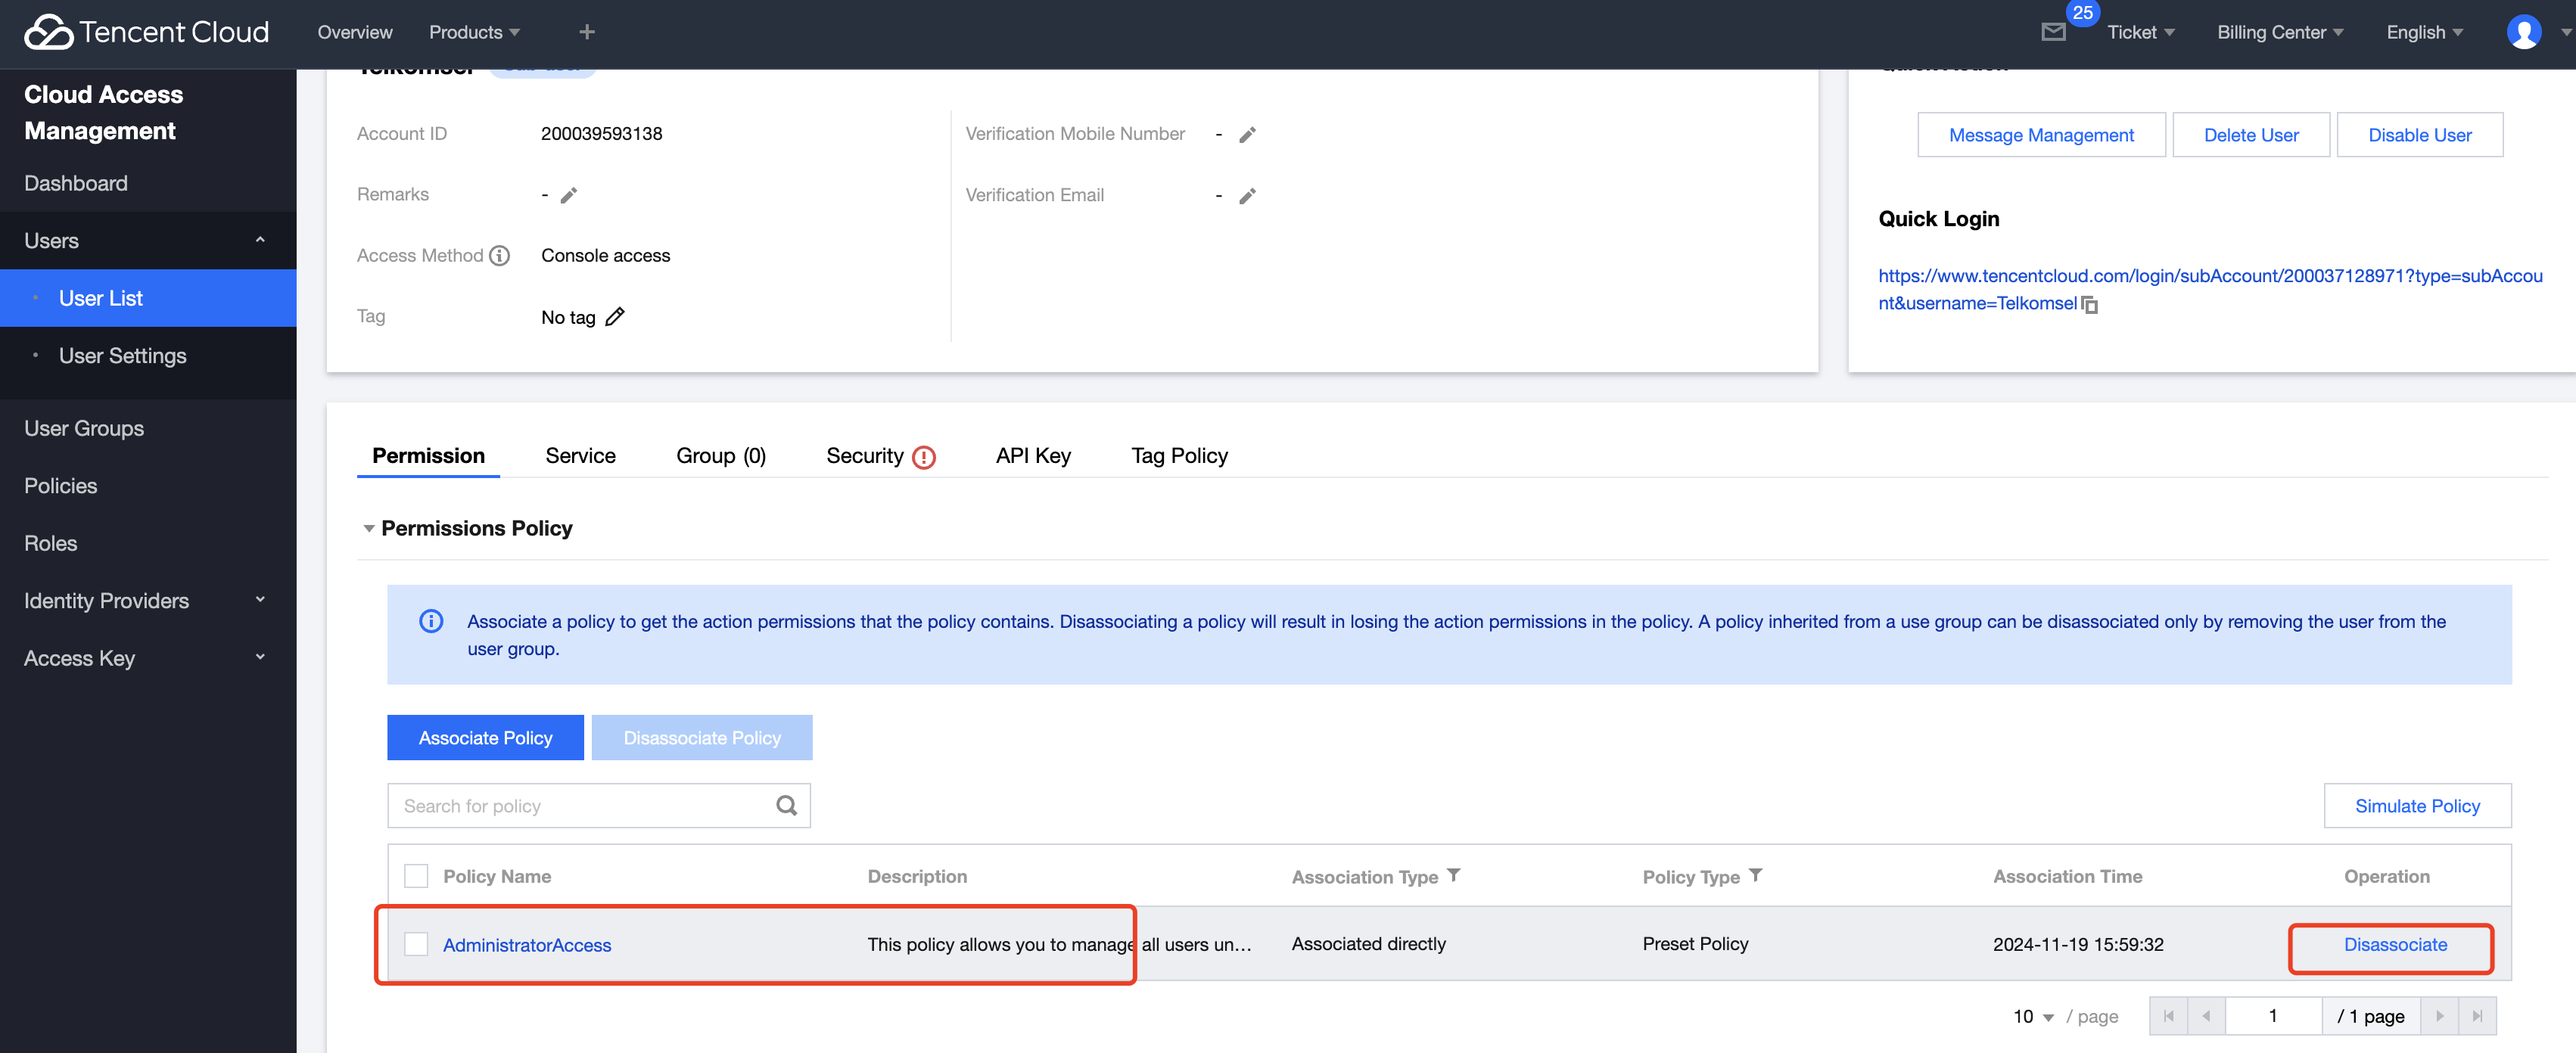
To revoke authorization for a specific sub-account, go to the user list and click the sub-account name, as shown in the diagram below:
After the click, go to the Permission Policy and remove the relevant permissions, as shown in the diagram below:
III. Sub-user Login Method
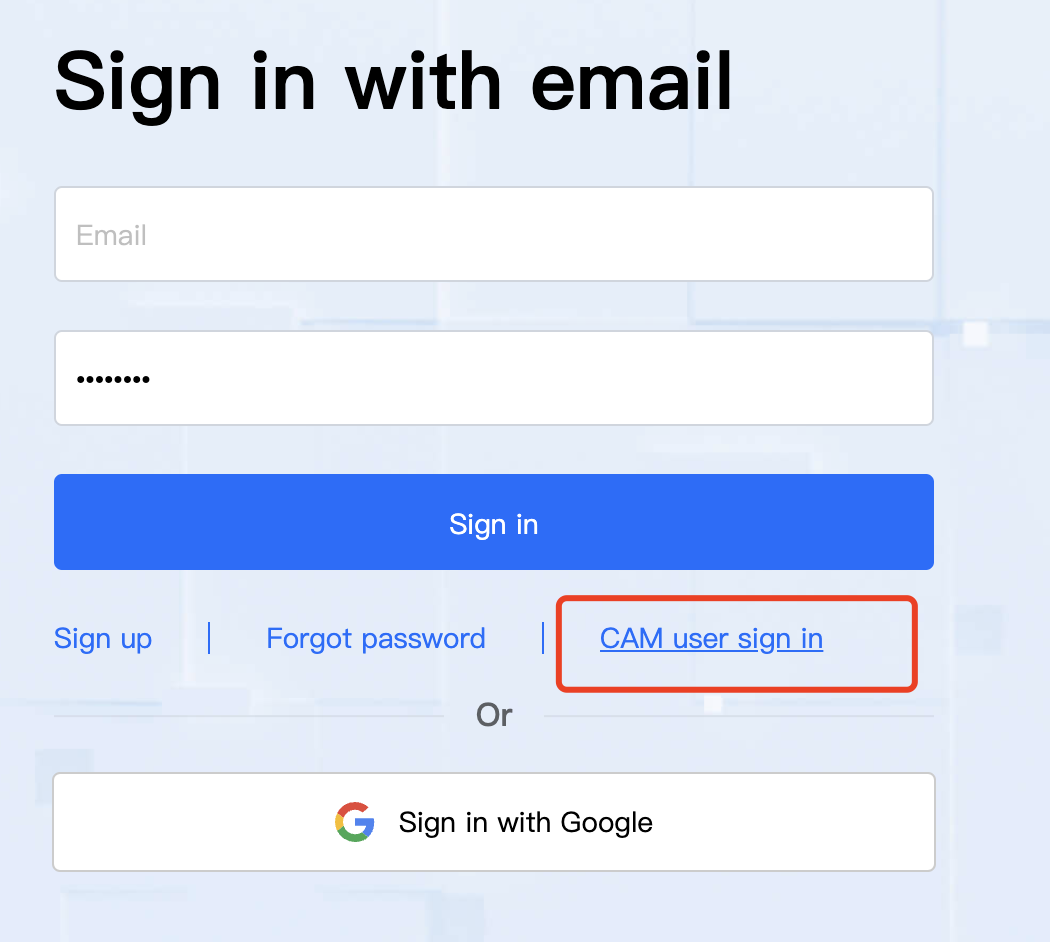
After the activation, the login entry for sub-users is shown in the diagram below: