tencent cloud

Tencent Cloud Super App as a Service

Release Notes and Announcements
Announcement: Tencent Cloud Mini Program Platform Renamed to Tencent Cloud Super App as a Service on January 2, 2025
Console Updates
Android SDK Updates
iOS SDK Updates
Flutter SDK Updates
IDE Updates
Base Library Updates
Product Introduction
Overview
Strengths
Use Cases
Purchase Guide
Billing Overview
Pay-As-You-Go Billing
Renewal Guide
Service Suspension Instructions
Getting Started
Plan Management
Overview
Console Account Management
Storage Configuration
Acceleration Configuration
Branding Configurations
Platform Features
Console Login
Users and Permission System
Mini Program Management
Mini Game Management
Superapp Management
Commercialization
Platform Management
User Management
Team Management
Operations Management
Security Center
Code Integration Guide
Getting Demo and SDK
Android
iOS
Flutter
Superapp Server
GUID Generation Rules
Mini Program Development Guide
Mini Program Introduction and Development Environment
Mini Program Code Composition
Guide
Framework
Components
API
Server Backend
JS SDK
Base Library
IDE Operation Instructions
Mini Game Development Guide
Guide
API
Server Backend
Practice Tutorial
Mini Program Login Practical Tutorial
Mini Program Subscription Message Practical Tutorial
Payment Practical Tutorial
Ad Integration Practical Tutorial
Mini Game Subscription Message Practical Tutorial
API Documentation
History
Introduction
API Category
Making API Requests
Operation Management APIs
User Management APIs
Team Management APIs
Sensitive API-Related APIs
Role Management APIs
Platform Management APIs
Other Console APIs
Mini Program or Mini Game APIs
Management-Sensitive APIs
Global Domain Management APIs
Superapp APIs
Data Types
Agreements
Service Level Agreement
Data Processing and Security Agreement
SDK Privacy Policy Module
SDK Data Processing and Security Agreement Module

Practical Tutorial for Superapps

PDF
Focus Mode
Font Size
Last updated: 2026-03-22 10:03:37

1. Initialization

Extend and implement the MiniConfigProxy class.
Add the following annotations for the implementation class of MiniConfigProxy:
@ProxyService(proxy = MiniConfigProxy.class)
Example:
@ProxyService(proxy = MiniConfigProxy.class)
public class MiniConfigProxyImpl extends MiniConfigProxy {
/**
* Obtains the Application instance of the superapp
* Note: 1. The mini program adopts a multi-process architecture. Ensure that sub-processes can also properly access the Application instance.
* 2. It is recommended to cache the Application instance in Application.attachBaseContext
* to prevent the SDK from obtaining a null Application instance due to component timing issues.
* @return
*/
@Override
public Application getApp() {
// Must use the Application instance of the superapp
return "your superapp Application";
}

/**
* Creates initialization configuration information
* @return
*/
@Override
public MiniInitConfig buildConfig() {
MiniInitConfig.Builder builder = new MiniInitConfig.Builder();
MiniInitConfig config = builder
.configAssetName("tcsas-android-configurations.json") // Configuration file name in assets
.autoRequestPermission(true) // Whether to automatically request system permissions for APIs that require permissions
.debug(true) // Log switch, default is off
.build();
return config;
}
}
Note:
1. The configAssetName in MiniConfig is used to specify the path and name of the configuration file in the source code project.
2. Since the SDK initially retrieves the superapp's Application instance from an internal ContentProvider, it is recommended to cache the Application instance in the Application.attachBaseContext method. This prevents the SDK from obtaining a null Application instance due to timing issues.
At this point, the integration of the mini program SDK is complete. The next step is to use the APIs provided by the mini program SDK to open and preview mini programs.

2. Open a mini program

When opening the mini program, the system will check whether there is a locally cached one. If not, it will automatically download the mini program from the remote server and then open it. If a cached version is available, the local mini program will be opened first while the system checks in the backend for any new versions on the server.
Note:
If a new version is available, it will be downloaded, and the next time you open the mini program, the updated version will be used.
Launch parameter description:
/**
* Whether to force update when opening the mini program (effective for cold startup). false: Prioritizes using local cache while asynchronously fetching the latest data. true: Opens the mini program only after receiving a network response.
*/
public boolean isForceUpdate = false;
/**
* Entry address, supports adding parameters: path?key=value&key1=value1
*/
public String entryPath;
/**
* Receives error messages during the mini program launch process
*/
public ResultReceiver resultReceiver;

/**
* Mini program launch parameters
*/
public String params;

/**
* Sets the task mode to be used when opening the mini program
*
* false: Multi-task mode; true: Single-task mode
*/
public boolean isSingleTask;
Open a mini program using the mini program appid
// Open a mini program using the mini program appid
//
TmfMiniSDK.startMiniApp(activity, appId, new MiniStartOptions());

2.1 Open a mini program using the mini program appid

On the home page of the superapp, open the released version (that has been approved and released online) of the mini program from the mini program list. See the example below:
TmfMiniSDK.startMiniApp(activity, appId, miniStartOptions);
Note:
The appId is the ID of the mini program, which can be obtained from the mini program developer or via the mini program search API.

2.2 Scan the QR code to open a mini program

The mini program SDK provides an API to open mini programs based on QR code scanning. Before using the scanning capability provided by the mini program SDK, you need to integrate the scanning extension capability. For details about the integration, refer to QR code scanning extension SDK.
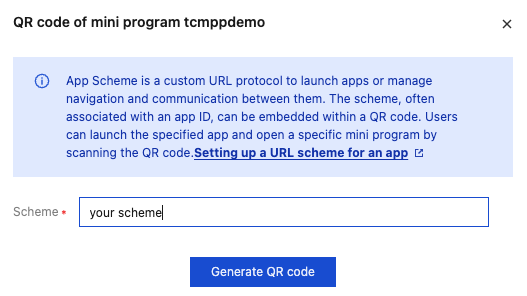
TmfMiniSDK.startMiniAppByScan(activity);
Mini programs can be opened by third-party apps and scanning tools via URL redirection. Before you can use this capability, you need to configure the URL Scheme of the superapp by adding the following string resource to the superapp:
<string name="mini_sdk_intent_filter_scheme">your scheme</string>
where your scheme should be replaced by the superapp's Scheme.
The host of the mini program URL is applet and the full format of the URL is: ${scheme}://applet?appid=${appId}&path=${encoded path}&param=${encoded param}. Parameters in the URL are as follows:
Parameter
Type
Required
Description
appId
String
true
Mini program appid
path
String
false
Mini program entry path, which requires URL encoding.
param
String
false
The query passed to the mini program, which requires URL encoding.
In the console, a corresponding URL is created for the released version of each mini program and a QR code is generated based on the URL. When a URL is created, tcmpp + superapp’s appKey is used as the Scheme by default.

To ensure that a correct URL is generated, please replace it with the superapp’s URL Scheme. Click Modify to change the Scheme used to generate the URL:

Once configured, you can open the mini program by scanning the generated QR code or via URL redirection.

3. Display the mini program list

3.1 Use the search API to retrieve all mini programs

The mini program SDK provides an API for online mini program searches, allowing you to search for mini programs by keywords and categories. If the keyword and category are empty, all mini programs will be returned:
Note:
SearchOptions parameter is used to specify the keywords and category information for the mini program search.
MiniCallback parameter is used to retrieve the search results for the mini programs.
/**
* Mini program search
*
* @param searchOptions
* @param callback
*/
public static void searchMiniApp(SearchOptions searchOptions, MiniCallback<List<MiniApp>> callback)

3.2 Get the recently accessed mini programs

The mini program SDK provides the following APIs to access the list of recently accessed mini programs.
/**
* Gets the list of recently accessed mini programs
* @param callback
*/
public static void getRecentList(IRecentMiniCallback callback)

4. Switch the language

The SDK engine currently supports Simplified Chinese, Traditional Chinese, English, French, Arabic, and Indonesian. Set the language using the MiniAppProxy API:
// Implement the MiniAppProxy API
public class YourMiniAppProxyImpl extends BaseMiniAppProxyImpl {
@Override
public Locale getLocale() {
// Return the language you want to set
return Locale.SIMPLIFIED_CHINESE; // Simplified Chinese
// or return Locale.US; // English
// or return new Locale("ar", "SA"); // Arabic
// or return new Locale("in", "ID"); // Indonesian
// or return Locale.FRANCE; // French
}
}

5. Switch the account

The mini program SDK provides open APIs for implementing features that are provided by superapps, such as login, user information retrieval, and payment.
Note:
The return value is the user account (must be unique). After setting, the data will be stored in isolation based on the account. Typically, you would use uin or openid. This account will also be used in login, user information retrieval, payment, and other Open APIs processes.
/**
* User account, must be unique. After setting, data will be stored in isolation based on the account. Typically, use uin or openid
*/
@Override
public String getAccount() {
return "tmf_test";
}
Note:
When a user logs out, the mini program termination API needs to be called to prevent sandbox data from being shared across different users. Here is an example:
TmfMiniSDK.stopAllMiniApp(MainActivity.this);

6. Customize the capsule button

Customize the Close button event listener

You can customize the Close button event listener to allow the superapp to receive callback events when the Close button is tapped.
Close button in the image:

API description:
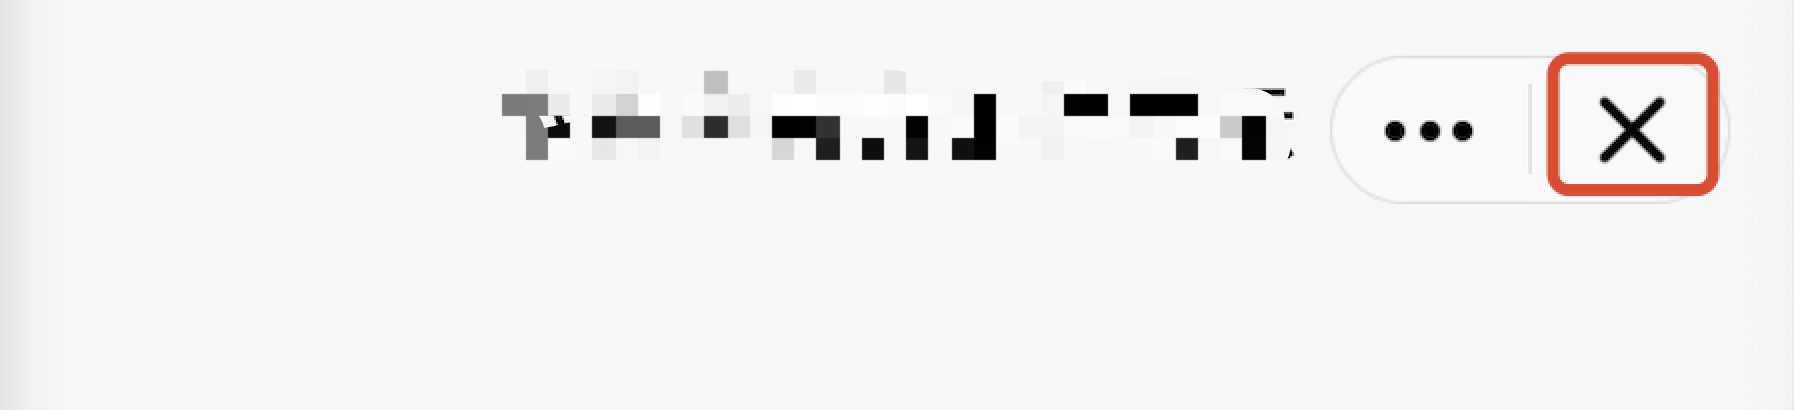
The return value of the onCapsuleButtonCloseClick method indicates whether a custom close button listener is implemented. A return value of true indicates customization, while false (the default value) indicates the use of the default listener.
/**
* Tap event for the capsule button's close option
* Called in the subprocess.
*
* @param miniAppContext Mini program runtime environment (mini program process, not main process)
* @param onCloseClickedListener Callback when the mini program is closed
* @return - Returns false if this API is not supported
*/
public abstract boolean onCapsuleButtonCloseClick(IMiniAppContext miniAppContext,
DialogInterface.OnClickListener onCloseClickedListener);
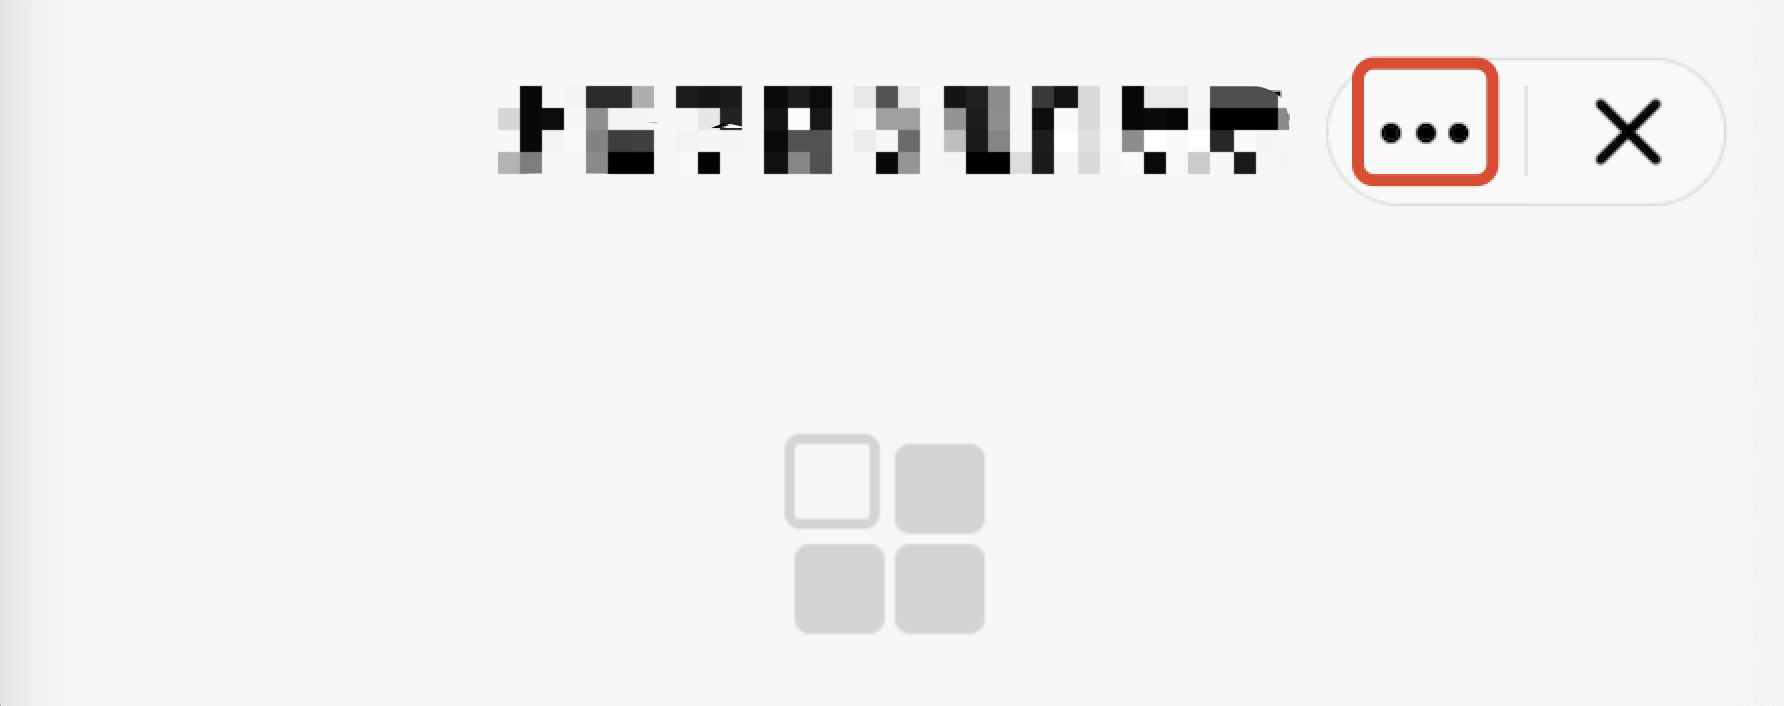
Customize the More button event listener

Customizing the event listener for the More button allows the superapp to capture the corresponding callback event when the More button is tapped.
More button in the image:

API Description: The onCapsuleButtonMoreClick method's return value indicates whether the More button listener is customized. A return value of true means it is customized, while false (the default value) means the default listener is used.
/**
* Tap event for the More options on the capsule button
*
* @param miniAppContext Mini program runtime environment
* @return - Returns false if this API is not supported
*/
public abstract boolean onCapsuleButtonMoreClick(IMiniAppContext miniAppContext);
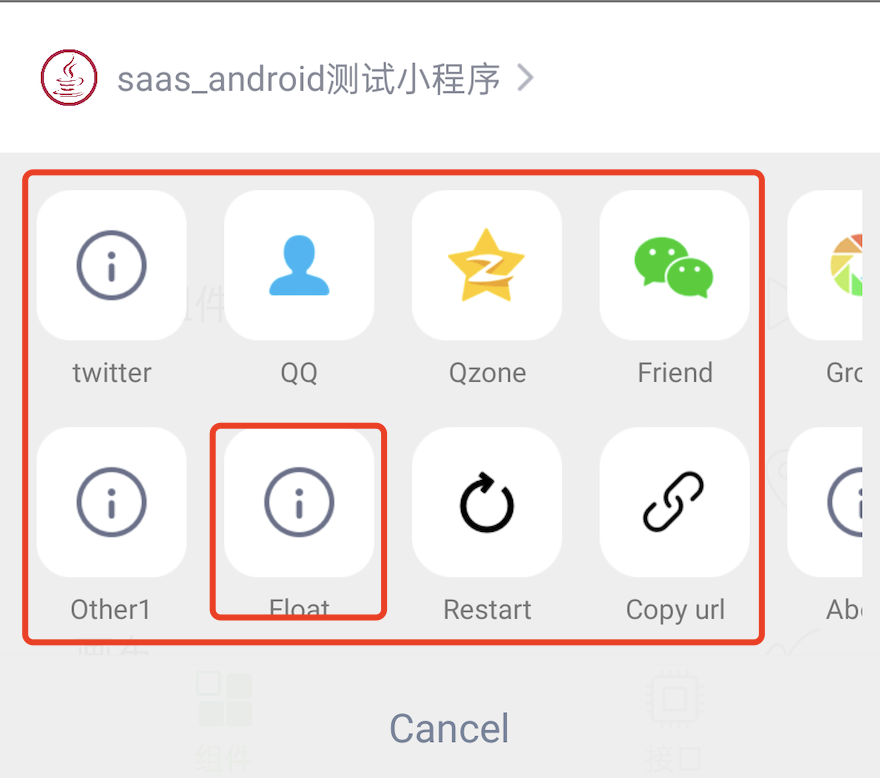
Customize the extended menu of the More button

When a user triggers the tap event for the More button, a list of optional extension buttons will pop up, as illustrated in the default list below:

By overriding the getMoreItems method in the MiniAppProxy class, you can customize the list of extension buttons for the More menu.
API description:
The getMoreItems method's return value represents the customized list of extension buttons.
Parameters MoreItemList.Builder is used to add extension buttons, and the display order of the buttons will match the order in which they are added.
MoreItem’s ID property is used to distinguish between buttons and must be unique.
/**
* Returns the buttons for the capsule's More panel. The IDs for extension buttons must be set within the range of [100, 200]; otherwise, the addition will be invalid.
* Calling environment: Subprocess
*
* @param builder
* @return
*/
public abstract ArrayList<MoreItem> getMoreItems(MoreItemList.Builder builder);

Warning:
The IDs for extension buttons must be set within the range of [100, 200]; otherwise, the addition will be invalid.
Example:
@Override
public ArrayList<MoreItem> getMoreItems(IMiniAppContext miniAppContext, MoreItemList.Builder builder) {
MoreItem item1 = new MoreItem();
// Set the menu ID (required), the ID for extension buttons must be within the range of [100, 200]; otherwise, the addition will be invalid.
item1.id = ShareProxyImpl.OTHER_MORE_ITEM_1;
// Set the menu title (optional)
item1.text = getString(miniAppContext, R.string.applet_mini_proxy_impl_other1);
// Set the menu icon (optional)
item1.drawable = R.mipmap.mini_demo_about;
// Set the visual accessibility description (optional). Defaults to the menu title.
item2.contentDescription = "Visual accessibility description for the menu";
// Listen for tap events
item2.onClickListener = new MoreItem.MoreItemClickListener() {
@Override
public void onClick(IMiniAppContext context, MoreItem item) {
// Handle tap event
}
};

// Adjust the order as needed
builder.addMoreItem(item1)
// Add built-in menu items as needed
.addRestart(getString(miniAppContext, R.string.applet_mini_proxy_impl_restart),
R.mipmap.mini_demo_restart_miniapp)
// Add built-in menu items as needed
.addAbout(getString(miniAppContext, R.string.applet_mini_proxy_impl_about),
R.mipmap.mini_demo_about)
// Add built-in menu items as needed
.addSetting(getString(miniAppContext, R.string.mini_sdk_more_item_setting_0),
R.drawable.mini_sdk_setting,
// Set the visual accessibility description (optional). Defaults to the menu title.
"Mini program settings");
return builder.build();
}

private String getString(IMiniAppContext miniAppContext, int id) {
return miniAppContext.getContext().getString(id);
}

7. Mini program internal UI

The SDK also supports custom UI display within the mini program.
Mini program API
AbsMiniUiProxy method
wx.showLoading
/**
* Customizes the loading page for checking updates in the mini program
* Calling environment: Main process
*
* @param context
* @return
*/
public abstract IMiniLoading updateLoadingView(Context context);
wx.showToast
/**
* Toast display API
* @param activity Current activity
* @param pageRoot Root ViewGroup of the current page
* @param toastInfo Toast information
* @return returns the toast instance
*/
IToast showToast(Activity activity, ViewGroup pageRoot, ToastInfo toastInfo);
wx.showActionSheet
/**
* General ActionSheet display API
* @param context Context
* @param actionSheetInfo ActionSheet information
* @return true if using a custom ActionSheet; false if using the SDK's default ActionSheet
*/
boolean showActionSheet(Activity context, ActionSheetInfo actionSheetInfo);

8. Output SDK runtime logs

By implementing the LogProxy in a mini program, developers can customize the way internal logs from the mini program SDK are handled and outputted.
public abstract class LogProxy {

/**
* Log printing
*
@param logLevel Log print level
* @param tag log tag
* @param msg Print message
* @param t Exception
*/
abstract public void log(int logLevel, String tag, String msg, Throwable t);

/**
* Whether to use colored output, used to control log display.
*/
abstract public boolean isColorLevel();
}

9. Dark mode handling

Currently, the UI in the SDK follows the system settings. The superapp can set the theme by implementing the IDarkModeProxy and overriding the isDarkMode method.
public interface IDarkModeProxy {
boolean isDarkMode();
}

11. Custom APIs

10.1 No-UI type

If a mini program needs capabilities from the superapp that the SDK doesn't support, developers can register custom APIs to enable these capabilities. This allows the mini program to call custom APIs provided by the superapp.
The superapp inherits the BaseJsPlugin to implement the custom mini program API capabilities.
Note:
Inherit BaseJsPlugin and define it with the annotation @JsPlugin(secondary = true).
Define a method that can only have one parameter, which must be of type RequestEvent.
Use the annotation @JsEvent("event name") on the method. When the mini program's JavaScript calls "event name," the corresponding method marked with @JsEvent will be called.
@JsEvent supports defining multiple event names.
You can choose to return data synchronously or asynchronously (only one method can be used for the same event).
You can call sendState to return intermediate states to the mini program multiple times. After calling sendState, you must call ok or fail to indicate the end of the entire process.
Example:
@JsPlugin(secondary = true)
public class CustomPlugin extends BaseJsPlugin {

@JsEvent("testSync")
public String custom1(final RequestEvent req) {
// Get the parameters
//req.jsonParams
// Return the data synchronously
JSONObject jsonObject = new JSONObject();
try {
jsonObject.put("key", "value");
} catch (JSONException e) {
throw new RuntimeException(e);
}
return req.okSync(jsonObject);
}

@JsEvent("testAsync")
public void getAppBaseInfo(final RequestEvent req) {
// Get the parameters
//req.jsonParams
// Return the data asynchronously
//req.fail();
//req.ok();
JSONObject jsonObject = new JSONObject();
try {
jsonObject.put("key", "test");
} catch (JSONException e) {
e.printStackTrace();
}
req.ok(jsonObject);
}
}
In a mini program, you can use it like this:
// Asynchronous API call
var opts = {
api_name: 'testAsync',
success: function(res) {},
fail: function(res) {},
complete: function(res) {},
data: { // Input parameters
name: 'kka',
Age 22
}
}
wx.invokeNativePlugin(opts);

// Synchronous API call
var opts = {
api_name: 'testSync',
sync:true
}
var rst = wx.invokeNativePlugin(opts);

10.1.1 Advanced usage

Custom APIs can also be configured through the superapp configuration file, allowing direct calls in the mini program using wx.api.
1. Place the configuration in customapi-config.json. Example content:
{
"extApi":[{
"name": "test",
"sync": false,
"params": {
"data": ""
}
},
{
"name": "testSync",
"sync": true,
"params": {
"name": "",
"title": ""
}
}
]
}


2. Put customapi-config.json into the Android project’s assets directory.

3. Specify the path to the custom API configuration file in the code
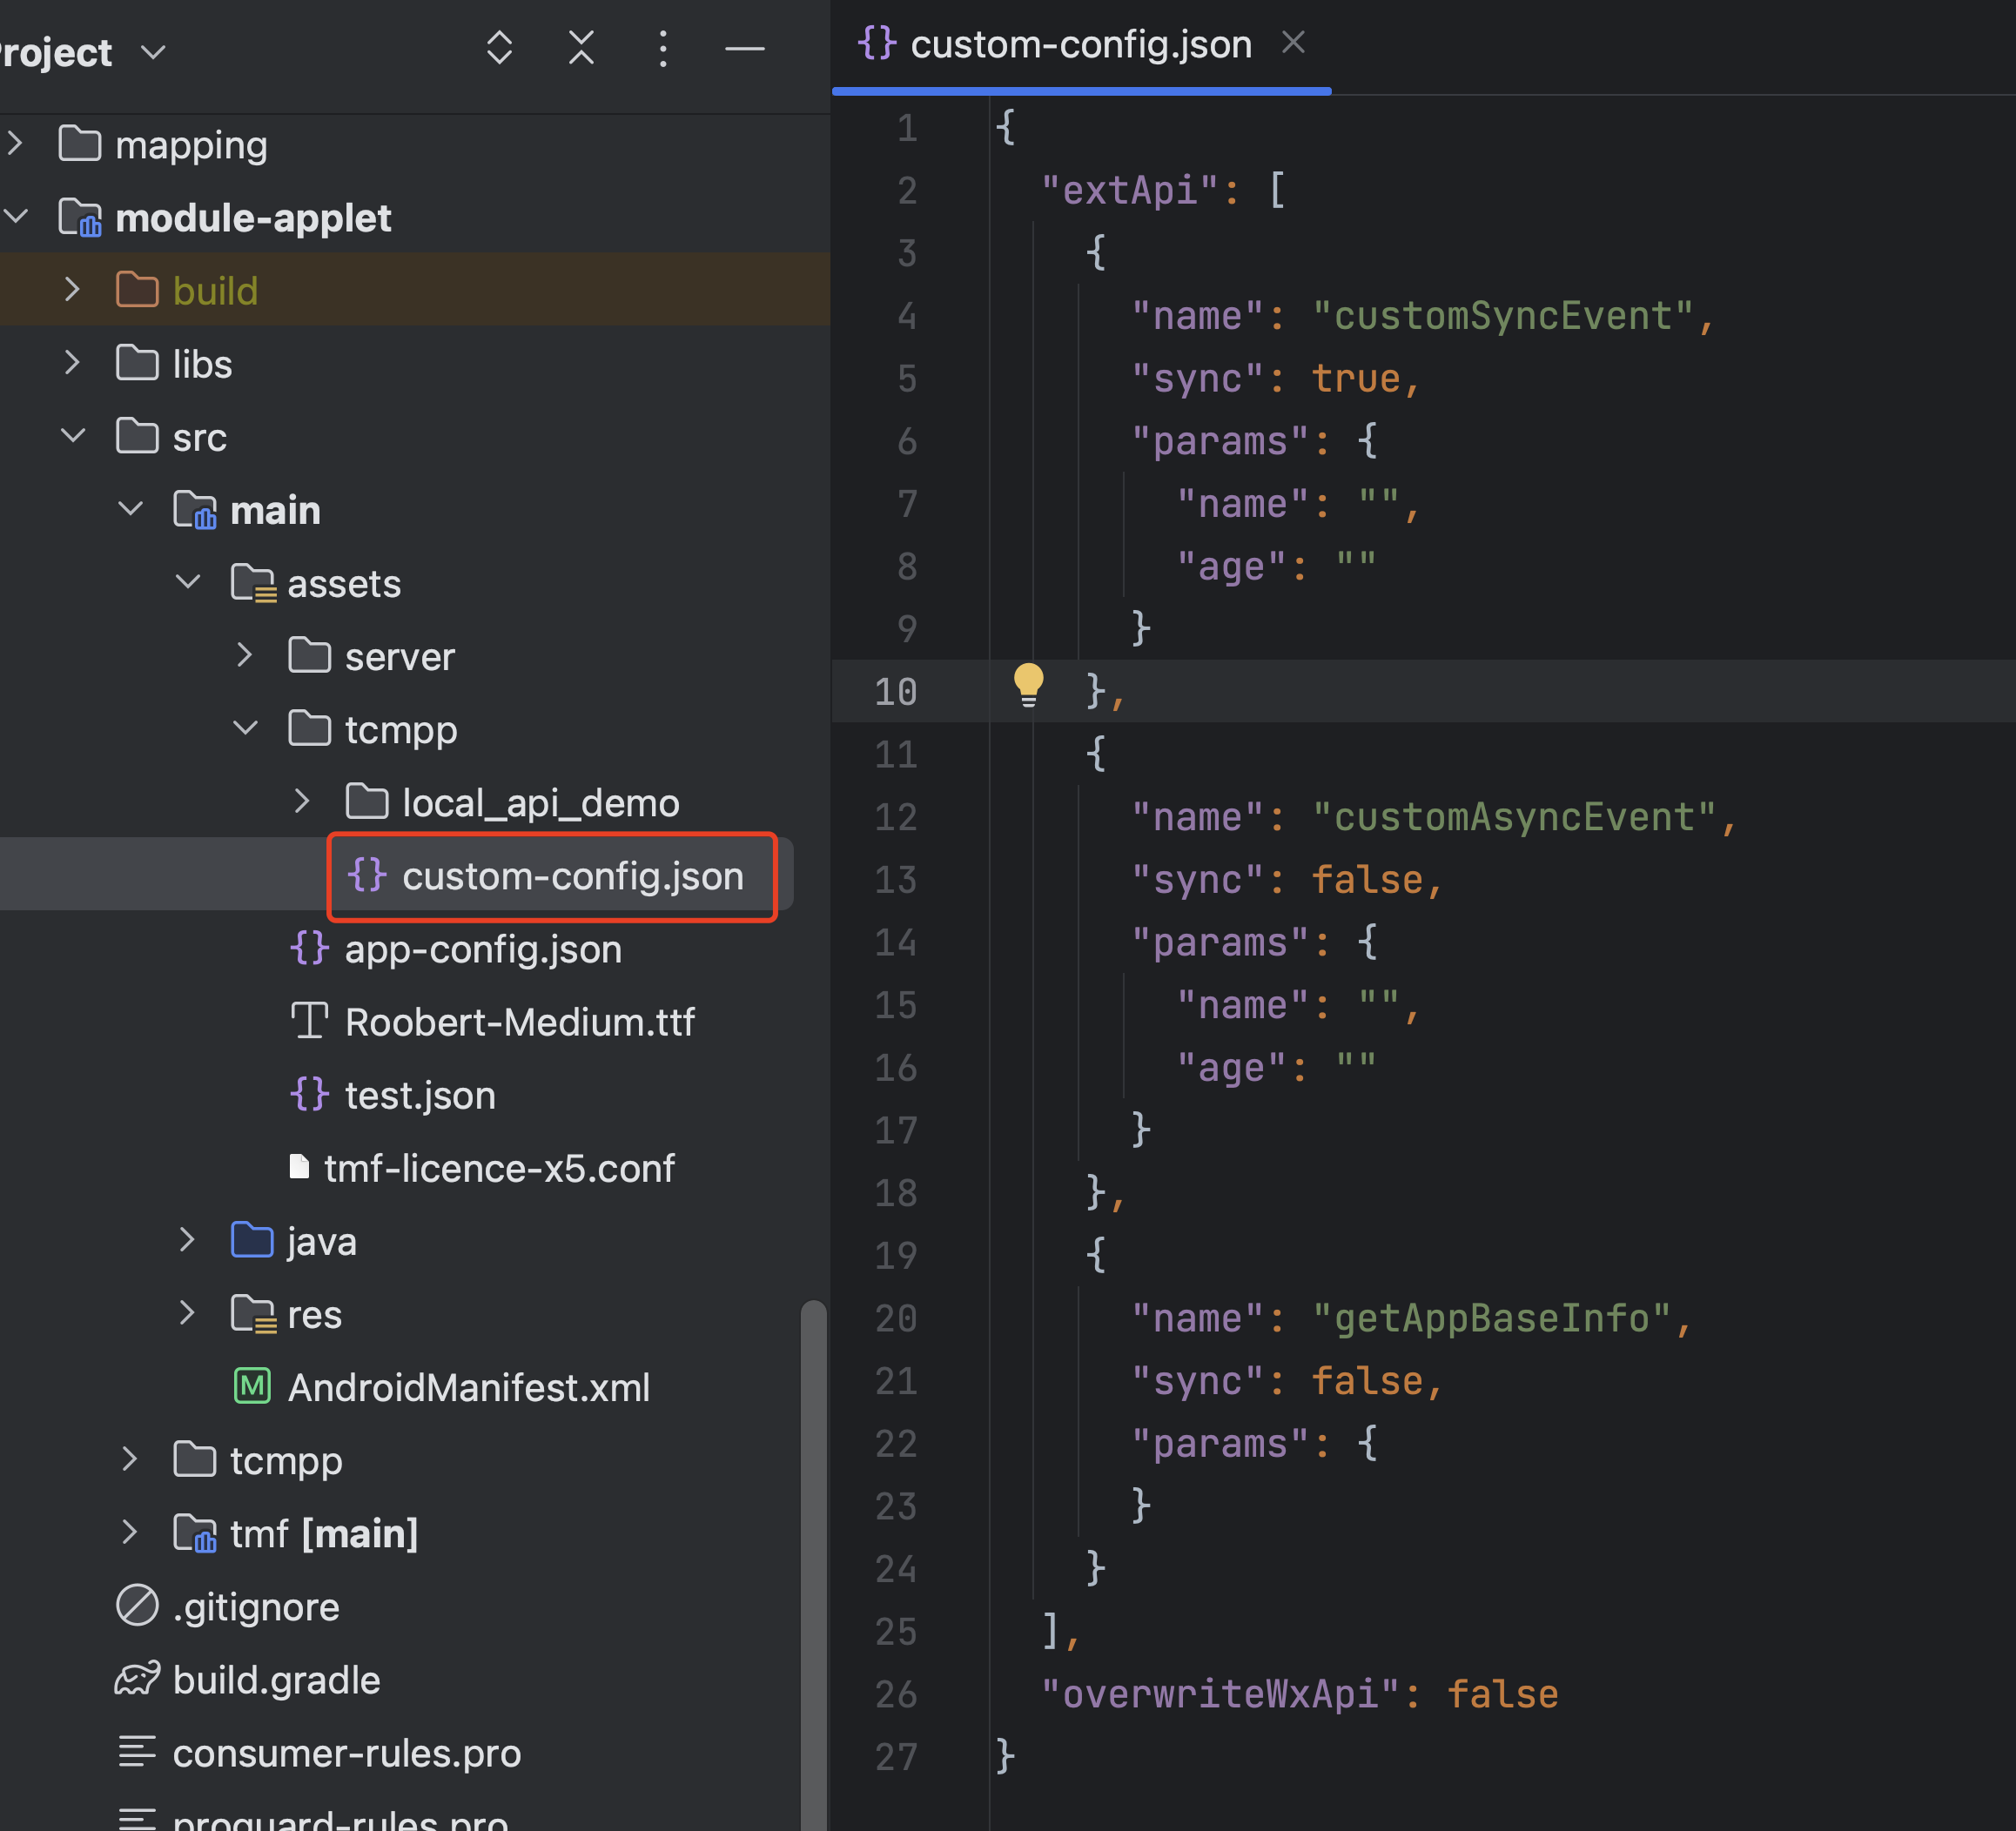
@ProxyService(proxy = MiniAppProxy.class)
public class MiniAppProxyImpl extends BaseMiniAppProxyImpl {
@Override
public MiniConfigData configData(Context context, int configType, JSONObject params) {
if(configType == MiniConfigData.TYPE_CUSTOM_JSAPI) {
// Custom JSAPI configuration
MiniConfigData.CustomJsApiConfig customJsApiConfig = new MiniConfigData.CustomJsApiConfig();
customJsApiConfig.jsApiConfigPath = "tcmpp/custom-config.json";


return new MiniConfigData
.Builder()
.customJsApiConfig(customJsApiConfig)
.build();
}
return null;
}
4. Call the custom API directly using wx.test() in the mini program.
// Asynchronous API call
var opts = {
success: function(res) {},
fail: function(res) {},
complete: function(res) {},
data: {
name : 'kka',
age : 22
}
}
wx.testAsync(opts);

// Synchronous API call
var rst = testSync(opts);

10.2 Custom UI

Users of mini program SDK can customize client native components for the mini program. Mini program developers can create and operate native components on mini program pages and communicate with them by using specific mini program APIs. On Android, native client components are rendered above the mini-program page, do not support zIndex, and will always overlay other mini-program components, potentially obscuring mini-program content. These components are drawn as regular Views.
Note:
To implement extended components, both the mini program developers and the host application developers need to make modifications. The combination of these modifications enables the extension of mini program view components.
App developers need to implement specific proxies to create native components and respond to operations on them when the mini program calls custom component APIs.

10.2.1 Native component extensions

To customize the creation of native components, the host can override the proxy settings as follows:
@ProxyService(proxy = ExternalElementProxy.class)
public class MyExternalElementProxy extends ExternalElementProxy{}
The proxy needs to implement the following methods:
1. Insert a component. This method is called when the mini program inserts a native component into the page. Developers need to implement this method and add the custom component as a child View to the container provided by the parent parameter.
/**
* Creates a component. This API is called when the mini program creates a custom native component.
*
* @param widgetId Unique ID of the component created by the mini program
* @param widgetContext Context of the mini program component, used for callbacks to the mini program
* @param type Type name of the component created by the mini program
* @param parent Parent container that holds the native component
* @param params Parameters passed when the mini program creates the component
*/
public abstract void handleInsertElement(long widgetId, ExternalWidgetContext widgetContext,
String type, ViewGroup parent, JSONObject params);
2. Update a component. This method is called to notify the superapp when the position or size of the native component changes within the mini program. The layout of the parent container of the native component will be adapted to the new style, and the native component itself can be adjusted as needed.
/**
* Updates component style. This API is called when the mini program updates the style of a custom native component.
*
* @param widgetId Mini program component ID
* @param widgetContext Context of the mini program component, used for callbacks to the mini program
* @param params Parameters passed when the mini program creates the component
*/
public abstract void handleUpdateElement(long widgetId, ExternalWidgetContext widgetContext,
JSONObject params);
3. Operate a component. This method is called when the mini program sends an event to a native component (e.g., button click, status change). The specific content of the event needs to be defined by the developer in params.
/**
* Operates a component. This API is called when the mini program needs to send commands or call special methods on the component.
*
* @param widgetId Mini program component ID
* @param widgetContext Context of the mini program component, used for callbacks to the mini program
* @param params Parameters passed when the mini program creates the component
*/
public abstract void handleOperateElement(long widgetId, ExternalWidgetContext widgetContext,
JSONObject params);
4. Delete a component. This method is called to notify the app when the mini program deletes a native component. At this point, the component's parent container is removed and the app should destroy the component.
/**
* Deletes a component
*
* @param widgetId Mini program component ID
* @param widgetContext Context of the mini program component, used for callbacks to the mini program
*/
public abstract void handleRemoveElement(long widgetId, ExternalWidgetContext widgetContext);

10.2.2 Mini program native component context

The context of mini program components contains methods that allow native components to send messages to the corresponding mini program components. The onExternalElementEvent method is used to send an onExternalElementEvent event directly to the mini program, and the mini program should capture and process the event. The callbackSuccess and callbackFail methods are used to call the success or fail callbacks respectively when the mini program calls an API to send an event to the superapp.
/**
* Sends the onExternalElementEvent event to the mini program
*
* @param jsonObject JSON data carried with the event
*/
public final void onExternalElementEvent(JSONObject jsonObject);

/**
* Calls the success callback method provided by the mini program
*
* @param jsonObject JSON data for the callback, can be null
*/
public final void callbackSuccess(JSONObject jsonObject);

/**
* Calls the fail callback method provided by the mini program
*
* @param jsonObject JSON data for the callback, can be null
/// @param message Error message
*/
public final void callbackFail(JSONObject jsonObject, String message);

10.2.3 Implementation of mini program extension

To insert a custom client-side component into a mini program page, you need to include an external-element node in the WXML:
<external-element
id="comp1"
type="maTestView"
_insert2WebLayer="true"
style="width: 200px;height: 100px;"
bindexternalelementevent="handleEvent"
></external-element>
The type should match the component type name agreed upon with the superapp._insert2WebLayer indicates whether the component is a same-layer component or a non-same-layer component (true for same-layer, which requires the client to implement a same-layer component proxy; false for non-same-layer, which requires the client to implement a non-same-layer proxy). The bindexternalelementevent can capture events passed from the native side, such as onExternalElementEvent or onXWebExternalElementEvent. The callback parameters include:
{
target,
currentTarget,
timeStamp,
touches,
detail, // parameters passed from native
}
Then, the mini program creates a context associated with this node using its ID.
this.ctx = wx.createExternalElementContext('comp1');
This method notifies the superapp to create the corresponding native component at the position of the node. Once the context is created, the mini program can send events to the native component and perform operations on it through this context:
this.ctx.call({
params1: {
name: 'name1',
age: 11
},
params2: {
name: 'name2',
age: 22
},
success: (e) => {
console.log('====operate success=====', e)
},
fail: (e) => {
console.log('====operate fail=====', e)
},
complete: (e) => {
console.log('====operate complete=====', e)
}
})


Help and Support

Was this page helpful?

Help us improve! Rate your documentation experience in 5 mins.

Feedback