This document describes how to connect to proprietary data sources. If your data source is self-built and not purchased on Tencent Cloud, we recommend that you use this method for connecting.
After creating a project, select Data and then Data Source, then click "Create Data Source".
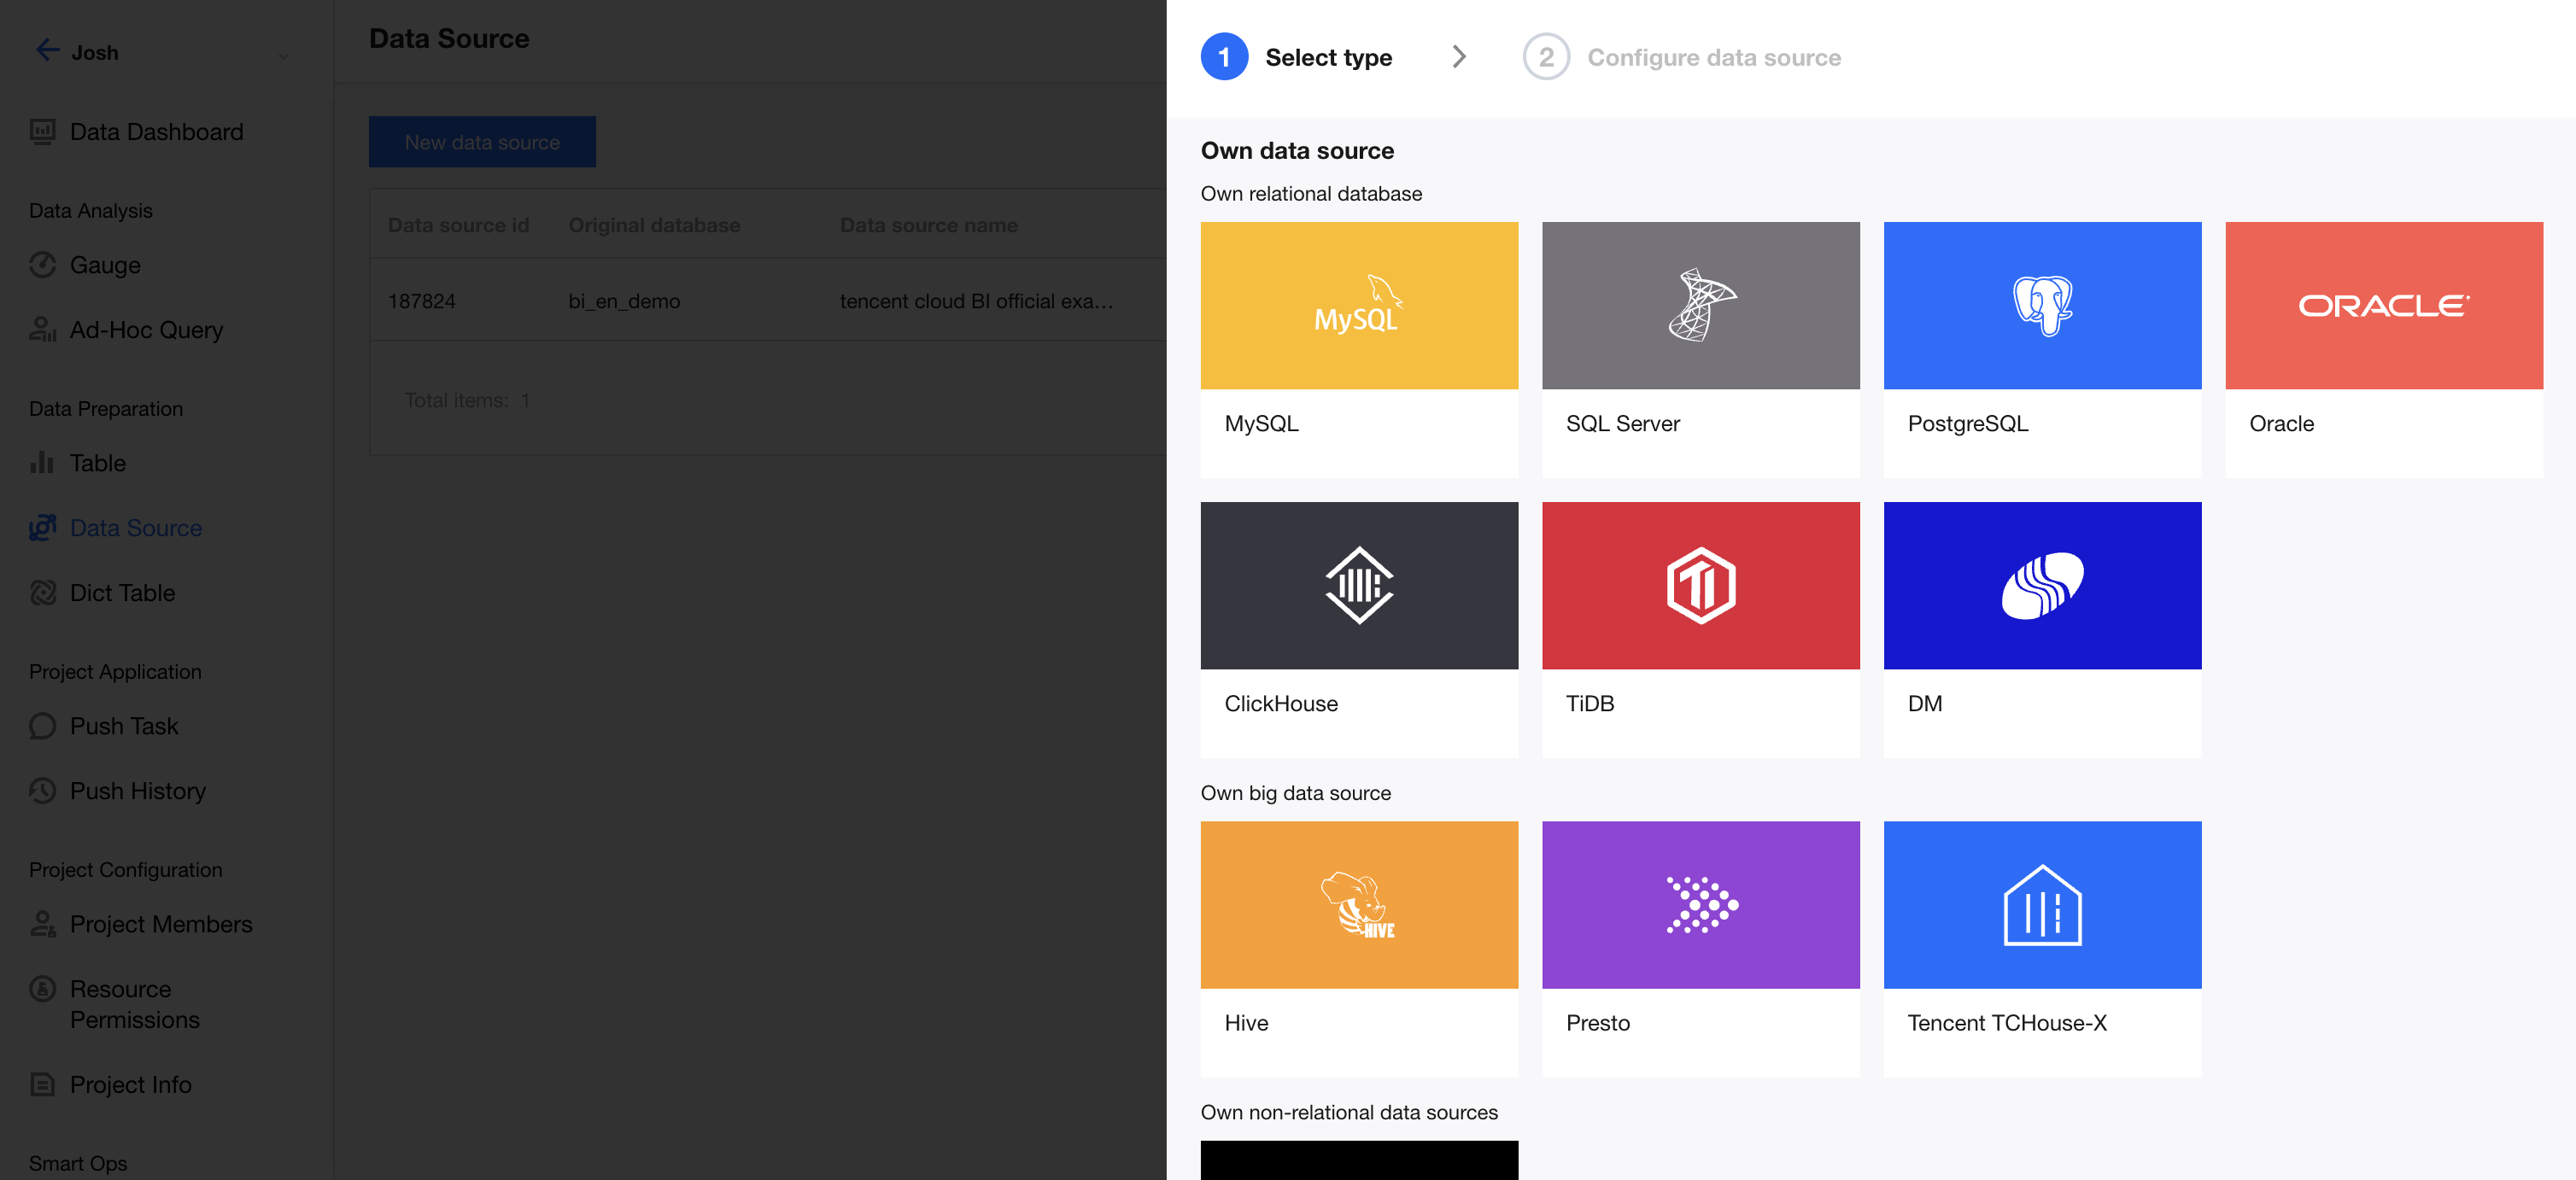
After clicking, select the type of data source to be connected. The required parameters vary slightly for different types. With MySQL as an example, the parameter descriptions are as follows:
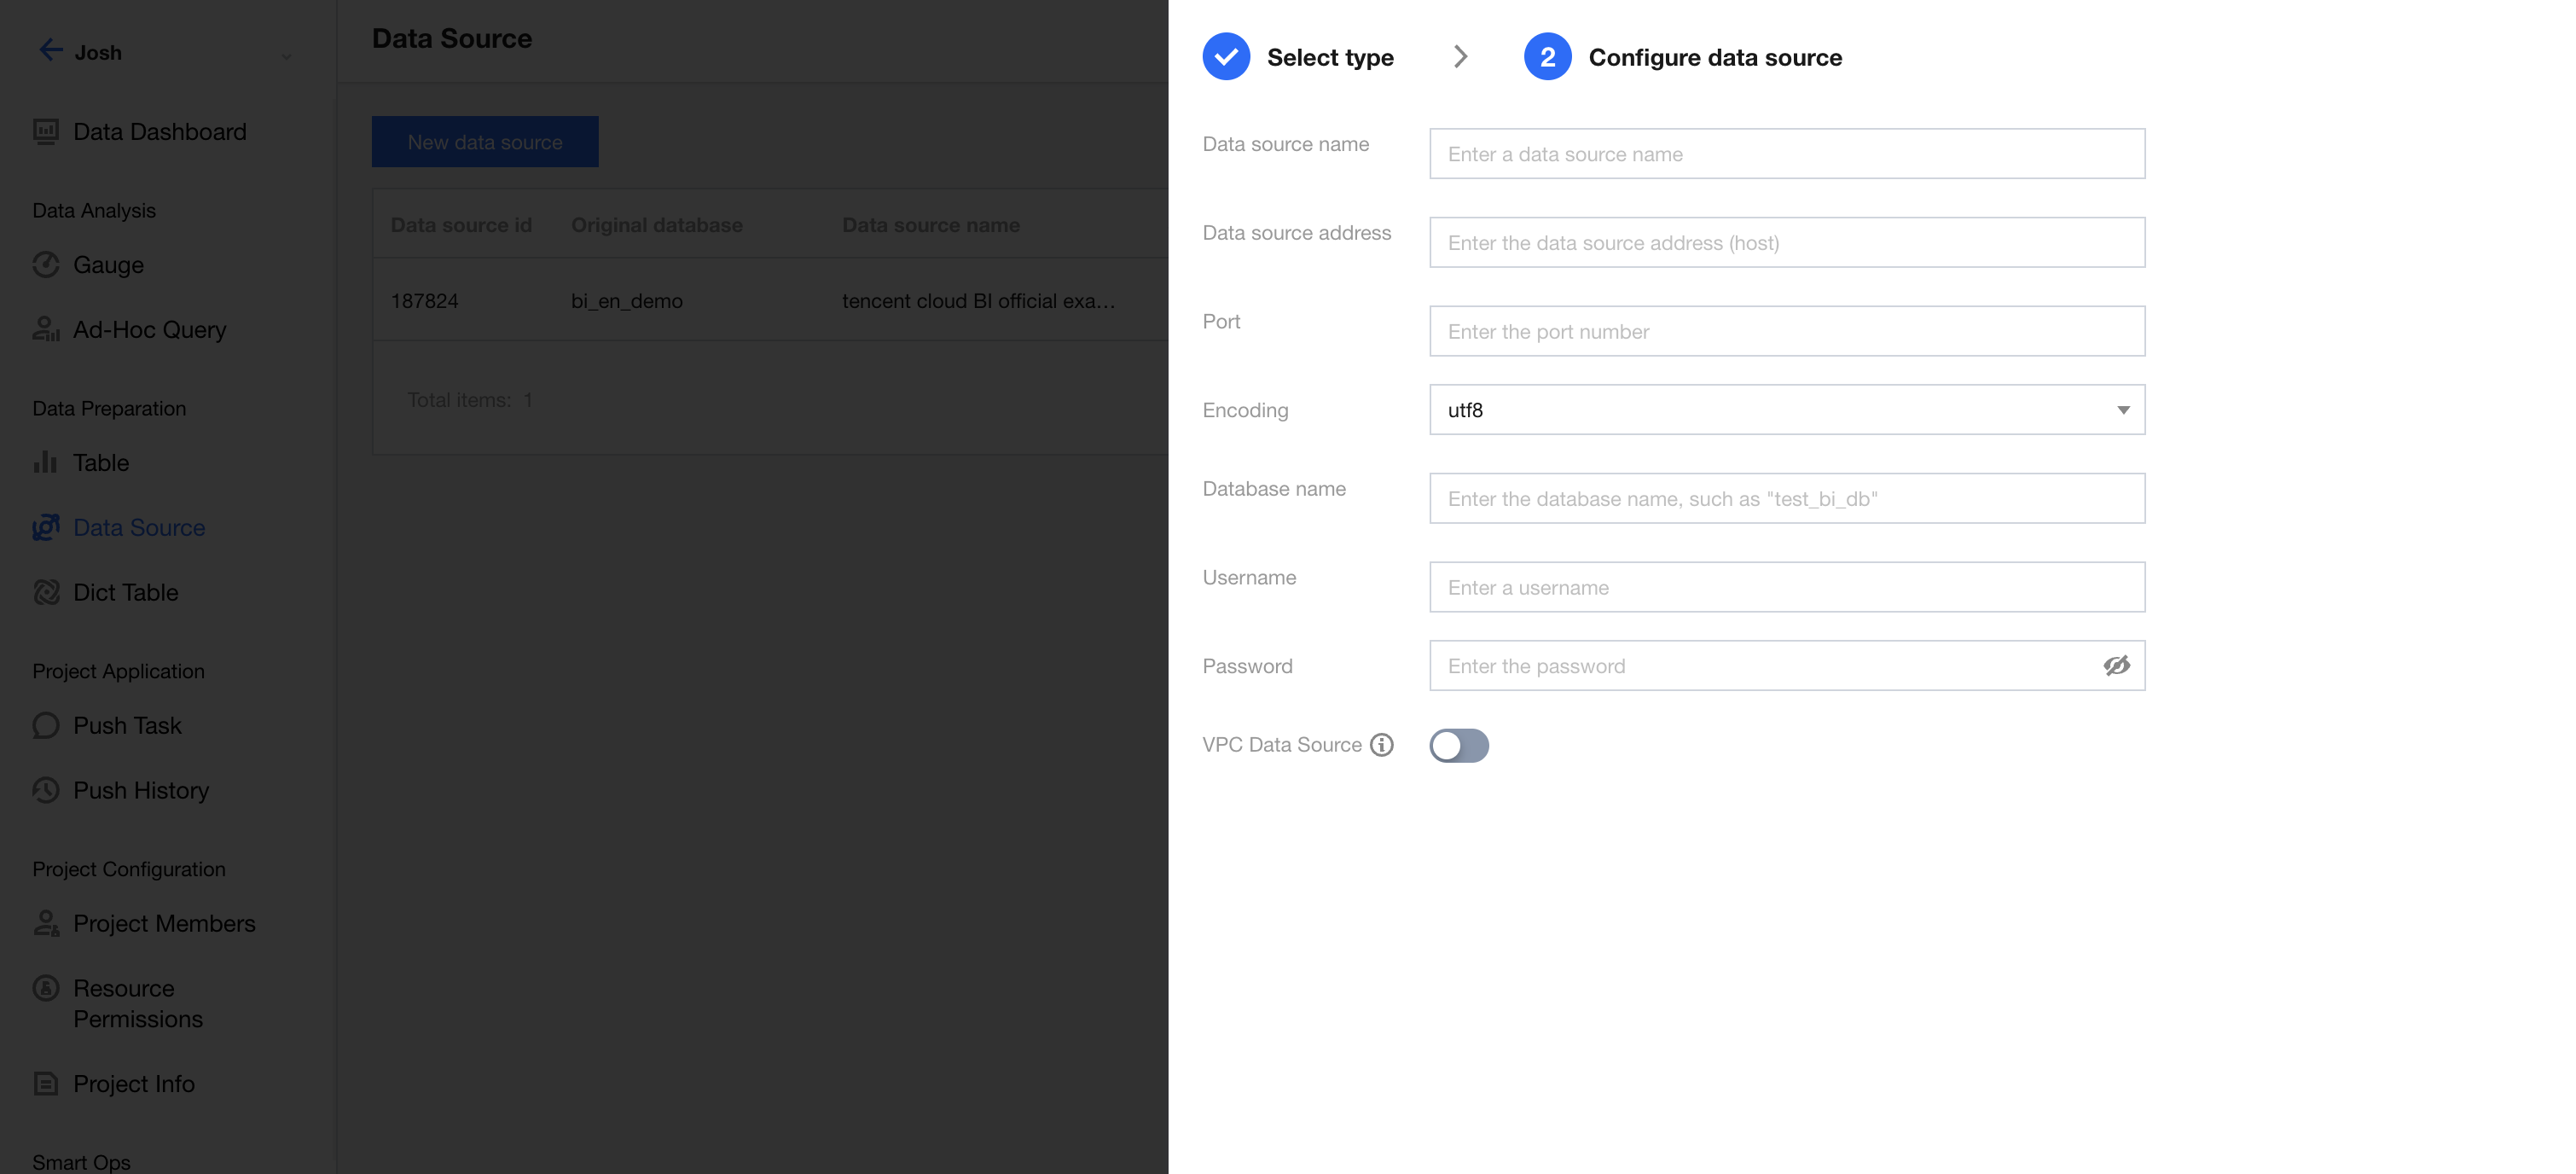
Data source display name: The name displayed in Business Intelligence (BI) shall not exceed 45 characters.
Data source address: The IP address of the database, such as a public network IP address in the format of cdb-2dhmvx6s.bj.tencentcdb.com. Private network IP addresses such as 49.232.129.87 are not supported. If the database is purchased on Tencent Cloud and is a cloud database supported by BI, refer to "Data Access - Cloud Data Sources" for connecting. If it is a cloud database not supported by BI, you can open the specified public network IP address and connect through your proprietary data source.
Port: The port number of the database, such as 3306.
Encoding: The database encoding format. Currently, 3 formats are supported, that is, "utf8", "gbk", and "latin1".
Database name: The name of the database.
Username & Password: The username and password for the database.
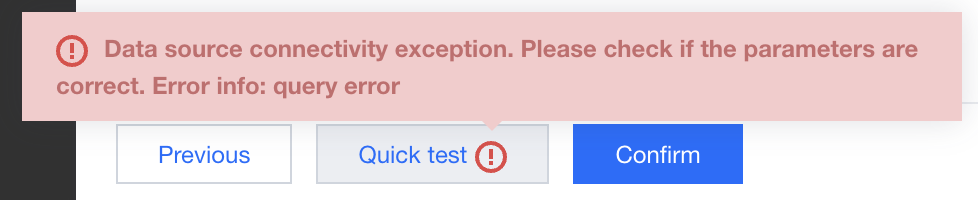
After entering the information, you can click One-click Testing at the bottom to perform a connectivity test. If the prompt "Data source connectivity exception" appears, the connection fails. At this point, first check whether the username, password, or other connection information is entered correctly.
If all the information is correct, your data source may have security-related settings blocking the BI egress IP address. In this case, activate the allowlist of BI egress IP addresses on the server hosting the database. For the specific IP address list, click here to view.
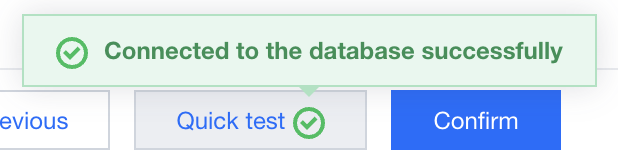
If the connection is successful, you will be prompted that the database is successfully connected. At this point, you can click OK for creation.
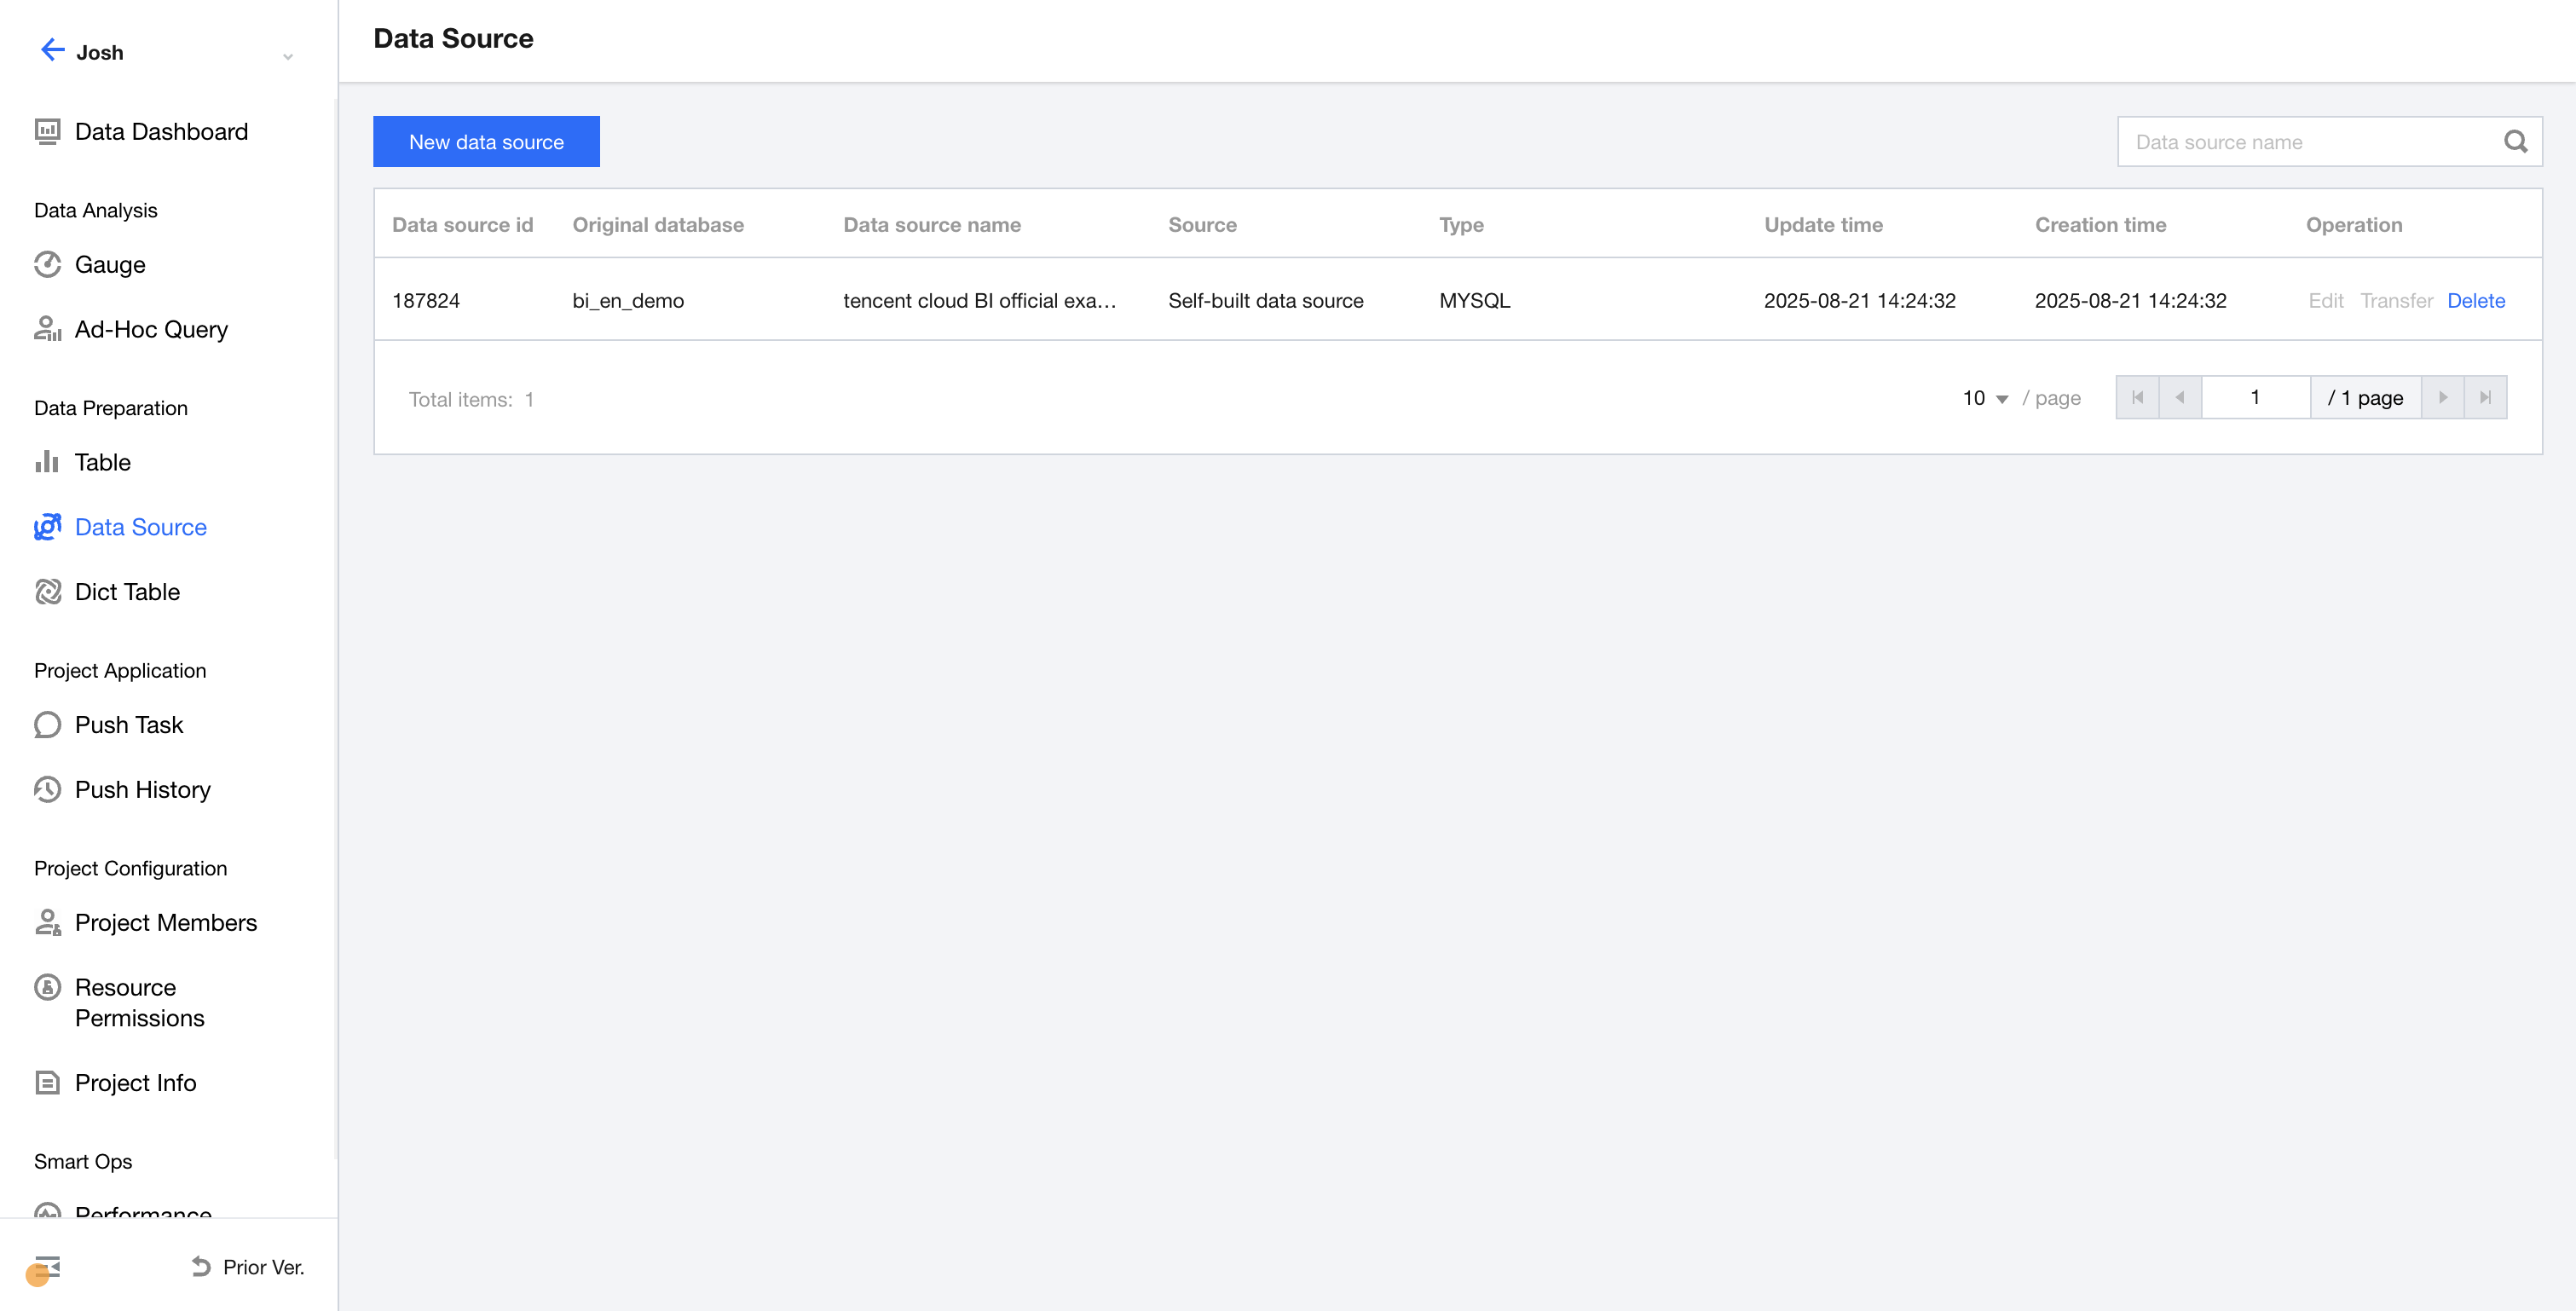
After the creation, a new row of records will be added in the list, as shown below, indicating that the creation is complete. If any information needs to be modified, click Edit to make changes.
Once the creation is complete, you can proceed with creating a data table. For details, see Creating Data Tables.