Note:
1. Email notifications cannot be received if the sender or person in charge is deleted or the email address is unbound.
2. If the push task fails consecutively 3 times (for example, if the task is scheduled for 10 o'clock daily, and the push task fails 3 days in a row), the system will automatically stop the task. The user can restart the task by editing or enabling the task again.
Once the report is generated, you can customize the push schedule as needed to receive regular reports via email.
Prerequisites:
The page to be pushed has been published.
The email address is deliverable and will not block emails.
This document introduces the following operations:
Email push configurations.
Push tests.
Manual push.
Viewing push records.
Enabling or disabling a task.
Email Push Configuration
The configurations for the WeCom Robot and DingTalk Robot are the same. The configuration method is illustrated below using the WeCom Robot as an example.
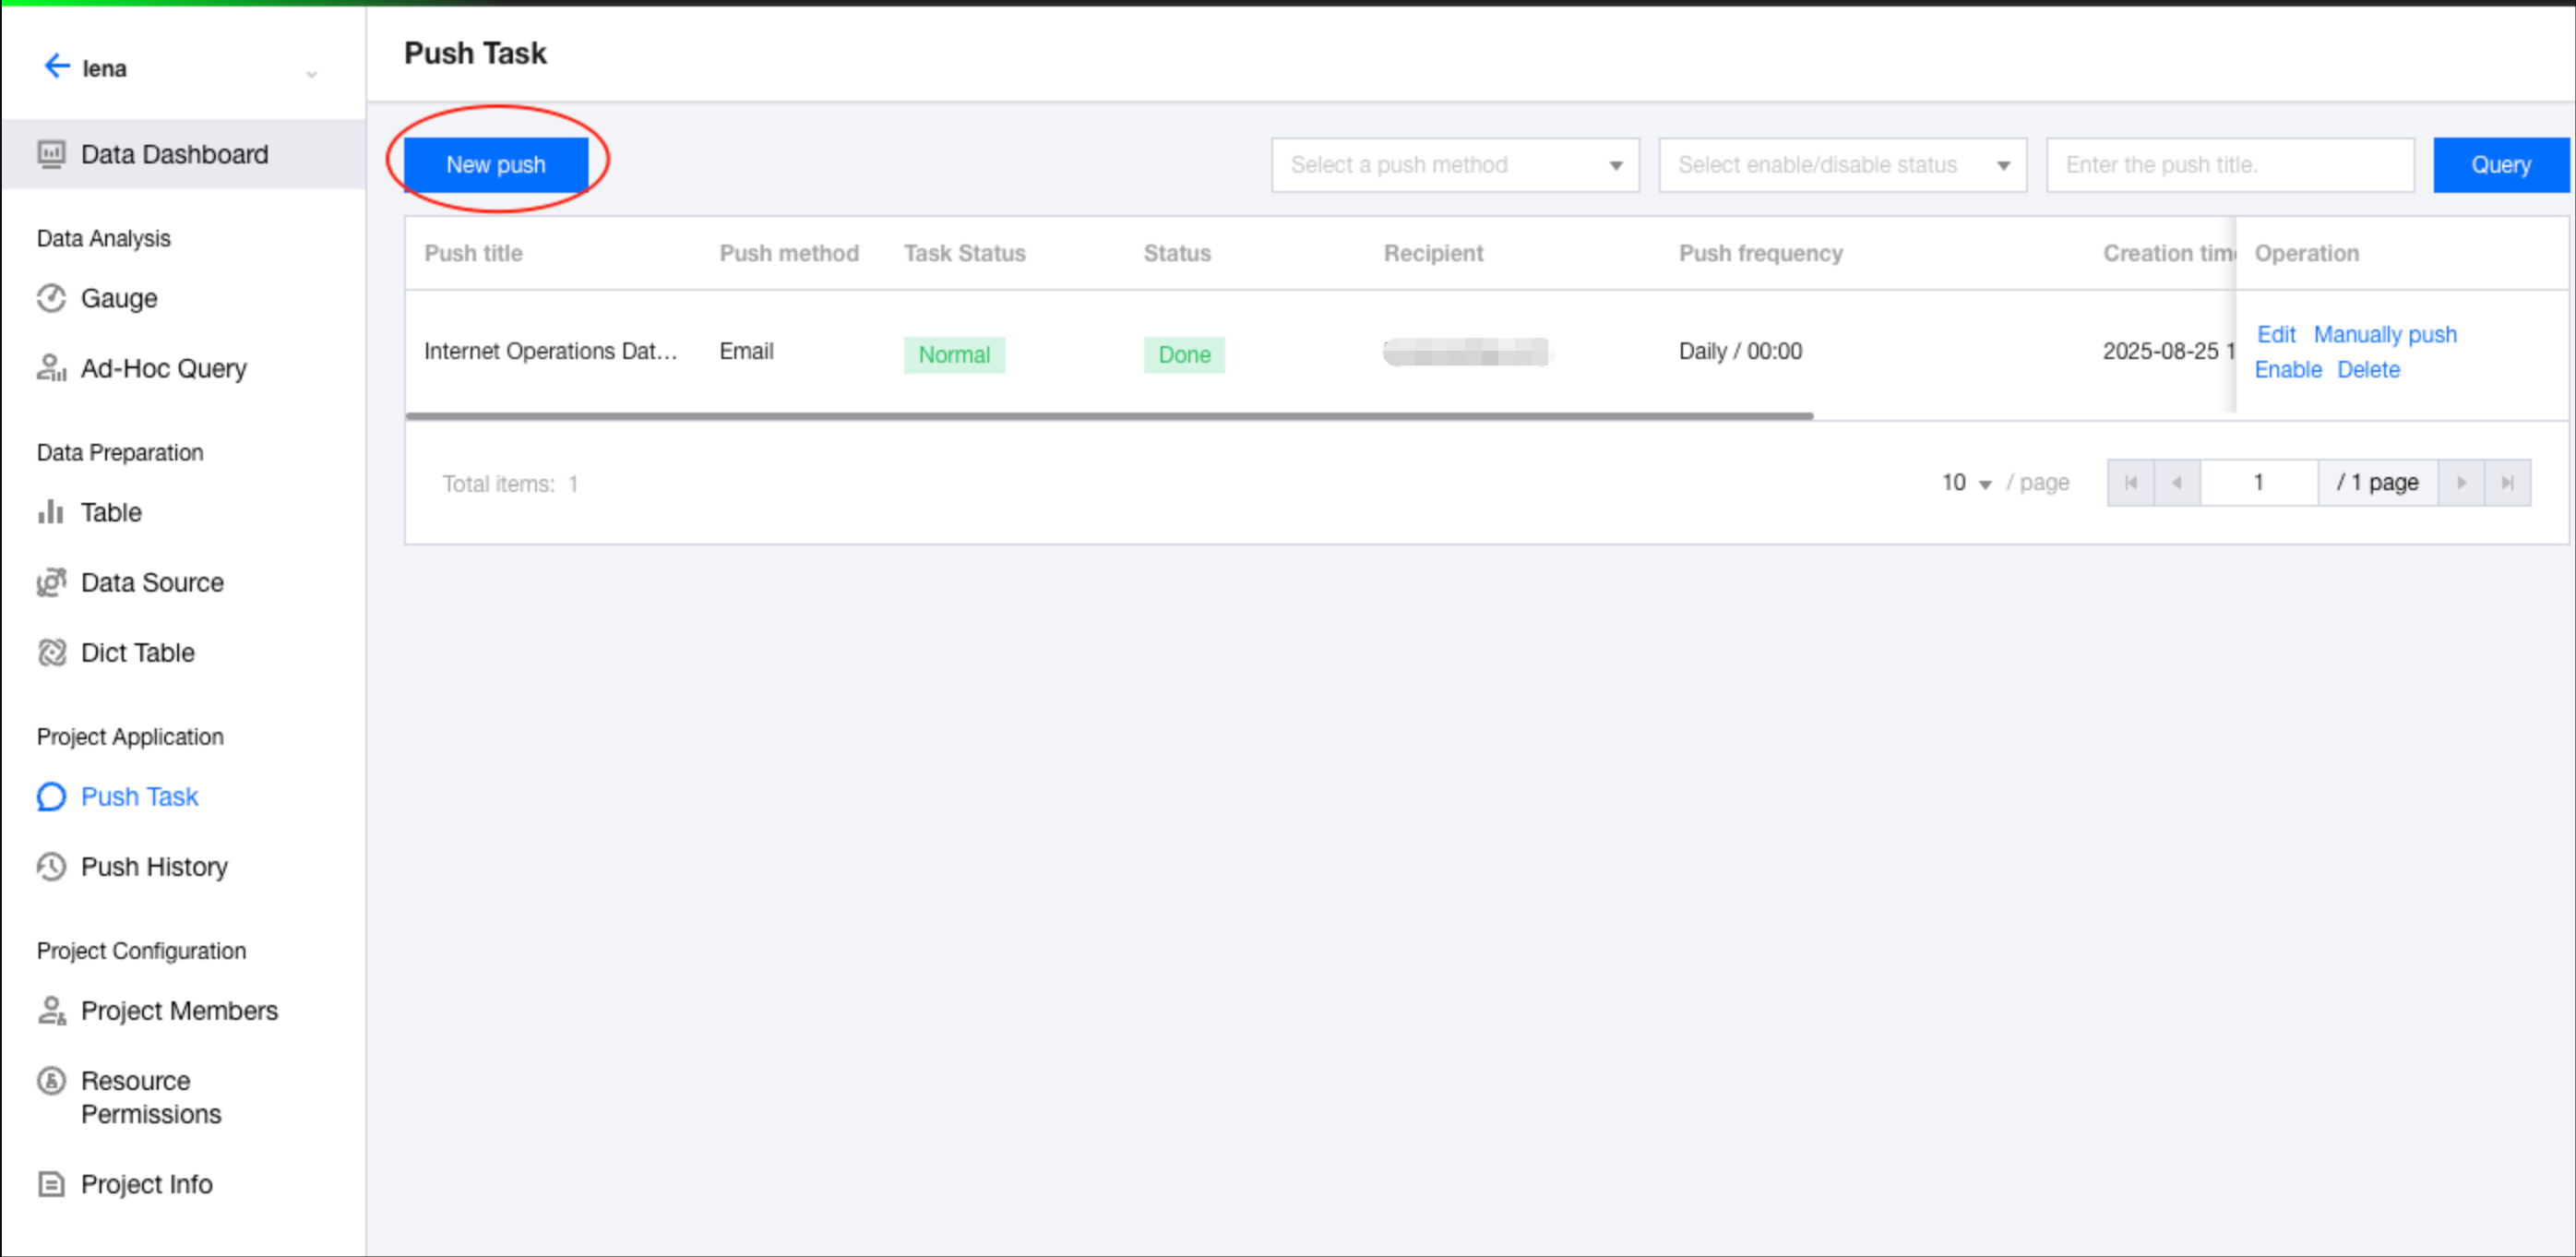
1. Go to the project management section > select a project > Push Tasks > New push.
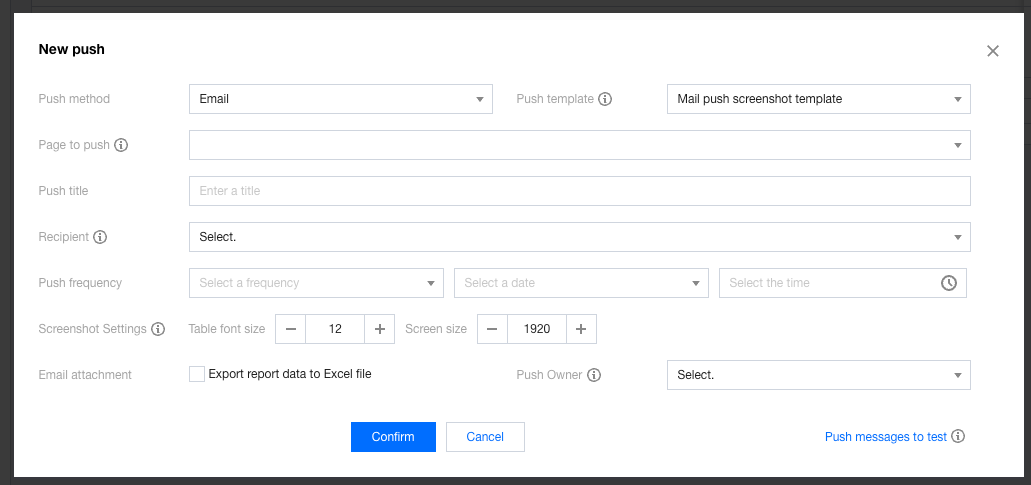
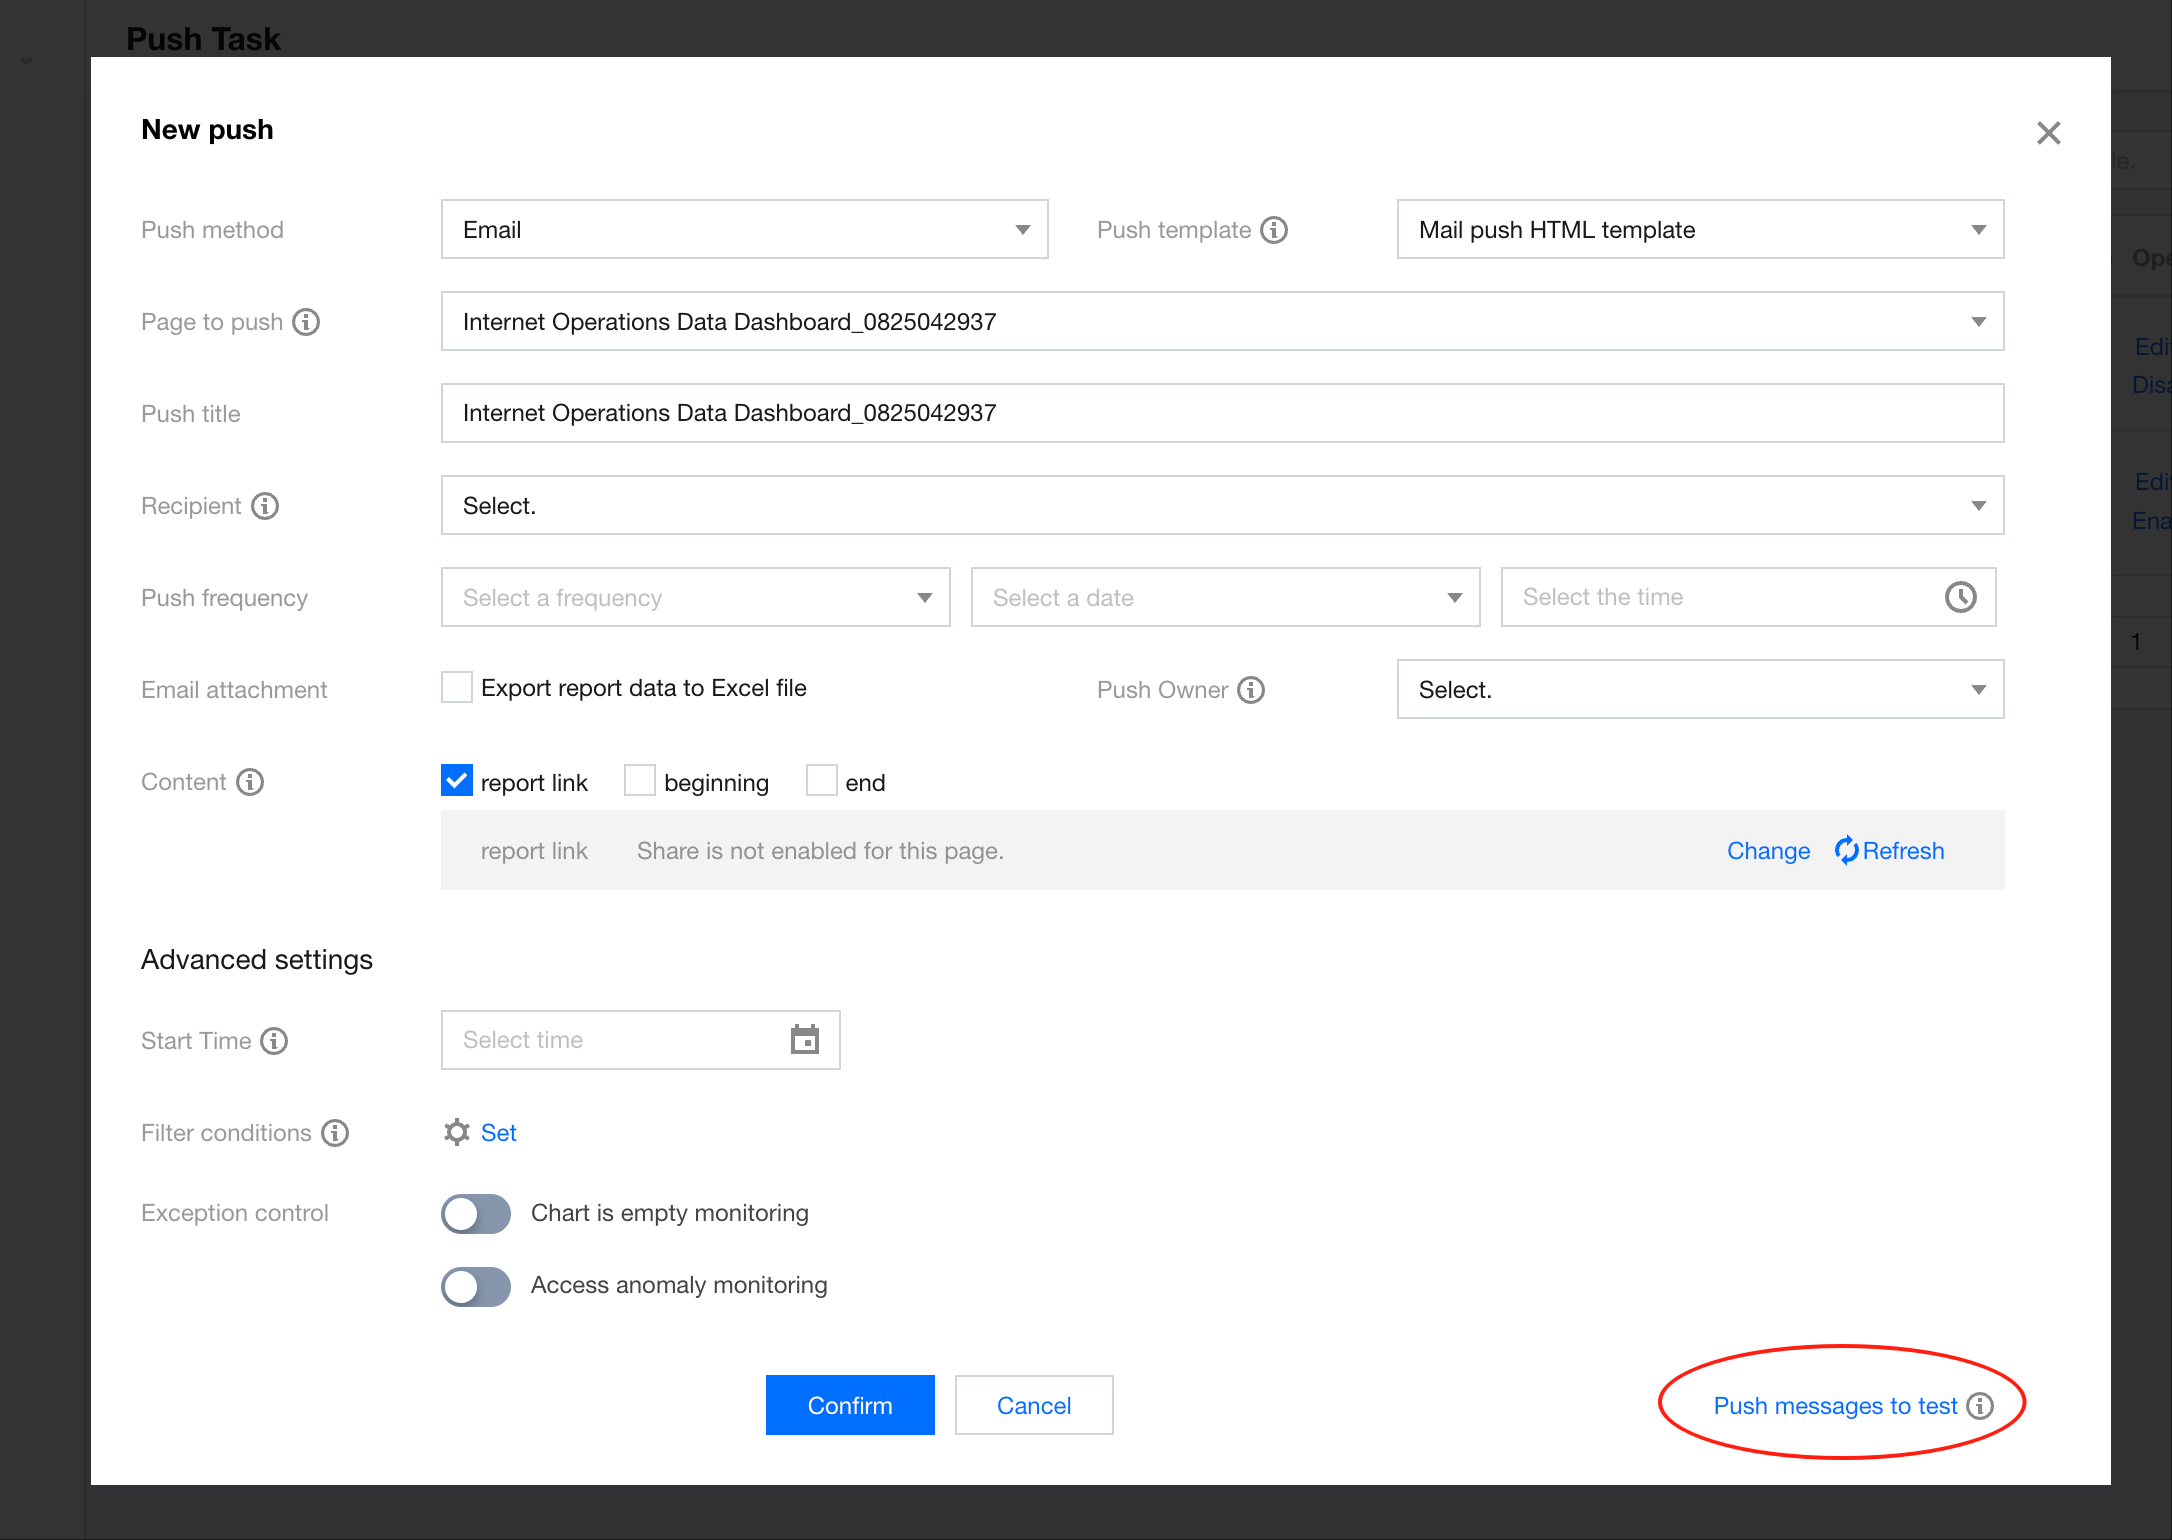
2. Select Email as the push method and choose the email template to be used for the push.
Business Intelligence (BI) includes built-in screenshot templates and HTML templates to better adapt to email reading. The differences are:
Screenshot templates: The email will only display images. If the page contains table components with a large volume of data, only the data visible on 1 screen will be included.
HTML templates: The email will display as an HTML page. If the page contains table components, they will be displayed as tables with a maximum of 500 rows, rather than as images.
Note:
Due to different HTML rendering behaviors in email readers (for example, Hotmail), display issues may occur, including misaligned rows and clipped content (for example, the email displays correctly in the WeCom email but incorrectly in Gmail). If you plan to use the HTML template, conduct thorough testing to ensure that the content is displayed as fully as possible on the client applications used by employees.
3. Select email recipients: If a user is not selectable from the list, it means that the user cannot receive email push notifications (for example, if the user is disabled).
Note:
If a user is deleted in the user management module and later added again, even if the username and email remain the same, the recipient will show as "User does not exist" here. You will need to select the user again (a user added after deletion is considered a brand-new user).
4. Other push configurations.
|
Push page | Select the page element to be pushed. | The page needs to be published before the push so that the page can be accessed. |
Push frequency | Set the frequency for scheduled push tasks, supporting monthly, daily, or weekly intervals. |
|
Push owner | For testing and receiving alarm notifications. |
|
Content | Include the beginning, the ending, and the link for sharing. | If the push page has not enabled report sharing, you need to enable the sharing first. |
Screenshot settings (only available under the email push screenshot templates) | You can set the font size for tables and the page width when pushing a report screenshot to ensure clarity. | Setting a font size that is too large or too small may affect the screenshot quality. Conduct thorough testing before applying the settings. |
Email attachment | By selecting this option, you can export the Excel data of the current pushed page as an attachment. |
|
Advanced settings - start time | Select the date for the first push execution. | The first push time is the first occurrence of the push frequency after the selected start time. For example, if the start time is next Monday and the frequency is every Friday, the actual first push time will be next Friday. If the start time is next Friday and the frequency is every Monday, the first push time will be the Monday of the week after next. |
Advanced settings - exception control - empty monitoring | Set the handling method for empty charts, including the following configuration items. 1. Empty range: Include fully empty and partially empty charts. 2. Handling of empty values: You can choose to pause the current push (unselecting will ignore the empty values and proceed with the push) or send an alarm (selecting this option will send an alarm to the notification robot when empty values are detected). | You can choose to send an alarm and pause the push at the same time. |
Advanced settings - exception control - access exception monitoring | Set the handling method for chart access errors, including the following configuration items. 1. Exception range: Include fully erroneous charts and partially erroneous charts. 2. Handling of exceptions: You can choose to pause the current push (unselecting will ignore the exceptions and proceed with the push) or send an alarm (selecting this option will send an alarm to the notification robot when empty values are detected). | You can choose to send an alarm and pause the push at the same time. |
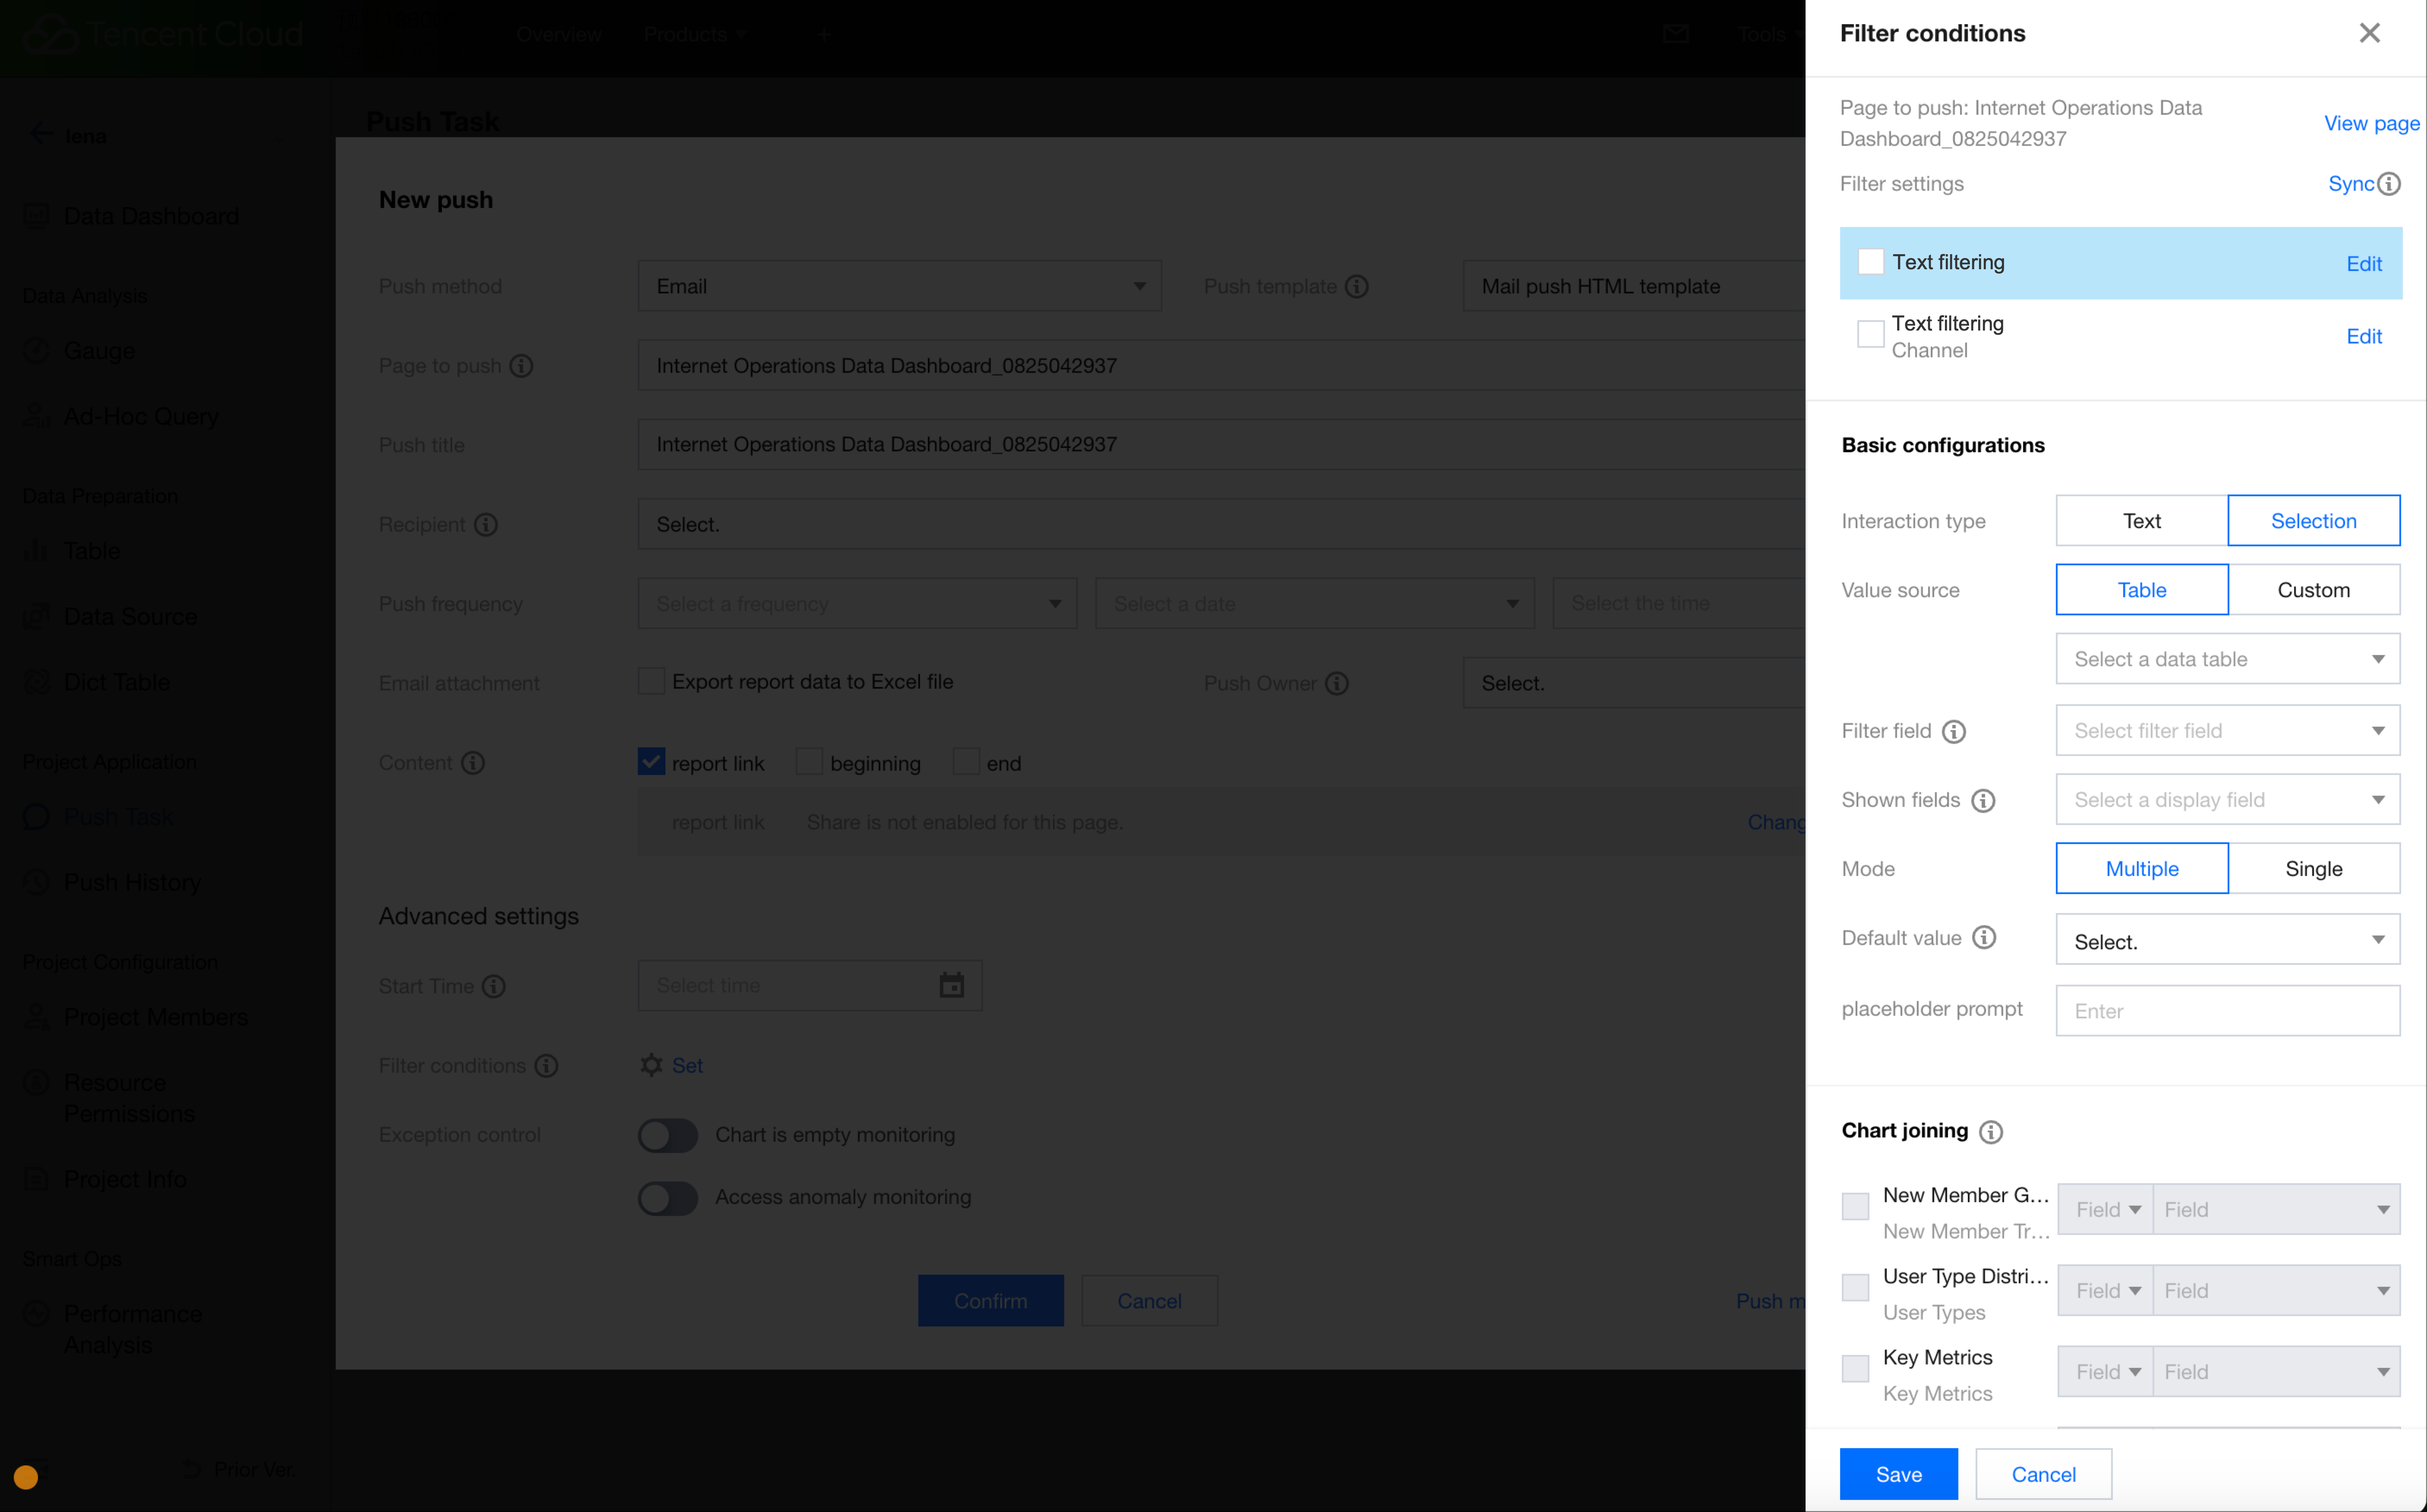
Condition settings (Only available under the HTML email templates) | If filters are present on the current page, you can set default filter values before the push to filter the data. The operation works the same as applying the filter. |
|
Example of condition settings:
Push Tests
Before the official push, it is necessary to perform a push test to verify whether the content is correct. Before the push test, select the push owner to receive the test email.
1. Click Push Test to initiate the message push.
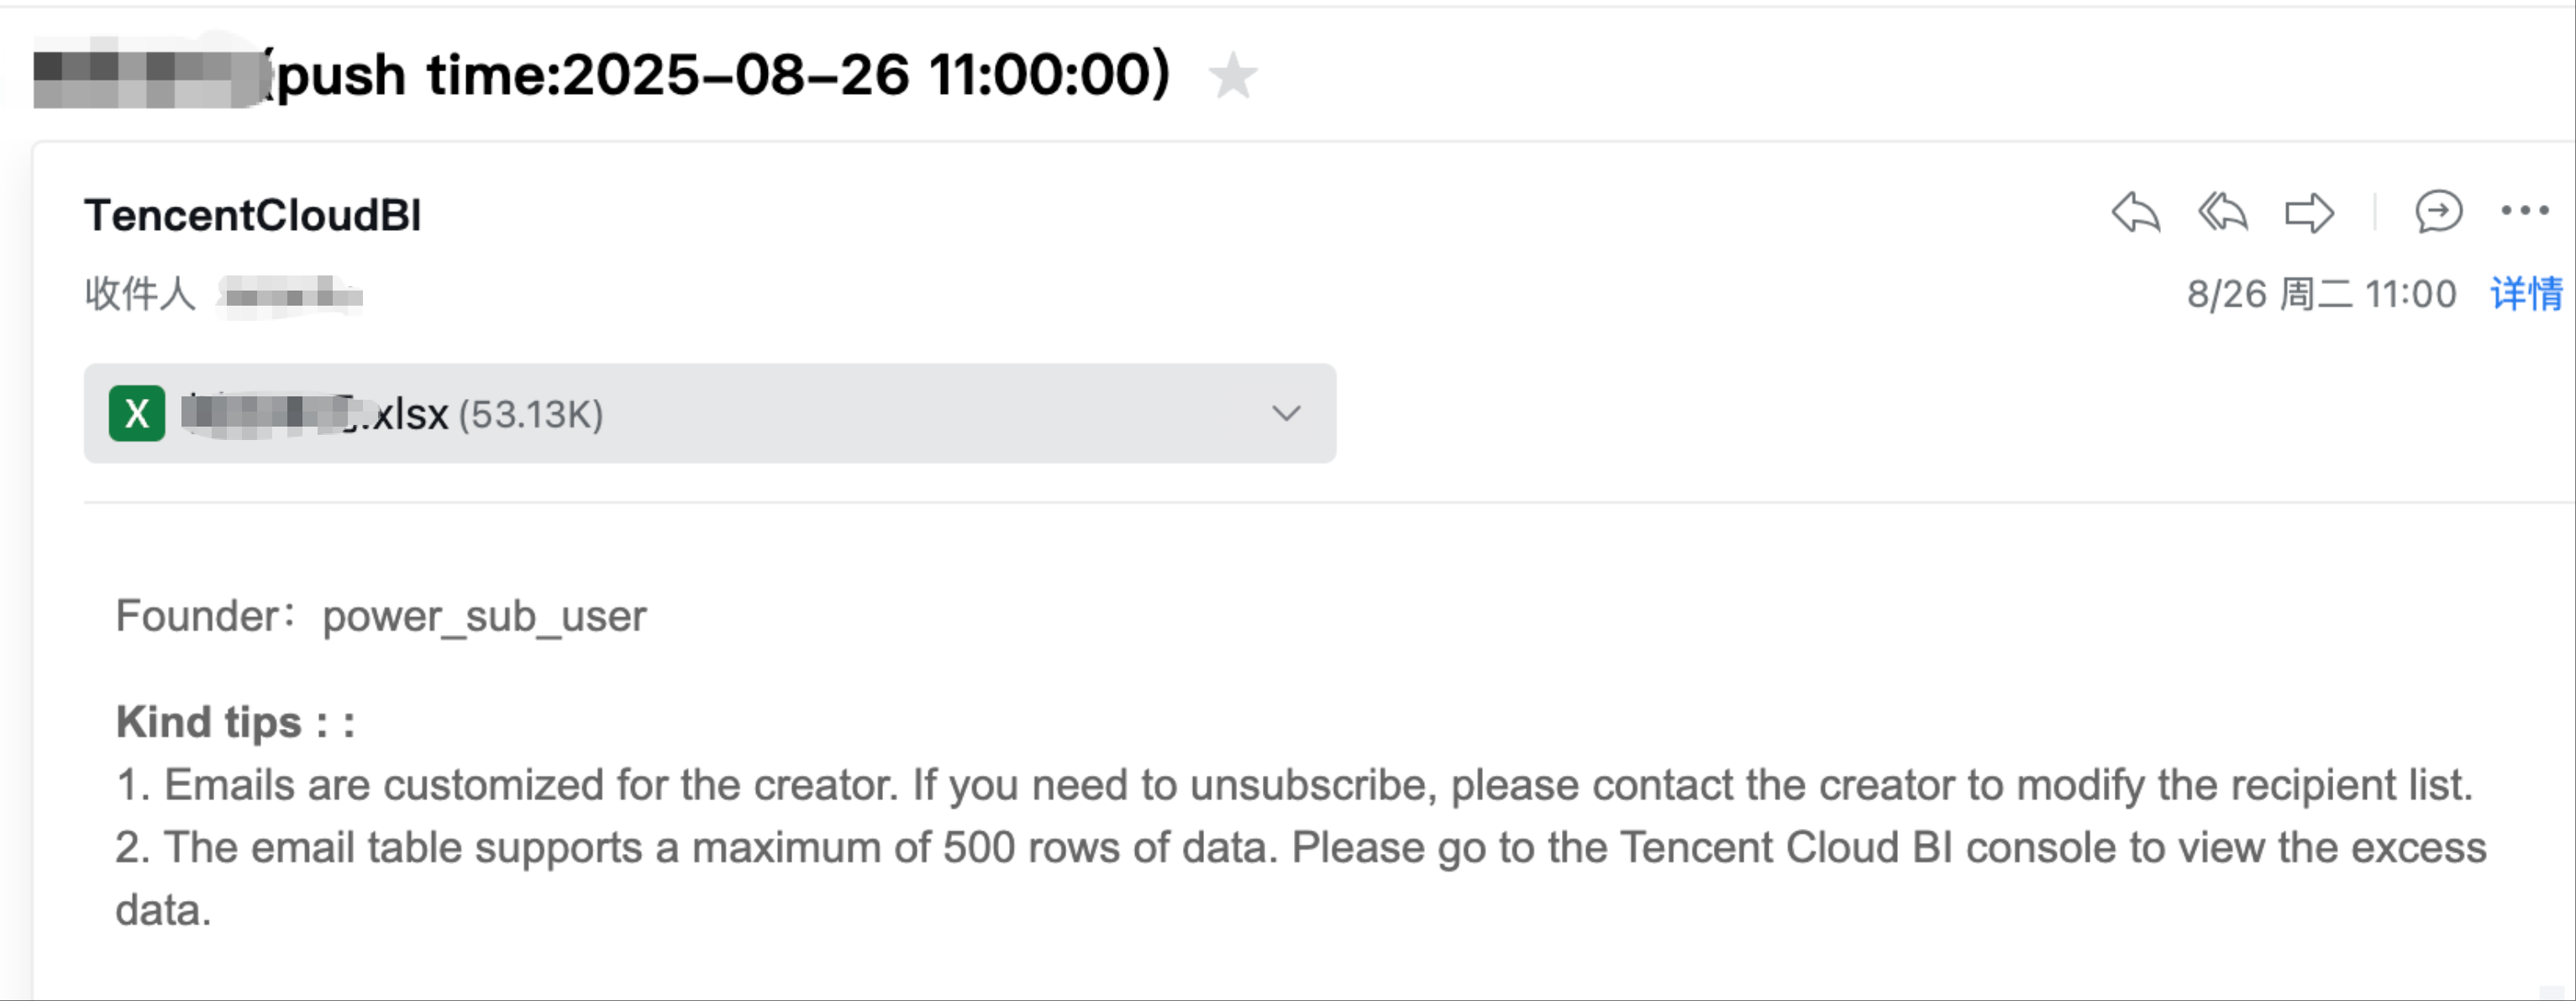
2. Ensure that the message is received: If you receive the following message, the push has been successful!
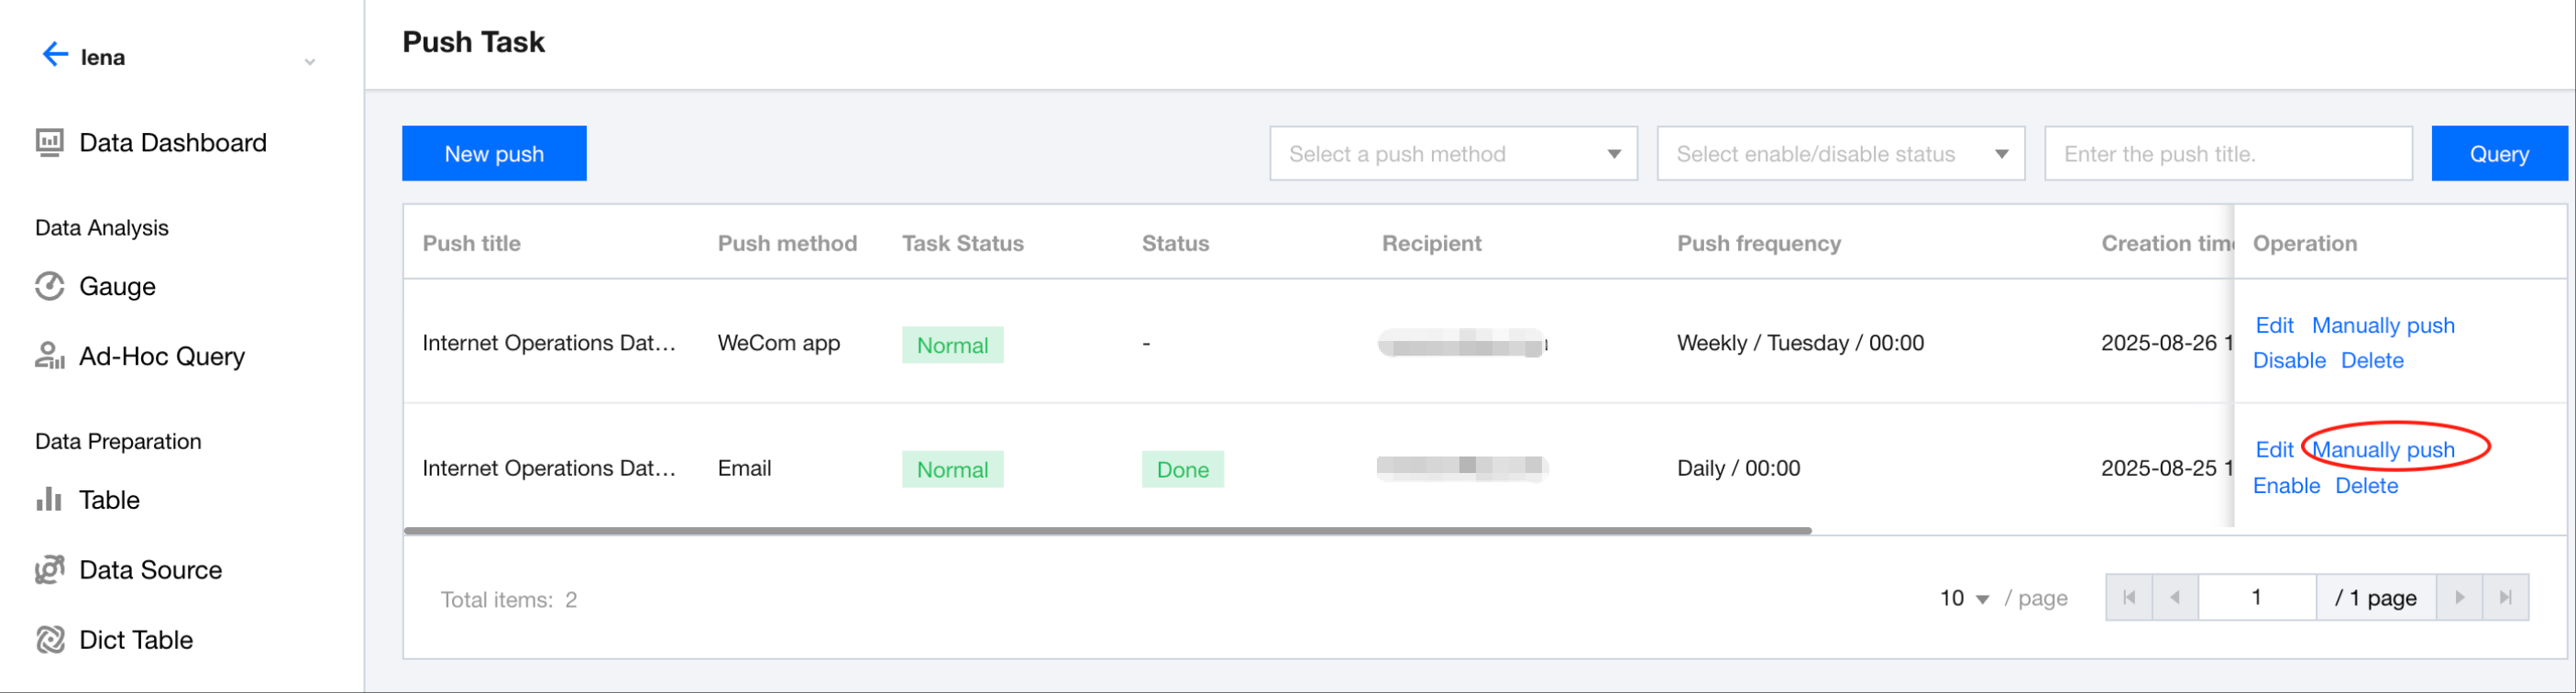
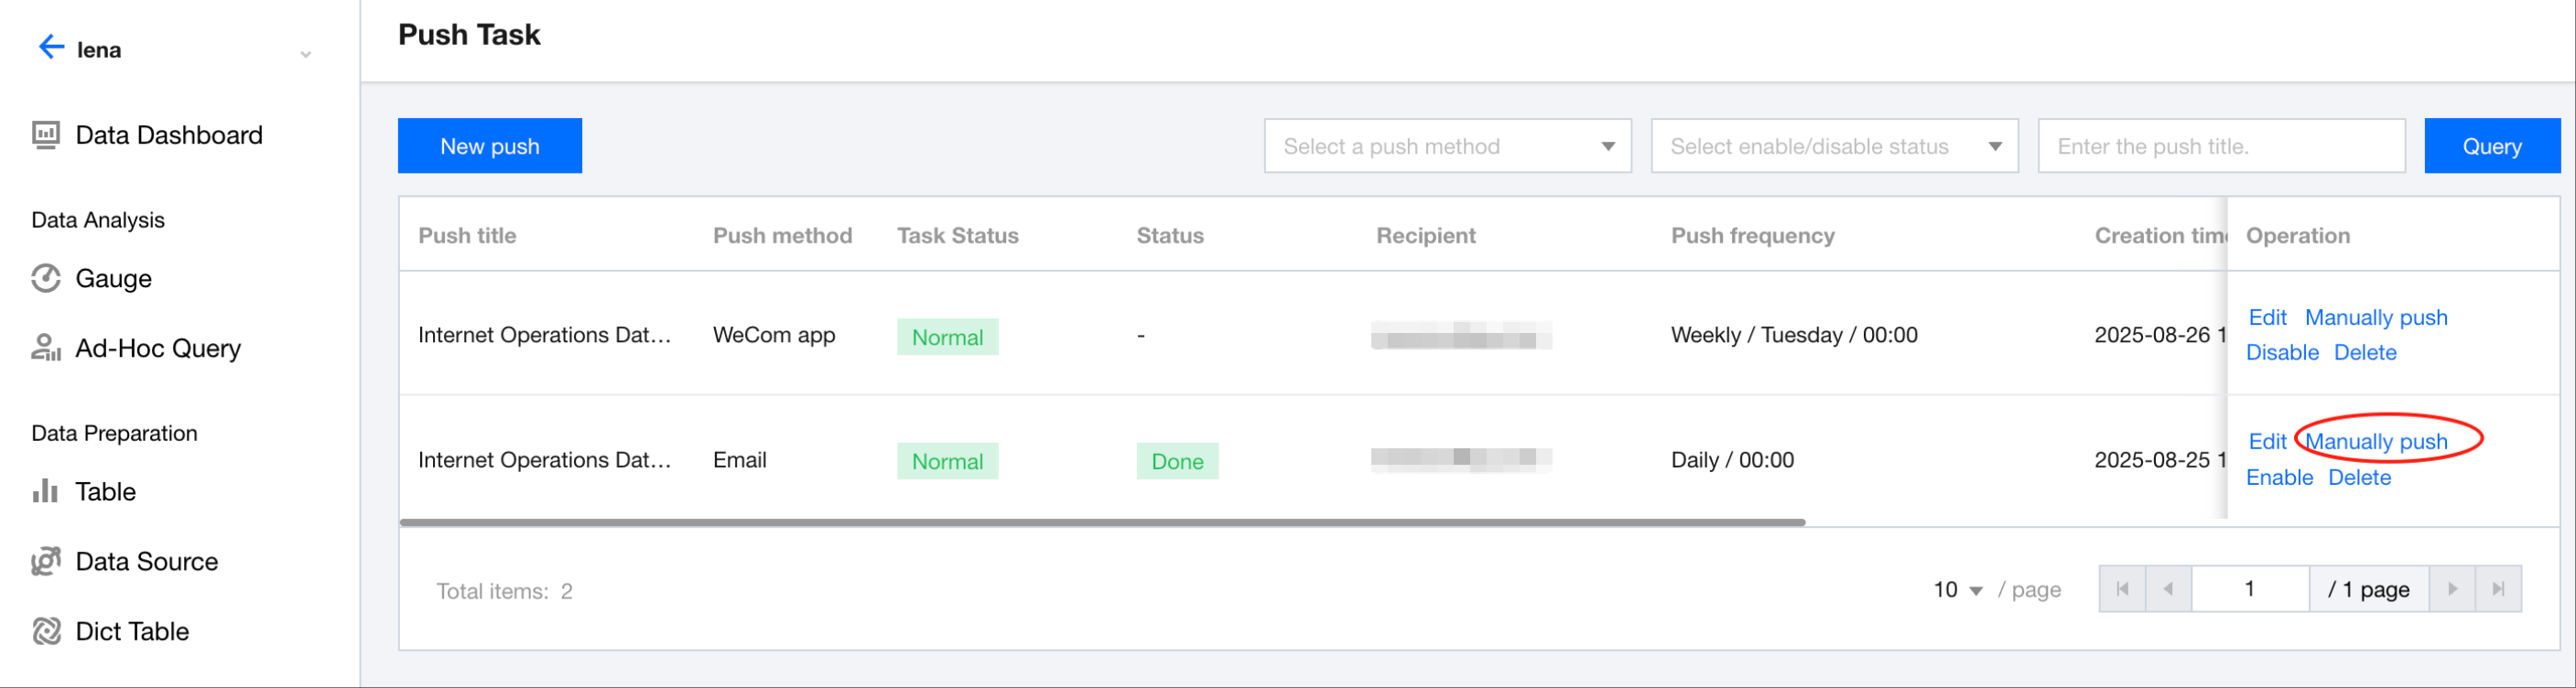
Manual Push
Certain scenarios may cause the push to be paused (for example, access exceptions causing the push to halt). In such cases, users can perform a manual push.
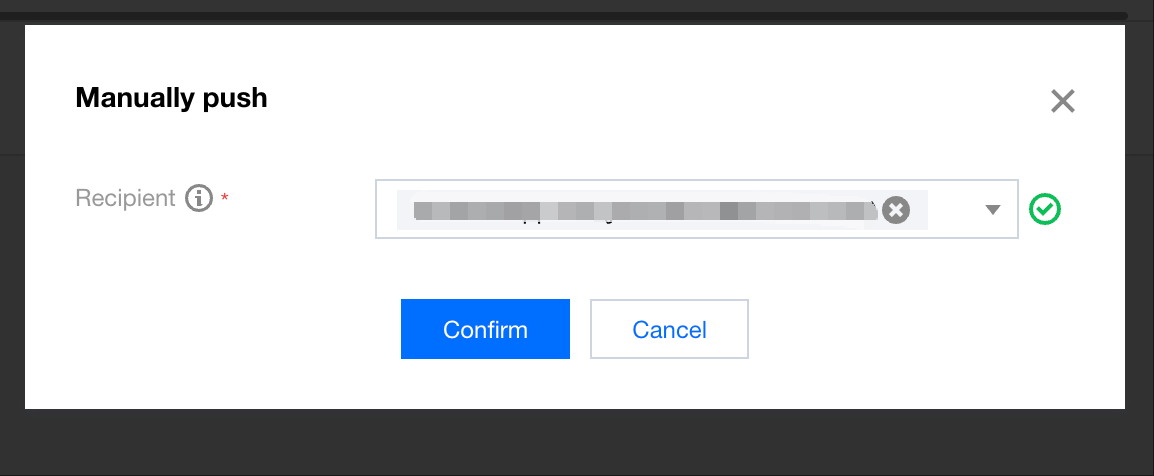
1. In the list, selecting Manual Push will trigger a push with the same content and recipients as the scheduled push.
2. In the secondary confirmation pop-up window, click Confirm to start the push.
Note:
Manual push will send the message immediately, bypassing the scheduled time in the task. Confirm that you want to send the message instantly before performing the manual push.
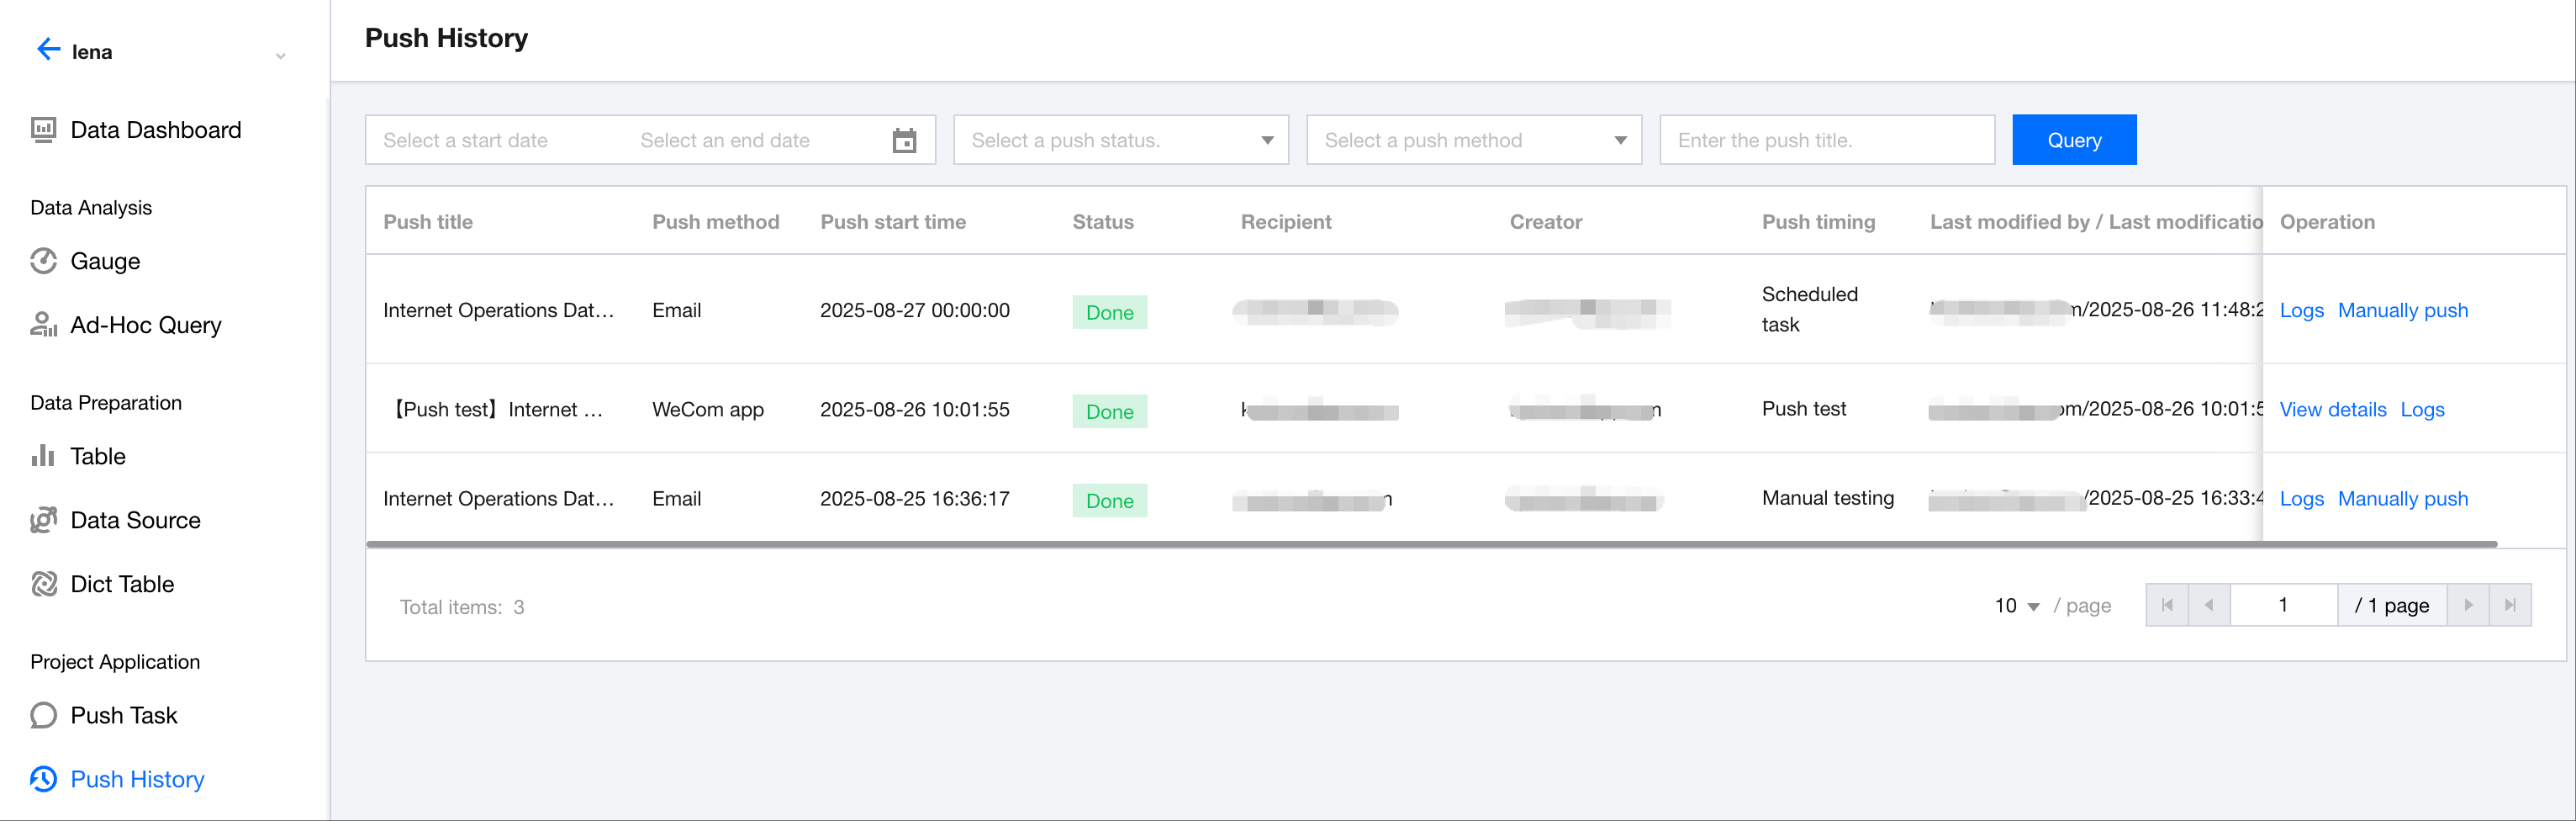
Viewing Push Records
Users can view the push details for the current project in Push Records.
Click Logs to view the log information for this push.
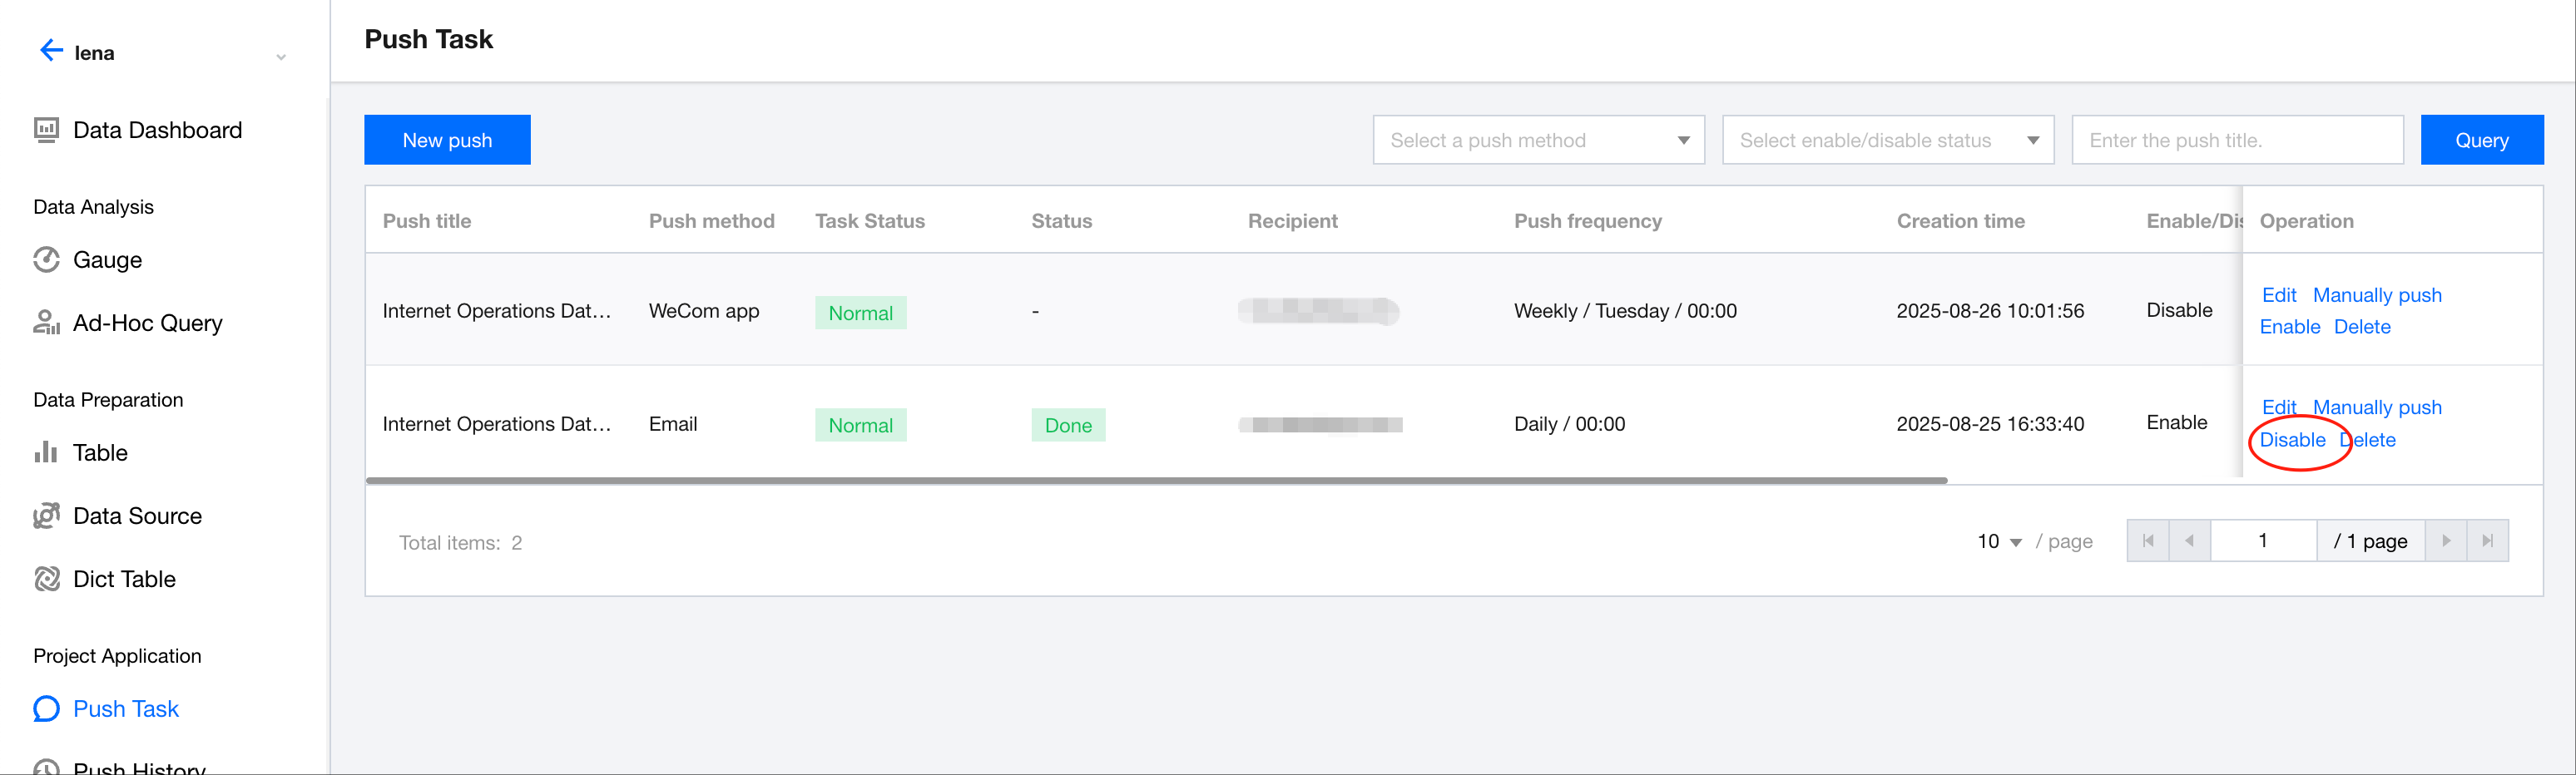
Enabling or Disabling a Task
In some cases, tasks may need to be temporarily paused to stop the push. Once adjustments are made, the task needs to be enabled again to resume the push. You can manage the task flexibly through the following steps.
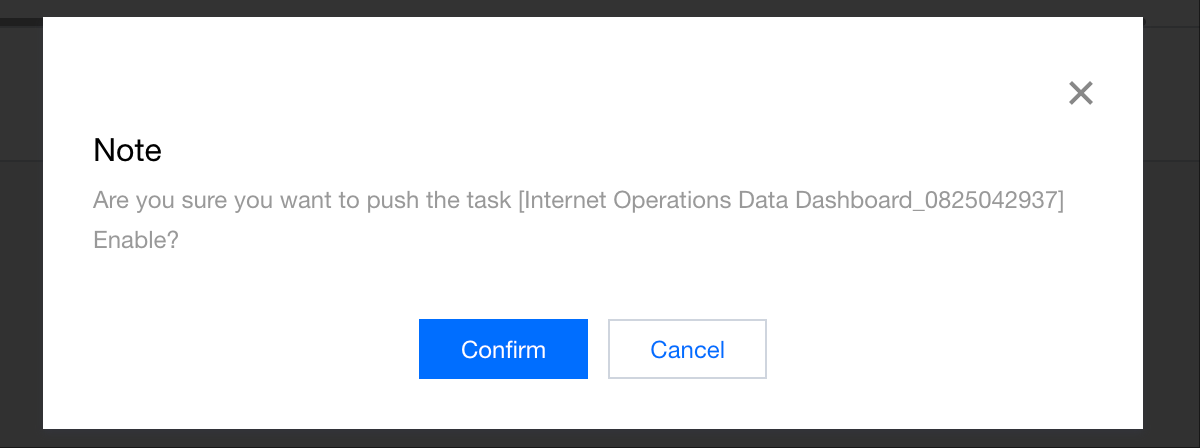
1. In the task list, click Disable to suspend an enabled task.
2. In the secondary confirmation pop-up layer, click Confirm to continue disabling the task.
3. In the disabled status, users can also enable the task to restore the task to the enabled status.