Community Edition Quick Start
Step 1: Login and Registration
Cloud Native Build supports login via mailbox or Tencent Cloud account. Unregistered users must complete account registration first.
Taking CNB Community Edition as an example, the registration and login process is as follows:
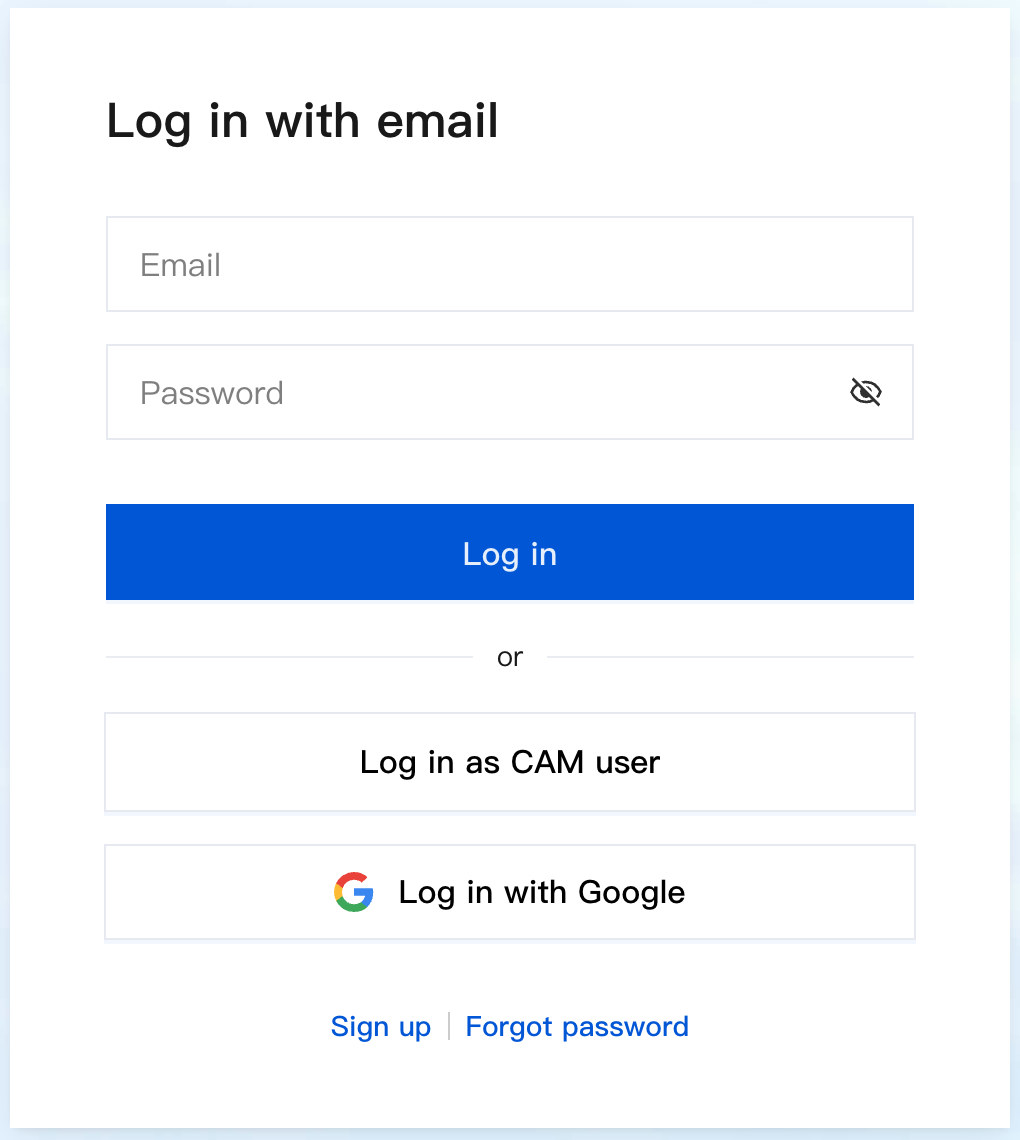
1. Visit the official website: https://cnb.build, click Log in in the upper right corner.
2. Use account to complete login. If not yet signed up, click Register now to register account.
Note:
CNB Enterprise Edition can connect with customer's own OA and other account systems via standard OAuth protocol. For operation details, please refer to Account Integration.
Step Two: Create a New Repository
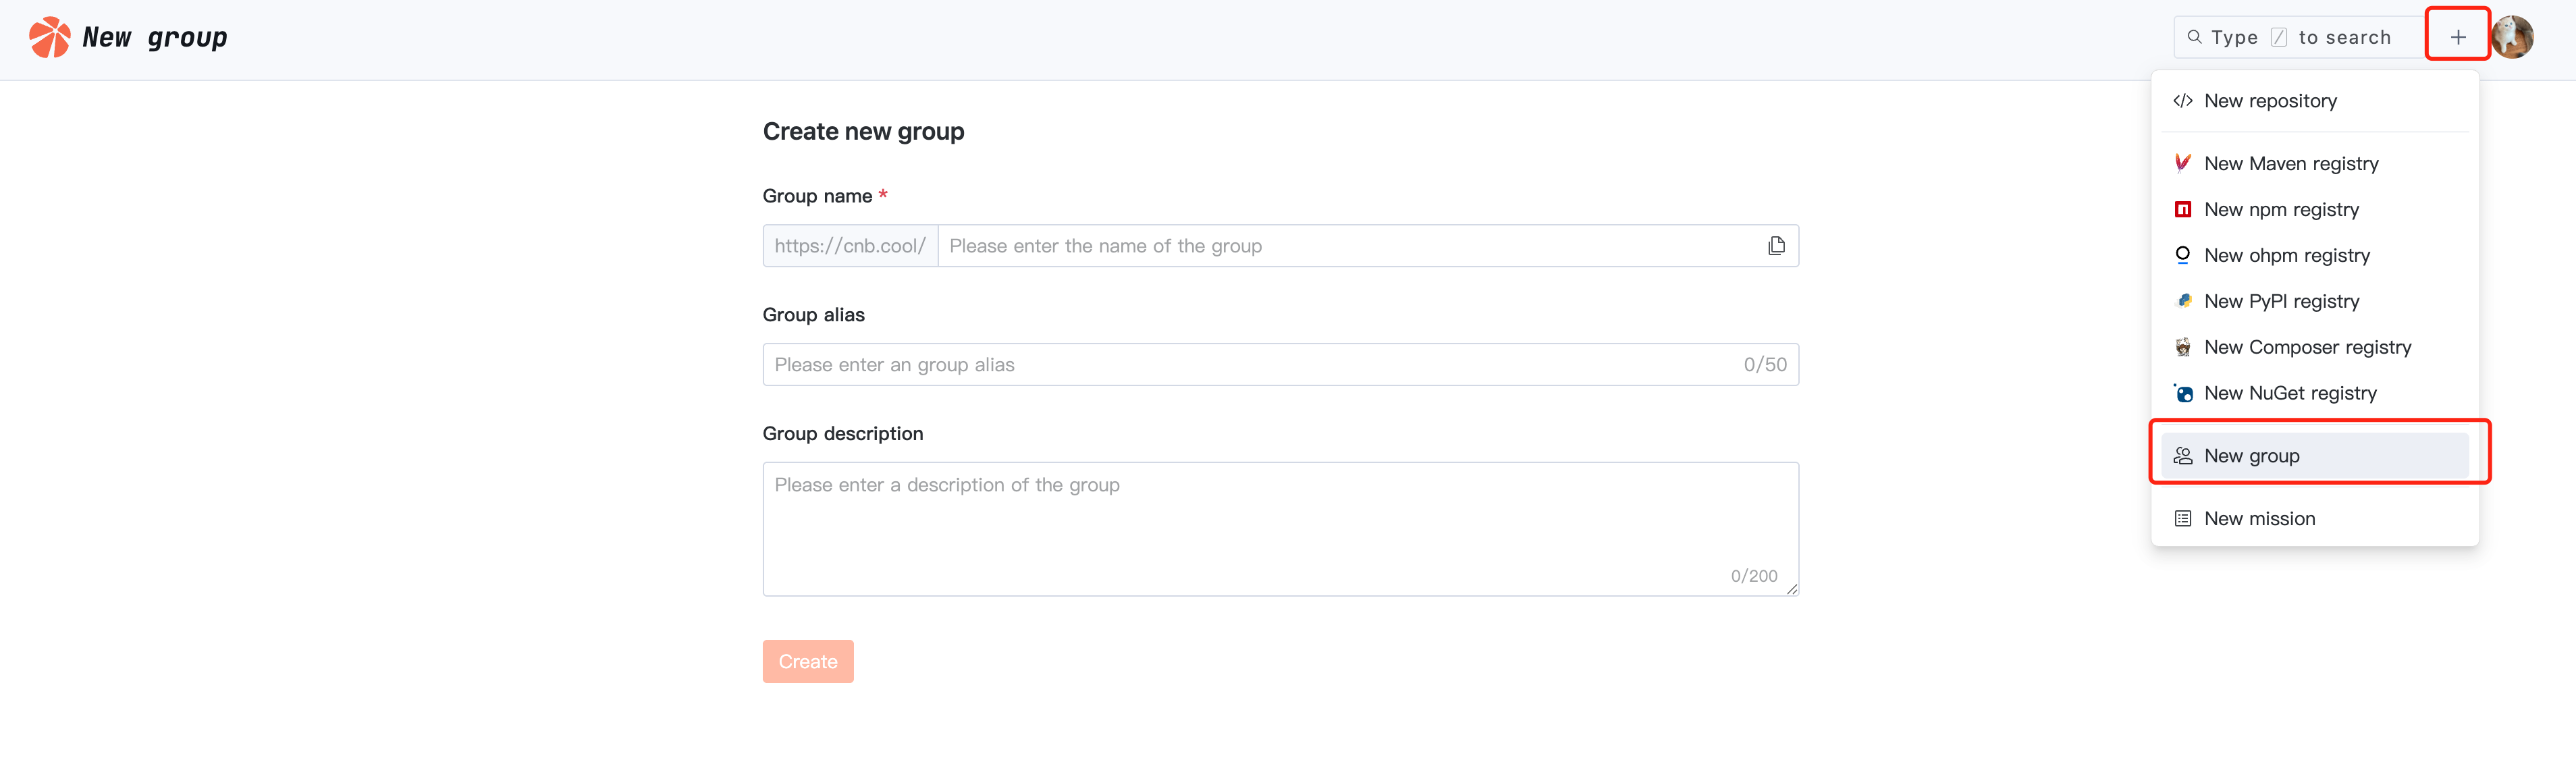
An organization is the namespace of a team to manage members and resources. Before creating repository resources, you need to create an organization to manage members, repositories, and other resources.
Repositories can be used to manage business code assets and cloud-native build pipeline configurations.
Creating an Organization
After entering CNB, click "+" in the upper right corner, select New group, fill in the organization name and related description, then click Create to complete the organization creation.
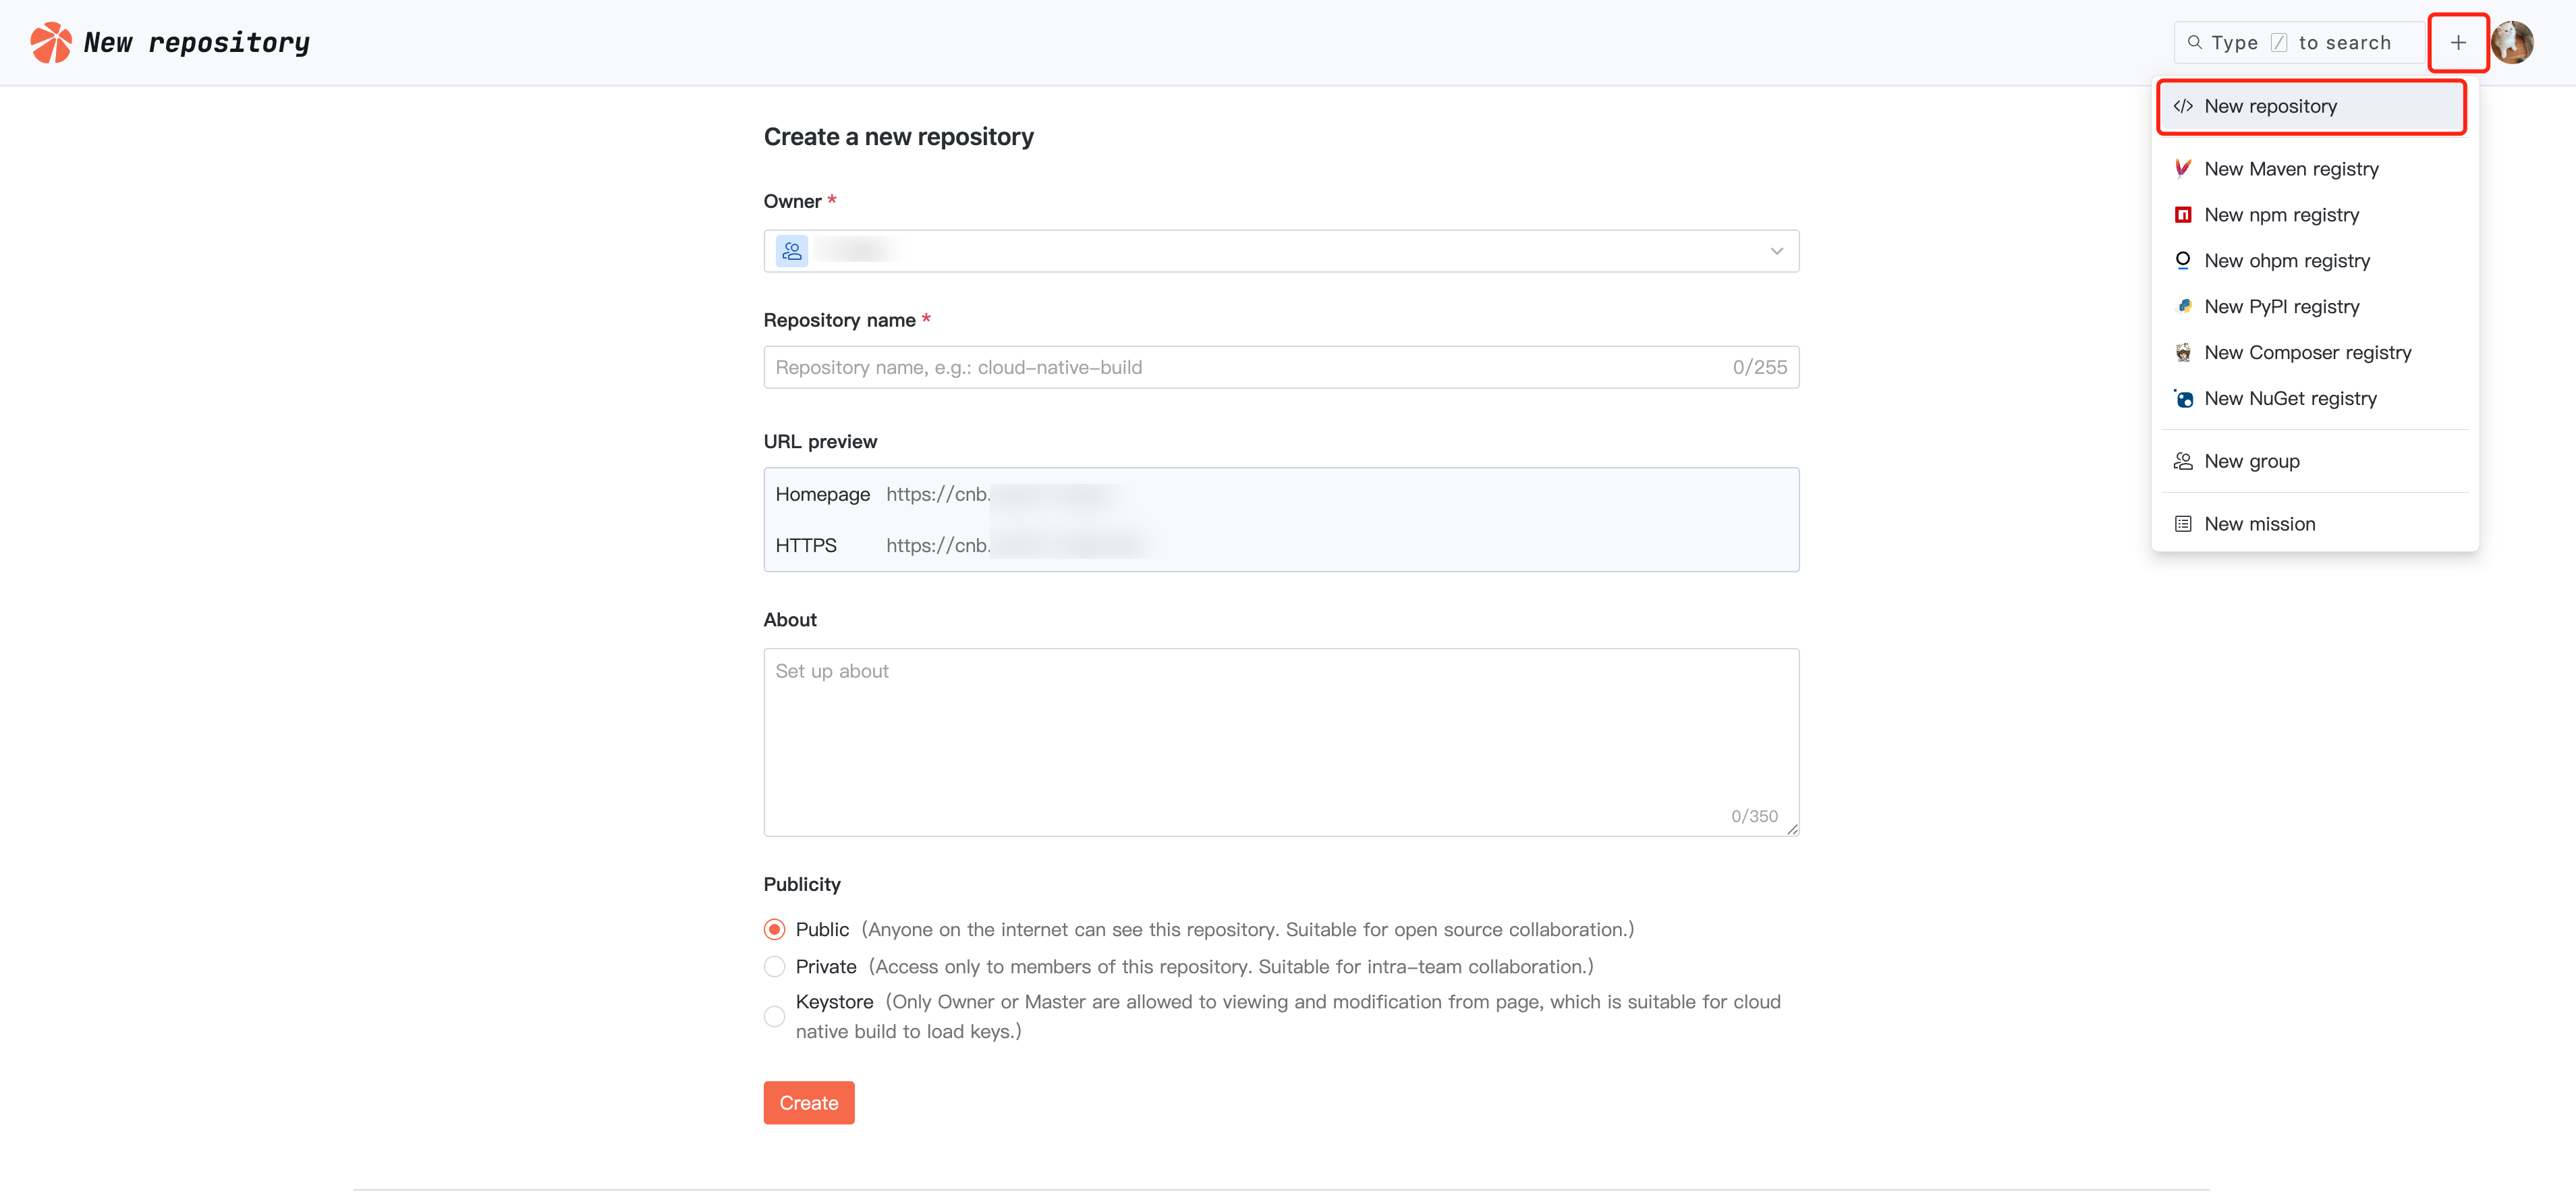
Creating a Repository
Click "+" in the upper right corner, select New repository, choose the repository's ownership organization, fill in the repository name, and select the repository visibility as needed. Then click Create to complete the warehouse creation.
Initializing a Repository
After the repository is created, you can choose any of the following methods to initialize it.
Cloud-Based Quick Initialization (Recommended)
You can execute related commands in native development to migrate an existing repository or directly create a new file to initialize it.

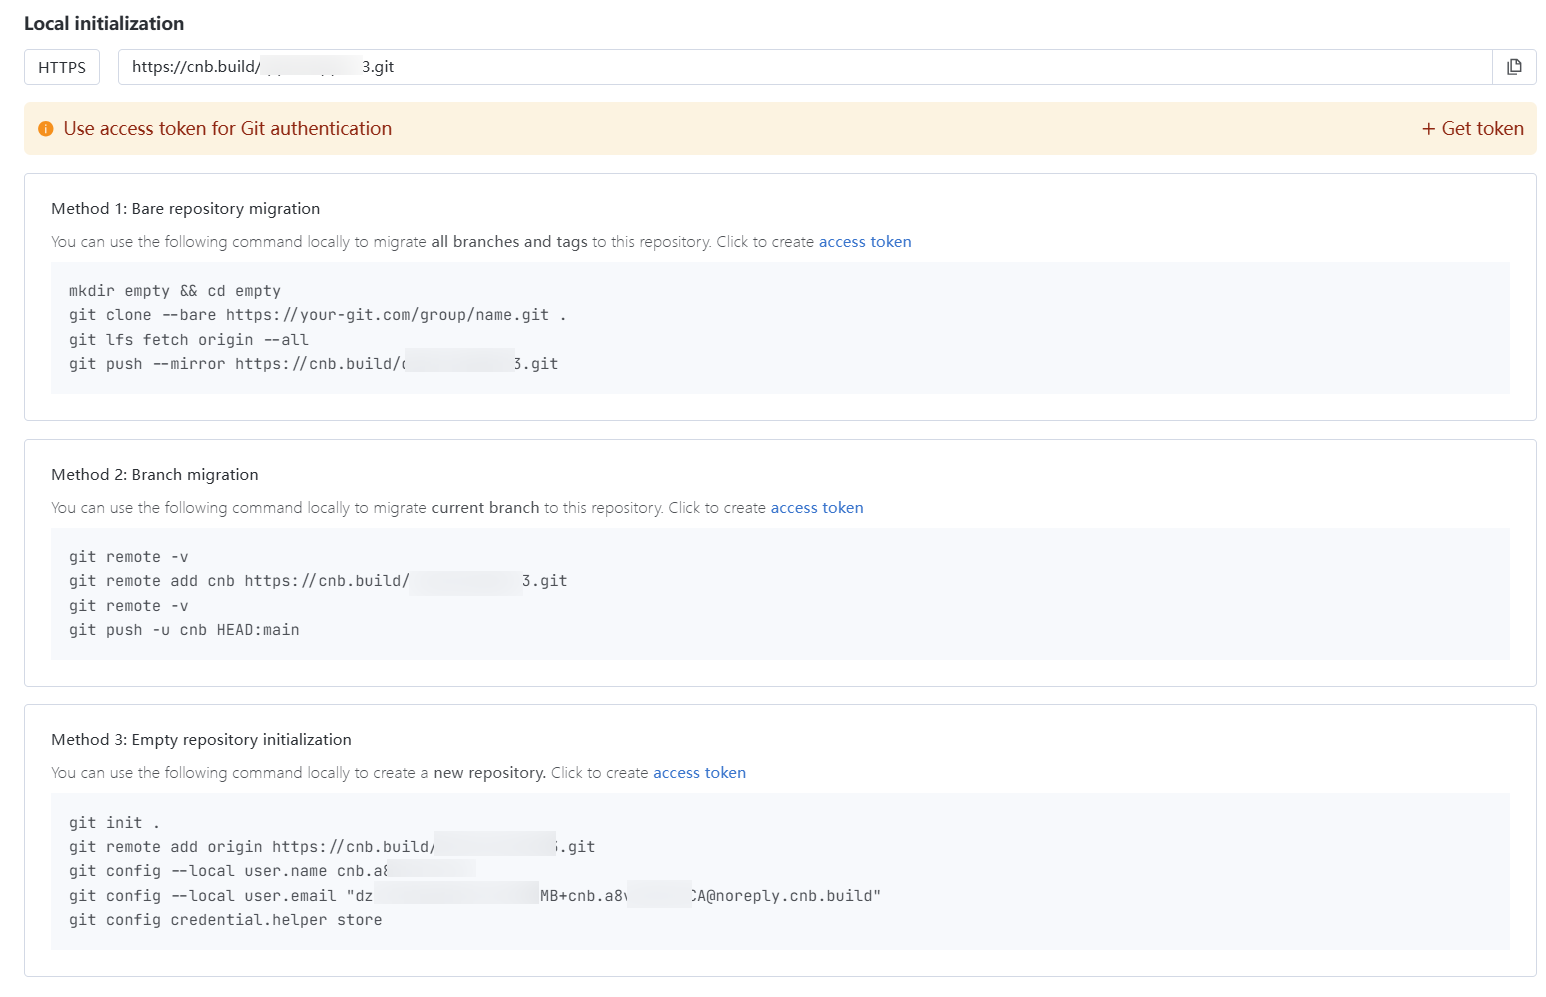
Local Initialization
Initialization can be done through any of the following methods: bare database migration, branch migration, or empty warehouse initialization. The specific command can be accessed through the target warehouse, with the interface as follows:
Step Three: Configure Cloud Native Build (Pipeline)
CNB pipeline configuration is declaratively managed by the
.cnb.yml file in the root directory of the code repository. For specific operations, see Cloud Native Build.Step Four: View Pipeline Execution Result
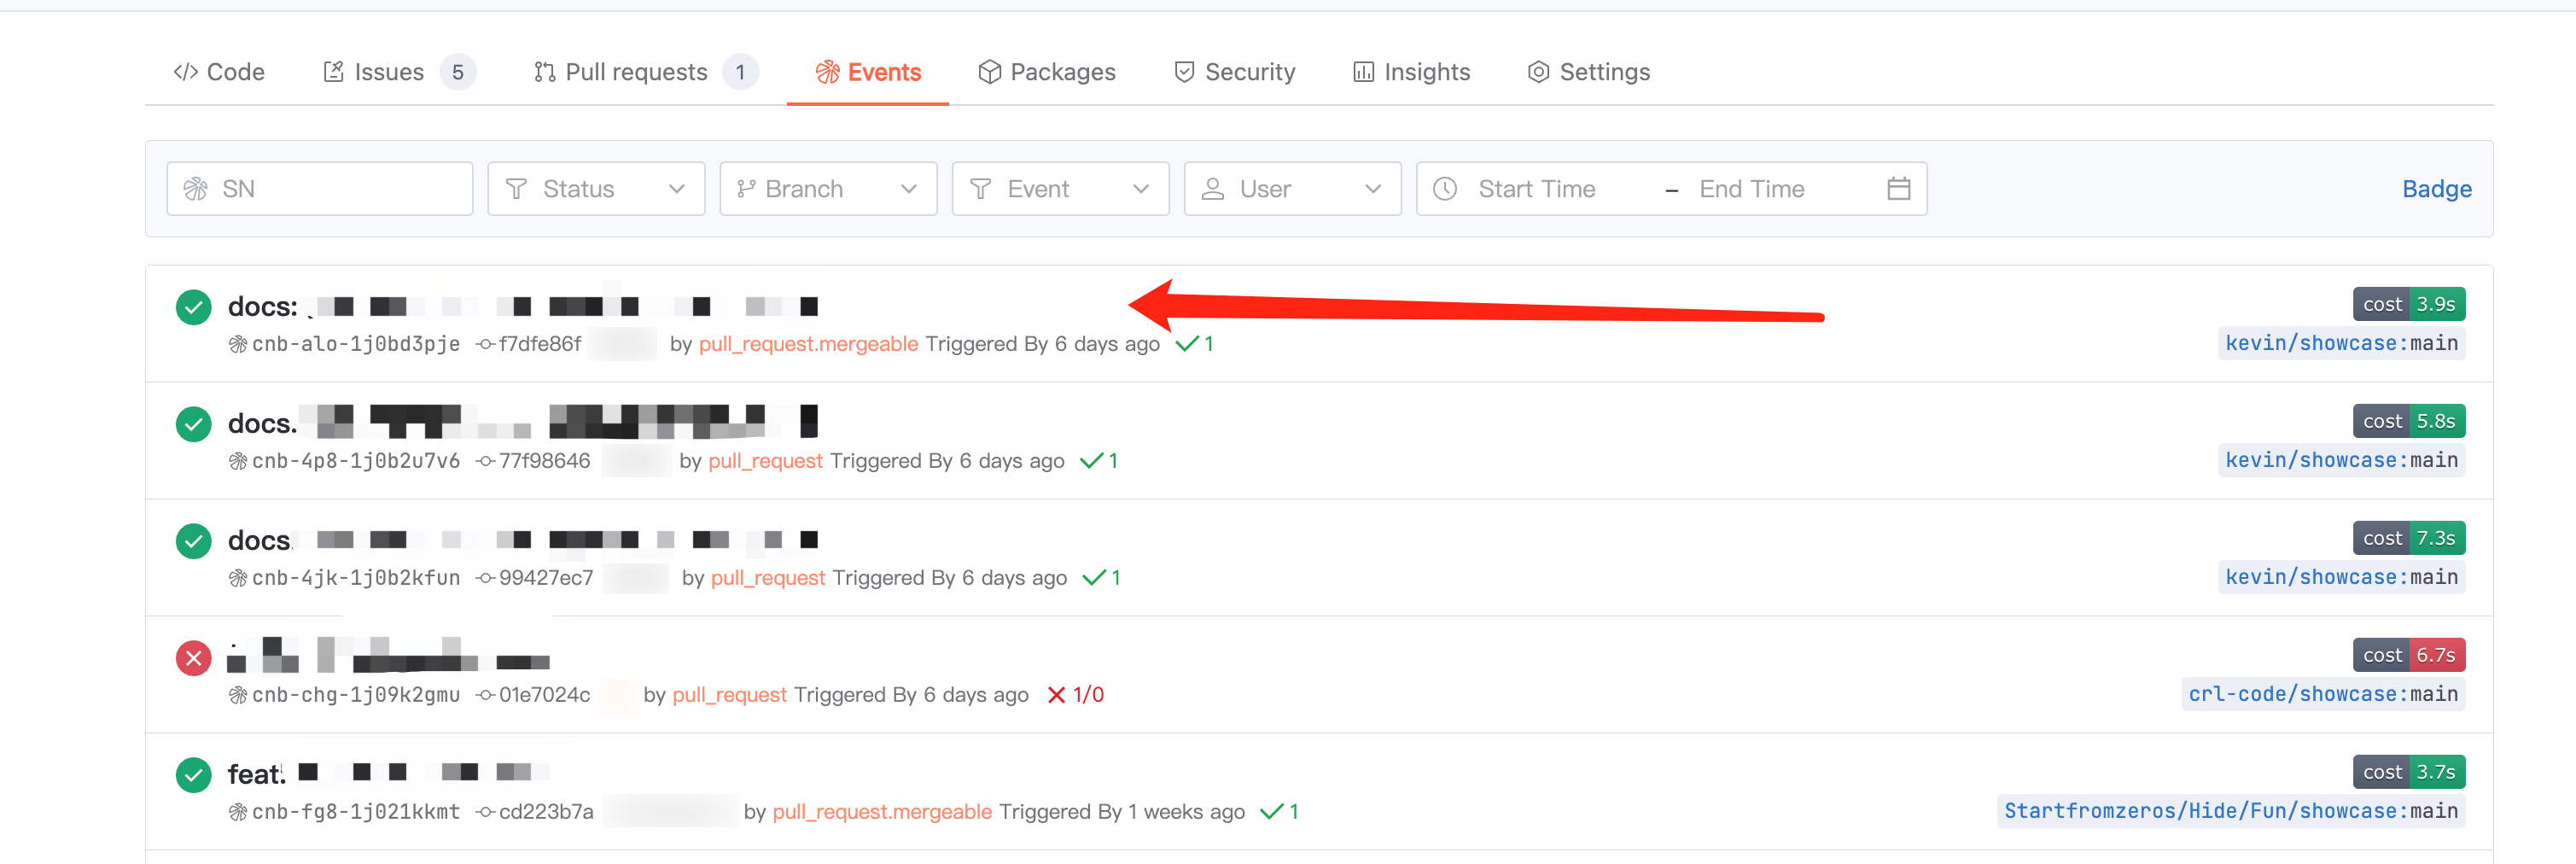
On the warehouse page, click Events to see the build list. The latest one is the pipeline triggered by the push event just now. The record with a loading flag below corresponds to the Cloud Native Development build.
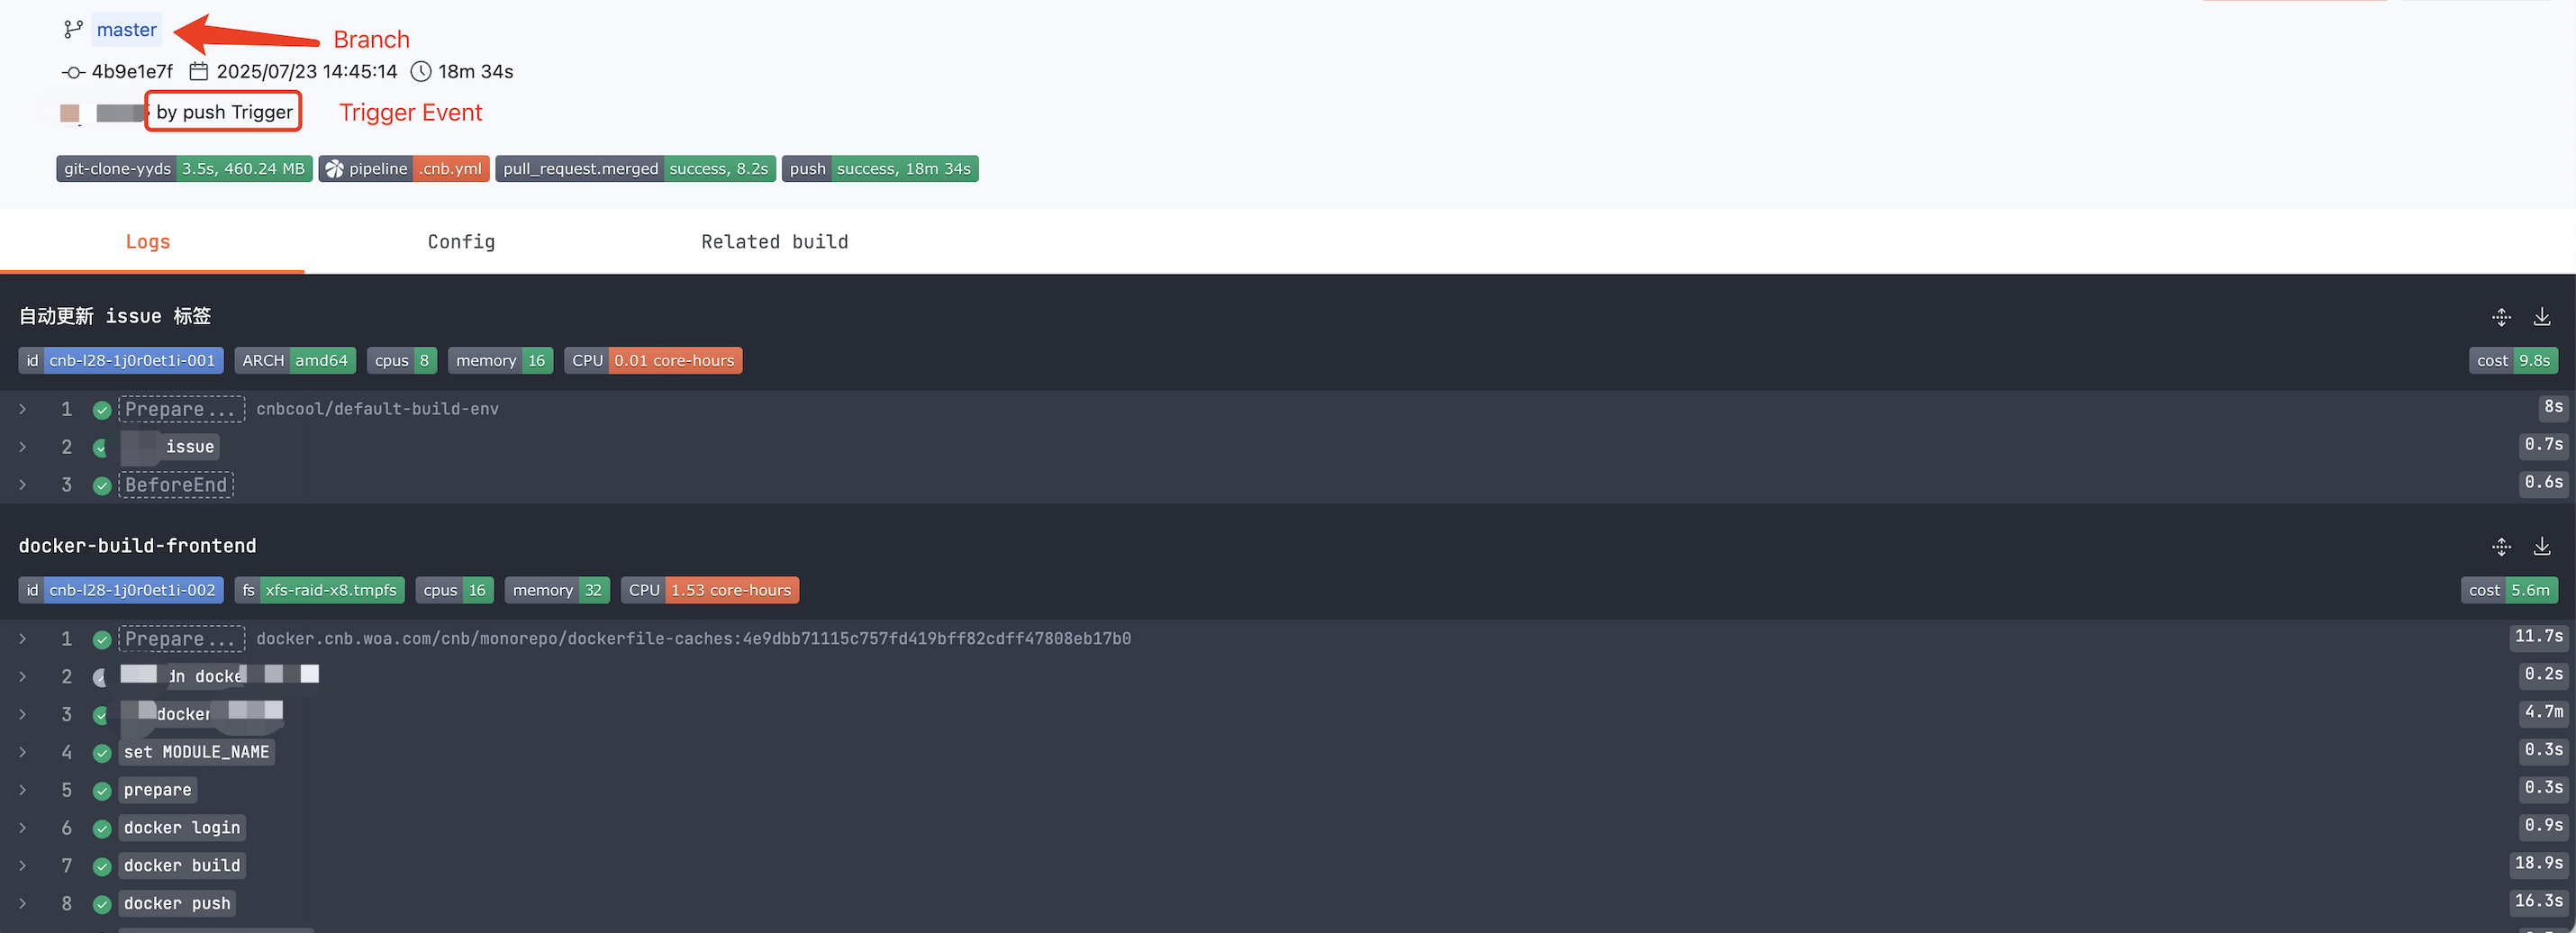
Click the pipeline name to enter and view build details. As shown in the figure below:
Cloud Native Build Grammar
Advanced Practice
To write a pipeline configuration more in line with your own needs, refer to Practical Example to select a scenario-based repository, fork the repository, or copy its configuration file to use.
Custom build environment. See Docker as Environment.
Custom build plug-in. See Docker as Plug-in.
Help and Support
Was this page helpful?
You can also Contact sales or Submit a Ticket for help.
Help us improve! Rate your documentation experience in 5 mins.
Feedback