View Management
Download
Focus Mode
Font Size
Overview
A view is a collection of resource information, usually created by administrators based on business scenarios and filter criteria. Users view and manage resources through views, achieving internal resource data permission control.
View Permission
The view in Cloud Resource Center provides users with an authentication scheme through Tencent Cloud CAM service, thereby achieving view permission management. Based on different user roles, Cloud Resource Center assigns the following view permissions to users:
Root account: The root account can be accessed without the need to grant permission.
Sub-account: There are two ways to enable view permission:
Grant authorization for all views via roles: Contact the root account administrator to select one of the following two CAM roles for the sub-account:
QcloudCloudrcFullAccess: Read-write access privileges in Cloud Resource Center, allowing create, delete, and update of views.
QcloudCloudrcReadOnlyAccess: Read-only access permission in Cloud Resource Center.
Grant authorization for designated views by configuring CAM policy: Please refer to the Cloud Access Management authorization guide documentation.
Operation Steps
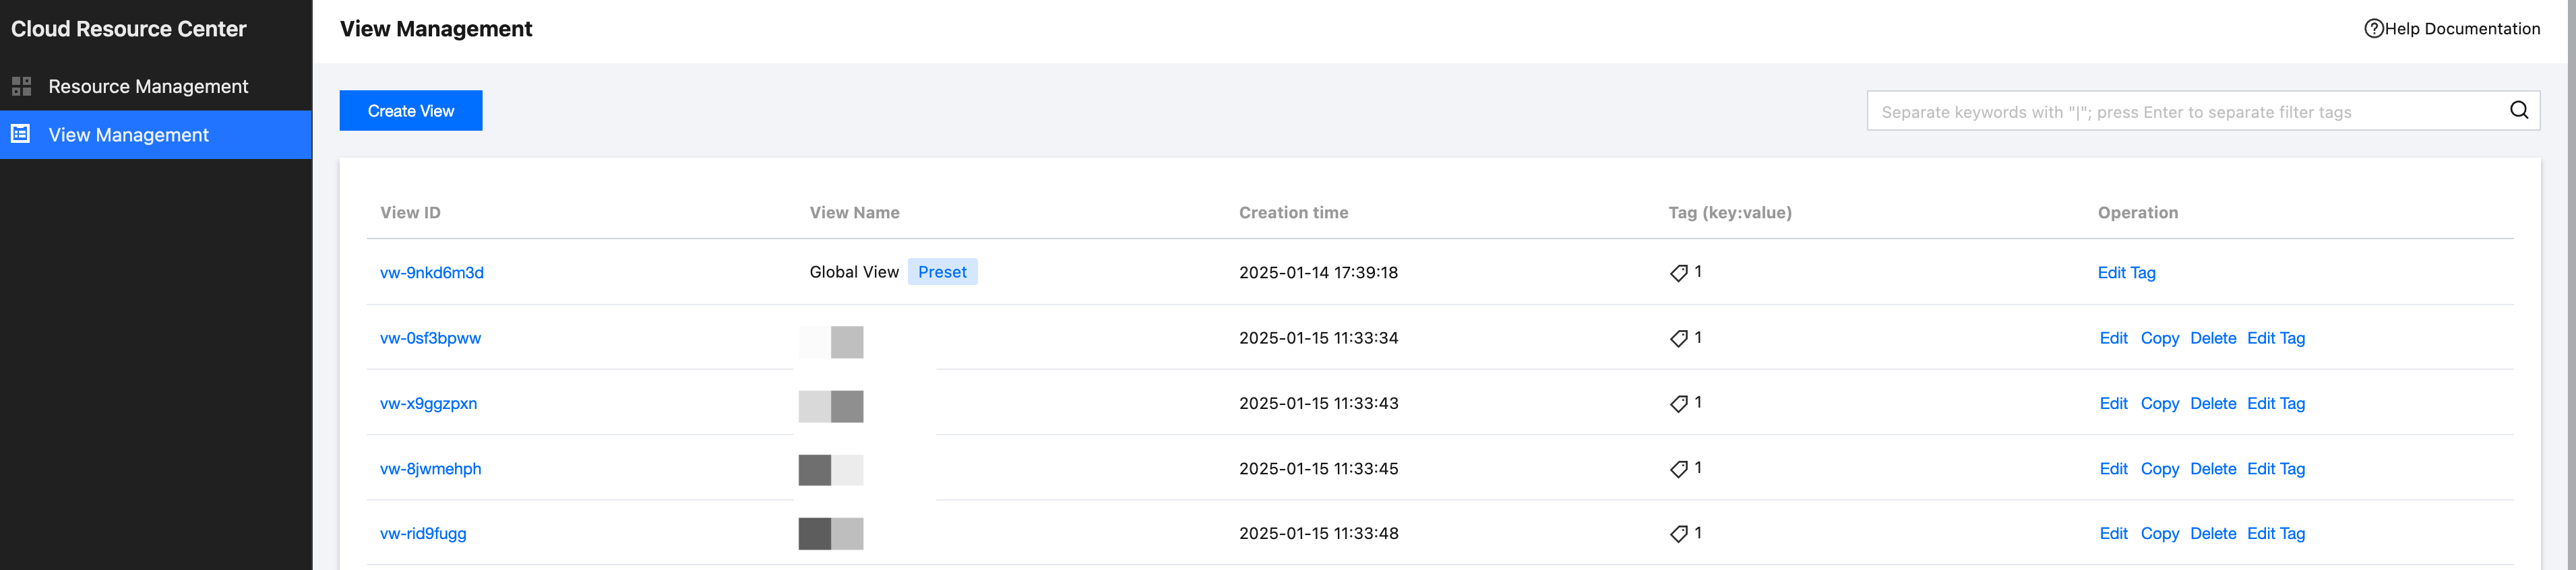
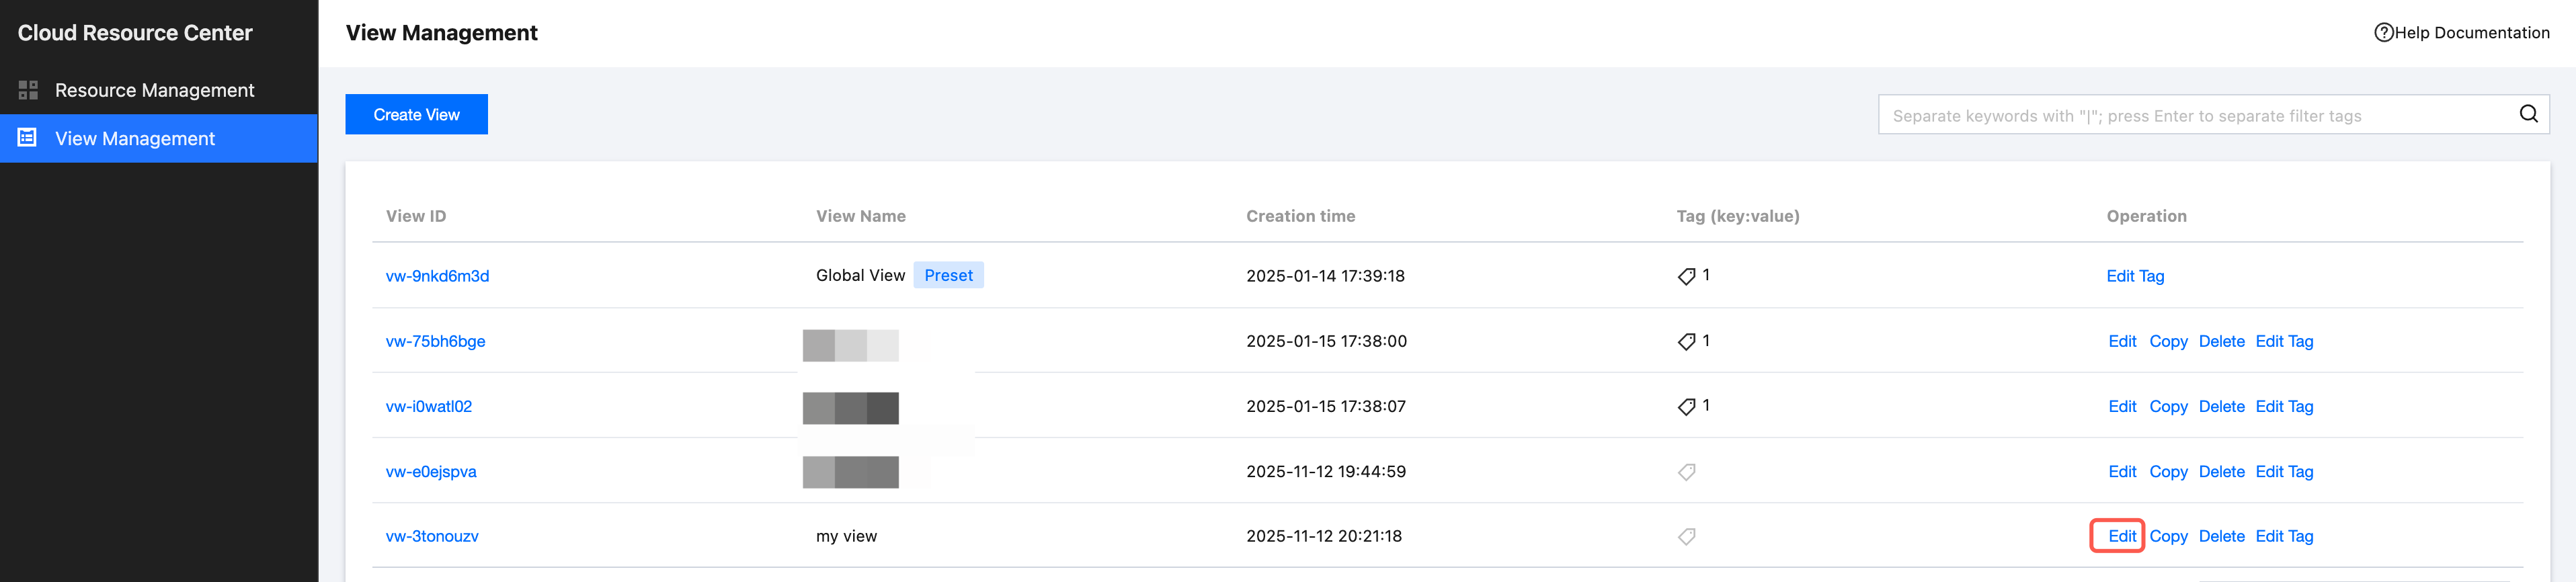
On the Cloud Resource Center webpage, click on the left View Management to enter the View Management page.
Creating a View
1. On the view management webpage, click Create View.
2. In the popup window, enter the view name, click Add Condition at the bottom, select the required condition and enter the value. You can also bind a tag to the view for future reference to search the view on the console tag page or configure sub-user access policy for the view by tag in CAM.
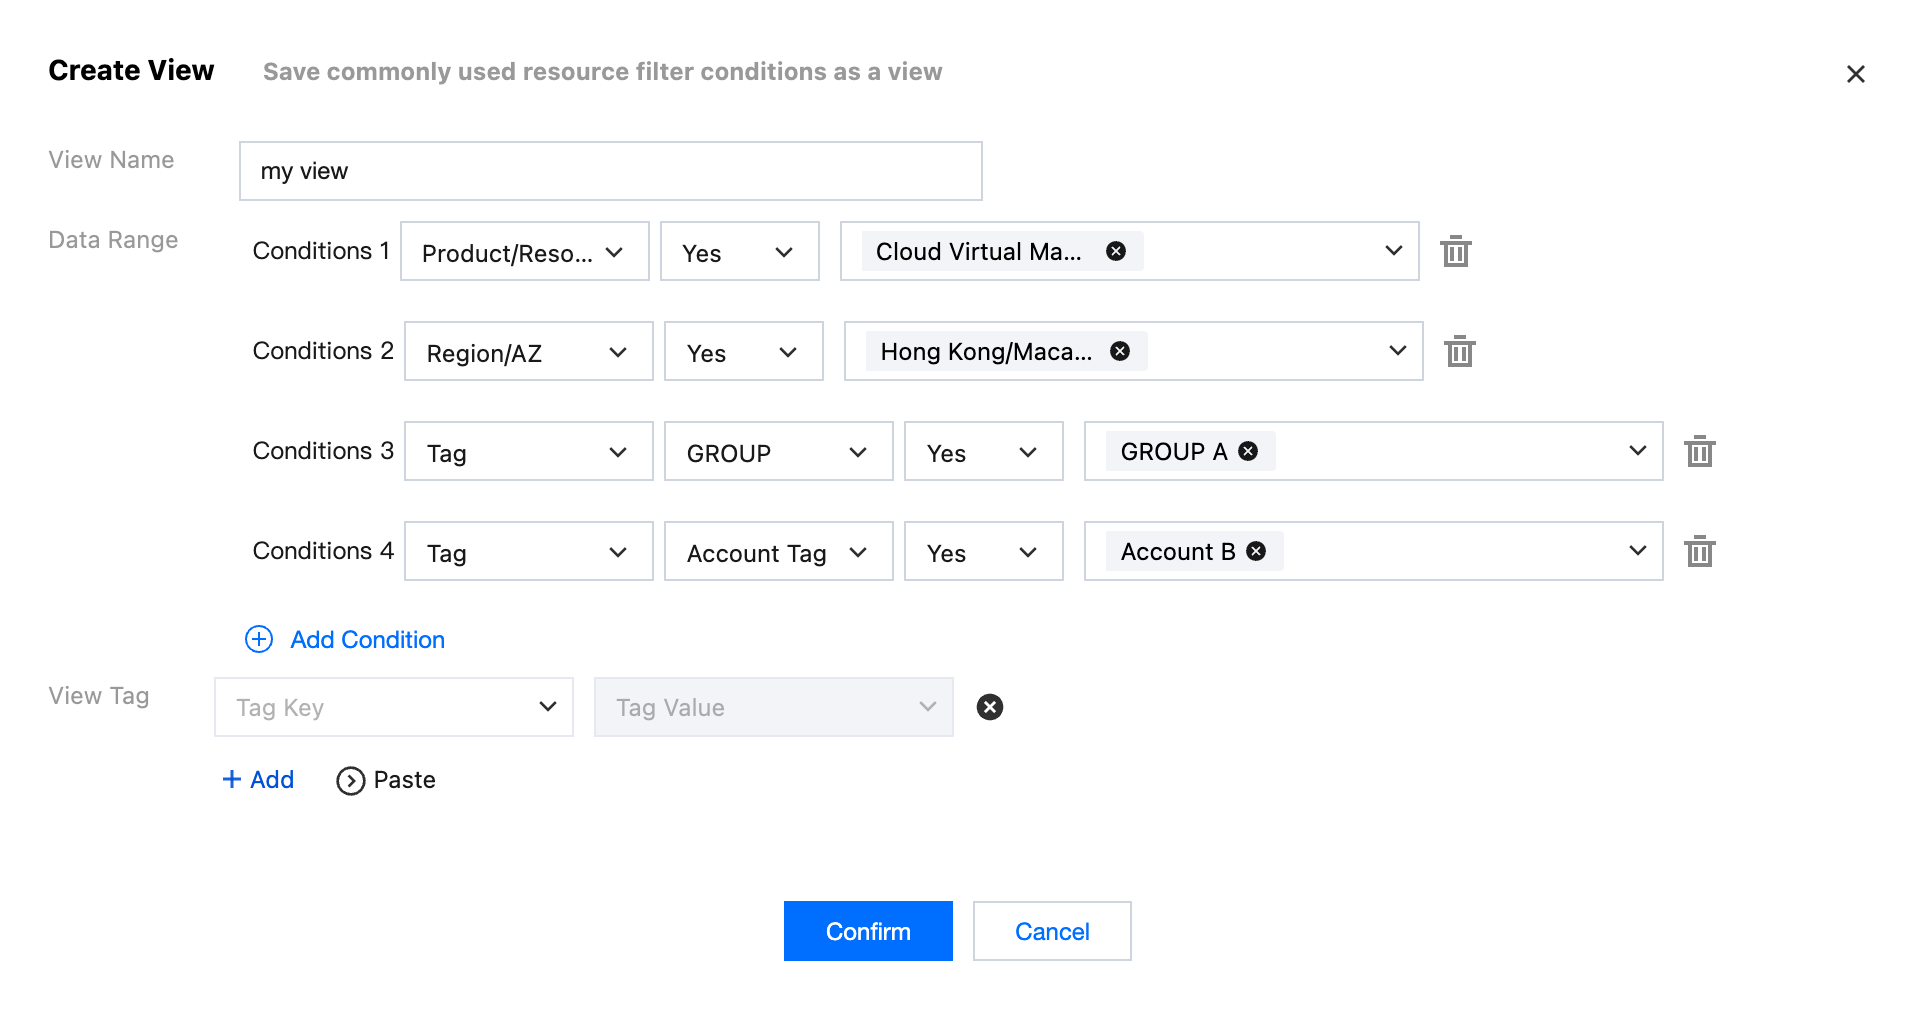
3. Enter the related condition, click Confirm, and save the newly created view.
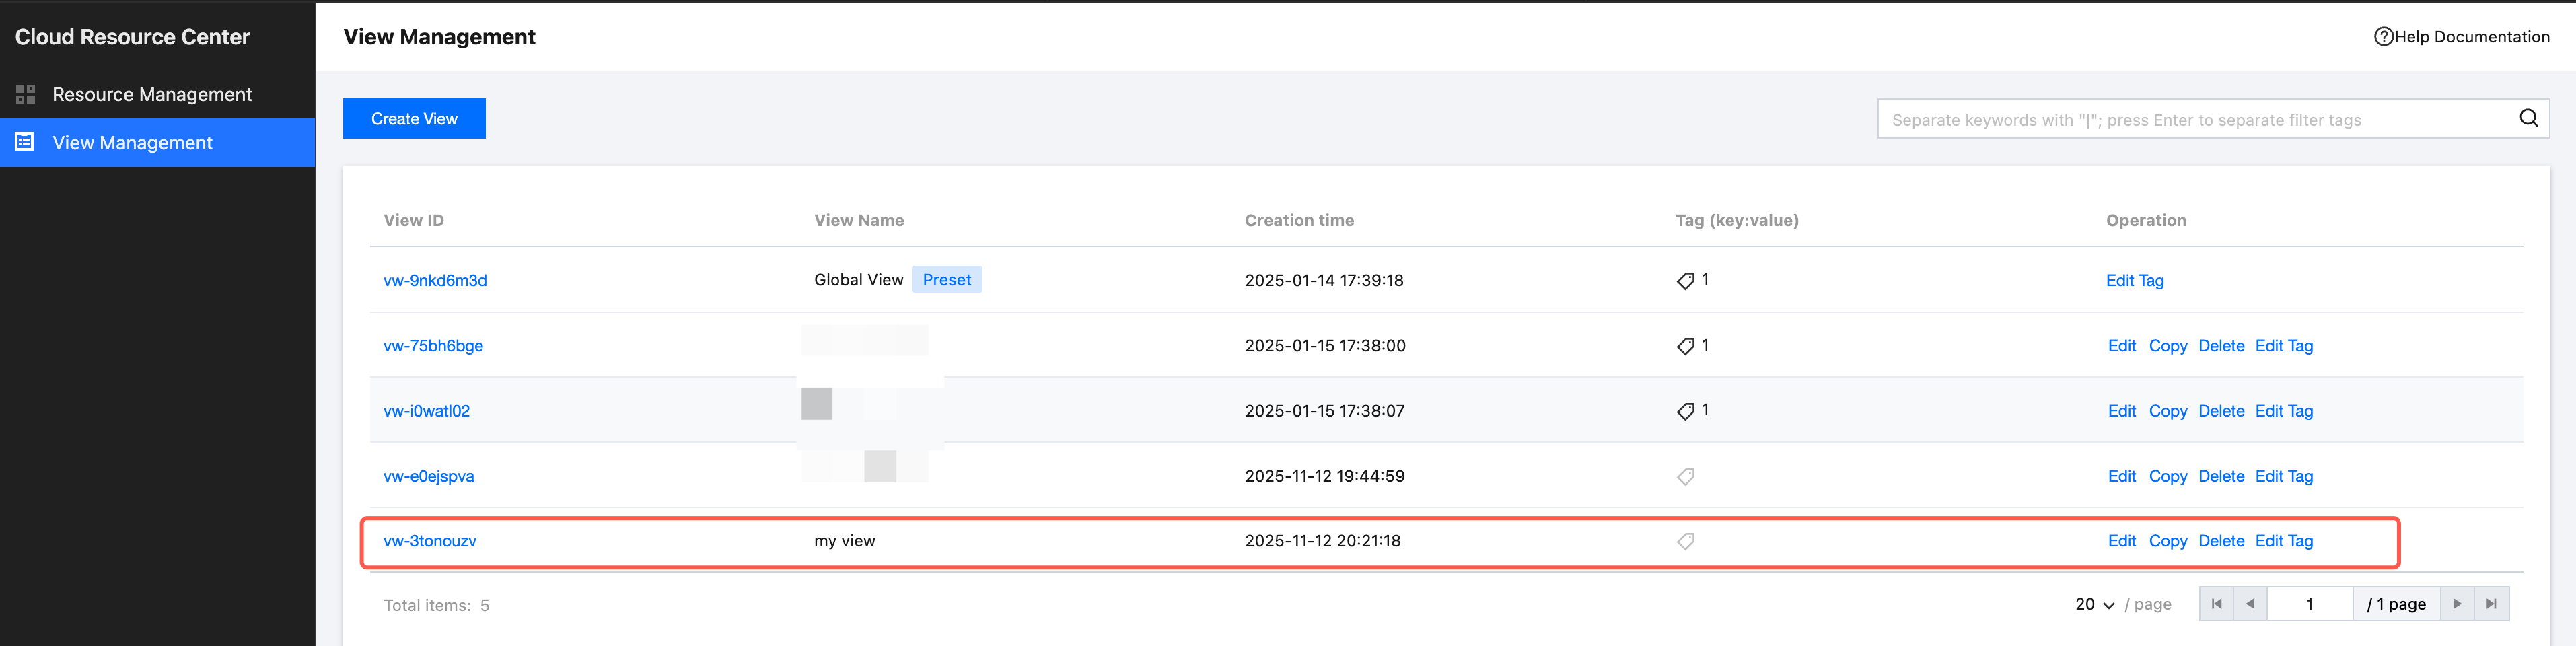
4. After the view is created, you can view the newly created view in the list.
Viewing a View
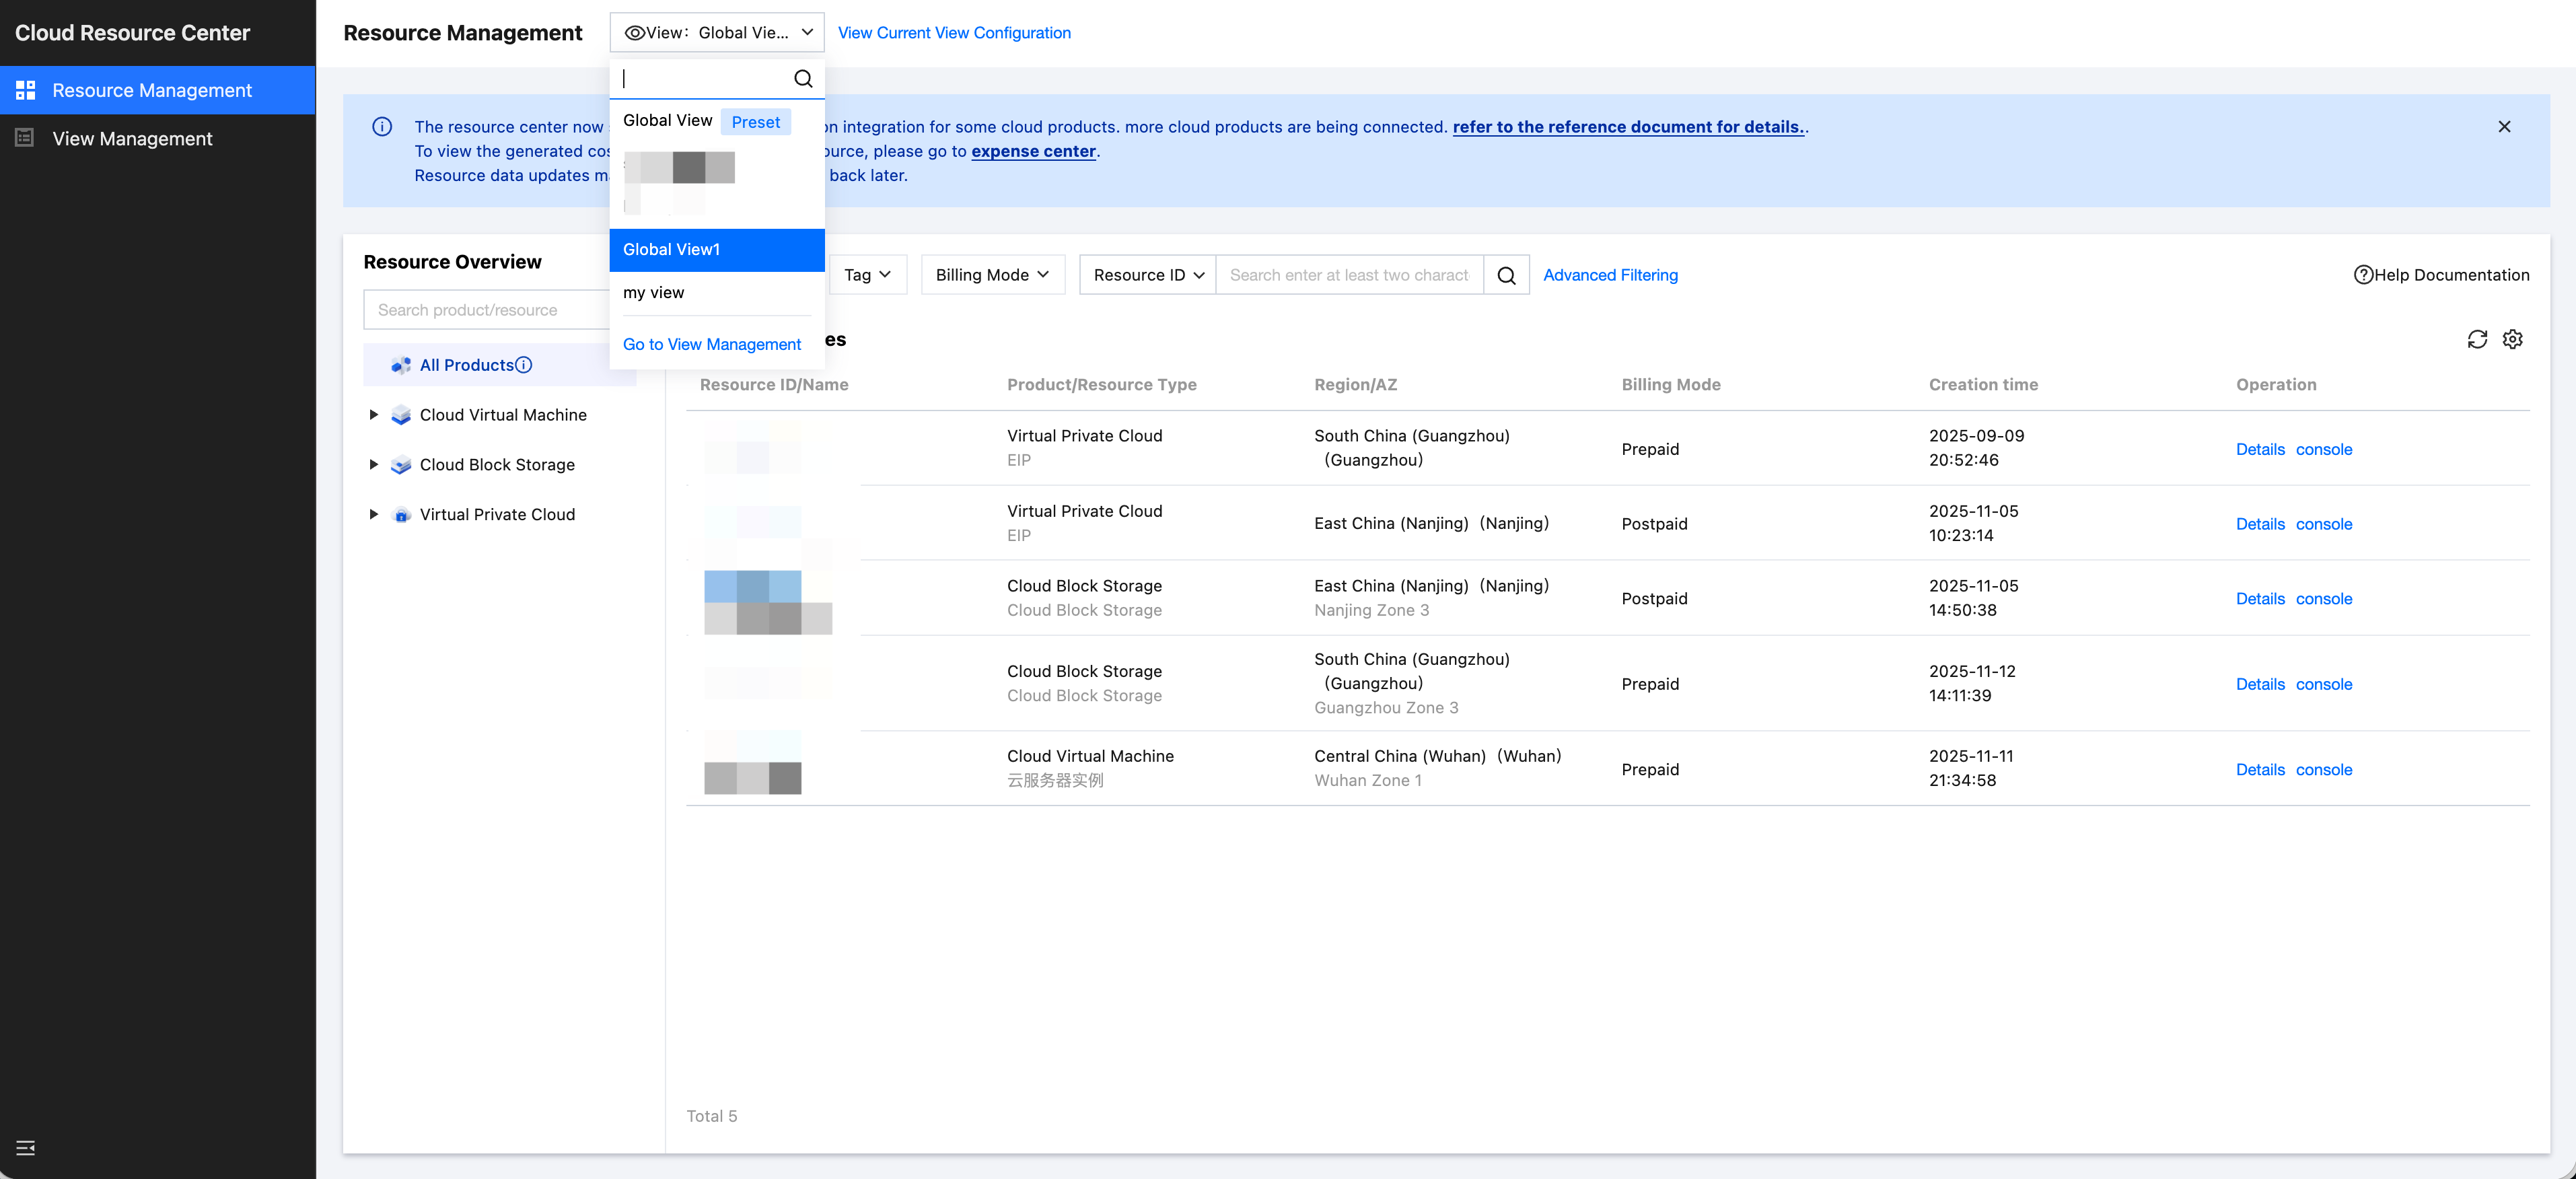
On the View Management webpage, click the selected View ID to directly view the content.
You can also select the view to view in the top-left corner of the Resource Management page. Your previously saved view filtering conditions will appear below the search bar.
Editing a View
1. On the View Management webpage, click Edit on the right of the view list to edit the view.
2. On the Edit View page, you can modify or delete previously saved criteria, or add new filter conditions.
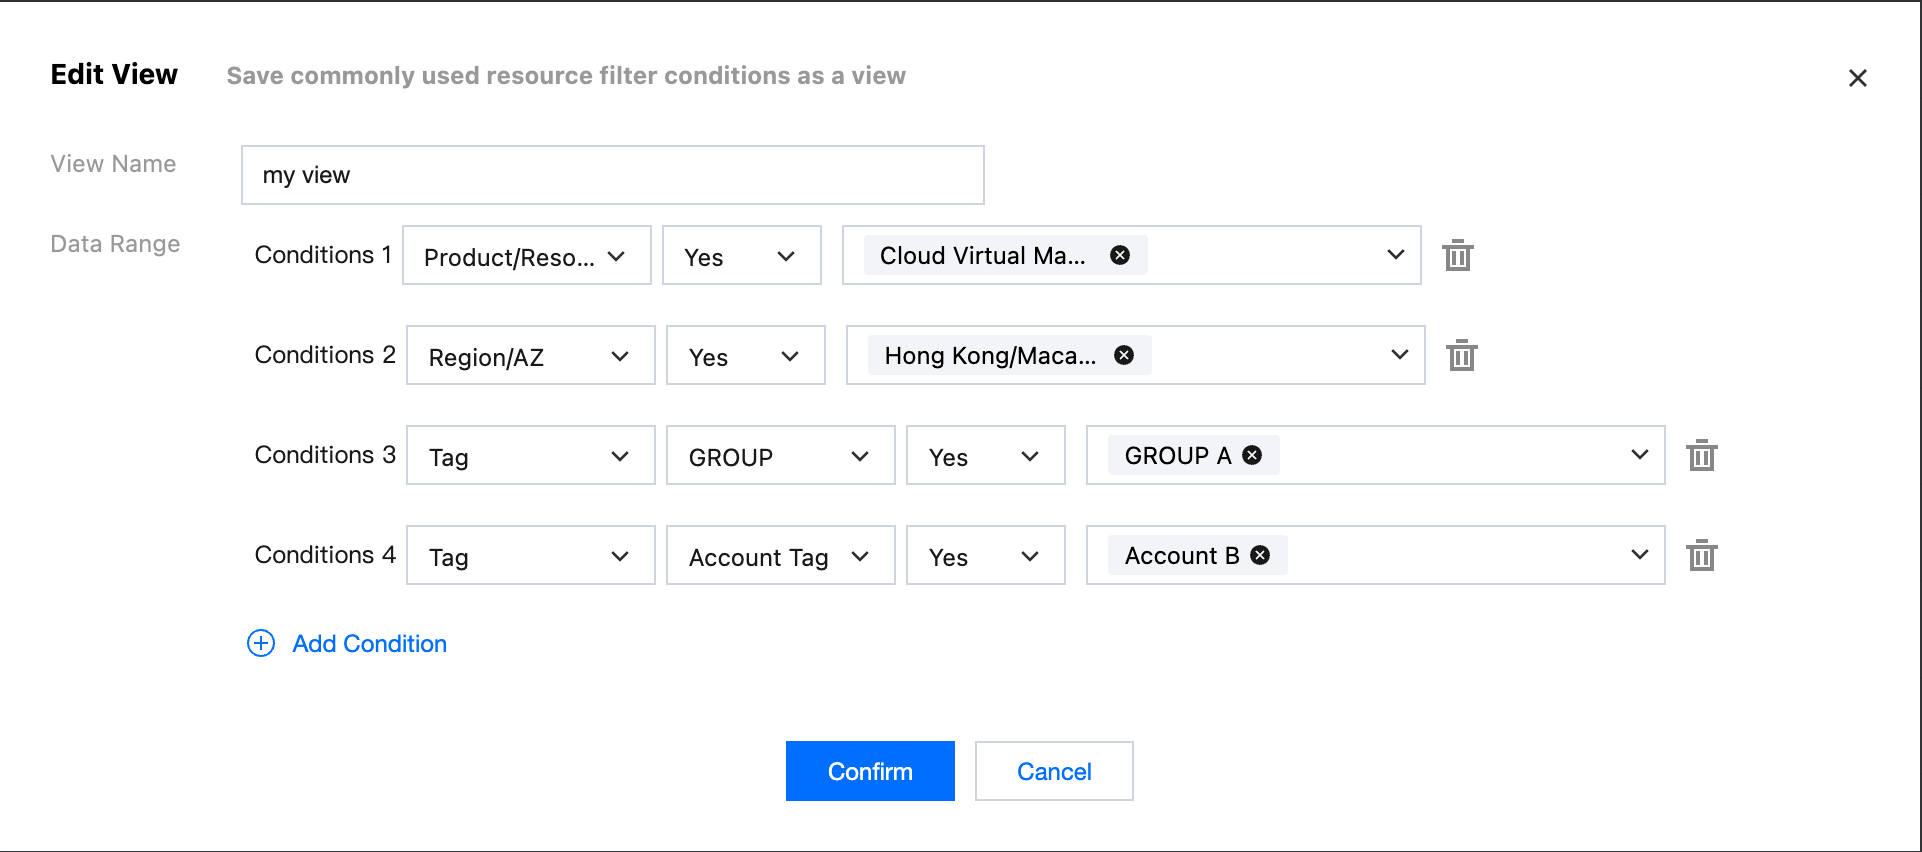
3. After editing, click Confirm to save.
Deleting a View
1. On the View Management webpage, click Delete on the right of the view list to delete the view.
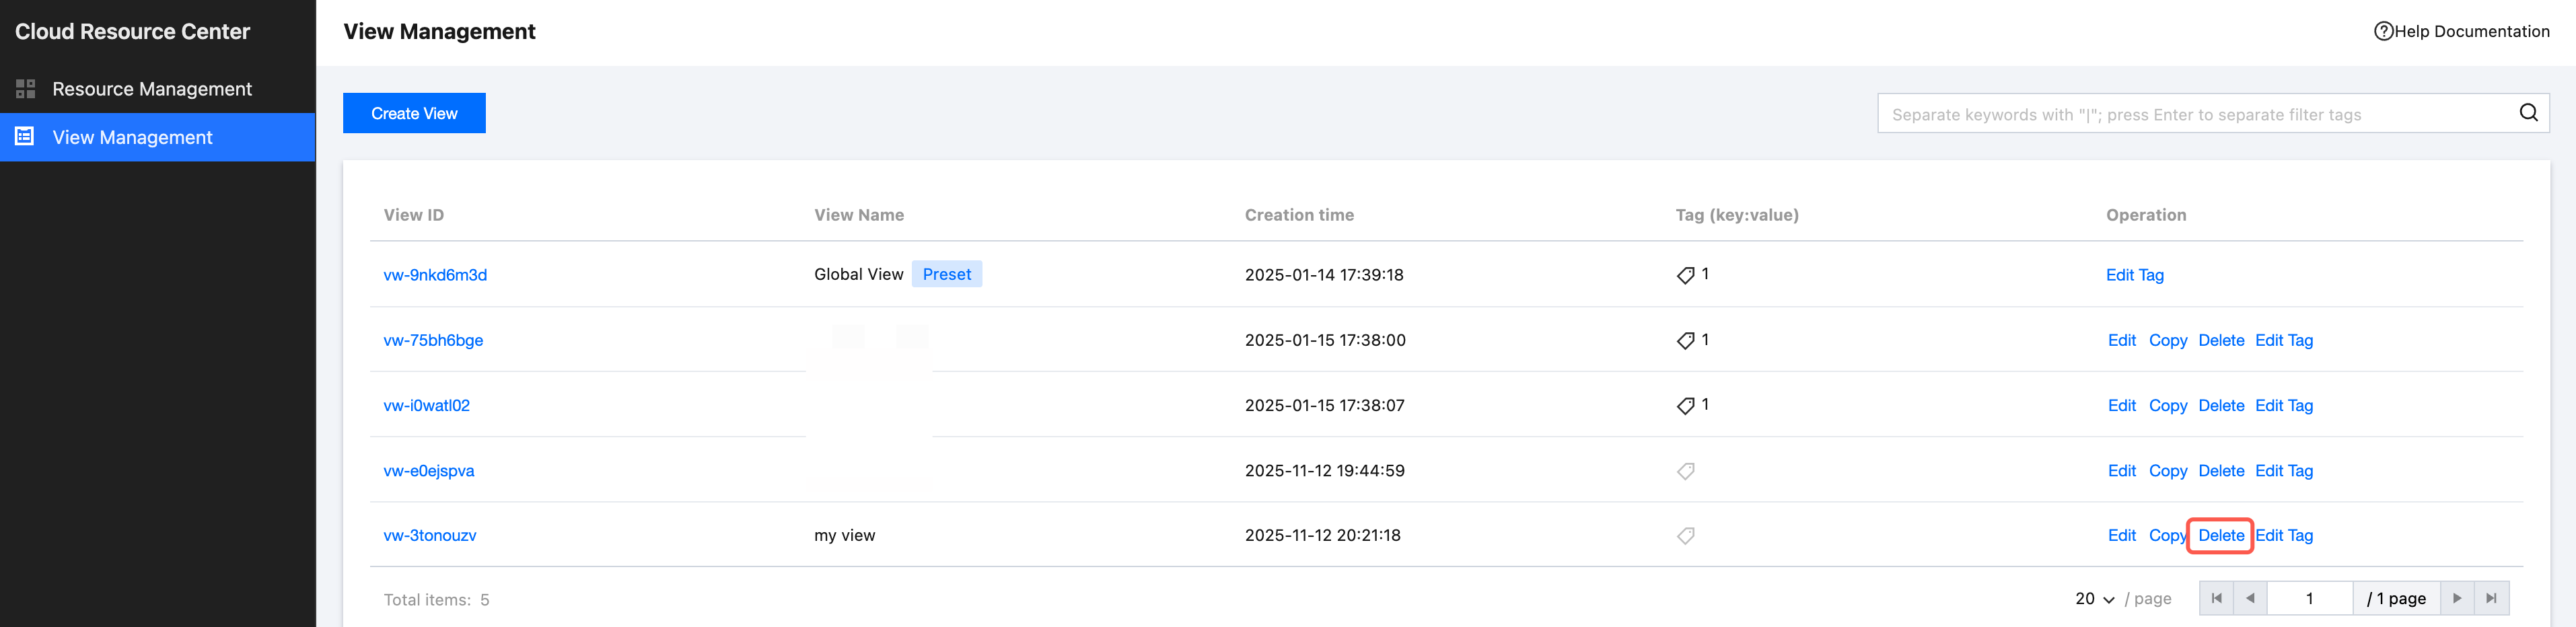
2. Click Confirm to complete the deletion.
Copying a View
1. On the View Management webpage, click Copy on the right of the view list to copy the view.
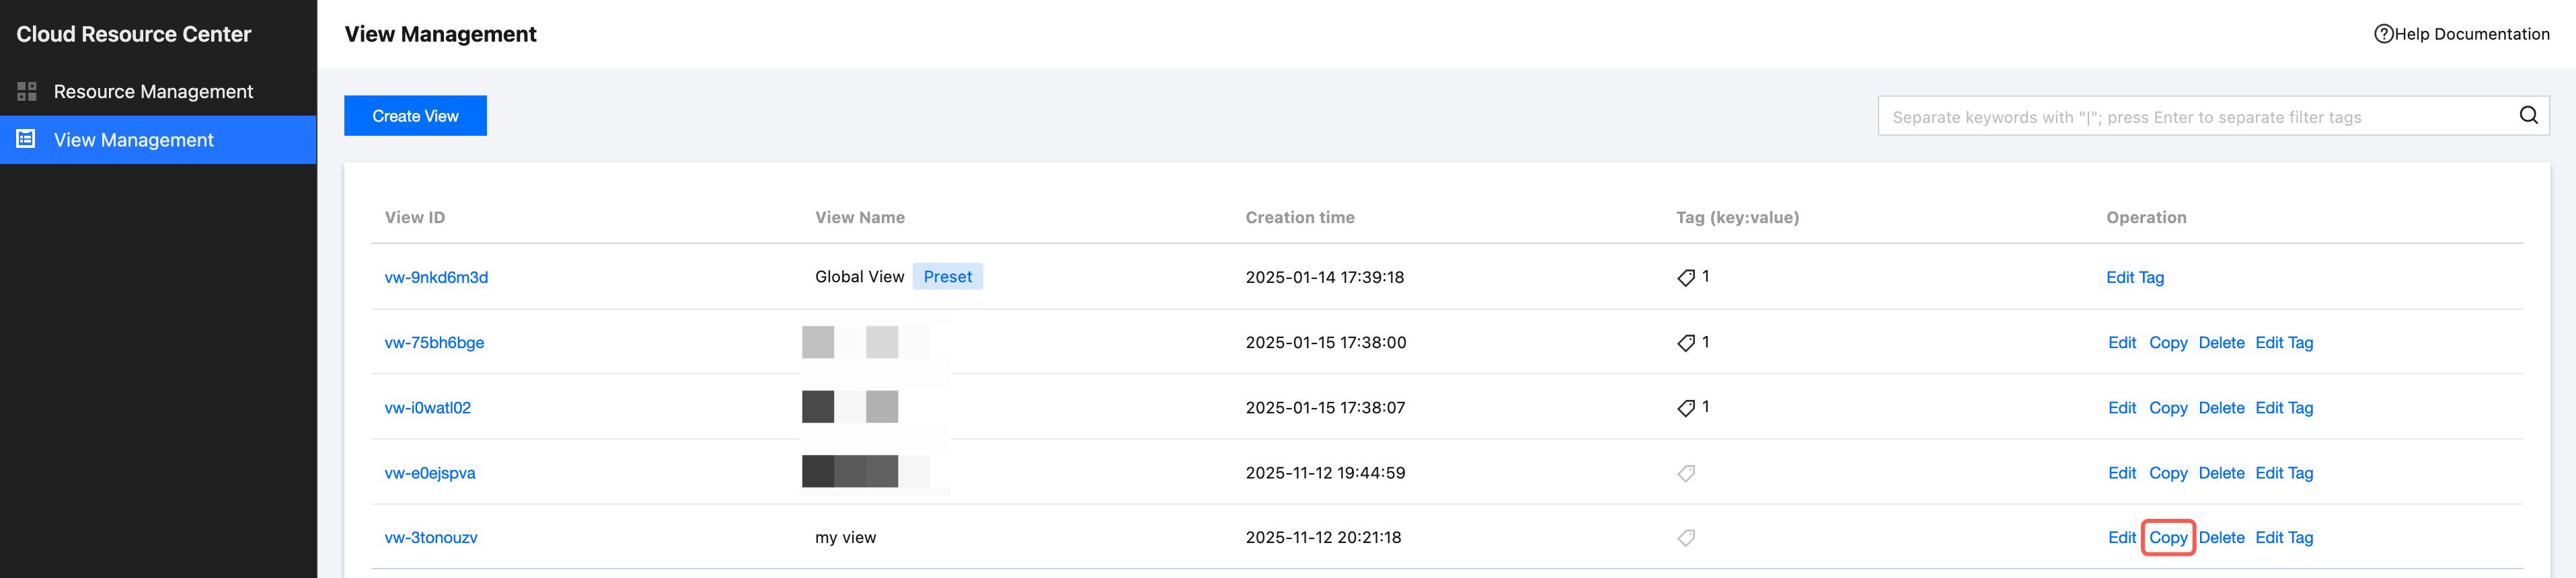
2. On the Copy View page, you can modify or delete the copied criteria, or add new filter conditions.

3. After editing, click Confirm to save.
Editing a Tag
1. On the View Management webpage, click Edit Tag on the right of the view list to edit the view tag.
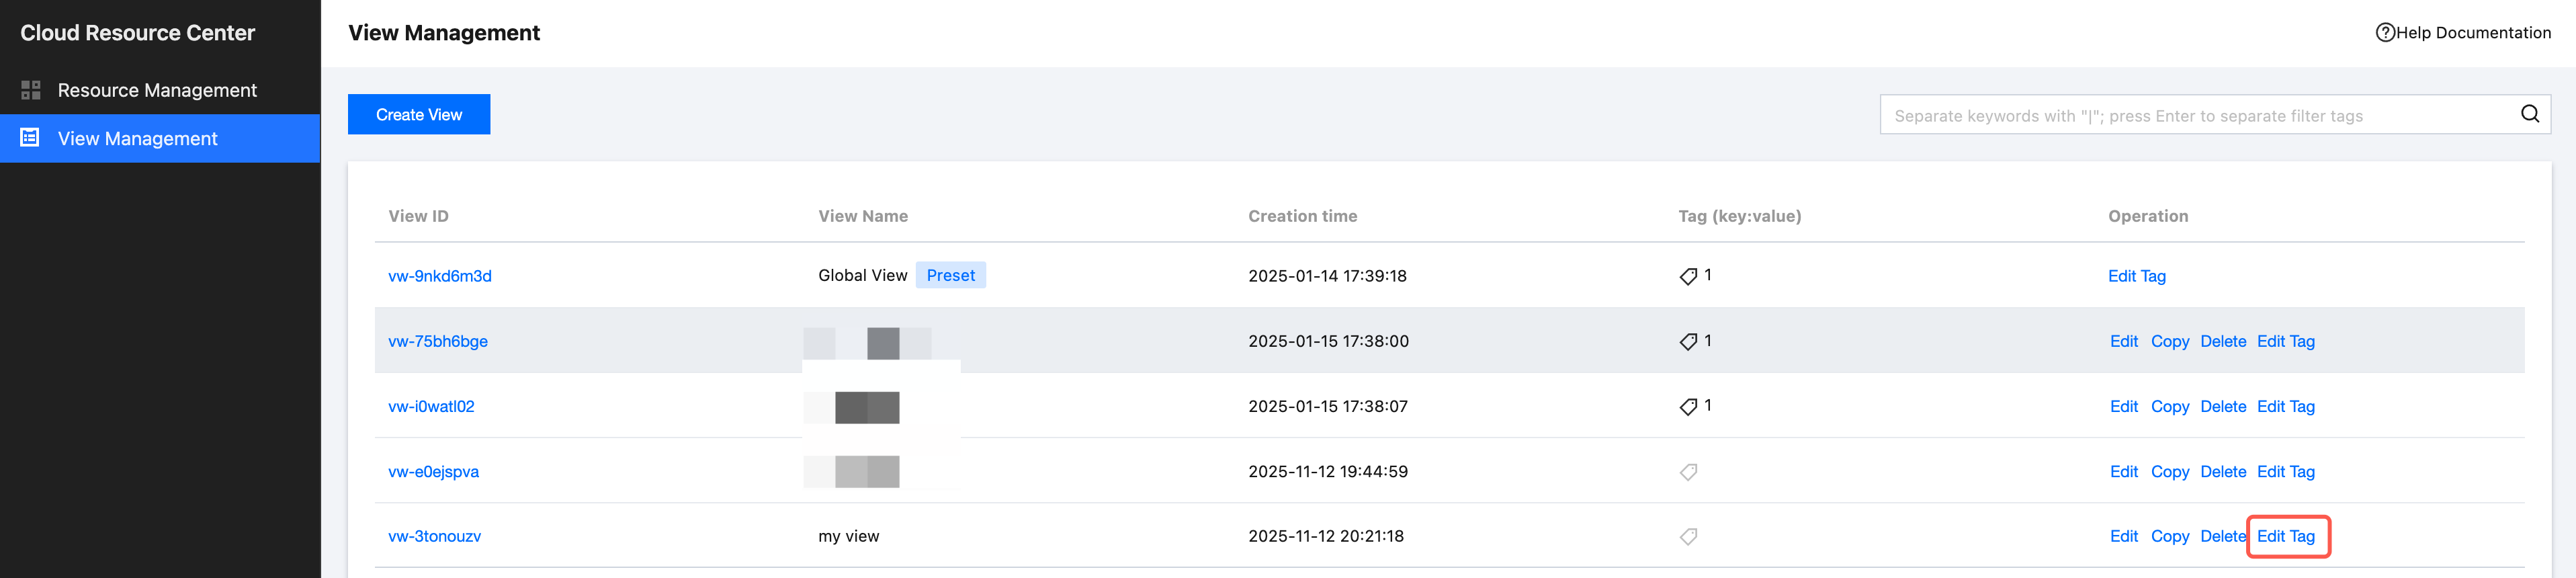
2. On the Edit Tag page, you can bind or delete tags as needed.
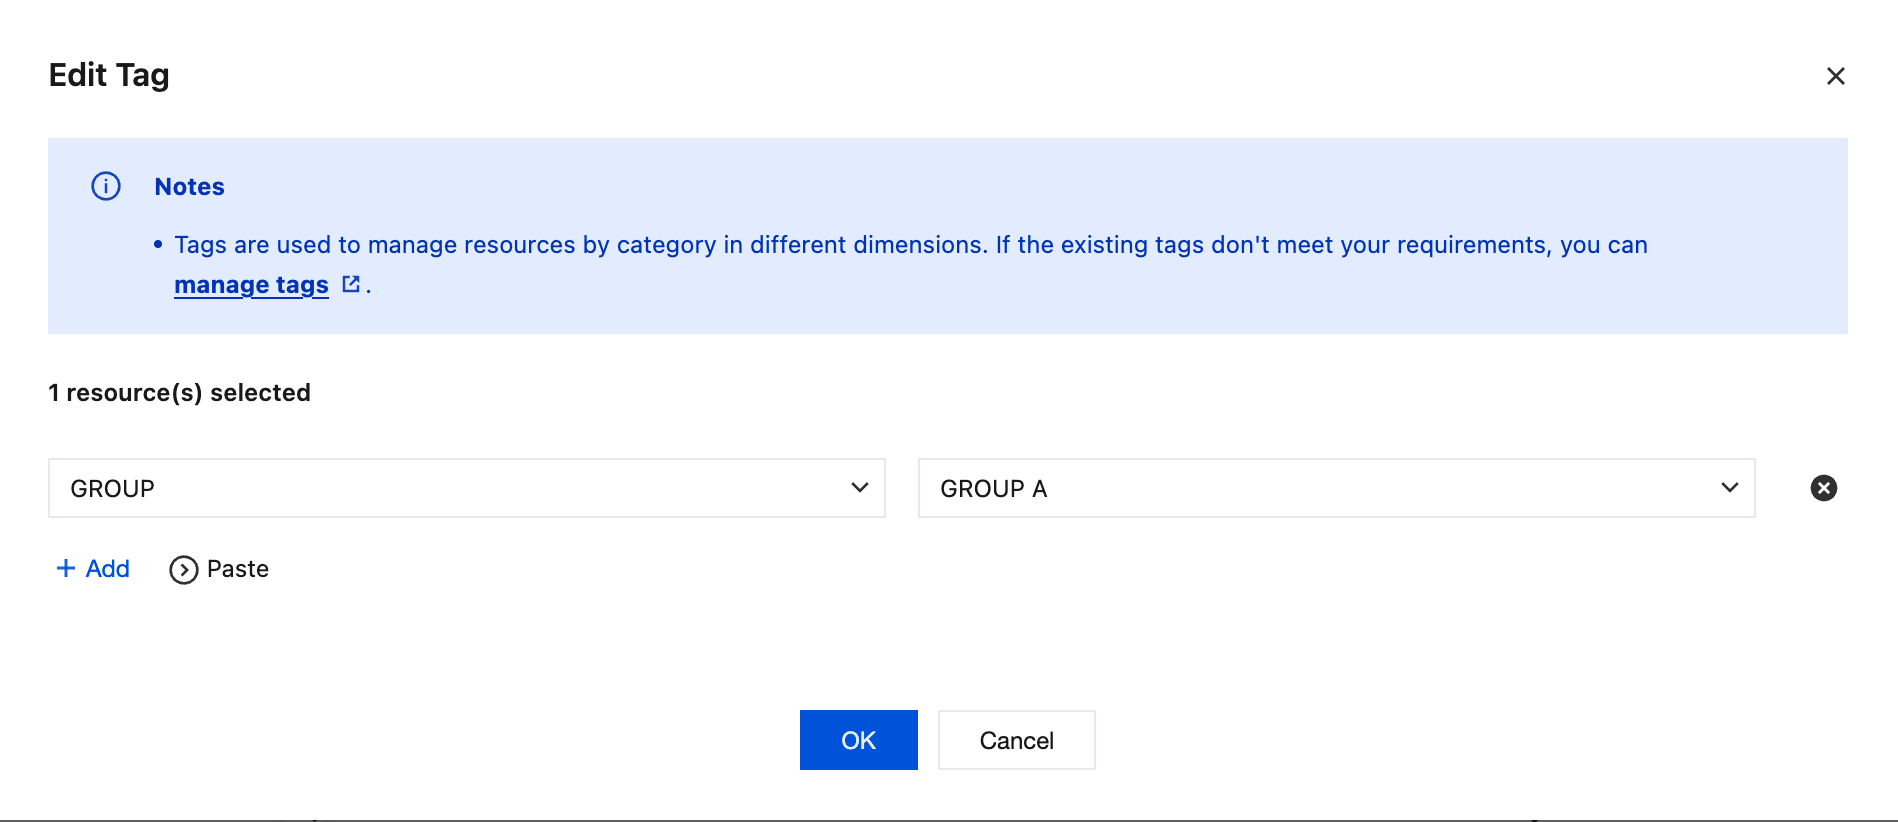
3. After editing, click OK.
Help and Support
Was this page helpful?
You can also Contact sales or Submit a Ticket for help.
Help us improve! Rate your documentation experience in 5 mins.
Feedback