To purchase the network disk for enterprises, see Purchase Method for specific operation steps.
Operation Steps
Step 1: Bind Super Admin Account and Log In
1. Go to the console for the Enterprise Network Disk Drive Management page.
2. Click the icon on the right of Pending Binding in the Super Administrator Account column, enter the super administrator's mobile number and verify it.
3. Click the domain name for enterprise network disk login to go to the login page.
4. Enter the super admin mobile number. After verification passes, you can log in successfully and access the enterprise network disk web version.
5. You can also go to the official website of TCED Download the TCED Client, and after verification with the mobile number of the super administrator, start using the TCED client.
Step 2: Create Users and Teams
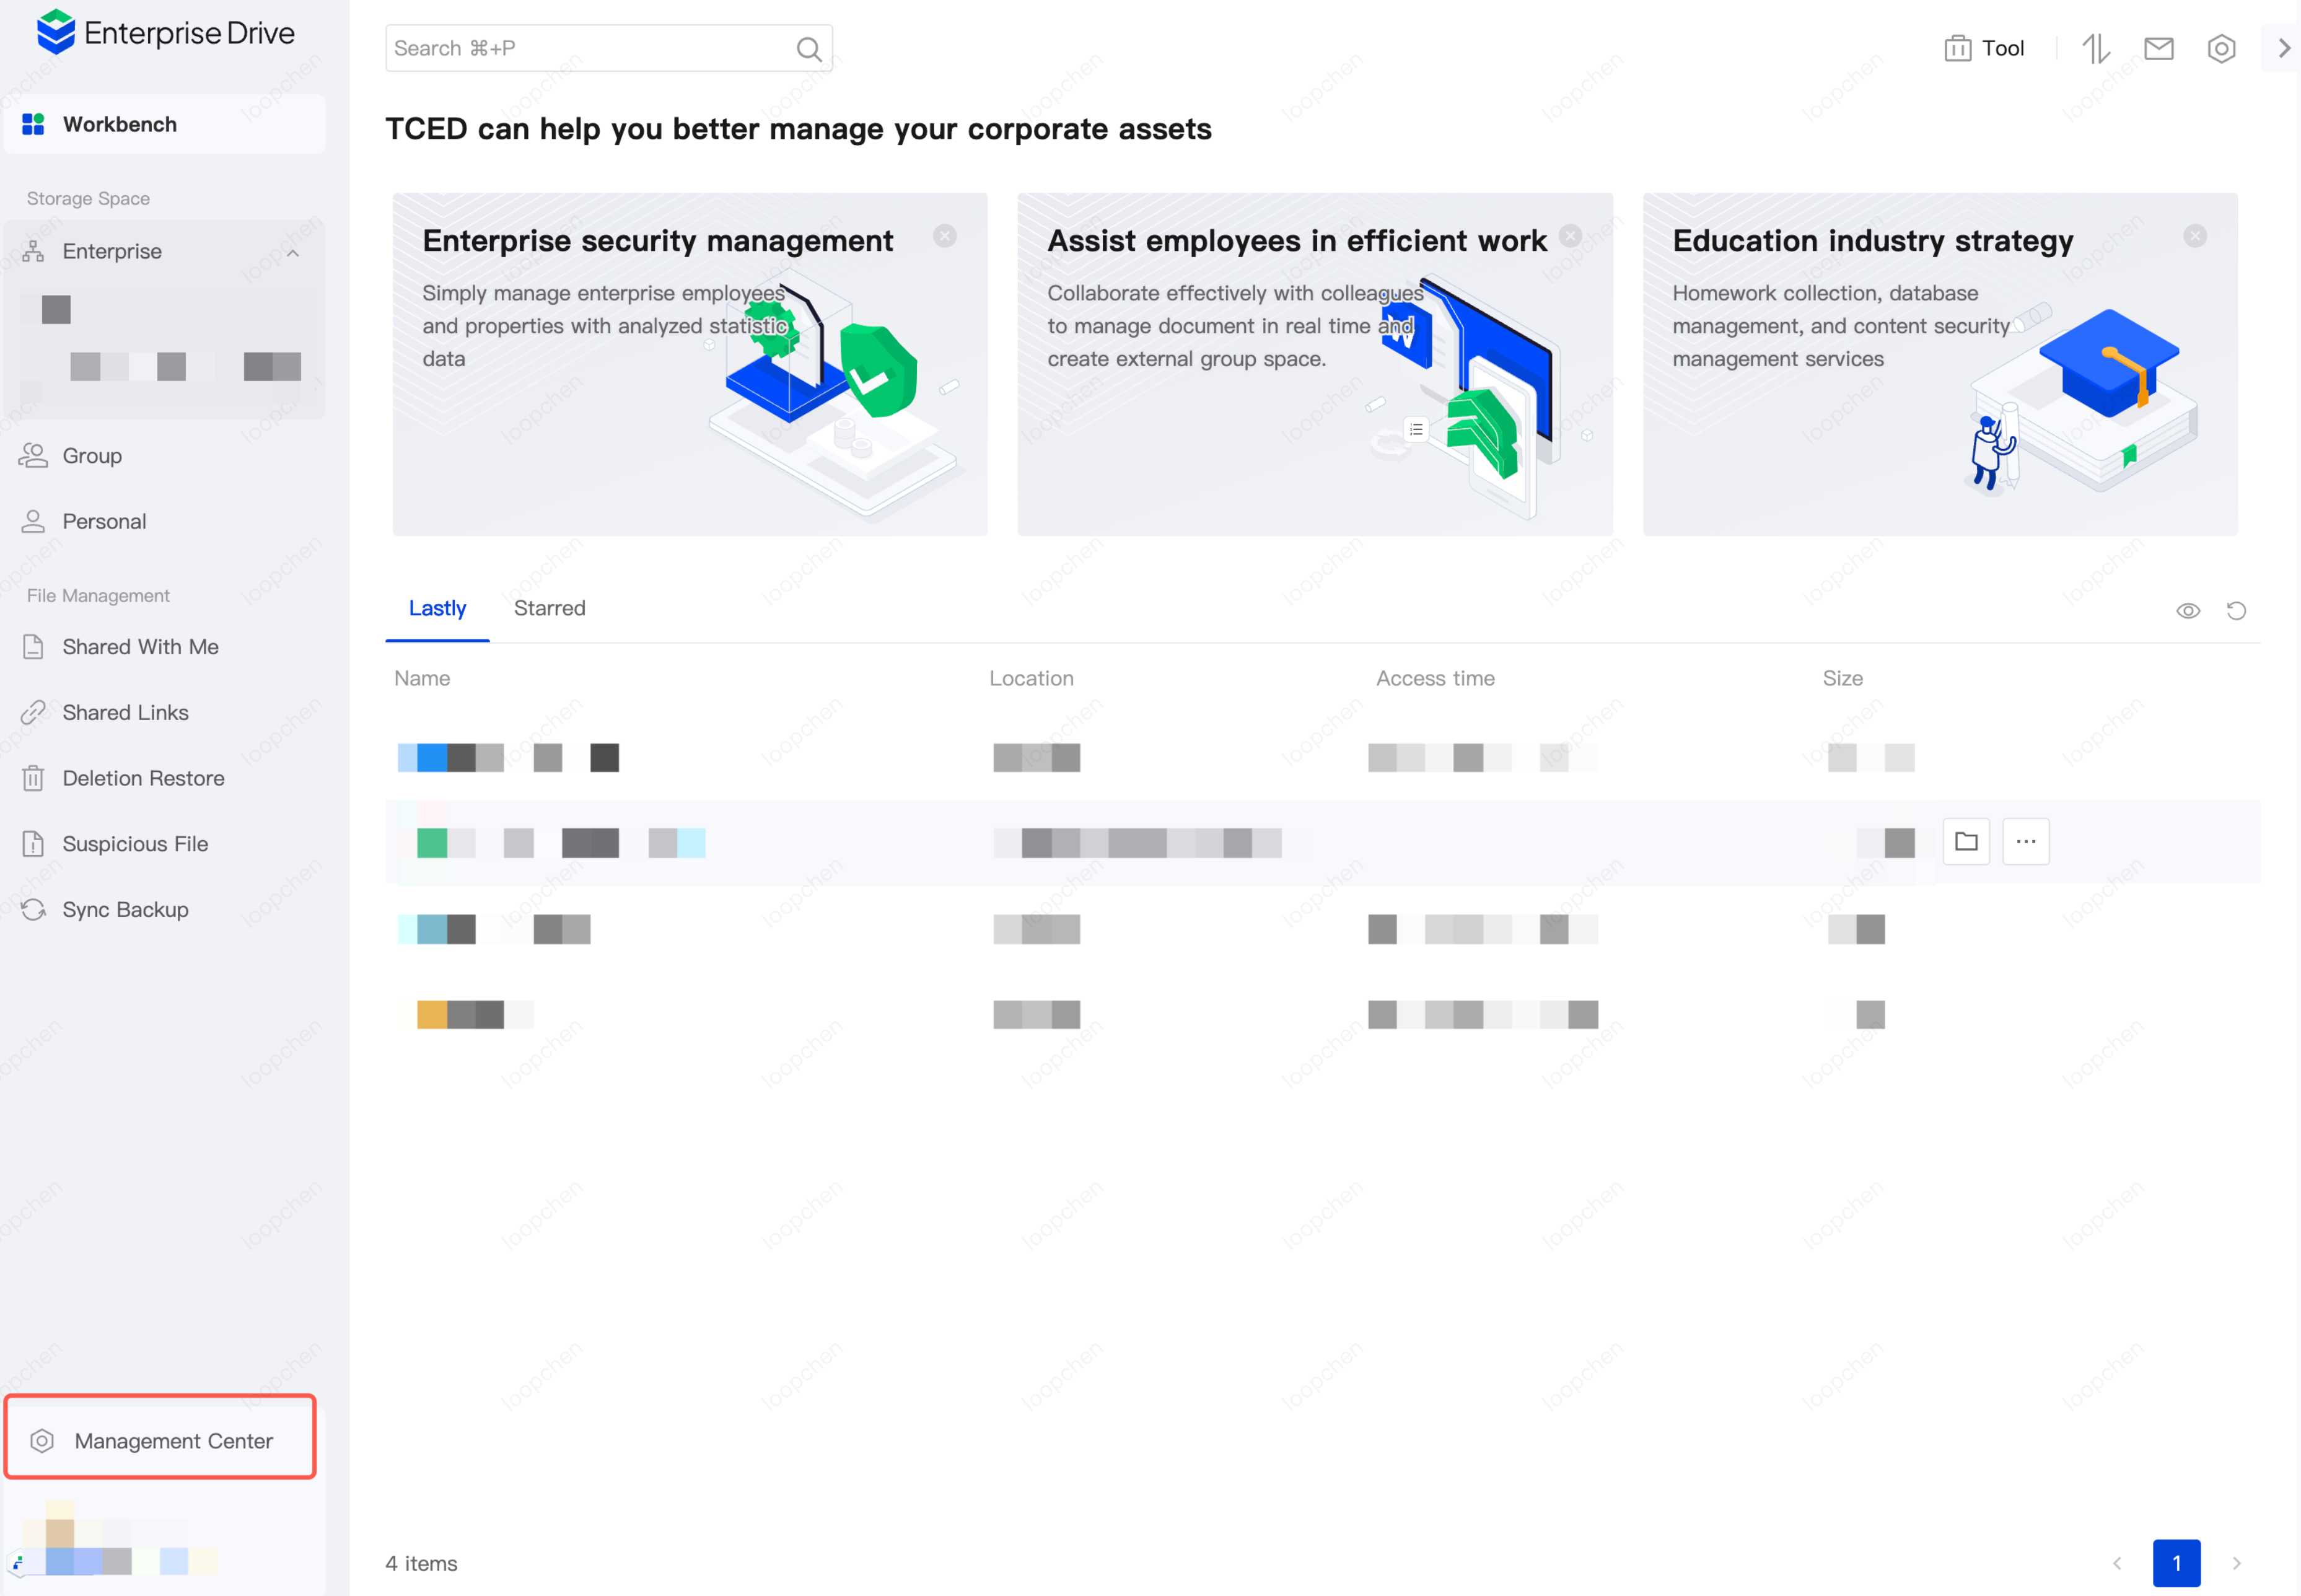
1. After successful login, the administrator clicks on the bottom left Management Center to go to the backend management page.
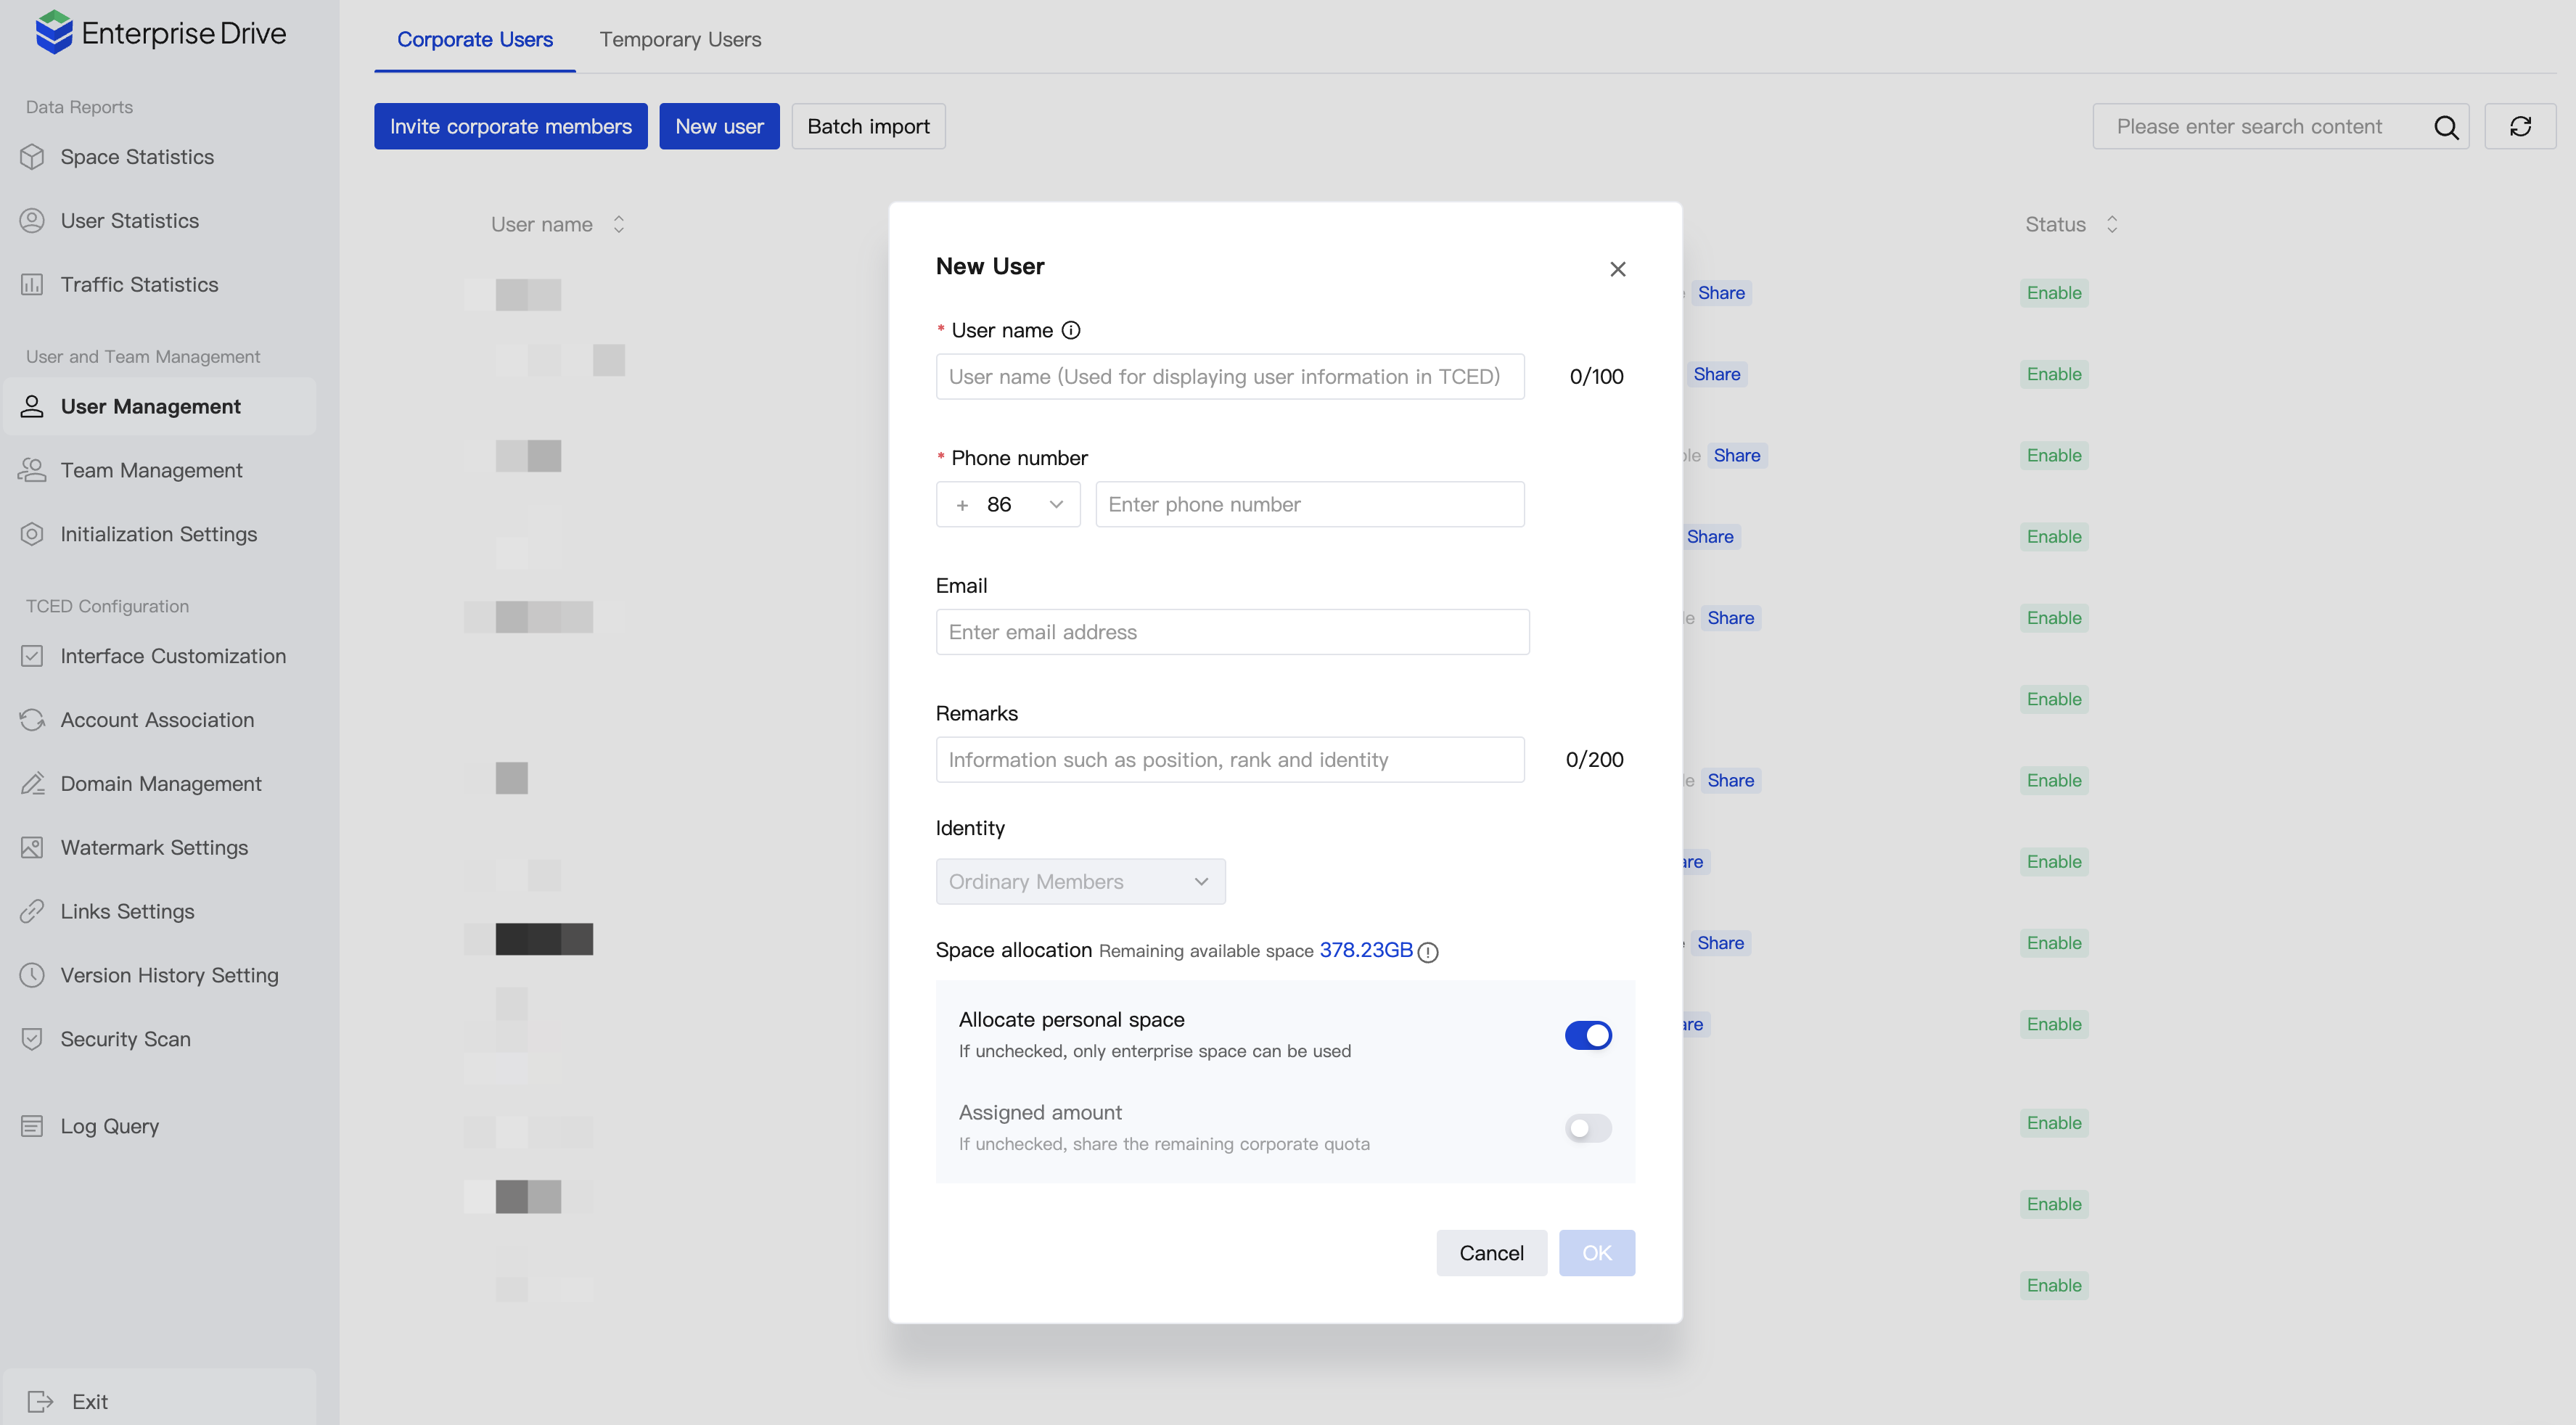
2. Click User and Team Management > User Management to enter the User Management page.
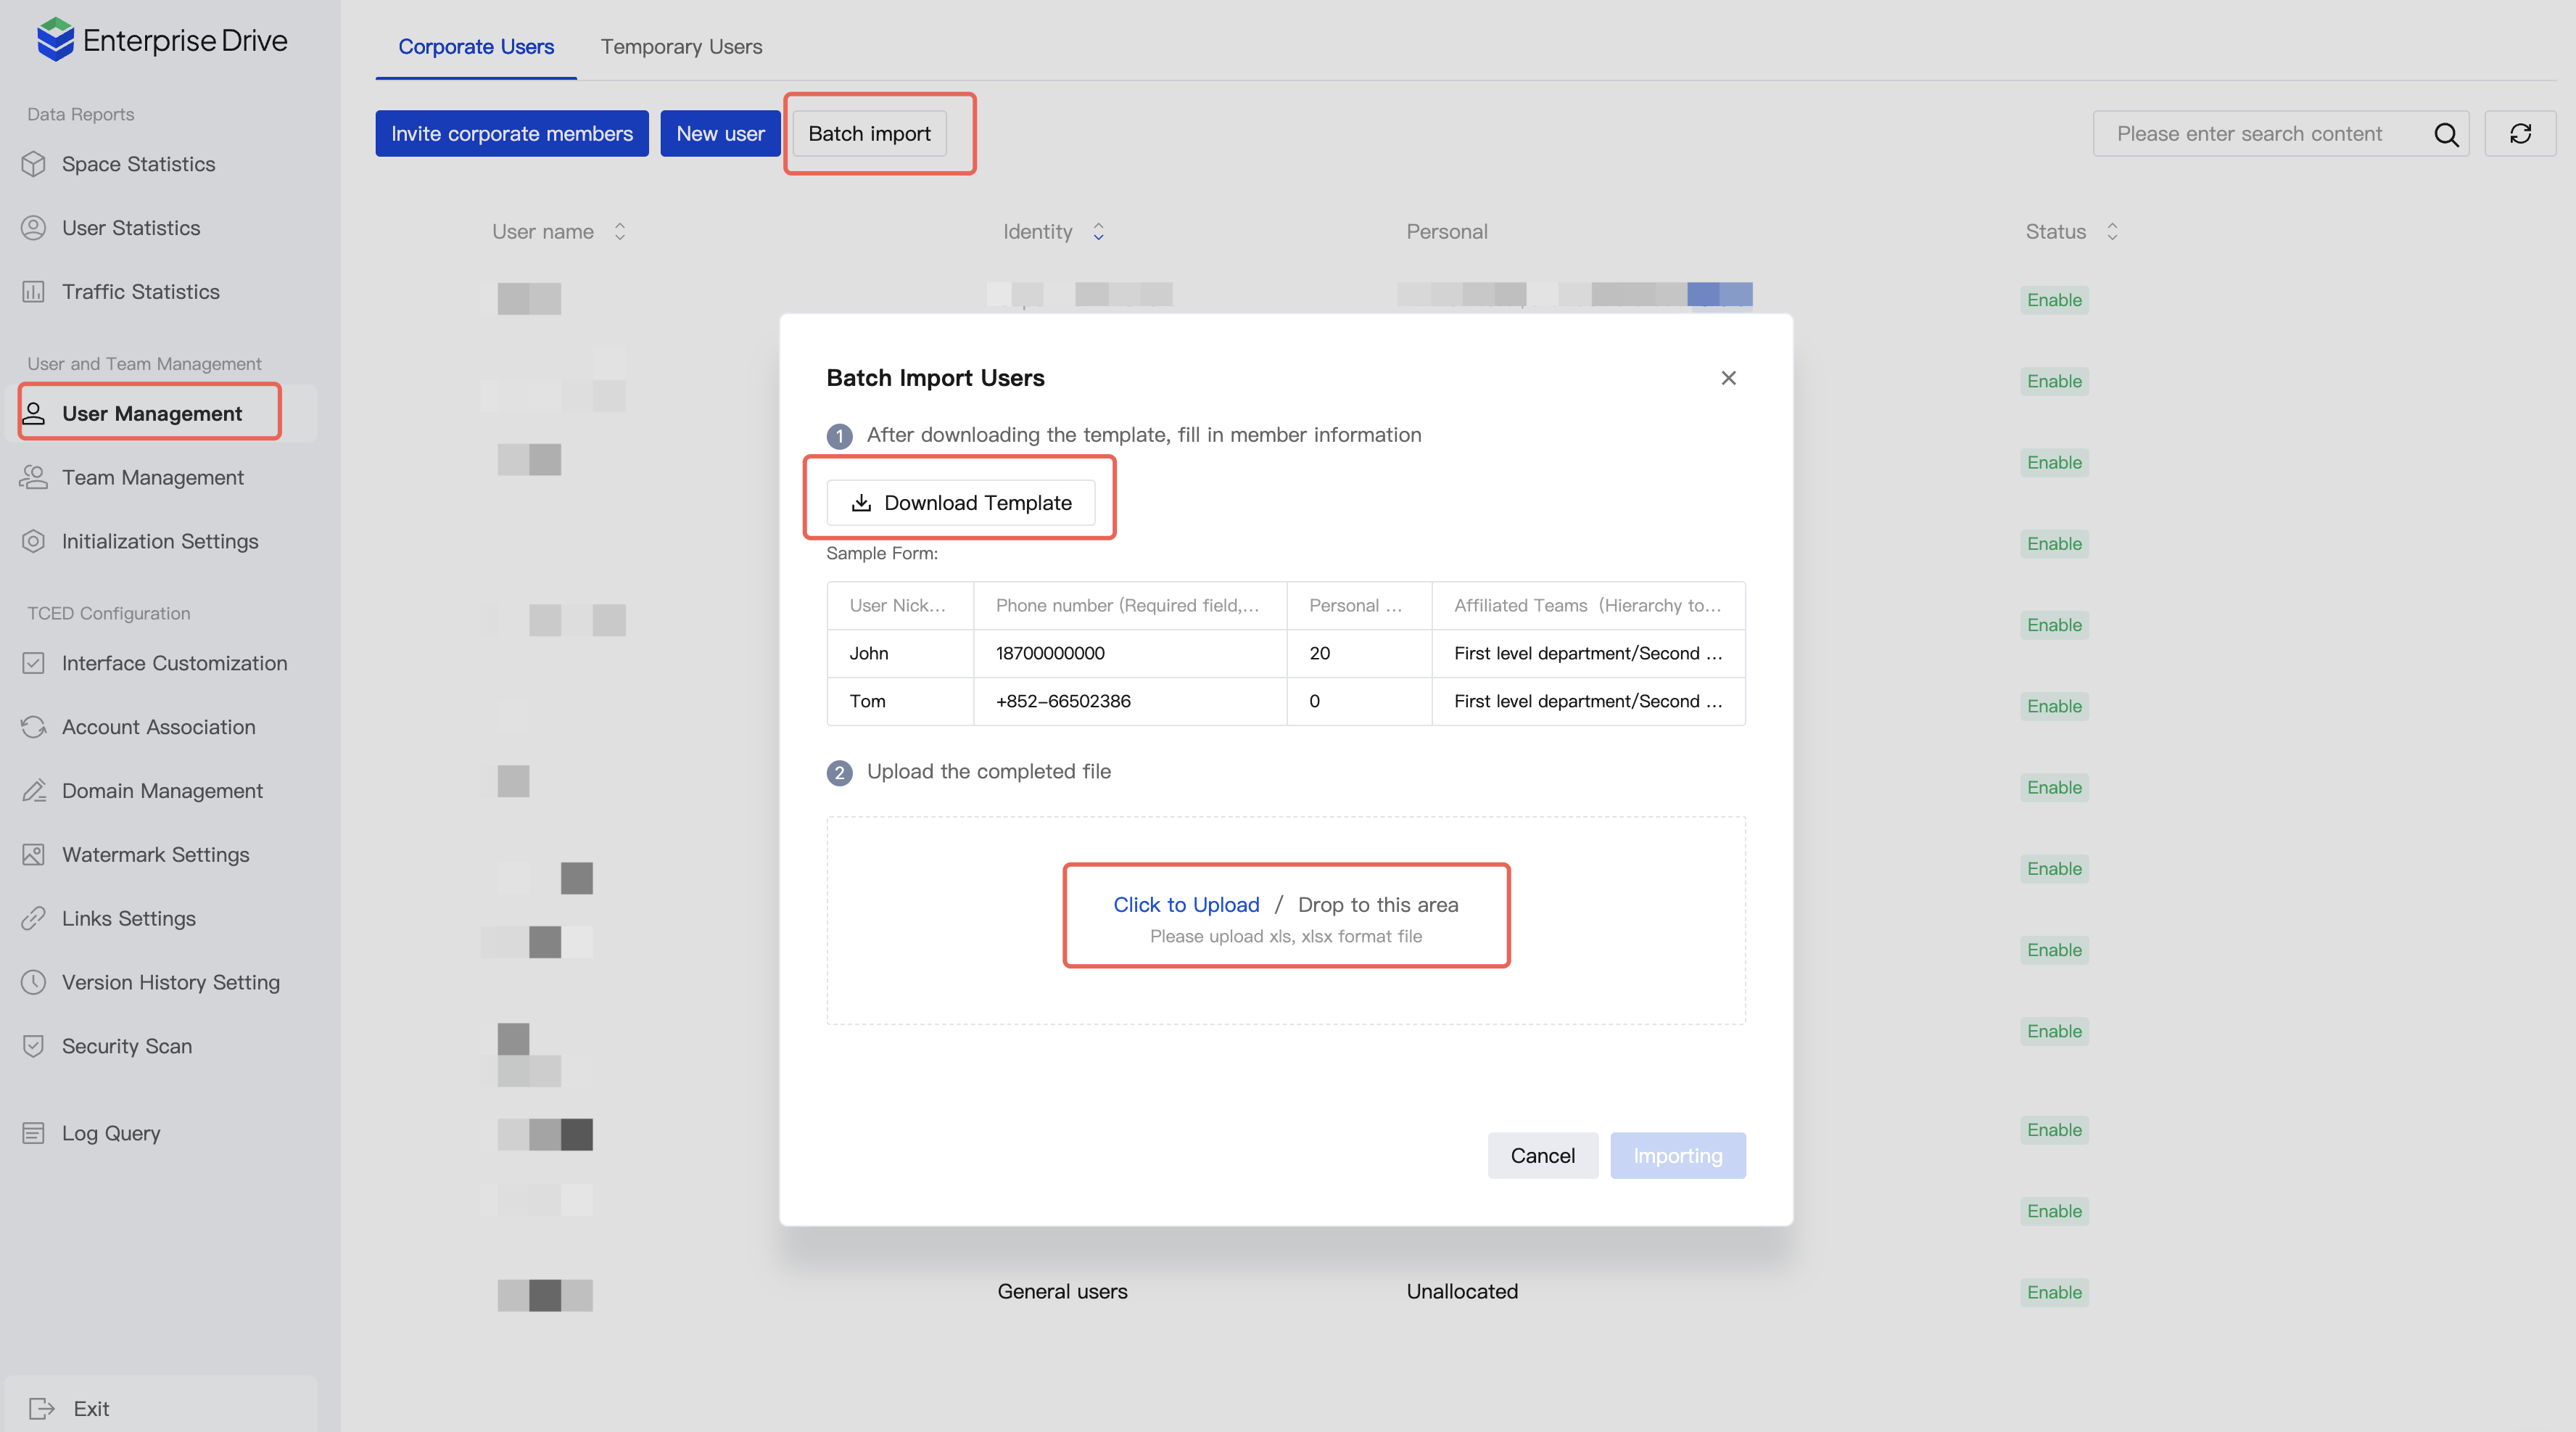
3. Click New User to add users individually, or click Batch Import to download the import template and import users and teams in batches.
New User: Click New User and fill in the corresponding parameters to complete user creation.
User nickname: Used for user identity recognition and search.
Mobile number: the mobile number used by the user for login. Enterprise-level duplicate check is performed for mobile numbers.
Email: the email used by the user for login.
Remarks: Add remarks for this user, up to 200 characters.
Identity: Set the user identity, which can be configured as Regular User or Administrator.
Space allocation: choose whether to allocate personal space to this user. If personal space is allocated, the user can utilize the allocated space for storing data, and the data in the personal space is accessible only to the user.
Click Batch Import > Download Template, open the downloaded spreadsheet, fill in the user nickname, mobile number, allocation of personal space, assigned team, and other information, upload the spreadsheet, and click Import to complete user import and team creation.
4. After successful addition, users can log in to the enterprise network disk via mobile number to perform operations.
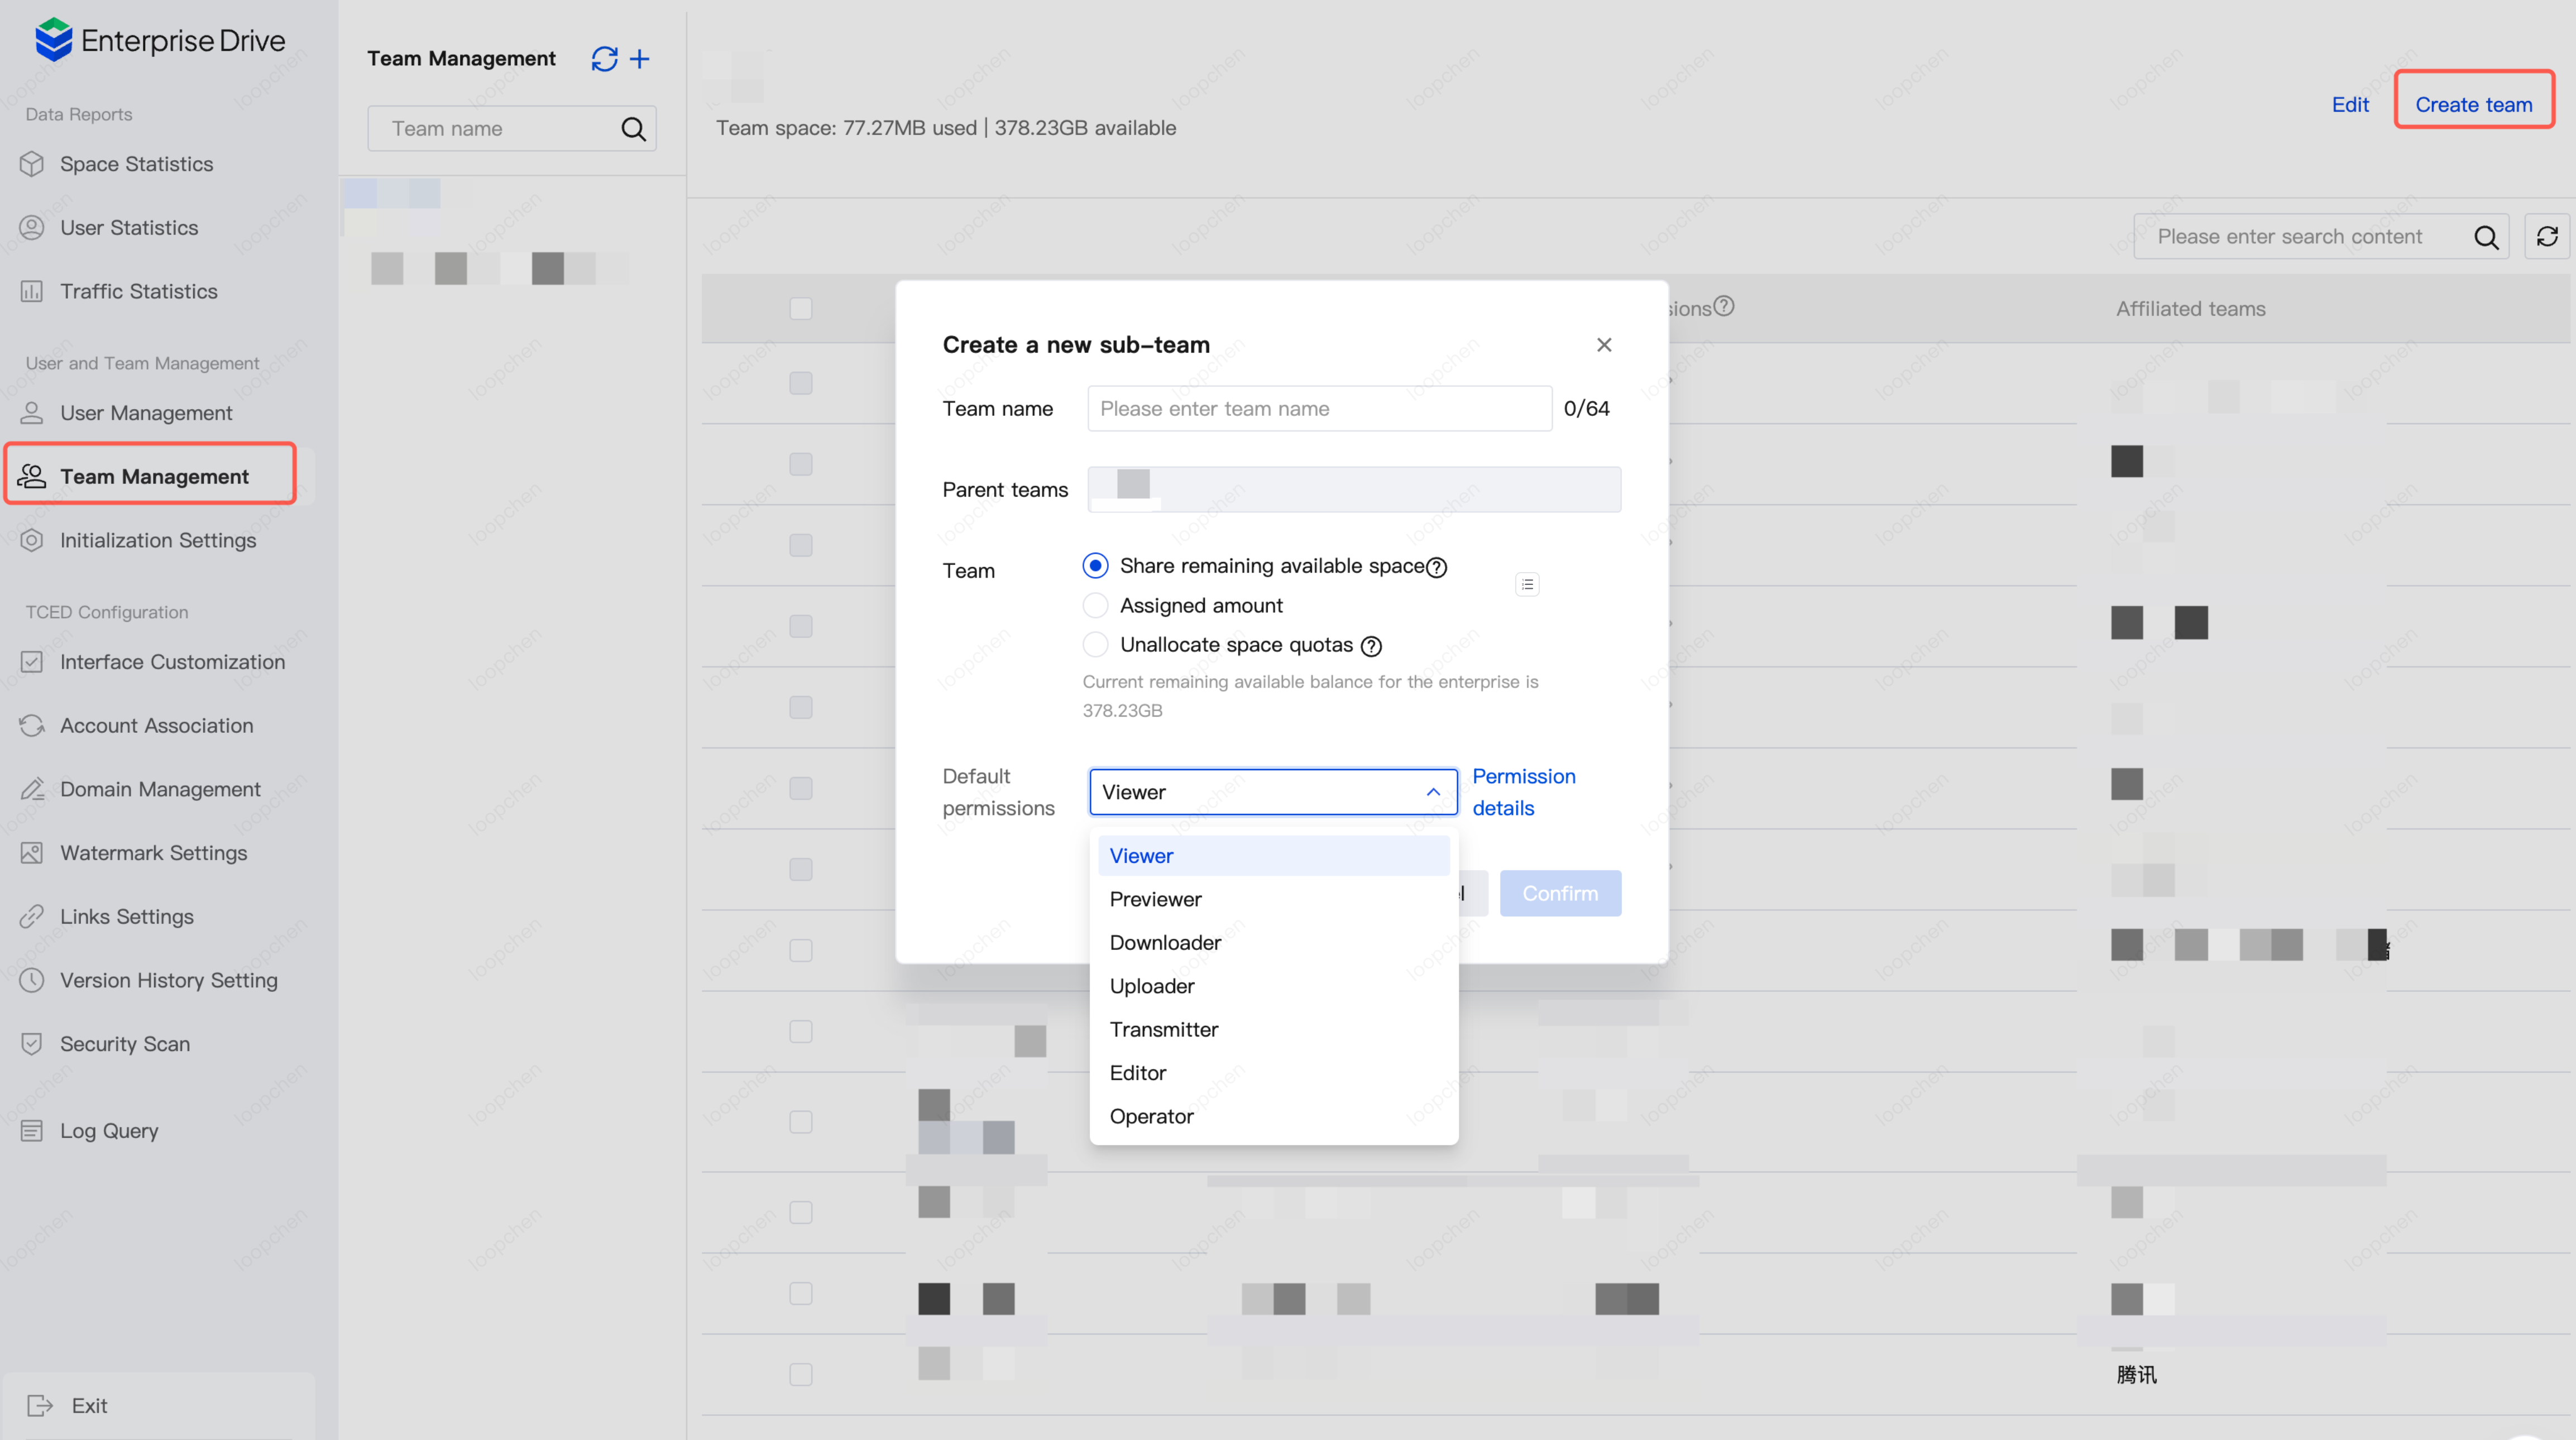
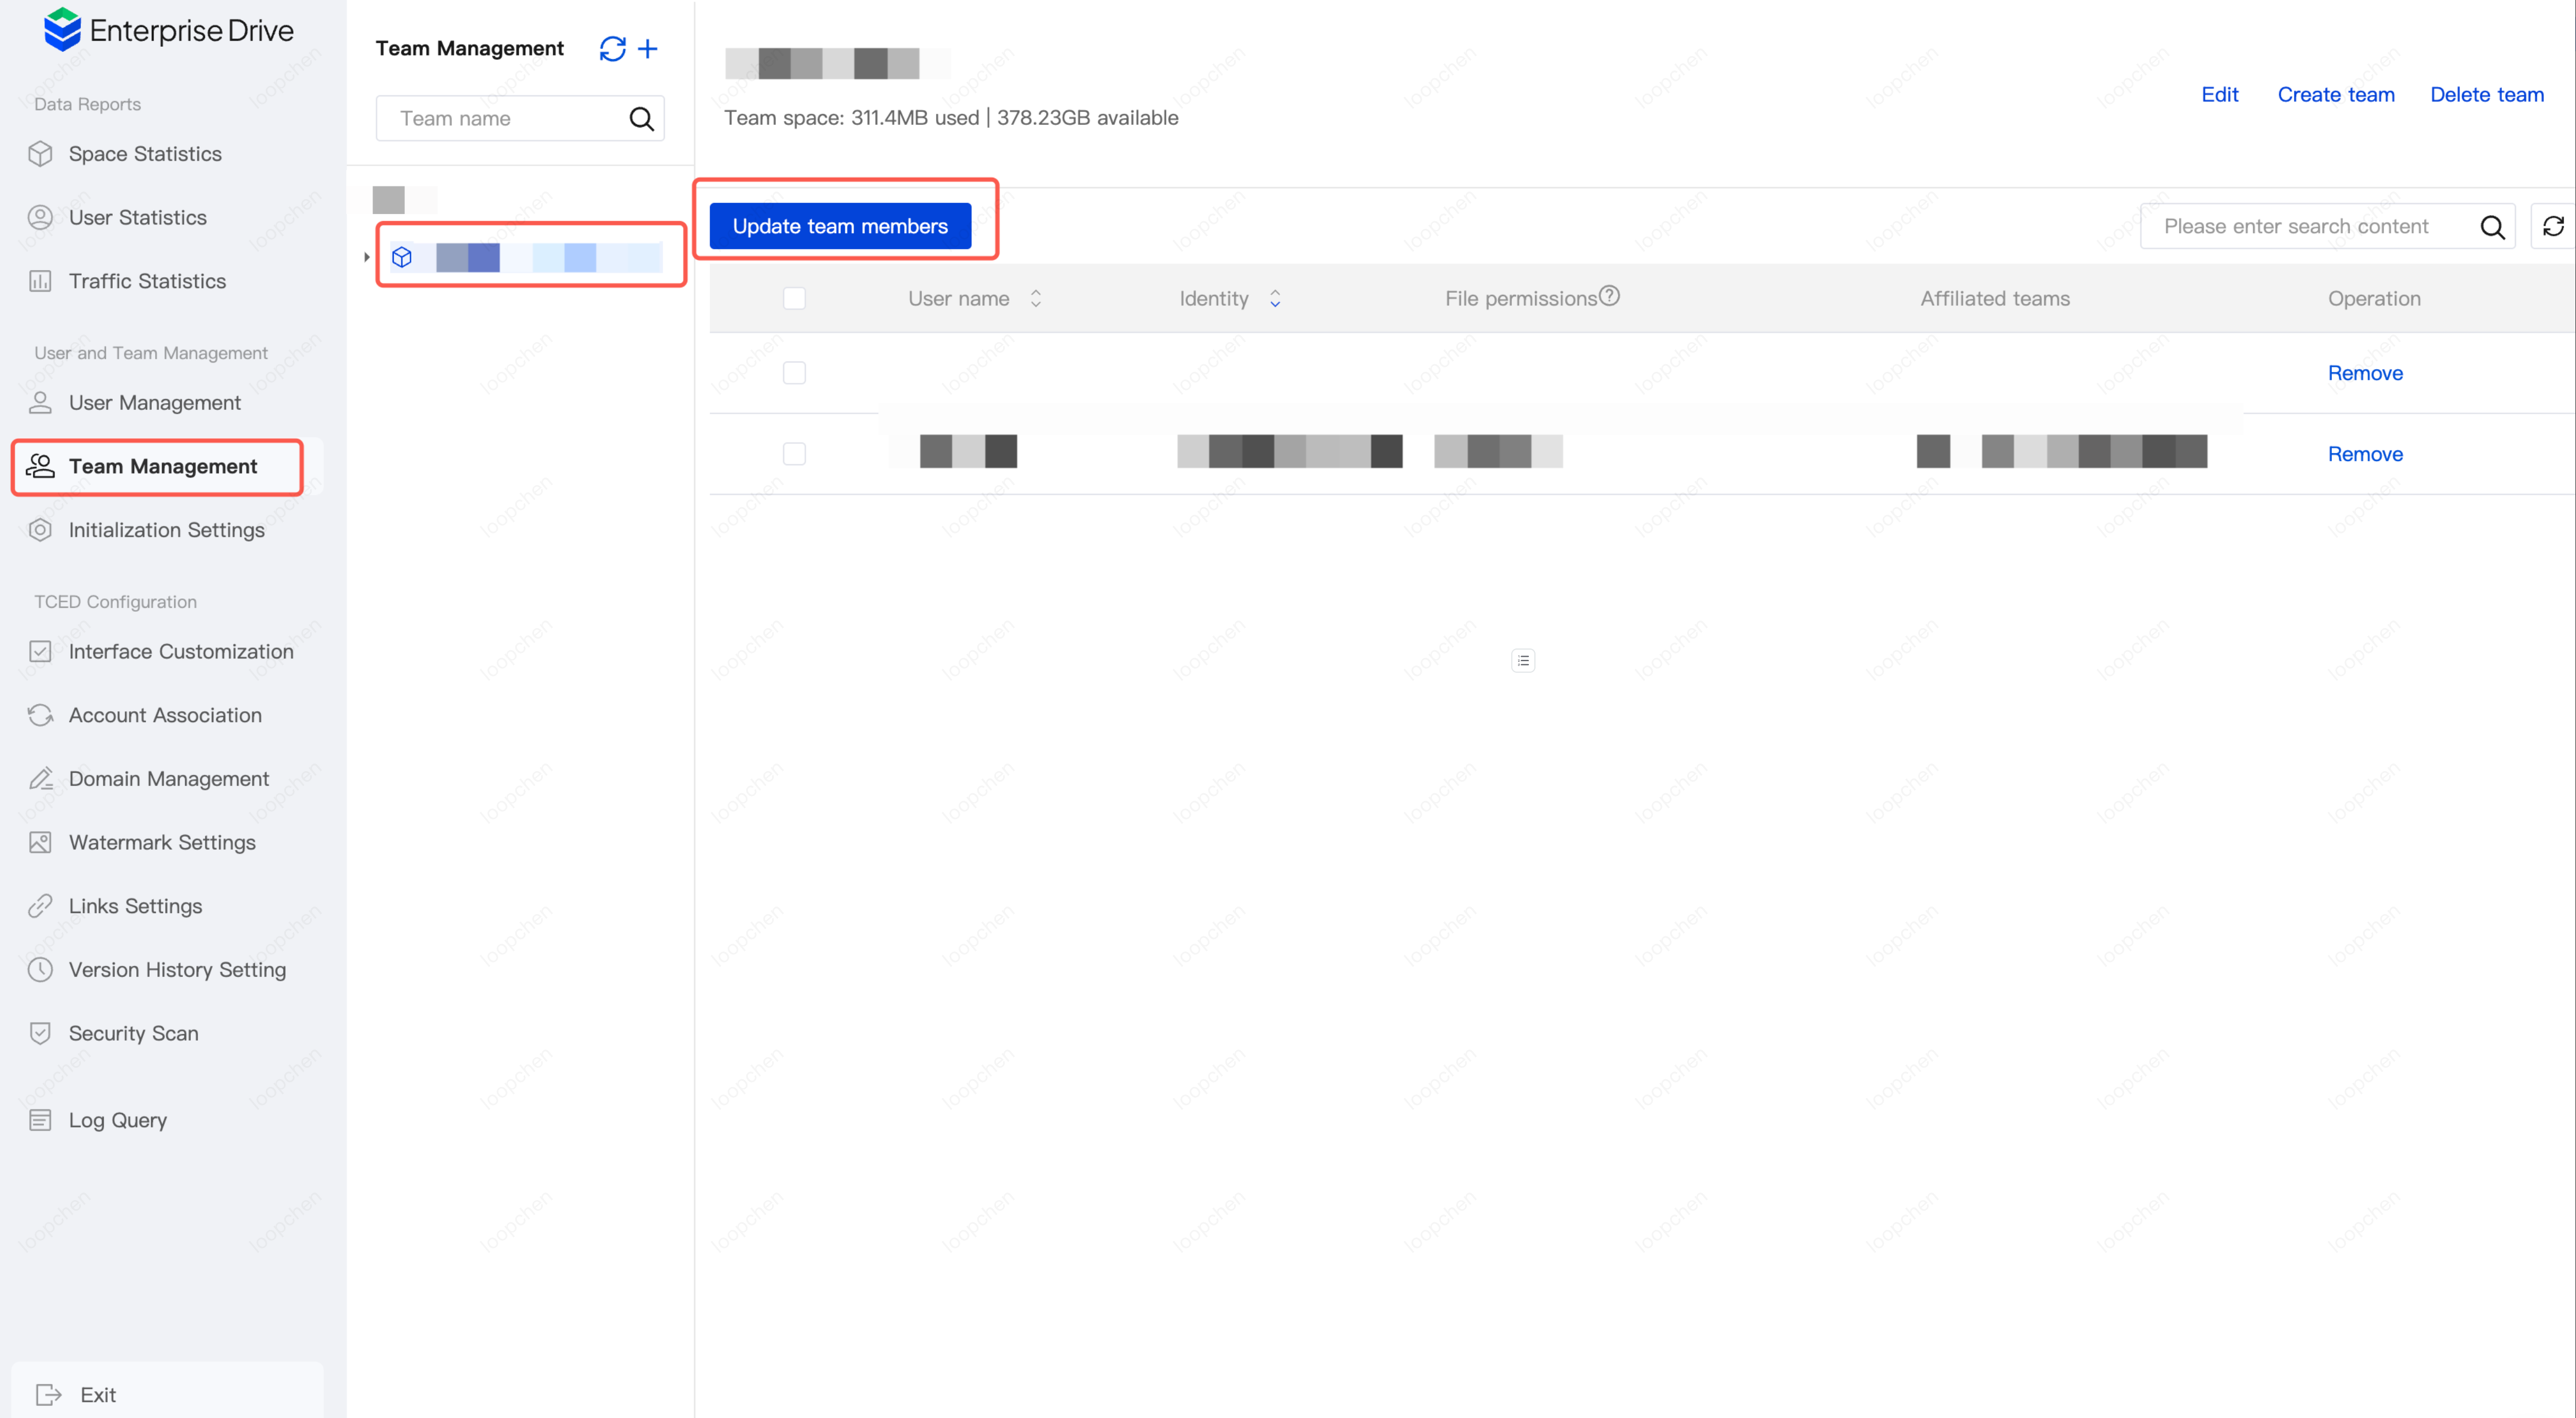
5. Click User and Team Management > Team Management to enter the Team Management page. All added users will automatically join the enterprise root directory.
6. You can click New Team, fill in the corresponding parameters to complete team creation.
Team name: no more than 64 characters, must not contain /; if two teams belong to the same parent team, their names must be unique.
Parent Team: select the specified Parent Team.
Team space: refers to the storage space quota of the team; must be less than the remaining allocable quota.
Default permission: the permission role granted by default to members who join the team. Click view permissions to see the permission scope for each role.
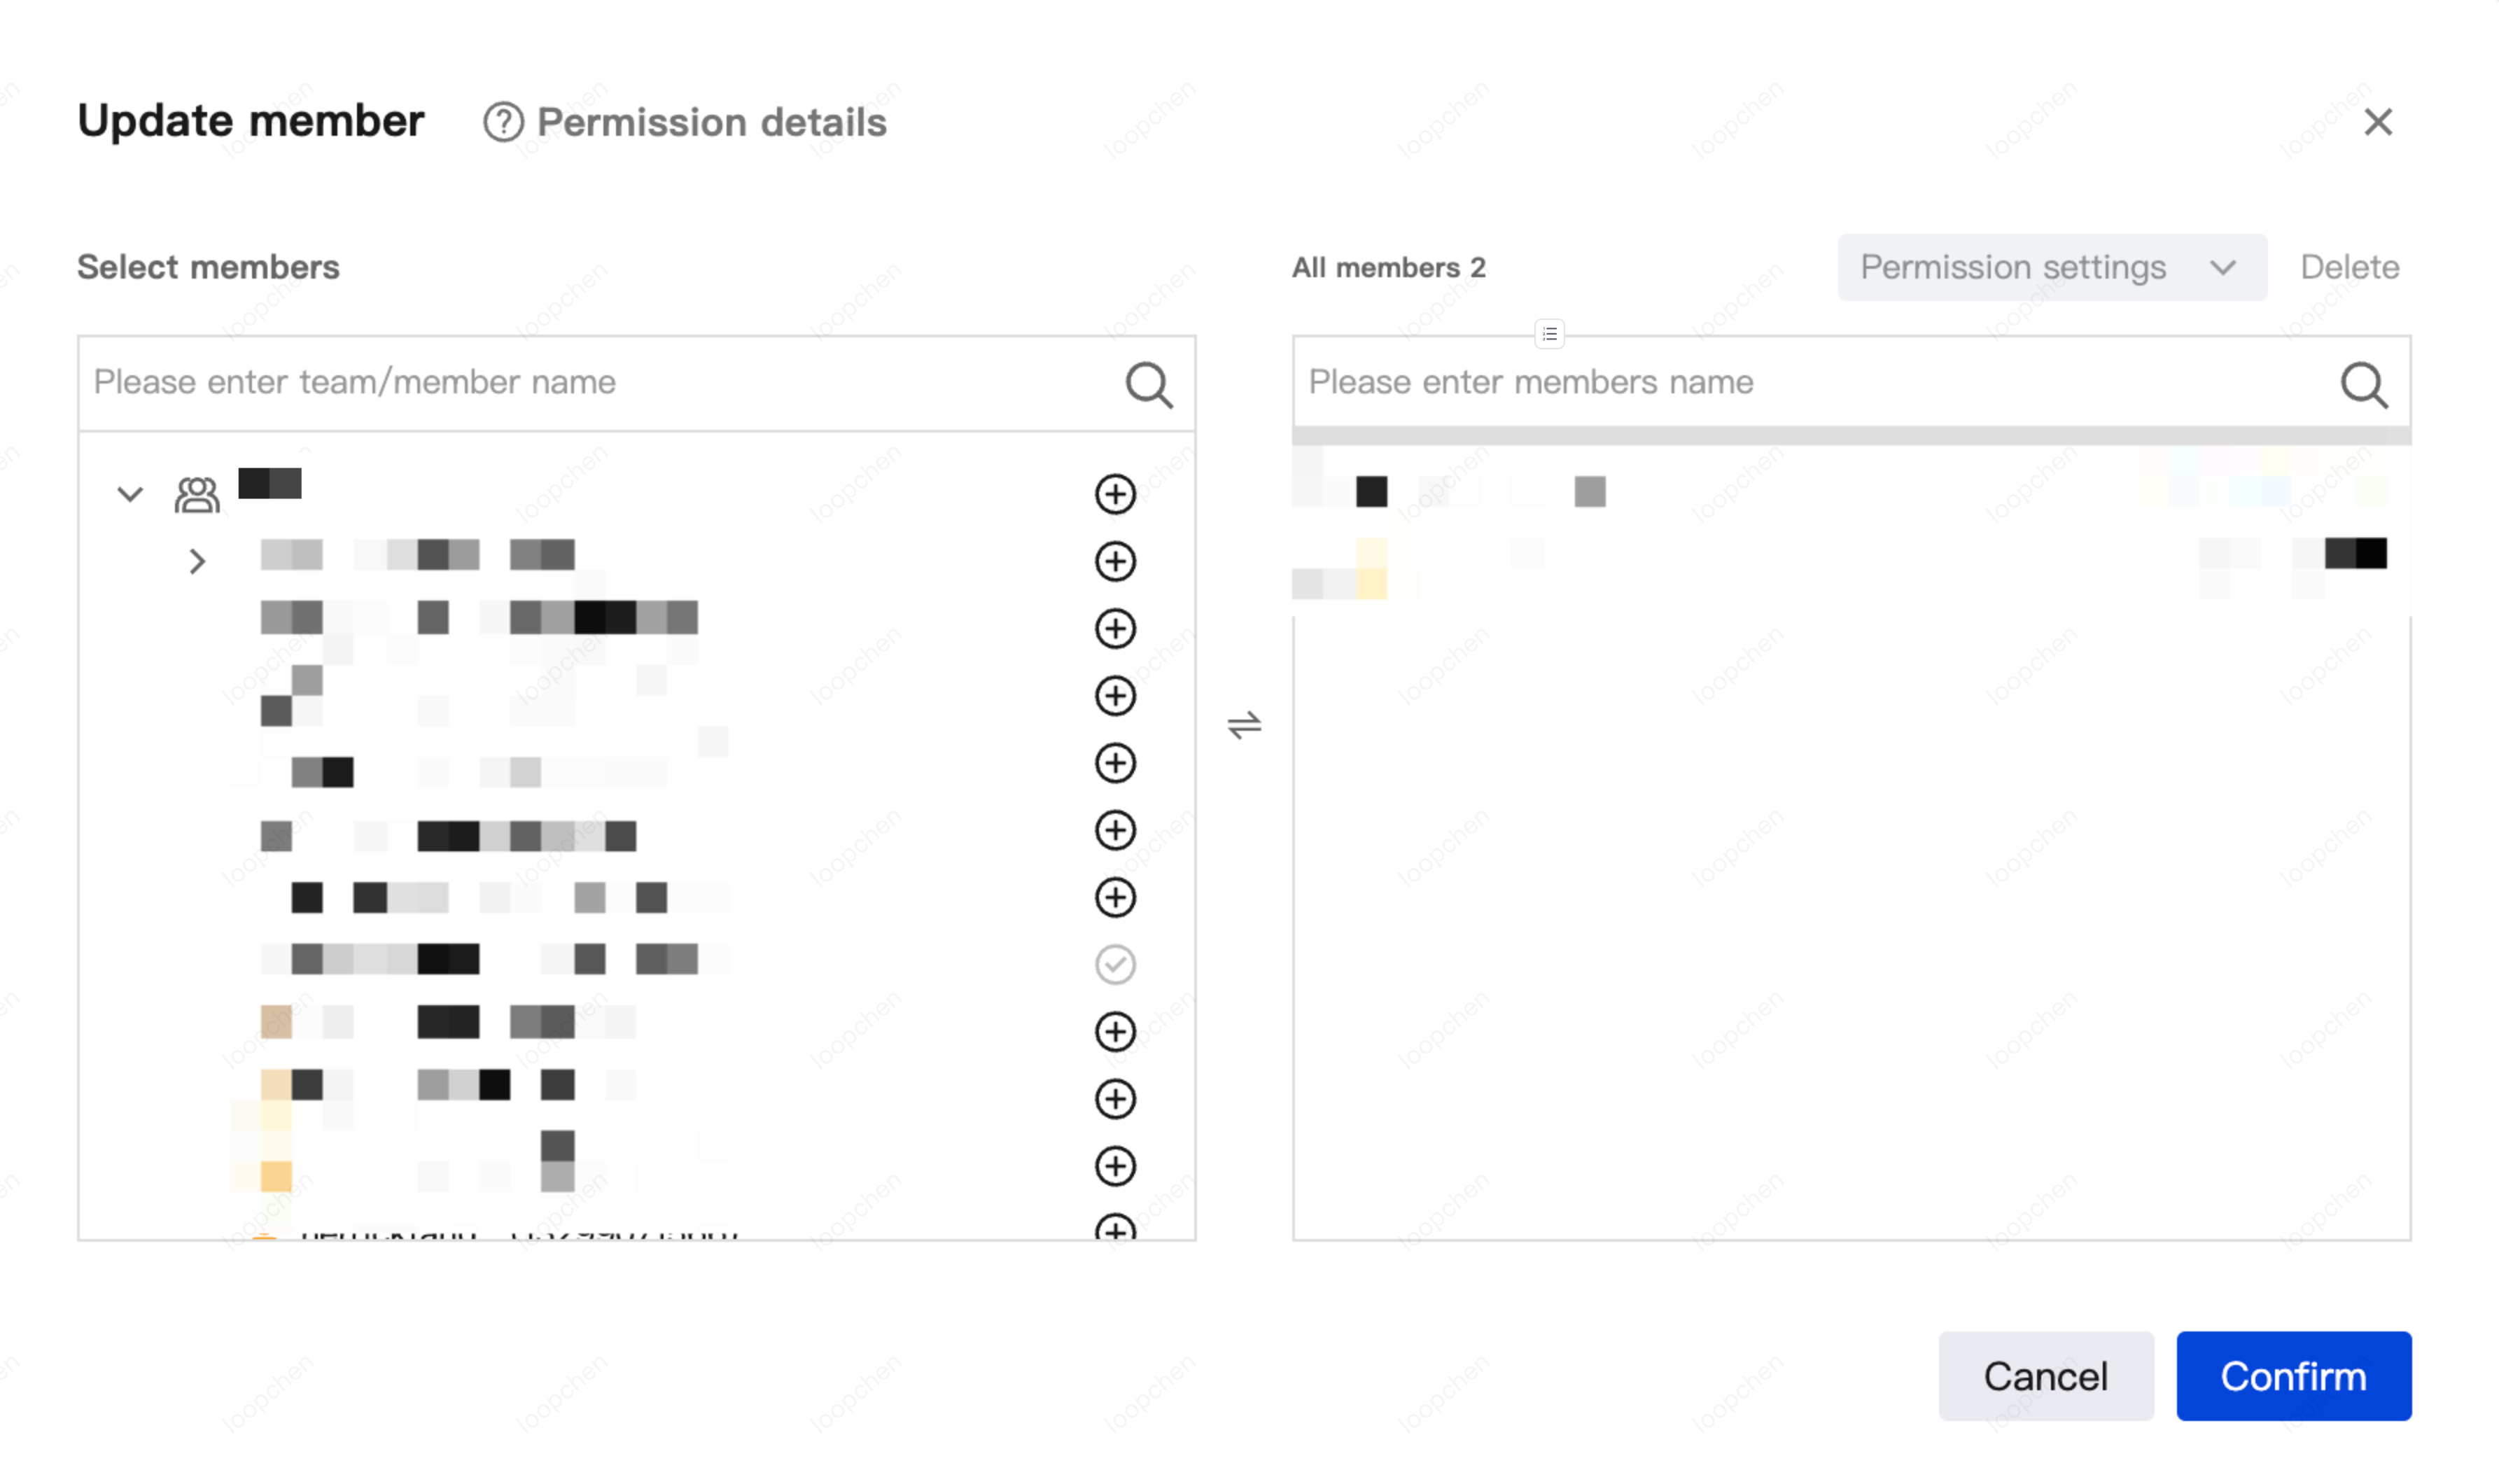
7. Select the team name to which you want to add members, go to the team management page, and click Update Team Members.
8. Select the members or teams you need to add, click Confirm to complete the addition.
Step 3: Upload File
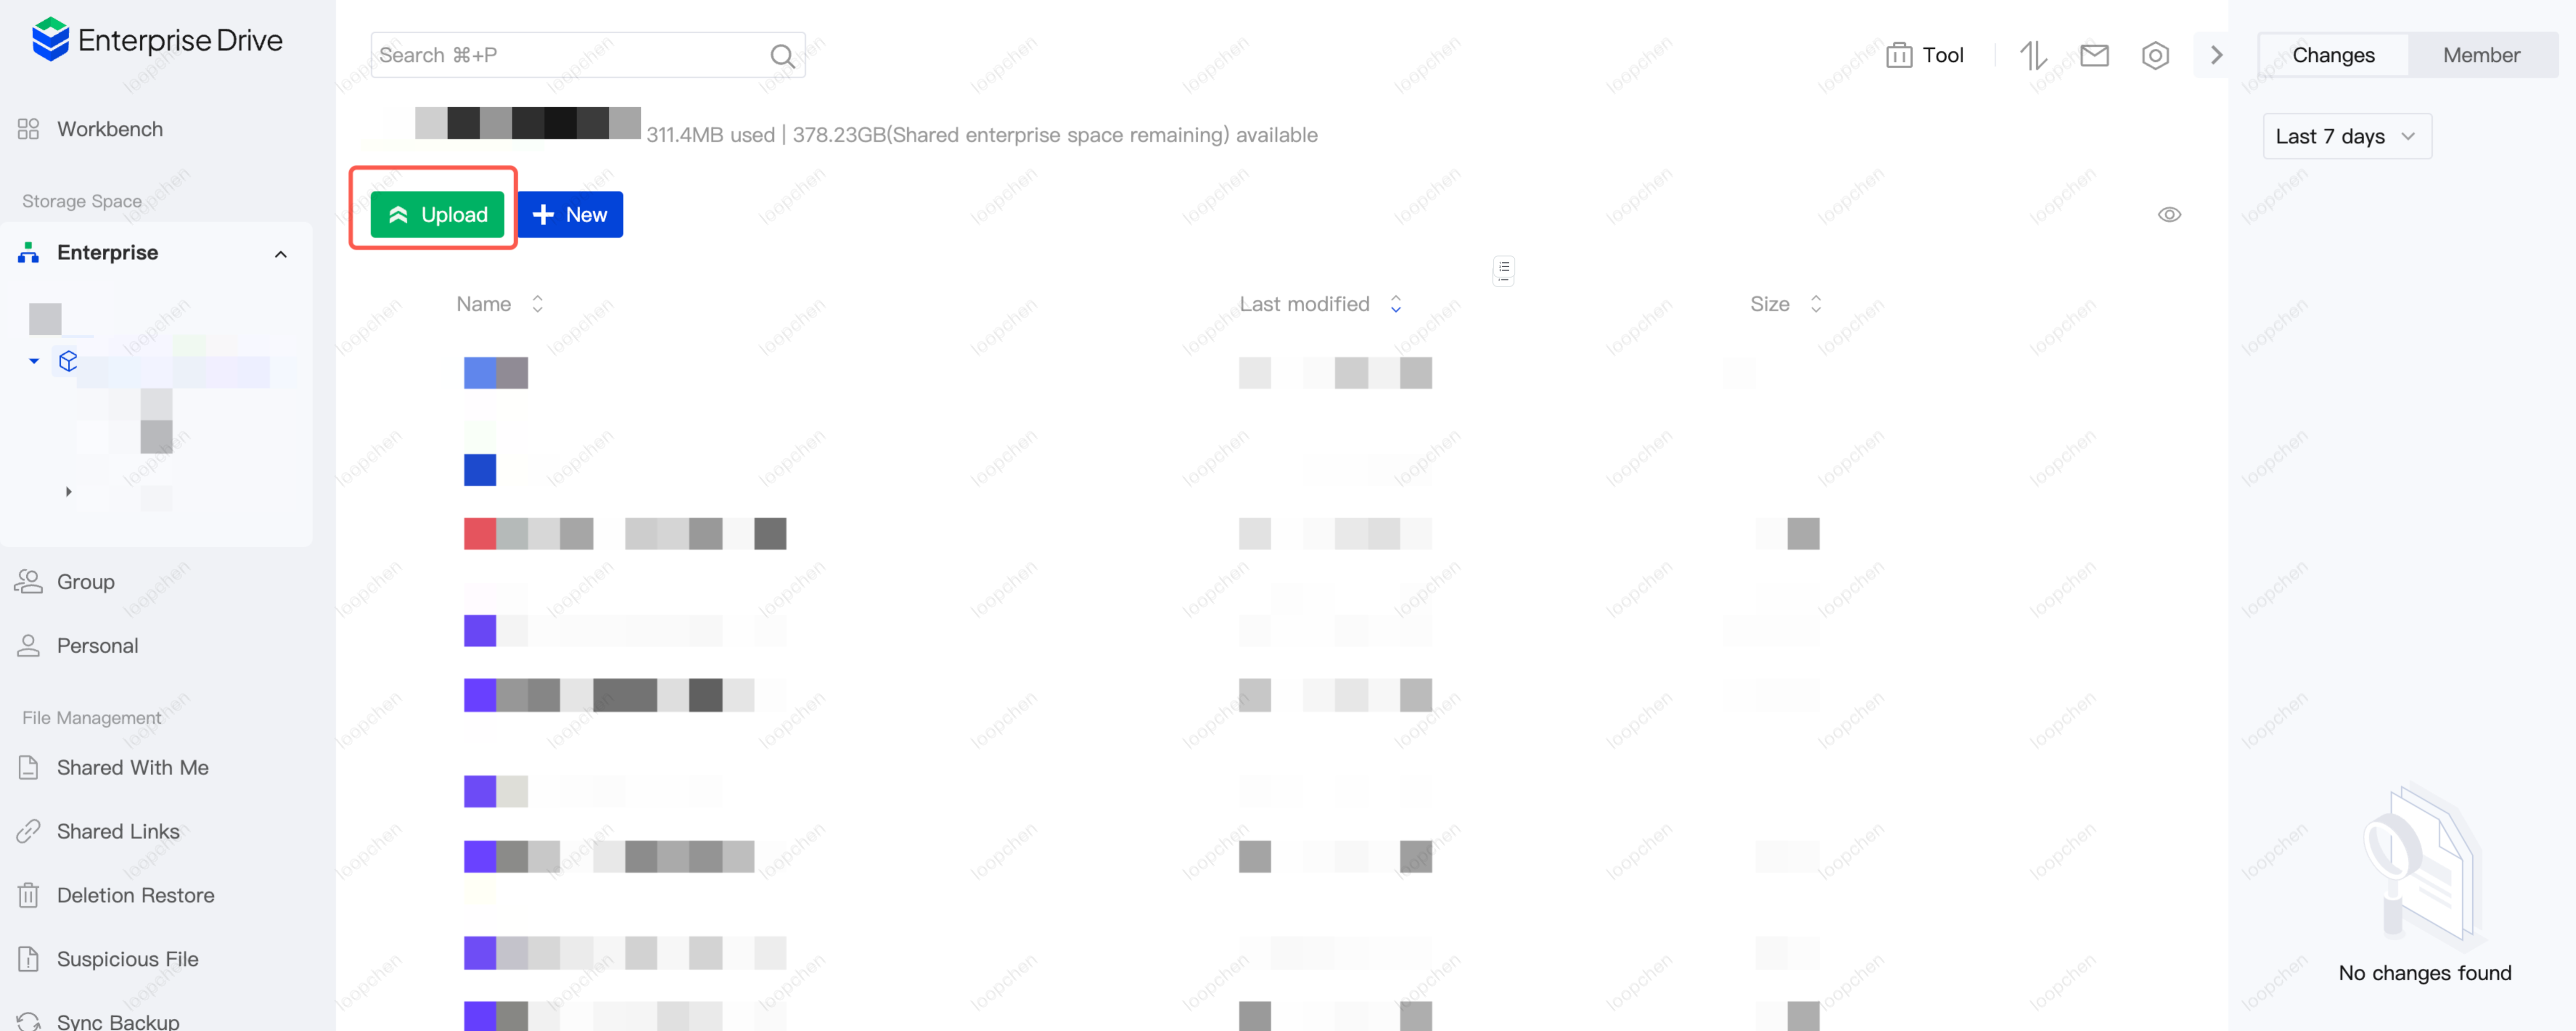
1. In the Enterprise Network Disk page, click Personal Space or Enterprise Space on the left.
2. Select the desired upload location and click Upload in the file list.
3. In the pop-up window, select Upload File or Upload Folder, and click Open to upload the selected files.