Overview
This document shows you how to configure a multi-user remote login to Windows CVM, taking a CVM with Windows Server 2016 R2 as the operating system as an example.
Note:
The trial period of the multi-user remote login feature provided by Microsoft is 120 days. If you haven't purchased multi-user login licenses (RDS CALs), after the trial ends, you can log in to CVM only through the mstsc /admin command but not Remote Desktop. Windows Server allows two users to log in at the same time by default, which meets most needs. Evaluate your needs based on your actual business scenarios, and if you strongly need to configure multi-user remote login, proceed as instructed in this document.
Directions
Adding remote desktop service
1. Log in to the Windows CVM.
2. On the desktop, click and select in the pop-up window to open Server Manager as shown below:
3. Click Add roles and features, and the Add Roles and Features Wizard will pop up.
4. In the Add Roles and Features Wizard window, keep the default parameters for the first three steps (click Next three times in a row).
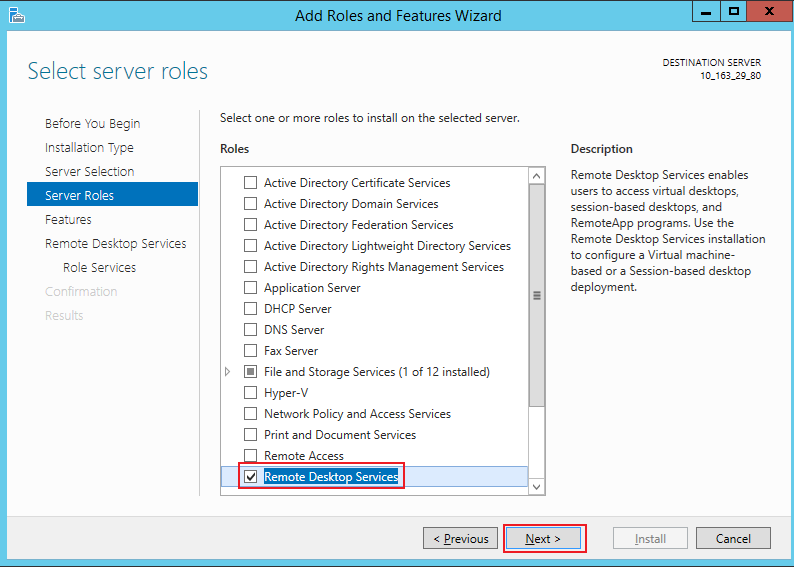
5. On the Select server roles page, select Remote Desktop Services and click Next as shown below:
6. Keep the default parameters and click Next twice in a row.
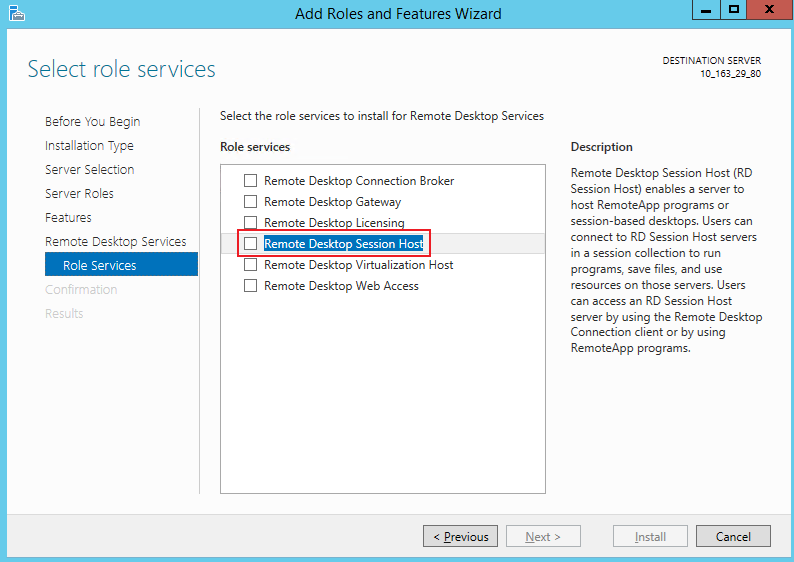
7. On the Select role services page, select Remote Desktop Session Host as shown below:
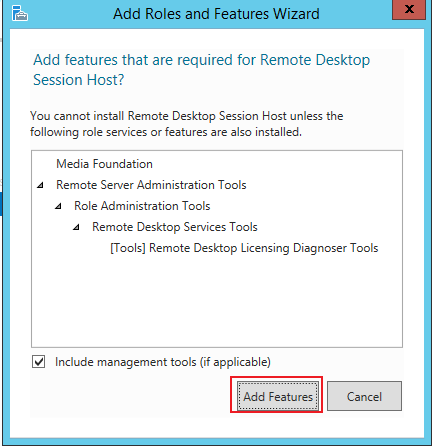
8. In the Add features that are required for Remote Desktop Session Host? pop-up window, click Add Features as shown below:
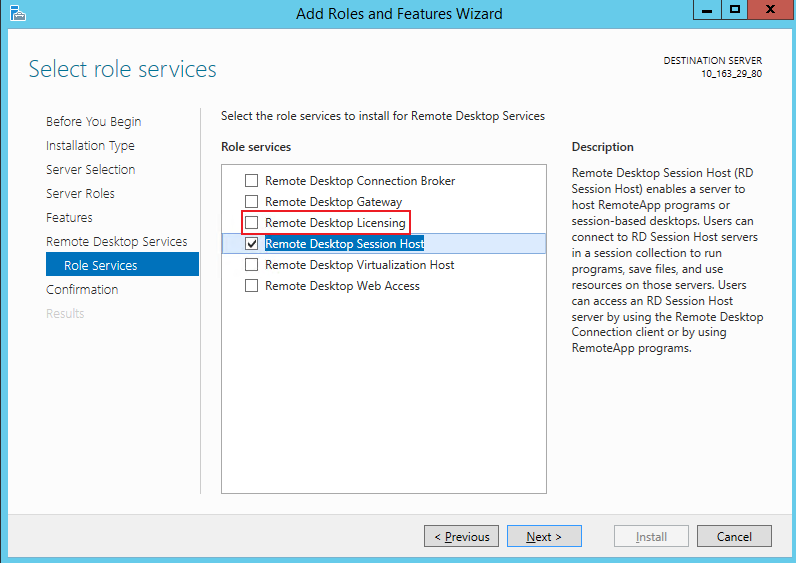
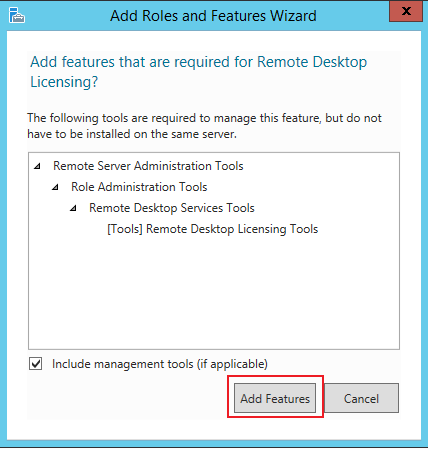
9. On the Select role services page, select Remote Desktop Licensing as shown below:
10. In the Add features that are required for Remote Desktop Licensing? pop-up window, click Add Features as shown below:
11. Click Next.
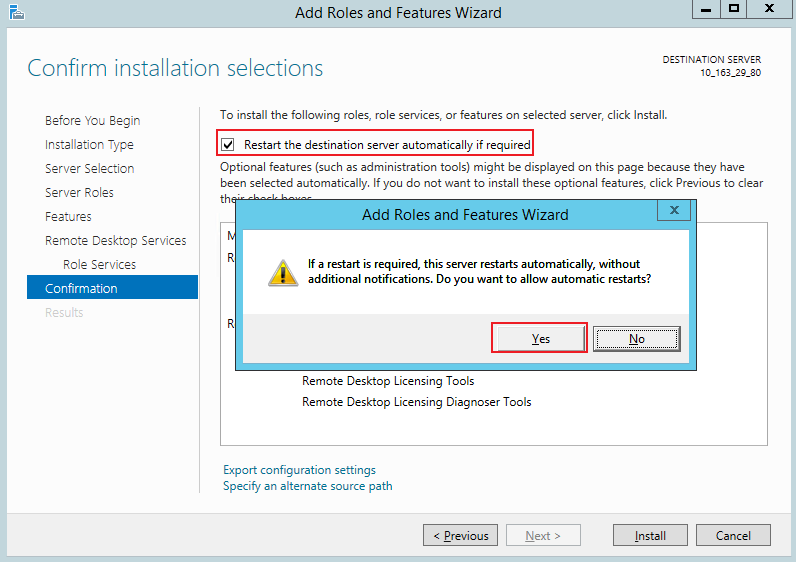
12. Select Restart the destination server automatically if required and click Yes in the pop-up window as shown below:
13. Click Install and wait for the Remote Desktop service installation to complete.
Applying for multi-user login license
1. On the desktop, click and select in the pop-up window to open Server Manager. 2. In the Server Manager window, select Tools > Remote Desktop Services > Remote Desktop Licensing Manager in the top-right corner.
3. In the Remote Desktop Licensing Manager pop-up window, right-click the row of the target server and select Activate Server.
4. In the Activate Server Wizard pop-up window, click Next.
5. Select Web Browser for Connection method and click Next.
You can also select other connection methods based on your actual conditions.
7. At the Remote Desktop Licensing website, select Activate a license server and click Next.
8. Enter the product ID obtained in step 6, enter the company information based on your actual conditions, and click Next. 9. After confirming that everything is correct, click Next.
10. Record the license server ID
and click Yes. 11. Enter the license server ID obtained in the previous step, select the licensing information as needed, enter the company information, and click Next .
Here, Enterprise agreement is selected as the licensing information as an example.
12. Select the product type and enter the product quantity and licensing information.
13. After confirming that everything is correct, click Next.
14. Get and record the key pack ID
. 15. Click Finish.
Activating Remote Desktop license server
1. On the desktop, click and select in the pop-up window to open Server Manager. 2. In the Server Manager window, select Tools > Remote Desktop Services > Remote Desktop Licensing Manager in the top-right corner.
3. In the Remote Desktop Licensing Manager pop-up window, right-click the row of the target server and select Activate Server.
4. In the Activate Server Wizard pop-up window, click Next.
5. Select Web Browser for Connection method and click Next.
You can also select other connection methods based on your actual conditions.
6. In License Server Activation, enter the license server ID obtained in step 10 and click Next. 7. When the Activate Server Wizard prompts You have completed the Activate Server Wizard, click Next to install the license.
Installing RDS client access license
1. In the Install Licenses Wizard window, confirm the license server information and click Next.
2. In Obtain Client License Key Pack, enter the license server ID obtained in step 14 and click Next. 3. When the Install Licenses Wizard prompts You have completed the Install Licenses Wizard as shown below, you have installed the license successfully.
Configuring Remote Desktop Session Host license server
1. On the desktop, click and select in the pop-up window to open Server Manager. 2. In the Server Manager window, select Tools > Remote Desktop Services > Remote Desktop Licensing Diagnoser and view the current server status.
3. On the desktop, right-click and select Run in the pop-up window. 4. In the Run window, enter gpedit.msc and press Enter to open Local Group Policy Editor.
5. On the left sidebar, select Computer Configuration > Administrative Templates > Windows Components > Remote Desktop Services > Remote Desktop Session Host > Licensing and double-click Use the specified Remote Desktop license servers.
6. In the Use the specified Remote Desktop license servers pop-up window, select Enabled, enter a CVM instance public IP or host name for License Servers to use, and click OK.
7. Double-Click Set the Remote Desktop licensing mode.
8. In the Set the Remote Desktop licensing mode pop-up window, select Enabled, set the licensing mode for the Remote Desktop Session Host server to By user, and click OK.
9. Restart the CVM instance.
At this point, you have completed the configuration of multi-user remote login.
References