Using QUIC Protocol on CLB
Last updated:2024-10-10 16:41:14
The Quick UDP Internet Connection (QUIC) protocol helps you access applications faster and achieve multiplexing with no reconnection required in scenarios such as weak network or frequent switch between Wi-Fi and 4G. This document describes how to configure the QUIC protocol in the CLB console.
QUIC Overview
QUIC is a transport layer network protocol designed by Google, multiplexing concurrent data streams using UDP. Compared with the popular TCP+TLS+HTTP2 protocol, QUIC has the following advantages:
Establish a connection faster.
Improve congestion control.
Adopt multiplexing to avoid head-of-line (HOL) blocking.
Support connection migration.
After QUIC is enabled, the client can establish a QUIC connection with a CLB instance. If the QUIC connection fails due to negotiation between the client and the CLB instance, HTTPS or HTTP/2 will be used.Upon enabling QUIC, the backend protocol can solely utilize HTTP1.x protocol.
Use Limits
Only CLB instances, excluding classic CLB instances, support the QUIC protocol.
Only IPv4 and IPv6 NAT64 CLB instances support the QUIC protocol.
Only layer-7 HTTPS listeners support the QUIC protocol.
Currently, CLB supports the following QUIC versions: Q050, Q046, Q043, h3-29, and h3-27.
Directions
1. Create a CLB instance as needed. For more information, see Creating CLB Instances(https://www.tencentcloud.com/document/product/214/6149!8d55ae663895d87ef8c66952b1635f3c).
2. Log in to the CLB console and click Instance management in the left sidebar.
3. On the page that appears, click the Cloud Load Balancer tab.
4. Create a Load Balancer instance and in the right-hand operation column, click Configure Listener.

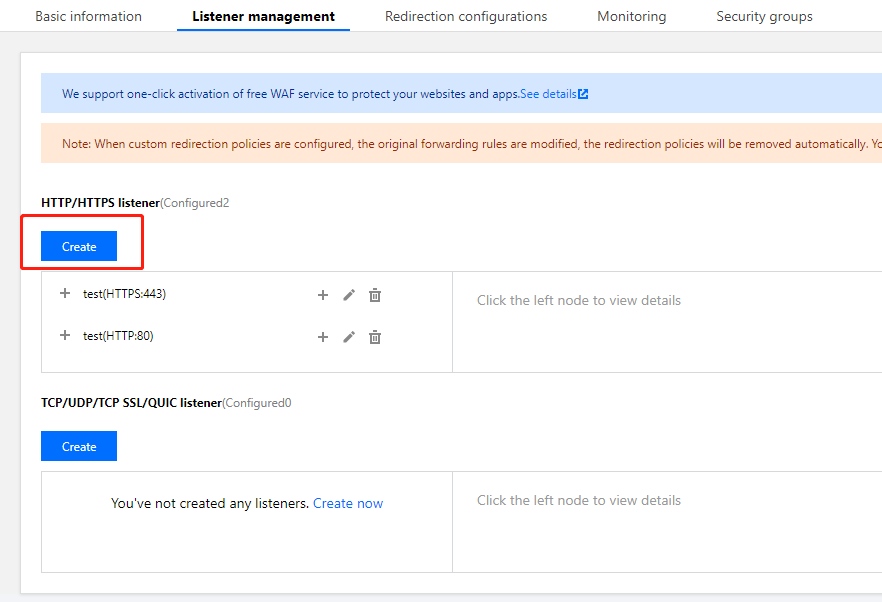
5. On the Listener management page, click Create under HTTP/HTTPS Listener.

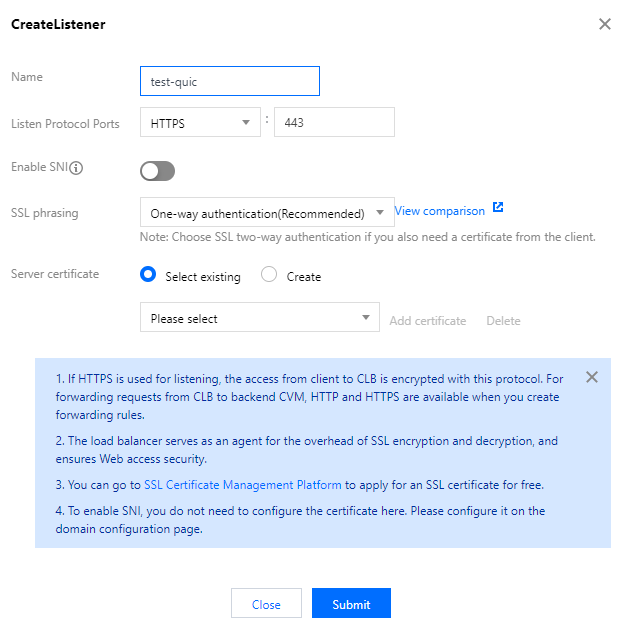
6. On the page that appears, select “HTTPS” as the protocol of the listening protocol port. Complete other configurations, and click Submit.

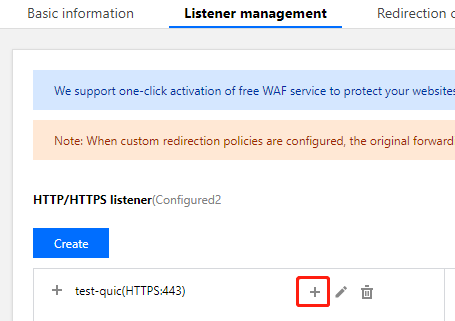
7. On the Listener management tab, click + on the right of the created listener.

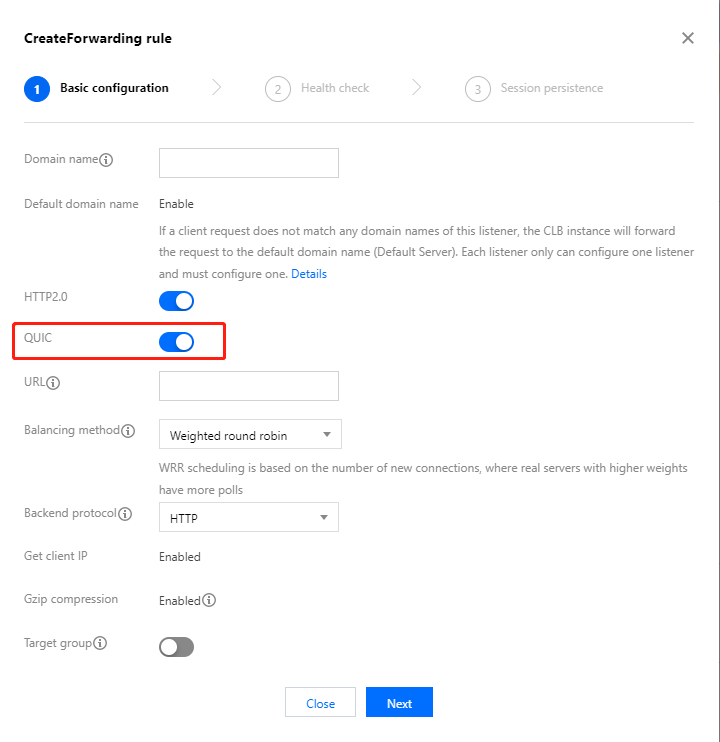
8. On the Create forwarding rules page, enable QUIC and create a layer-7 rule. Fill in relevant fields and click Next to complete the basic configuration.
Note:
After you create an HTTPS forwarding rule, you can enable or disable the QUIC protocol as needed under the domain name of the rule.
Based on the UDP protocol, QUIC will use the UDP port of a CLB instance. If you enable QUIC for a HTTPS listener, UDP and TCP ports will be used. For example, if you enable QUIC for the HTTPS:443 listener, both TCP:443 and UDP:443 ports are used, and you cannot create the TCP:443 or UDP:443 listener.

Related Operations
Was this page helpful?
You can also Contact Sales or Submit a Ticket for help.
Yes
No
Feedback

