To achieve multiple IP addresses on a single Elastic Network Interface (ENI), you can apply for a secondary private IP address for your ENI. This document describes how to apply for and configure the secondary private IP address.
2. In the left sidebar, choose IP and ENI > ENI to go to the ENI list page.
3. Click the ID of the instance for which you want to apply for a secondary private IP address to go to the details page.
4. Click the IPv4 Address Management tab to view the private IP address information.
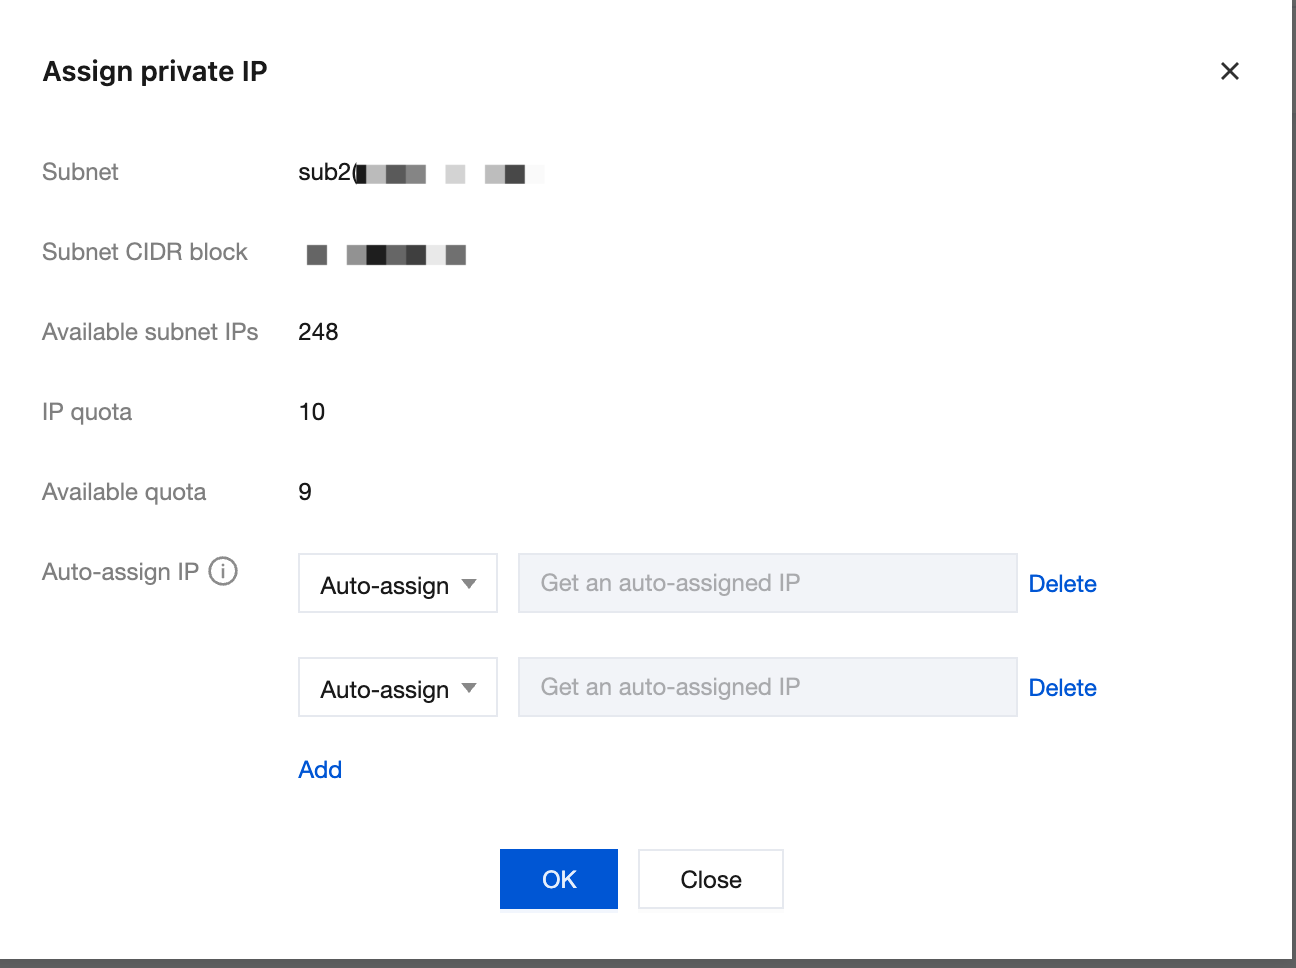
5. Click Assign Private IP. In the displayed dialog box, select Auto-fill or manually enter the private IP address to be assigned, and click OK.
Note
If you select manual entry, ensure that the entered private IP address is within the CIDR block of the subnet and is not a system-reserved IP address.
For example, if the subnet CIDR block is 10.0.0.0/24, the available private IP address range is 10.0.0.2 to 10.0.0.254.
Configuring Secondary Private IP Addresses for a Linux CVM
RHEL Series Operating Systems
Applicable operating systems: TencentOS 3/2, CentOS 6/7, Red Hat 6/7, AlmaLinux, Rocky Linux, OpenCloudOS, and so on.
Sample ENI: The primary ENI eth0 is taken as an example to demonstrate the operations. If you are operating on a secondary ENI, modify the ENI identifier based on the actual situation.
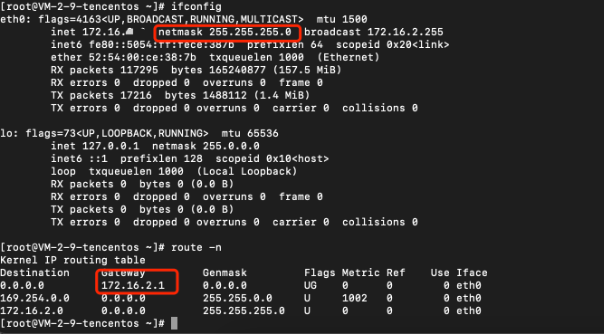
1. Run the ifconfig command in the CVM to view the current network information, and use the route -n command to query the default gateway. In this example, the netmask is 255.255.255.0, the MAC address is 52:54:00:ce:38:7b, and the gateway (default gateway) is 172.16.2.1.
2. Modify the network configuration file
To configure a single private IPv4 address, run the vi /etc/sysconfig/network-scripts/ifcfg-eth0:0 command and add the corresponding configuration items.
The configuration file content is as follows:
[root@mufei /]# vi /etc/sysconfig/network-scripts/ifcfg-eth0:0
DEVICE=eth0:0 # Set to eth0:0 to be consistent with the file name.
BOOTPROTO=static # The protocol is static. none is also acceptable.
HWADDR=00:0C:29:6F:62:A7 # MAC address, same as eth0.
ONBOOT=yes # Enable this ENI on boot.
IPADDR=172.16.2.6 # Newly bound IP address.
NETMASK=255.255.255.0 # Subnet mask.
GATEWAY=172.16.2.1 # Gateway.
3. Restart the network service.
The command to restart the network service is as follows:
Note:
Restarting the network service causes service interruption. Evaluate the business impact and proceed with caution.
[root@mufei /]# systemctl restart network
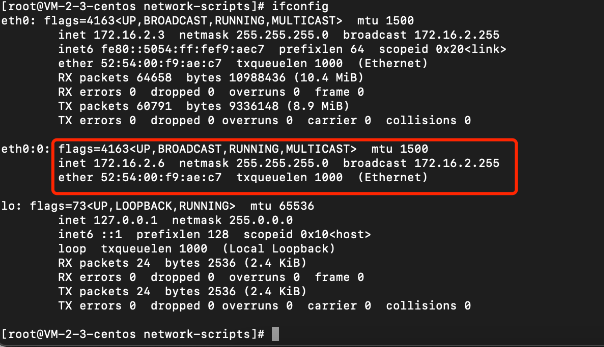
4. Run the ifconfig command to check the configuration effect.
5. The sample effect of configuring one secondary private IP address is shown in the figure below:
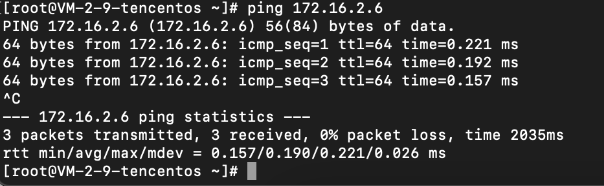
After configuration, perform a Ping test from other CVMs in the same VPC to verify the connectivity of the secondary IP address.
Debian Series Operating Systems
Applicable operating systems: Ubuntu 18/20/22, Ubuntu 14/16, and Debian 8/9/10.
Sample ENI: The primary ENI eth0 is taken as an example to demonstrate the operations. If you are operating on a secondary ENI, modify the ENI identifier based on the actual situation.
1. Run the ifconfig command in the CVM to view the current network information, and use the route -n command to query the default gateway.
2. Based on the operating system for the instance, select the method for configuring the secondary private IP address.
Debian series: Ubuntu 18/20/22.
In Ubuntu 18.04, Netplan is used for network configuration management, which differs significantly from that in version 16.04 and earlier.
a. Modify the configuration file: sudo vim /etc/netplan/50-cloud-init.yaml
The configuration file content is as follows:
b. Run the following command for the configuration to take effect:
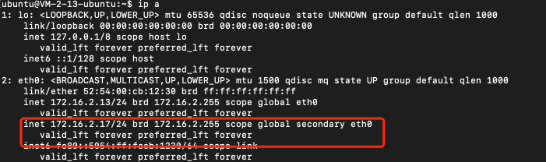
ubuntu@VM-2-13-ubuntu:~$ sudo netplan apply
c. Use the command ip a to check the ENI information and confirm that the configuration has taken effect.
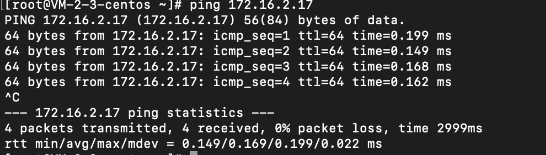
d. Test the secondary IP address from a server in the same VPC to ensure that connectivity is normal.
Debian series: Ubuntu 14/16 and Debian 8/9/10.
a. Run the vi /etc/network/interfaces command to open the network configuration file and add the corresponding configuration items to it.
auto eth0:0
iface eth0:0 inet static
address 172.16.2.2 # Secondary IP address
mask 255.255.255.0
b. Run /etc/init.d/networking restart to make the ENI configuration take effect.
Note:
Restarting the network service causes service interruption. Evaluate the business impact and proceed with caution.
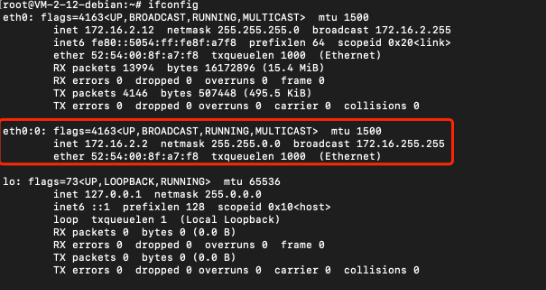
c. Run the ifconfig command to check the configuration effect.
SLES Series Operating Systems
Applicable operating systems: OpenSUSE 15/42.
Sample ENI: The primary ENI eth0 is taken as an example to demonstrate the operations. If you are operating on a secondary ENI, modify the ENI identifier based on the actual situation.
1. Run the vi /etc/sysconfig/network/ifcfg-eth0 command to open the network configuration file and add the following configuration items:
IPADDR_0=172.16.2.8 # Secondary IP address
NETMASK_0=255.255.255.0 # Mask
LABEL_0='0'# Sub-ENI index
2. Run the service network restart or systemctl restart network command to restart the network service.
Note:
Restarting the network service causes service interruption. Evaluate the business impact and proceed with caution.
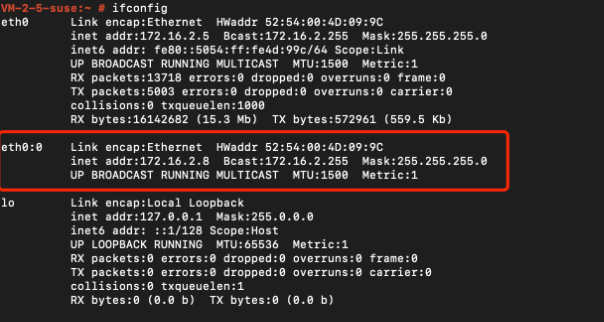
3. Run the ifconfig command to check the configuration effect.
Configuring Secondary Private IP Addresses for a Windows CVM
1.
Perform the following
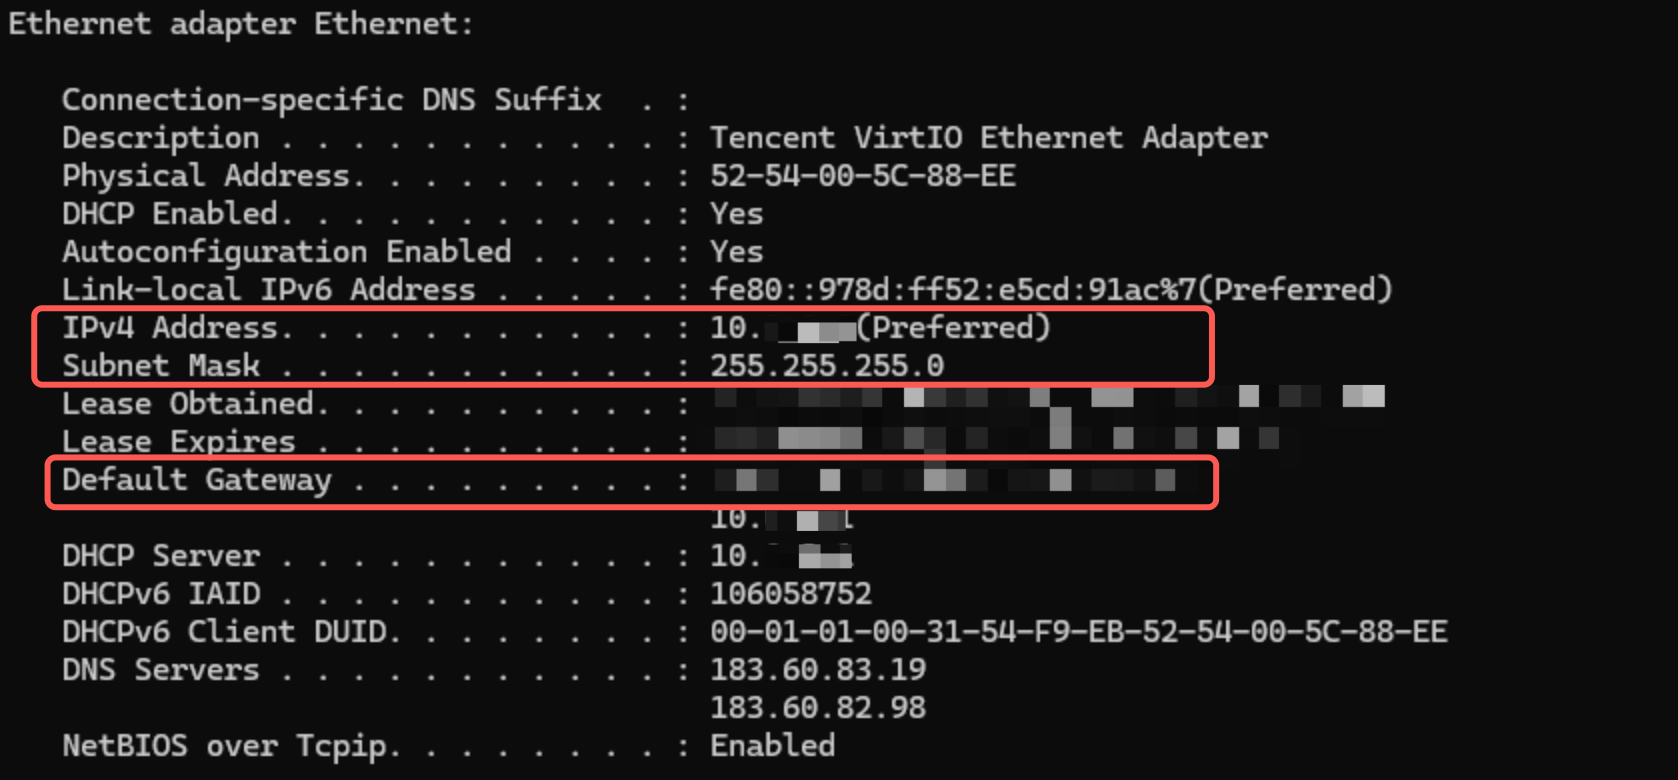
steps to view the IP address, subnet mask, default gateway, and DNS servers of the CVM:
1.1 On the operating system interface, select
in the lower-left corner and click
to open the Windows PowerShell window, and then run the following command:
ipconfig /all
1.2 Record the values for the IPv4 address, subnet mask, default gateway, and DNS servers from the generated network interface information.
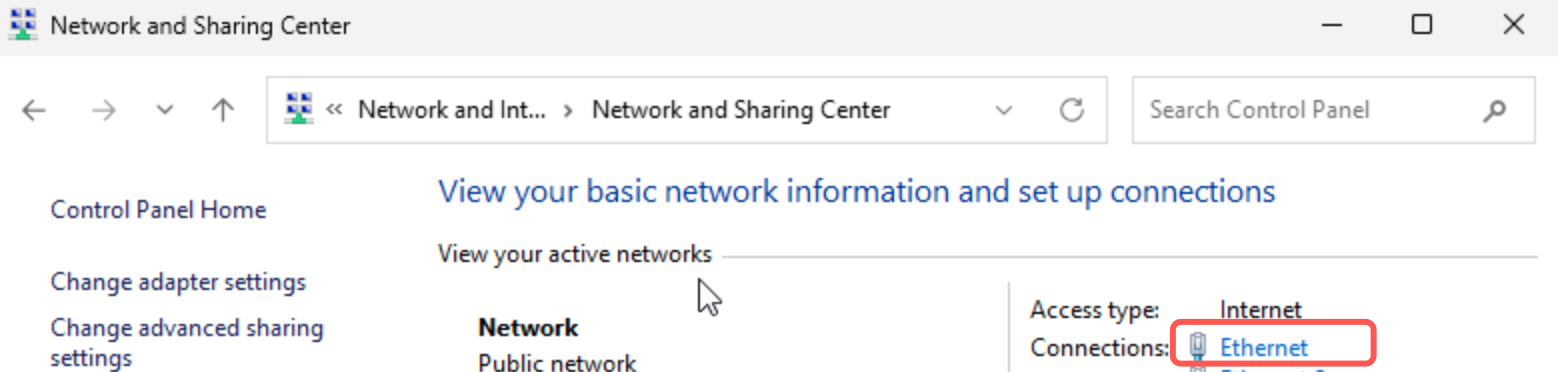
2. Choose Control Panel > Network and Internet > Network and Sharing Center in the operating system, and click the ENI named Ethernet to edit it.
3. In the Ethernet Status dialog box, click Properties.
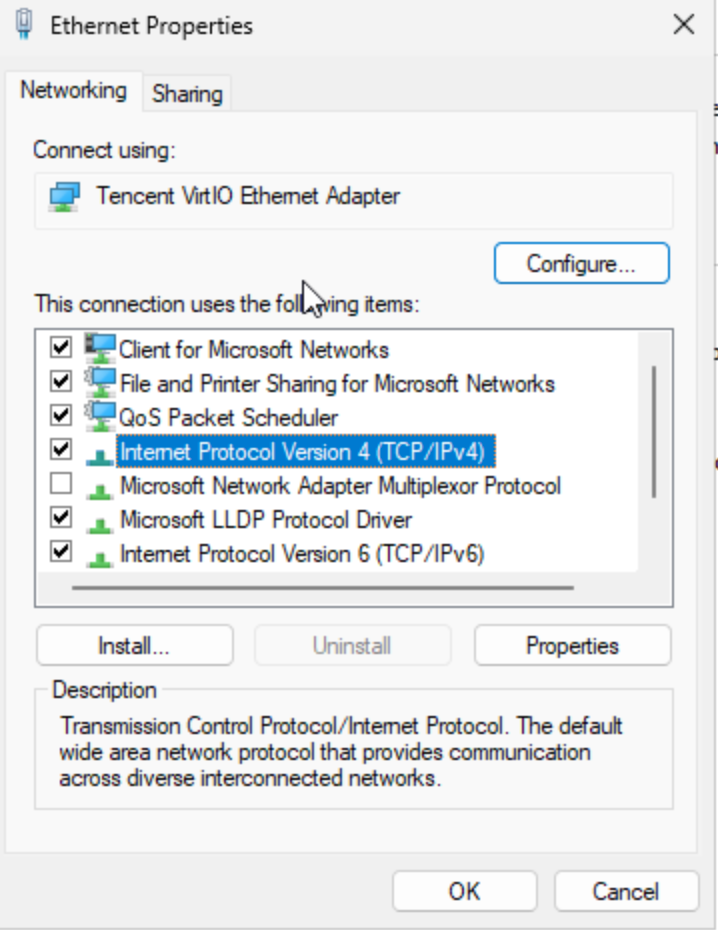
4. In the Ethernet Properties dialog box, select Internet Protocol Version 4 (TCP/IPv4) and click Properties.
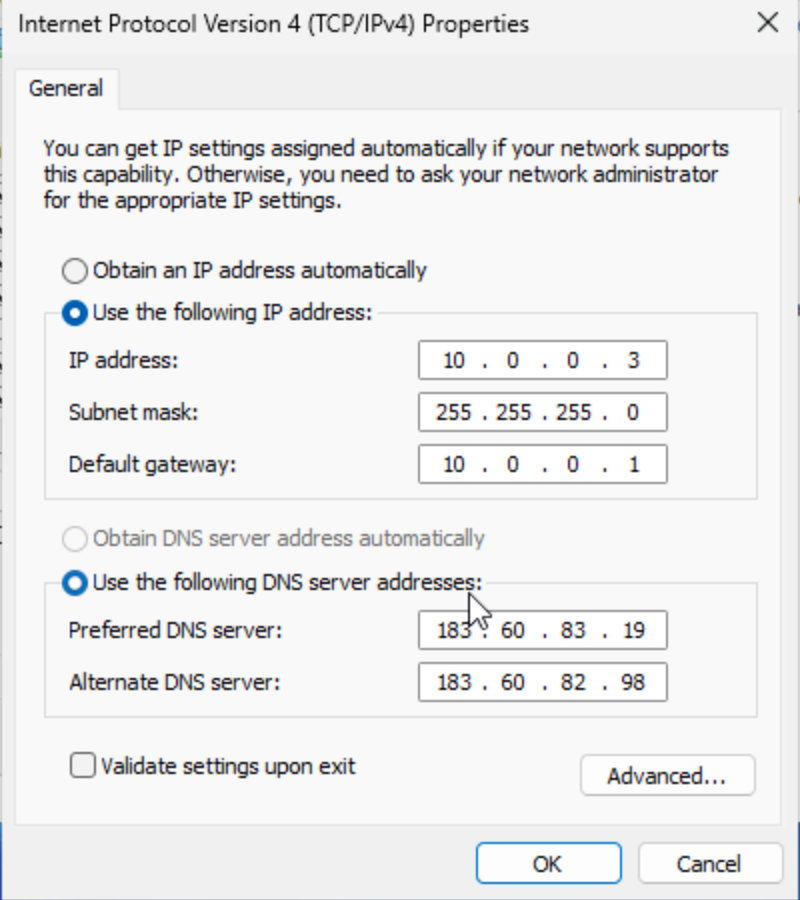
5. In the Internet Protocol Version 4 (TCP/IPv4) Properties dialog box, specify the following information:
Backup DNS server in Step 1. If no backup DNS server is listed, you do not need to specify this parameter.
6. Click Advanced to configure the secondary private IP address.
7. In the Advanced TCP/IP Settings dialog box, click Add under the IP Address section.
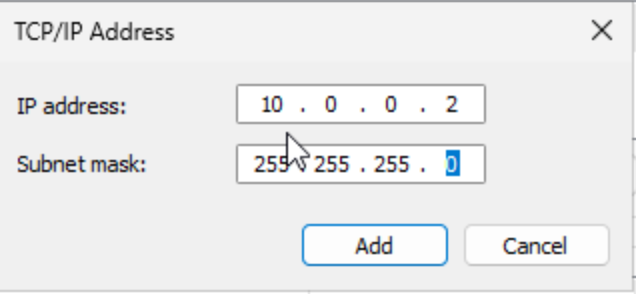
8. In the TCP/IP Address dialog box, enter the secondary private IP address and the subnet mask from Step 1, and then click Add, as shown in the figure below.
9. In the Internet Protocol Version 4 (TCP/IPv4) Properties dialog box, click OK.
10. In the Ethernet Properties dialog box, click OK to complete the configuration.
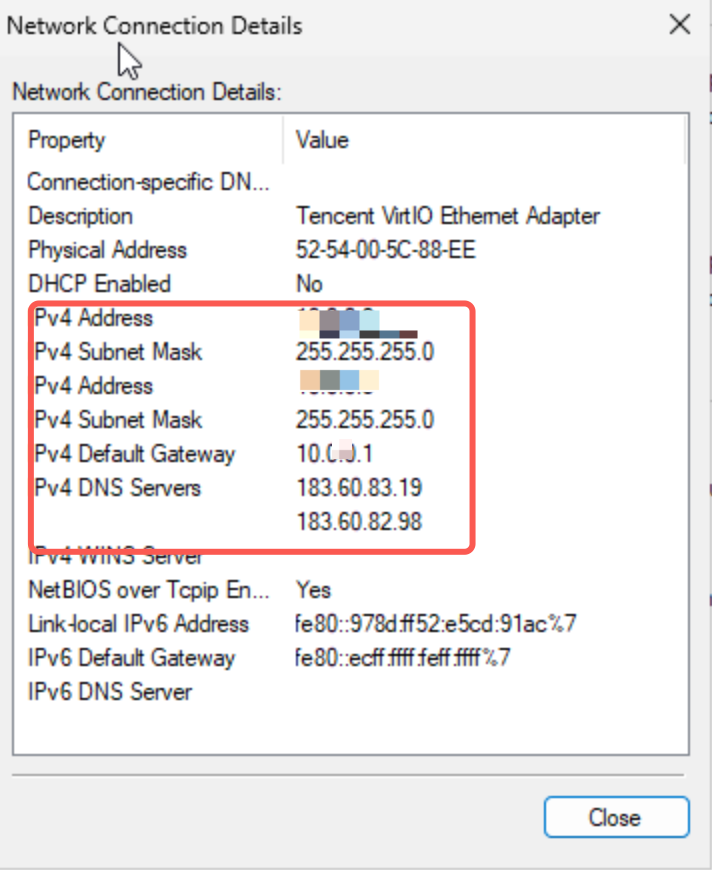
11. In the Ethernet Status dialog box, click Details to view the configured IP address information, as shown in the figure below.