
C++
最后更新时间:2024-12-02 20:36:46
C++
最后更新时间: 2024-12-02 20:36:46
简介
欢迎使用腾讯云开发者工具套件(SDK)3.0,SDK 3.0 是云 API 3.0 平台的配套工具。SDK 3.0 实现了统一化,各个语言版本的 SDK 具备使用方法相同、接口调用方式相同、错误码和返回包格式相同等优点。
本文以 C++ SDK 3.0 为例,介绍如何使用、调试并接入腾讯云产品 API。
目前已支持云服务器 CVM、私有网络 VPC 、云硬盘 CBS 等 腾讯云产品,后续会支持其他云产品接入。
依赖环境
C++ 11 或更高版本的编译器,即 GCC 4.8 或以上版本。暂时仅支持 Linux 安装环境,不支持 Windows 环境。
获取安全凭证。安全凭证包含 SecretId 及 SecretKey 两部分。SecretId 用于标识 API 调用者的身份,SecretKey 用于加密签名字符串和服务器端验证签名字符串的密钥。前往 API 密钥管理 页面,即可进行获取,如下图所示:
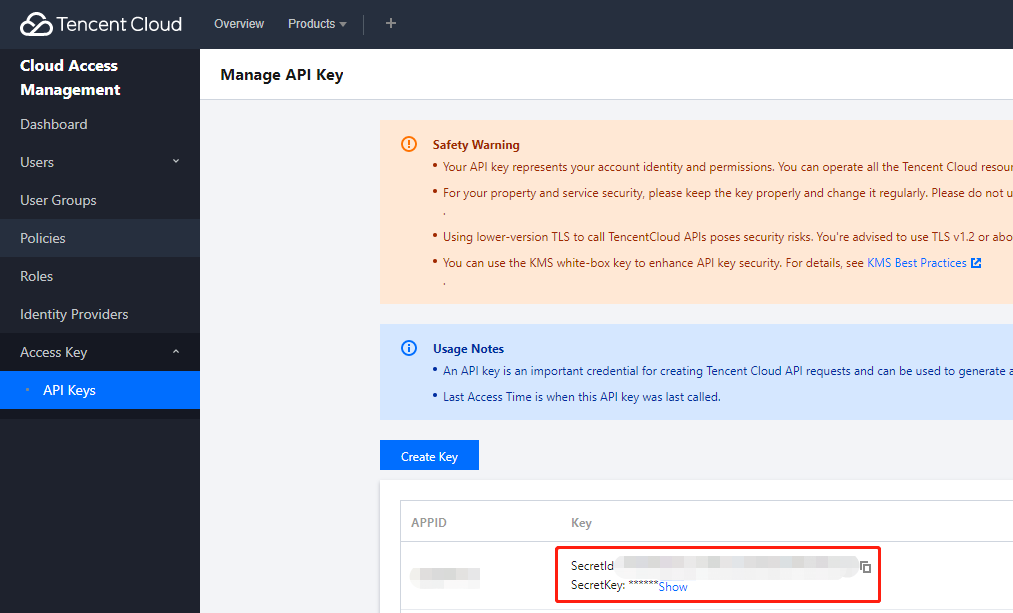
注意:
您的安全凭证代表您的账号身份和所拥有的权限,等同于您的登录密码,切勿泄露他人。
获取调用地址。调用地址(endpoint)一般形式为
*.tencentcloudapi.com,产品的调用地址有一定区别,例如,云服务器的调用地址为cvm.tencentcloudapi.com。具体调用地址可参考对应产品的 API 文档。安装 cmake 编译工具(cmake 3.0 或以上版本),例如:
ubuntusudo apt-get install cmakecentosyum install cmake3
安装依赖库 libcurl,建议安装最新版的 libcurl 库,否则可能存在 libcurl 库内存泄露 bug 问题。
ubuntusudo apt-get install libcurl4-openssl-devcentosyum install libcurl-devel
安装依赖库 openssl,安装示例如下:
ubuntusudo apt-get install libssl-devcentosyum install openssl-devel
安装依赖库 libuuid,安装示例如下:
ubuntusudo apt-get install uuid-devcentosyum install libuuid-devel
安装 SDK
从源代码构建 SDK
1. 前往 Github 代码托管地址 下载最新代码。
2. 进入 SDK 创建生成必要的构建文件,这里的
path/to/是指 tencentcloud-sdk-cpp 包的实际路径。cd <path/to/tencentcloud-sdk-cpp>mkdir sdk_buildcd sdk_buildcmake ..makesudo make install
使用SDK
注意:
示例不能直接运行,需要将密钥等信息改为真实可用的信息,最好配置在环境变量,避免暴露在代码中。
以 cvm 产品的 DescribeInstances 接口为例:
#include <tencentcloud/core/TencentCloud.h>#include <tencentcloud/core/Credential.h>#include <tencentcloud/cvm/v20170312/CvmClient.h>#include <tencentcloud/cvm/v20170312/model/DescribeInstancesRequest.h>#include <tencentcloud/cvm/v20170312/model/DescribeInstancesResponse.h>#include <tencentcloud/cvm/v20170312/model/Instance.h>#include <iostream>#include <string>using namespace TencentCloud;using namespace TencentCloud::Cvm::V20170312;using namespace TencentCloud::Cvm::V20170312::Model;using namespace std;int main(){TencentCloud::InitAPI();string secretId = "<your secret id>";string secretKey = "<your secret key>";Credential cred = Credential(secretId, secretKey);DescribeInstancesRequest req = DescribeInstancesRequest();CvmClient cvm_client = CvmClient(cred, "ap-guangzhou");auto outcome = cvm_client.DescribeInstances(req);if (!outcome.IsSuccess()){cout << outcome.GetError().PrintAll() << endl;TencentCloud::ShutdownAPI();return -1;}DescribeInstancesResponse rsp = outcome.GetResult();cout<<"RequestId="<<rsp.GetRequestId()<<endl;cout<<"TotalCount="<<rsp.GetTotalCount()<<endl;if (rsp.InstanceSetHasBeenSet()){vector<Instance> instanceSet = rsp.GetInstanceSet();for (auto itr=instanceSet.begin(); itr!=instanceSet.end(); ++itr){cout<<(*itr).GetPlacement().GetZone()<<endl;}}TencentCloud::ShutdownAPI();return 0;}
#include <tencentcloud/core/TencentCloud.h>#include <tencentcloud/core/profile/HttpProfile.h>#include <tencentcloud/core/profile/ClientProfile.h>#include <tencentcloud/core/Credential.h>#include <tencentcloud/core/NetworkProxy.h>#include <tencentcloud/core/AsyncCallerContext.h>#include <tencentcloud/cvm/v20170312/CvmClient.h>#include <tencentcloud/cvm/v20170312/model/DescribeInstancesRequest.h>#include <tencentcloud/cvm/v20170312/model/DescribeInstancesResponse.h>#include <tencentcloud/cvm/v20170312/model/Instance.h>#include <iostream>#include <string>using namespace TencentCloud;using namespace TencentCloud::Cvm::V20170312;using namespace TencentCloud::Cvm::V20170312::Model;using namespace std;int main(){TencentCloud::InitAPI();// use the sdk// 实例化一个认证对象,入参需要传入腾讯云账户secretId,secretKey,此处还需注意密钥对的保密string secretId = "<your secret id>";string secretKey = "<your secret key>";Credential cred = Credential(secretId, secretKey);// 实例化一个http选项,可选的,没有特殊需求可以跳过。HttpProfile httpProfile = HttpProfile();httpProfile.SetKeepAlive(true); // 状态保持,默认是FalsehttpProfile.SetEndpoint("cvm.ap-guangzhou.tencentcloudapi.com"); // 指定接入地域域名(默认就近接入)httpProfile.SetReqTimeout(30); // 请求超时时间,单位为秒(默认60秒)httpProfile.SetConnectTimeout(30); // 响应超时时间,单位是秒(默认是60秒)ClientProfile clientProfile = ClientProfile(httpProfile);DescribeInstancesRequest req = DescribeInstancesRequest();Filter respFilter;respFilter.SetName("zone");respFilter.SetValues({ "ap-guangzhou-1", "ap-guangzhou-2" });req.SetFilters({ respFilter });req.SetOffset(0);req.SetLimit(5);CvmClient cvm_client = CvmClient(cred, "ap-guangzhou", clientProfile);// set proxy// NetworkProxy proxy = NetworkProxy(NetworkProxy::Type::HTTP, "localhost.proxy.com", 8080);// cvm_client.SetNetworkProxy(proxy);auto outcome = cvm_client.DescribeInstances(req);if (!outcome.IsSuccess()){cout << outcome.GetError().PrintAll() << endl;TencentCloud::ShutdownAPI();return -1;}DescribeInstancesResponse rsp = outcome.GetResult();cout<<"RequestId="<<rsp.GetRequestId()<<endl;cout<<"TotalCount="<<rsp.GetTotalCount()<<endl;if (rsp.InstanceSetHasBeenSet()){vector<Instance> instanceSet = rsp.GetInstanceSet();for (auto itr=instanceSet.begin(); itr!=instanceSet.end(); ++itr){cout<<(*itr).GetPlacement().GetZone()<<endl;}}TencentCloud::ShutdownAPI();return 0;}
Demo 用例编译执行:
cd example/cvm/v20170312mkdir buildcd buildcmake ..make./DescribeInstances
如果报错动态库找不到,可指定动态库路径。例如,libtencentcloud-sdk-cpp-core.so 安装到了 /usr/local/lib 路径下:
export LD_LIBRARY_PATH=/usr/local/lib:$LD_LIBRARY_PATH./DescribeInstances
说明:
单元测试
依赖库 gtest
安装示例如下:
git clone https://github.com/google/googletestcd googletestcmake CMakeLists.txtmake
将生成的 libgtest.a libgtest_main.a 静态库,以及 gtest 的头文件,拷贝到系统目录下。
配置环境变量
ENV_SecretId: 密钥 ID
ENV_SecretKey: 密钥 Key
测试
执行以下脚本
sh function_test.sh
相关配置
代理
若在代理的环境下使用 SDK 进行接口调用,则需设置系统环境变量
https_proxy(已在示例代码中体现),否则可能出现无法正常调用,抛出连接超时异常的现象。文档反馈