The quota limit per domain for each edition is: Advanced Edition: 1000 entries/domain, Enterprise Edition: 5000 entries/domain, Flagship Edition: 20000 entries/domain. Each IP address or IP address range occupies one quota entry.
Manual Addition
1. Log in to the WAF console, and in the left sidebar, click Protection Policies > Blocklist.
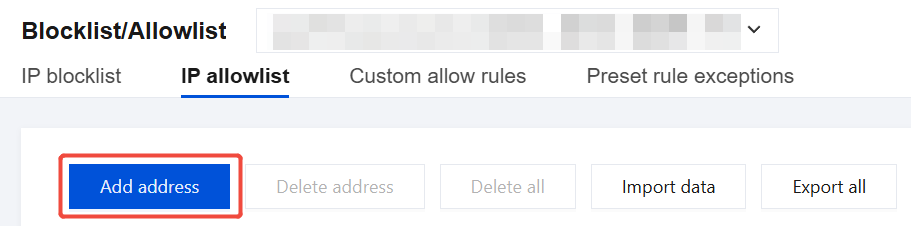
2. On the allowlist and blocklist page, select the domain name to be protected in the top-left corner and click IP allowlist.
Note
When the selected domain name is Global, the IP address or IP range will be added to the global allowlist.
3. On the IP allowlist page, click Add address.
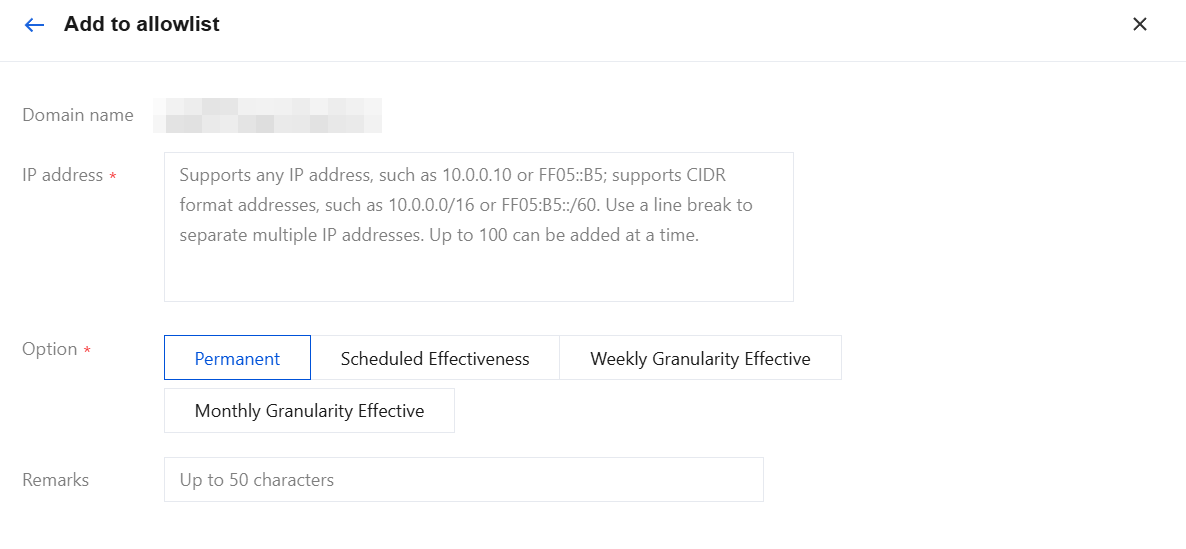
4. On the Add to Allowlist page, configure related parameters and click OK.
Parameter description
IP address: Supports any IP address, such as 10.0.0.10 or FF05::B5; supports CIDR format addresses, such as 10.0.0.0/16 or FF05:B5::/60, separated by line breaks, with up to 100 added at a time.
Option
Option
Description
Permanent
Permanent.
Scheduled Effectiveness
Select time: Set the effective time range, with a maximum of 20 entries.
Time zone selection: Specifies the time zone corresponding to the selected time range.
Weekly Granularity Effective
Selection cycle: Select effective dates by week, supports multiple selections, and set the corresponding time range. Up to 20 records can be added.
Time zone selection: Specifies the time zone corresponding to the selected time range.
Monthly Granularity Effective
Selection cycle: Select effective dates by month, supports multiple selections, and set the corresponding time range. Up to 20 entries can be added.
Time zone selection: Specifies the time zone corresponding to the selected time range.
Remarks: Customized within 50 characters.
Import Data
1. On the Allowlist/Blocklist page, select the domain name to be protected in the upper-left corner, and click IP allowlist.
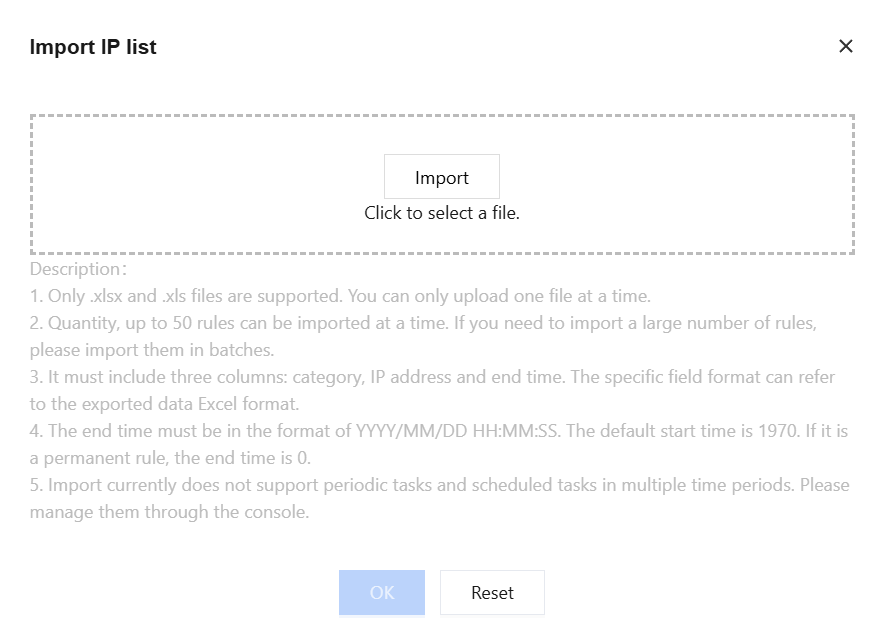
2. On the IP Allowlist page, click Import data > Import. After the data is parsed successfully, click OK.
Editing IP Allowlist
1. On the Allowlist/Blocklist page, select the domain name to be protected in the upper-left corner, and click IP allowlist.
2. On the IP Allowlist page, select the required IP address, click Edit in the operation column, modify the expiration time and remarks, and click OK to save.
Copy IP Address
1. On the Allowlist/Blocklist page, select the domain name to be protected in the upper-left corner, and click IP allowlist.
2. On the IP Allowlist page, select the required IP address, click Copy IP Address in the operation column to copy it to the clipboard.
Deleting IP Allowlist
1. On the Allowlist/Blocklist page, select the domain name to be protected in the upper-left corner, and click IP allowlist.
2. On the IP Allowlist page, you can delete a single address, partial addresses, or all addresses. Specific operations are as follows:
Single: Select a single IP address, click Delete address or Delete in the operation column, and a Confirm Deletion pop-up window will appear.
Note
The deleted IP address cannot be recovered. It should be re-added to take effect.
Partial: Select multiple IP addresses, click Delete address, and a Confirm Deletion pop-up window will appear.
Note
The deleted IP address cannot be recovered. It should be re-added to take effect.
All: Click Delete all, and a Confirm Deletion pop-up window will appear.
Note:
This operation will clear all IP address allowlist information under the current domain name. Please exercise caution! The deleted information cannot be recovered and must be re-added to take effect.
3. In the Confirm Deletion pop-up window, click OK to delete the address.
Exporting All Filtered Results
1. On the Allowlist/Blocklist page, select the domain name to be protected in the upper-left corner, and click IP Allowlist.
2. On the IP Allowlist page, click the search box and enter IP address or Rule ID to filter IP addresses. Alternatively, click the Source, Option, Status fields to filter IP addresses based on corresponding criteria.
3. After the required IP addresses are filtered, click Export all to export the required IP filtering results.