产品动态
产品近期公告
关于 TRTC Live 正式上线的公告
关于TRTC Conference 正式版上线的公告
Conference 商业化版本即将推出
关于多人音视频 Conference 开启内测公告
关于音视频通话 Call 正式版上线的公告
关于腾讯云音视频终端 SDK 播放升级及新增授权校验的公告
关于 TRTC 应用订阅套餐服务上线的相关说明
AIConversationKit组件。遵循本指南,您将在20分钟内完成以下关键步骤,并实现具备完整 UI 界面的 AI 对话功能。AI 对话界面 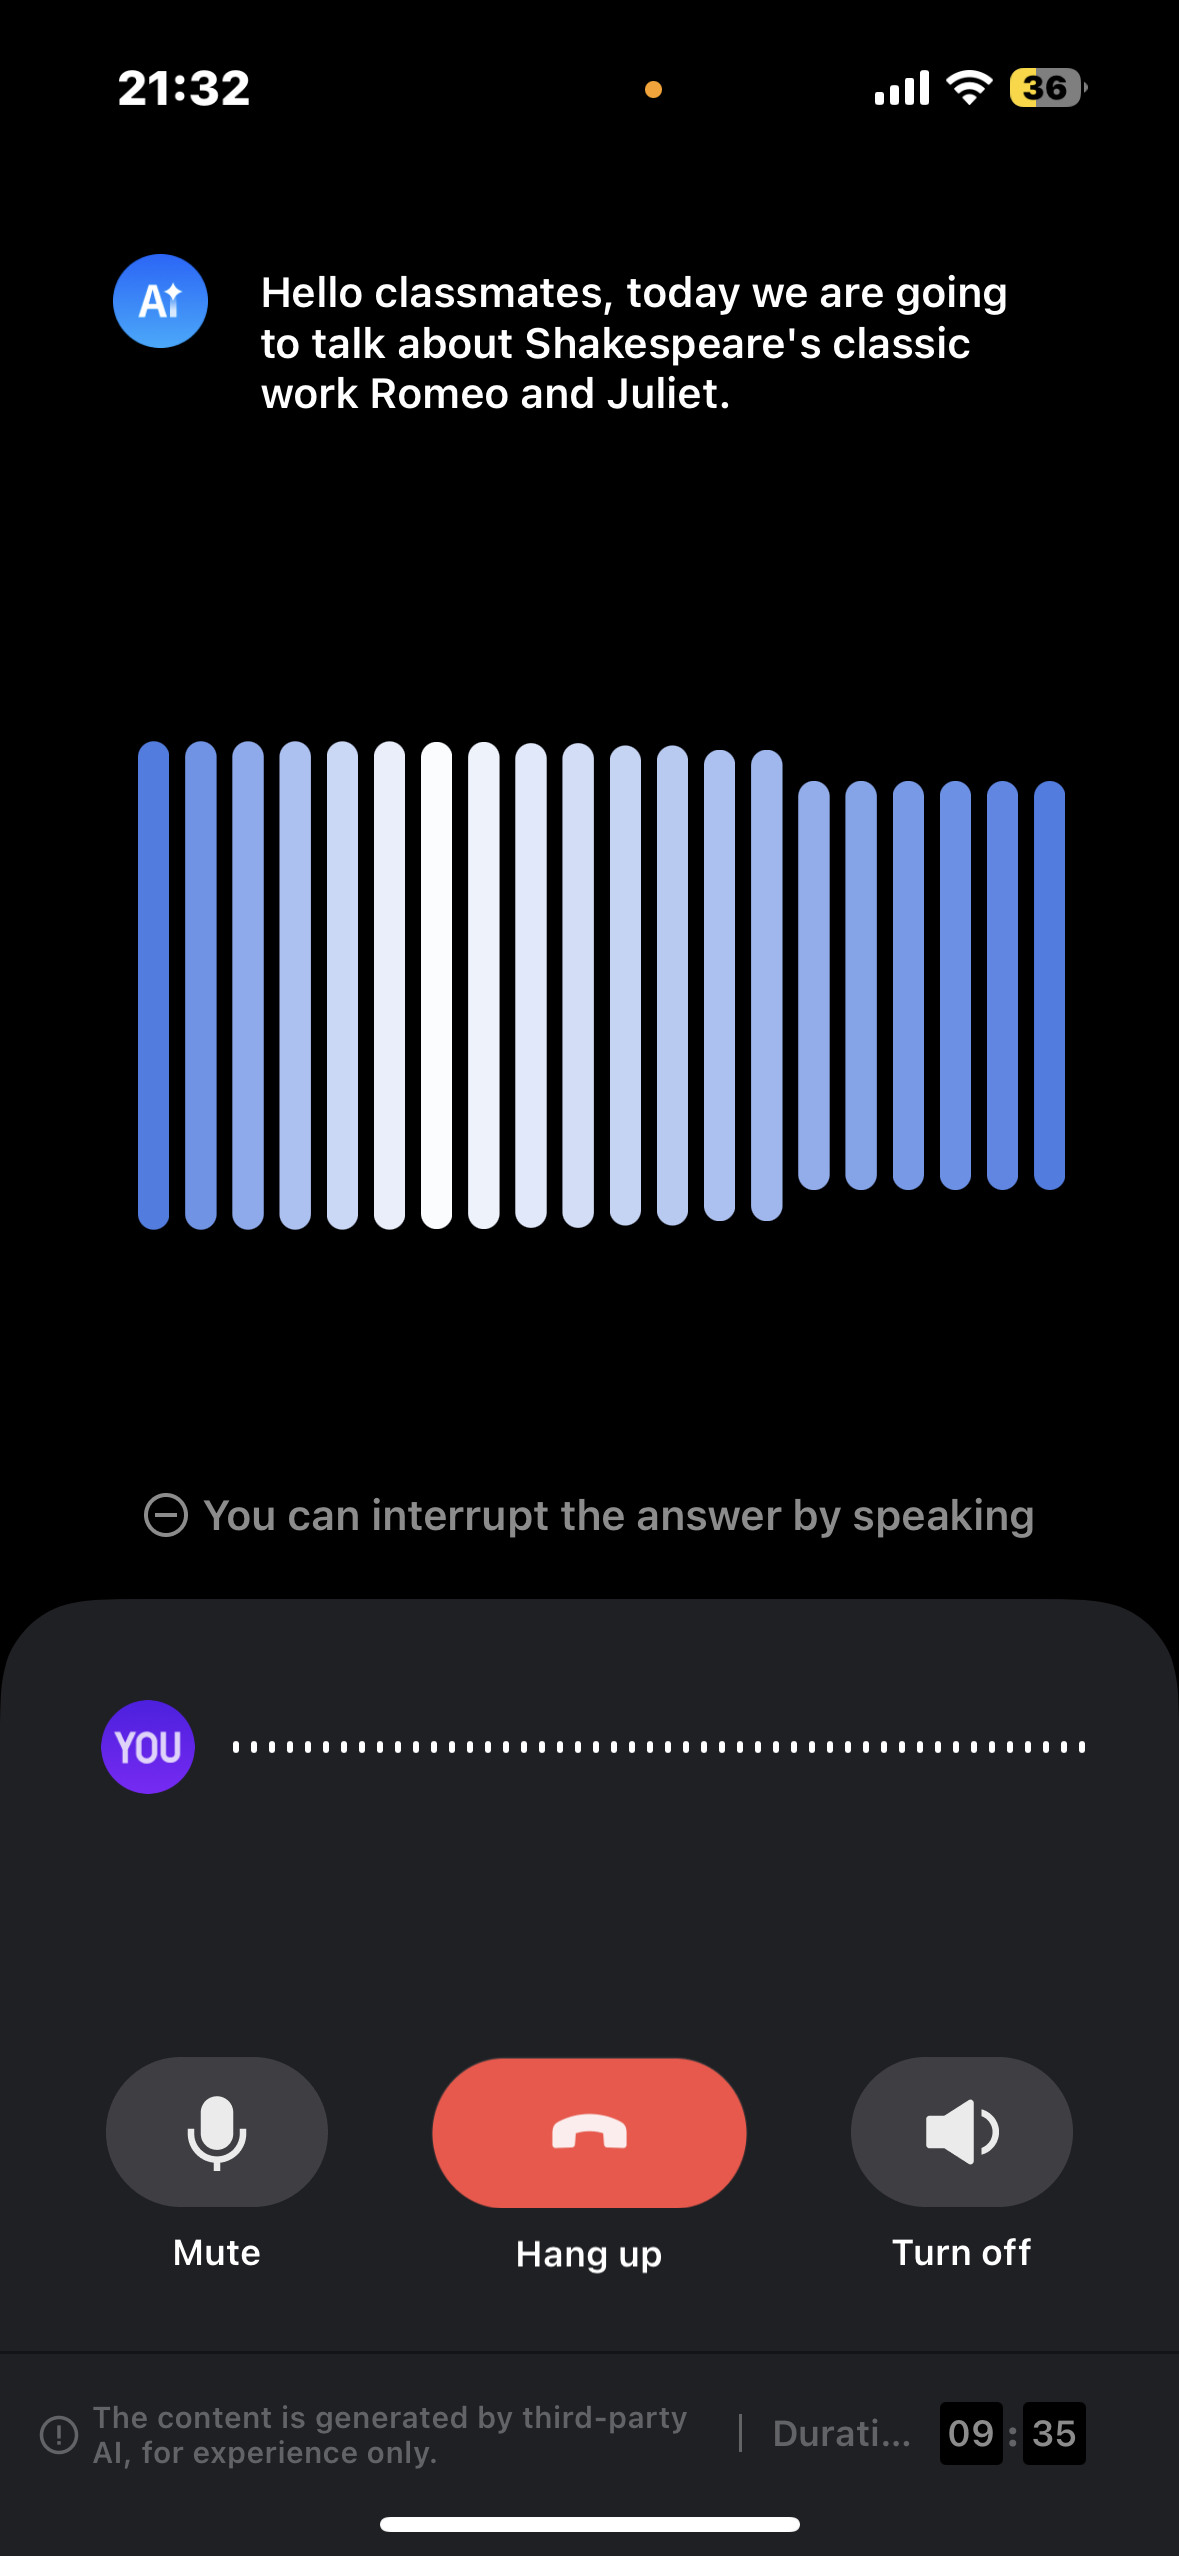 |
|
Android目录下的aiconversatonkit子目录到您当前工程中的 app 同级目录中,如下图: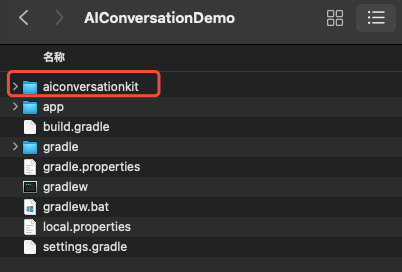
setting.gradle(或 settings.gradle.kts)文件,并在其中增加如下代码,它的作用是将aiconversationkit组件导入到您当前的项目中。include ':aiconversationkit'
include (":aiconversationkit")
build.gradle(或 build.gradle.kts)文件,并在其中增加如下代码,它的作用是声明当前app对新加入的aiconversationkit组件的依赖。api project(':aiconversationkit')
api(project(":aiconversatonkit"))
-keep class com.tencent.** { *; }
application 节点中添加 tools:replace="android:allowBackup" ,覆盖组件内的设置,使用自己的设置。// app/src/main/AndroidManifest.xml<applicationandroid:name=".DemoApplication"android:allowBackup="false"android:icon="@drawable/app_ic_launcher"android:label="@string/app_name"android:largeHeap="true"android:theme="@style/AppTheme"tools:replace="android:allowBackup">
TUILogin中的相关接口完成组件的登录。这个步骤异常关键,因为只有在登录后才能正常使用 AIConversationkit的各项功能,故请您耐心检查相关参数是否配置正确。String userId = "denny"; // Please replace with your UserIDint sdkAppId = 1400000001; // Please replace with the sdkAppId obtained in step 1String sdkSecretKey = "xxxx"; // Please replace with the sdkSecretKey obtained in step 1String userSig = GenerateTestUserSig.genTestUserSig(sdkAppId, userId, sdkSecretKey);TUILogin.login(this, sdkAppId, userId, userSig, new TUICallback() {@Override public void onSuccess() {}@Override public void onError(int errorCode, String errorMessage) {}});
val userId = "denny" // Please replace with your UserIDval sdkAppId = 1400000001 // Please replace with the sdkAppId obtained in step 1val sdkSecretKey = "xxxx" // Please replace with the sdkSecretKey obtained in step 1val userSig = GenerateTestUserSig.genTestUserSig(sdkAppId, userId, sdkSecretKey)TUILogin.login(this, sdkAppId, userId, userSig, object : TUICallback() {override fun onSuccess() {}override fun onError(errorCode: Int, errorMessage: String) {}})
参数 | 类型 | 说明 |
userId | String | 客户根据自己的业务自定义用户 ID,只允许包含大小写英文字母(a-z A-Z)、数字(0-9)及下划线和连词符。 |
sdkAppId | int | |
secretKey | String | |
userSig | String | 一种安全保护签名,用于对用户进行登录鉴权认证,确认用户是否真实,阻止恶意攻击者盗用您的云服务使用权。 |
GenerateTestUserSig.genTestSig函数生成 userSig。该方法中 SDKSecretKey 很容易被反编译逆向破解,一旦您的密钥泄露,攻击者就可以盗用您的腾讯云流量。AIConversationDefine.StartAIConversationParams startParams = new AIConversationDefine.StartAIConversationParams();int sdkAppId = 1400000001; // 1、Replace your sdkAppIdString sdkSecretKey = "xxxx"; // 2、Replace your sdkSecretKeyString aiRobotId = "robot_" + TUILogin.getUserId();String aiRobotSig = GenerateTestUserSig.genTestUserSig(sdkAppId, aiRobotId, sdkSecretKey);startParams.agentConfig = AIConversationDefine.AgentConfig.generateDefaultConfig(aiRobotId, aiRobotSig);startParams.secretId = "xxx"; // 3、Replace your secretIdstartParams.secretKey = "xxx"; // 4、Replace your secretKey// 5、Replace your llmConfigstartParams.llmConfig = "{\\"LLMType\\":\\"openai\\",\\"Model\\":\\"hunyuan-turbo-latest\\",\\"SystemPrompt\\":\\"你是一个私人助手\\",\\"APIUrl\\":\\"https:xxx\\",\\"APIKey\\":\\"xxx\\",\\"History\\":5,\\"Streaming\\":true}";// 6、Replace your ttsConfigstartParams.ttsConfig = "{\\"TTSType\\":\\"tencent\\",\\"AppId\\":\\"xxx\\",\\"SecretId\\":\\"xxx\\",\\"SecretKey\\":\\"xxx\\",\\"VoiceType\\":\\"502001\\",\\"Speed\\":1.25,\\"Volume\\":5,\\"PrimaryLanguage\\":1,\\"FastVoiceType\\":\\"\\"}";Intent intent = new Intent(this, AIConversationActivity.class);intent.putExtra(KEY_START_AI_CONVERSATION, startParams);startActivity(intent);
val startParams = AIConversationDefine.StartAIConversationParams()val sdkAppId = 1400000001 // 1、Replace your sdkAppIdval sdkSecretKey = "xxxx" // 2、Replace your sdkSecretKeyval aiRobotId = "robot_" + TUILogin.getUserId()val aiRobotSig = GenerateTestUserSig.genTestUserSig(sdkAppId, aiRobotId, sdkSecretKey)startParams.agentConfig = AIConversationDefine.AgentConfig.generateDefaultConfig(aiRobotId, aiRobotSig)startParams.secretId = "xxx" // 3、Replace your secretIdstartParams.secretKey = "xxx" // 4、Replace your secretKey// 5、Replace your llmConfigstartParams.llmConfig = "{\\"LLMType\\":\\"openai\\",\\"Model\\":\\"hunyuan-turbo-latest\\",\\"SystemPrompt\\":\\"你是一个私人助手\\",\\"APIUrl\\":\\"https:xxx\\",\\"APIKey\\":\\"xxx\\",\\"History\\":5,\\"Streaming\\":true}"// 6、Replace your ttsConfigstartParams.ttsConfig = "{\\"TTSType\\":\\"tencent\\",\\"AppId\\":\\"xxx\\",\\"SecretId\\":\\"xxx\\",\\"SecretKey\\":\\"xxx\\",\\"VoiceType\\":\\"502001\\",\\"Speed\\":1.25,\\"Volume\\":5,\\"PrimaryLanguage\\":1,\\"FastVoiceType\\":\\"\\"}"val intent = Intent(this, AIConversationActivity::class.java)intent.putExtra(KEY_START_AI_CONVERSATION, startParams)startActivity(intent)

startParams.secretId和startParams.secretKey中。startParams.llmConfig,将 TTSConfig 对应的字符串值复制到startParams.ttsConfig中。文档反馈