2. Top up online.
Lighthouse instances are available through monthly subscription. To make a purchase, you need to top up your account as instructed in Payment Methods.
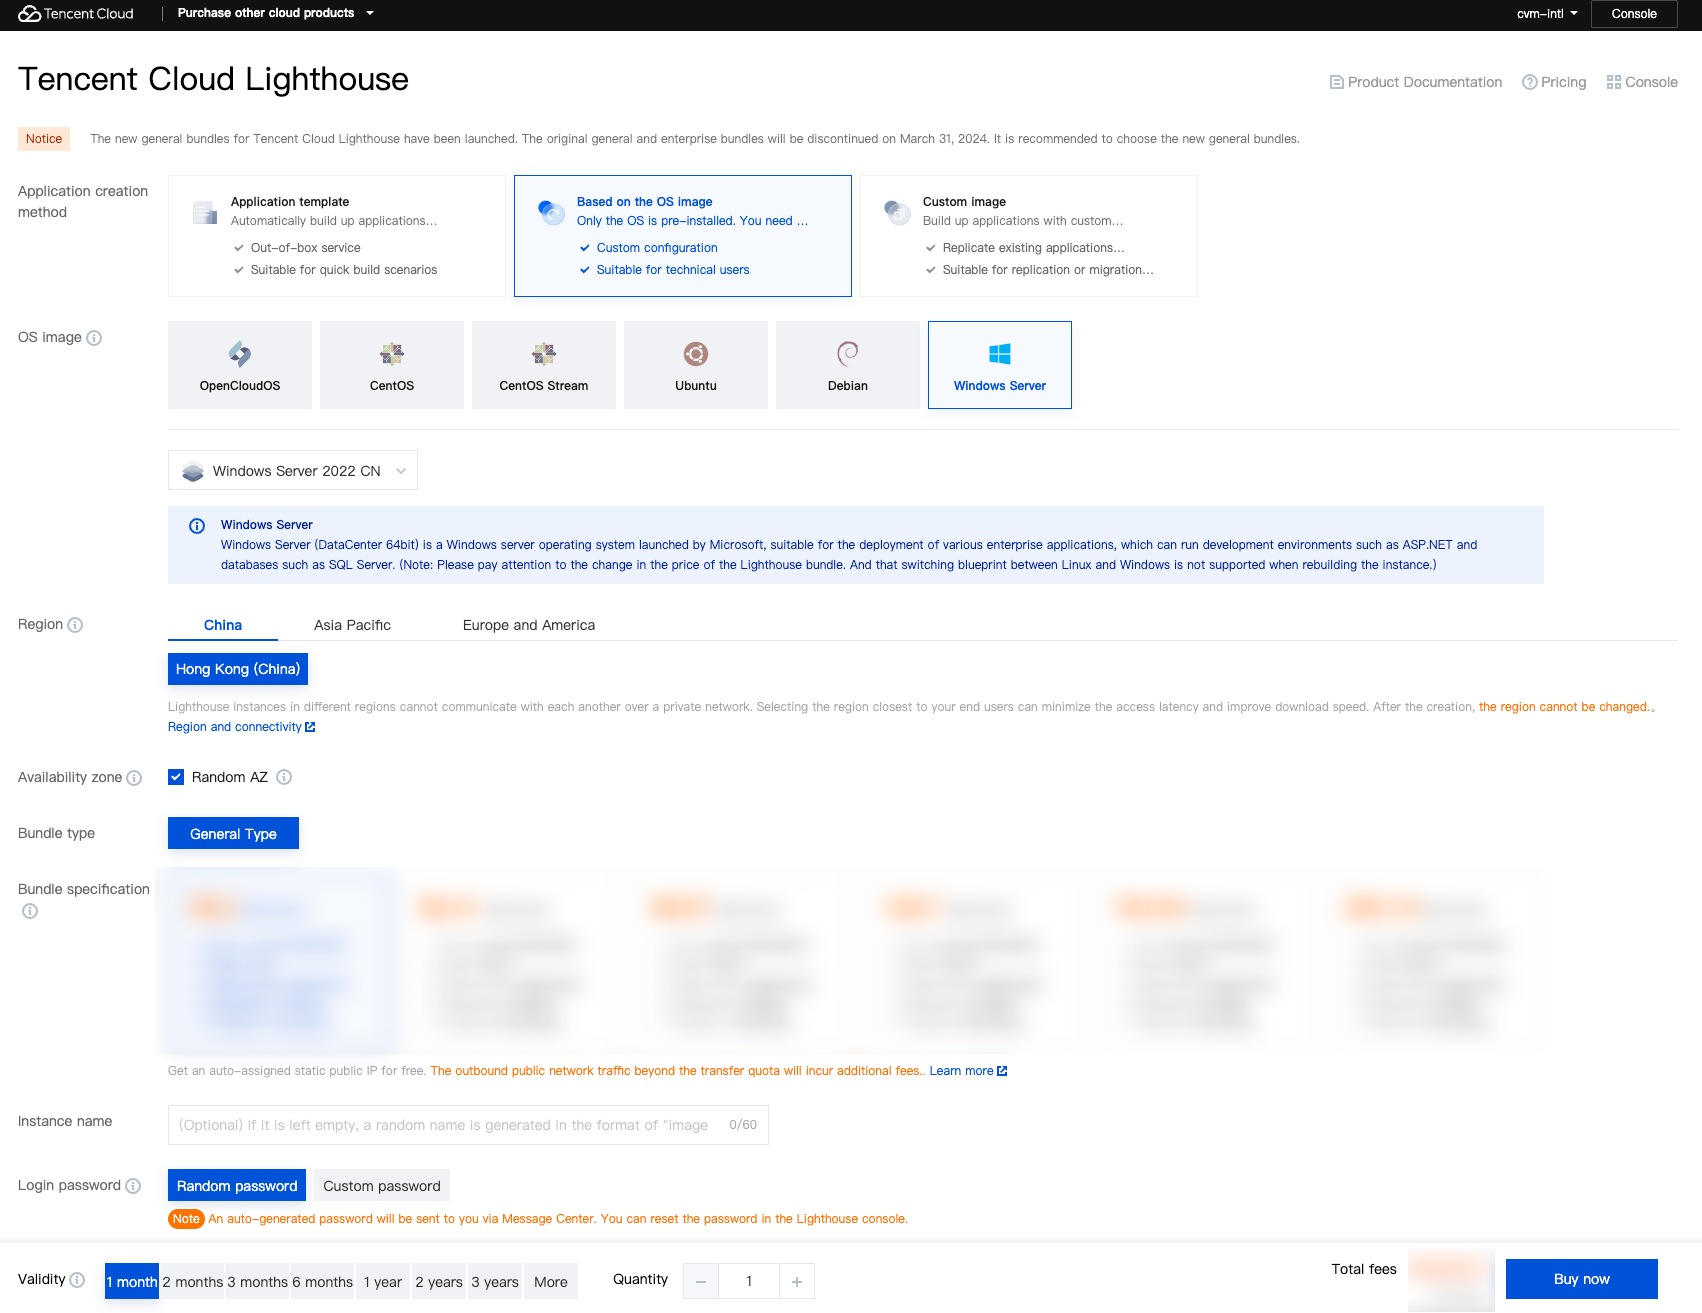
2. Click Create to enter the Lighthouse purchase page as shown below:
Region: We recommend you select a region near your target users to reduce the network latency and improve their access speed.
Availability zone: Randomly assigned is selected by default. You can select one as well.
Image: Select an OS as needed. The Windows Server 2022 system image is selected here as an example.
Instance bundle: Select an instance bundle according to the required instance configuration (including CPU, memory, system disk, bandwidth, and data transfer plan).
Instance name: Enter a custom instance name. If it is left empty, an "image name + 4-digit random string" will be used as the name by default. When multiple instances are created in a batch, their names will be consecutive with auto-incrementing suffixes. For example, if you enter "LH" as the name and purchase three instances, the three instances are named "LH1", "LH2", and "LH3".
Login method: If you select a Windows image, you can use this option to set the login password of the instance:
Set password: Set the custom password for instance login.
Random password: The system sends an automatically generated password to your Message Center.
Purchase period: Default to 1 month.
Quantity: Default to 1.
3. Click Buy now.
4. After confirming the configuration information is correct, click Submit order, and make the payment as prompted.
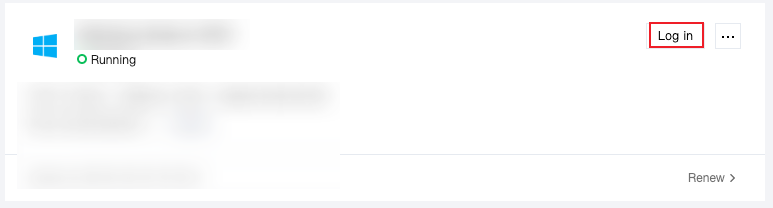
Step 3. Log in to the Windows Lighthouse Instance
1. In the Lighthouse console, find the newly purchased instance in the instance list, and click Log in.
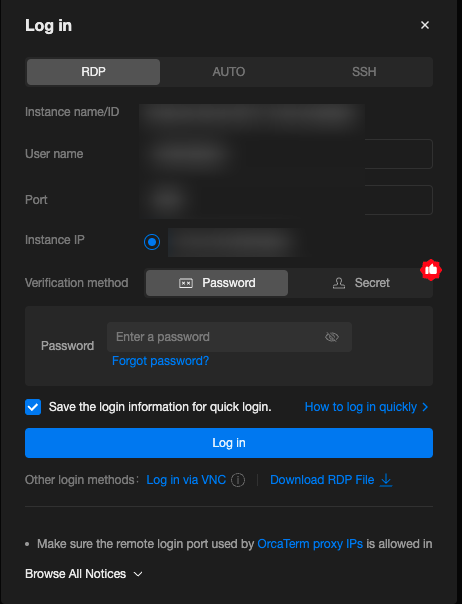
Log in to Windows instances via the OrcaTerm terminal.
2. In the pop-up login window, enter your password and click Log in to access the instance.
Moreover, you may remotely connect to Windows instances via VNC or local RDP tools (such as Windows' built-in MSTSC).