Performing Single-Core CPU Stress Test with Custom Actions
Download
フォーカスモード
フォントサイズ
Background
CFG allows users to customize fault actions for chaos engineering experiments. Users can configure action parameters and execute script commands based on specific scenarios.
Practical Examples
This section demonstrates how to configure custom actions to perform chaos engineering experiments for CVM single-core CPU stress test.
Step 1: Experiment preparation
A CVM instance that can be used for fault injection (The example instance runs TencentOS Server 2.6 (Final) system.)
Fault action script file
Step 2: Create custom actions
1. Log in to Tencent Cloud Smart Advisor > Chaotic Fault Generator, click Action Library Management, and select Create Custom Action.
2. Configure custom actions, and configure command content and command parameters. Click Save after completing the configuration.
3. After the above contents are saved, the corresponding custom actions will appear in the custom action list.
The example command content is as follows, where the percentage and timeout parameters can be passed during execution.
#!/bin/bashuser=$(whoami)if [ !$user == 'root' ]thensudo -ifiecho -e "["`date +"%Y-%m-%d %H:%M:%S"`"] \\c"echo "installing stress-ng..."yum install stress-ng -ypercentage={{percentage}}timeout={{timeout}}stress-ng -c 1 -l $percentage --timeout $timeoutif [[ !$? -eq 0 ]]thenecho -e "["`date +"%Y-%m-%d %H:%M:%S"`"] \\c"echo "Failed"exit 1elseecho -e "["`date +"%Y-%m-%d %H:%M:%S"`"] \\c"echo "Completed"exit 0fi
Step 3: Experiment orchestration
1. Enter the Experiment Management page and click Create a New Experiment.
2. Click Skip and create a blank experiment, fill in the experiment details, and select the objective CVM instance for the experiment.
3. Add experiment actions. Click Add Now , select Shell Script , select the created Custom action, and click Next .
4. Leave the action parameters as default and click Confirm.
5. After configuring action parameters, click Next. After confirming all configurations, click Submit to complete experiment creation.
Step 4: Execute the experiment
1. Execute the experiment and observe the execution results.
2. Use the top command to view CPU. The CPU usage has reached the configured value.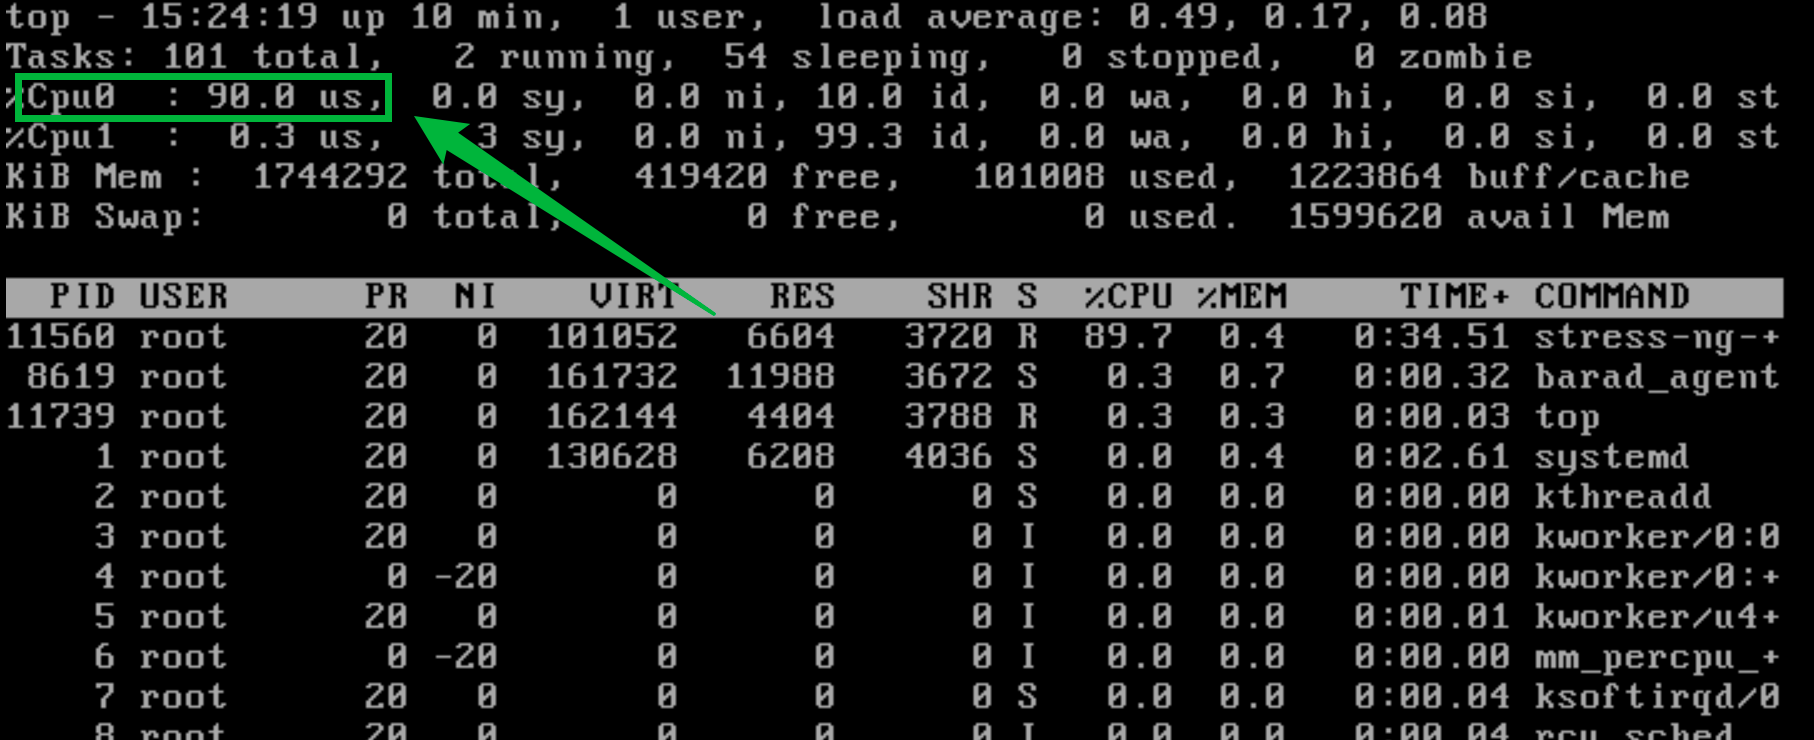
3. The action will last for 60 seconds. After completing experiment execution, view the CPU usage. It has been recovered to normal.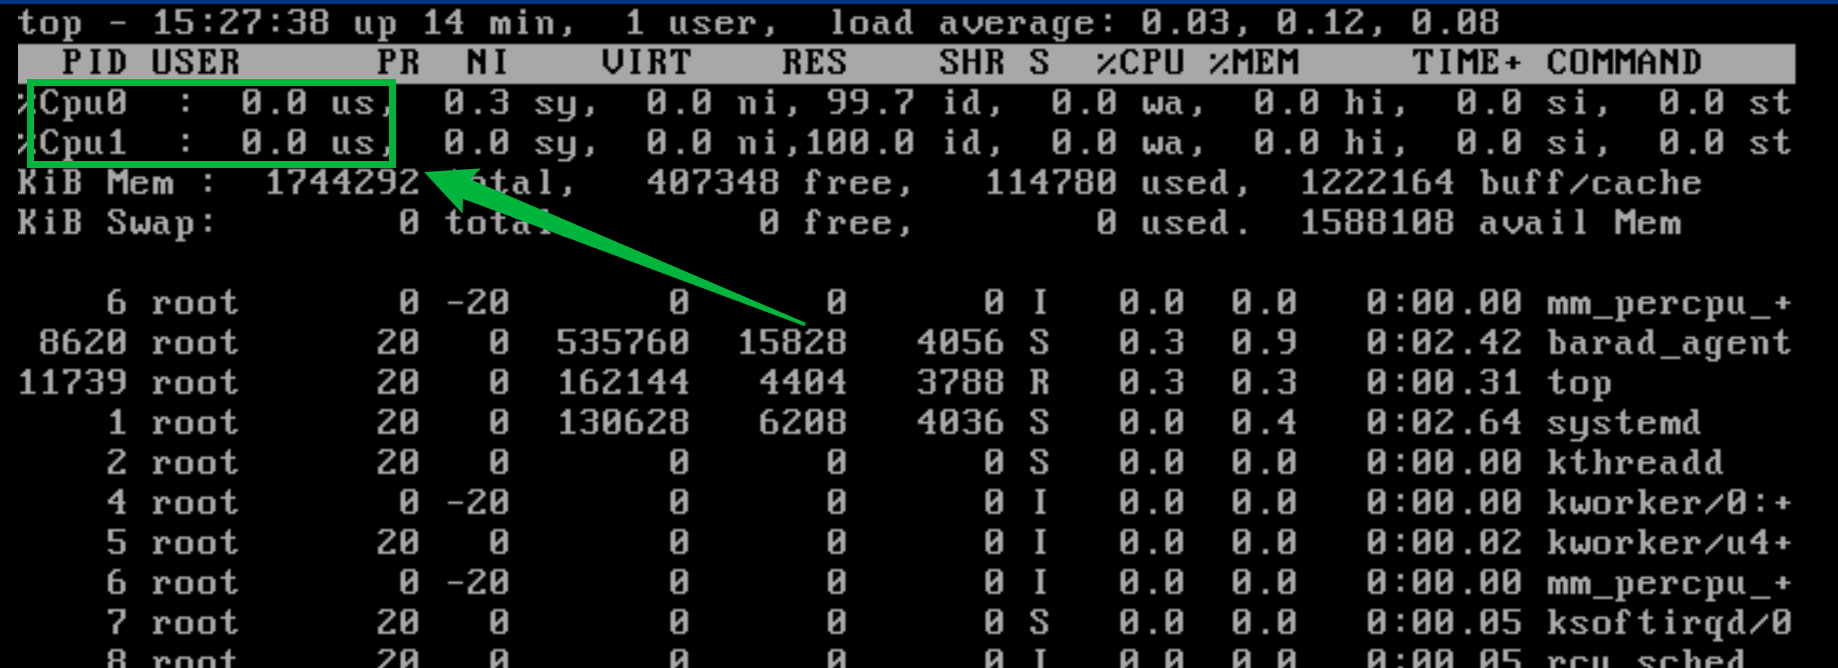
フィードバック