Automatic Renewal Rules
Service Content: cloud application rendering
Automatic renewal cycle: 1 month. The above operations can be canceled at any time.
Deducted amount: Calculated based on the selected CAR concurrency scale. Refer to the console for the actual amount.
Time and method of deduction: The system will perform the deduction on the day of product expiration. If the deduction fails due to insufficient account balance, the service will be terminated upon expiration.
Enable Auto-Renewal
You can enable automatic renewal in the following three ways.
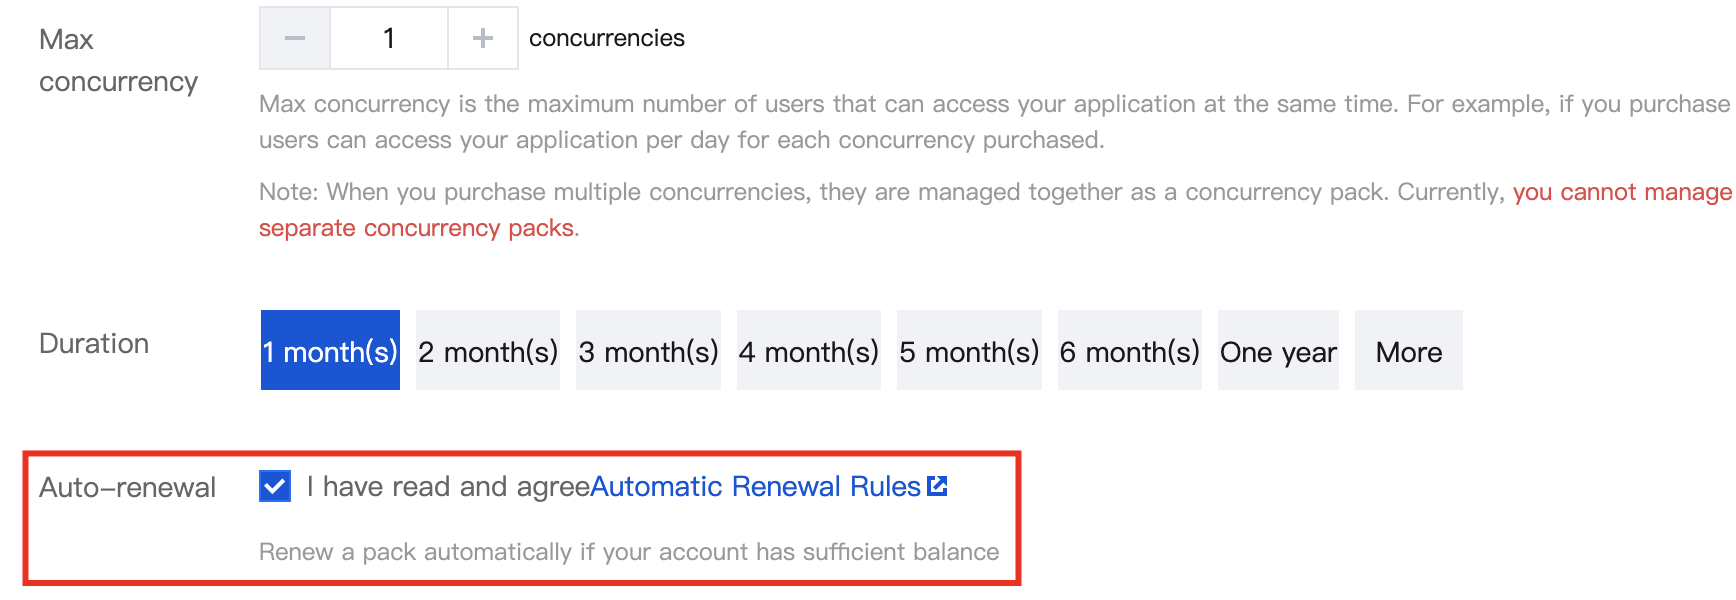
Enable Automatic Renewal on the Purchase Page
Enable Automatic Renewal Via Console
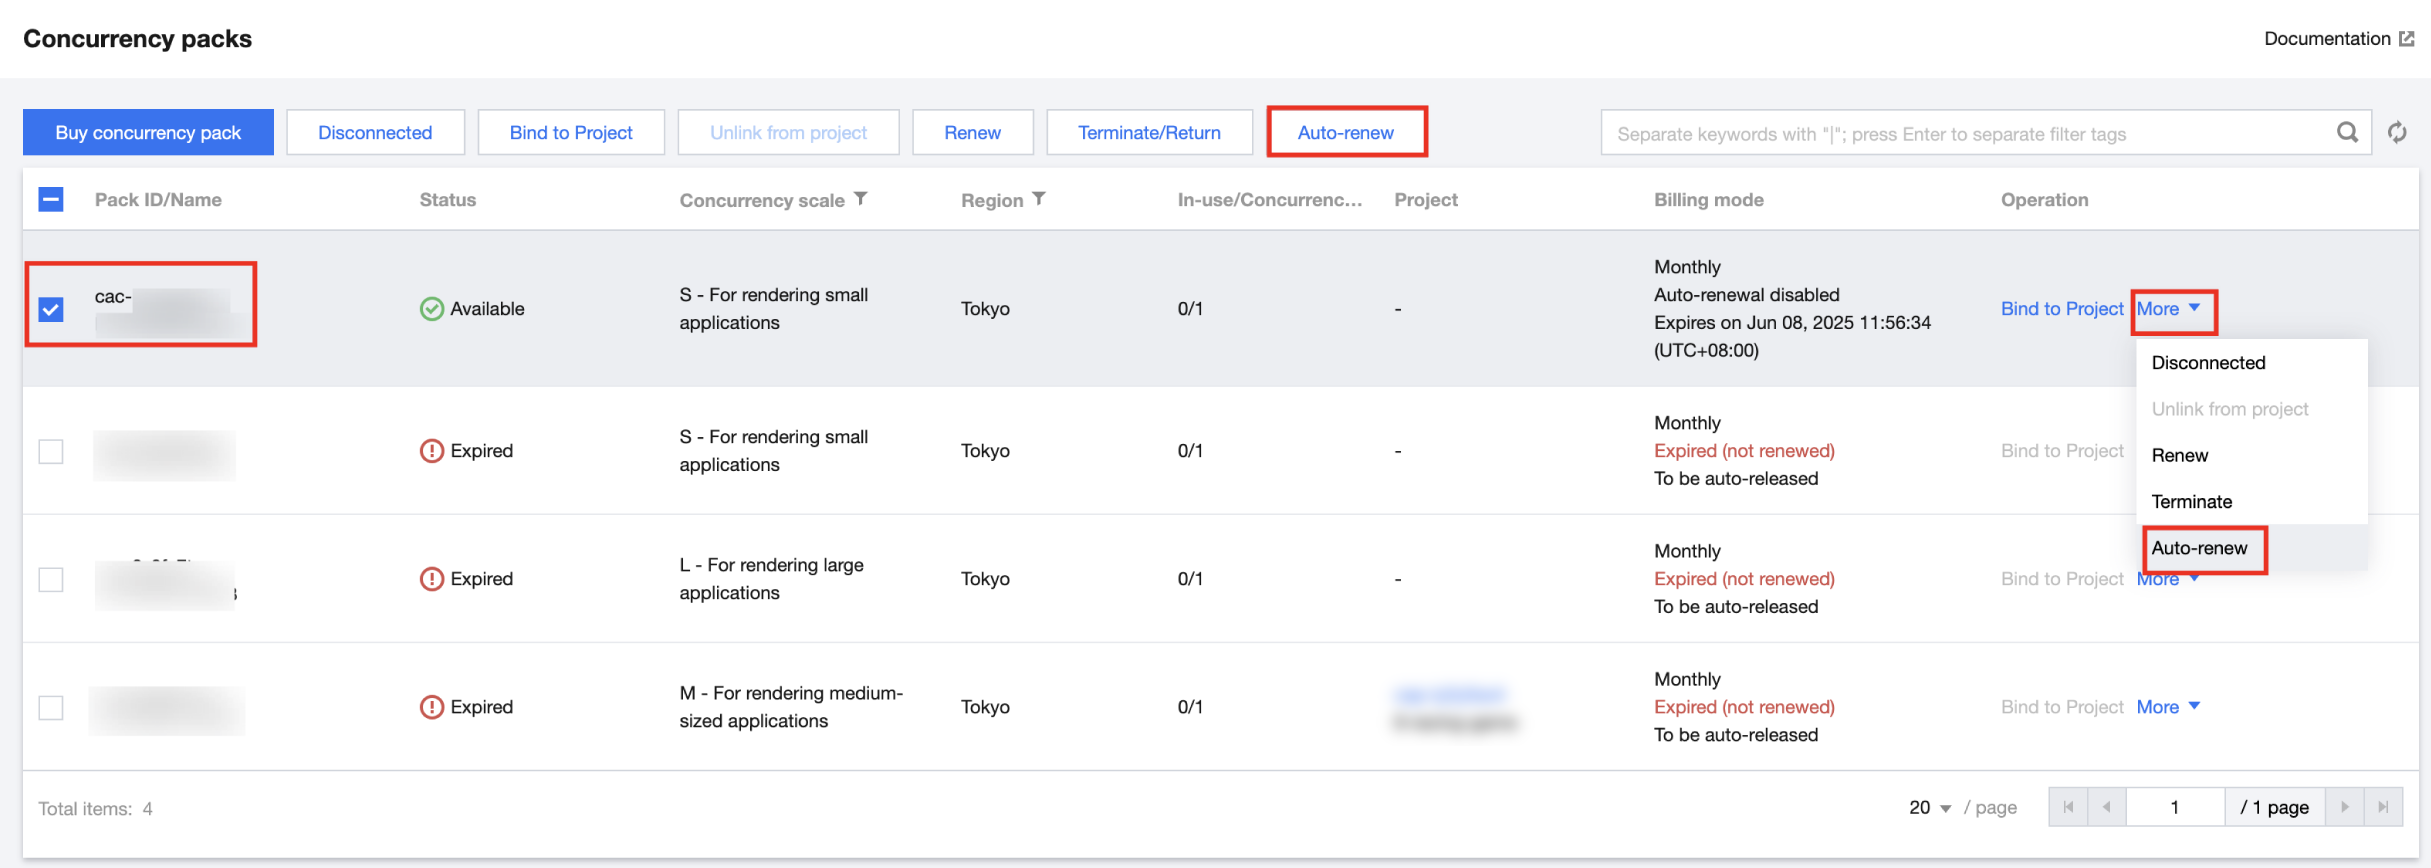
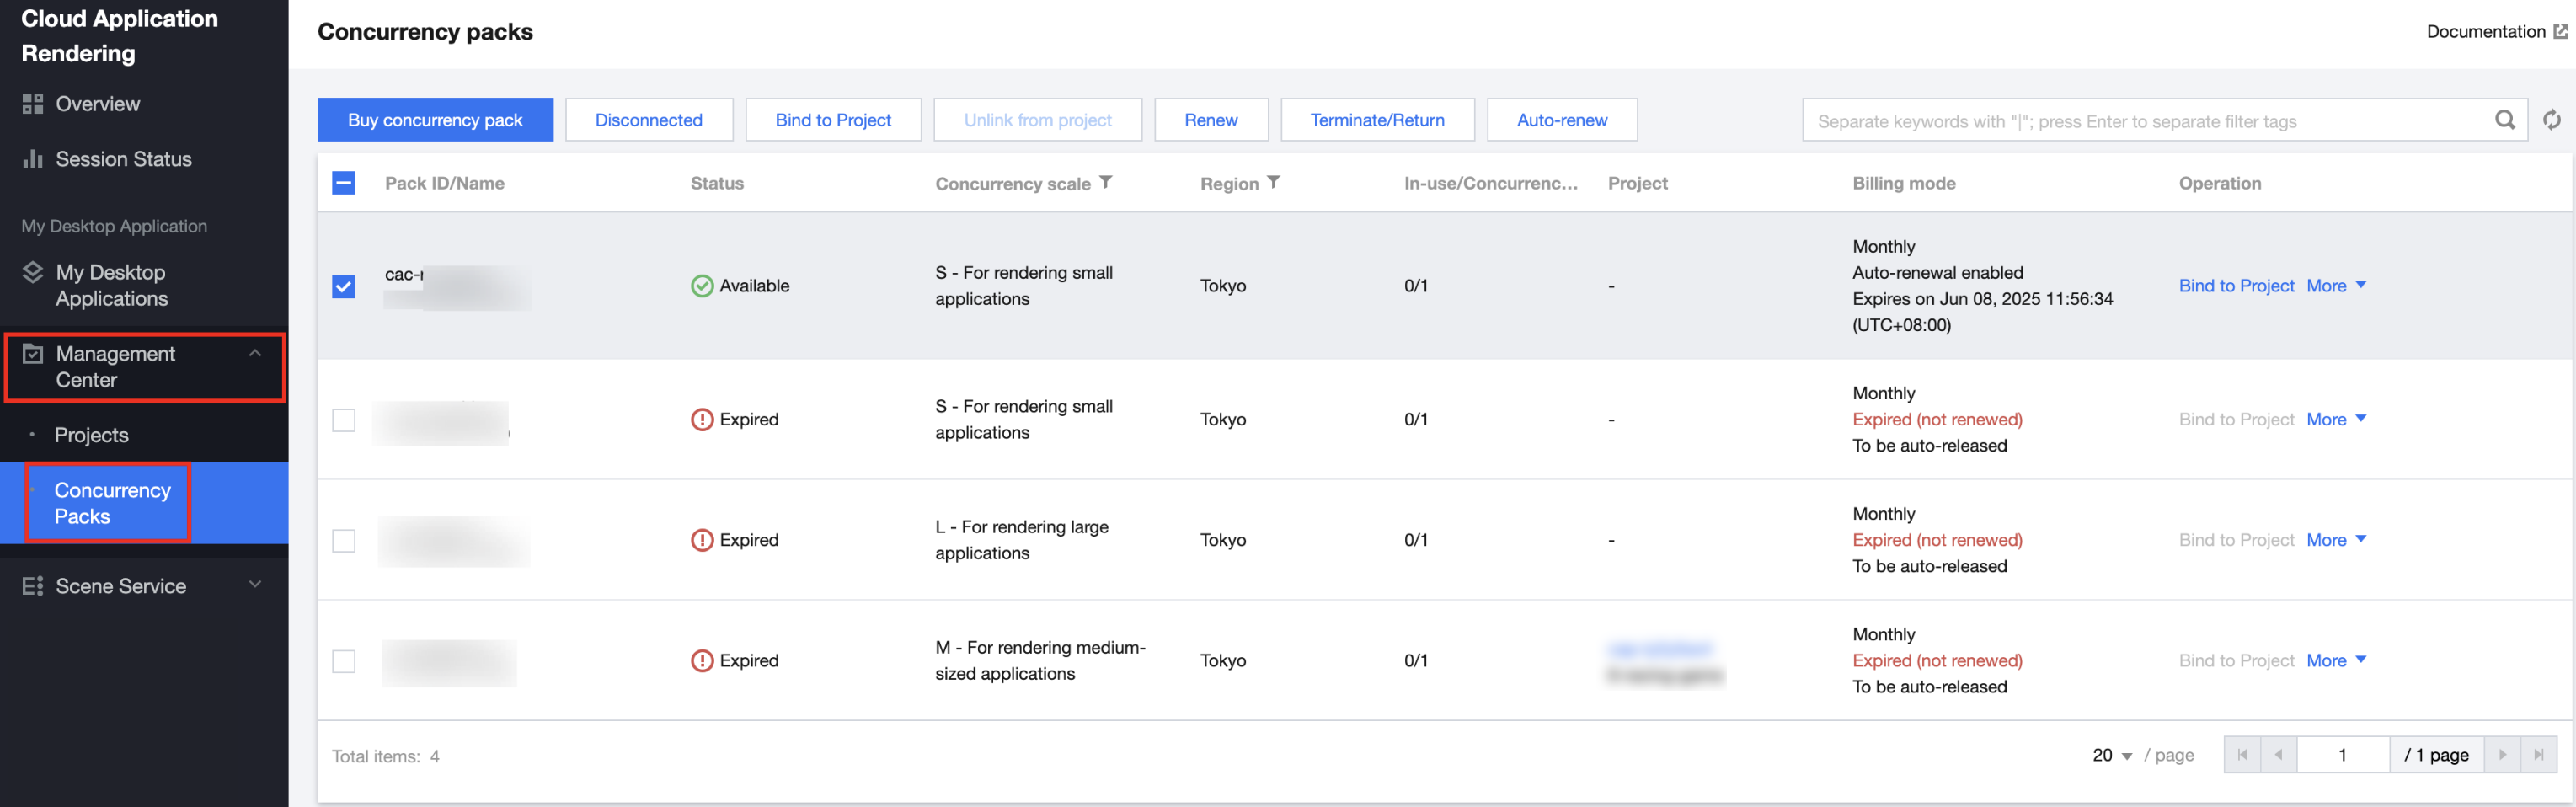
1. Log in to the CAR product console. In the left sidebar, click Management Center > Concurrency Packs. As shown in the figure below: 2. Find the concurrency package for which you want to subscribe to auto-renewal. Check it and click Auto-Renewal in the purchase bar above, or click More > Auto-Renewal in the operation section. As shown in the figure below:
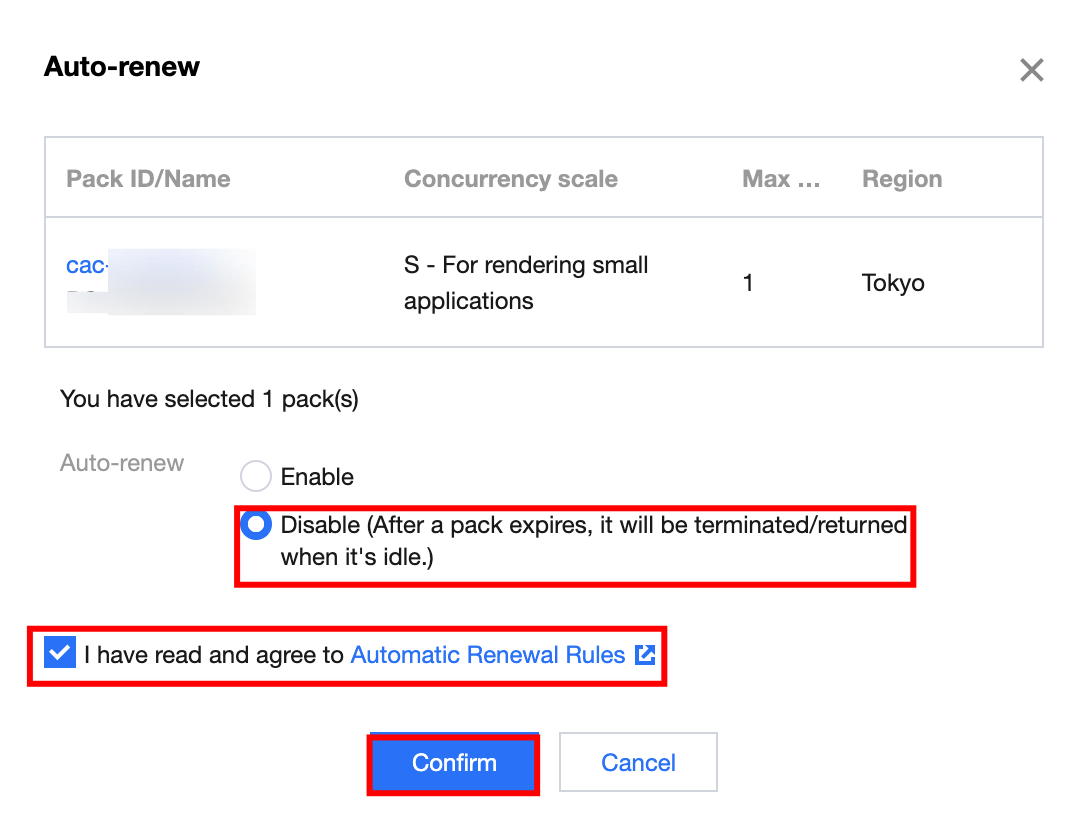
3. In the pop-up auto-renewal window, confirm the concurrency package information. After confirming that everything is correct, check to agree to the Automatic Renewal Rules, and select Enable auto-renewal. As shown in the figure below: Enable Automatic Renewal in the Expense Center
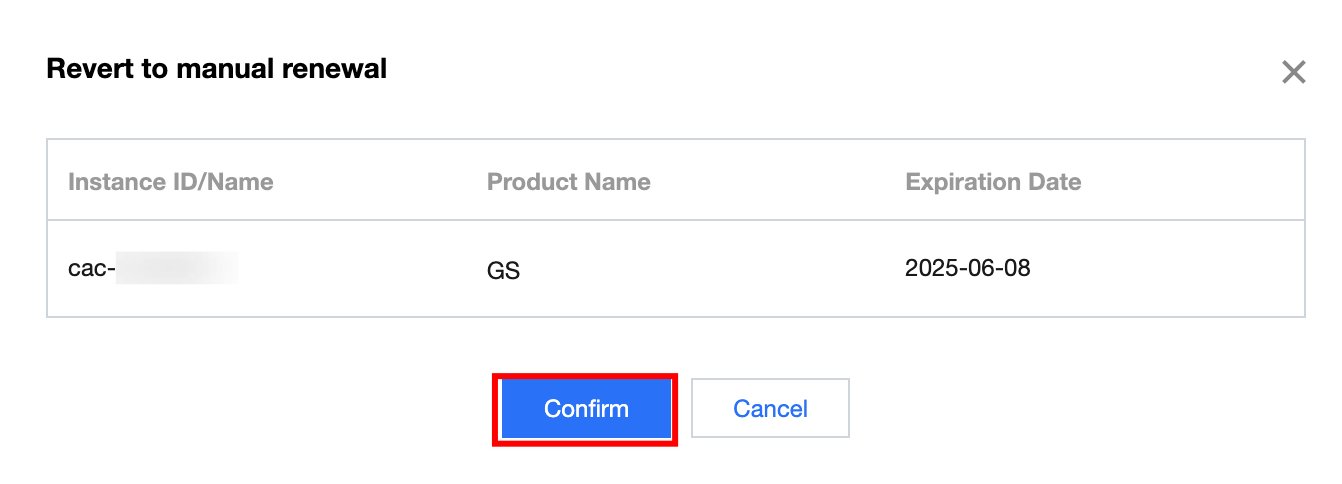
2. Find the cloud gaming product you want to subscribe to with automatic renewal. For products that do not renew upon expiration, you need to set them to manual renewal first. Click Revert to make the settings. As shown in the figure below:
3. In the pop-up manual renewal window, confirm the product information and click Confirm to set it to manual renewal. As shown in the figure below:
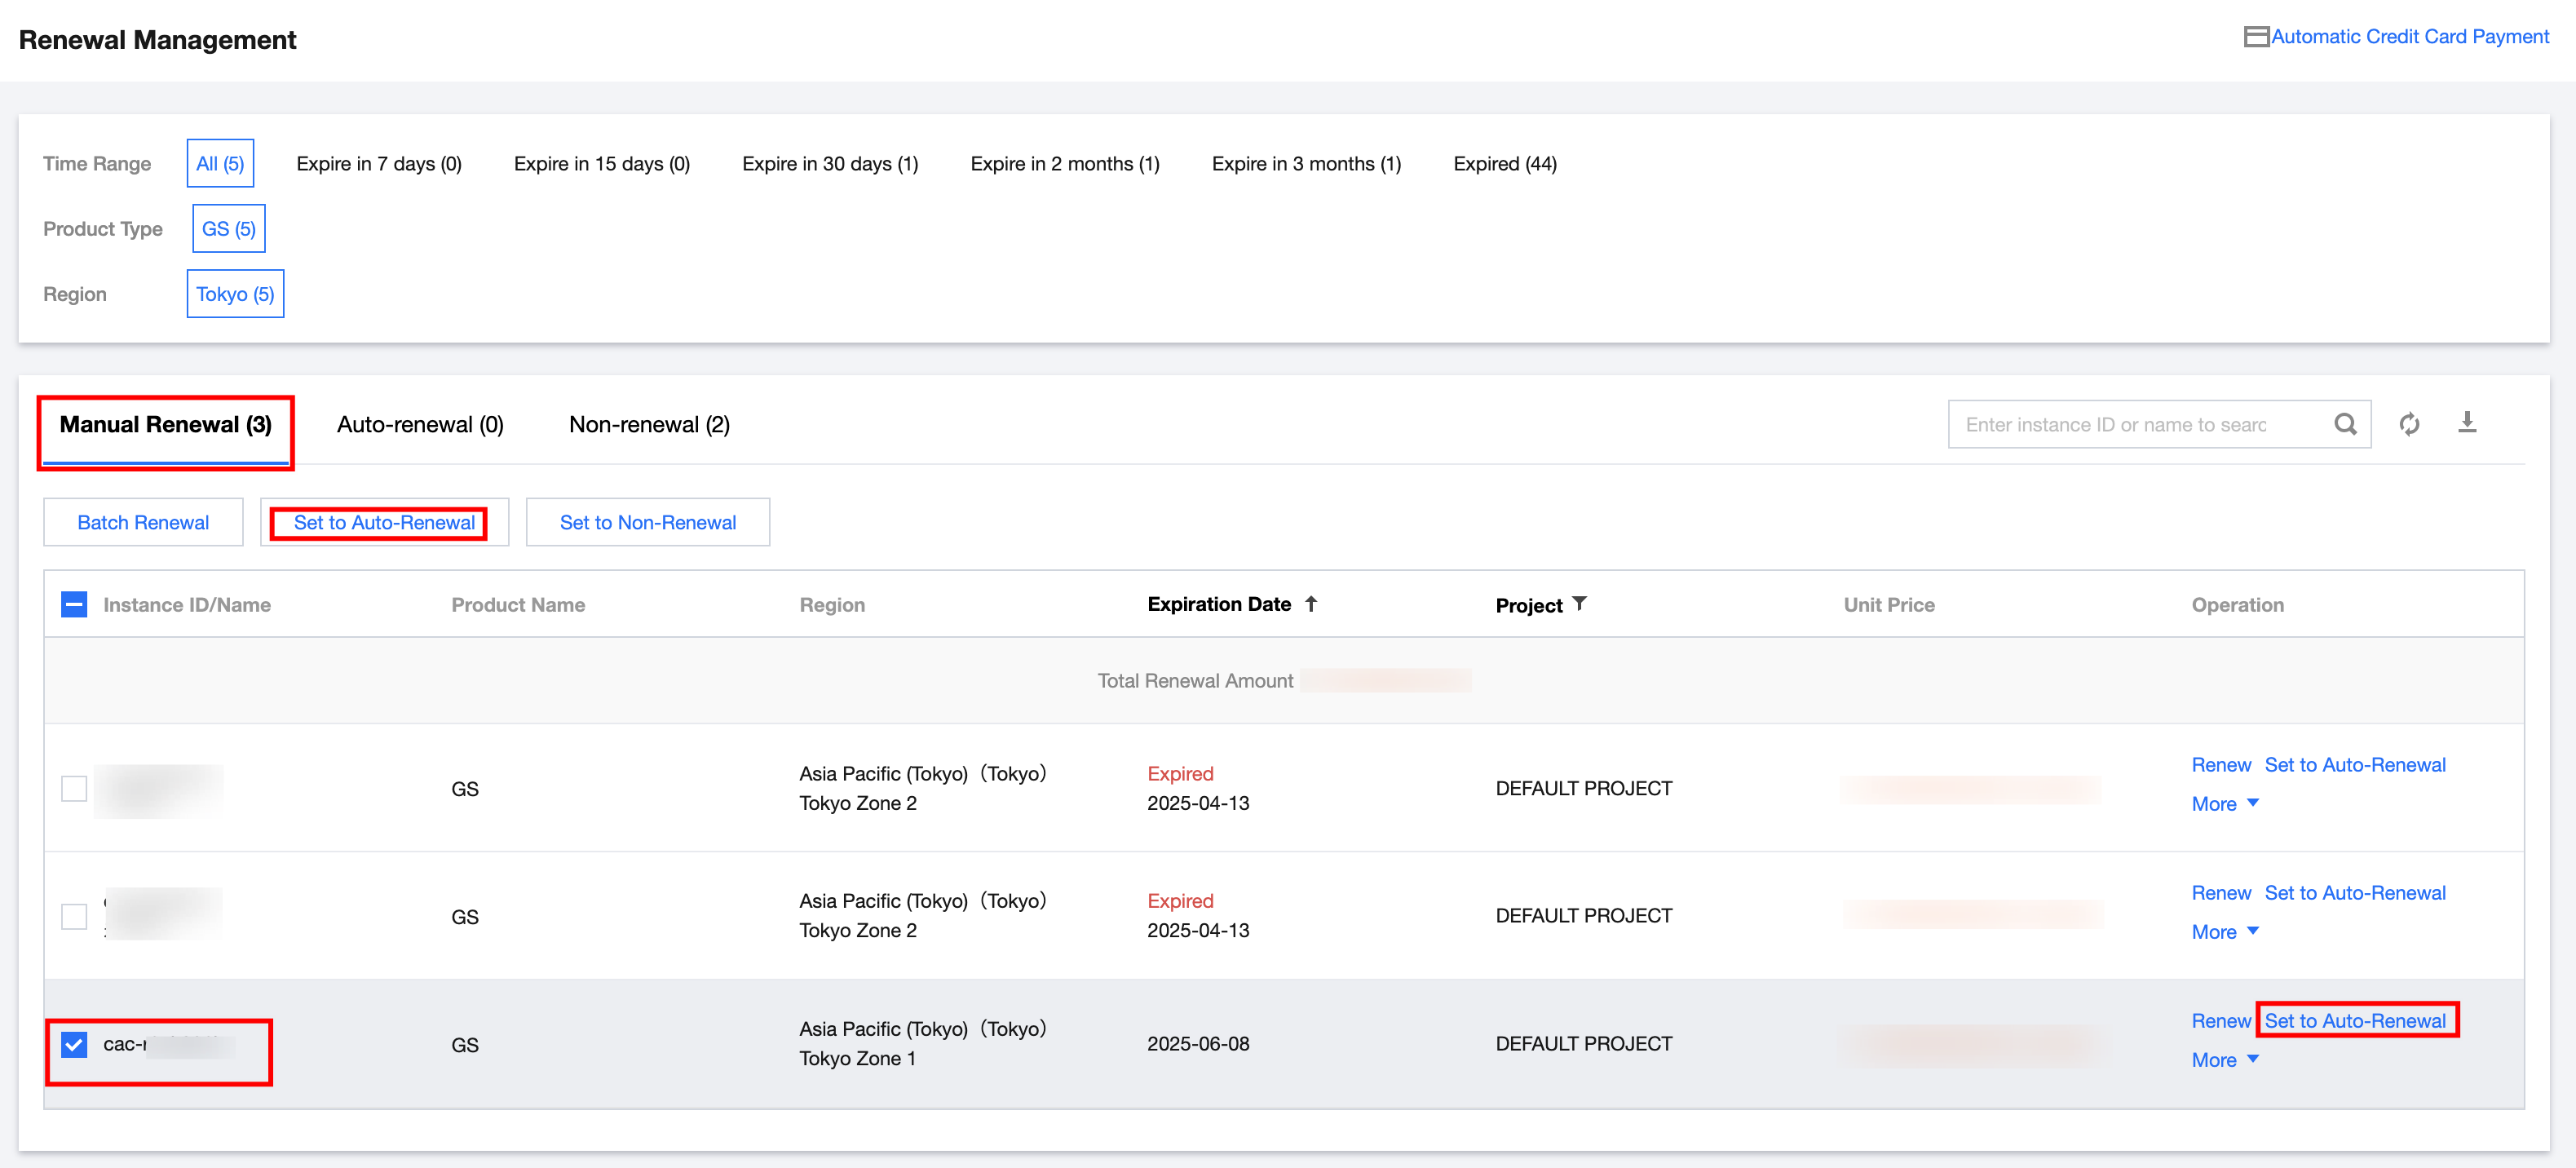
4. Click Manual Renewal , find the cloud gaming product you want to auto-renew, select it, and then click Set to Auto-Renewal. As shown in the figure below:
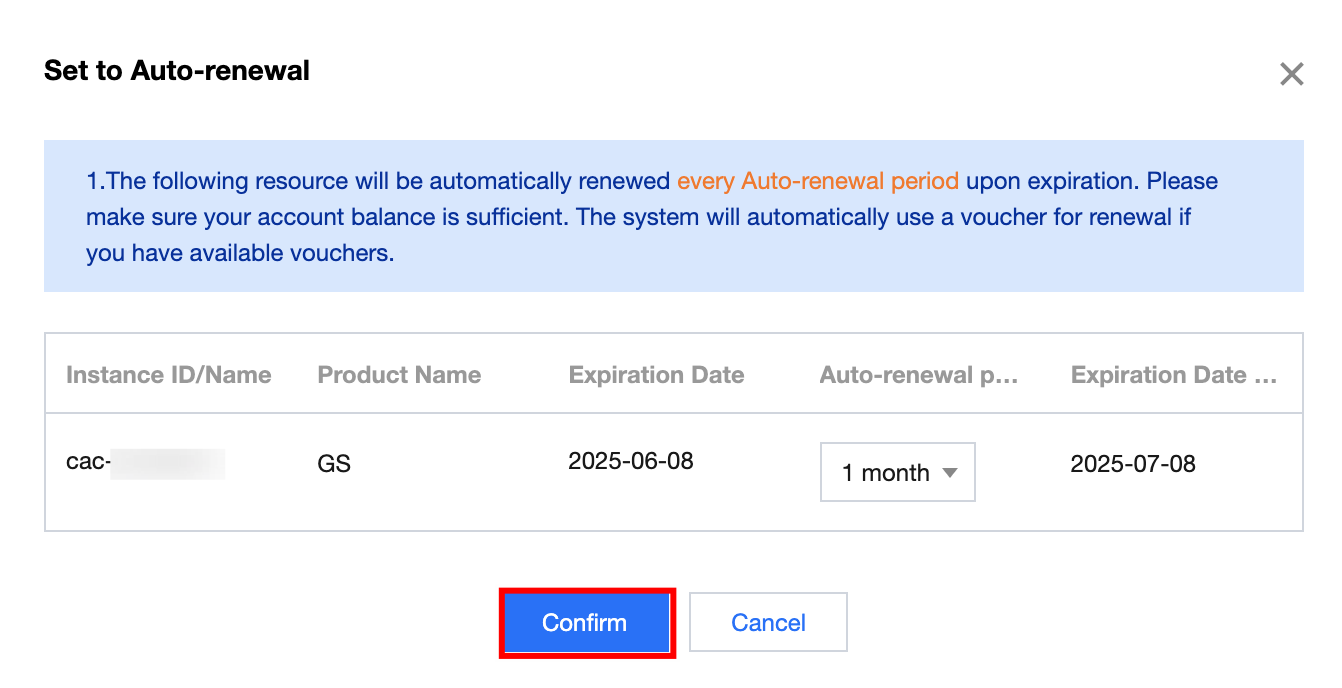
5. In the pop-up auto-renewal window, confirm the product information. After confirming that everything is correct, click Confirm. As shown in the figure below:
Cancel Automatic Renewal
You can cancel the automatic renewal service in the following two ways.
Cancel Automatic Renewal Service Via Console
2. Find the concurrency package for which you want to cancel the subscribed auto-renewal. To cancel auto-renewal: Check the concurrency package and click Auto-Renewal at the top, or click More > Auto-Renewal. As shown in the figure below:
3. In the pop-up window for setting auto-renewal, confirm the product information. After confirming that everything is correct, select Disable auto-renewal, check to agree to the Automatic-Renewal Rules, and click Confirm. As shown in the figure below: Cancel Automatic Renewal Service in the Expense Center
2. Find the Cloud Gaming (GS) product for which you want to cancel the subscribed auto-renewal. To cancel auto-renewal: Check the product, and click Set to Manual Renewal / Set to Non-Renewal at the top of the purchase bar or in the operation area. As shown in the figure below:
3. In the pop-up window to set to manual renewal, confirm the product information and click Confirm. As shown in the figure below:
Manage Automatic Renewal
You can view subscribed automatic renewal services in the following two ways.
Check Subscribed Auto-Renewal Products Via Console
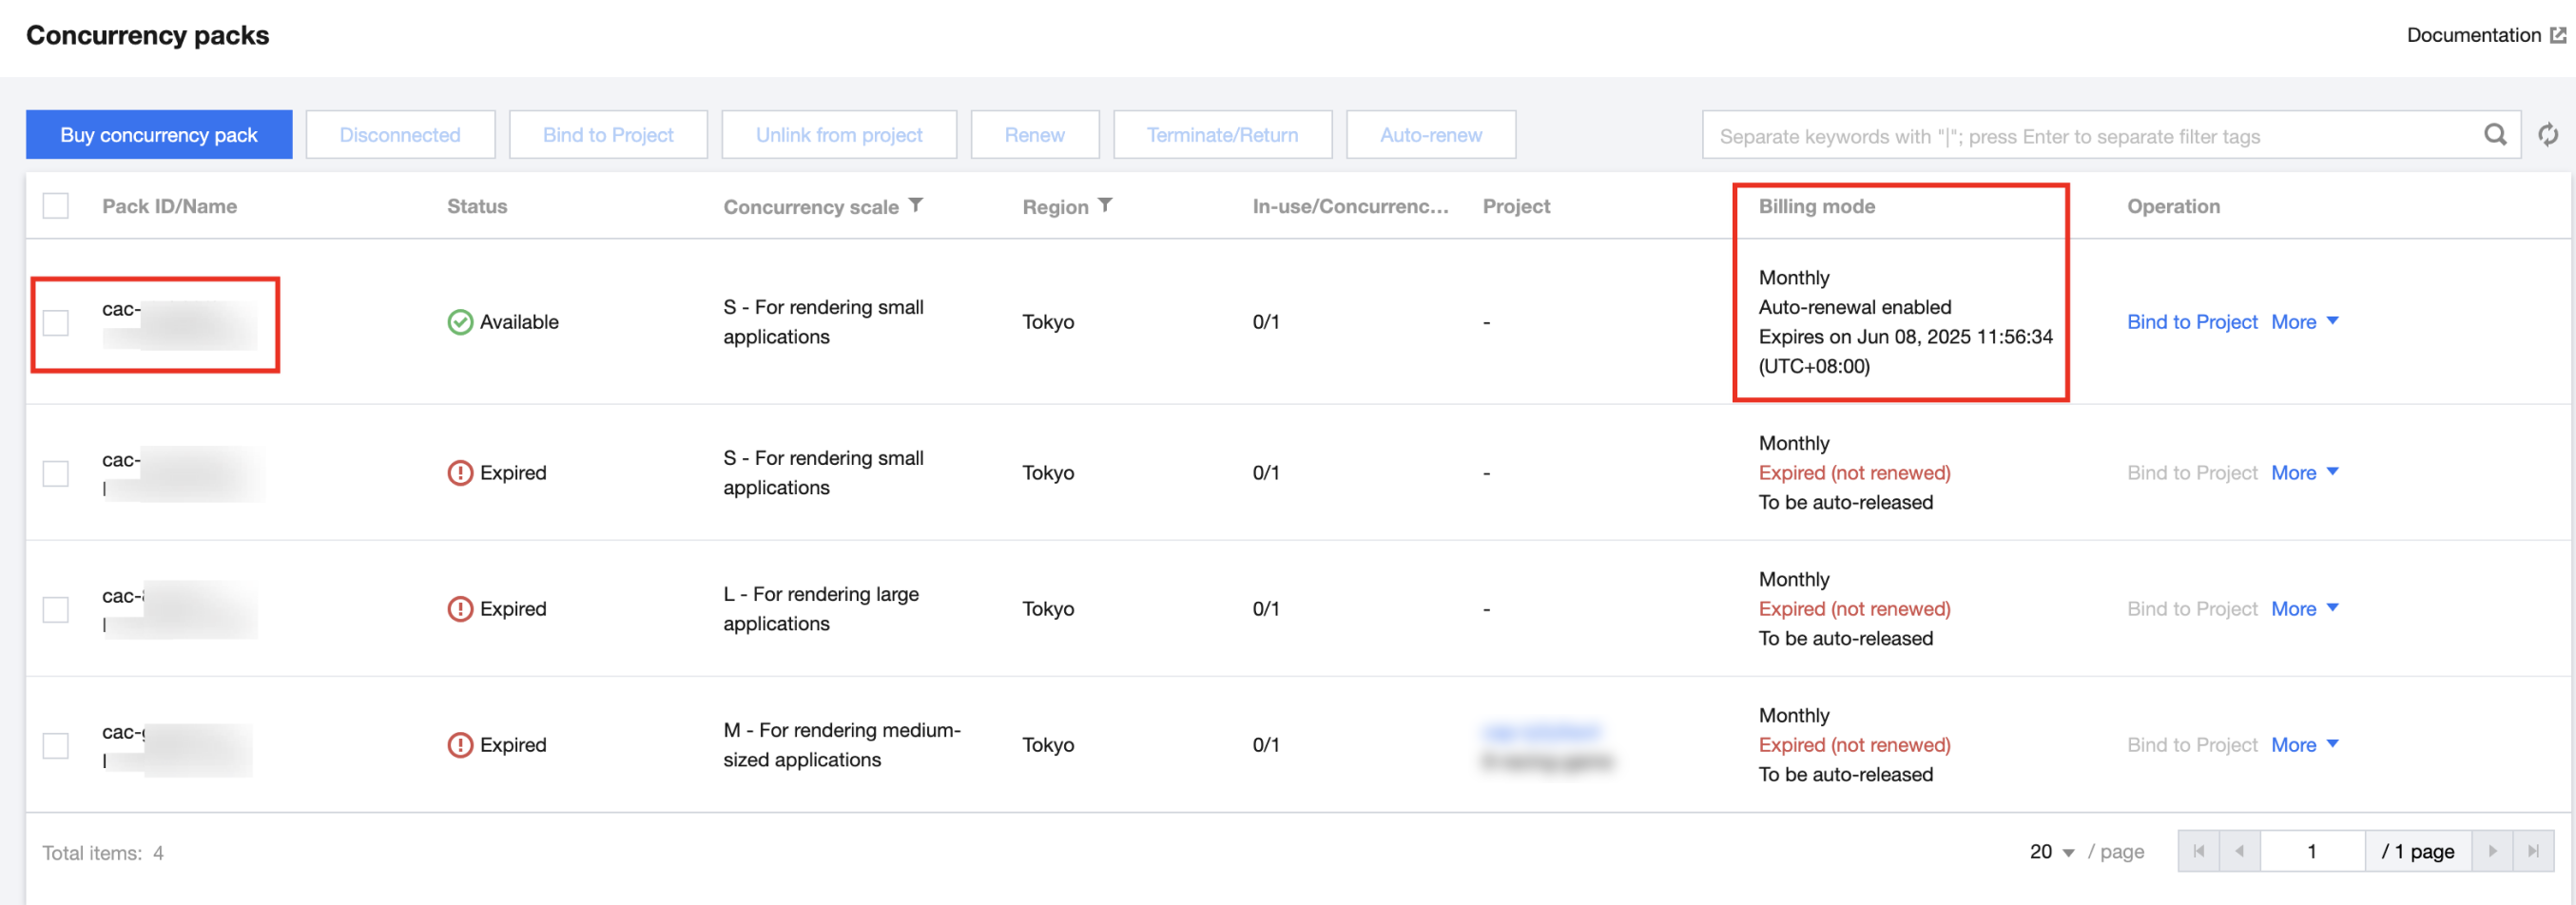
2. Find the cloud rendering concurrency package with auto-renewal that you want to view, and check the information related to auto-renewal in the billing mode. As shown in the figure below:
Check Subscribed Auto-Renewal Products in the Expense Center
You can please see subscribed auto-renewal products and manage automatic renewal cycles by following operations:
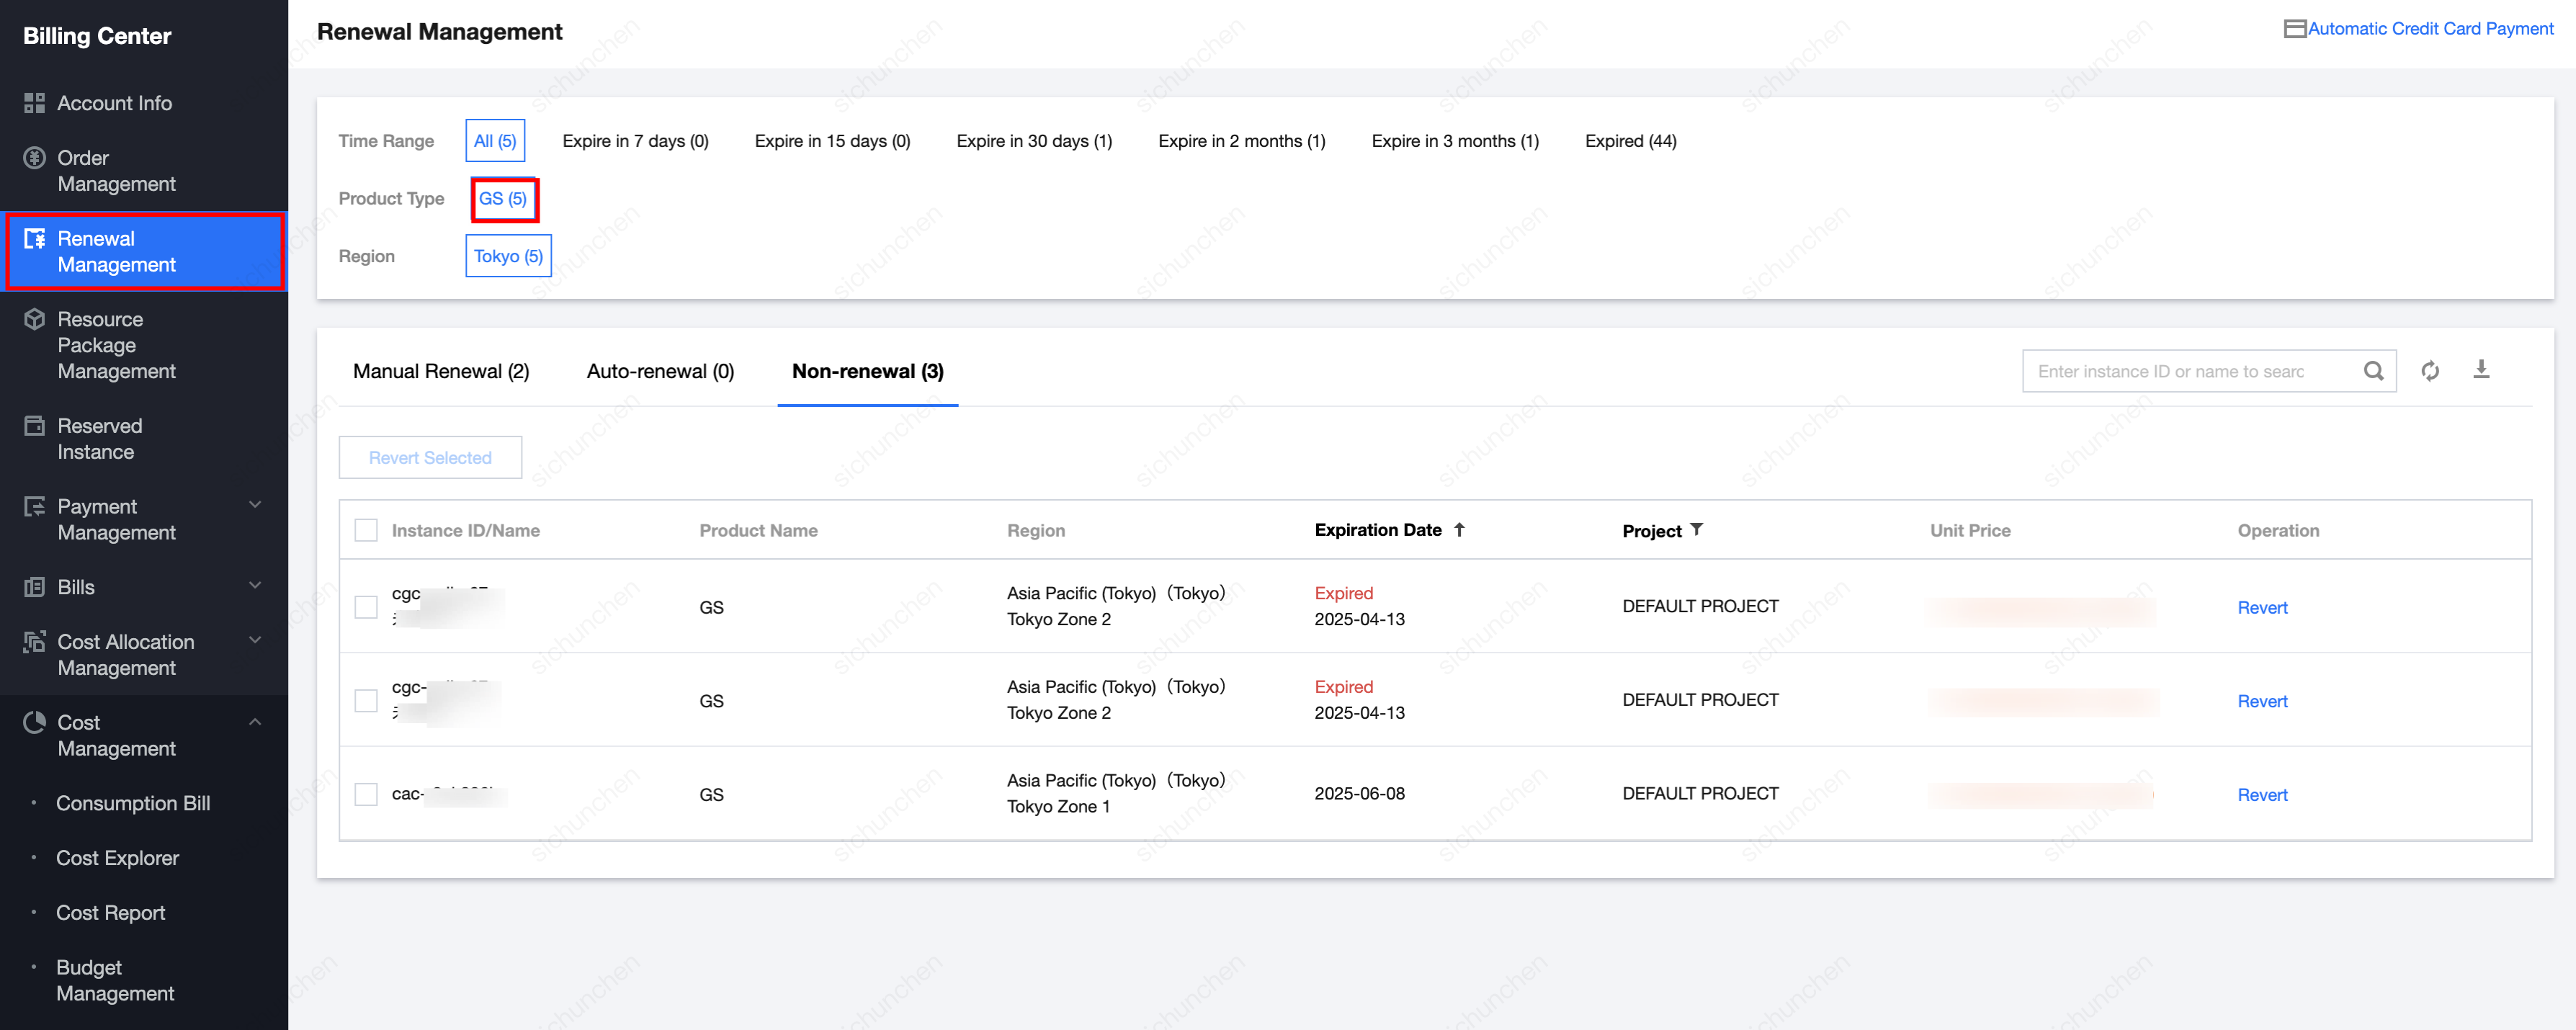
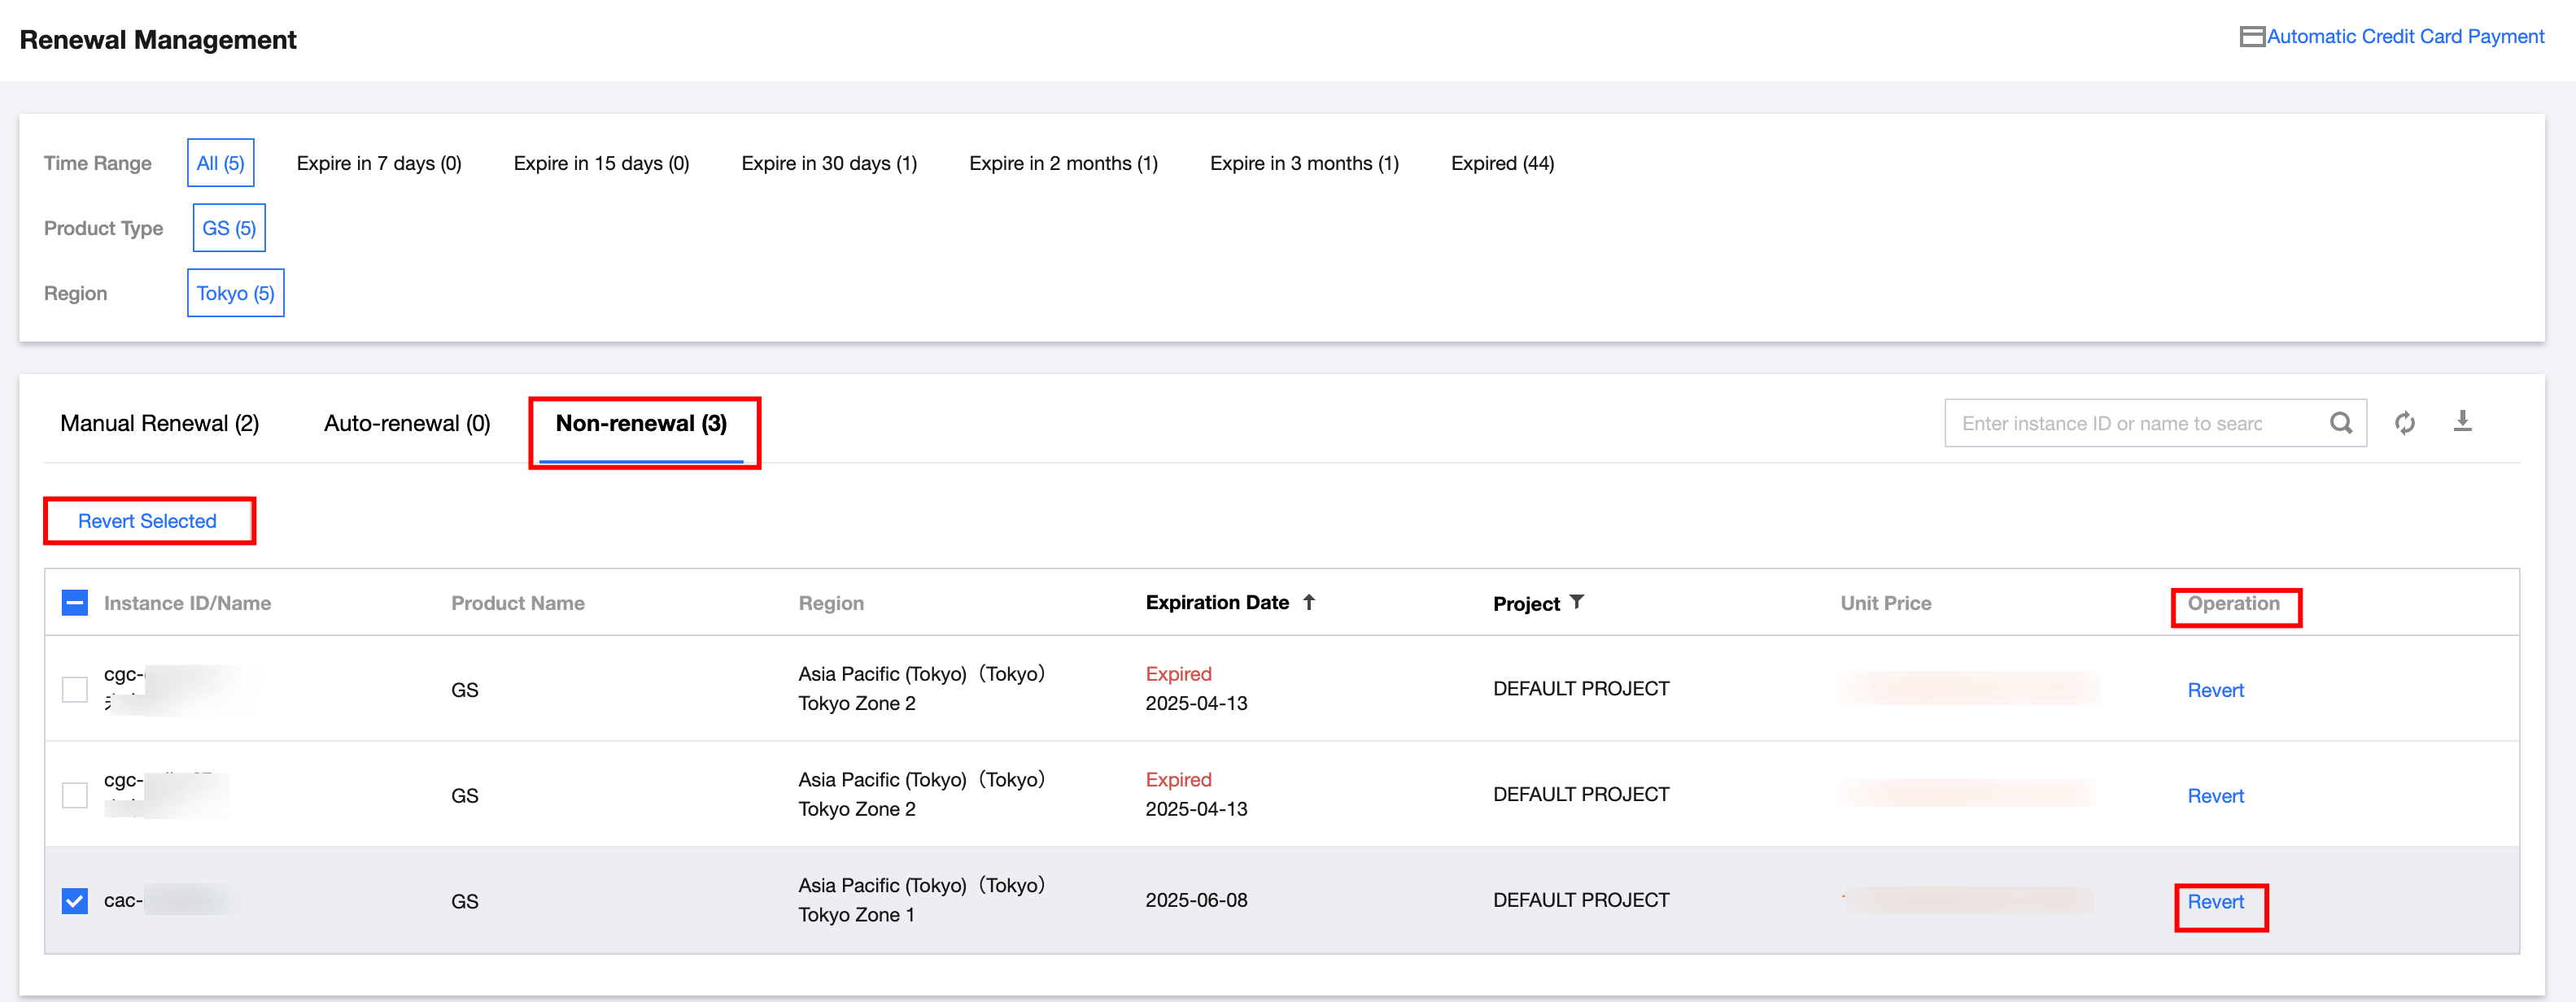
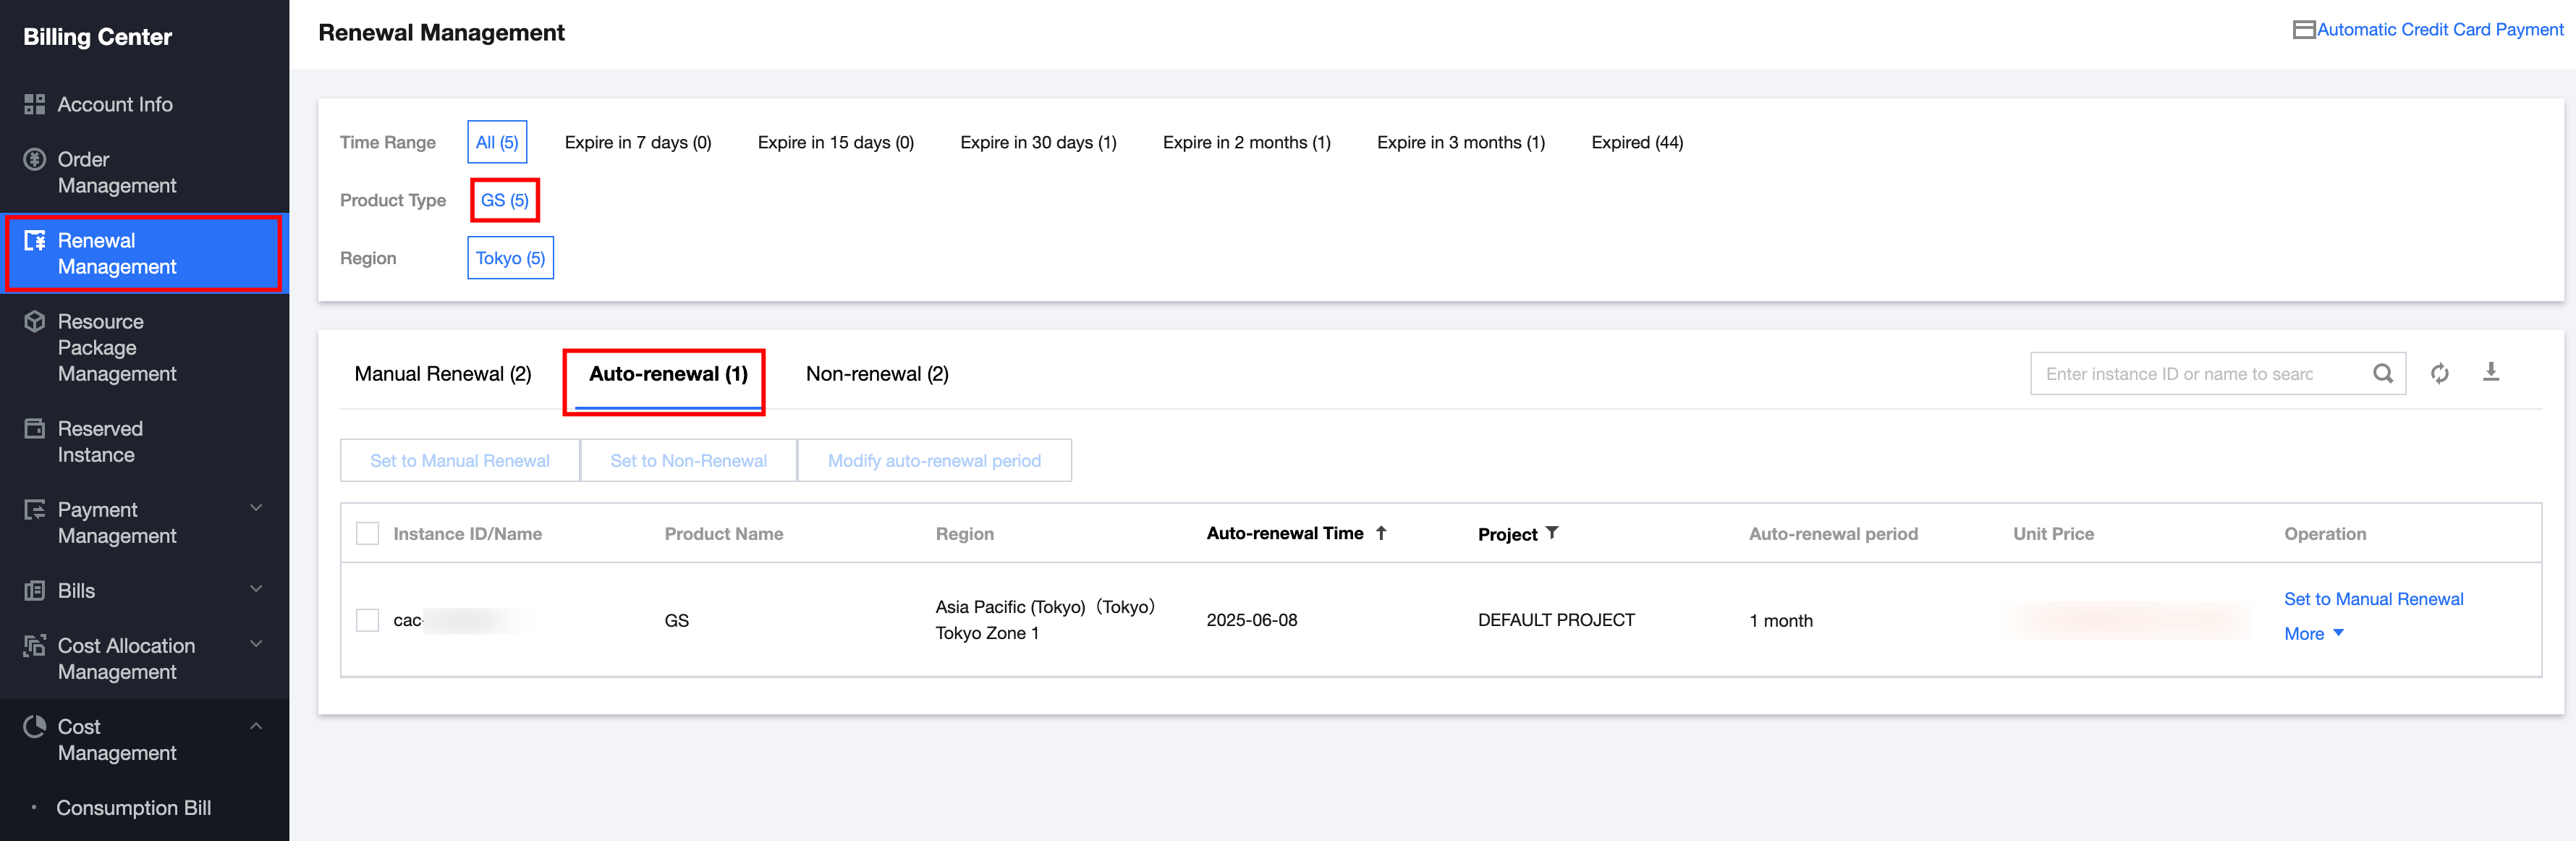
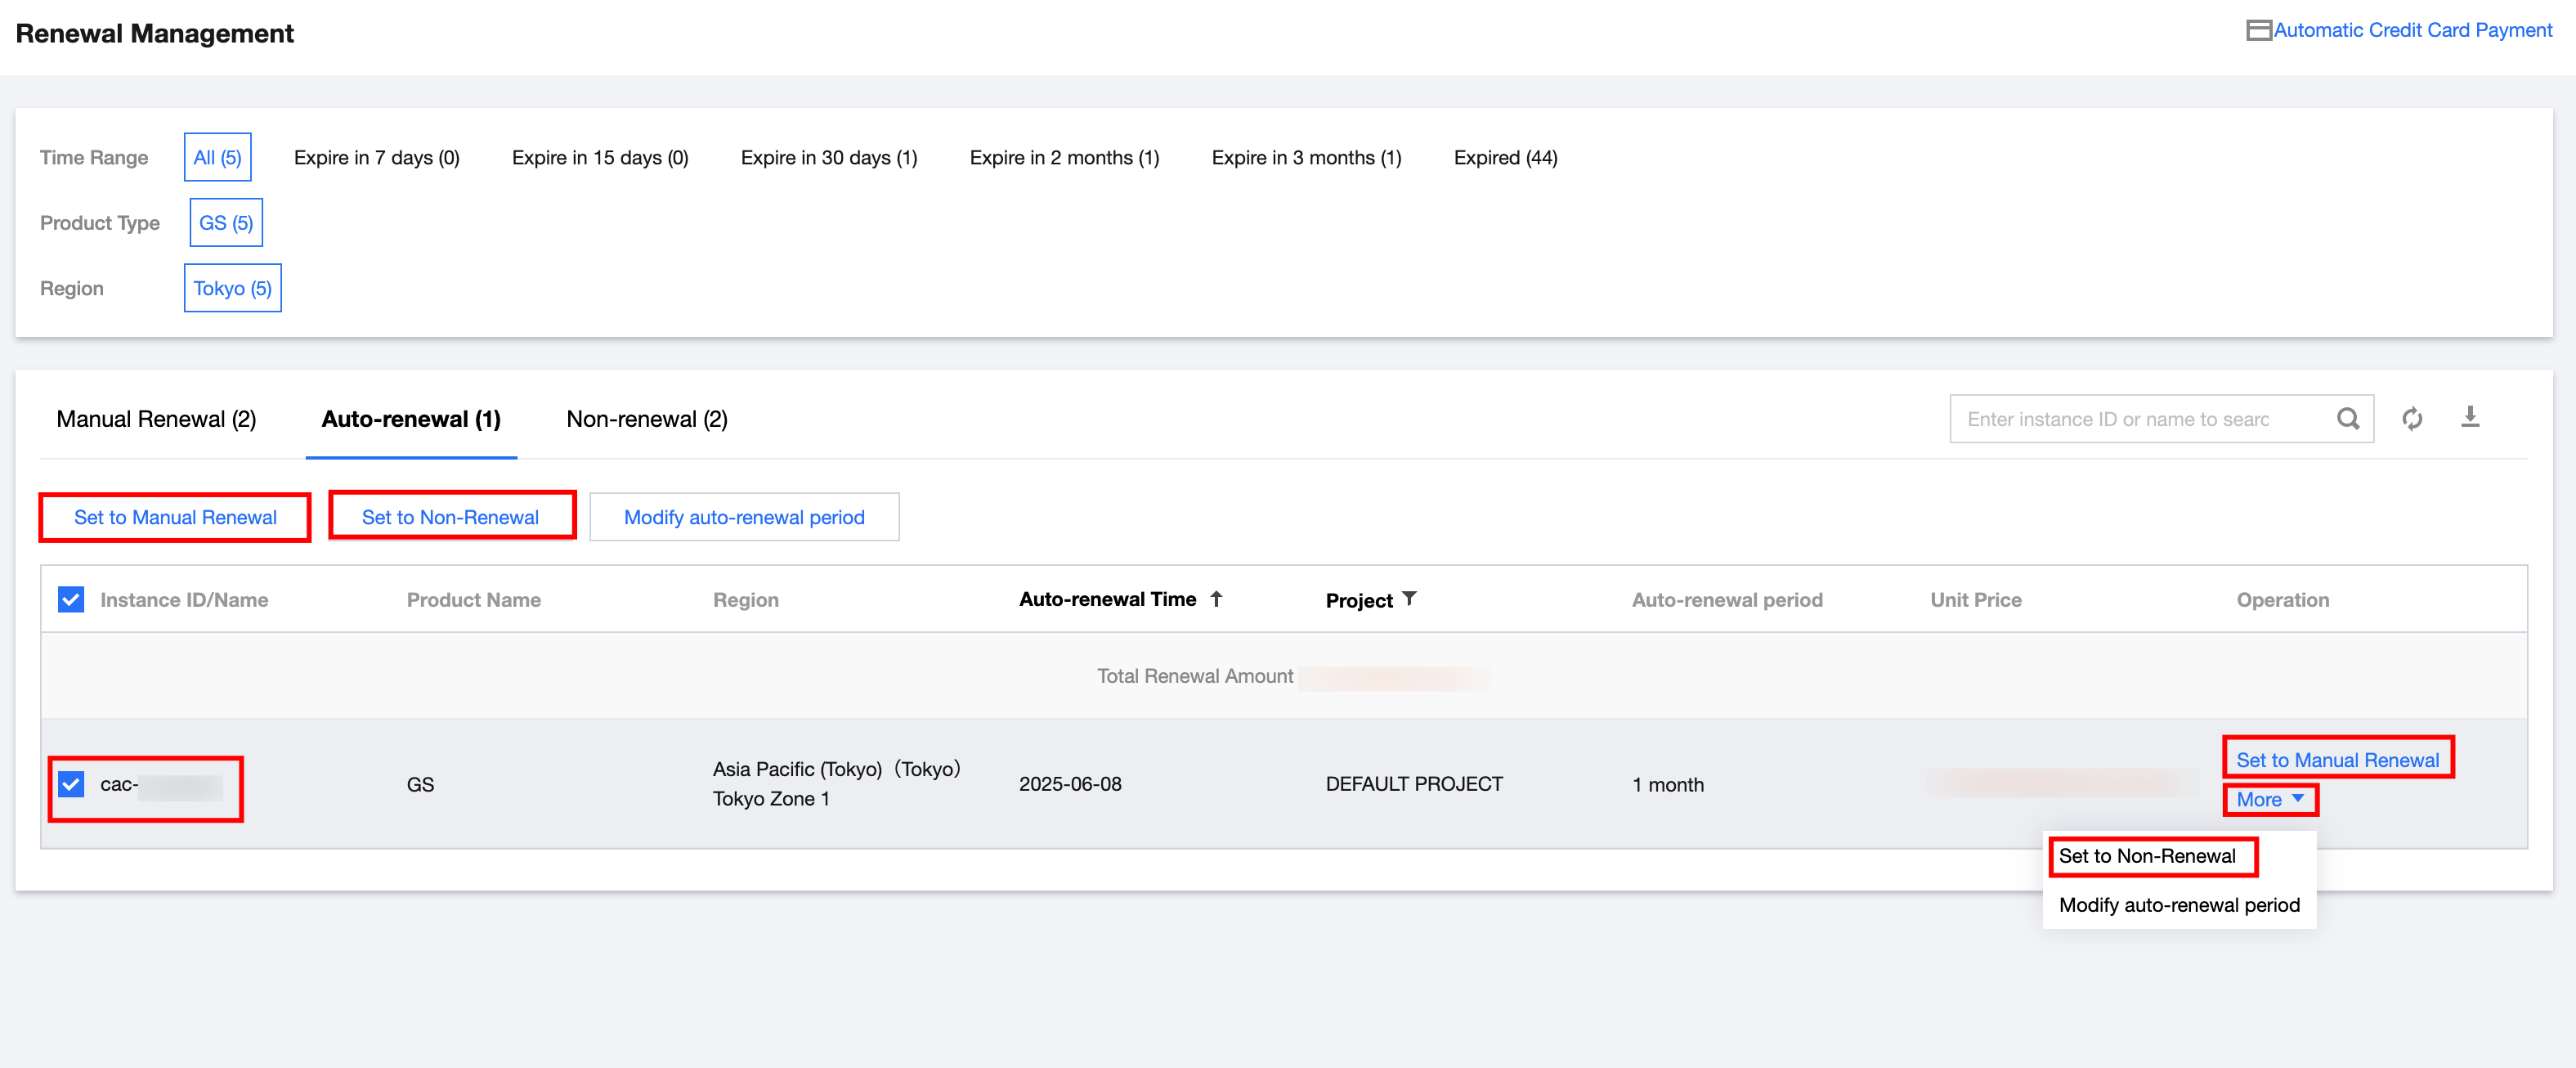
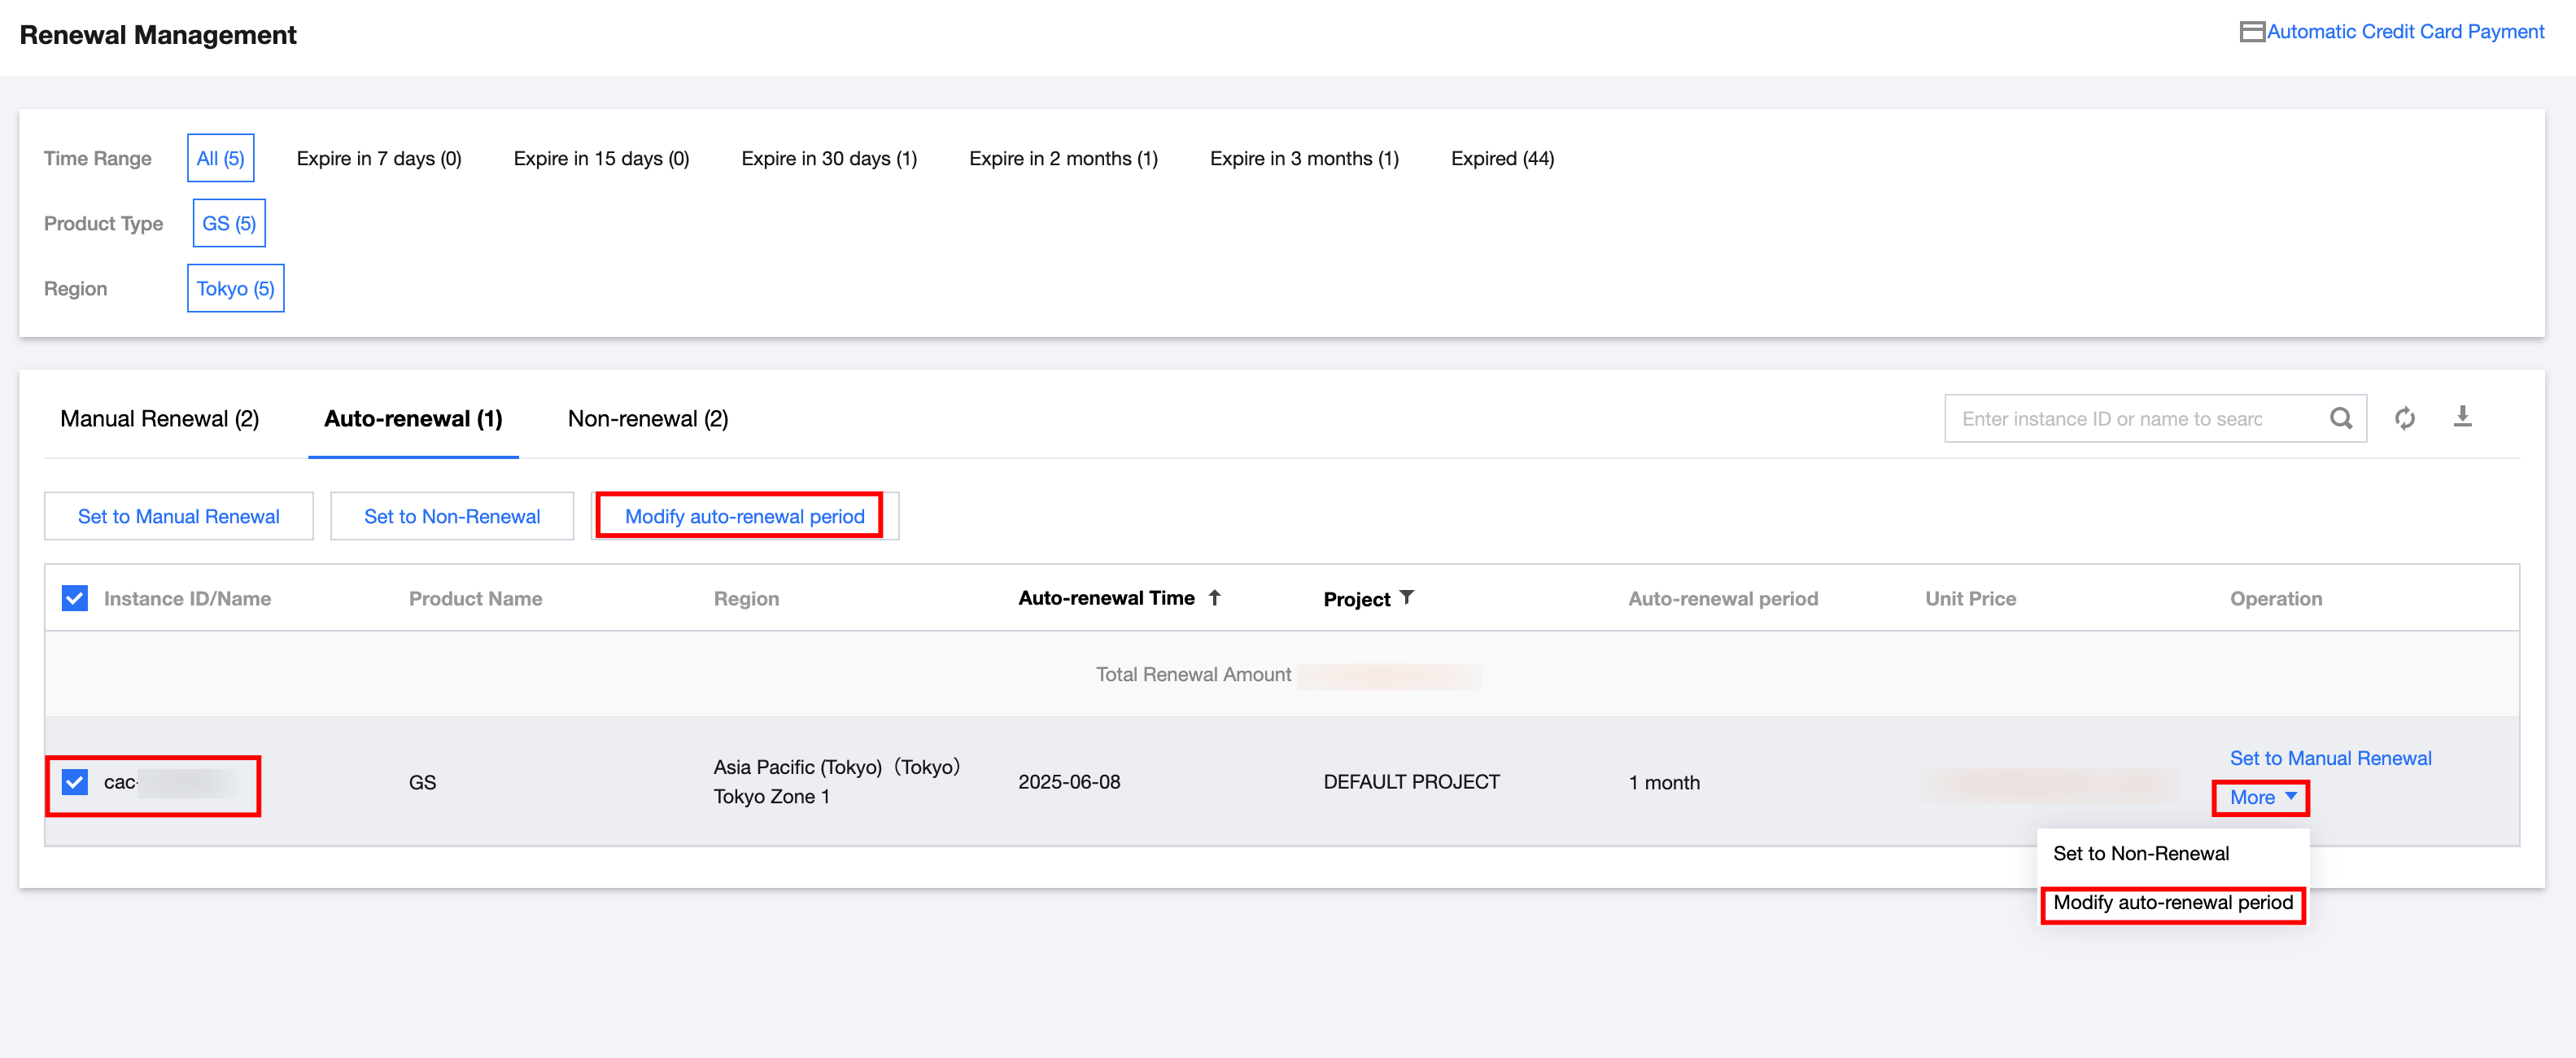
1. Log in to Expense Center > Renewal Management Page. In the top navbar, select GS under Product Category and click Auto-renewal to view information related to automatically renewed products. As shown in the figure below: 2. Find the product with auto-renewal that you want to view and set the auto-renewal period: Check the product and click Modify Auto-Renewal period at the top, or click More > Modify Auto-Renewal period. As shown in the figure below:
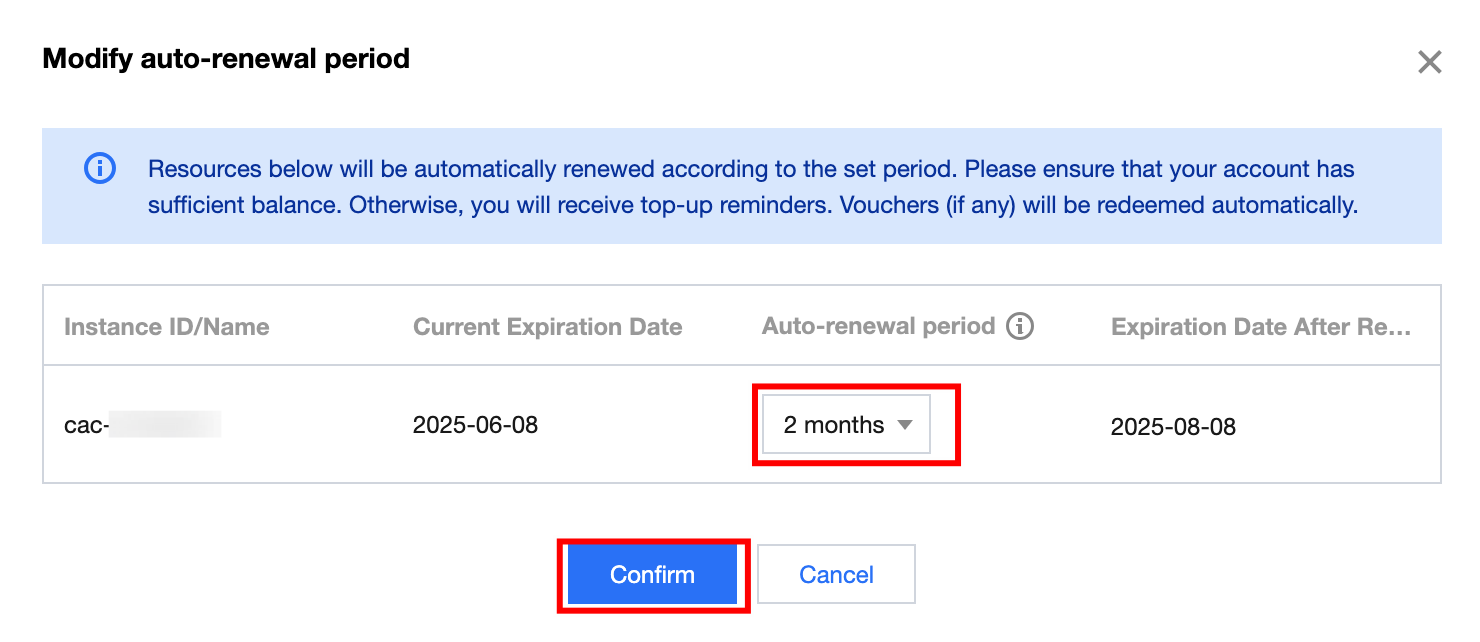
3. In the pop-up Modify Auto-Renewal period window, confirm the product information and set the automatic renewal period. After confirming that everything is correct, click Confirm. As shown in the figure below: