tencent cloud

Tencent Cloud WeData

Release Notes
Dynamic Release Record (2026)
Product Introduction
Product Overview
Product Advantages
Product Architecture
Product Features
Application Scenarios
Purchase Guide
Billing Overview
Product Version Purchase Instructions
Execute Resource Purchase Description
Billing Modes
Overdue Policy
Refund
Preparations
Overview of Account and Permission Management
Add allowlist /security groups (Optional)
Sign in to WeData with Microsoft Entra ID (Azure AD) Single Sign-On (SSO)
Operation Guide
Console Operation
Project Management
Data Integration
Studio
Data Development
Data Analysis
Data Science
Data Governance (with Unity Semantics)
API Documentation
History
Introduction
API Category
Making API Requests
Smart Ops Related Interfaces
Project Management APIs
Resource Group APIs
Data Development APIs
Data Asset - Data Dictionary APIs
Data Development APIs
Ops Center APIs
Data Operations Related Interfaces
Data Exploration APIs
Asset APIs
Metadata Related Interfaces
Task Operations APIs
Data Security APIs
Instance Operation and Maintenance Related Interfaces
Data Map and Data Dictionary APIs
Data Quality Related Interfaces
DataInLong APIs
Platform Management APIs
Data Source Management APIs
Data Quality APIs
Platform Management APIs
Asset Data APIs
Data Source Management APIs
Data Types
Error Codes
WeData API 2025-08-06
Service Level Agreements
Related Agreement
Privacy Policy
Data Processing And Security Agreement
Contact Us
Glossary

Practical Tutorial

PDF
フォーカスモード
フォントサイズ
最終更新日: 2026-03-31 10:54:49

Tutorial 1: Allow the EMR Engine Network Security Group

For the initial use of the EMR engine in WeData Studio, you need to check if the security group used by EMR allows access to the WeData Studio network segment (30.22.32.0/19). If not, perform the following operations on the security group:
1. Enter the EMR Console, select specific engine > instance information > configure security group.

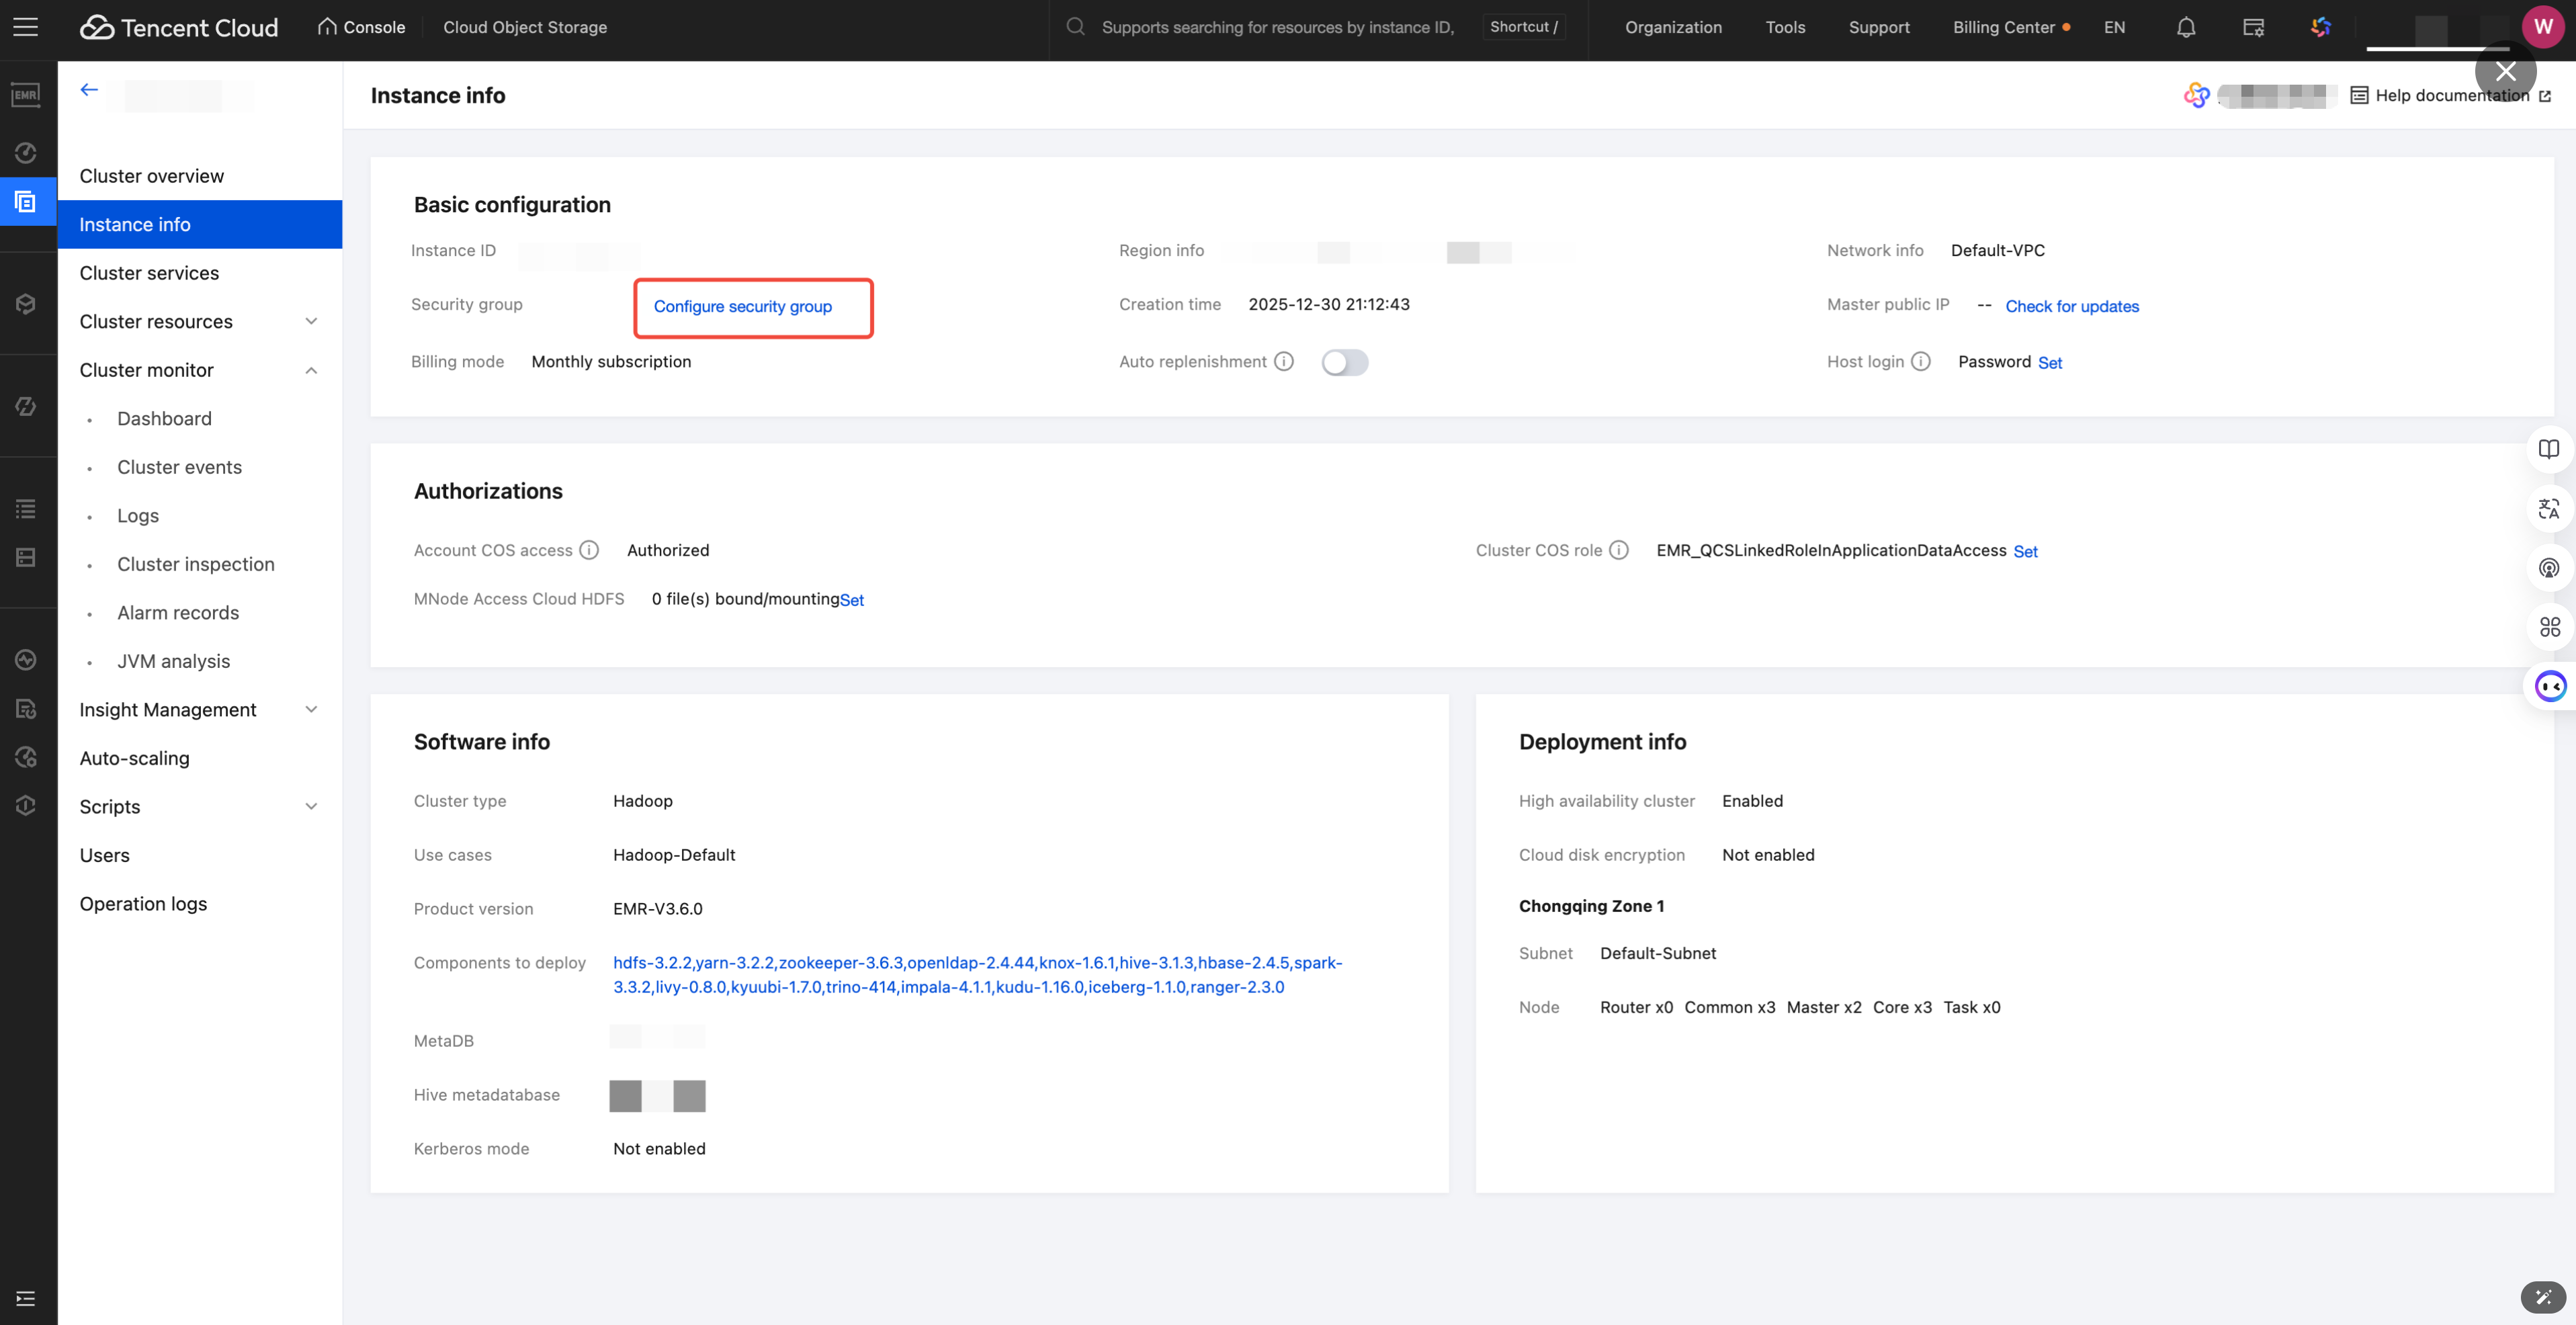
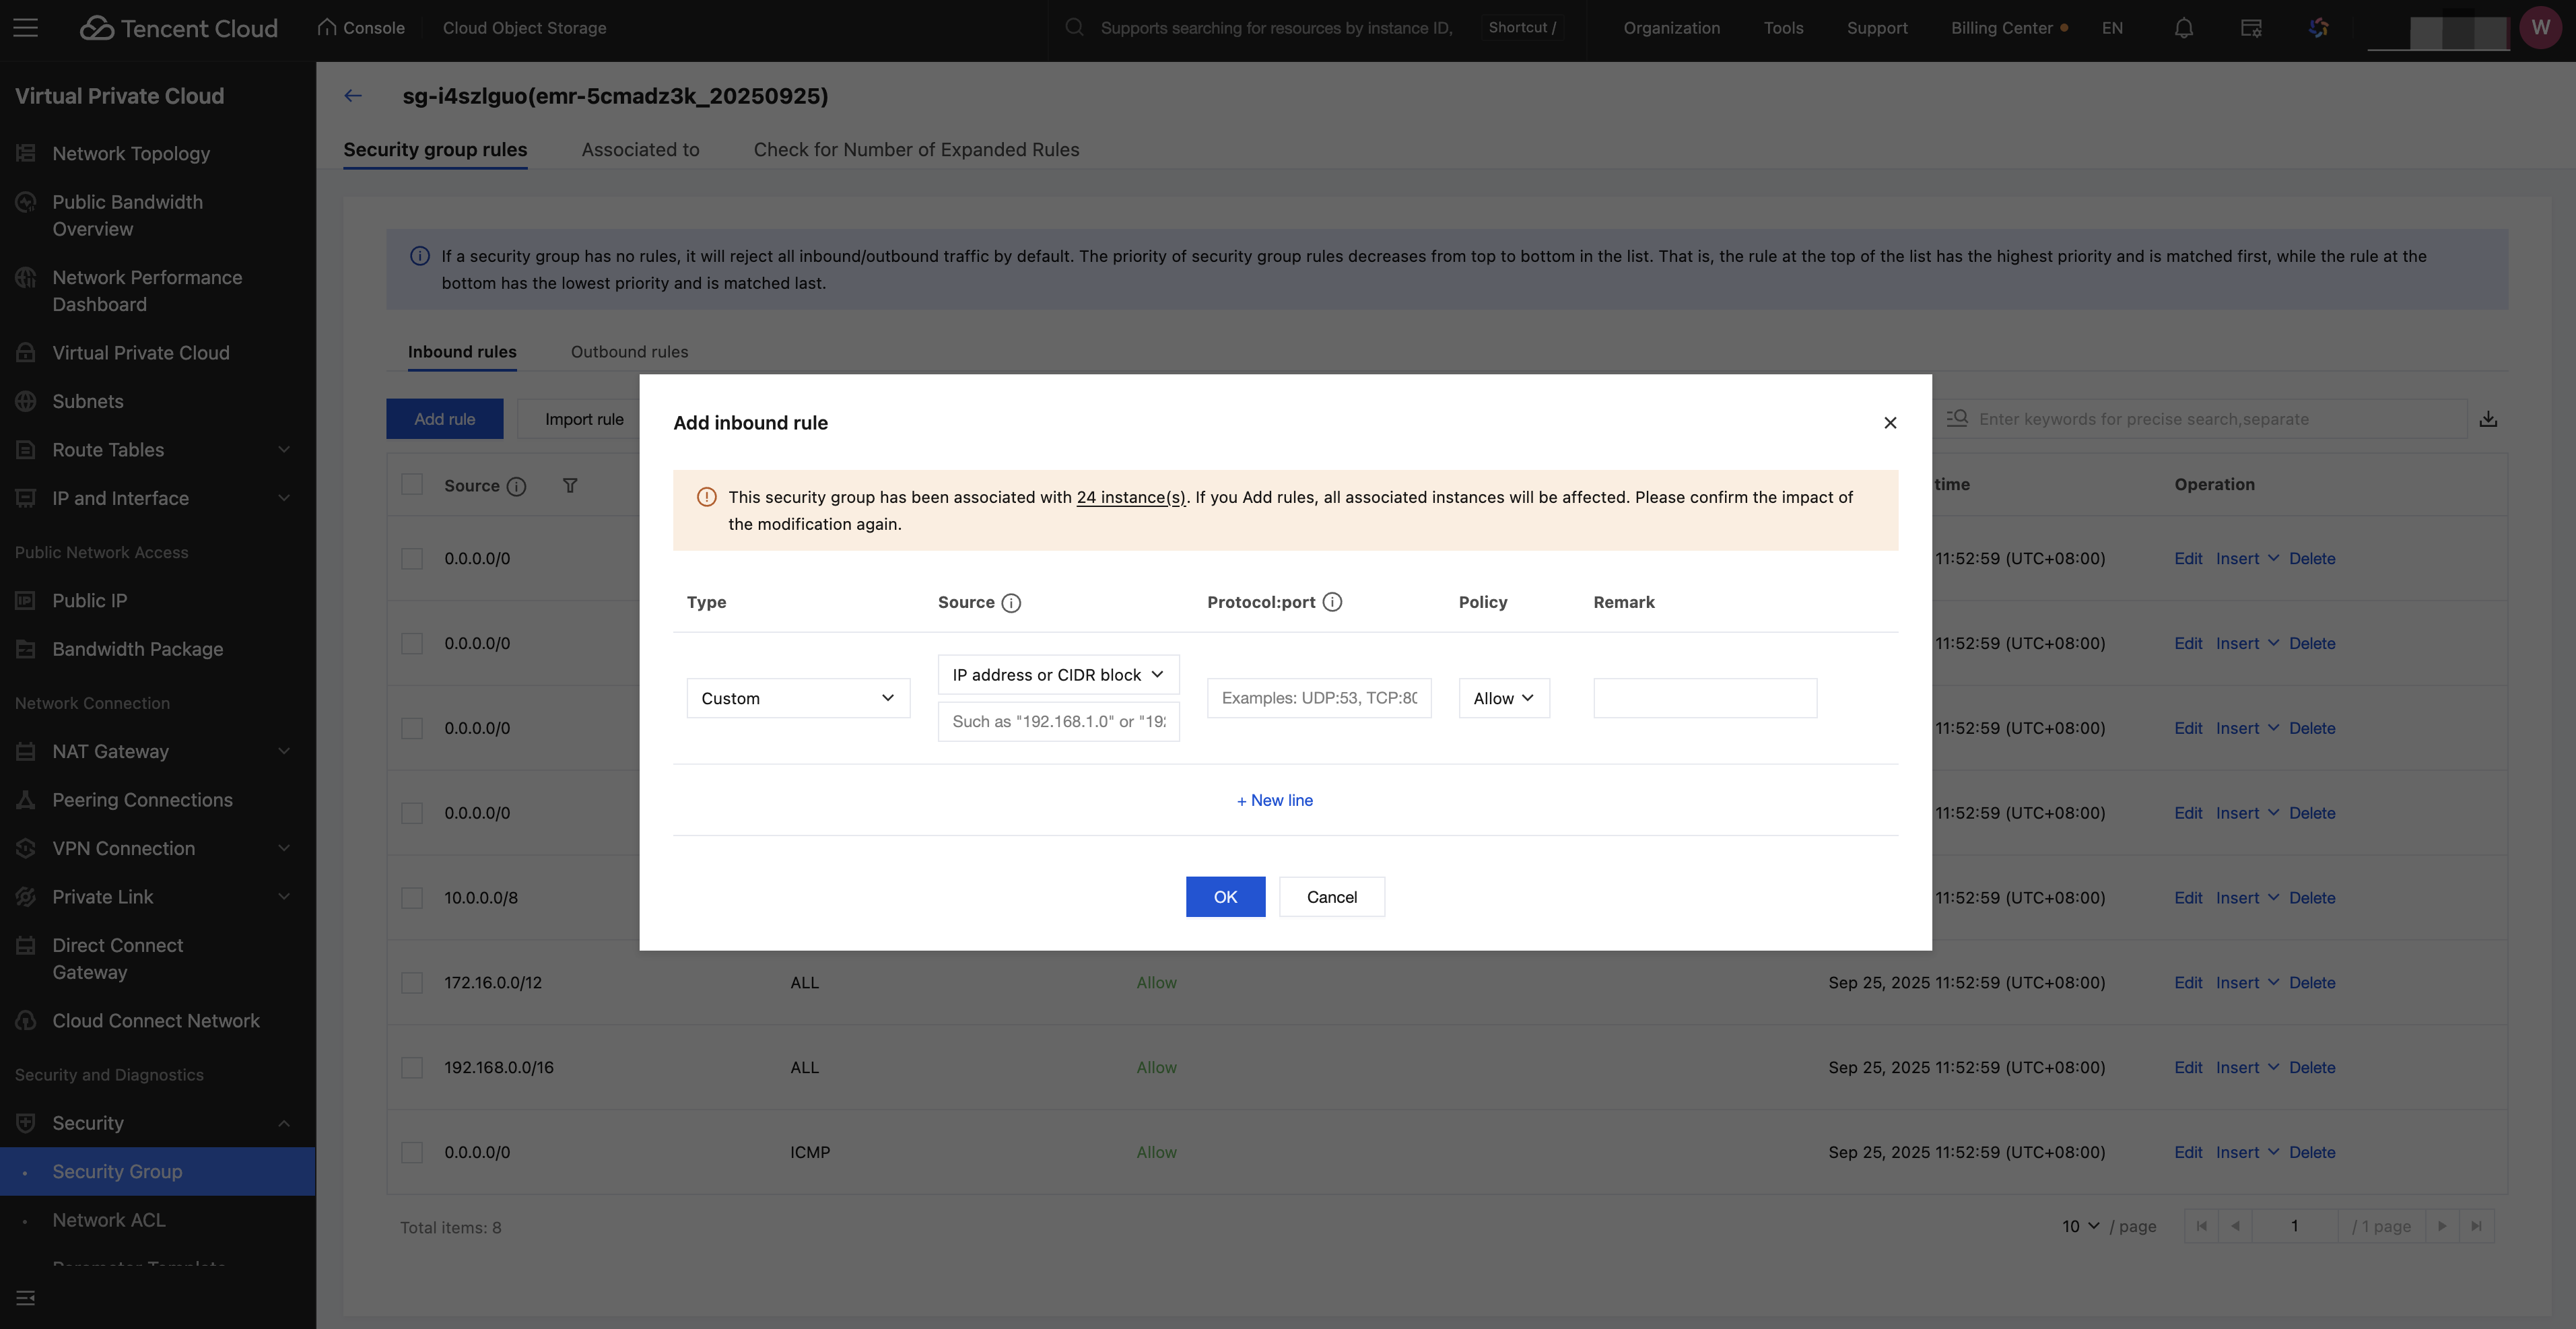
2. Click the specific security group, add inbound rule: 30.22.32.0/19 TCP:8888, then click confirm.


Tutorial 2: Refer to Another Python File in a Notebook

1. Define a function add_numbers in the b.py file, return the value of a+b.

def add_numbers(a,b):
return a+b
2. In the a.ipynb file, refer to b.py, call the functions defined in file b, and output the return value.

import b
result = b.add_numbers(3, 4)
print(result)
# 7

Tutorial Three: Reading a CSV File in a Directory in Notebook

1. Click folder > upload to upload the CSV file you need to use to the directory.

2. Read the CSV file in the directory through code in the Notebook and print it.
file_path = "/Workspace/Workspace/Users/celiacui/sample_data.csv" #replace with your csv file path
df = spark.read.csv(file_path, header=True, inferSchema=True)
#print df
display(df)

ヘルプとサポート

この記事はお役に立ちましたか?

フィードバック