JSON Web Token (JWT) is a commonly used authentication and authorization method in modern web services. Cloud Native API Gateway can verify JWT requests with the HS256 or RS256 signature. You can configure JWT credentials (public and private keys) for consumers and use these credentials to sign their JWT tokens. Cloud Native API Gateway can transmit the JWT token through Query, Cookie, or Header. If the signature of a JWT request is verified, Cloud Native API Gateway forwards the request to the upstream service. Otherwise, it discards the request.
Three common JWT signature algorithms are HS256, RS256, and ES256, differing in the keys required for message signature and signature verification.
HS256 uses the same secret_key for signature and verification. It is suitable for centralized authentication scenarios where both signature and verification should be performed by a credible party.
RS256 uses an RSA private key for signature and an RSA public key for verification. Therefore, verification can be delegated to other applications.
ES256 uses a private key for signature and a public key for verification and has a shorter signature than RS256.
This document describes how to implement the following common JWT authentication and authorization scenarios on the Kong Cloud Native Gateway using the JWT plugin:
Authenticating and authorizing requests with the HS256 signature
Authenticating and authorizing requests with the RS256 signature
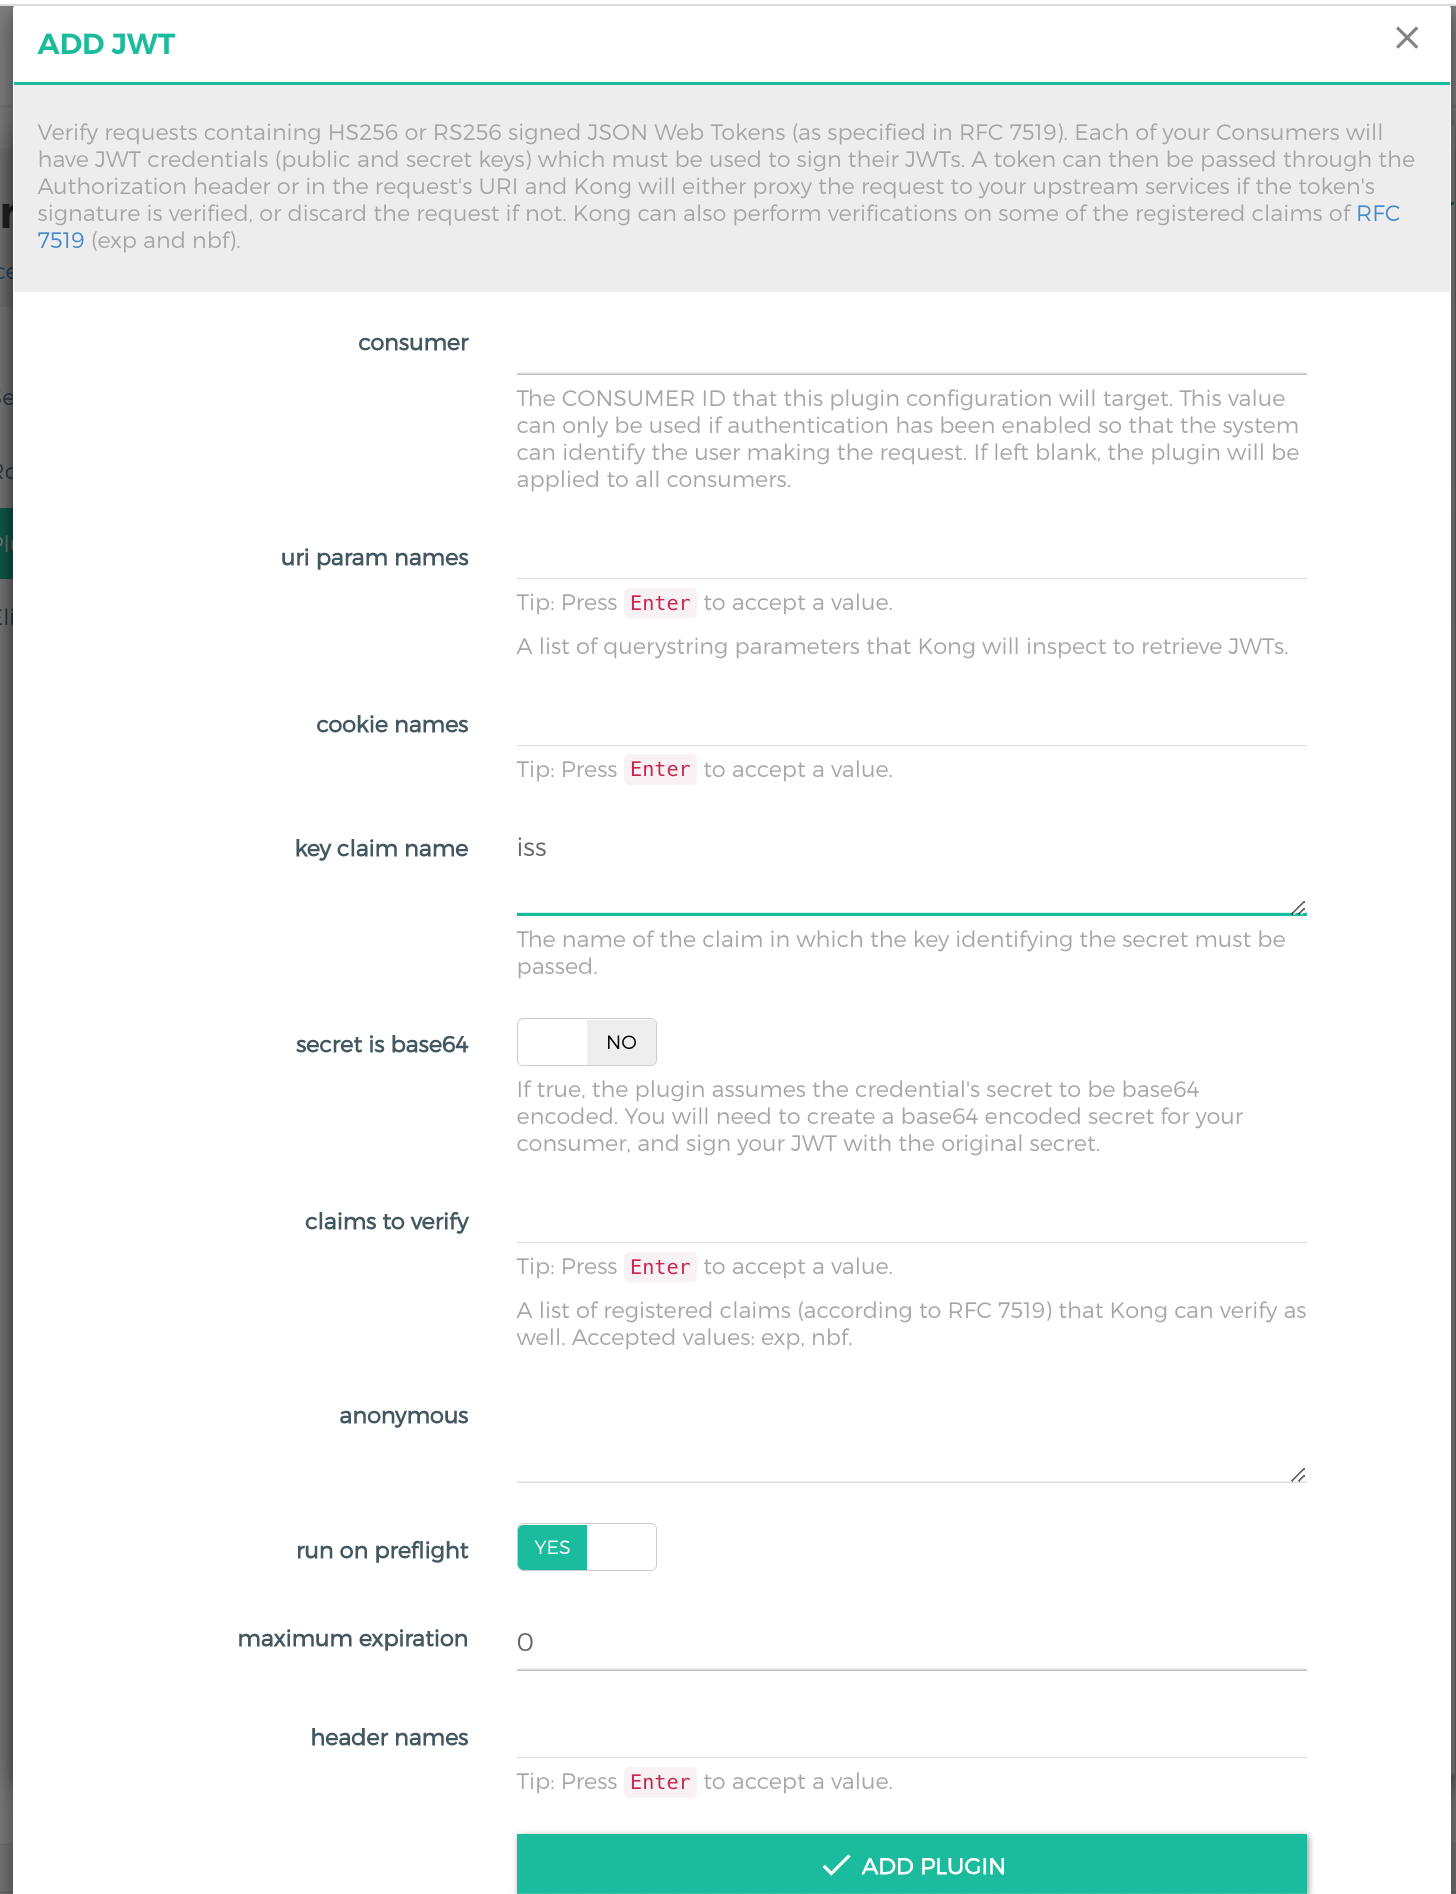
List of Query parameters used to obtain the JWT token. This field is configured when the JWT token is configured in the URI.
cookies names
List of Cookie parameters used to obtain the JWT token. This field is configured when the JWT token is configured in Cookie.
key claim name
Key value of the credential, corresponding to the JWT Claim content, which is set to iss by default.
secret is base64
Whether the secret of the credential is base64-encoded.
claims to verify
Claims verified by Cloud Native API Gateway, which can be exp or nbf.
anonymous
Whether a request is submitted to an anonymous consumer to process when authentication fails. It is empty by default, indicating that a 4xx response is returned when the request fails.
run on preflight
Whether the plugin should run its logic on OPTIONS preflight requests (and attempt to authenticate the identity). If it is set to false, OPTIONS requests are always allowed.
maximum expiration
JWT token expiration time, ranging from 0 to 31536000 (365 days). When this field is specified, you need to specify exp in claims to verify. The default value is 0, indicating indefinite. When the token expires, the request is denied with HTTP 403. Note that potential clock drift should be considered when this field is configured.
header names
List of header parameters used to obtain the JWT token. This field is configured when the JWT token is configured in the URI.
Operation Steps
Scenario 1: Authenticating and Authorizing Requests with the HS256 Signature
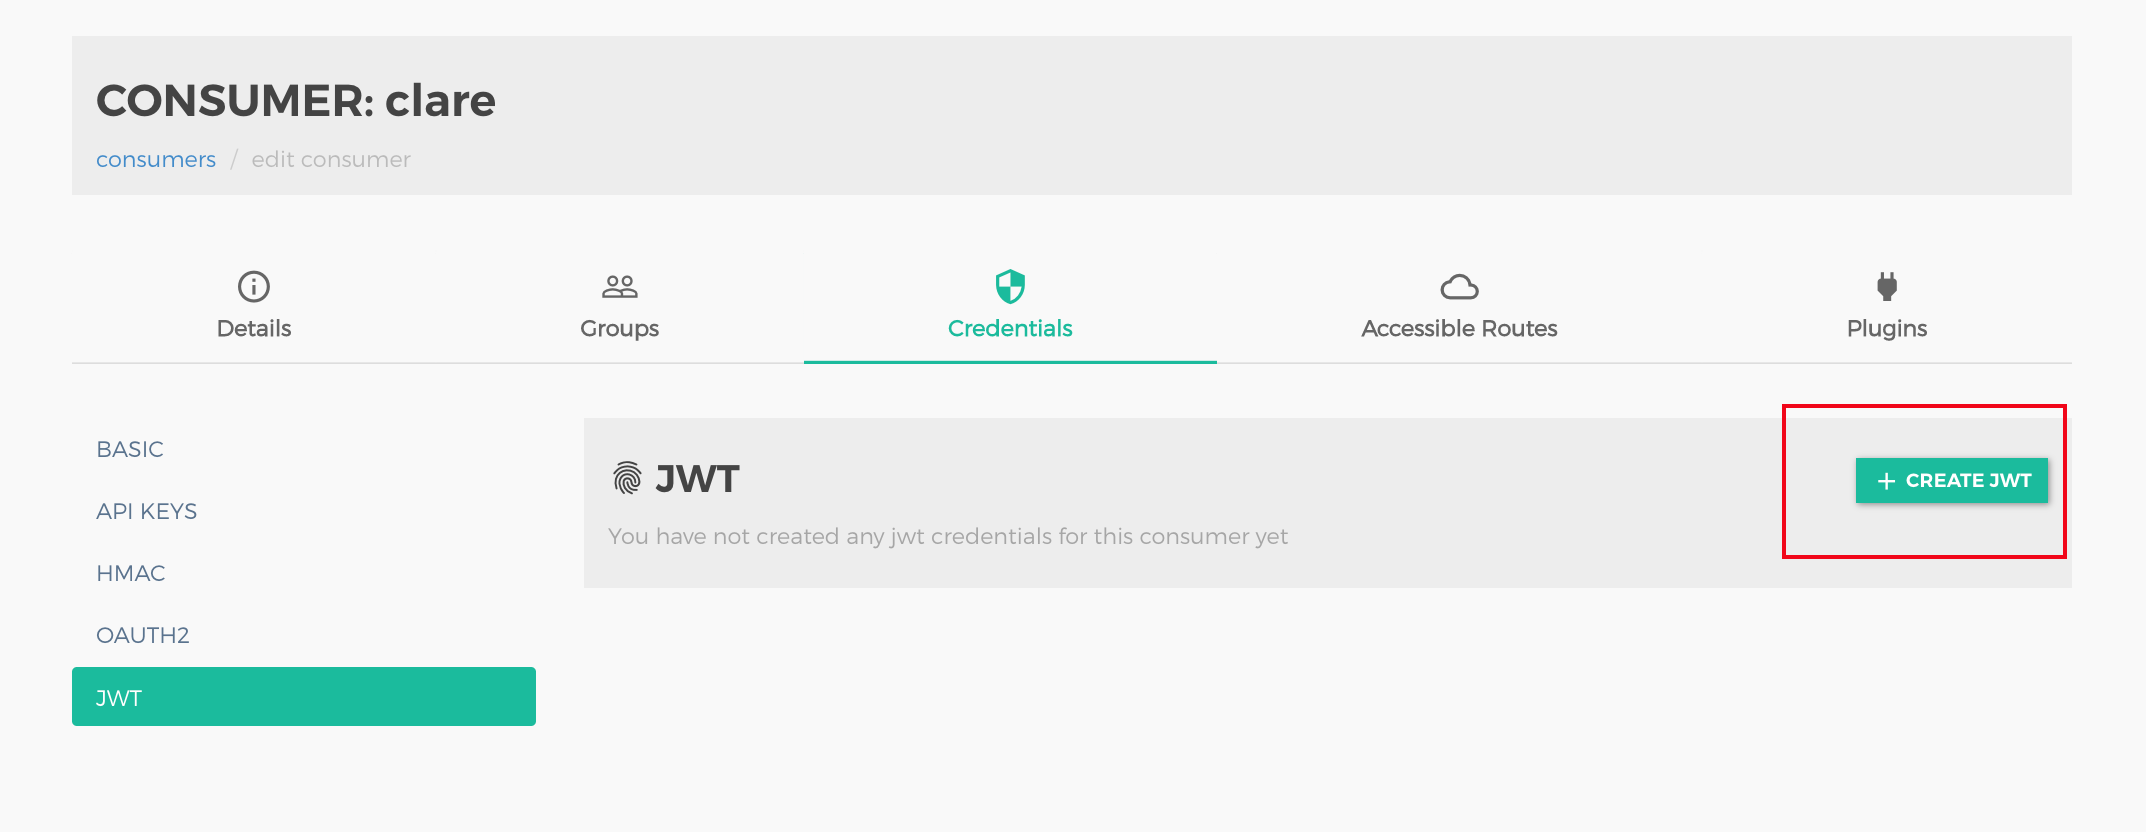
Step 1: Creating a Consumer
1. Log in to the Tencent Service Framework (TSF) console, go to the details page of the Cloud Native API Gateway instance for which the JWT plugin needs to be configured, and view the Konga console login method on the Konga Console tab page.
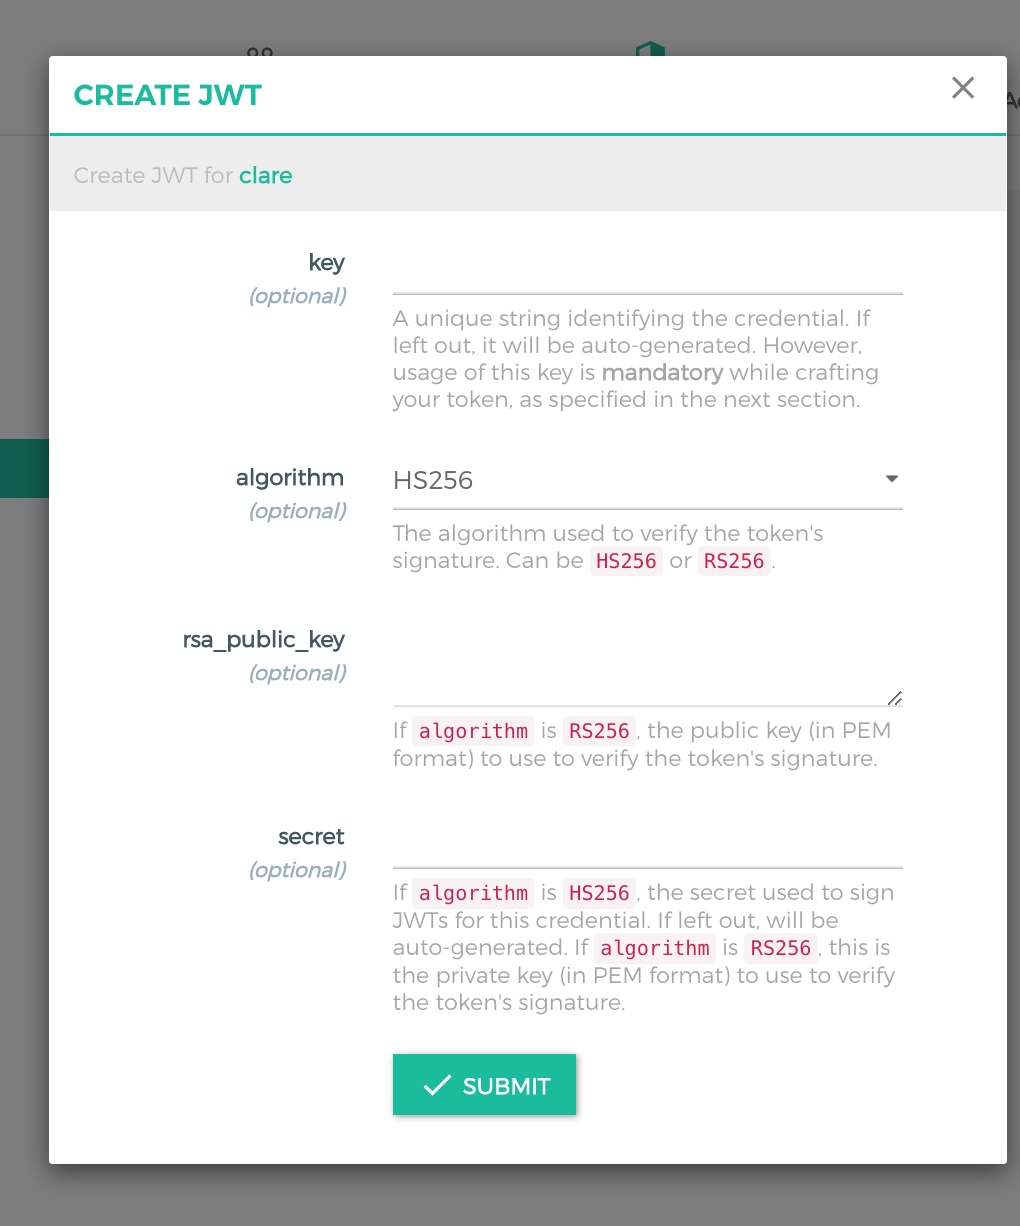
2. Log in to the Konga console, go to the consumer details page, and select the user (such as clare) for whom access control needs to be configured. Click the Credentials tab, select JWT, click Create JWT, and create a JWT token as the access credential for the user.
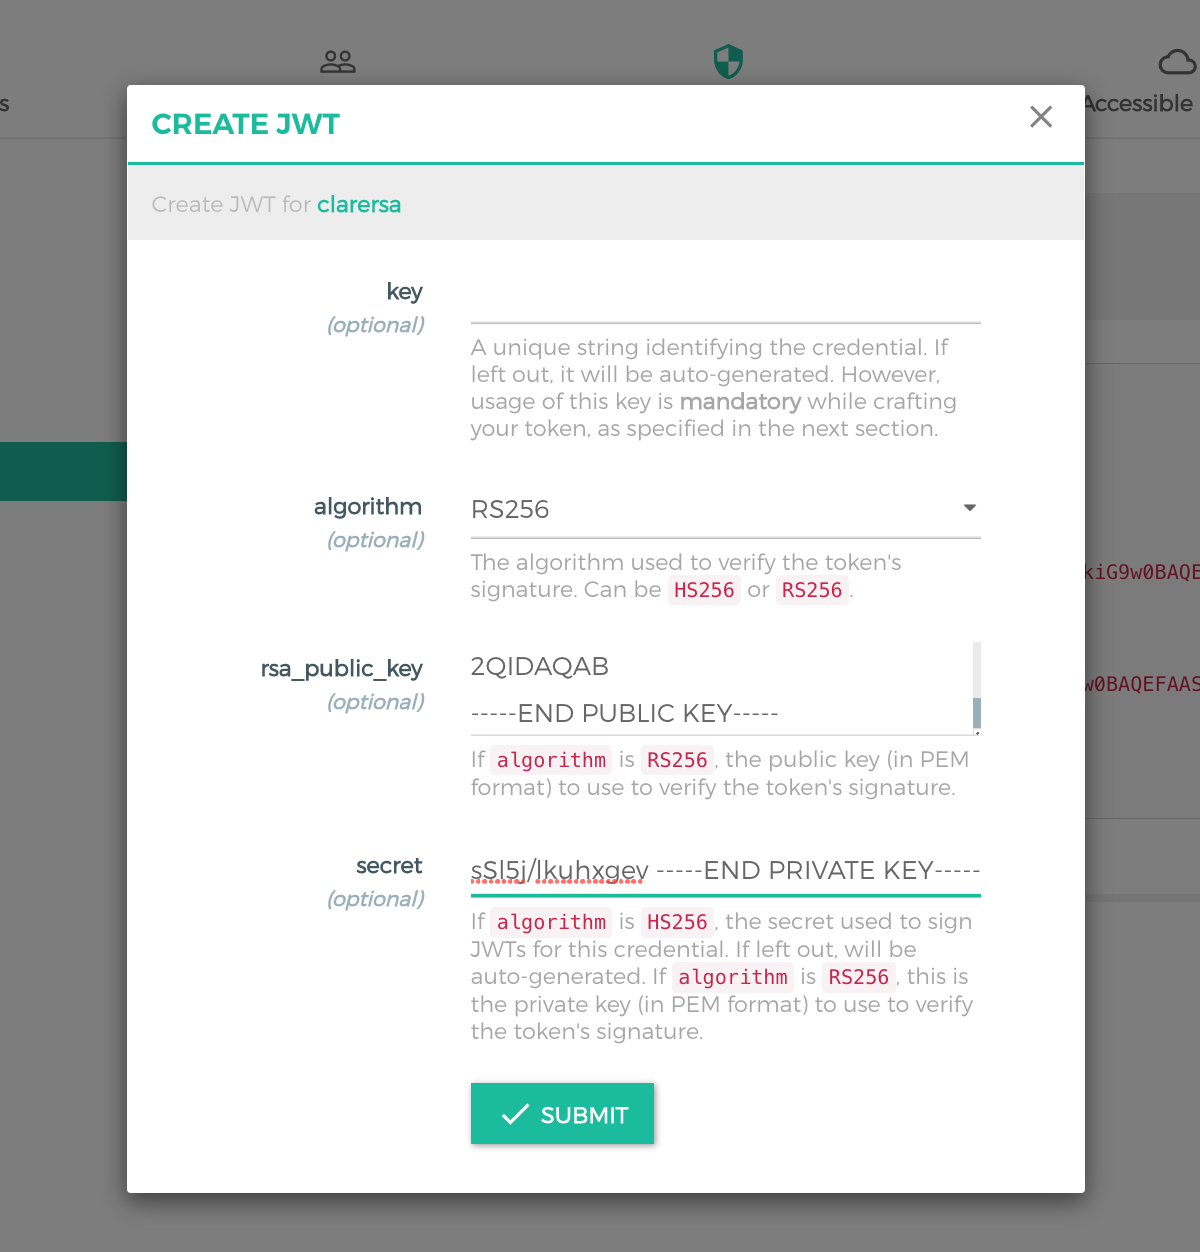
3. Configure JWT-related parameters.
Configuration Item
Description
key
Corresponding to the issuer of JWT Claims. If it is not specified, a key is generated automatically.
algorithm
Encryption algorithm used for the JWT token signature, which can be HS256 or RS256. In this scenario, it is set to HS256.
secret
Secret set for signature verification when the signature algorithm is HS256. If it is not specified, a secret is generated automatically.
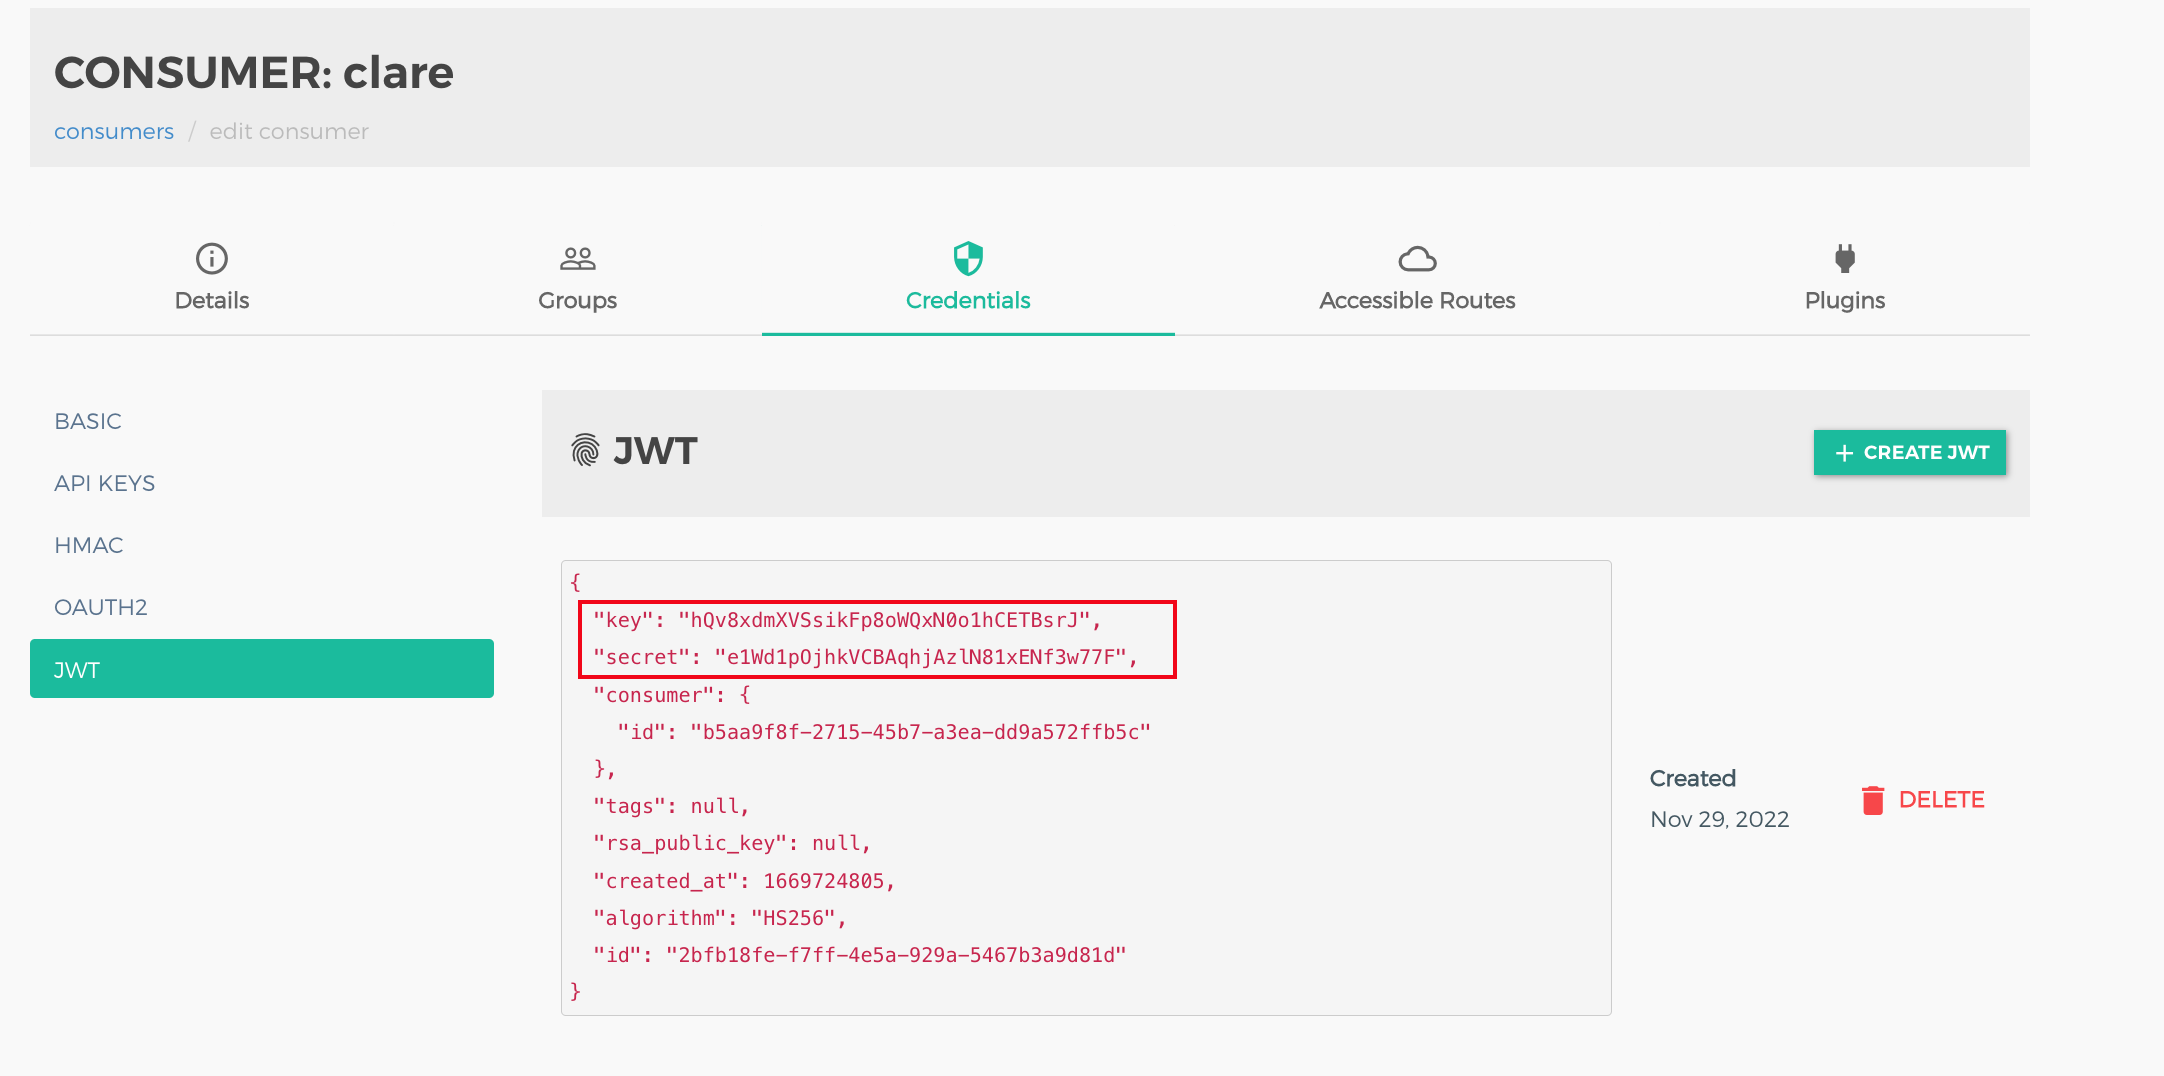
4. View the generated user credentials.
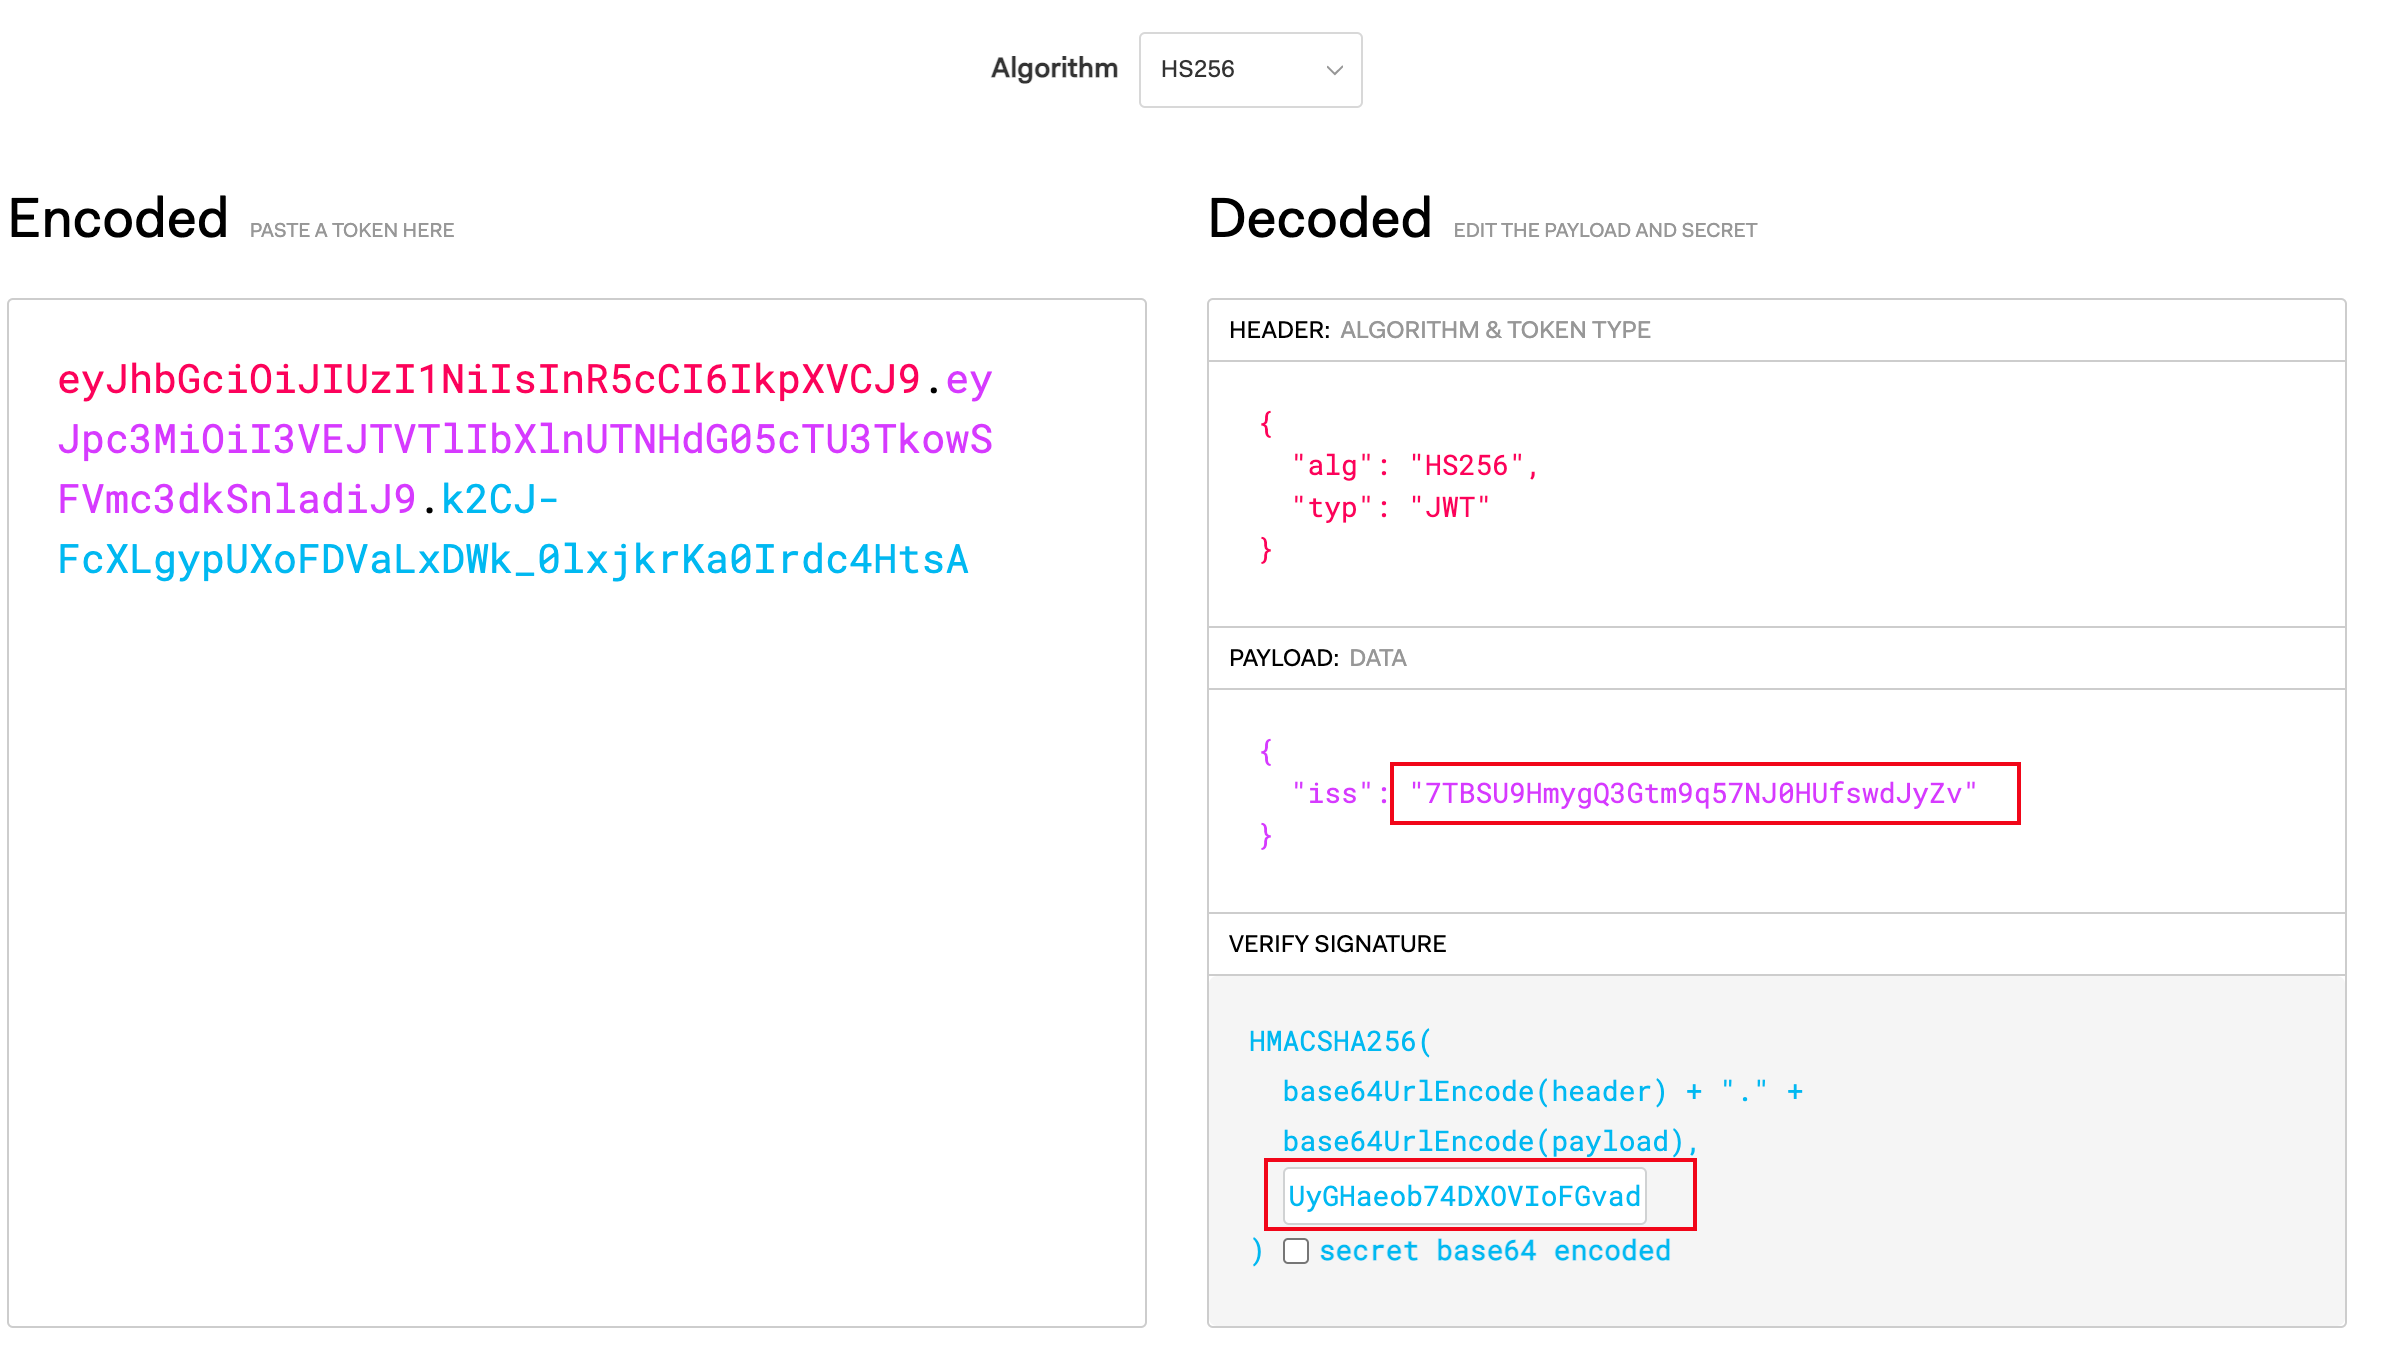
5. Use the program to generate the JWT token.
Step 2: Binding the JWT Plugin
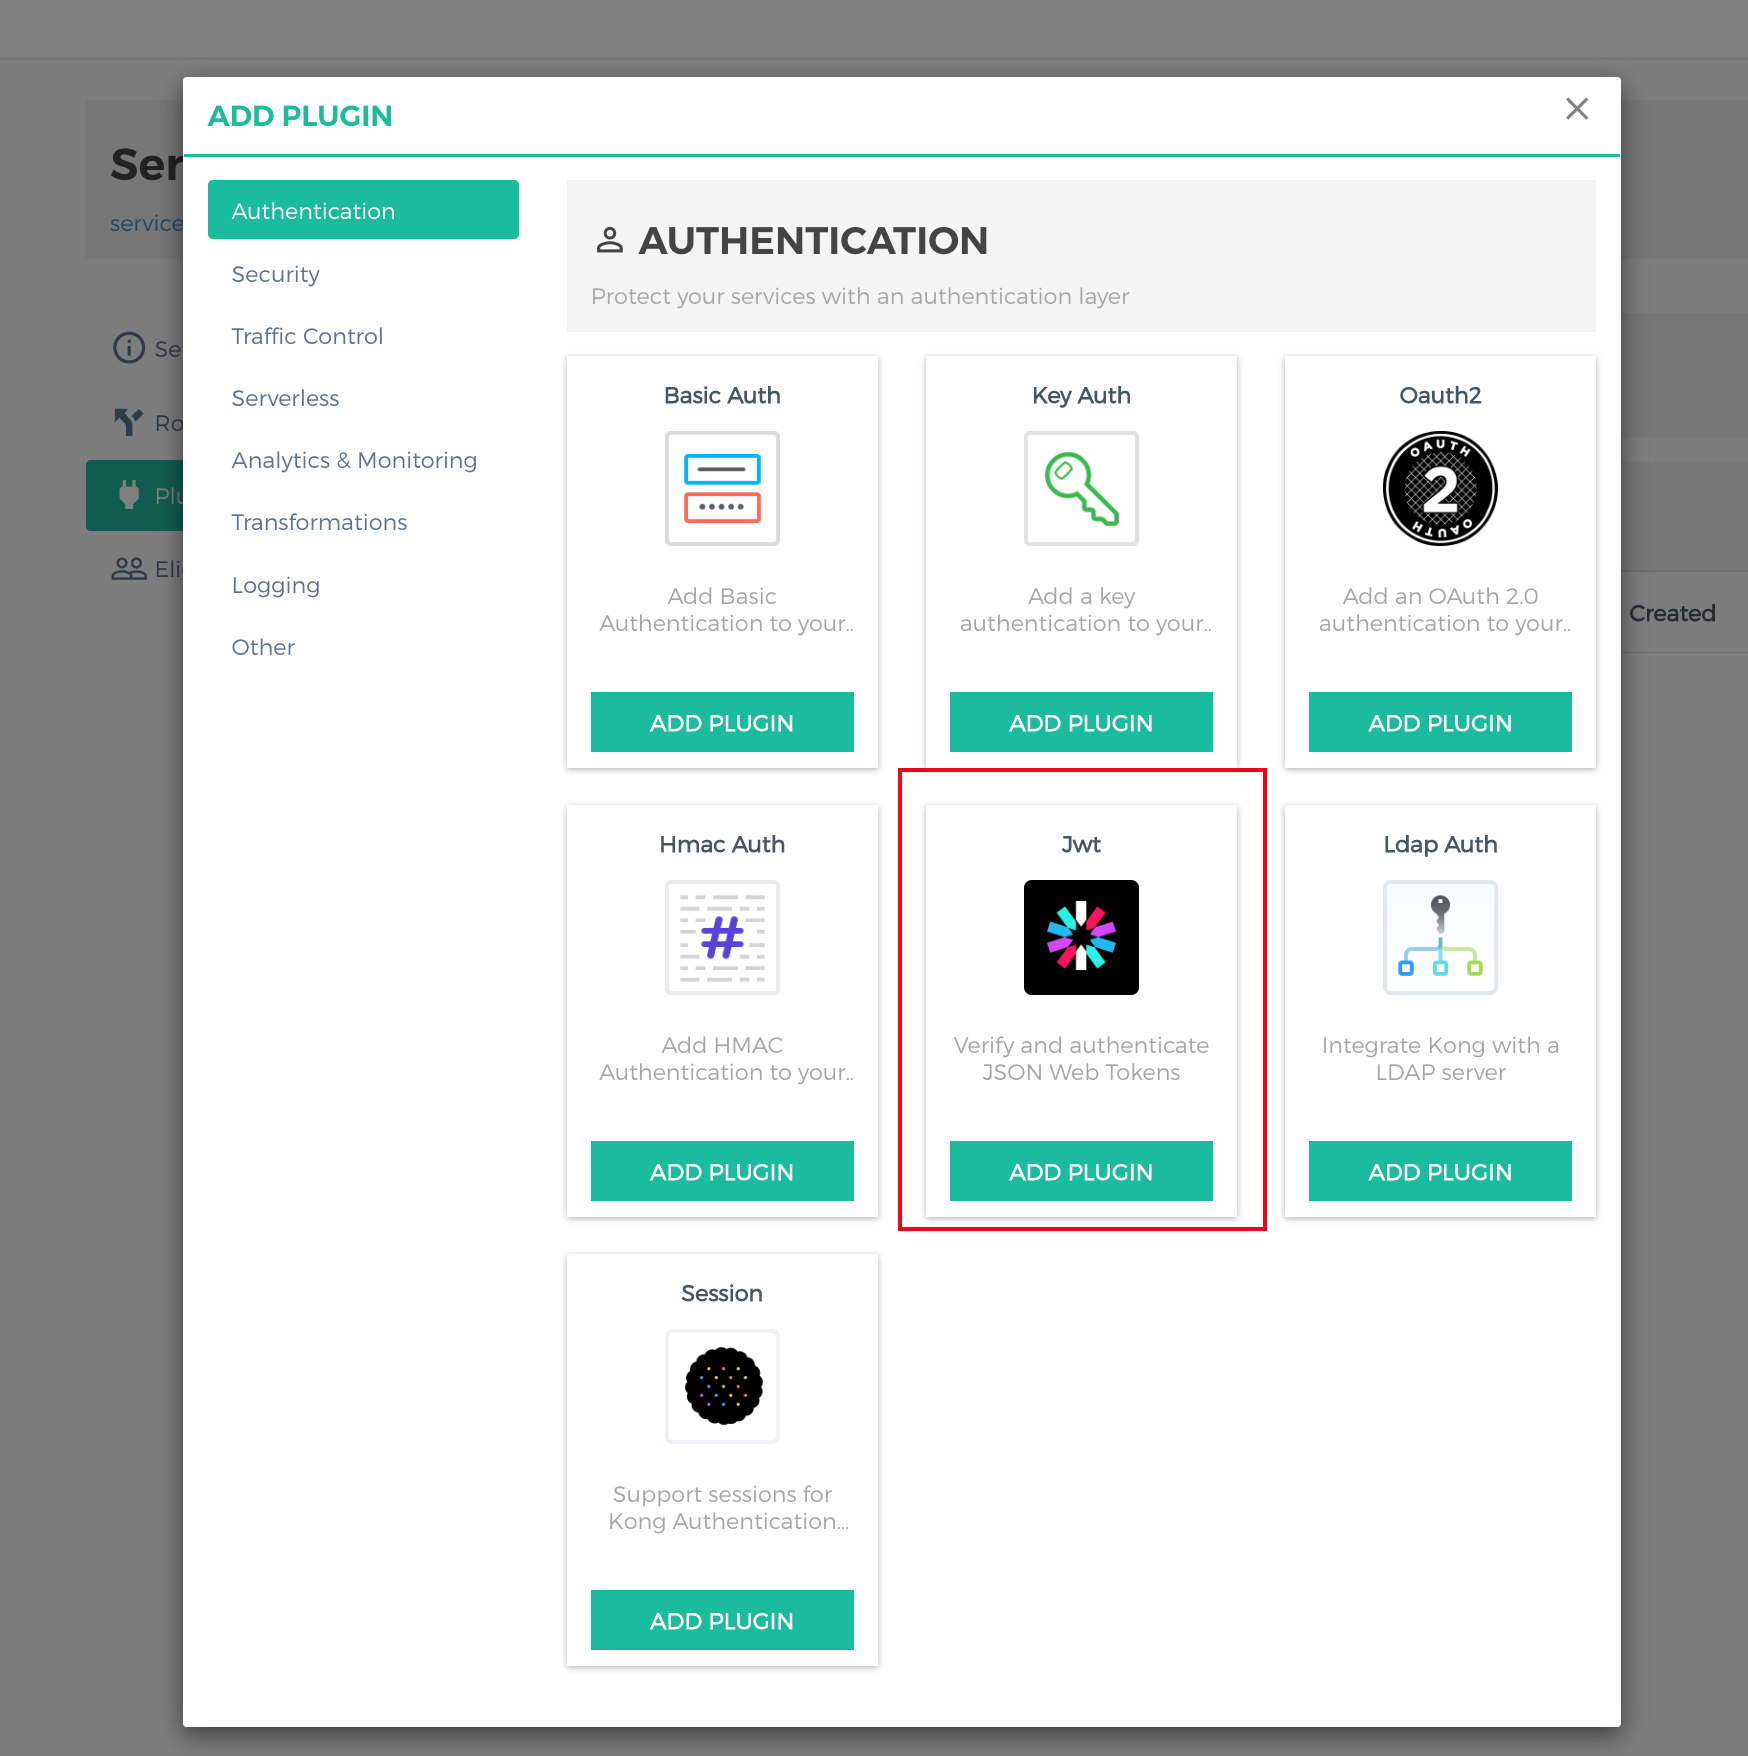
1. Go to the details page of the service that needs to be authenticated, click ADD PLUGIN, select Jwt under the Authentication group in the plugin marketplace, and click ADD PLUGIN.
2. Specify the JWT token verification information, and click ADD PLUGIN.
Step 3: Testing Requests
1. Send a request without a JWT token to the service. The request is denied, and 401 is returned.
curl -i xxxxxxx/test
HTTP/1.1 401 Unauthorized
Connection: keep-alive
Content-Length: 26
Content-Type: application/json;charset=utf-8
Date: Tue, 29 Nov 202212:55:33 GMT
Server: kong/2.5.1
X-Kong-Response-Latency: 23
{"message":"Unauthorized"}
2. Send a request with a JWT token to the service. The request is successful.
Scenario 2: Authenticating and Authorizing Requests with the RS256 Signature
Step 1: Creating a Consumer
1. Log in to the TSF console, go to the details page of the Cloud Native API Gateway instance for which the JWT plugin needs to be configured, and view the Konga console login method on the Konga Console tab page.
2. Log in to the Konga console, go to the consumer details page, and select the user (such as clarersa) for whom access control needs to be configured. Click the Credentials tab, select JWT, click Create JWT, and create a JWT token as the access credential for the user.
3. Configure JWT-related parameters.
Configuration Item
Description
key
Corresponding to the issuer of JWT Claims. If it is not specified, a key is generated automatically.
algorithm
Encryption algorithm used for JWT token signature, which can be HS256 or RS256. In this scenario, it is set to RS256.
rsa_public_key
Public key (PEM format) set for signature verification when the signature algorithm is RS256.
secret
Private key (PEM format) set for signature verification when the signature algorithm is RS256.
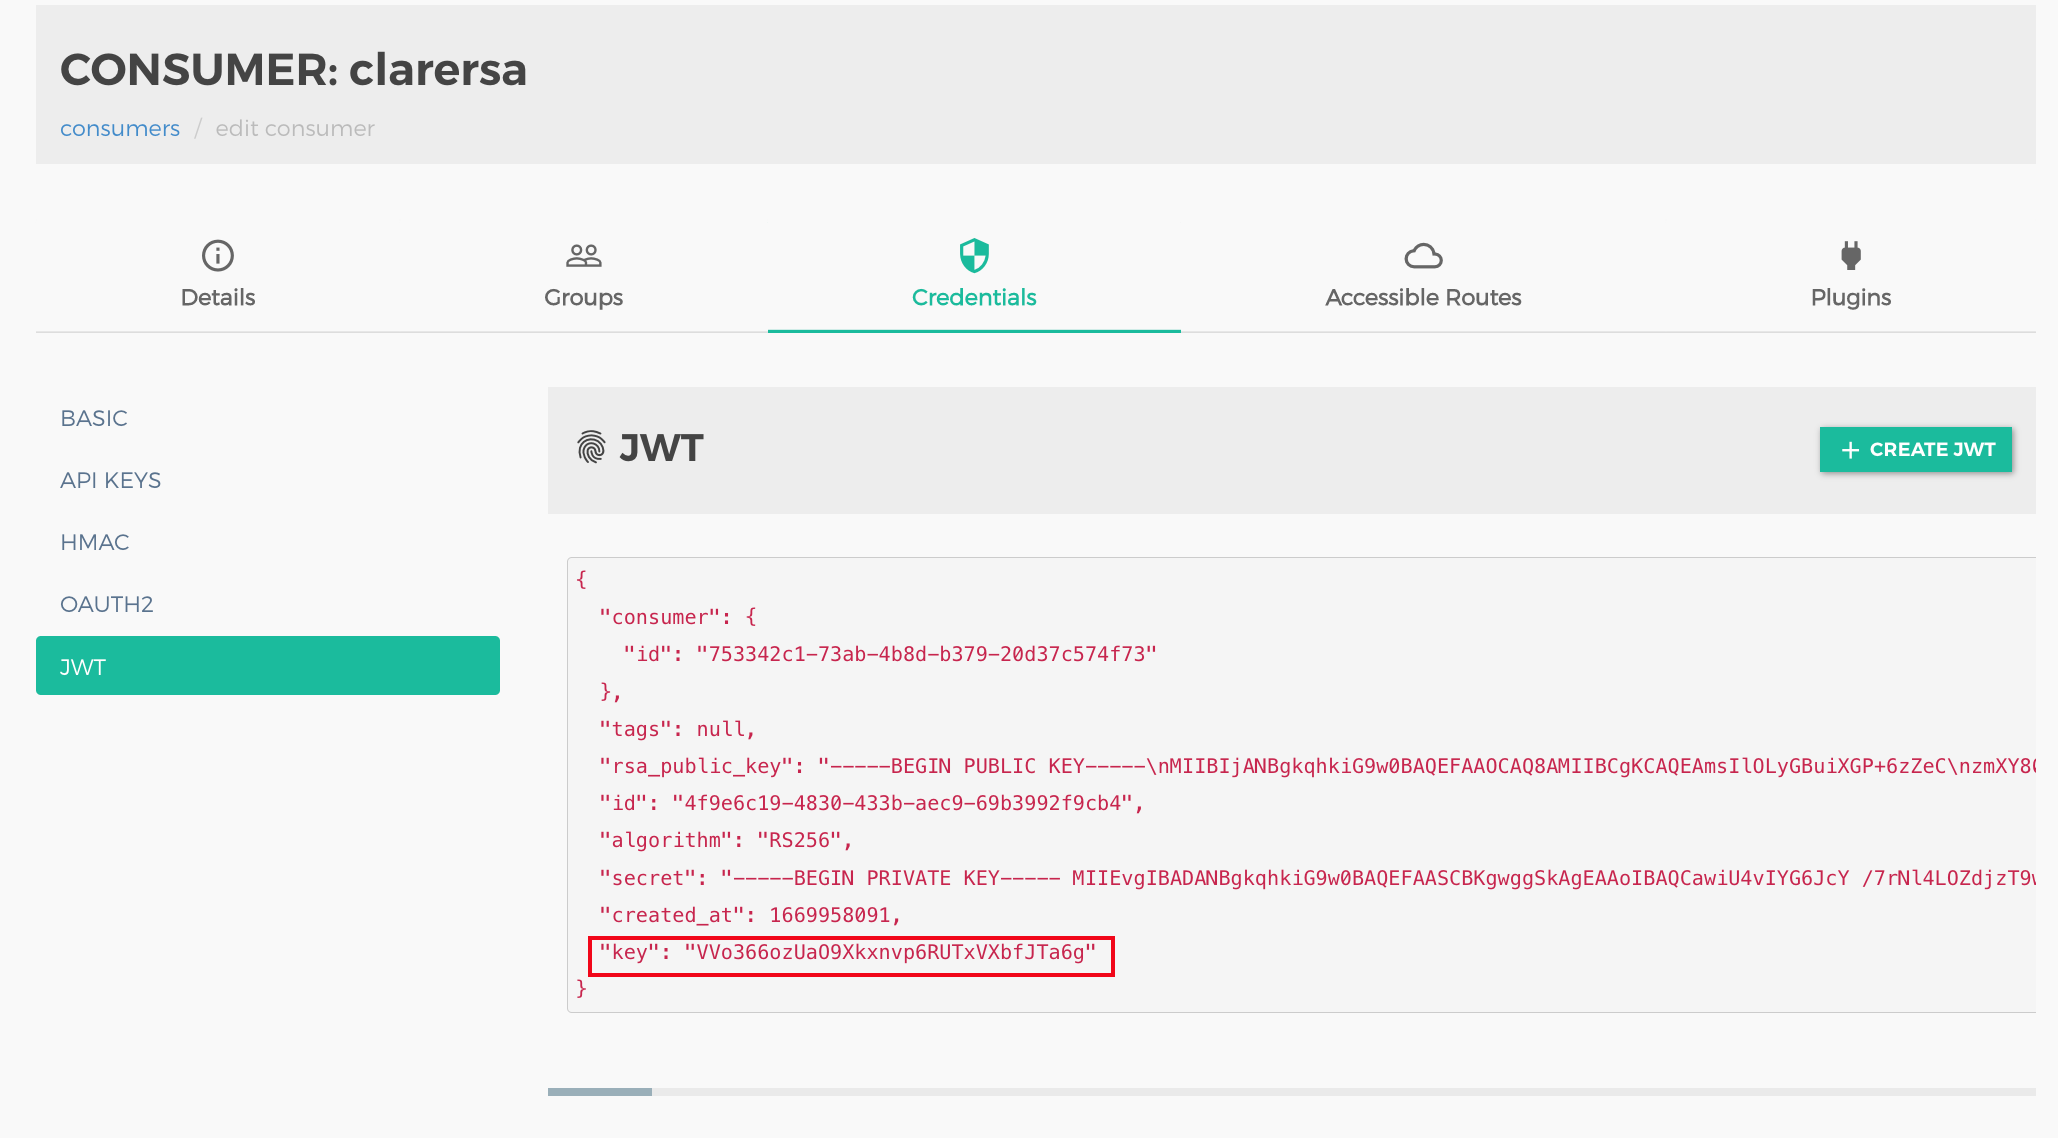
4. View the generated user credentials.
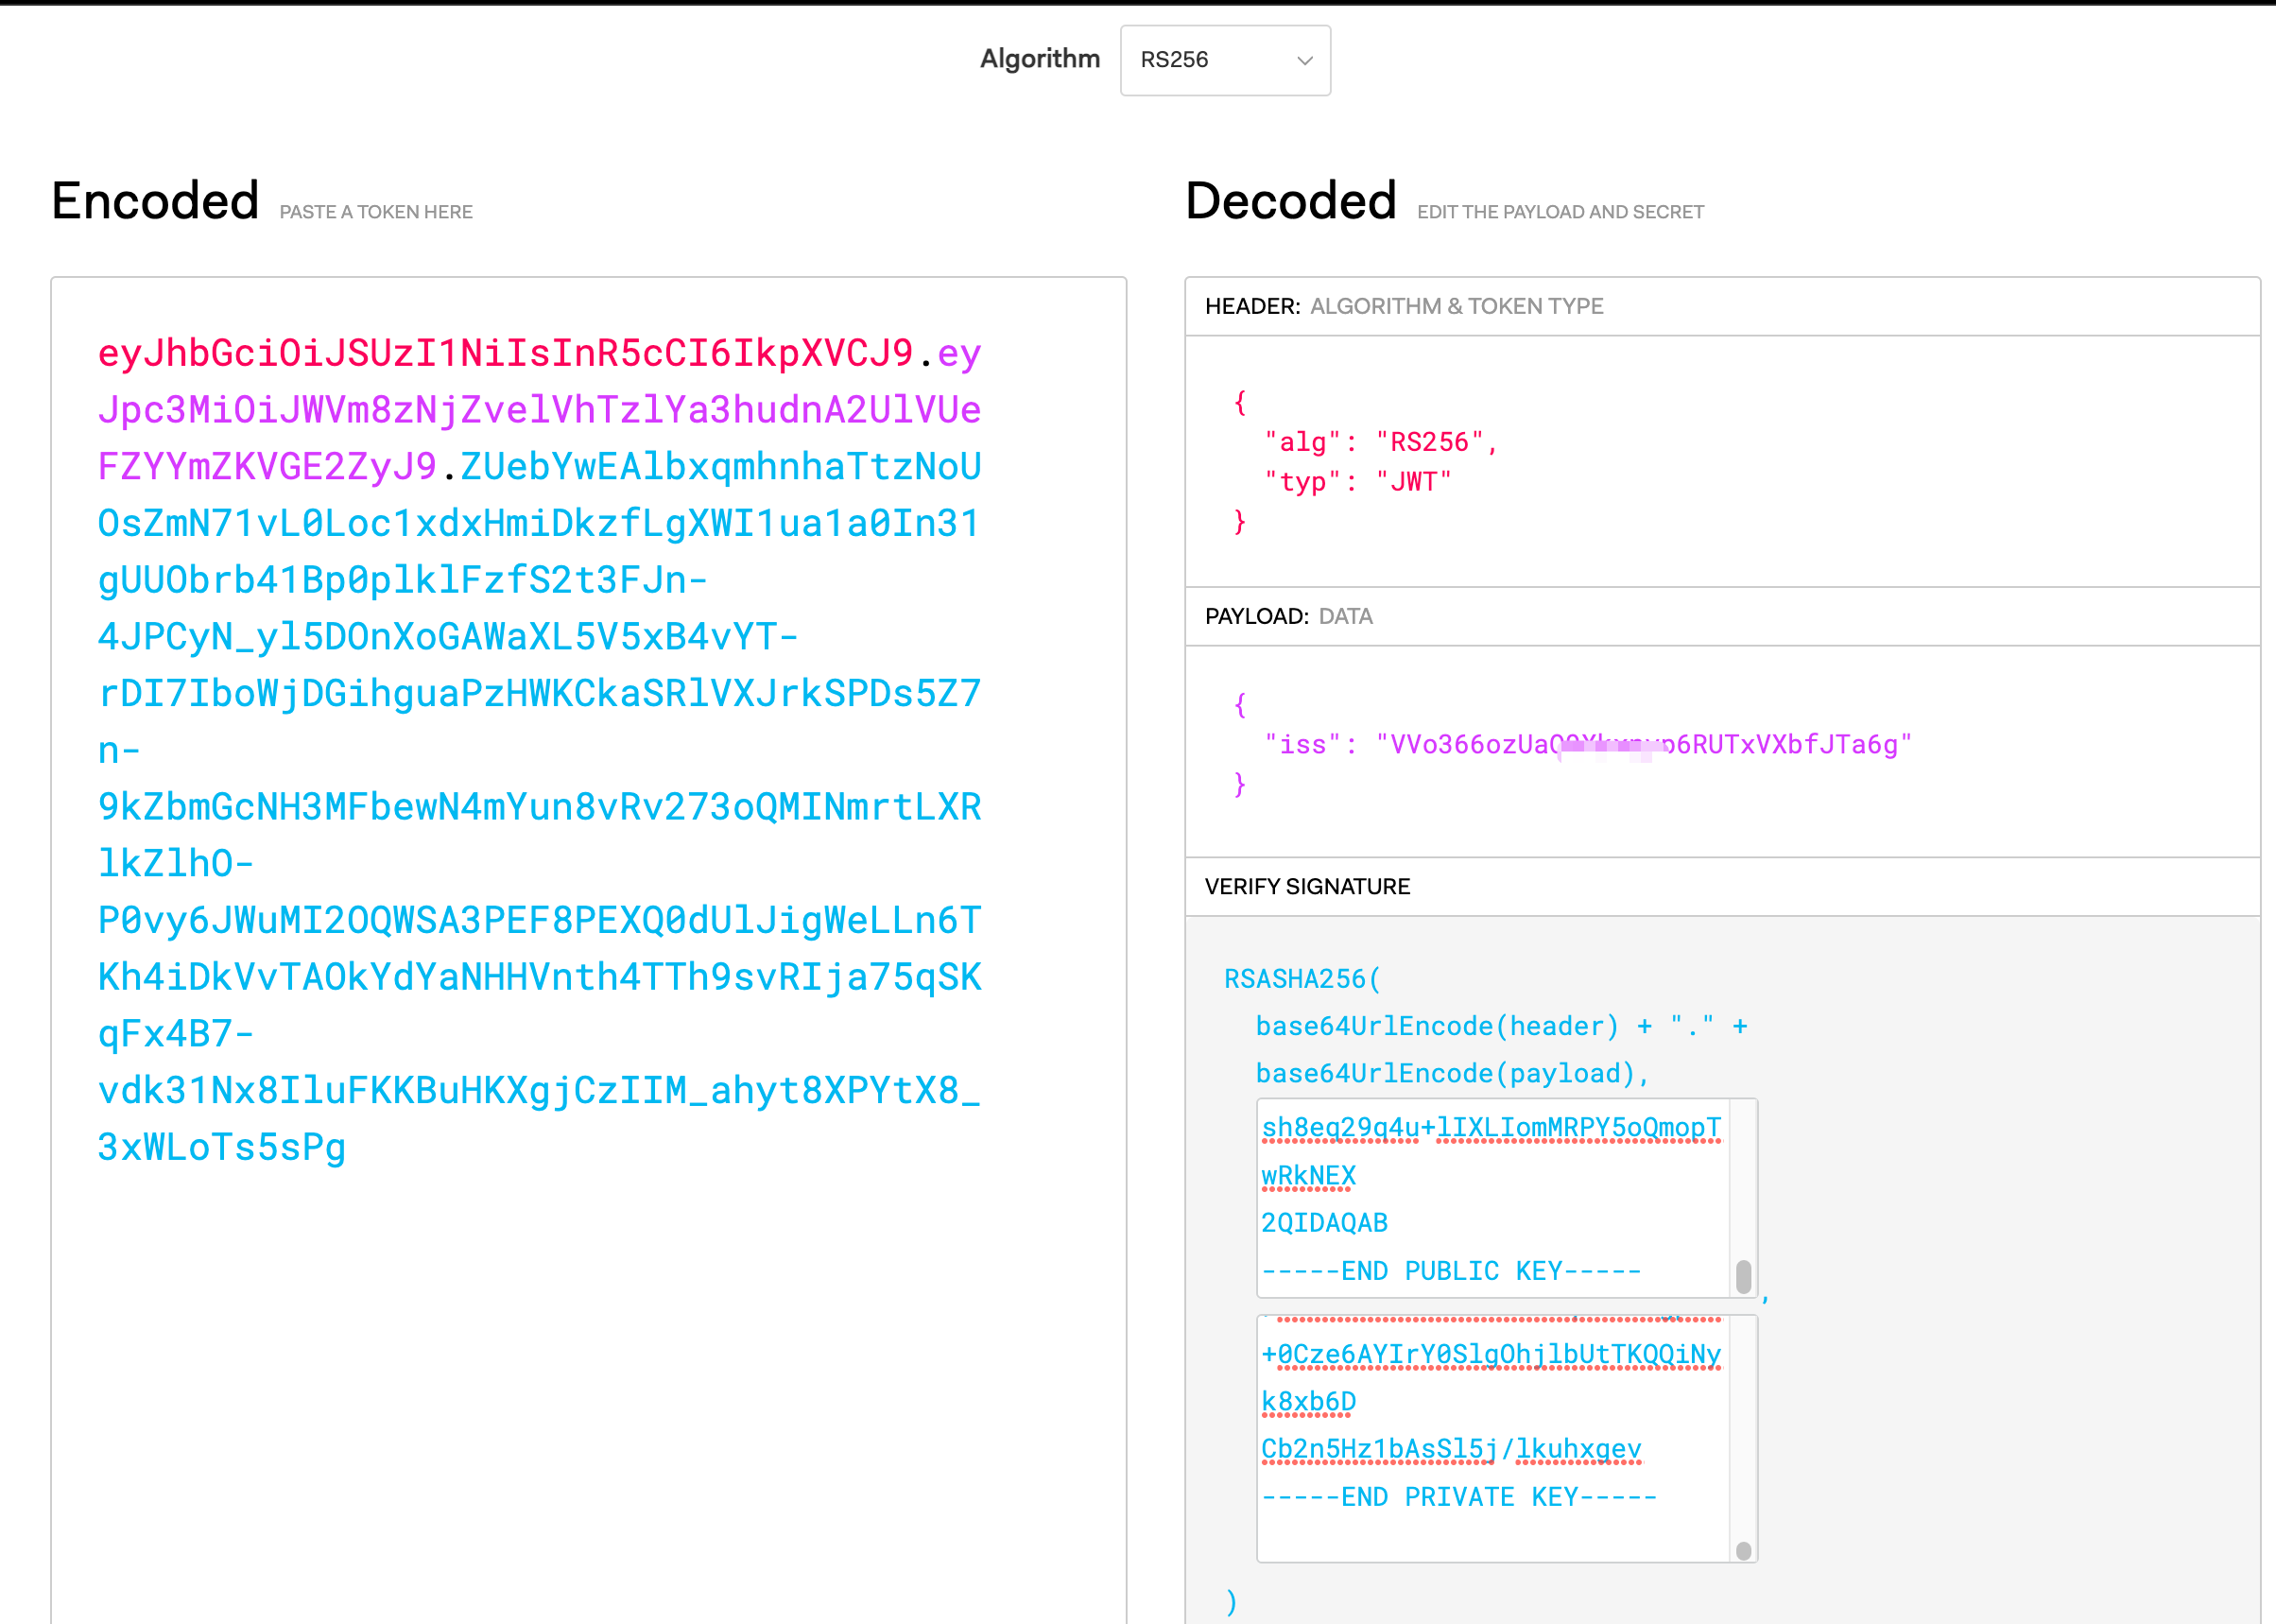
5. Generate the JWT token.
Step 2: Binding the JWT Plugin
1. Go to the details page of the service that needs to be authenticated, click ADD PLUGIN, select Jwt under the Authentication group in the plugin marketplace, and click ADD PLUGIN.
2. Specify the JWT token verification information, and click ADD PLUGIN.
Step 3: Testing Requests
1. Send a request without a JWT token to the service. The request is denied, and 401 is returned.
curl -i xxxxxxx/testrsa
HTTP/1.1 401 Unauthorized
Connection: keep-alive
Content-Length: 26
Content-Type: application/json;charset=utf-8
Date: Tue, 29 Nov 202212:55:33 GMT
Server: kong/2.5.1
X-Kong-Response-Latency: 23
{"message":"Unauthorized"}
2. Send a request with a JWT token to the service. The request is successful.