tencent cloud

VPN Connections

Release Notes and Announcements
Release Notes
Announcements
Product Introduction
Overview
Components
Application Scenarios
Use Limits
Related products
Purchase Guide
Billing Overview
Purchase Methods
Expiration Notifications
Getting Started
IPSec VPN
SSL VPN
Operation Guide
VPN Gateway
VPN Tunnel
Customer Gateway
SSL VPN Server
SSL VPN Client
Binding an Anti-DDoS Instance
Alarming and Monitoring
SSL VPN Configuration Guide
IPSec VPN Configuration Guide
Operations Overview
Practical Tutorial
IPsec VPN
SSL VPN
API Documentation
FAQs
Concepts
Scenarios
Generic class
Billing
About IPsec gateways
About SSL
Troubleshooting
VPN Tunnel Unconnected
VPN Tunnel Connected Yet Private Network Unconnected
IPSec VPN Error Description for Negotiation Failure
Service Agreement
Service Level Agreement
Contact Us
Glossary

Step 1: Create a VPN Gateway

PDF
Modo Foco
Tamanho da Fonte
Última atualização: 2024-01-09 14:20:07
1. Log in to the VPC console.
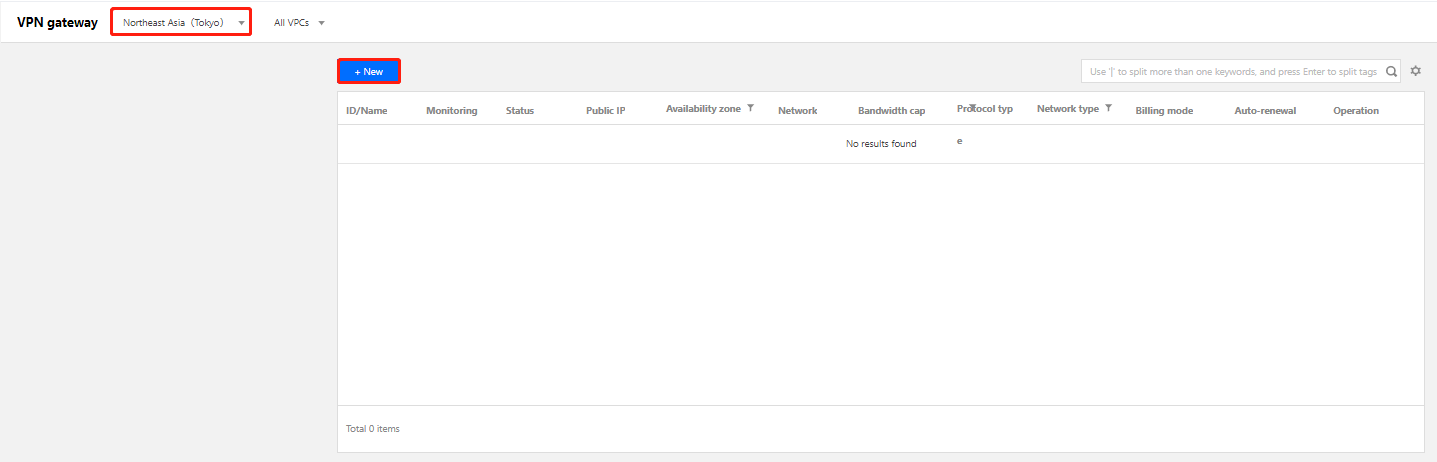
2. Click VPN Connections > VPN Gateway in the left directory to enter the admin page.
3. Choose a region (Tokyo in this example), and click +New.
Note:
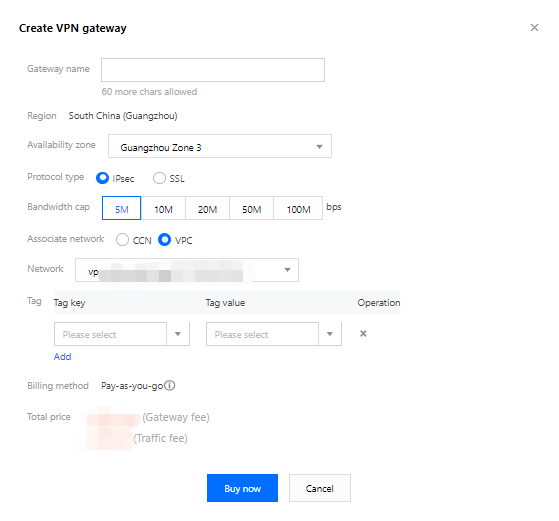
If the +New button is grayed out and “No VPC available” is displayed when the mouse hovers over it, create a VPC as instructed in Creating VPCs before creating the VPN gateway.

4. In the pop-up dialog box, enter the VPN gateway name (such as VPN1), choose VPC as the associated network, choose VPC1 as the network it belongs to, and select the bandwidth cap and billing method.
Note:
If the VPN gateway uses 200Mbps, 500Mbps, 1,000Mbps, or 3,000Mbps bandwidth, AES128+MD5 is recommended for VPN tunnel encryption.

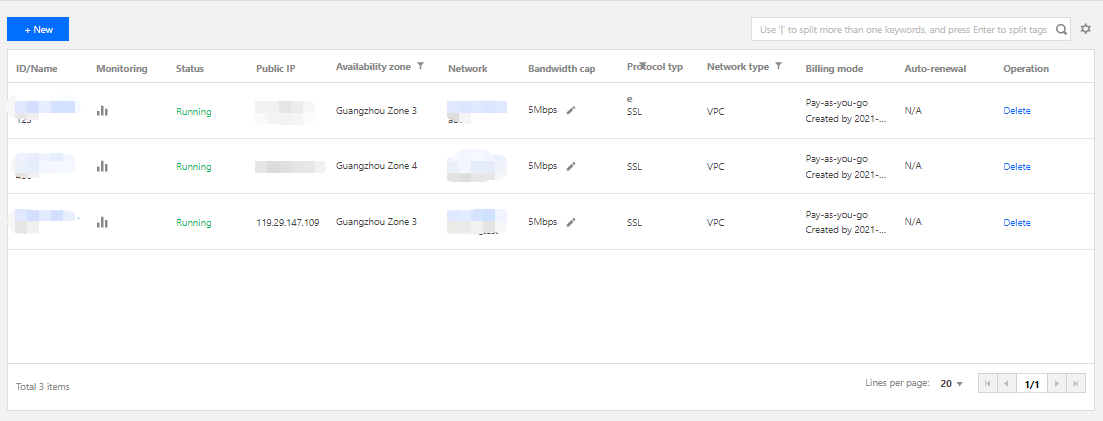
5. Click Create. After the VPN gateway is created, the system randomly assigns it a public IP address such as 119.29.147.109.


Ajuda e Suporte

Esta página foi útil?

comentários