With a data processing workflow, you can quickly and flexibly create video processing processes as needed. A workflow is bound to a path of an input bucket. When a video file is uploaded to the path, the media workflow will be automatically triggered to perform the specified processing operation, with the processing result automatically saved to the specified path of the destination bucket.
You can use a data processing workflow to implement the following features: audio/video transcoding (including top speed codec transcoding and broadcast media format transcoding), video frame capturing, video-to-animated image conversion, intelligent thumbnail, audio/video splicing, voice separation (also known as voice/sound separation), highlights generation (also known as video montage), adaptive multi-bitrate, SDR to HDR, video enhancement, super resolution, audio/video segmentation, custom function, and image processing.
Note:
Currently, workflows can process 3GP, ASF, AVI, DV, FLV, F4V, M3U8, M4V, MKV, MOV, MP4, MPG, MPEG, MTS, OGG, RM, RMVB, SWF, VOB, WMV, WEBM, MP3, AAC, FLAC, AMR, M4A, WMA, and WAV files. When initiating a media processing request, you must enter the complete file name and extension; otherwise, the format cannot be recognized and processed.
Currently, the workflow feature can only manipulate video files being uploaded. To perform media operations on cloud data, use the job feature.
3. Click the name of the bucket for media processing.
4. On the left sidebar, select Data Processing Workflow > Workflow to go to the workflow management page.
5. Click Create Workflow.
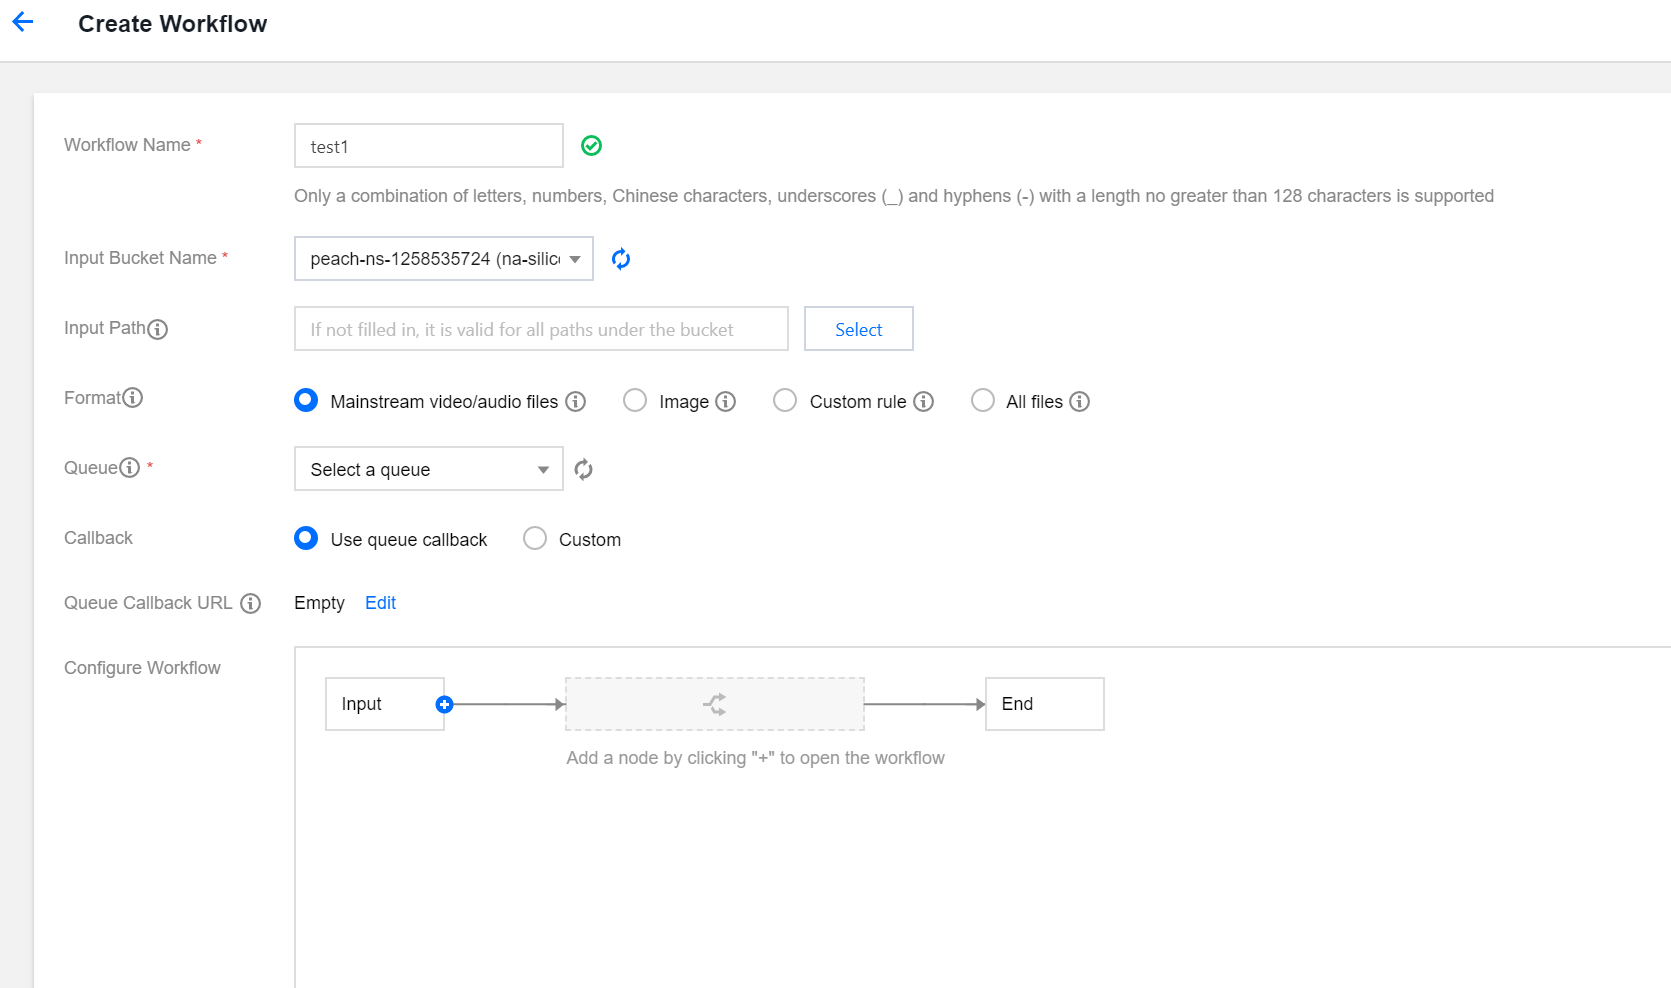
6. On the Create Workflow page, configure the following items:
Workflow Name: It is required and can contain up to 128 letters, digits, underscores (_), and hyphens (-).
Input Bucket Name: It is the current bucket by default.
Input Path: It is optional and must start and end with /. If it is not specified, the workflow will be triggered for all paths in the input bucket. After the media workflow is enabled, when a video file is uploaded to this path, the workflow will be automatically triggered.
Format: Select the default audio, video, or image file filter rule or a custom rule. You can also select all files to process all objects in the bucket.
Queue: It is required. When you activate the service, the system will automatically create a user queue for you. When you submit a job, the job will be arranged in the queue first and executed in sequence according to the priority and order of submission. You can view the queue information in Common Configuration.
Callback: You can use the queue callback, i.e., callback URL bound to the queue. To modify it, please go to the corresponding queue list.
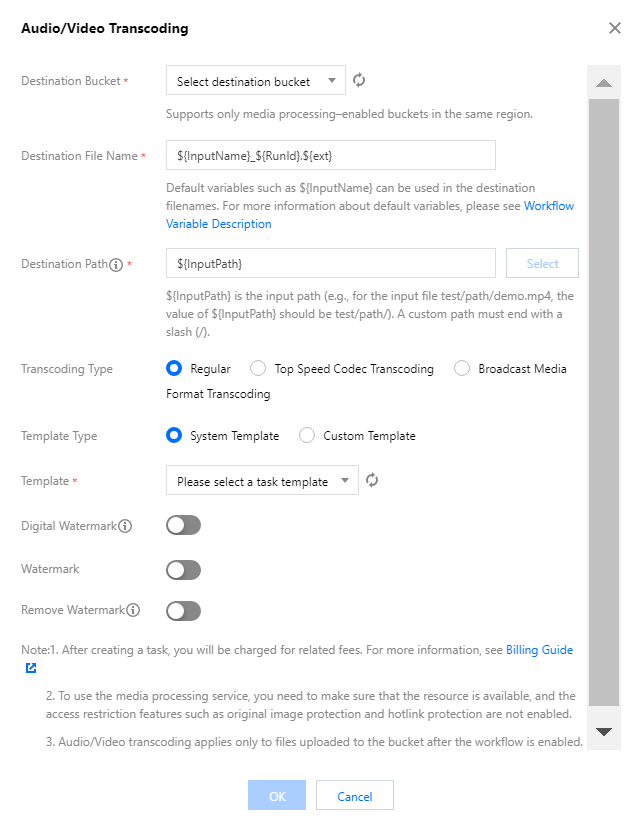
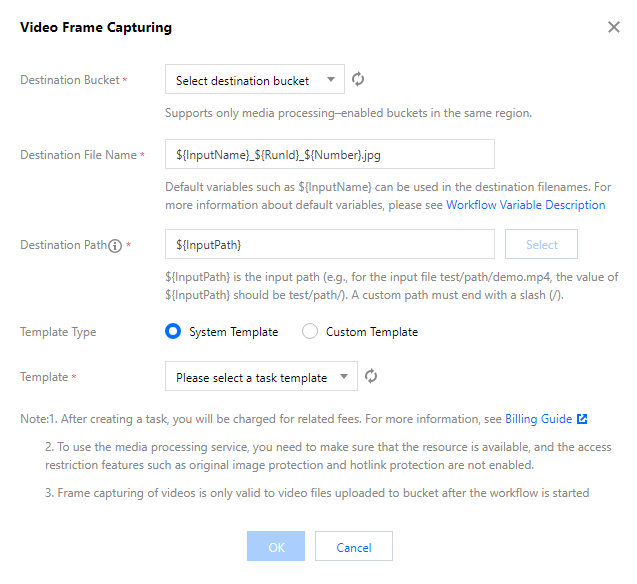
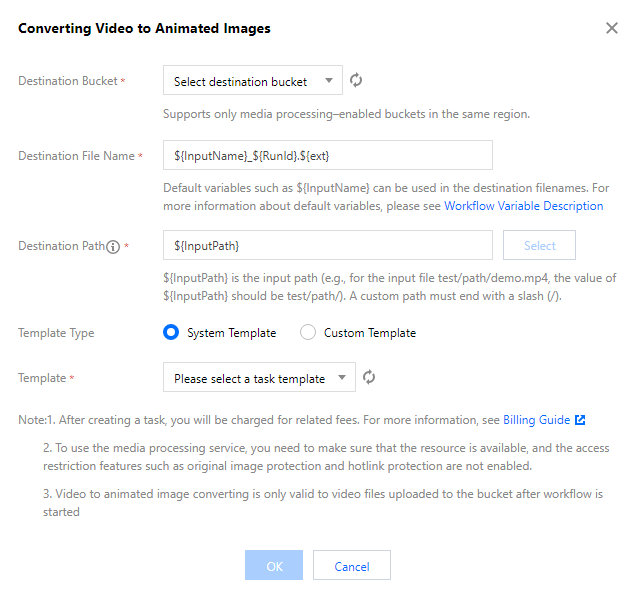
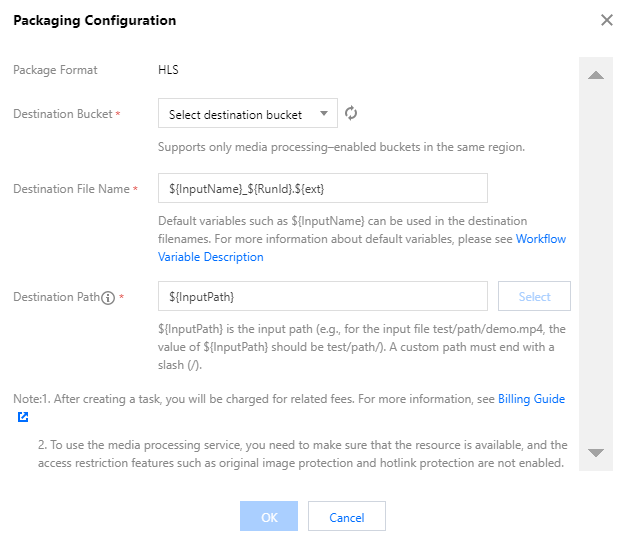
Configure Workflow: Click + on the right to add any of the following nodes: audio/video transcoding (including top speed codec transcoding and broadcast media format transcoding), video frame capturing, video to animated image conversion, intelligent thumbnail, audio/video splicing, voice separation, highlights generation, HLS adaptive multi-bitrate, SDR to HDR, video enhancement, super-resolution, audio/video segmentation, custom function, and image processing. You need to configure at least one job node in a workflow and set the destination bucket, filename (see Workflow Variable Description), path, and job template for each job node. For more information on templates and how to set them, see Template.
Audio/Video transcoding
Video frame capturing
Video-to-animated image conversion
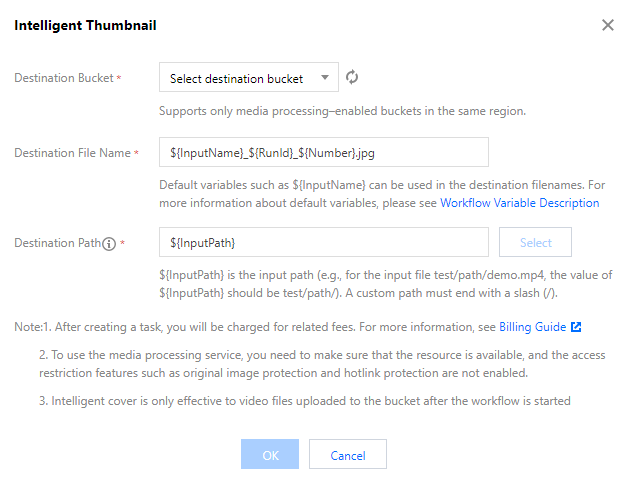
Intelligent thumbnail
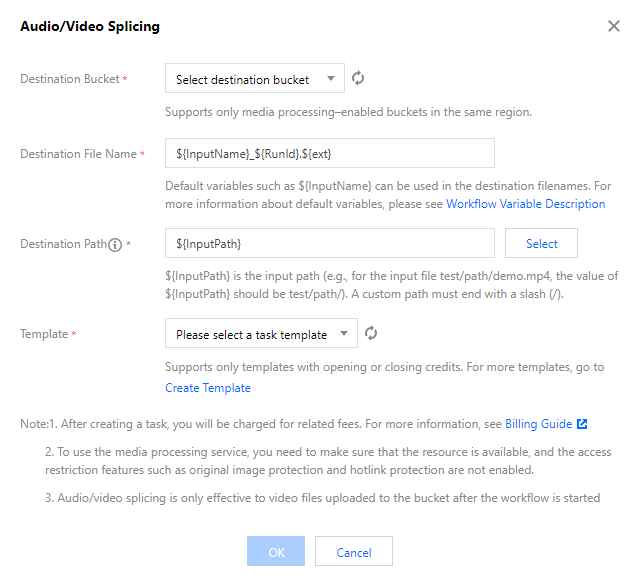
Audio/Video splicing
Description: The intelligent thumbnail feature understands the video content with the aid of Tencent Cloud's advanced AI technologies to intelligently extract three optimal keyframes.
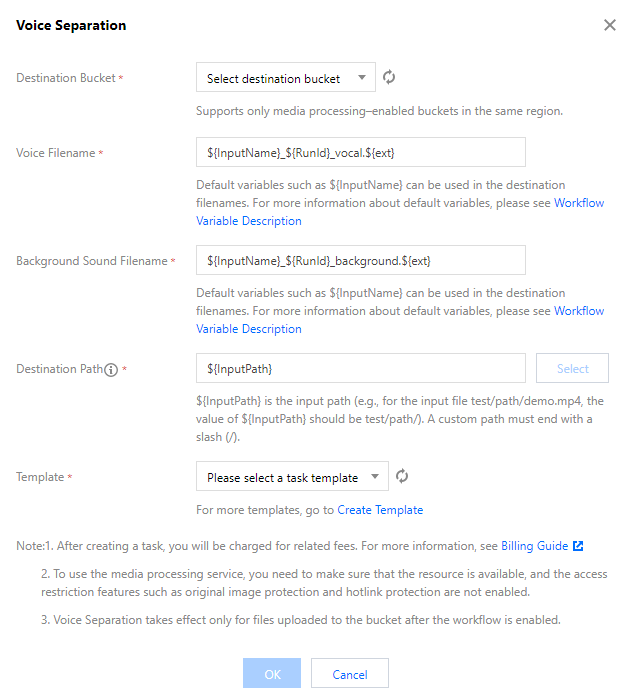
Voice separation
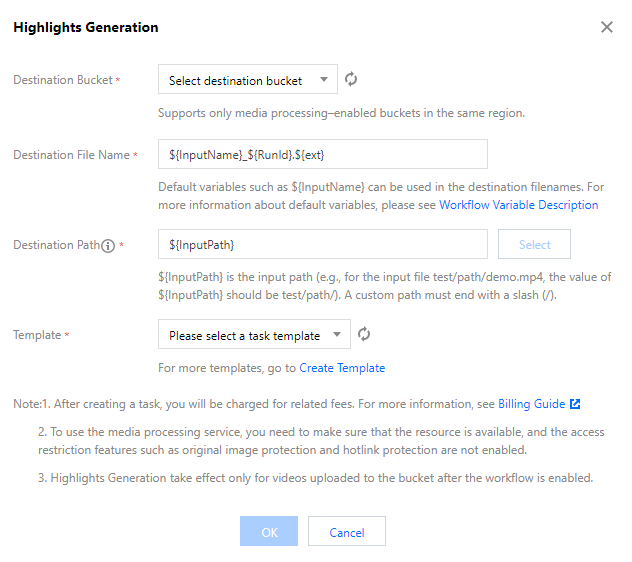
Highlights generation
Adaptive bitrate streaming
SDRtoHDR
Description: The HLS adaptive multi-bitrate feature encapsulates multiple files with multiple bitrates and audio tracks into one multi-bitrate adaptive HLS or DASH video file.
7. After confirming that the configuration is correct, click Save.
Workflows are disabled by default. To enable a workflow, click the toggle in the Enable column. Once enabled, the workflow will take effect in five minutes. Then, it will automatically perform media processing operations on video files uploaded subsequently. After processing files, it will output the new generated files to the specified file path.
Managing workflow
You can view the list of created workflows on the workflow management page.
The workflow list displays the names, IDs, input paths, creation times, and statuses of workflows. You can search for workflows by name and ID to view, edit, or delete specified workflows.
Enable: Once a workflow is enabled, video files uploaded to the specified path in the input bucket will be automatically processed according to the workflow configuration. You can click the toggle again to pause the workflow.
Note:
Workflows are disabled by default. To enable a workflow, click the toggle in the Enable column. Once enabled, the workflow will take effect in 5 minutes.
Details: You can view the configuration details of the current workflow.
View Execution Instance: You can view the workflow execution status and time by time.
More:
Click More > Edit in the Operation column to enter the Edit Workflow page, where you can modify the workflow configuration.
Click More > Delete in the Operation column to delete the workflow.
Note:
You cannot edit or delete an enabled workflow.
Viewing execution instance
An execution instance will be generated after a workflow is executed for each video file. The execution instance page displays the source file address, workflow execution status, and execution time.
1. Go to the workflow management page and click View Execution Instance in the Operation column of the target workflow to enter the execution instance list page.
2. On the list page, click Details in the Operation column of the target instance to enter the instance details page.
3. On the instance details page, you can view the job ID, execution status, start time, and end time of each workflow node.
Triggering workflow
After a workflow is created, it can be automatically triggered for files uploaded to the specified bucket or manually triggered for existing files in the bucket.
1. On the workflow management page, click More > Create Execution Instance of the target workflow.
2. On the Create Execution Instance page, select the file for which to trigger the workflow and click Save to immediately trigger and execute the workflow.
You can view the workflow execution status on the execution instance page.
Workflow Variable Description
Workflows support rendering destination file names and URLs with the following variables:
Variable Name
Description
InputName
Filename of the input file (without file extension)
InputNameAndExt
Filename of the input file (with file extension)
InputPath
File input path
RunId
Execution instance ID
Ext
Destination file format
Number
Destination file number
Sample
If the names of your input files are test1.mp4 and test2.mp4, and you want to convert them to the FLV format (the final filenames will be test1.flv and test2.flv), then set the parameter format of the destination filename to ${InputName}.${Ext}.
If the parameter format of the destination filename is set to ${InputNameAndExt}_${RunId}.${Ext}:
When the workflow generates two instances (000001 and 000002) during execution, the final filenames will be test1.mp4_000001.flv and test2.mp4_000002.flv.