Android
最后更新时间:2025-11-18 18:59:00
TUIKit 是基于 IM SDK 的一款 UI 组件库,可通过 UI 组件快速实现聊天、会话、搜索、关系链、群组等功能。本文介绍如何快速集成 TUIKit 并实现核心功能。
关键概念
经典版 UI:从 5.7.1435 版本开始,TUIKit 支持模块化集成,支持了经典版 UI(类微信 UI)。
简约版 UI:从 6.9.3557 版本开始,TUIKit 新增了全新的简约版 UI(类 WhatsApp UI)。
注意:
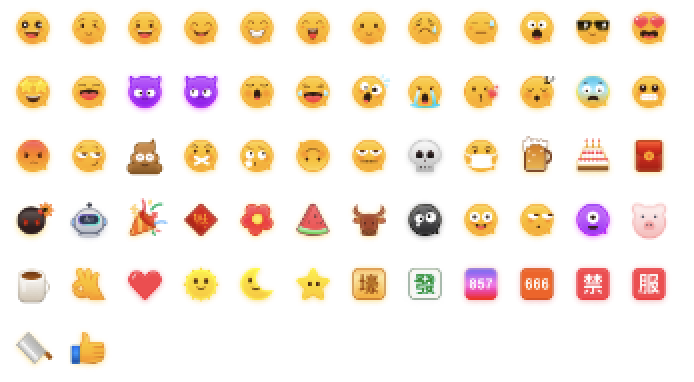
为尊重表情设计版权,Chat Demo/TUIKit 工程中不包含大表情元素切图,正式上线商用前请您替换为自己设计或拥有版权的其他表情包。下图所示默认的小黄脸表情包版权归腾讯云所有,您可以通过升级至 Chat 专业版 Plus 和企业版 免费使用该表情包。


前提条件
Android Studio 2022.3.1 及之后的版本
Android 5.0 及以上真机或模拟器
一个有效的腾讯云账号及 Chat 应用。可参考开通服务从控制台获取以下信息:
SDKAppID:App 在控制台获取的 Chat 应用的 ID,为应用的唯一标识
SDKSecretKey:应用的密钥
版本兼容性说明:
为确保构建环境稳定,请严格遵循官方兼容性要求进行配置:
Gradle、Android Gradle Plugin、JDK 与 Android Studio 的兼容性,请参阅 Android 官方文档:版本说明
Kotlin、Android Gradle Plugin 与 Gradle 的版本映射关系,请参阅 Kotlin 官方文档:Kotlin-Gradle 插件兼容性
我们建议您根据上述指南,选择与项目要求完全匹配的版本组合。
集成 TUIKit
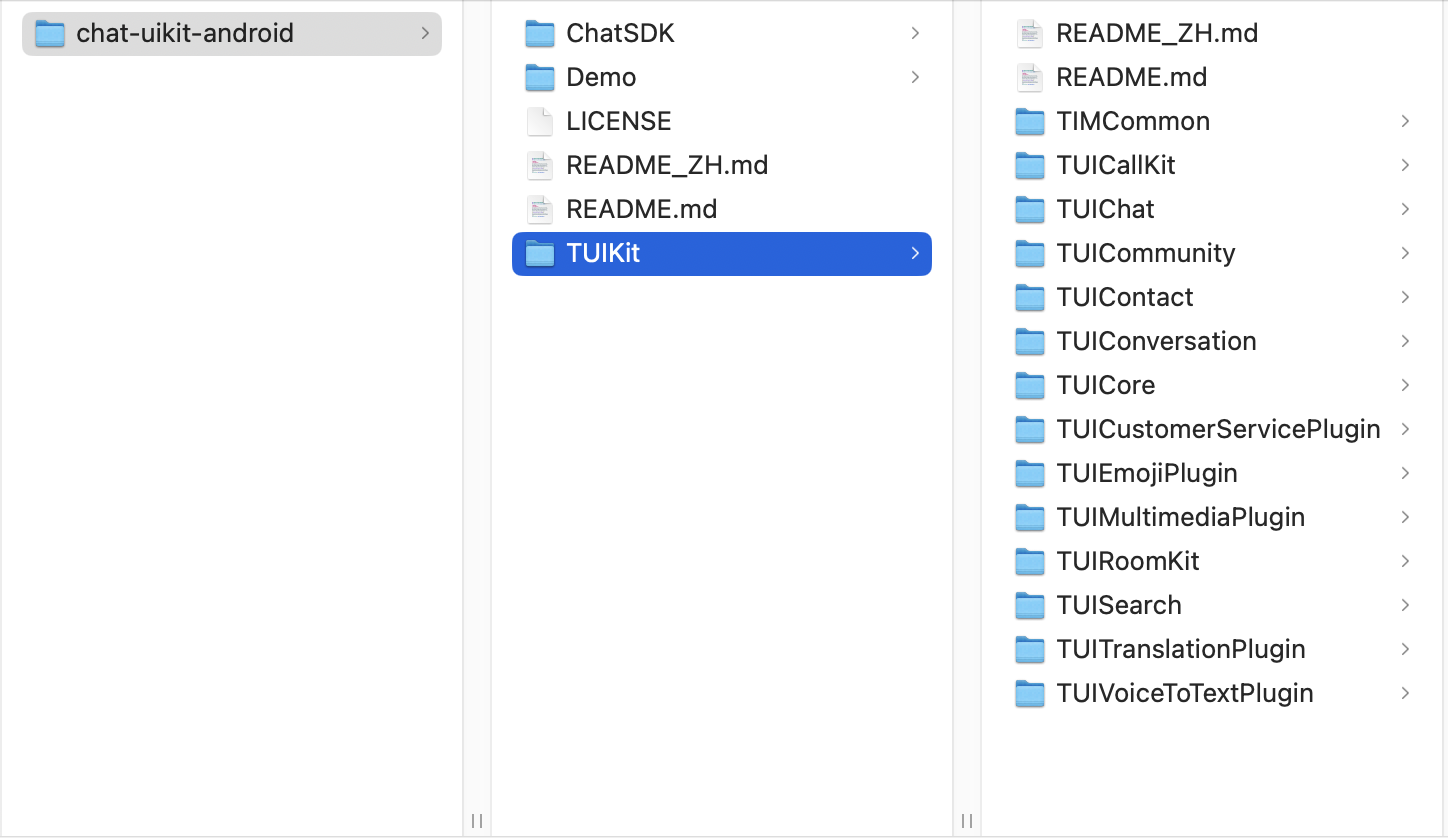
1. 从 GitHub 下载 Android TUIKit 源码,将 TUIKit 目录复制到您的工程目录下:

2. 根据实际业务需求在 settings.gradle 中添加对应的 TUI 组件。TUI 组件之间相互独立,添加或删除均不影响工程编译。
说明:
TUIKit 可以放在任何位置,只要在 settings.gradle 中正确设置相对路径即可。
// Include the upper-layer app moduleinclude ':app'// Include the internal communication module (required module)include ':tuicore'project(':tuicore').projectDir = new File(settingsDir, '../TUIKit/TUICore/tuicore')// Include the common module of IM component (required module)include ':timcommon'project(':timcommon').projectDir = new File(settingsDir, '../TUIKit/TIMCommon/timcommon')// Include the chat feature module (basic feature module)include ':tuichat'project(':tuichat').projectDir = new File(settingsDir, '../TUIKit/TUIChat/tuichat')// Include the relationship chain feature module (basic feature module)include ':tuicontact'project(':tuicontact').projectDir = new File(settingsDir, '../TUIKit/TUIContact/tuicontact')// Include the conversation list feature module (basic feature module)include ':tuiconversation'project(':tuiconversation').projectDir = new File(settingsDir, '../TUIKit/TUIConversation/tuiconversation')// Include the search feature module (To use this module, you need to purchase the Pro edition 、Pro Plus edition or Enterprise edition)include ':tuisearch'project(':tuisearch').projectDir = new File(settingsDir, '../TUIKit/TUISearch/tuisearch')// Include the community topic feature module (To use this module, you need to purchase the Pro edition 、Pro Plus edition or Enterprise edition)include ':tuicommunity'project(':tuicommunity').projectDir = new File(settingsDir, '../TUIKit/TUICommunity/tuicommunity')// Include the audio/video call feature moduleinclude ':tuicallkit-kt'project(':tuicallkit-kt').projectDir = new File(settingsDir, '../TUIKit/TUICallKit/tuicallkit-kt')// Include the video conference moduleinclude ':tuiroomkit'project(':tuiroomkit').projectDir = new File(settingsDir, '../TUIKit/TUIRoomKit/tuiroomkit')// Include speech-to-text plugin, supported from version 7.5include ':tuivoicetotextplugin'project(':tuivoicetotextplugin').projectDir = new File(settingsDir, '../TUIKit/TUIVoiceToTextPlugin/tuivoicetotextplugin')// Include chat message translation plugin, supported from version 7.2 (Value-added feature activation is required. Please contact Tencent Cloud sales)include ':tuitranslationplugin'project(':tuitranslationplugin').projectDir = new File(settingsDir, '../TUIKit/TUITranslationPlugin/tuitranslationplugin')// Include emoji reaction plugin, supported from version 7.8 (To use this module, you need to purchase the Pro edition 、Pro Plus edition or Enterprise edition)include ':tuiemojiplugin'project(':tuiemojiplugin').projectDir = new File(settingsDir, '../TUIKit/TUIEmojiPlugin/tuiemojiplugin')
3. 在 app 模块的 build.gradle 中添加下列依赖:
dependencies {api project(':tuiconversation')api project(':tuicontact')api project(':tuichat')api project(':tuisearch')api project(':tuicommunity')api project(':tuicallkit-kt')api project(':tuiroomkit')// Integrate speech-to-text plugin, supported from version 7.5api project(':tuivoicetotextplugin')// Integrate translation plugin, supported from version 7.2 (Value-added feature activation is required. Please contact Tencent Cloud sales)api project(':tuitranslationplugin')// Integrate emoji reaction plugin, supported from version 7.8 (To use this module, you need to purchase the Pro edition 、Pro Plus edition or Enterprise edition)api project(':tuiemojiplugin')// Integrate group chain plugin, supported from version 7.1api 'com.tencent.imsdk:tuigroupnote-plugin:8.4.6667'// Integrate group voting plugin, supported from version 7.1api 'com.tencent.imsdk:tuipoll-plugin:8.4.6667'// Integrate session grouping plugin, supported from version 7.3api 'com.tencent.imsdk:tuiconversationgroup-plugin:8.4.6667'// Integrate session tagging plugin, supported from version 7.3api 'com.tencent.imsdk:tuiconversationmark-plugin:8.4.6667'// Integrate message push plugin, supported from version 7.6api 'com.tencent.timpush:timpush:8.4.6667'// Integrate the corresponding manufacturer's push package as neededapi 'com.tencent.timpush:fcm:8.4.6667'api 'com.tencent.timpush:xiaomi:8.4.6667'api 'com.tencent.timpush:meizu:8.4.6667'api 'com.tencent.timpush:oppo:8.4.6667'api 'com.tencent.timpush:vivo:8.4.6667'api 'com.tencent.timpush:huawei:8.4.6667'api 'com.tencent.timpush:honor:8.4.6667'}
4. 在 app 目录下找到 AndroidManifest.xml 文件,在 application 节点中添加
tools:replace="android:allowBackup",覆盖组件内的设置,使用自己的设置。// app/src/main/AndroidManifest.xml<applicationandroid:name=".BaseApplication"android:allowBackup="false"android:icon="@drawable/app_ic_launcher"android:label="@string/app_name"android:largeHeap="true"android:theme="@style/AppTheme"tools:replace="android:allowBackup">
5. 添加 maven 仓库。
// settings.gradlepluginManagement {repositories {google()mavenCentral()gradlePluginPortal()maven { url "https://mirrors.tencent.com/nexus/repository/maven-public" }maven { url "https://developer.huawei.com/repo" }maven { url "https://developer.hihonor.com/repo" }}}dependencyResolutionManagement {repositories {mavenCentral()maven { url "https://mirrors.tencent.com/nexus/repository/maven-public/" }maven { url "https://mirrors.tencent.com/repository/maven/liteavsdk/" }maven { url "https://developer.huawei.com/repo/" }maven { url "https://developer.hihonor.com/repo" }}}
// settings.gradle.ktspluginManagement {repositories {google()mavenCentral()gradlePluginPortal()maven { url = uri("https://mirrors.tencent.com/nexus/repository/maven-public") }maven { url = uri("https://developer.huawei.com/repo") }maven { url = uri("https://developer.hihonor.com/repo") }}}dependencyResolutionManagement {repositories {mavenCentral()maven { url = uri("https://mirrors.tencent.com/nexus/repository/maven-public") }maven { url = uri("https://mirrors.tencent.com/repository/maven/liteavsdk") }maven { url = uri("https://developer.huawei.com/repo") }maven { url = uri("https://developer.hihonor.com/repo") }}}
// project root build.gradlebuildscript {repositories {google()mavenCentral()maven { url "https://mirrors.tencent.com/nexus/repository/maven-public" }maven { url "https://developer.huawei.com/repo" }maven { url "https://developer.hihonor.com/repo" }}}allprojects {repositories {google()mavenCentral()maven { url "https://mirrors.tencent.com/nexus/repository/maven-public/" }maven { url "https://mirrors.tencent.com/repository/maven/liteavsdk/" }maven { url "https://developer.huawei.com/repo/" }maven { url "https://developer.hihonor.com/repo" }}}
// project root build.gradle.ktsbuildscript {repositories {google()mavenCentral()maven { url = uri("https://mirrors.tencent.com/nexus/repository/maven-public") }maven { url = uri("https://developer.huawei.com/repo") }maven { url = uri("https://developer.hihonor.com/repo") }}}allprojects {repositories {google()mavenCentral()maven { url = uri("https://mirrors.tencent.com/nexus/repository/maven-public") }maven { url = uri("https://mirrors.tencent.com/repository/maven/liteavsdk") }maven { url = uri("https://developer.huawei.com/repo") }maven { url = uri("https://developer.hihonor.com/repo") }}}
6.
配置 Kotlin 支持(可选)
如果您的项目已是 Kotlin 工程:可跳过此步。
如果您的项目尚未配置 Kotlin:请添加对应版本的 Kotlin Gradle 插件:
注意:
若需添加 Kotlin Gradle 插件,$kotlin_version 请填入具体版本号,并确保其与您项目的 Android Gradle 插件版本兼容(如 $kotlin_version 设置为 1.9.0 ,对应的 Android Gradle 插件版本是 8.6.0)。可以参考 Kotlin-Gradle 插件兼容性。
// project root build.gradlebuildscript {dependencies {classpath "org.jetbrains.kotlin:kotlin-gradle-plugin:$kotlin_version"}}
7. 配置混淆规则。
在您的 app/proguard-rules.pro 文件中添加以下混淆规则:
-dontshrink-dontoptimize-keep class com.tencent.qcloud.** { *; }-keep class com.tencent.imsdk.** { *; }-keep class * implements com.tencent.qcloud.tuicore.interfaces.TUIInitializer {}
8. Android Studio 中点击 File > Sync Project with Gradle Files 集成组件。
注意:
1. 使用本地集成方案时,如需升级时需要从 GitHub 获取最新的组件代码,覆盖您本地项目的 TUIKit 目录。
2. 当私有化修改和远端有冲突时,需要手动合并,处理冲突。
说明:
1. 源码集成 TUIKit 时,默认会集成两套版本 UI 组件。
2. 经典版和简约版 UI 不能混用,集成多个组件时,您必须同时全部选择经典版 UI 或简约版 UI。例如,经典版
TUIChat 组件必须与经典版 TUIConversation、TUIContact 组件搭配使用。同理,简约版 TUIChat 组件必须与简约版 TUIConversation、TUIContact 组件搭配使用。实现步骤
常见问题
音视频常见问题
通话邀请的超时时间默认是多久?
通话邀请的默认超时时间是 30 秒。
在邀请超时时间内,被邀请者如果离线再上线,能否立即收到邀请?
如果是单聊通话邀请,被邀请者离线再上线可以收到通话邀请,TUIKit 内部会自动唤起通话邀请界面。
如果是群聊通话邀请,被邀请者离线再上线后会自动拉取最近 30 秒内的邀请,TUIKit 会自动唤起群通话界面。
Android Studio 集成常见问题
提示 "Manifest merger failed : Attribute application@allowBackup value=(true) from AndroidManifest.xml" 如何处理?
IM SDK 中默认
allowBackup 的值为 false ,表示关闭应用的备份和恢复功能。您可以在您的
AndroidManifest.xml 文件中删除 allowBackup 属性,表示关闭备份和恢复功能;也可以在 AndroidManifest.xml 文件的 application 节点中添加 tools:replace="android:allowBackup" 表示覆盖 IM SDK 的设置,使用您自己的设置。 // app/src/main/AndroidManifest.xml<applicationandroid:name=".BaseApplication"android:allowBackup="false"android:icon="@drawable/app_ic_launcher"android:label="@string/app_name"android:largeHeap="true"android:theme="@style/AppTheme"tools:replace="android:allowBackup">
提示 "Plugin with id 'kotlin-android' not found." 如何处理?
复制 TUIKit 代码到自己的工程的模块中,使用时发生空指针等异常问题?
当您将 TUIKit 的某个模块代码复制到自己工程的某个模块目录下时,除了需要迁移 TUIKit 模块的 Manifest 文件内容外,还必须在目标模块的 build.gradle 文件中添加如下必要的依赖。这一步骤是确保 TUIKit 组件能够正确初始化的关键。如果忽略这些依赖,可能会导致空指针等异常问题。
dependencies {annotationProcessor 'com.google.auto.service:auto-service:1.1.1'}
联系我们
文档反馈

