tencent cloud

Tencent Effect SDK

Release Notes and Announcements
Release Notes
Tencent Effect SDK V3.5 Version Released
Tencent Effects SDK V3.0 Version Related API and Material Changes
Product Introduction
Overview
Features
Basic Concepts
Strengths
Use Cases
Purchase Guide
Pricing Overview
Purchase Guide
Payment Overdue and Refund
Tutorial
Demos
Free Trial License
Licenses
Adding and Renewing a License (Mobile)
Adding and Renewing a License (Desktop)
Adding and Renewing a License (Web)
FAQs
SDK Download
Features
SDK Download
Version History
SDK Integration Guide(No UI)
General Integration of Tencent Effect
Integrating Capabilities
SDK Integration Guide(Including UI)
General Integration of Tencent Effect
Integrating Tencent Effect into MLVB SDK
Integrating Tencent Effect into TRTC SDK
Integrating Tencent Effect into UGSV SDK
Virtual Avatars
API Documentation
iOS
Android
Flutter
Web
Feature Guide
Reducing SDK Size
SDK Integration Issue Troubleshooting
Performance Fine-Tuning
Effect Fine-Tuning
Material Usage
Effect Parameters
Recommended Parameters in Beautification Scenarios
UGSV Enterprise Edition Migration Guide
Integrating Tencent Effect for Third-Party Publishers (Flutter)
Integrating Beauty AR Web into Mini Programs
Tencent Effect Studio Usage
Beauty AR Web
Overview
Quick Start
SDK Integration
Parameters and APIs
Console Guide
Demos
Preset Effect List
Practical Tutorial
FAQs
FAQs
General
Technical
License
Legacy Documentation
Recommended Parameters in Beautification Scenarios
Beauty Parameters Table
One-Minute Integration of TRTC
One-Minute Integration of Live Streaming
TE SDK Policy
Privacy Policy
Data Processing And Security Agreement
Contact Us

Face-Following Sticker

PDF
Focus Mode
Font Size
Last updated: 2026-03-30 18:03:41

Introduction

The Follow component lets you attach 2D images, pag files, and other assets to specific objects on the screen. Tencent Effect currently supports tracking for faces, gestures, bodies, and cat faces. This example demonstrates face tracking; other tracking types follow similar steps.

Basic Usage

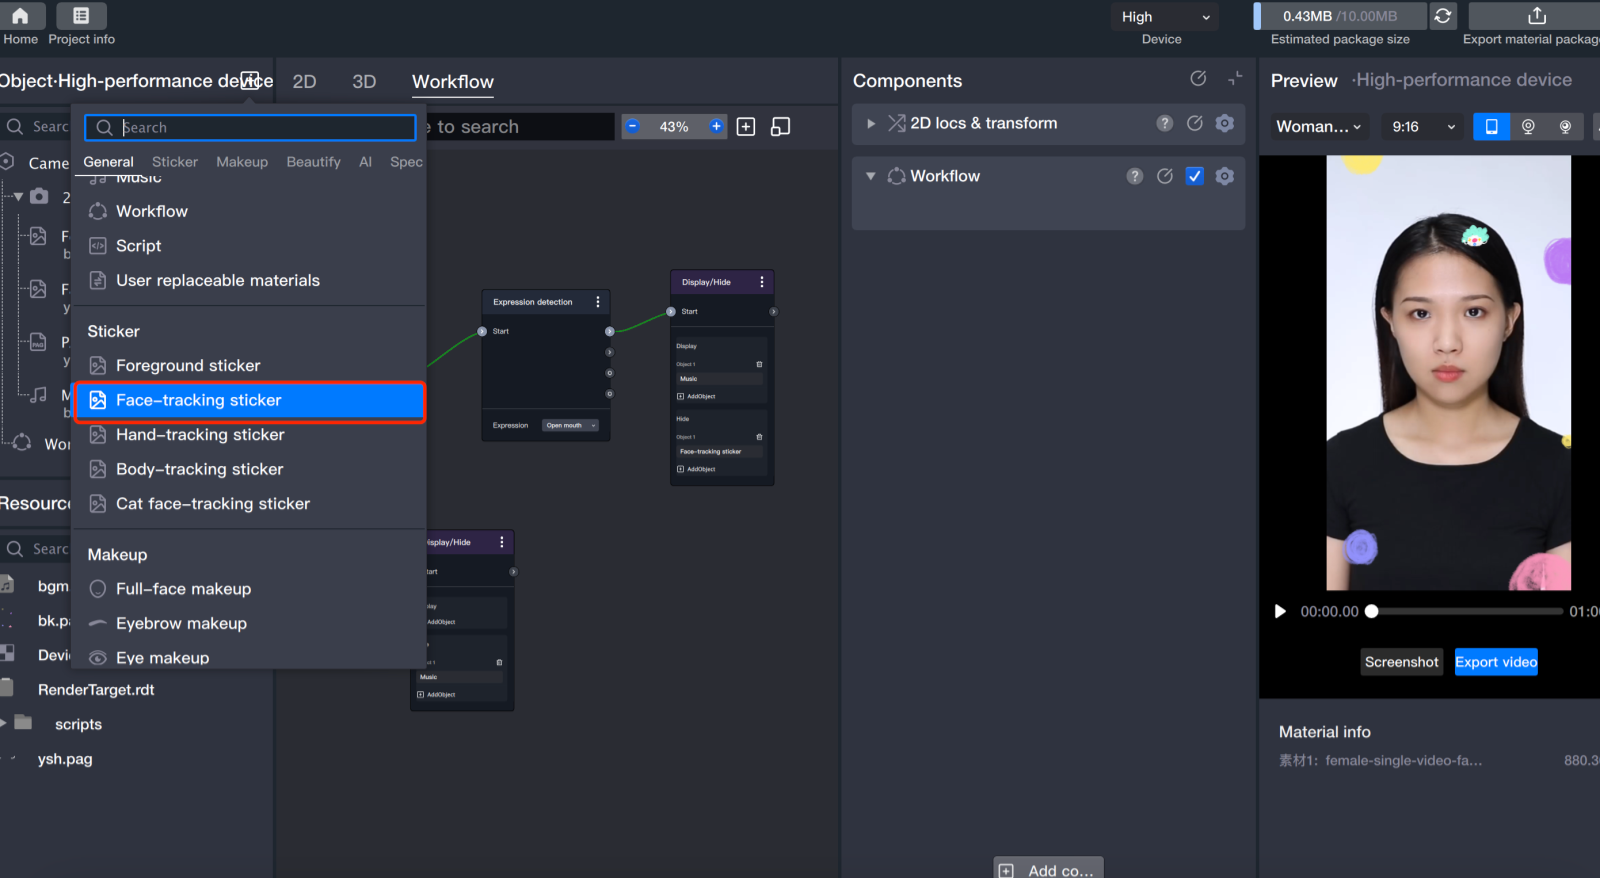
Step 1: Add a Follow Object

Add a follow object: In the Object panel, add a follow sticker.

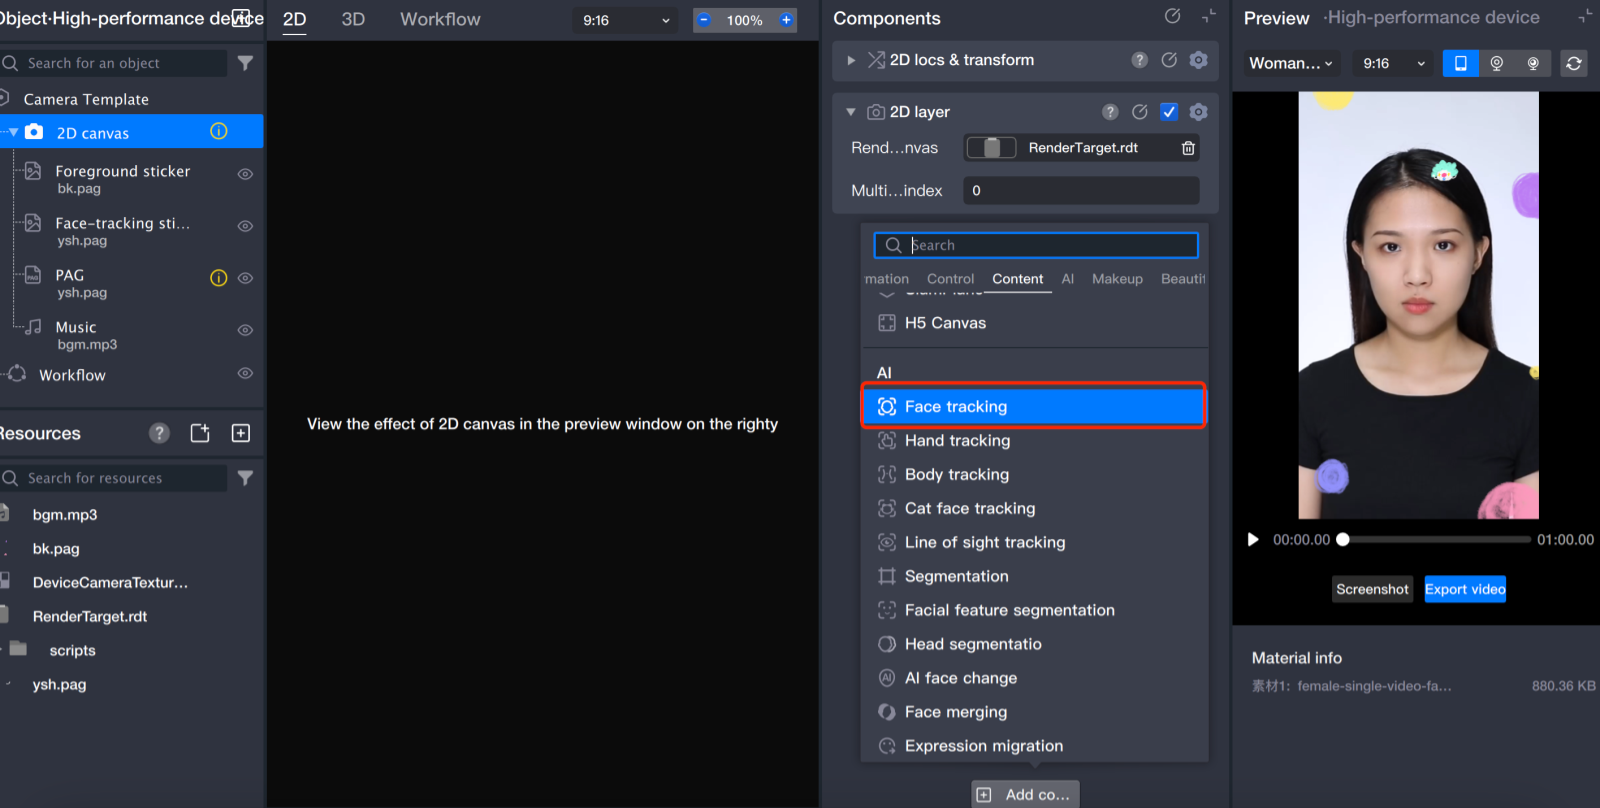
You can also add a tracking component directly:
Create or select an object, then add a tracking component to it in the Component panel.

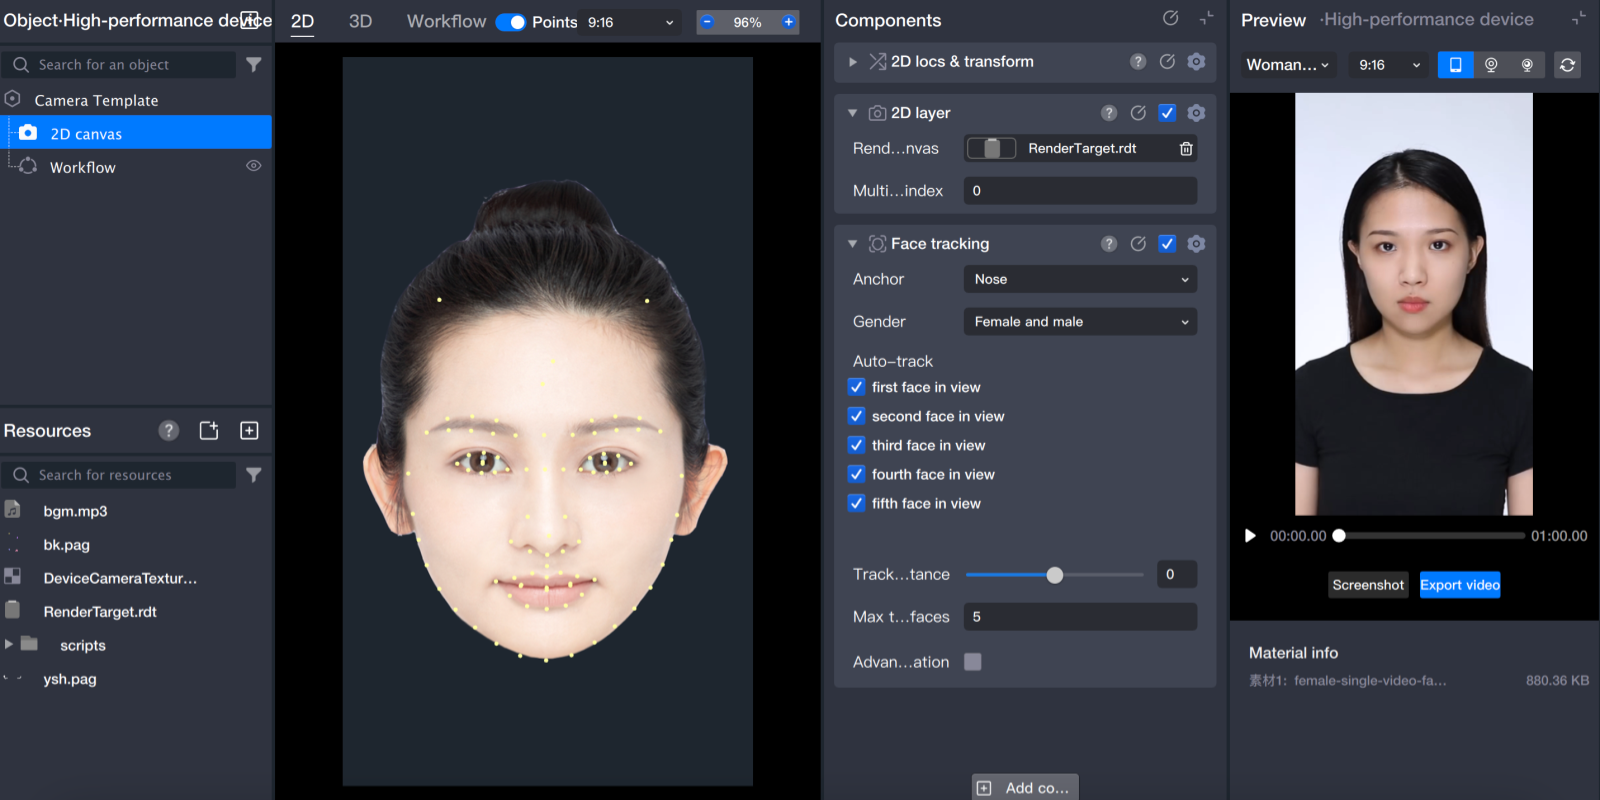
After adding any follow component, the Scene panel displays the corresponding template landmark map.


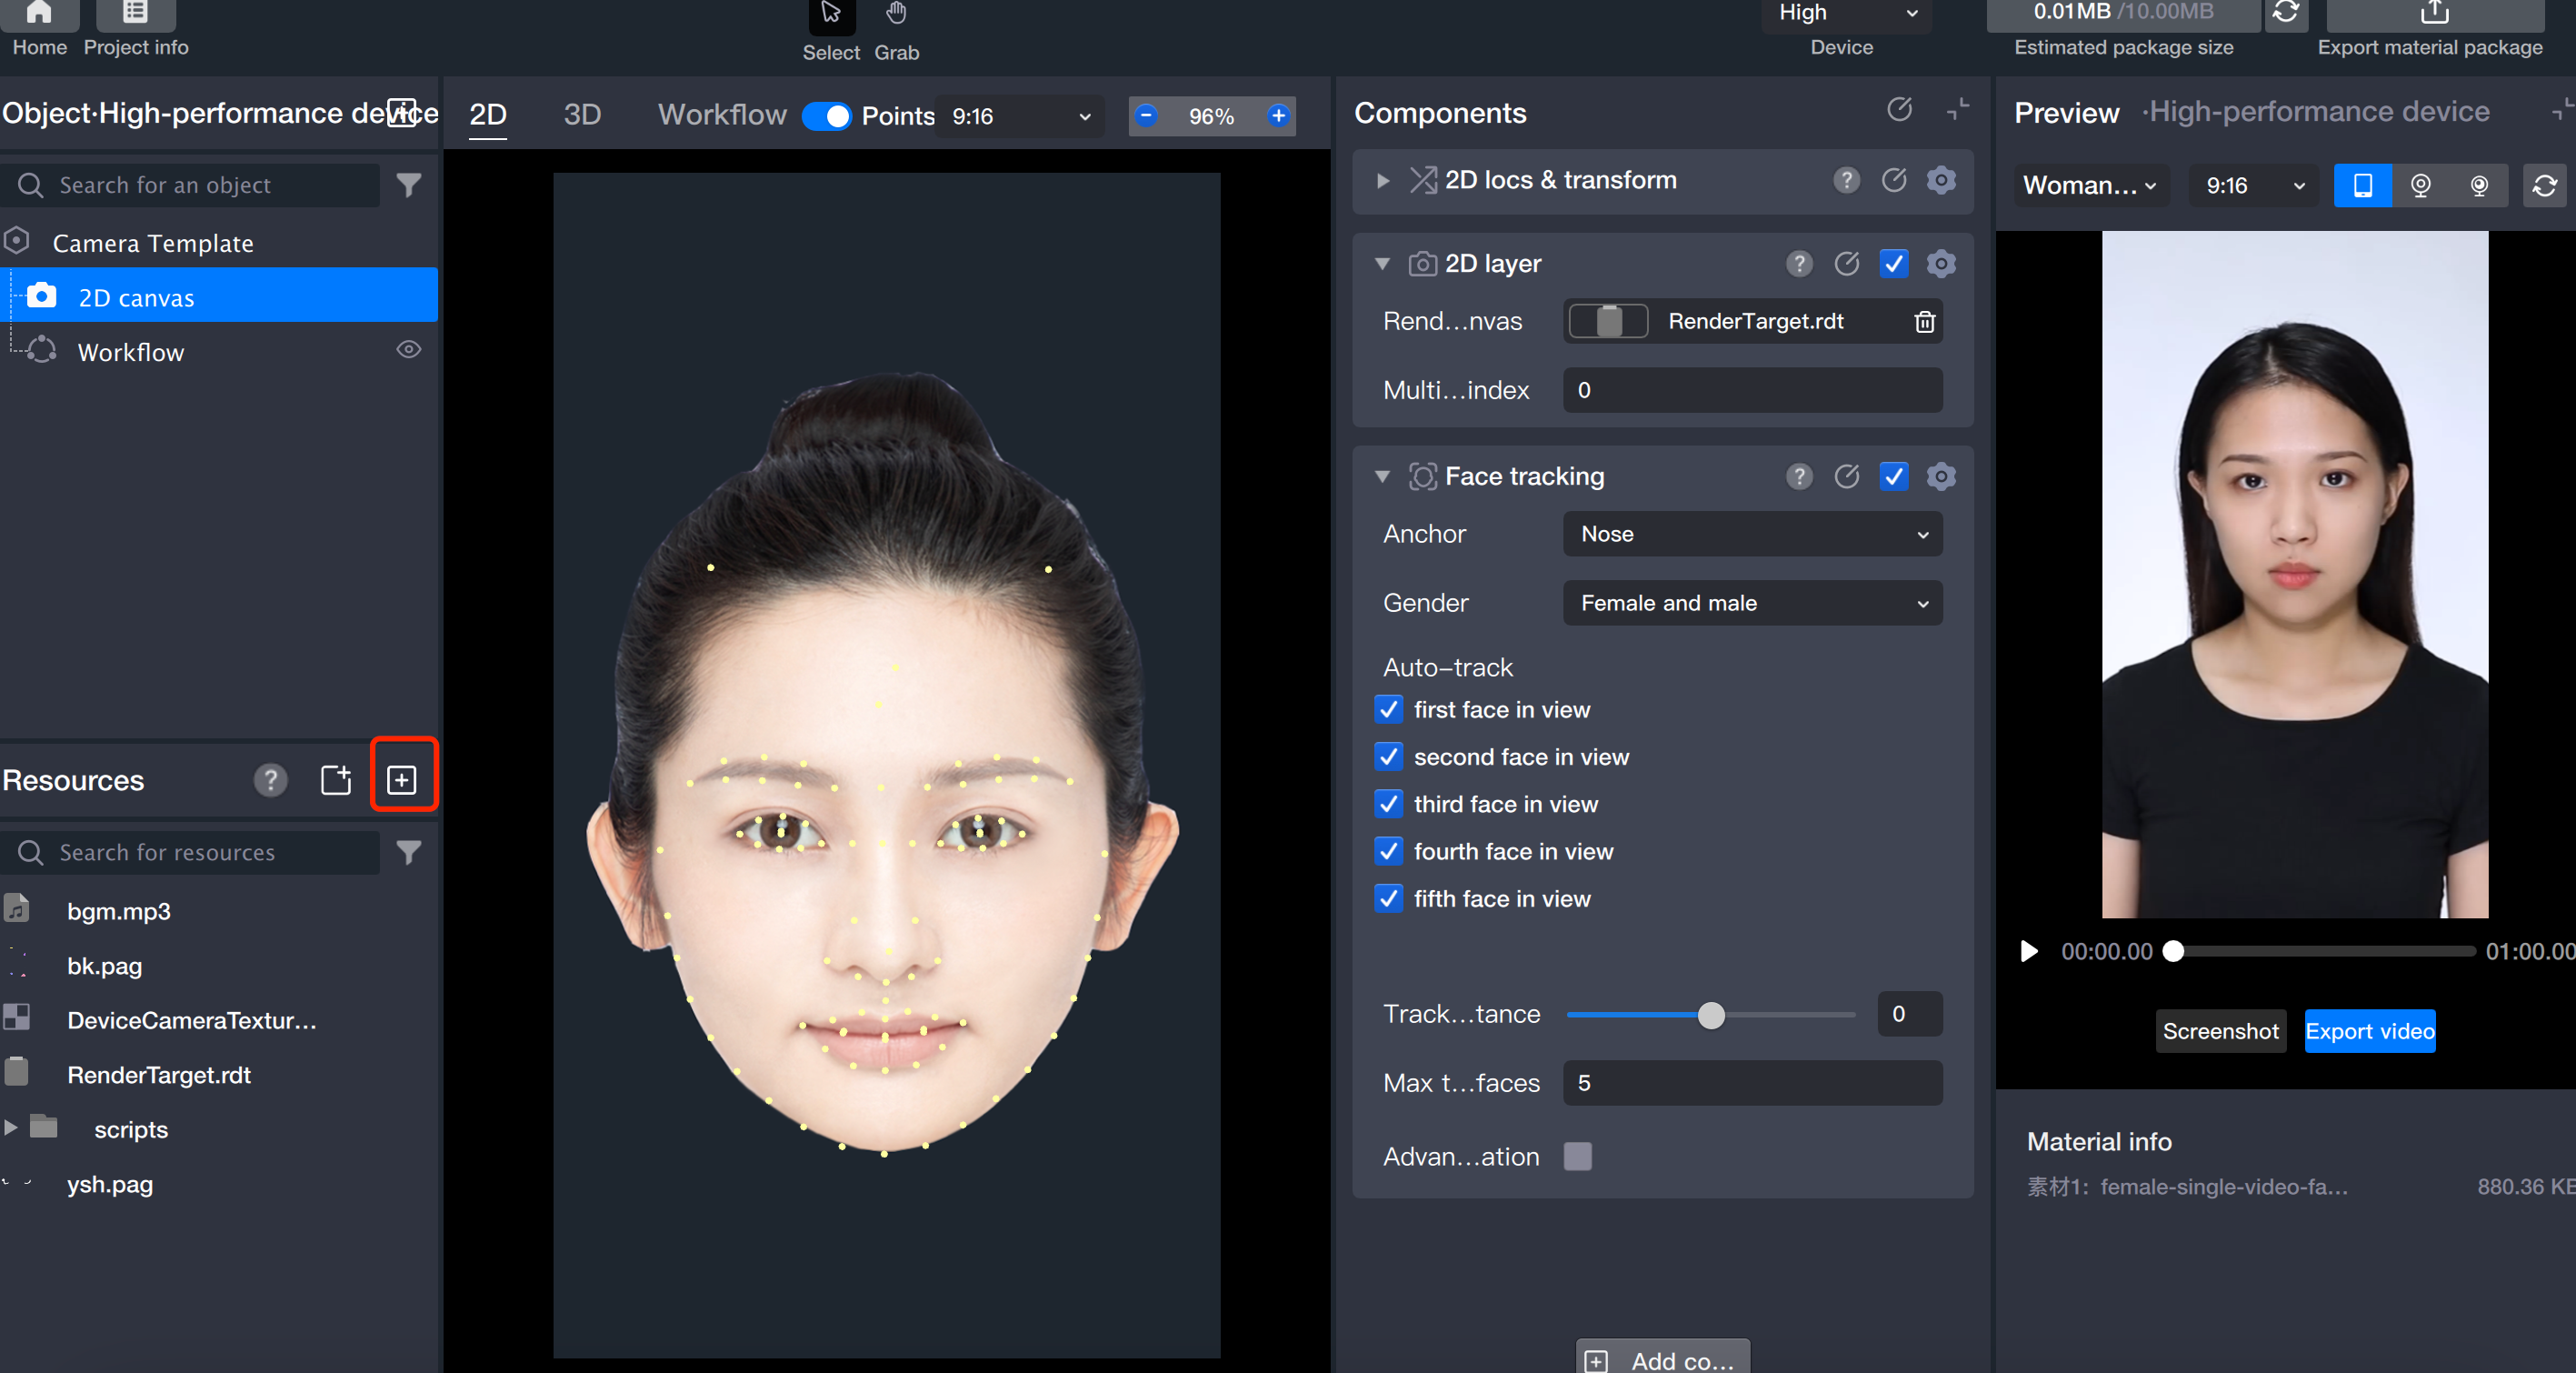
Step 2: Import Sticker Files

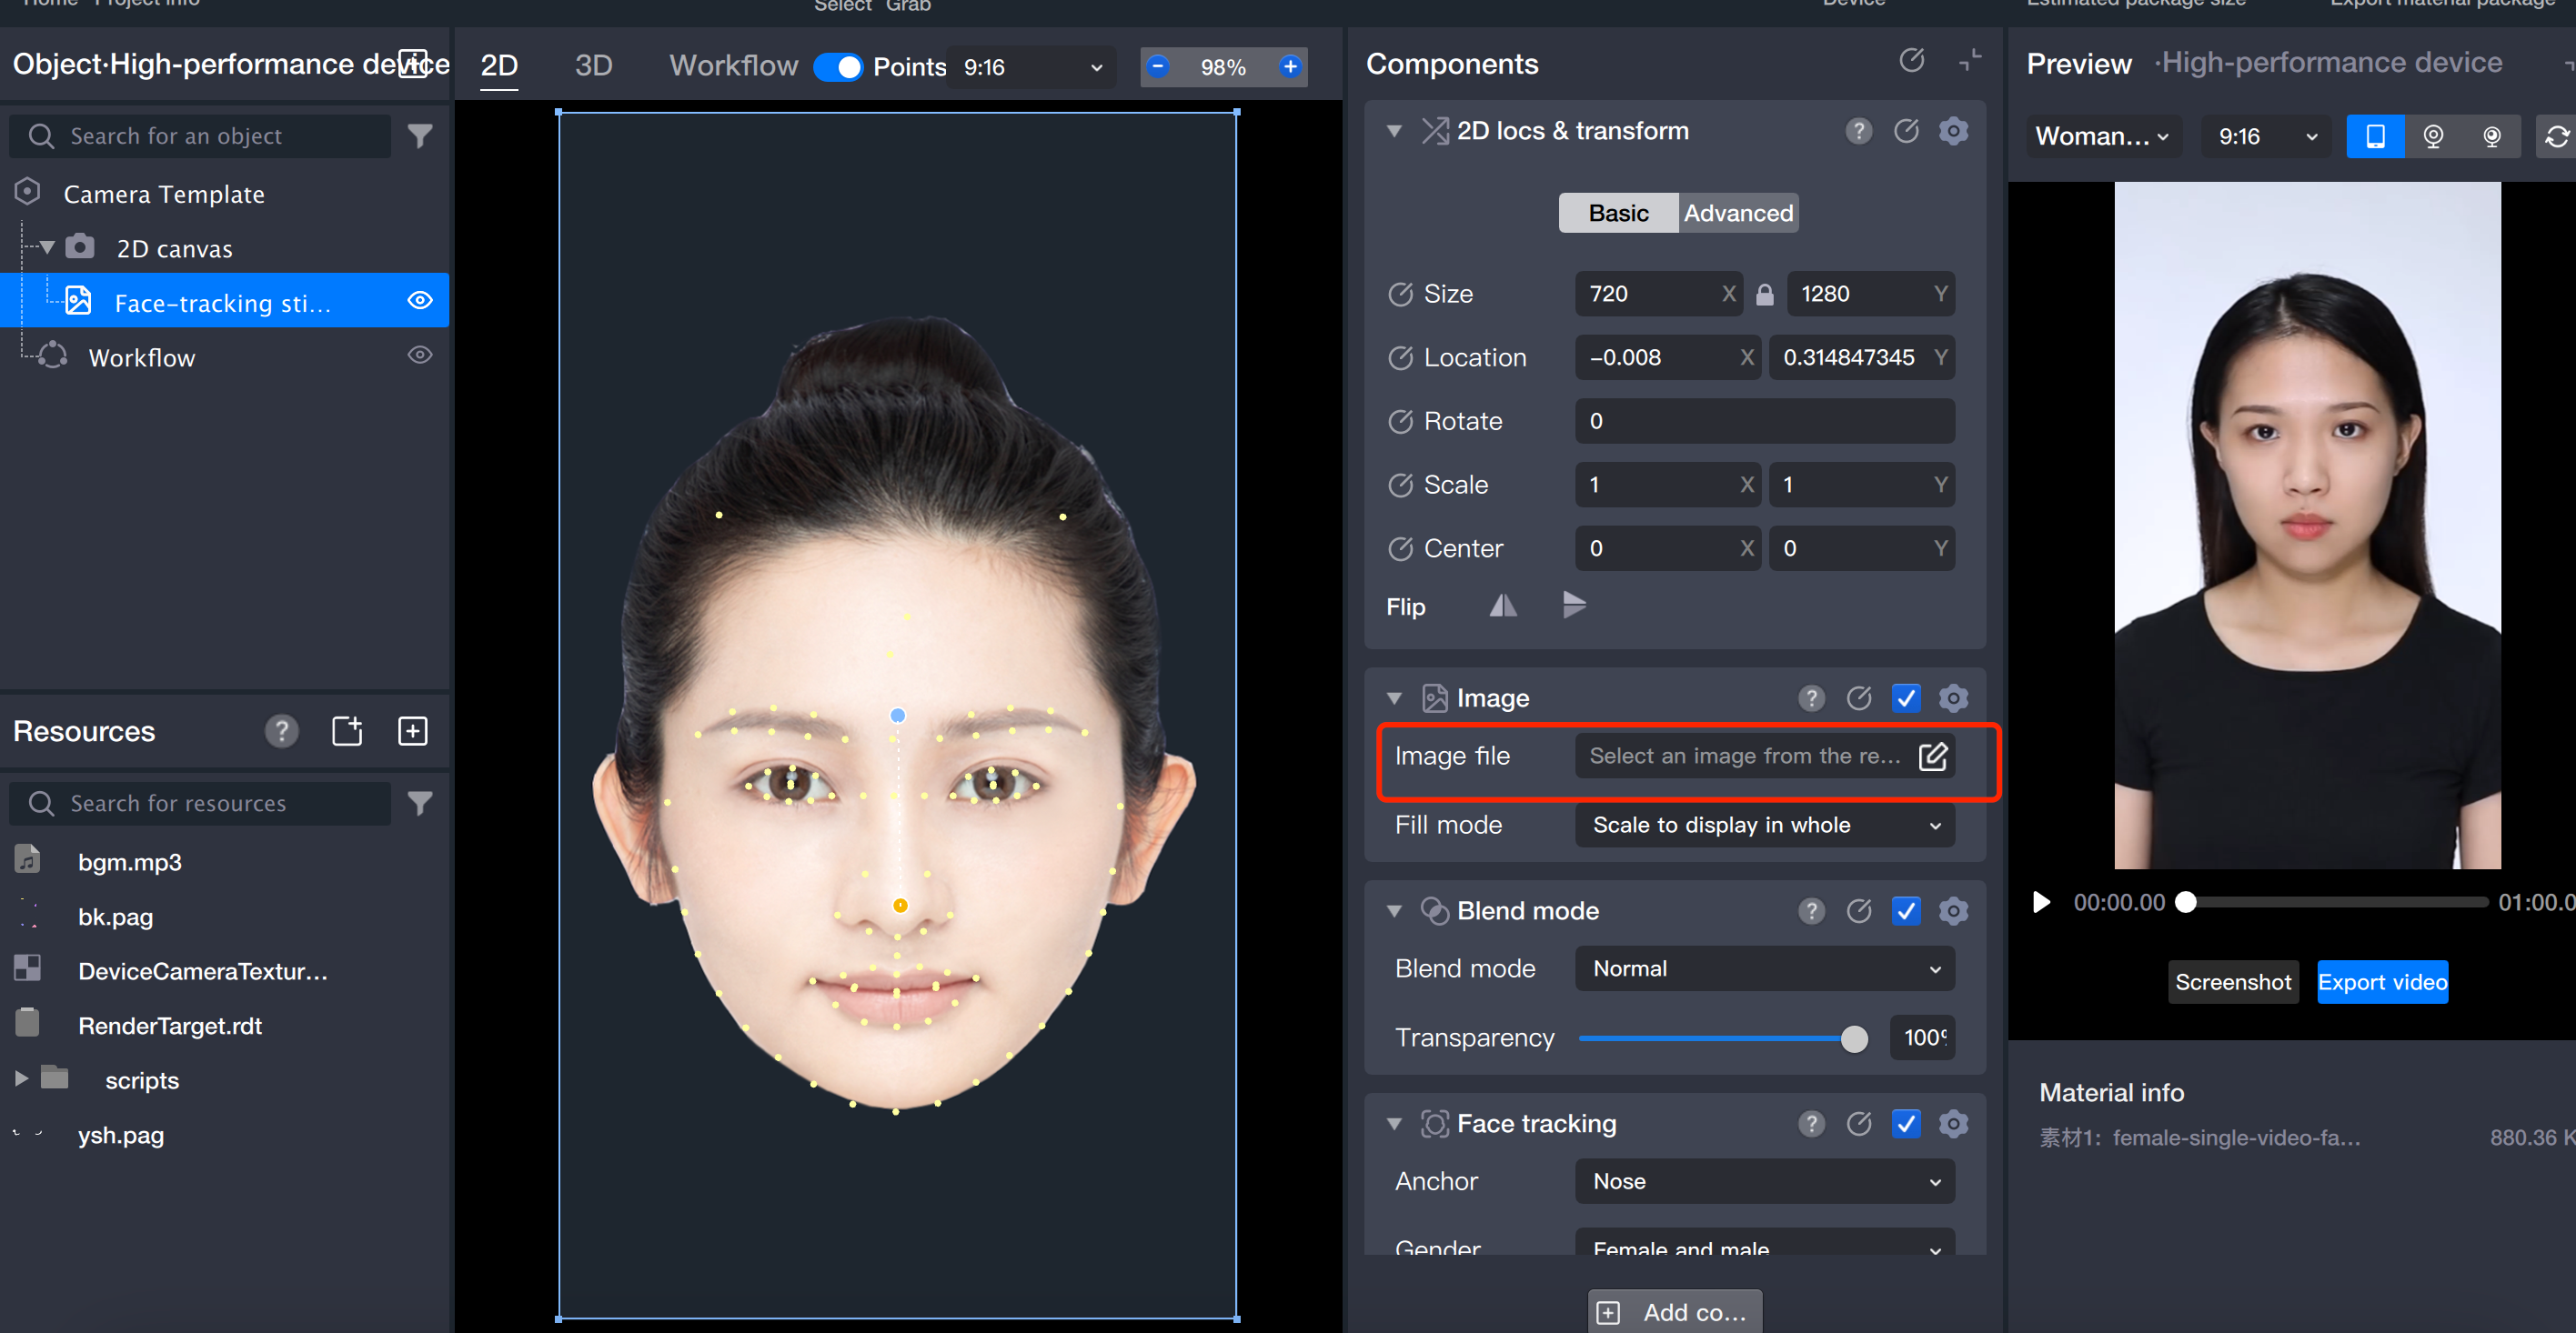
1. Click + to import external sticker files into the Resource panel.

2. In the Component panel, click the file property and select the sticker file you imported in the previous step.


Step 3: Adjust Asset Parameters
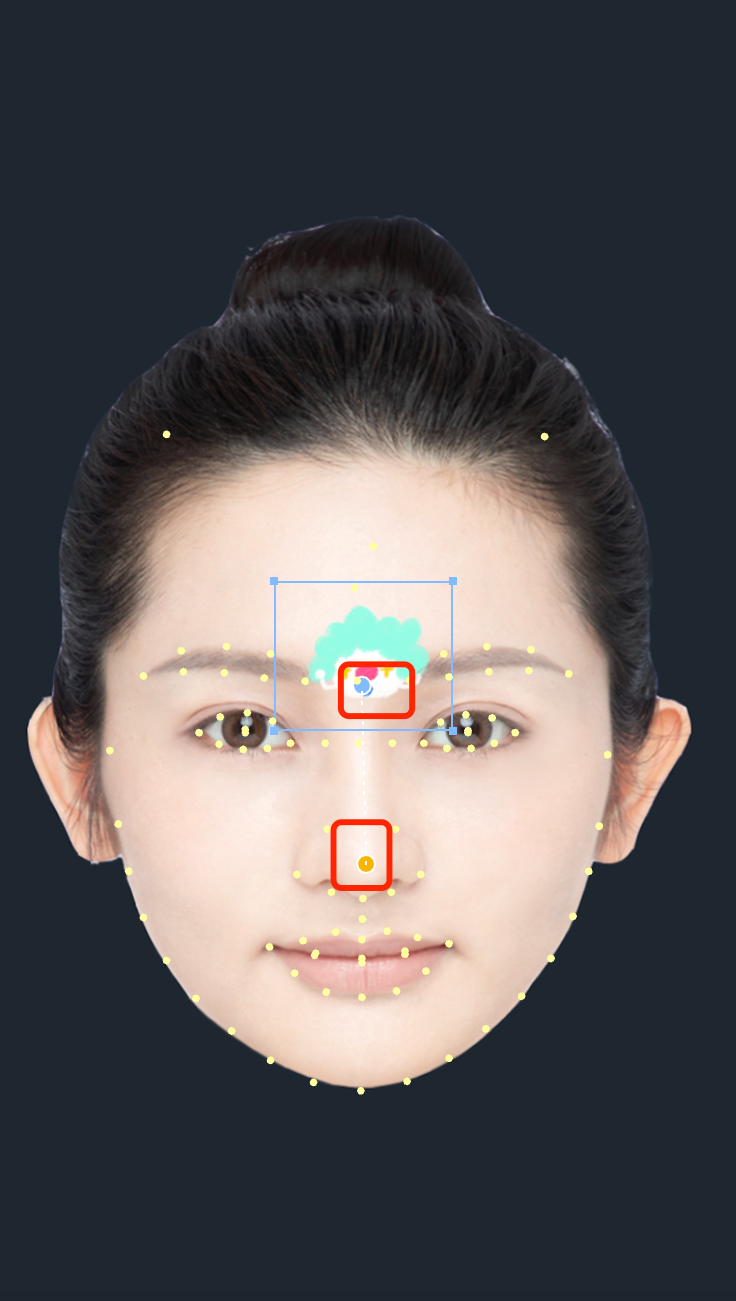
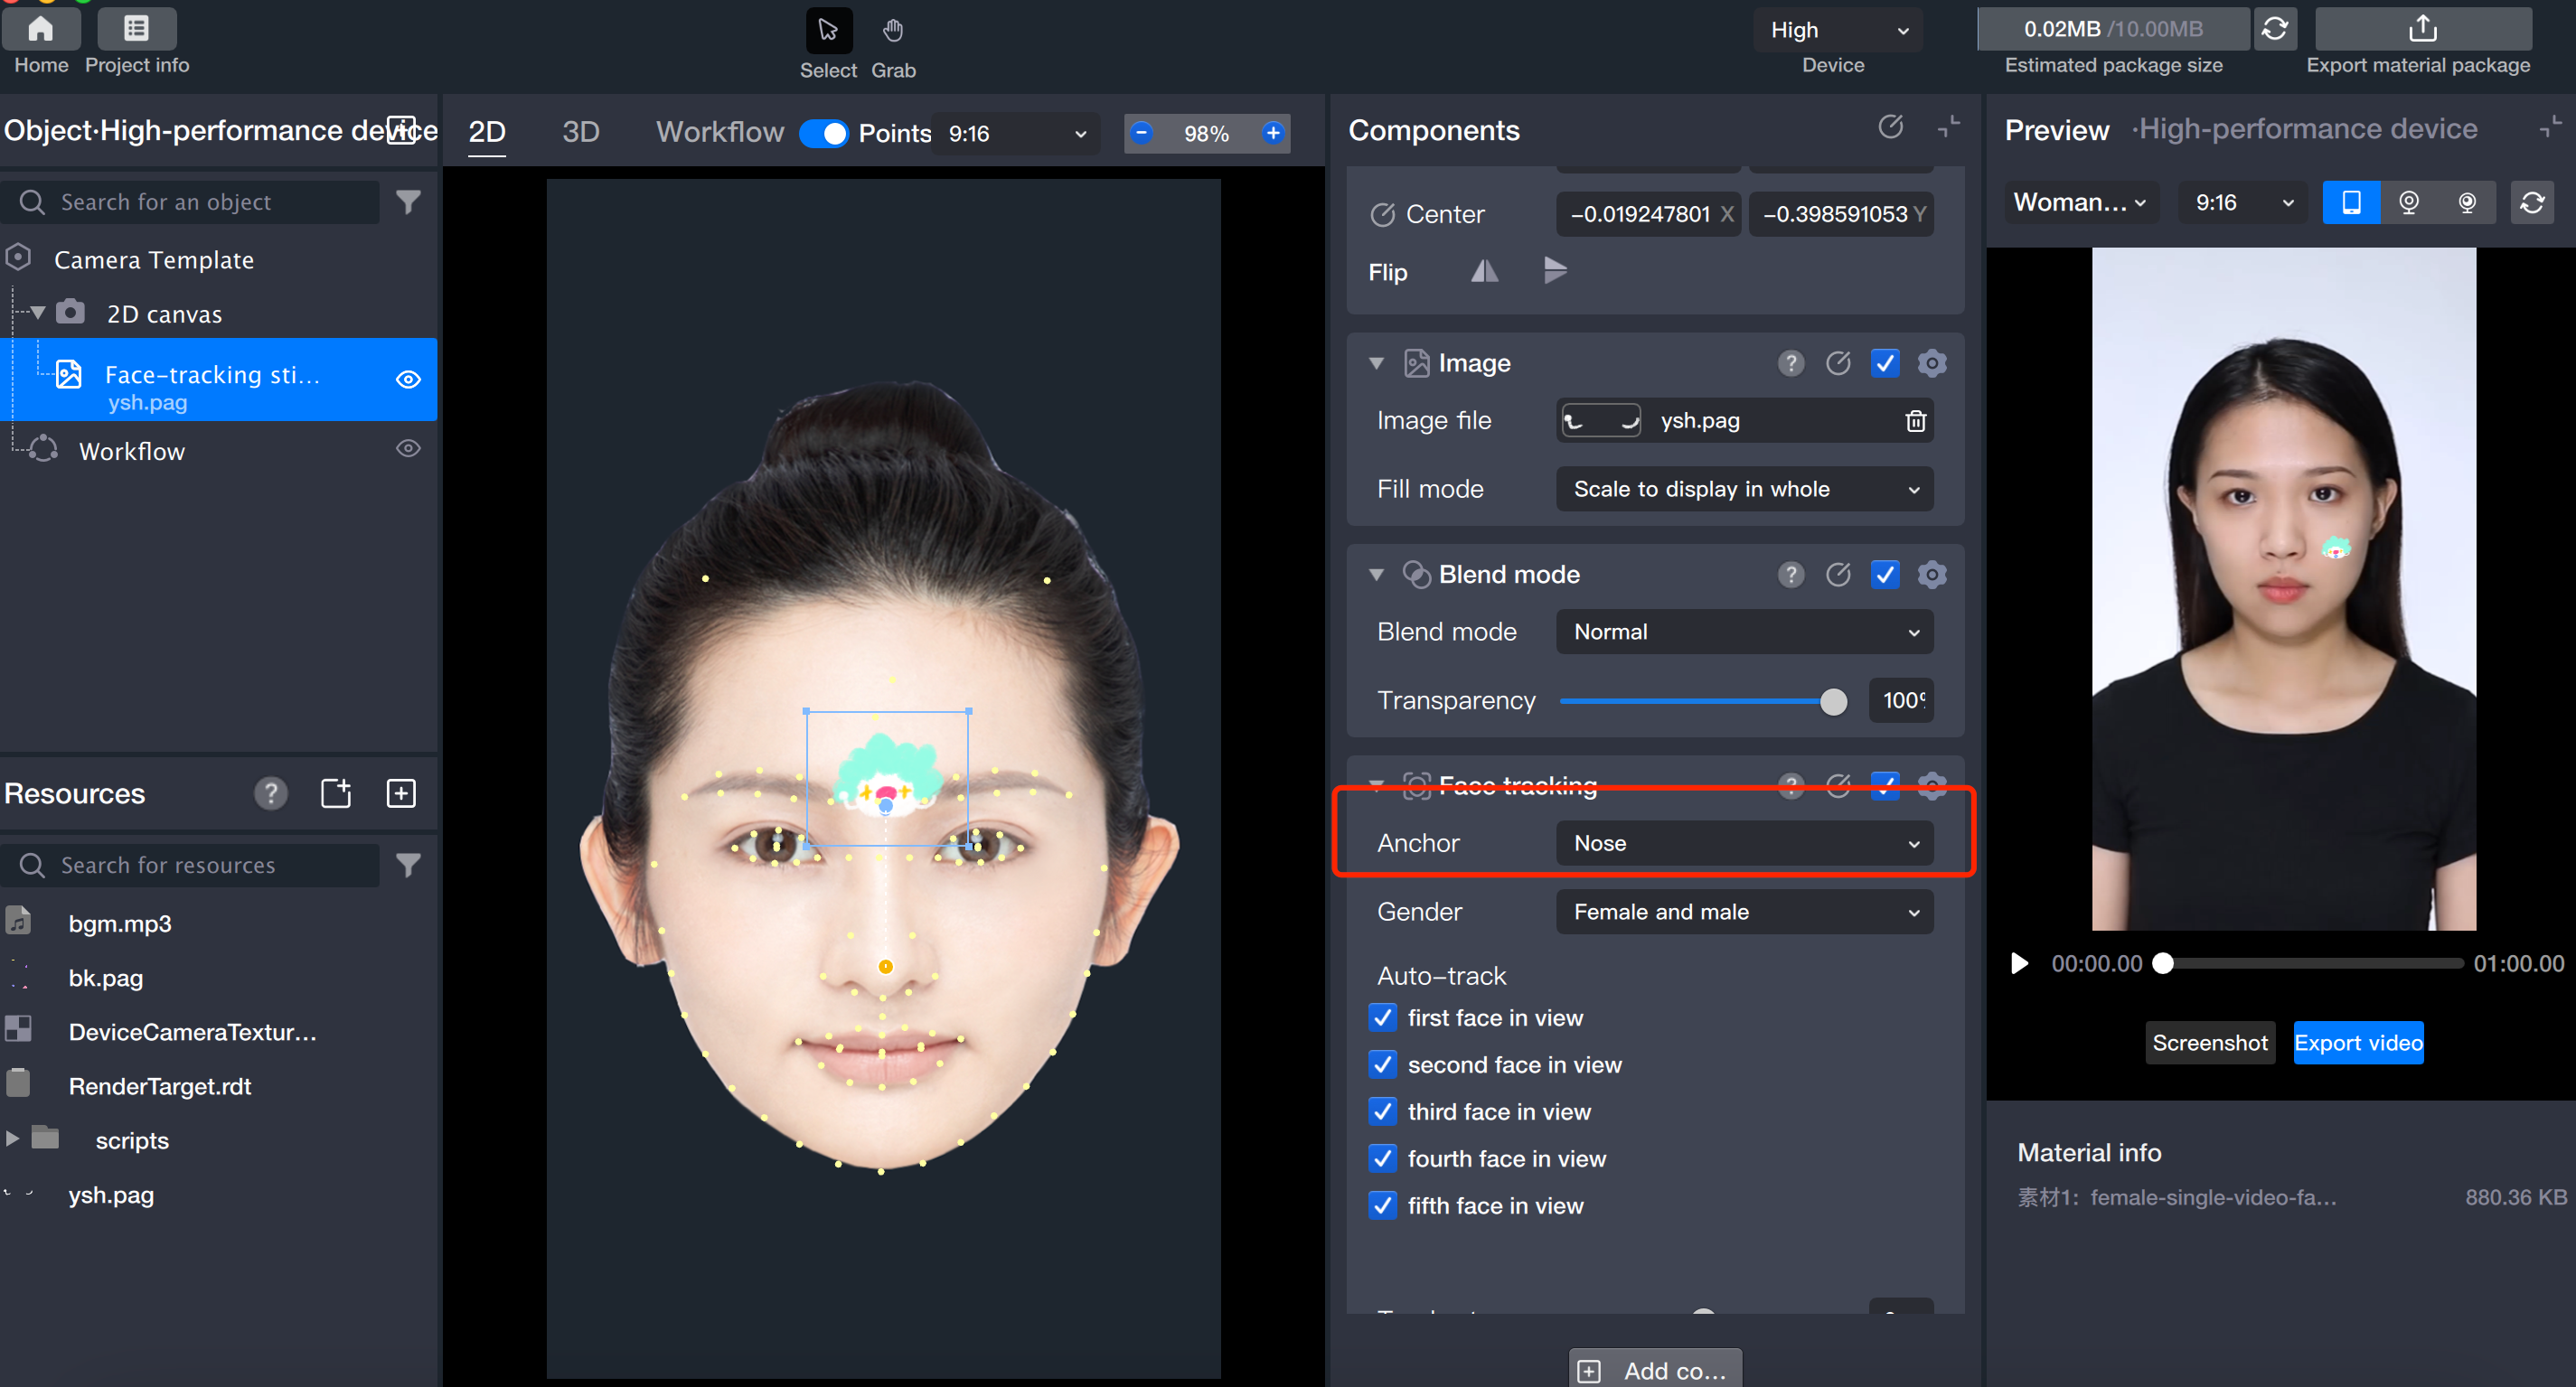
1. Bind landmarks
Drag to bind the landmark.


Adjust in the Component panel.

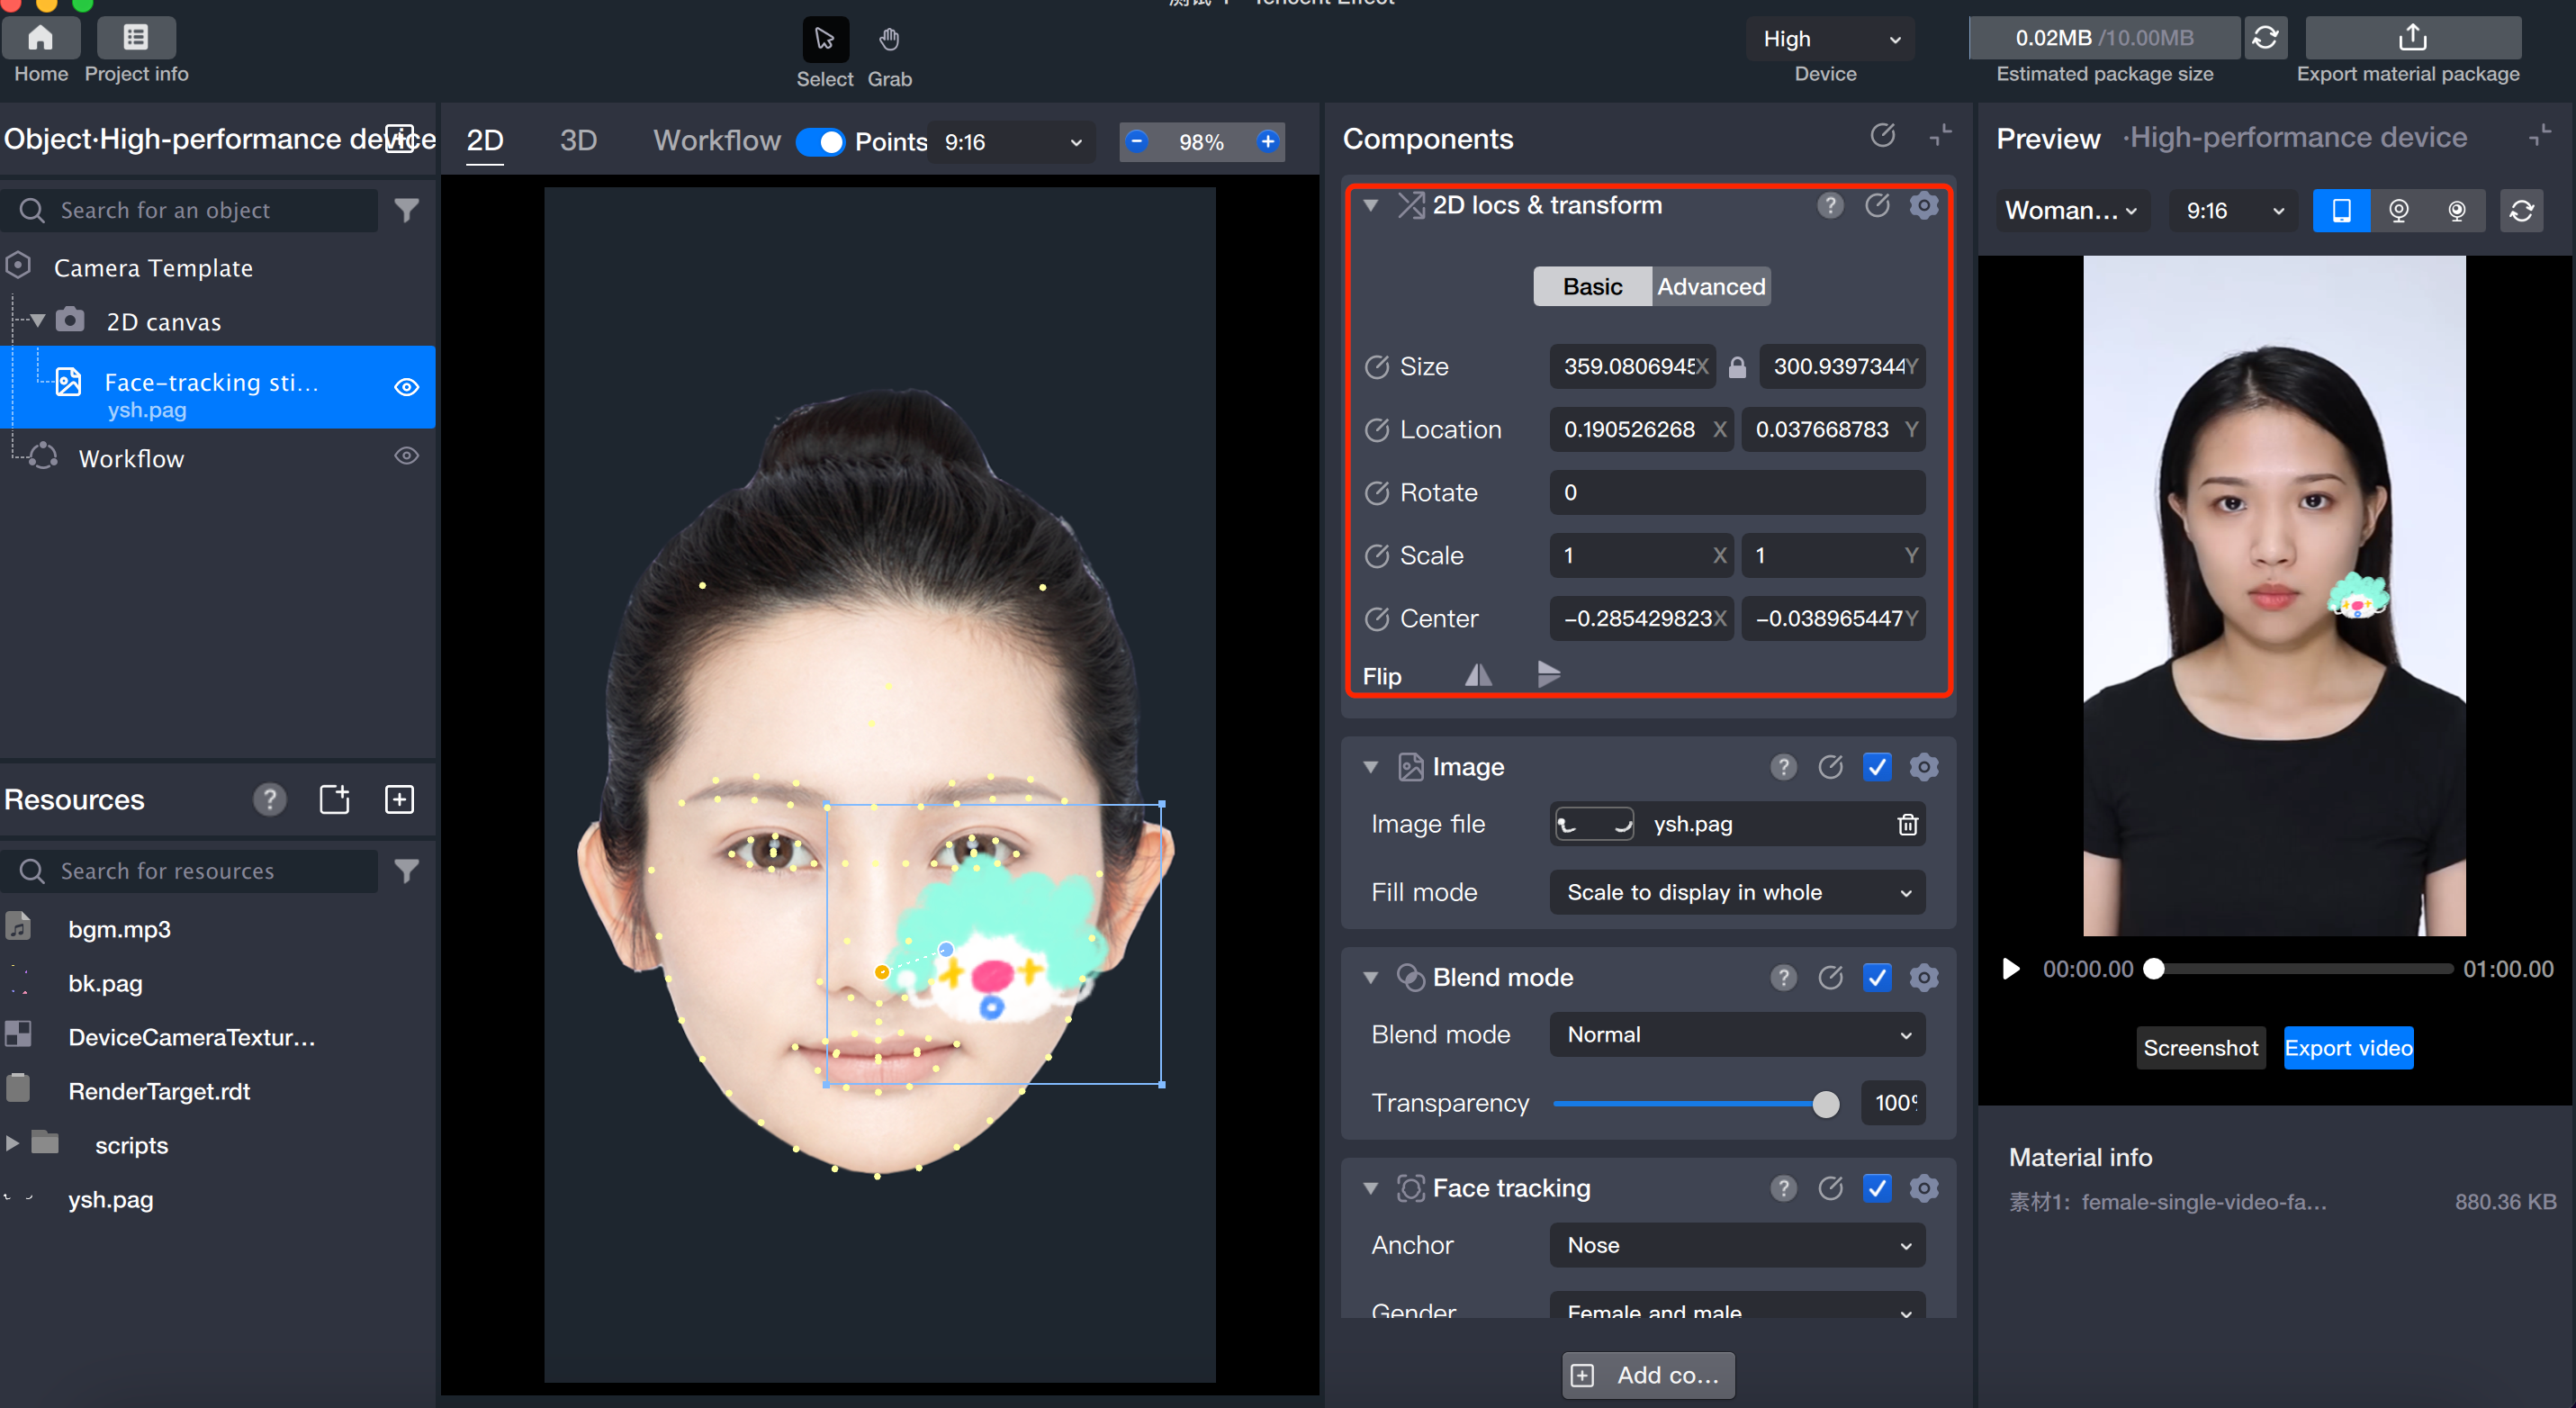
2. Change sticker position, orientation, and size.
Drag the sticker in the Scene panel to reposition it.
Adjust position and transformation in the Component panel.
Note:
Make sure to select this object or its parent object in the Object panel.
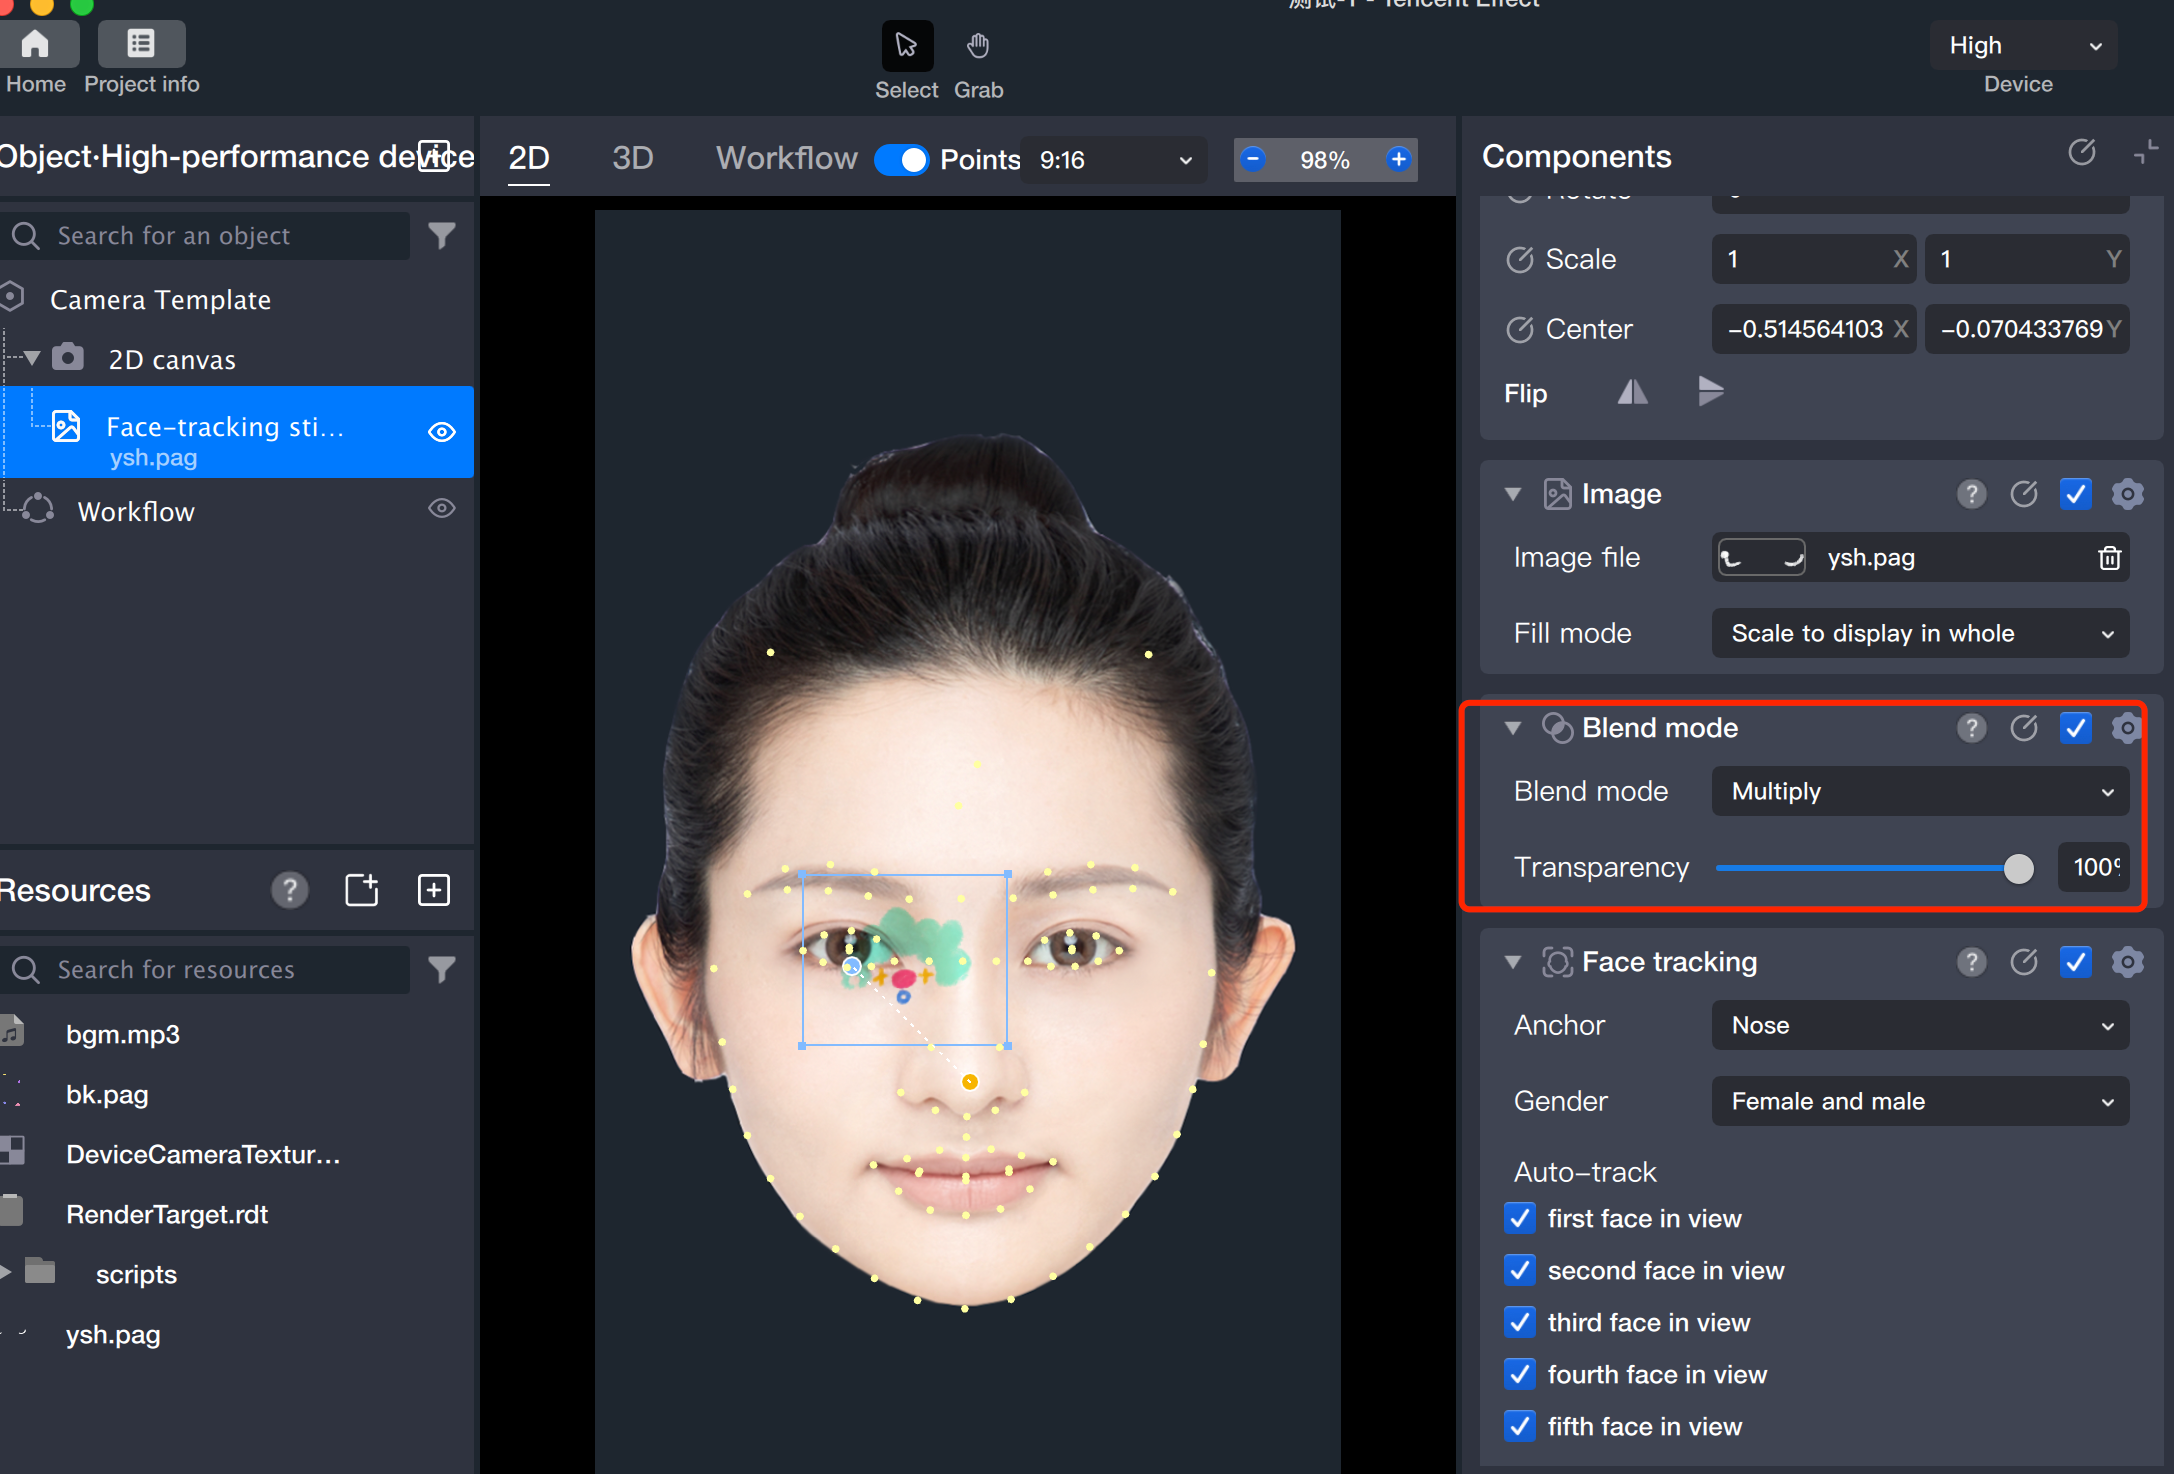
3. Modify modes.
To help designers preview image effects, the blend mode and fill mode parameters for follow component stickers are consistent with those commonly used in design software.


Help and Support

Was this page helpful?

Help us improve! Rate your documentation experience in 5 mins.

Feedback