tencent cloud

Tencent Effect SDK

Release Notes and Announcements
Release Notes
Tencent Effect SDK V3.5 Version Released
Tencent Effects SDK V3.0 Version Related API and Material Changes
Product Introduction
Overview
Features
Basic Concepts
Strengths
Use Cases
Purchase Guide
Pricing Overview
Purchase Guide
Payment Overdue and Refund
Tutorial
Demos
Free Trial License
Licenses
Adding and Renewing a License (Mobile)
Adding and Renewing a License (Desktop)
Adding and Renewing a License (Web)
FAQs
SDK Download
Features
SDK Download
Version History
SDK Integration Guide(No UI)
General Integration of Tencent Effect
Integrating Capabilities
SDK Integration Guide(Including UI)
General Integration of Tencent Effect
Integrating Tencent Effect into MLVB SDK
Integrating Tencent Effect into TRTC SDK
Integrating Tencent Effect into UGSV SDK
Virtual Avatars
API Documentation
iOS
Android
Flutter
Web
Feature Guide
Reducing SDK Size
SDK Integration Issue Troubleshooting
Performance Fine-Tuning
Effect Fine-Tuning
Material Usage
Effect Parameters
Recommended Parameters in Beautification Scenarios
UGSV Enterprise Edition Migration Guide
Integrating Tencent Effect for Third-Party Publishers (Flutter)
Integrating Beauty AR Web into Mini Programs
Tencent Effect Studio Usage
Beauty AR Web
Overview
Quick Start
SDK Integration
Parameters and APIs
Console Guide
Demos
Preset Effect List
Practical Tutorial
FAQs
FAQs
General
Technical
License
Legacy Documentation
Recommended Parameters in Beautification Scenarios
Beauty Parameters Table
One-Minute Integration of TRTC
One-Minute Integration of Live Streaming
TE SDK Policy
Privacy Policy
Data Processing And Security Agreement
Contact Us

Face Liquify

PDF
Focus Mode
Font Size
Last updated: 2026-03-30 18:03:42

Introduction

Face Liquify uses brushes that can be freely positioned and applied multiple times. The area beneath each brush is deformed based on the brush's settings, allowing you to either expand or shrink specific regions. Face Liquify is essential for creating playful and exaggerated face filters.

Basic Usage

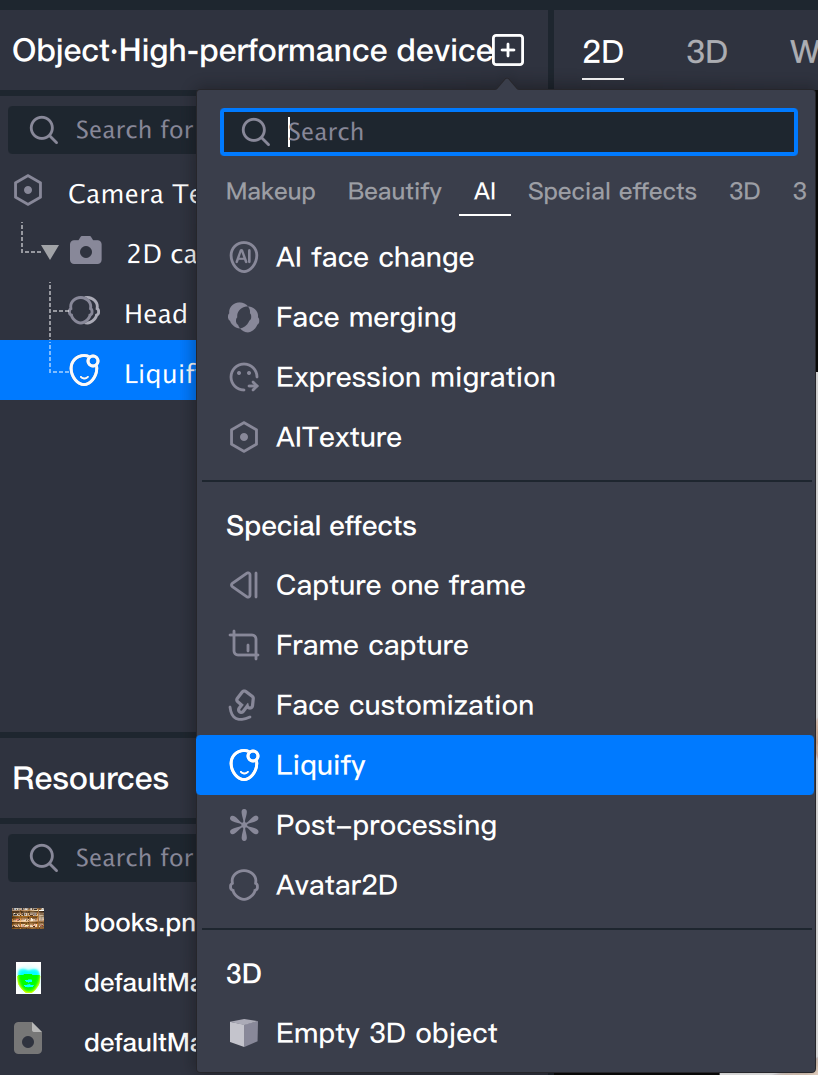
Step 1: Add a Face Liquify Object

Add a Face Liquify object from the Object panel.


Step 2: Adjust Parameters

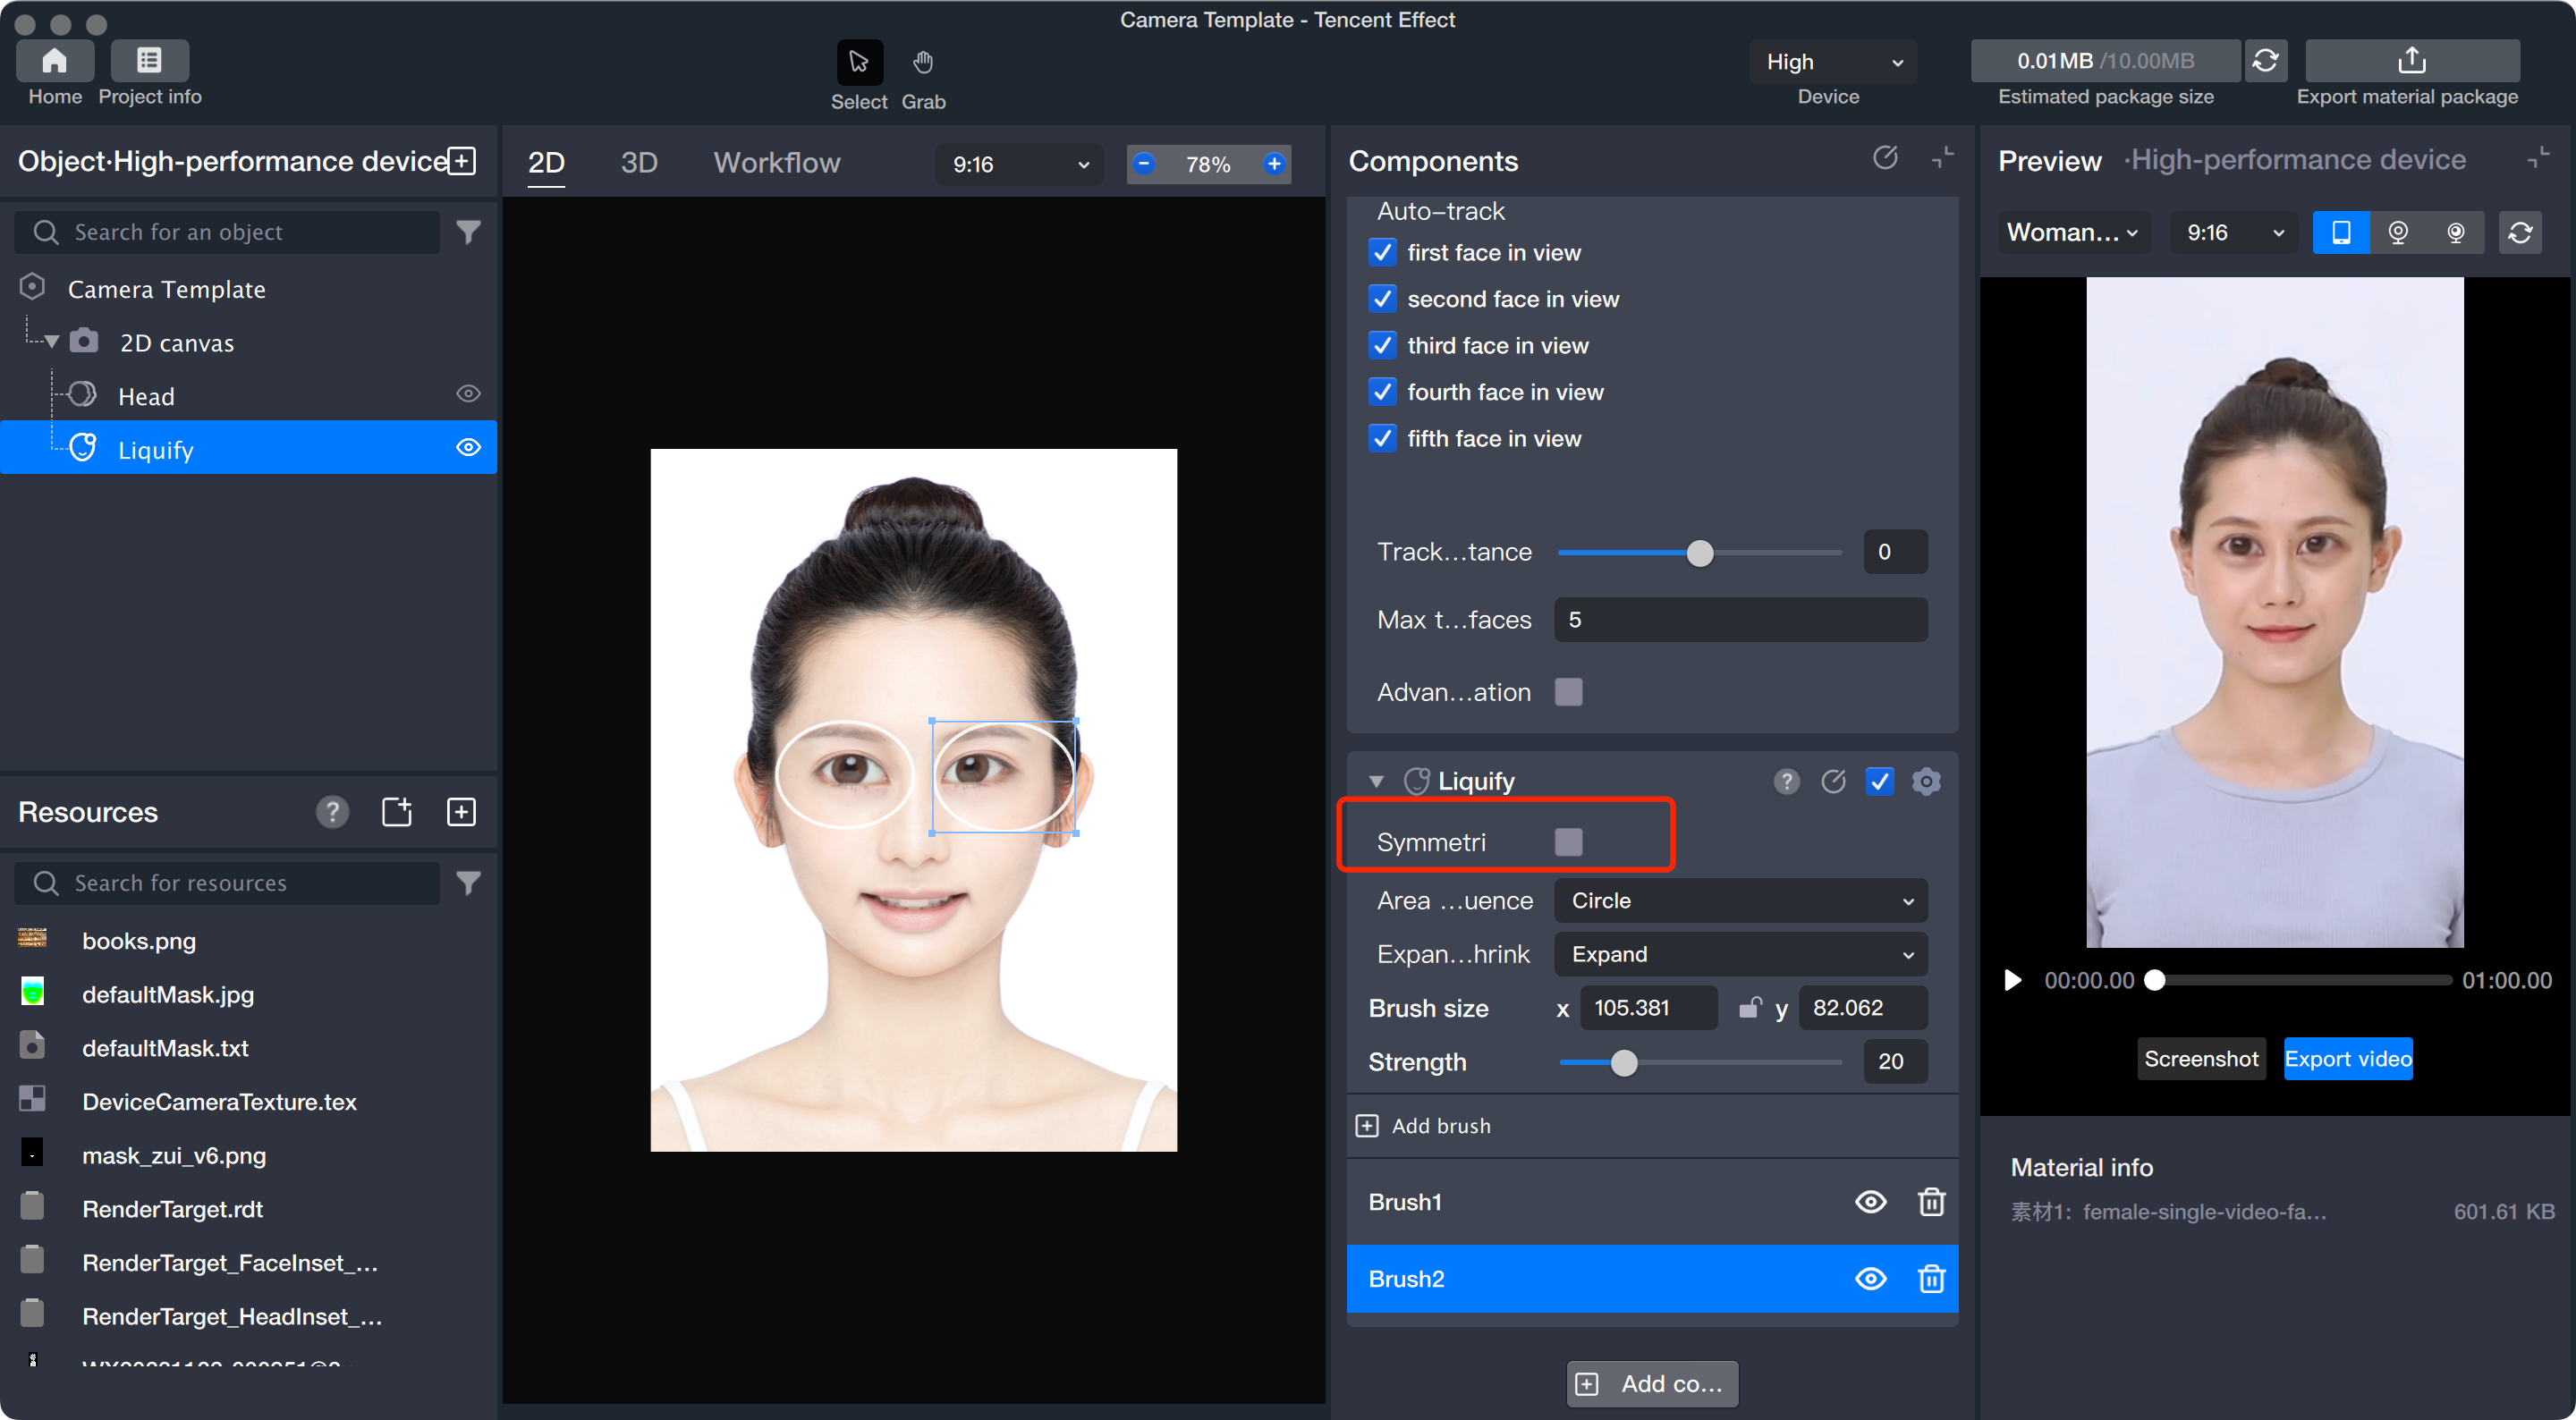
Add Brush: In the Face Liquify component panel, click Add Brush to create a new brush.
Brush Scaling: Resize the brush directly in the Scene panel by dragging its edge—drag outward to increase size, drag inward to decrease size. You can also adjust brush size in the Face Liquify component. Click the center lock button to maintain the aspect ratio for proportional scaling.
Left-Right Symmetry: When left-right facial symmetry is disabled, only one circular brush appears in the Scene panel. Dragging this circle deforms the local region. When enabled, two circles display: a solid and a dashed circle. Dragging the solid circle applies the deformation to the dashed circle in a mirrored manner.


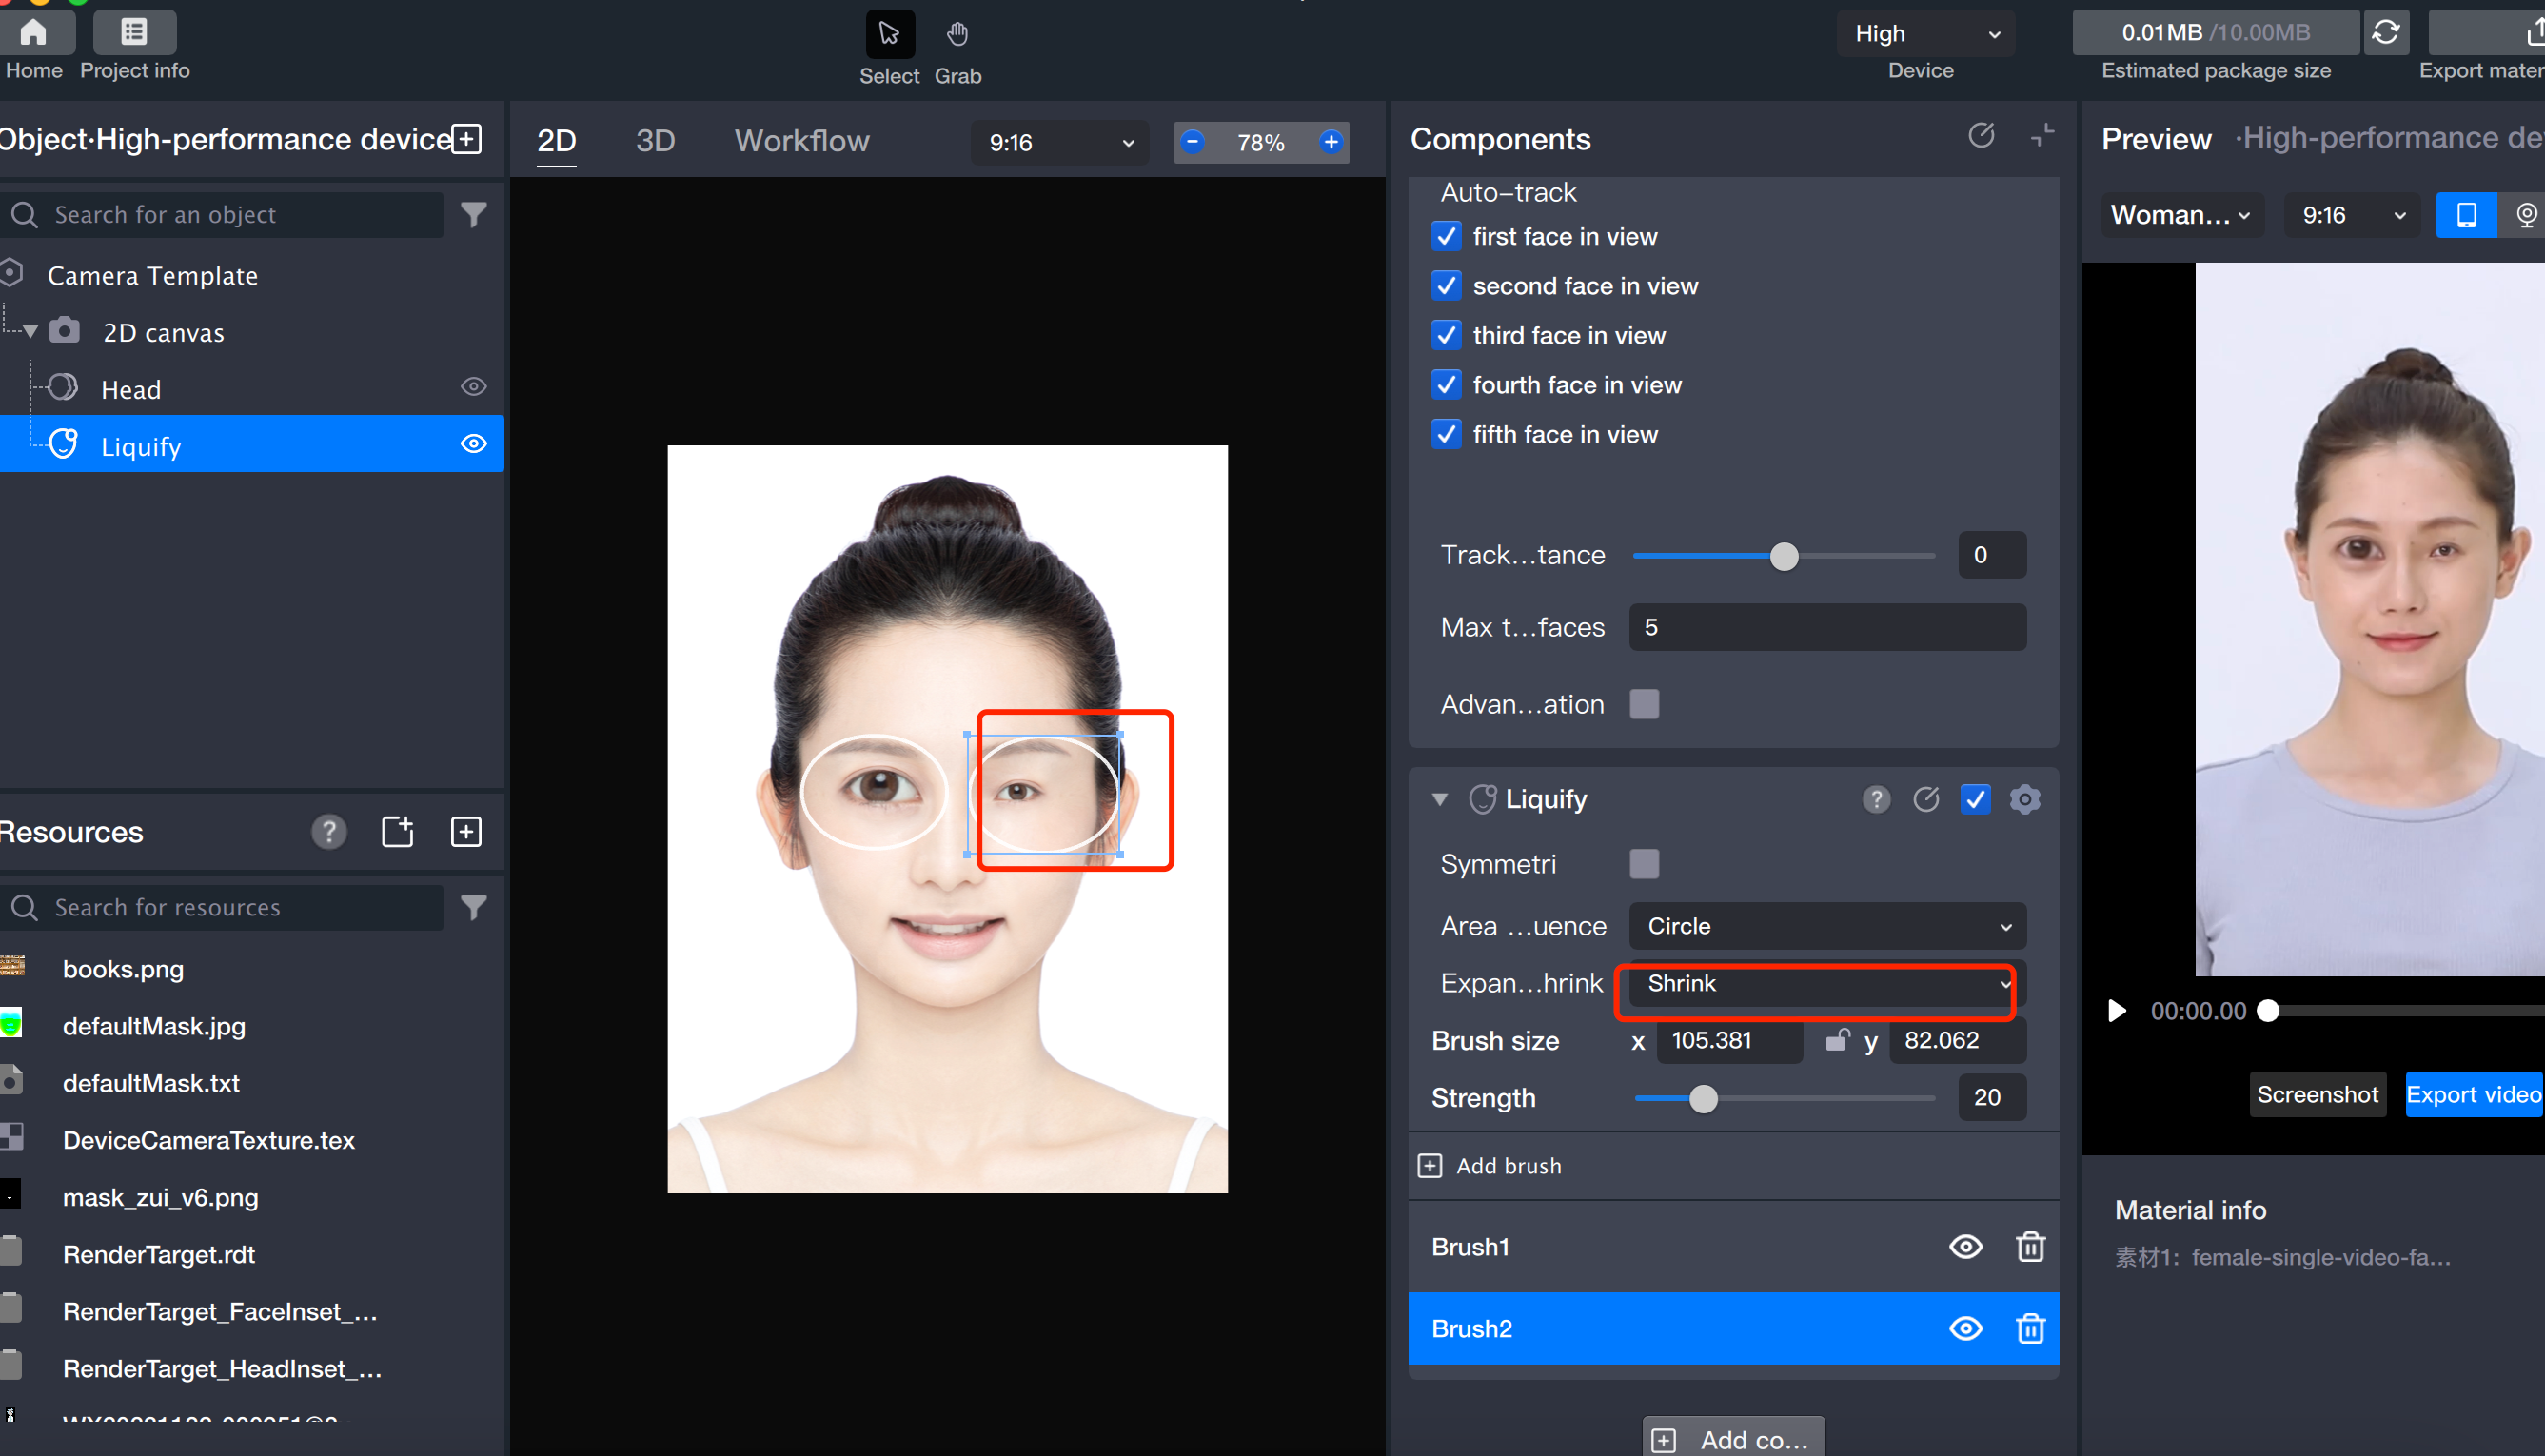
Expand/Shrink: Use this slider to control the deformation effect. Moving the slider toward "Expand" enlarges the local area; moving it toward "Shrink" reduces the area.


Brush Strength: This parameter determines the intensity of the expansion or shrinkage effect.
Add Multiple Brushes: The Face Liquify tool allows you to add multiple brushes within the same component. All brushes simultaneously deform the face, and overlapping regions will combine their effects.


Help and Support

Was this page helpful?

Help us improve! Rate your documentation experience in 5 mins.

Feedback