Overview
The HTTP response feature is supported by the rule engine. When the corresponding conditions are matched, the EdgeOne node directly responds with the specified status code and page content.
Feature Description
Response status code: supports 2XX, 4XX, and 5XX, excluding 499, 514, 101, 301, 302, 303, 509, and 520-599.
Response page: supports the Content-Type options including text/html, application/json, text/plain, and text/xml.
Use Cases
The following are some common use cases for HTTP responses:
Configuring the Flash cross-domain policy file: The crossdomain.xml file is used to specify the domain names or IP addresses that can access the website resources.
Basic access control: such as IP allowlist/blocklist, Referer allowlist/blocklist, UA allowlist/blocklist, and region access control.
Temporary maintenance or activity page: When the website is under temporary maintenance or hosting specific activities, the HTTP response feature can be used to guide users to the maintenance notification page or activity page, thereby enhancing user experience.
Preparations
Scenario 1: The Domain Name Requires Configuring the crossdomain.xml File
If your business at the www.example.com domain name under the example.com site needs to control cross-domain access through the crossdomain.xml file, you can refer to the following steps:
1. Log in to the Tencent Cloud EdgeOne console, enter Service Overview in the left menu bar, and click the site to be configured under Website Security Acceleration. 2. On the site details page, click Site Acceleration to enter the global site configuration page. Then click Network Optimization in the right sidebar.
3. On the site details page, click Site Acceleration to enter the global configuration page. Then click the Rule Engine tab.
4. On the rule engine page, click Create rule and select Add blank rule.
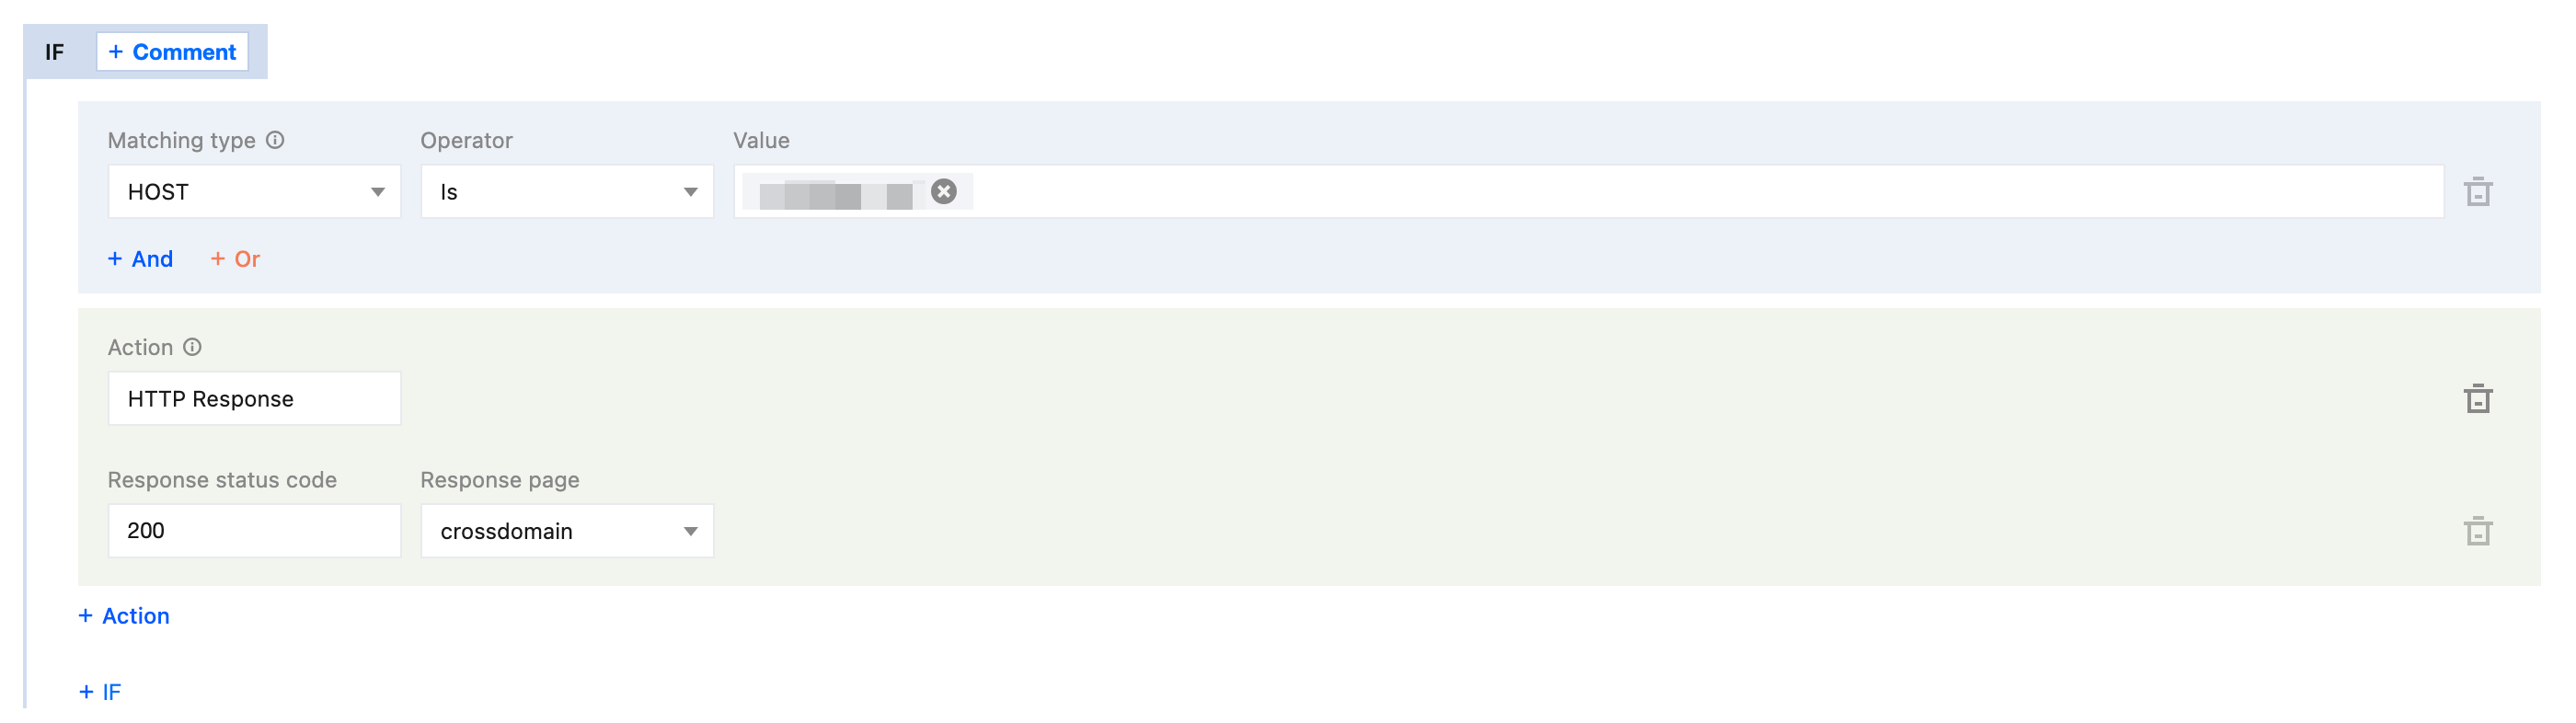
5. On the rule editing page, select the matching type as HOST and set its value to equal www.example.com.
6. Click the choice box below Action and select the action as HTTP Response in the pop-up action list.
7. Configure the response status code to 200 and select the created crossdomain.xml file from the dropdown list for the response page.
8. The complete rule configuration is shown below. Click Save and publish to finish the rule configuration.
Scenario 2: The Domain Name Requires Configuring a Referer Allowlist
If your business at the www.example.com domain name under the example.com site only allows access by requests with https://www.example.com/ as Referer, and directly denies other requests with 403, you can refer to the following steps:
1. Log in to the Tencent Cloud EdgeOne console, enter Service Overview in the left menu bar, and click the site to be configured under Website Security Acceleration. 2. On the site details page, click Site Acceleration to enter the global configuration page. Then click the Rule Engine tab.
3. On the rule engine page, click Create rule and select Add blank rule.
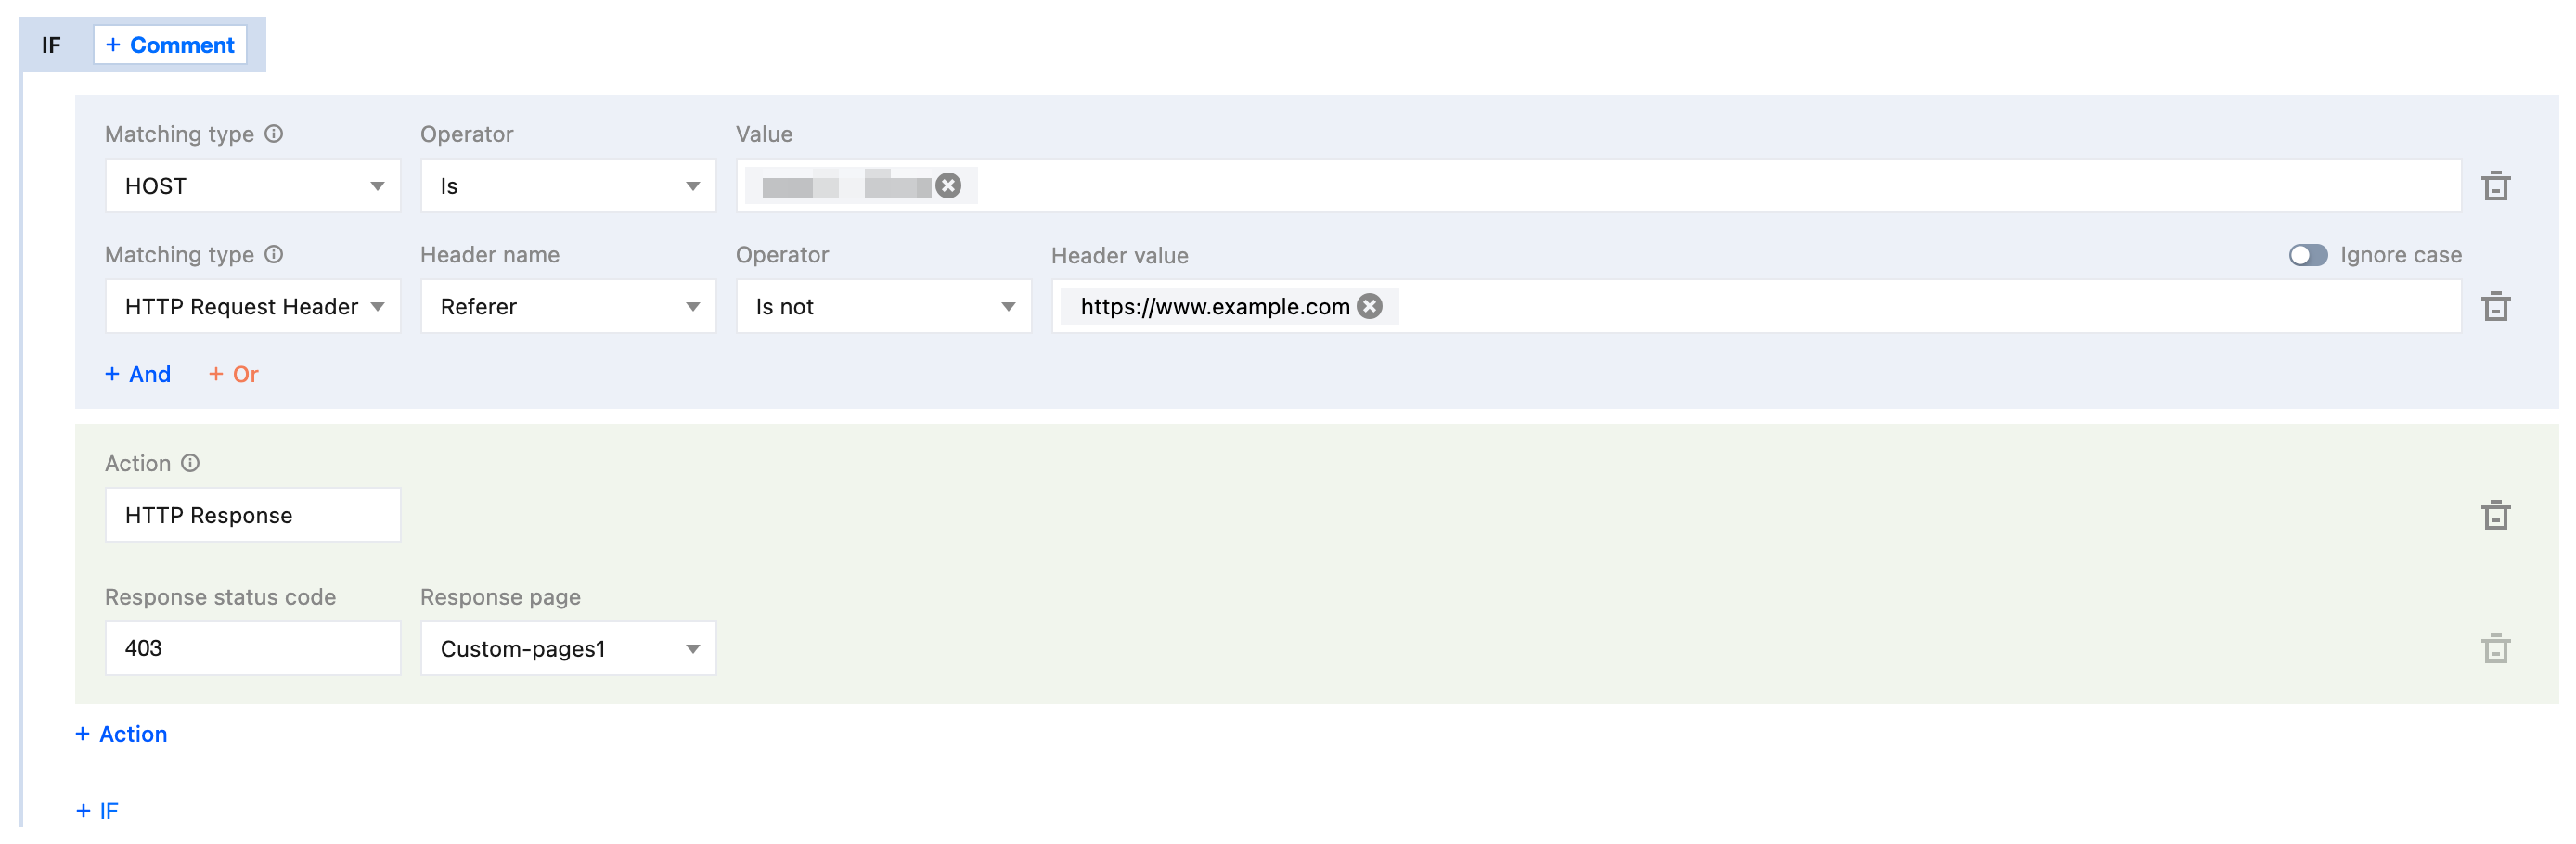
4. On the rule editing page, select the matching type as HOST and set its value to equal www.example.com. Additionally, select the matching type as HTTP Request Header, select the header name as Referer, and set the header value to equal https://www.example.com/.
5. Click the choice box below Action and select the action as HTTP Response in the pop-up action list.
6. Configure the response status code to 403 and select the response page from the dropdown list. If no page is available, click Create page to create a page first and then reference it.
7. The complete rule configuration is shown below. Click Save and publish to finish the rule configuration.
Scenario 3: The Domain Name Requires Configuring a UA Blocklist
The resources of your business at the www.example.com domain name under the example.com site are maliciously crawled by Google crawlers, causing a sudden bandwidth increase of the domain name and severely affecting the bills. Through analysis, it is found that the crawler requests contain spider in the User-Agent. To block such requests, you can refer to the following steps:
1. Log in to the Tencent Cloud EdgeOne console, enter Service Overview in the left menu bar, and click the site to be configured under Website Security Acceleration. 2. On the site details page, click Site Acceleration to enter the global configuration page. Then click the Rule Engine tab.
3. On the rule engine page, click Create rule and select Add blank rule.
4. On the rule editing page, select the matching type as HOST and set its value to equal www.example.com. Additionally, select the matching type as HTTP Request Header, select the header name as User-Agent, and set the header value to match the regular expression *spider*.
5. Click the choice box below Action and select the action as HTTP Response in the pop-up action list.
6. Configure the response status code to 403 and select the response page from the dropdown list. If no page is available, click Create page to create a page first and then reference it.
7. The complete rule configuration is shown below. Click Save and publish to finish the rule configuration.