Build a Conversation Workflow
Overview
The conversation workflow is a visual design platform for building intelligent voice systems. It allows easy configuration of voice interactions through drag-and-drop, enabling businesses to design multi-round conversations, set business rules, integrate APIs, and customize voice styles. This visual approach simplifies complex conversation logic, allowing quick adjustments to meet business needs while ensuring precise execution. It helps businesses deliver smart voice services, improving both customer experience and operational efficiency.
Step 1: Create a Conversation Flow
Step 1: Create a Conversation Flow
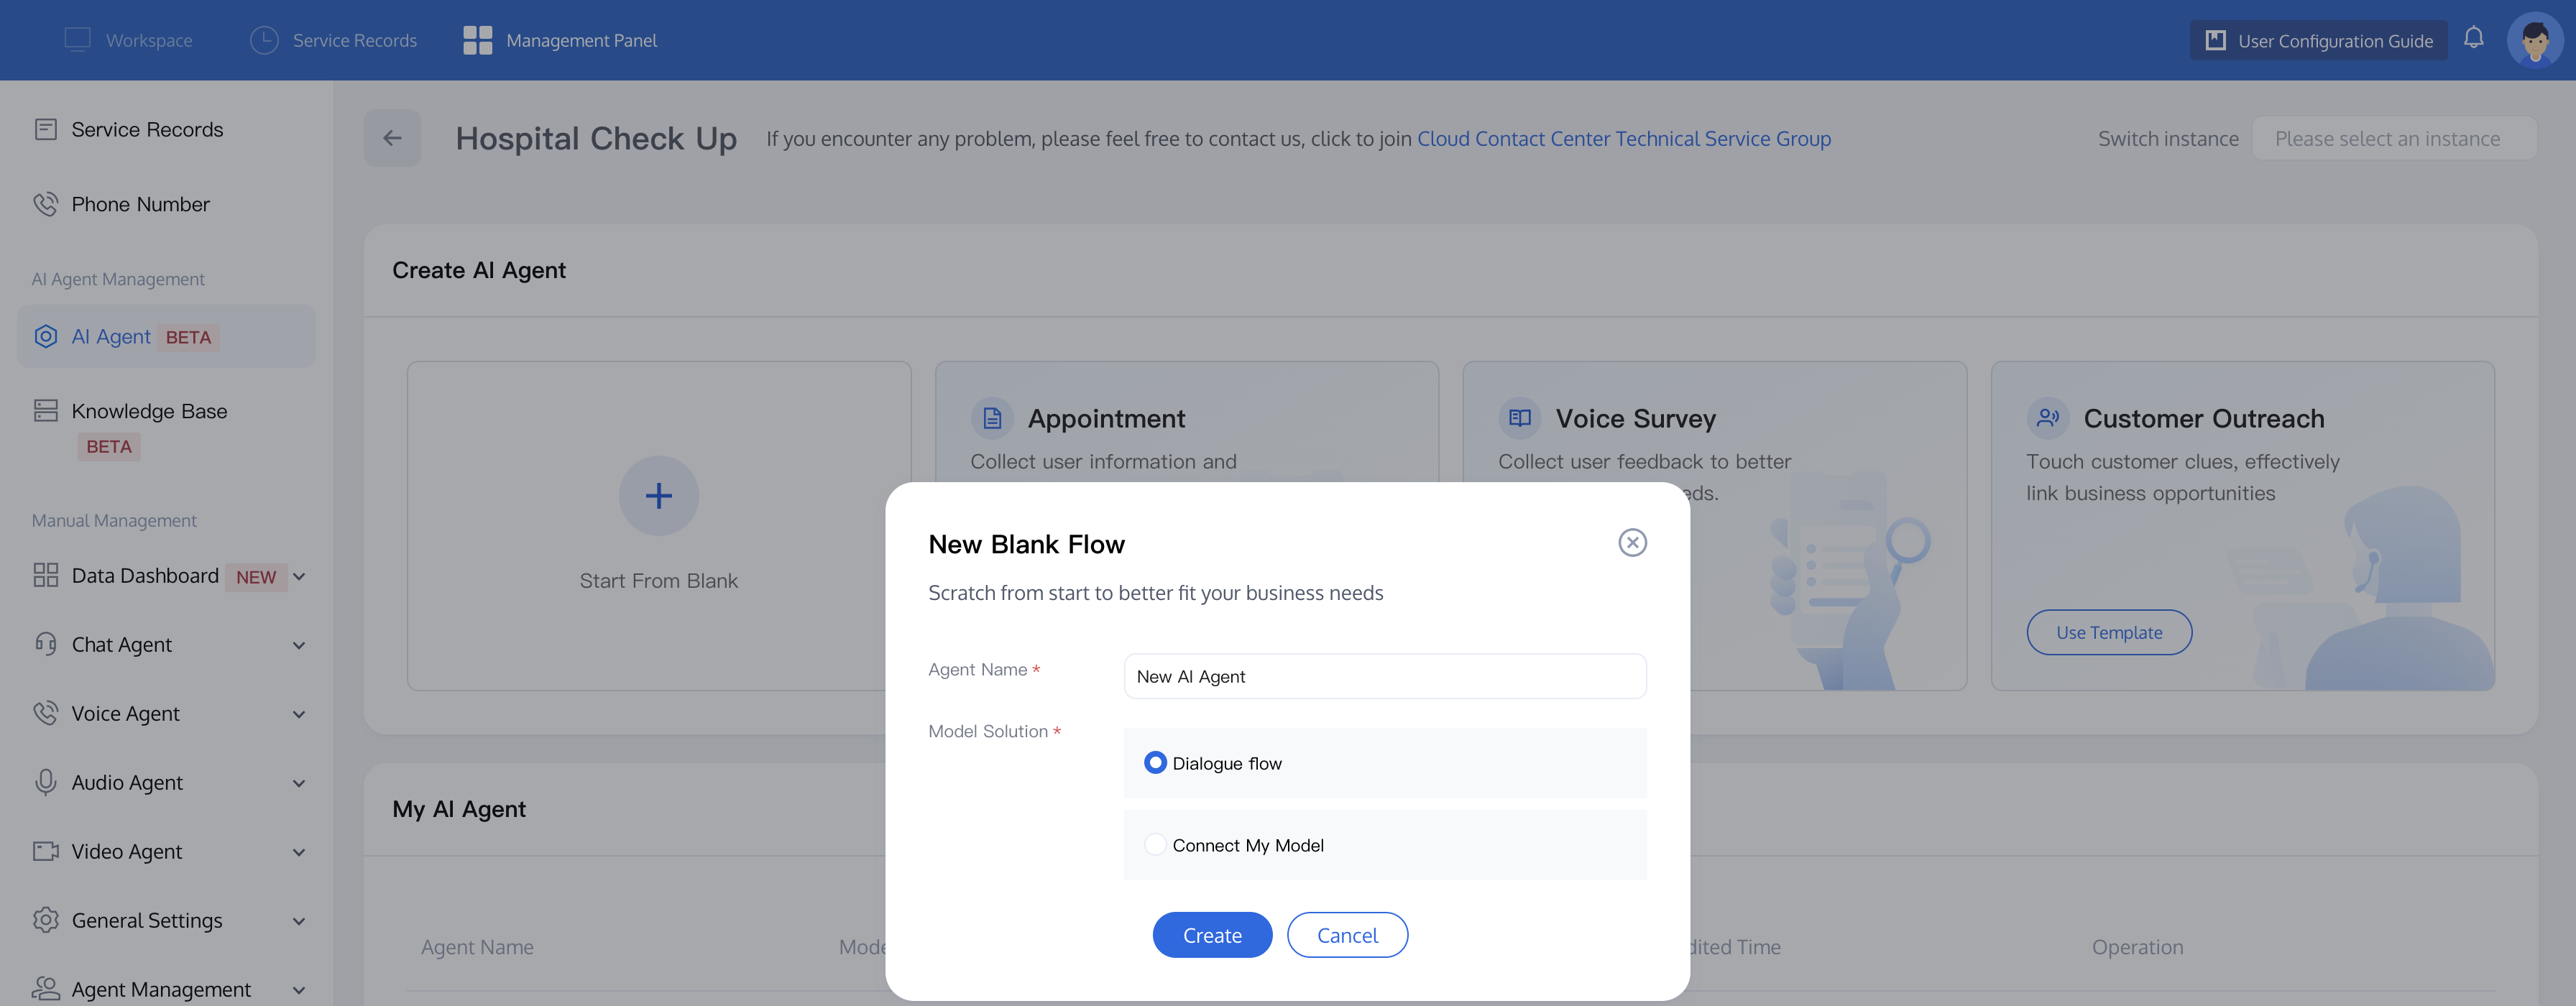
1. Log in to the Tencent Cloud Contact Center (TCCC) Management Panel. On the left menu, click AI Agent > Start From Blank, and customize the process from scratch. In the Start From Blank popup, fill in the Agent Name (e.g., "Outbound Call"). Leave the Model Solution as the default selection Conversation Flow, and click Create. The system will automatically create a blank process canvas for you.
2. When you first enter the process canvas, click on Start Call, and the settings panel will automatically pop up on the right. In this panel, you can configure the common properties for the entire process, such as selecting the Voice and setting up the User no response options.
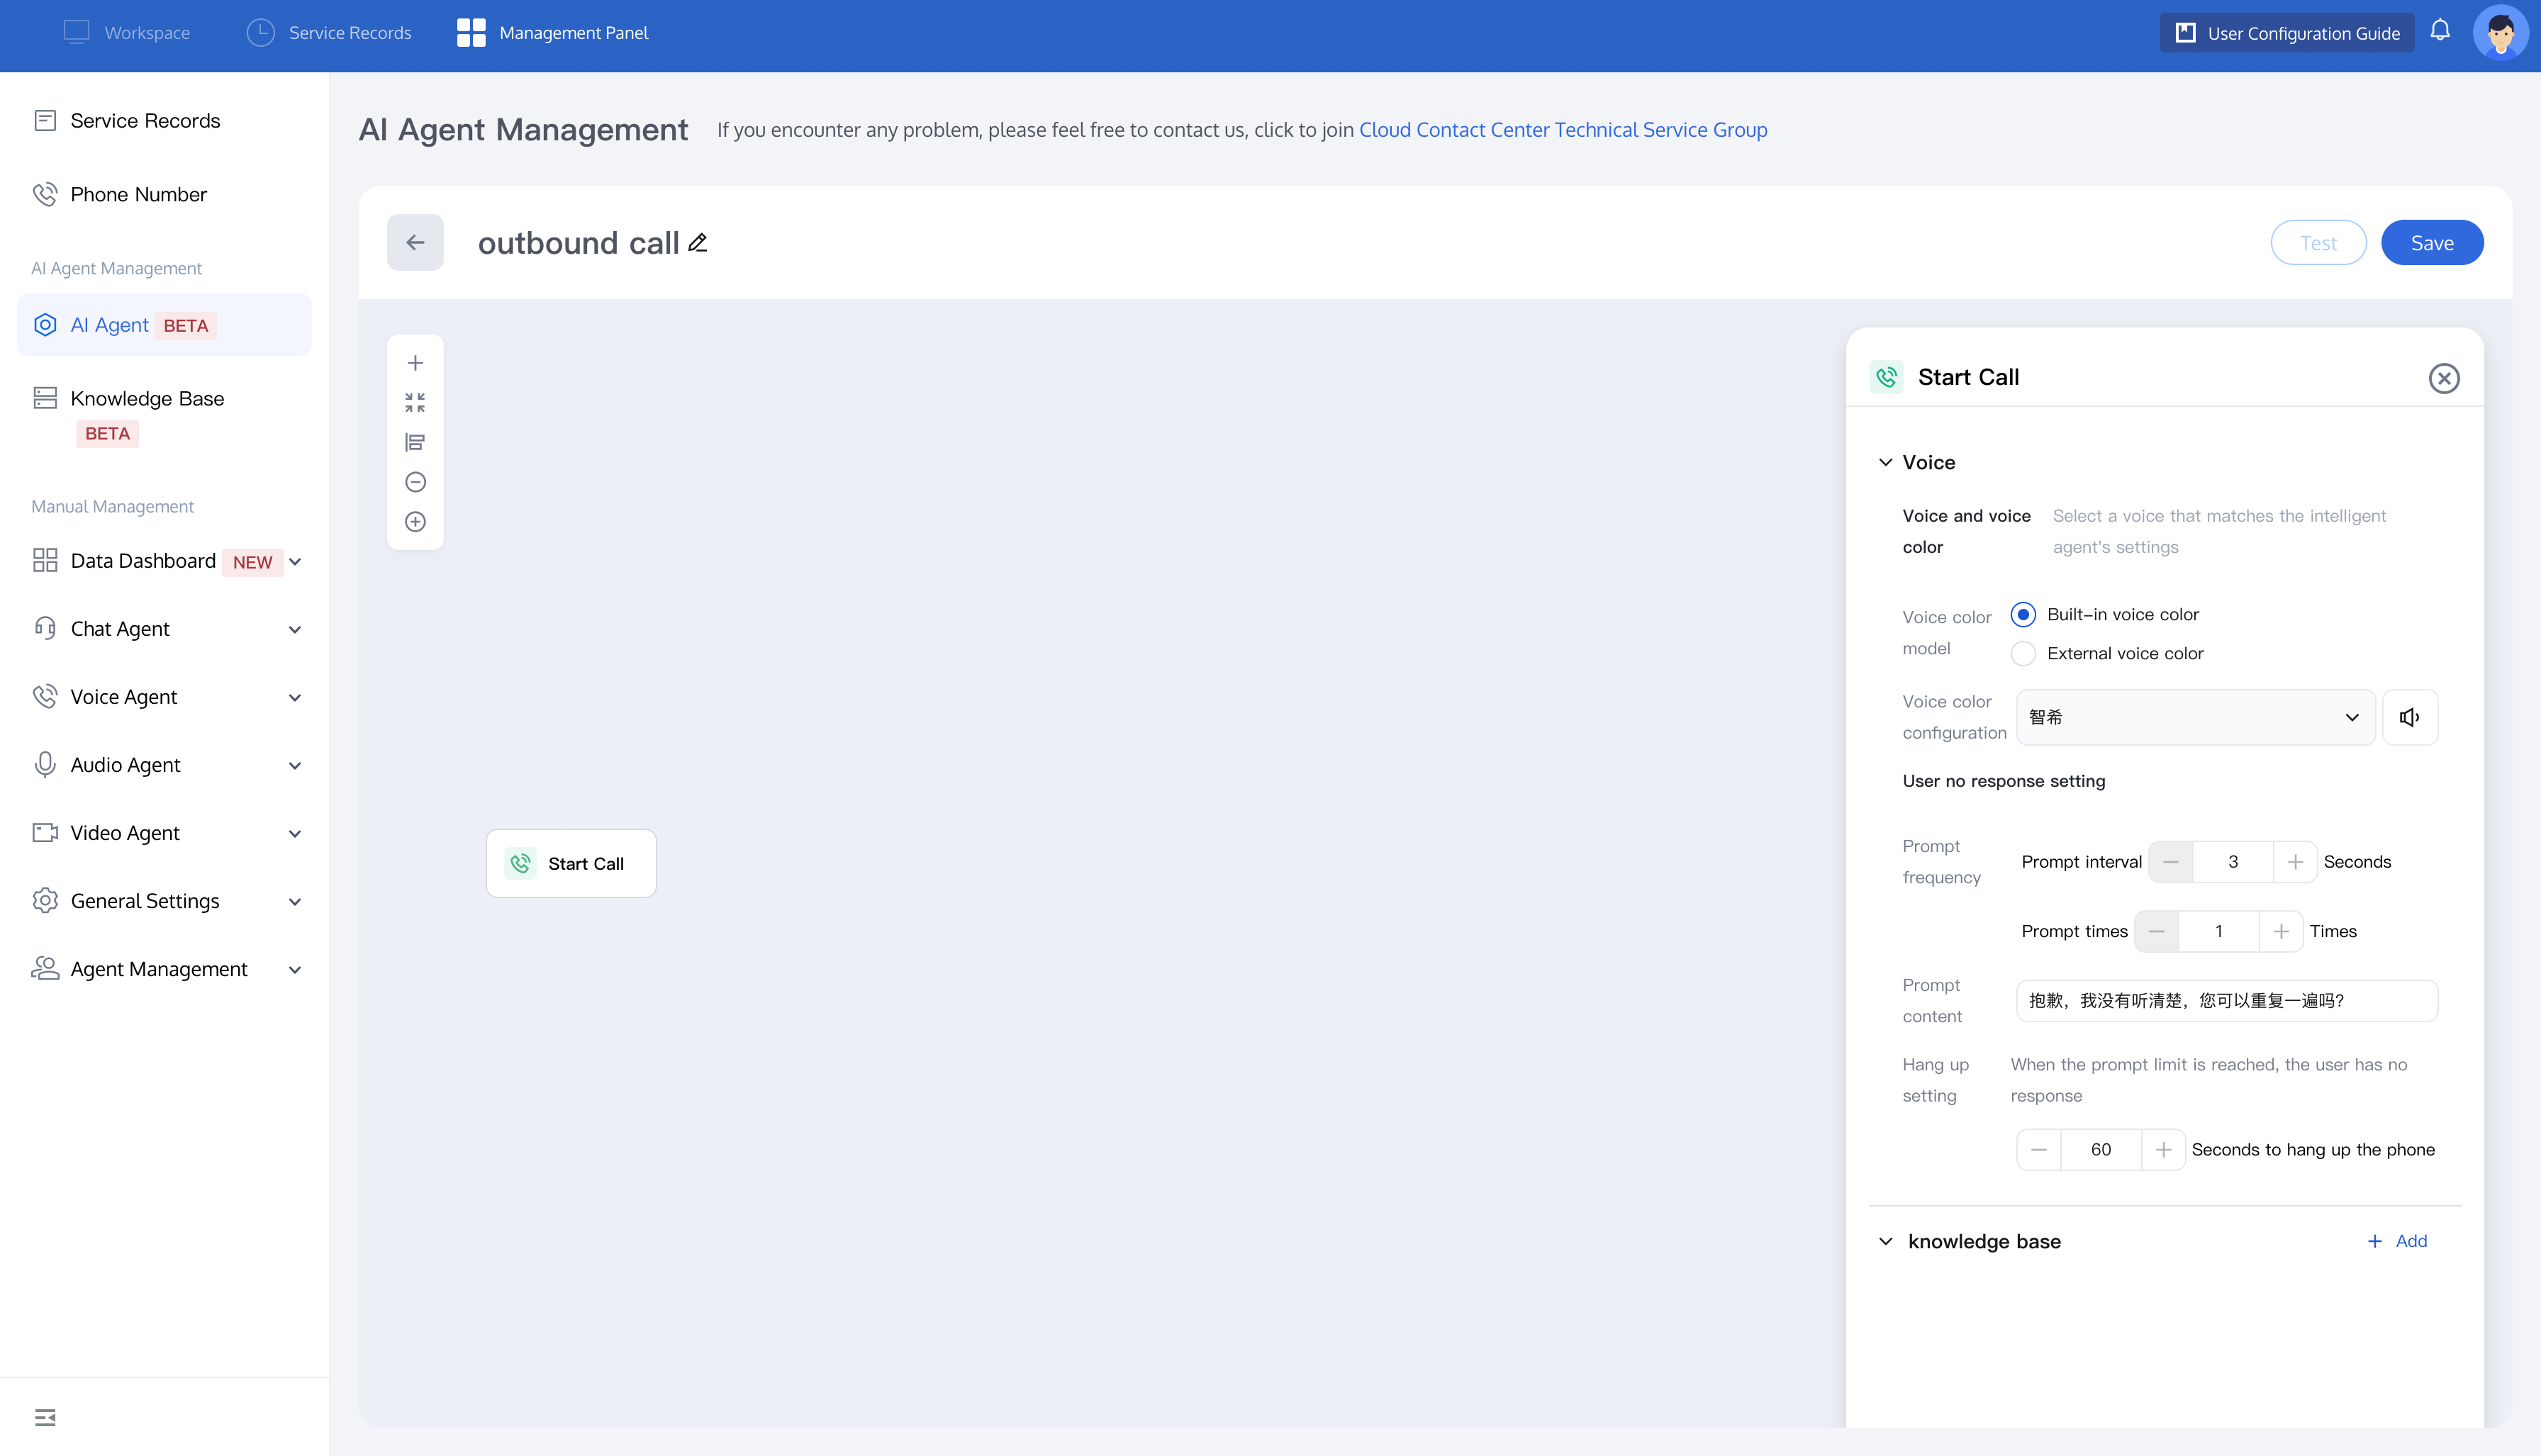
Language and Voice: You can select the appropriate Voice configuration based on your business scenario.
Built-in voice: You can choose from various Built-in voice options (e.g., "Zhixi") to match different requirements.
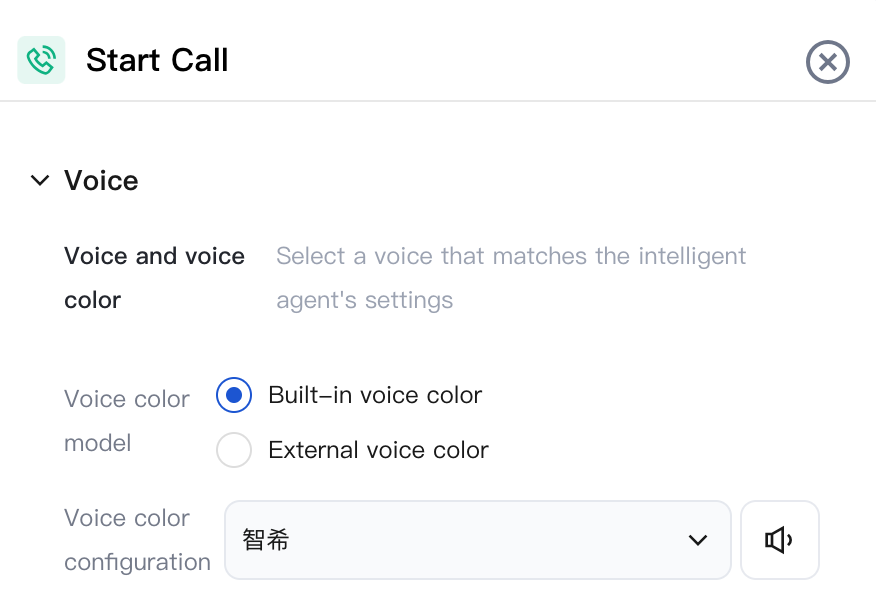
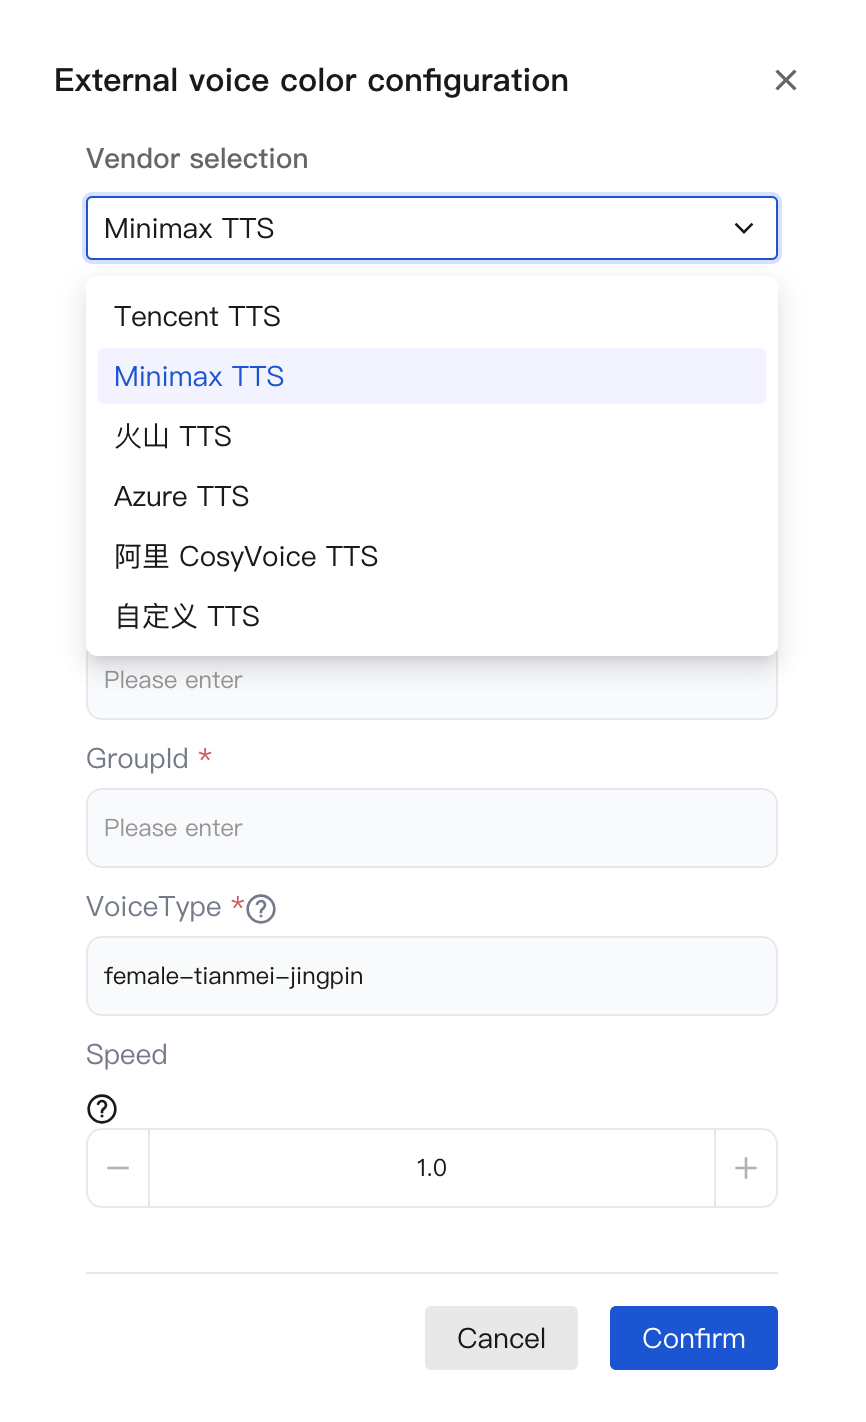
External voice configuration: Supports integration with voice engines from mainstream vendors.
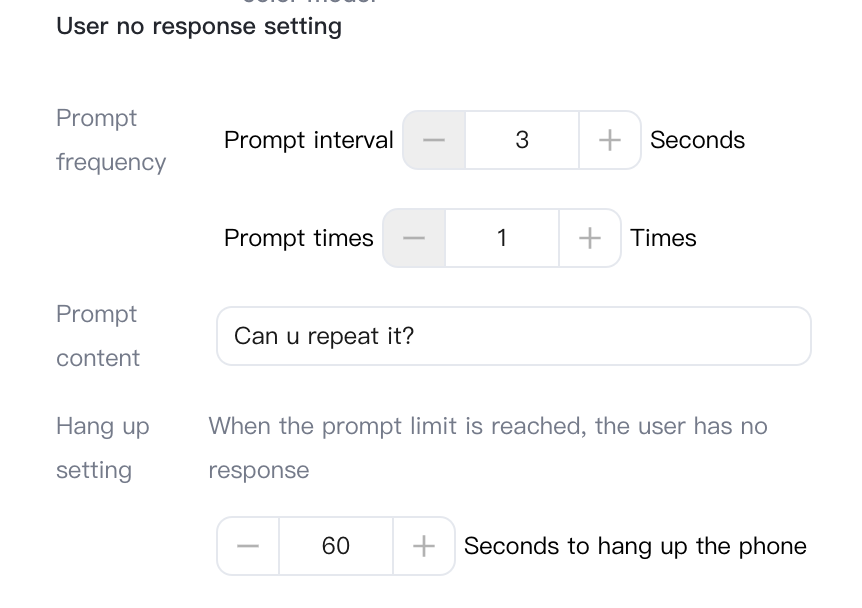
User no response settings: You can configure the Prompt frequency and Hang up setting according to your business needs, which are useful for situations where users remain unresponsive over a certain period.
Step 2: Adding Nodes
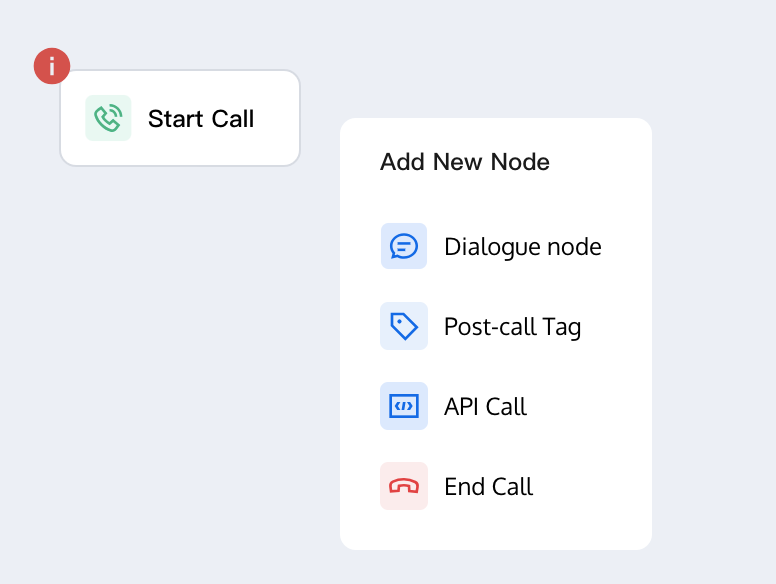
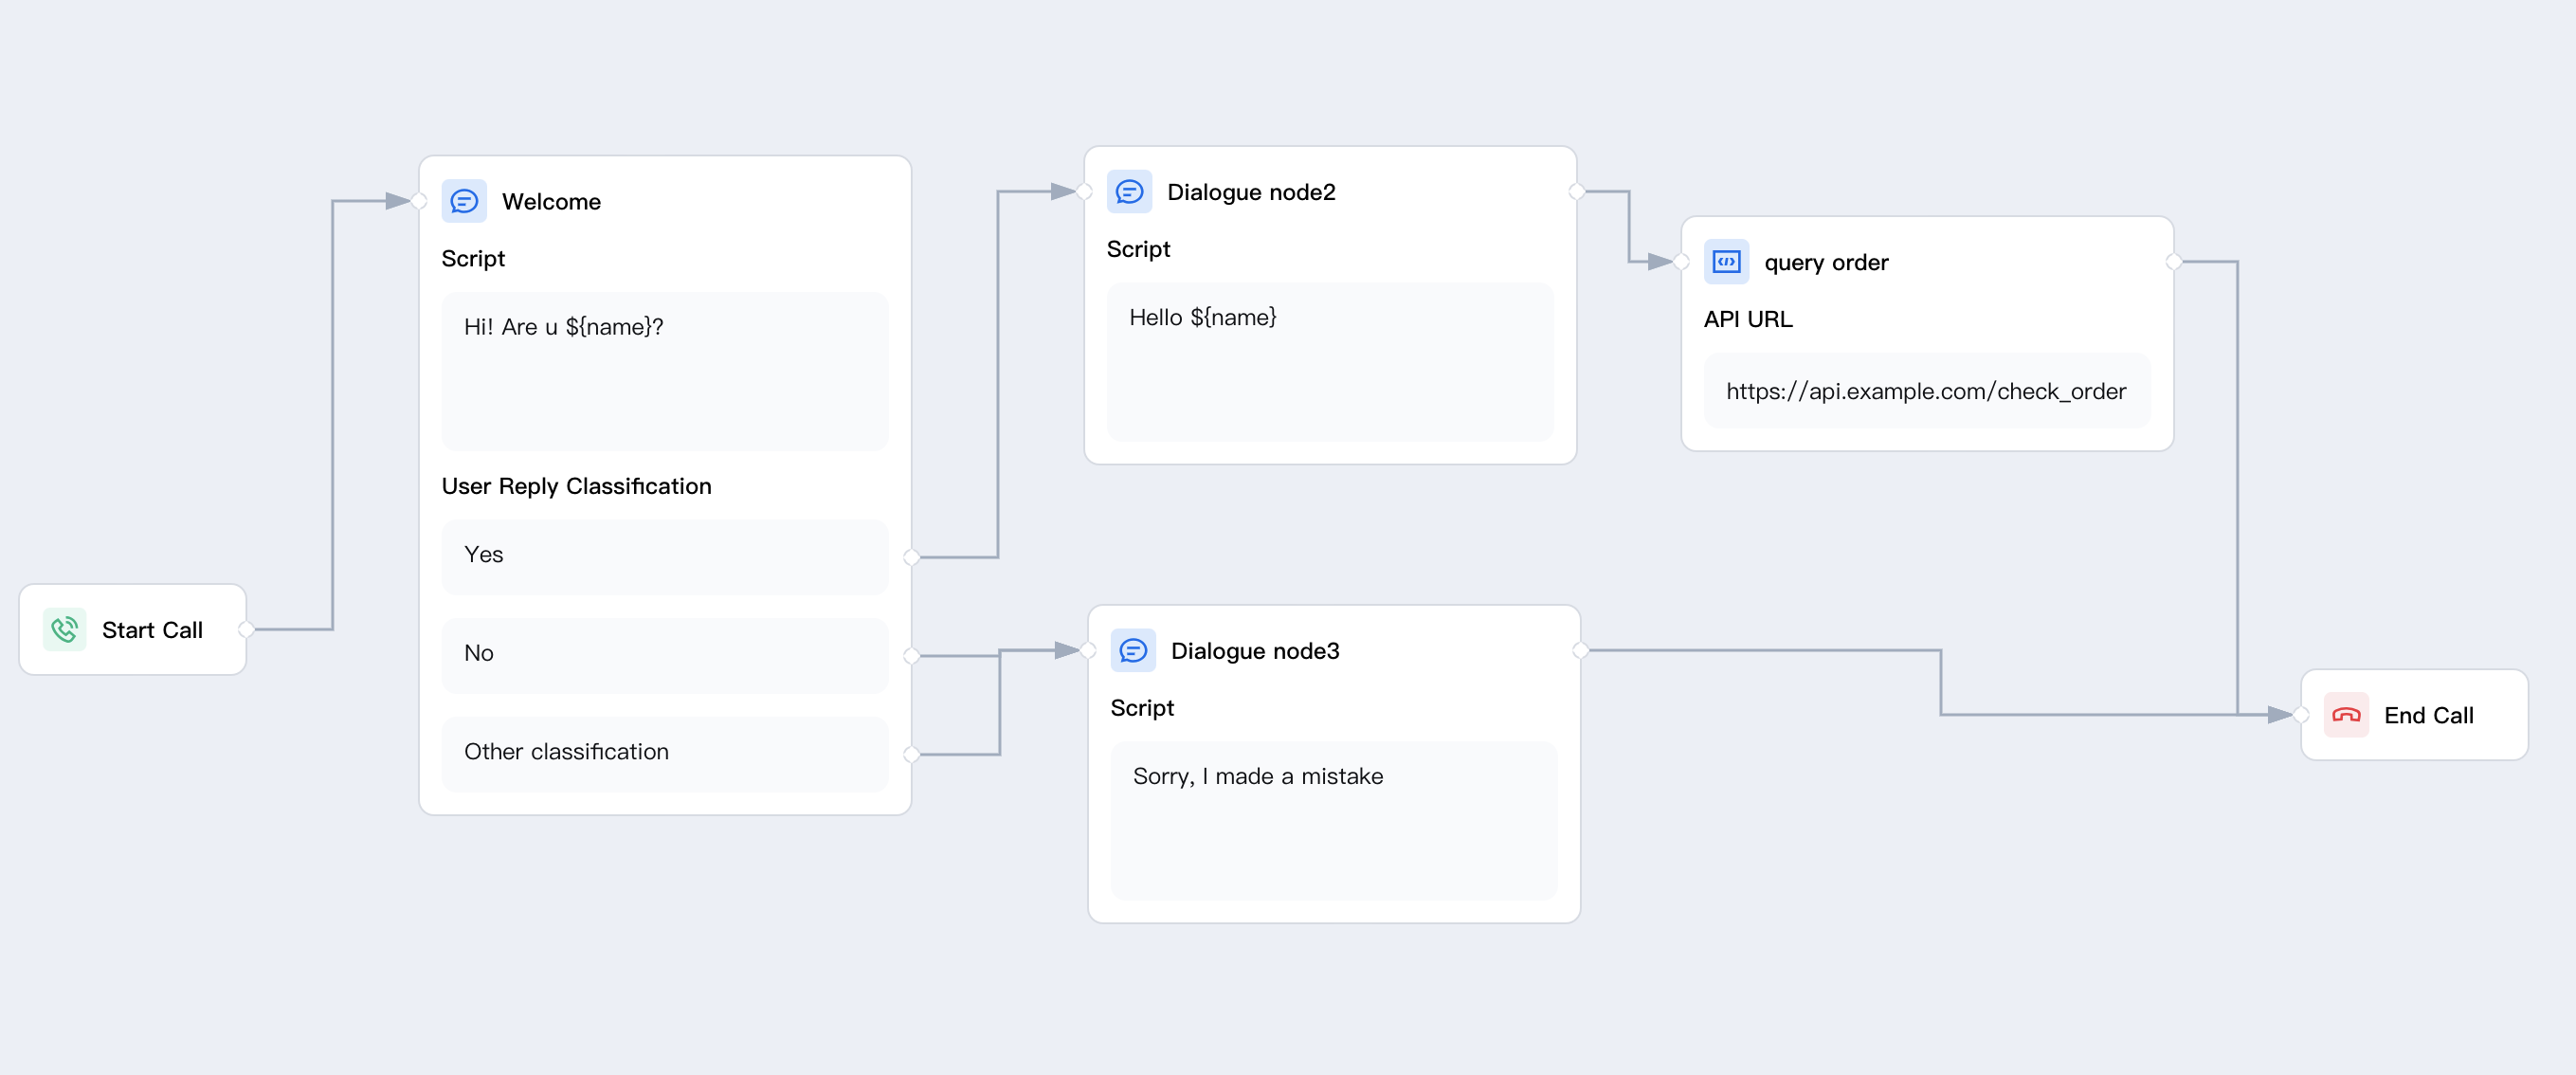
On the process canvas, you can click the "+" button next to Start Call to Add a New Node. The system supports various node types, including Conversation node, Post-call Tag, API call, Transfer, and End call, which can be configured flexibly based on your business needs.
Conversation Node
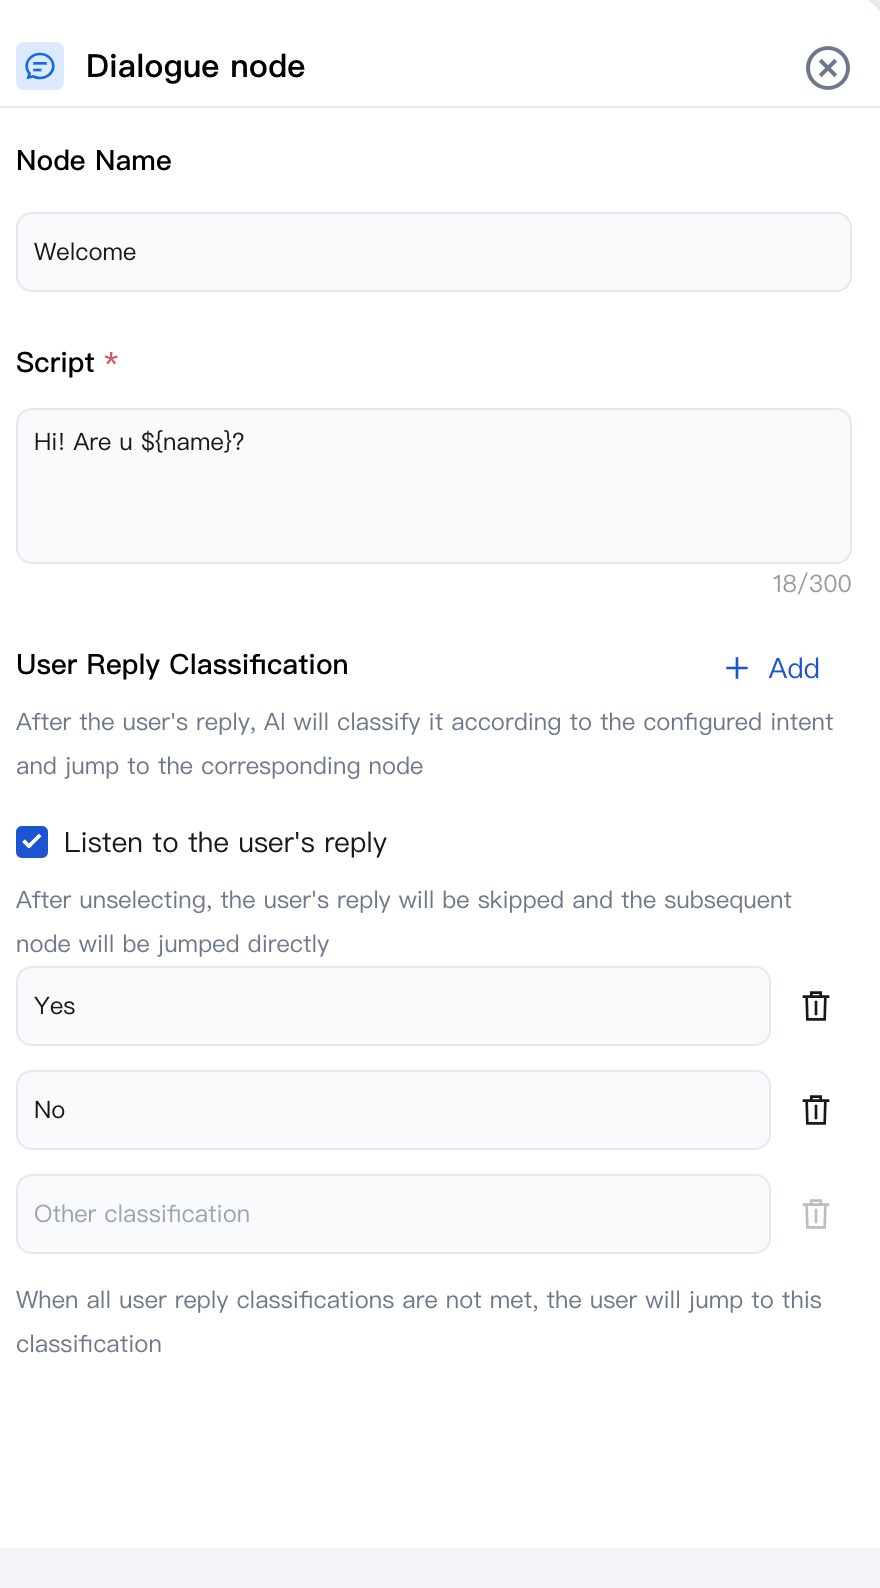
Conversation Node is the core unit for AI Agent and user interaction. It is used to set question scripts, define user reply categories, and determine the logic for redirecting the process. You can first click Conversation Node to add new node, and in the popup, fill in the following information:
Node Name: (e.g., "Welcome").
Script: (e.g., "Hello, are you xxx").
User Reply Classification: You can check Listen to the user's reply and define how the system categorizes user responses, such as "Yes" or "No." If a response does not match any of the predefined categories, the system will redirect to Other classification.
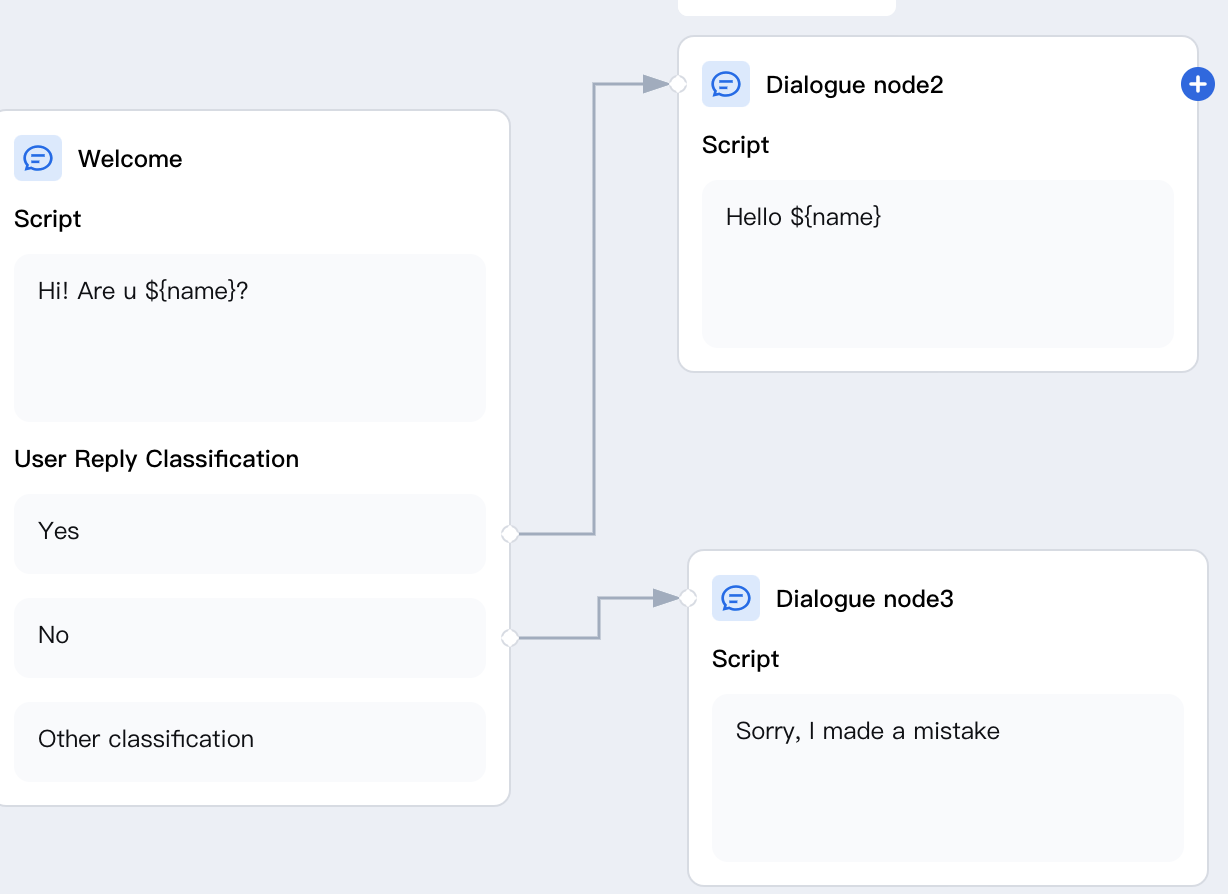
When the customer answers "Yes," you can click the + button next to "Yes" to add a new Conversation node and input a script (e.g., "Hello xxx").
When the customer answers "No," you can click the + button next to "No" to add a new Conversation node and input a script (e.g., "Sorry, I made a mistake")
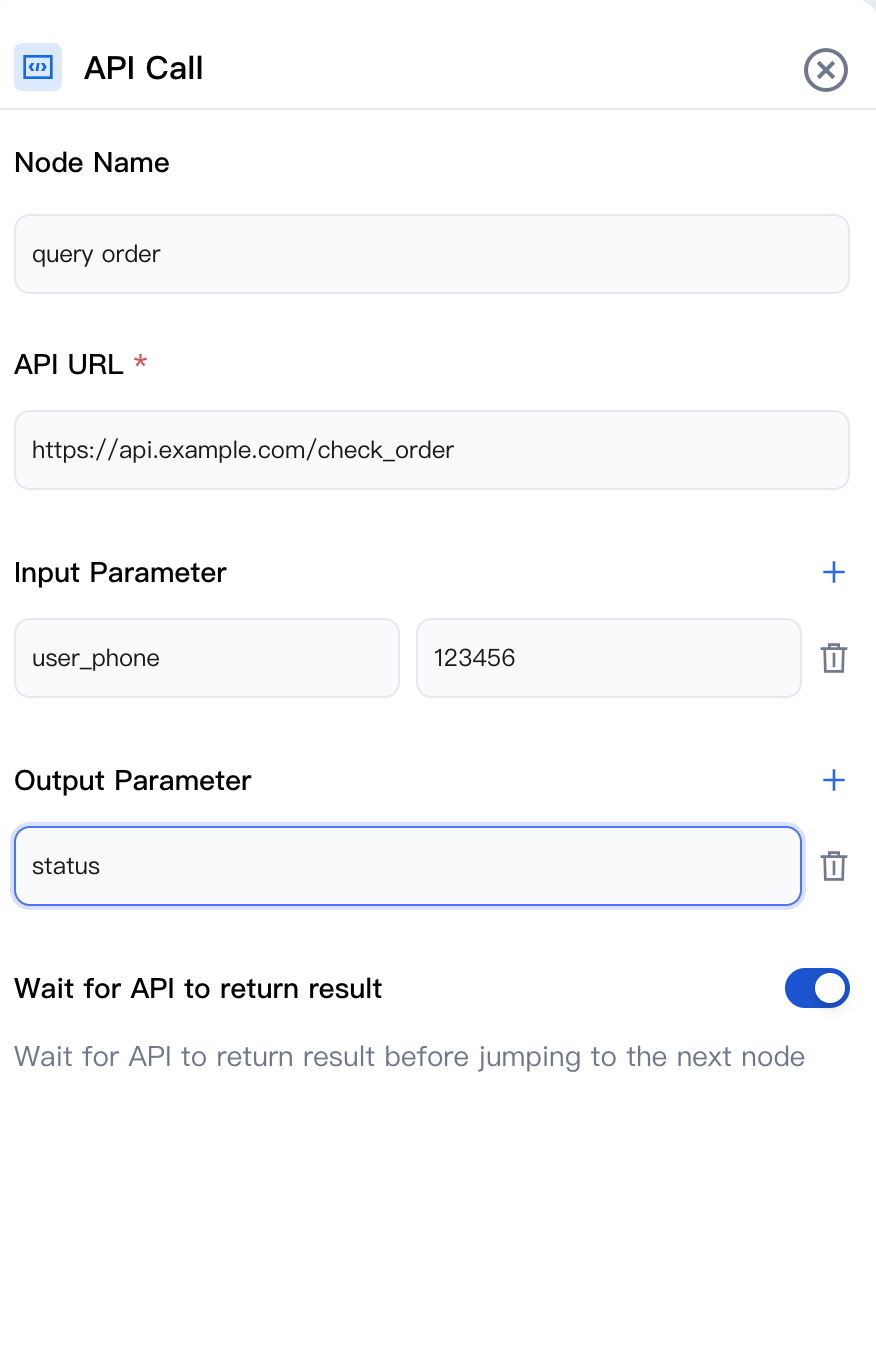
Calling the API
When designing the process, you can add an API call node for business scenarios requiring data interaction with external systems. Here's how to use this feature:
Add an API call node next to the conversation node, such as "Hello xxx." Then, configure the API call node as follows:
Node name: Choose a clear name, like "Query Order," for easy identification in subsequent process management.
API URL: Enter the actual business API URL, (e.g., "https://api.example.com/check_order").
Input parameter: Click the "+" button to add a parameter called "user_phone," which will automatically pass the user's phone number from the earlier conversation to the API.
Output parameter: Add an Output parameter named “status”. The name must match the field name in the data returned by the API. For example, if the API returns { 'Status': 'Shipped' }, then you should fill in “status” here. In subsequent nodes, you can directly reference this variable using ${status}.
Wait for API to return result: Please ensure the Wait for API to return result switch is enabled.
Post-Call Tag
You can also add a post-call tag node while configuring the conversation flow. For detailed steps, refer to Post-Call Tag (Generated by Public Large Model)
End Call
When configuring the call process, make sure to properly set the End Call node to ensure the call ends correctly. If the customer answers "No," add the End Call node directly in that branch, and the system will play the default closing statement before hanging up. For a "Yes" response, add the End Call node after all business processes (e.g., information query, transaction completion) are finished. Place the End Call node at the end of each process and test to ensure all paths end properly, avoiding interruptions for a smooth call experience.
Help and Support
Was this page helpful?
You can also Contact sales or Submit a Ticket for help.
Help us improve! Rate your documentation experience in 5 mins.
Feedback