Configuring CVM Instance as Public Gateway
Last updated:2024-10-22 16:44:58
Warning:
Using a single CVM instance as the public gateway has the risk of single point of failure. We recommend you use NAT Gateway in the production environment.
As of December 6, 2019, Tencent Cloud will no longer support configuring a CVM instance as the public gateway on the CVM purchase page. If you need to configure a gateway, follow the instructions below.
Overview
If some of your CVM instances in a Tencent Cloud VPC do not have common public IPs but you need to access the public network, you can use a CVM instance with a common public IP or EIP. The public gateway CVM instance translates the source IP for outbound traffic. When other CVM instances access the public network through the public gateway CVM instance, the source IPs will be translated into the public IP of the public gateway CVM instance.
Prerequisites
You have logged in to the CVM console.
As a public gateway CVM instance can forward route forwarding requests only from subnets other than the one it resides, it must be in different subnets from the CVM instances that need to access the public network through it.
A public gateway CVM instance must be a Linux CVM instance, as a Windows CVM instance cannot be used as a public gateway.
Directions
Step 1. Bind an EIP (optional)
Note:
Skip this step if the public gateway CVM already has a public IP.
1. Log in to the CVM console and select EIP on the left sidebar.
2. Locate the target EIP and select More > Bind in the Operation column.

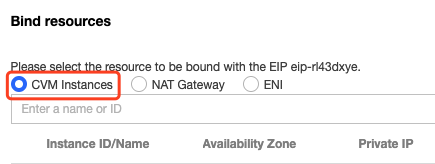
3. In the pop-up window, select a CVM instance to be configured and bind it to the EIP.

Step 2. Configure a route table for the gateway subnet
Note:
The gateway subnet and other subnets cannot share the same route table. You need to create a separate route table for the gateway subnet and associate them.
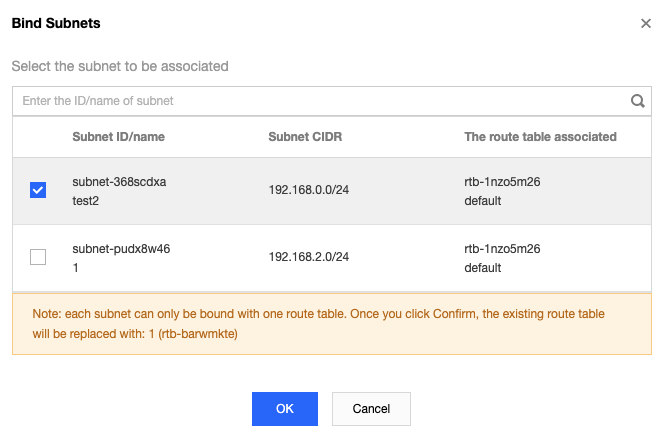
2. Associate the route table with the subnet where the public gateway CVM resides.

Step 3. Configure a route table for other subnets
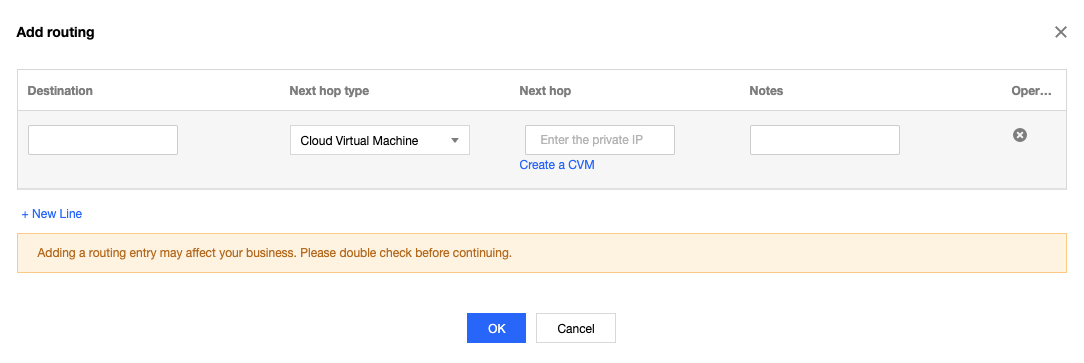
Configure a route table for other subnets and a default route through the public gateway CVM instance, so that the CVM instances within these subnets can access the public network through the route forwarding capability of the public gateway.
Add the following routing policies to the route table:
Destination: The public IP you want to access.
Next hop type: CVM.
Next hop: Private IP of the CVM instance to which the EIP is bound in step 1.
For more information, see Managing Routing Policies.

Step 4. Configure a public gateway
1. Log in to the public gateway CVM instance and perform the following operations to enable the network forwarding and NAT proxy features:
1.1 Run the following command to create the
vpcGateway.sh script in usr/local/sbin.vim /usr/local/sbin/vpcGateway.sh
1.2 Press i to switch to the edit mode and add the following code to the script.
#!/bin/bashecho "----------------------------------------------------"echo " `date`"echo "(1)ip_forward config......"file="/etc/sysctl.conf"grep -i "^net\\.ipv4\\.ip_forward.*" $file &>/dev/null && sed -i \\'s/net\\.ipv4\\.ip_forward.*/net\\.ipv4\\.ip_forward = 1/' $file || \\echo "net.ipv4.ip_forward = 1" >> $fileecho 1 >/proc/sys/net/ipv4/ip_forward[ `cat /proc/sys/net/ipv4/ip_forward` -eq 1 ] && echo "-->ip_forward:Success" || \\echo "-->ip_forward:Fail"echo "(2)Iptables set......"iptables -t nat -A POSTROUTING -j MASQUERADE && echo "-->nat:Success" || echo "-->nat:Fail"iptables -t mangle -A POSTROUTING -p tcp -j TCPOPTSTRIP --strip-options timestamp && \\echo "-->mangle:Success" || echo "-->mangle:Fail"echo "(3)nf_conntrack config......"echo 262144 > /sys/module/nf_conntrack/parameters/hashsize[ `cat /sys/module/nf_conntrack/parameters/hashsize` -eq 262144 ] && \\echo "-->hashsize:Success" || echo "-->hashsize:Fail"echo 1048576 > /proc/sys/net/netfilter/nf_conntrack_max[ `cat /proc/sys/net/netfilter/nf_conntrack_max` -eq 1048576 ] && \\echo "-->nf_conntrack_max:Success" || echo "-->nf_conntrack_max:Fail"echo 10800 >/proc/sys/net/netfilter/nf_conntrack_tcp_timeout_established \\[ `cat /proc/sys/net/netfilter/nf_conntrack_tcp_timeout_established` -eq 10800 ] \\&& echo "-->nf_conntrack_tcp_timeout_established:Success" || \\echo "-->nf_conntrack_tcp_timeout_established:Fail"
1.3 Click Esc and enter :wq to save and close the file.
1.4 Run the following command to set the script permission.
chmod +x /usr/local/sbin/vpcGateway.shecho "/usr/local/sbin/vpcGateway.sh >/tmp/vpcGateway.log 2>&1" >> /etc/rc.local
2. Set the RPS of the public gateway.
2.1 Run the following command to create the
set_rps.sh script in usr/local/sbin.vim /usr/local/sbin/set_rps.sh
2.2 Press i to switch to the edit mode and add the following code to the script.
# !/bin/bashecho "--------------------------------------------"datemask=0i=0total_nic_queues=0get_all_mask() {local cpu_nums=$1if [ $cpu_nums -gt 32 ]; thenmask_tail=""mask_low32="ffffffff"idx=$((cpu_nums / 32))cpu_reset=$((cpu_nums - idx * 32))if [ $cpu_reset -eq 0 ]; thenmask=$mask_low32for ((i = 2; i <= idx; i++)); domask="$mask,$mask_low32"doneelsefor ((i = 1; i <= idx; i++)); domask_tail="$mask_tail,$mask_low32"donemask_head_num=$((2 ** cpu_reset - 1))mask=$(printf "%x%s" $mask_head_num $mask_tail)fielsemask_num=$((2 ** cpu_nums - 1))mask=$(printf "%x" $mask_num)fiecho $mask}set_rps() {if ! command -v ethtool &>/dev/null; thensource /etc/profilefiethtool=$(which ethtool)cpu_nums=$(cat /proc/cpuinfo | grep processor | wc -l)if [ $cpu_nums -eq 0 ]; thenexit 0fimask=$(get_all_mask $cpu_nums)echo "cpu number:$cpu_nums mask:0x$mask"ethSet=$(ls -d /sys/class/net/eth*)for entry in $ethSet; doeth=$(basename $entry)nic_queues=$(ls -l /sys/class/net/$eth/queues/ | grep rx- | wc -l)if (($nic_queues == 0)); thencontinueficat /proc/interrupts | grep "LiquidIO.*rxtx" &>/dev/nullif [ $? -ne 0 ]; then # not smartnic#multi queue don't set rpsmax_combined=$($ethtool -l $eth 2>/dev/null | grep -i "combined" | head -n 1 | awk '{print $2}')#if ethtool -l $eth goes wrong.[[ ! "$max_combined" =~ ^[0-9]+$ ]] && max_combined=1if [ ${max_combined} -ge ${cpu_nums} ]; thenecho "$eth has equally nic queue as cpu, don't set rps for it..."continuefielseecho "$eth is smartnic, set rps for it..."fiecho "eth:$eth queues:$nic_queues"total_nic_queues=$(($total_nic_queues + $nic_queues))i=0while (($i < $nic_queues)); doecho $mask >/sys/class/net/$eth/queues/rx-$i/rps_cpusecho 4096 >/sys/class/net/$eth/queues/rx-$i/rps_flow_cnti=$(($i + 1))donedoneflow_entries=$((total_nic_queues * 4096))echo "total_nic_queues:$total_nic_queues flow_entries:$flow_entries"echo $flow_entries >/proc/sys/net/core/rps_sock_flow_entries}set_rps
2.3 Click Esc and enter :wq to save and close the file.
2.4 Run the following command to set the script permission.
chmod +x /usr/local/sbin/set_rps.shecho "/usr/local/sbin/set_rps.sh >/tmp/setRps.log 2>&1" >> /etc/rc.localchmod +x /etc/rc.d/rc.local
3. Restart the public gateway CVM instance to apply the configuration. Then, test whether a CVM instance without a public IP can access the public network.
Was this page helpful?
You can also Contact Sales or Submit a Ticket for help.
Yes
No
Feedback

