Operation Scenarios
Sometimes, containers may fail to work properly after an exception occurs. If there is no sufficient information in the business log to help you identify the cause, you need to use coredump for further analysis. This document how to generate and save coredump for containers.
Note:
This document only applies to TKE clusters.
Prerequisites
Directions
Enabling coredump
1. Run the following command on the node to set the storage path format of the core file for the node:
echo "/tmp/cores/core.%h.%e.%p.%t" > /proc/sys/kernel/core_pattern
Main parameters are described as follows:
%h: host name (in a Pod, the host name is the Pod name) (recommended).
%e: program file name (recommended).
%p: process ID (optional).
%t: coredump time (optional).
The complete path where the core file is generated is as follows:
/tmp/cores/core.nginx-7855fc5b44-p2rzt.bash.36.1602488967
2. After configuring the node, you need not modify the existing container configuration. The container configuration will automatically take effect through inheritance. If you require batch execution on multiple nodes, perform the corresponding operation accordingly:
Enabling the COS add-on
To prevent the loss of the core file after the container restarts, you need to mount a volume for the container. As the cost of mounting an independent cloud disk for each pod is too high, you need to mount the component to COS. For the directions, see Installing the COS add-on. Creating a bucket
Log in to the COS console, and manually create a COS bucket for storing the core file generated by the container coredump. In this document, a custom bucket named coredump is created as an example. For directions, see Creating a bucket. Creating a Secret
You can choose any of the following three methods to create a Secret for accessing COS based on your needs:
To create a Secret by using the kubectl command line tool, refer to the following code snippet:
kubectl create secret generic cos-secret -n kube-system --from-literal=SecretId=AKI*****************lV --from-literal=SecretKey=paQ9***************sZF
Note:
Remember to replace SecretId, SecretKey, and namespace.
Creating a PV and PVC
To use the COS plug-in, you need to manually create a PV and PVC and then bind them.
Creating a PV
1. On the details page of the target cluster, choose Storage > PersistentVolume in the left sidebar to go to the "PersistentVolume" page.
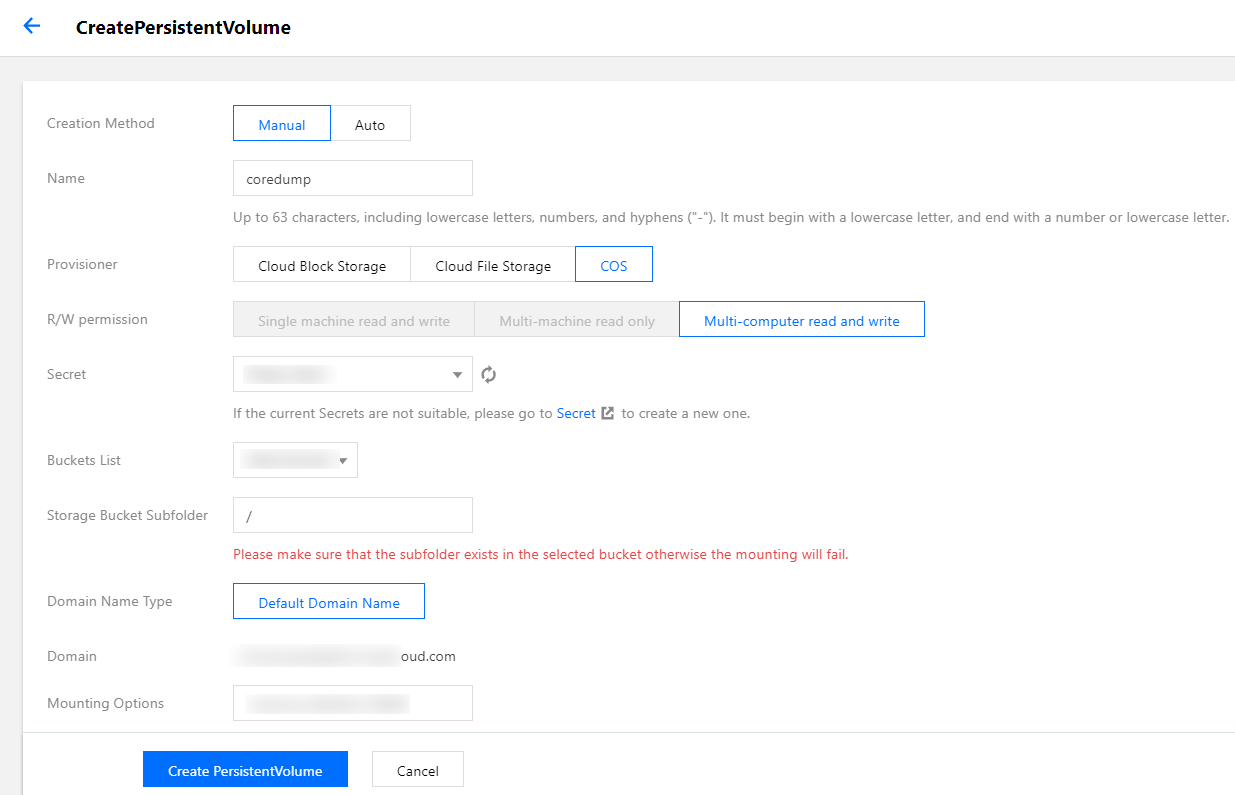
2. Click Create to go to the "Create a PersistentVolume" page and set the PV parameters as required, as shown in the figure below:
Main parameters are described as follows: Creation Method: select Static.
Secret: select the Secret created in Creating a Secret. In this document, coredump is used as an example (under the kube-system namespace). Bucket List: select the bucket created for storing the coredump file.
Bucket Sub-directory: specify the root directory here. If you need to specify a sub-directory, please create one in the bucket in advance.
3. Click Create a PersistentVolume to complete the process.
Creating a PVC
1. On the details page of the target cluster, choose Storage > PersistentVolumeClaim in the left sidebar to go to the "PersistentVolumeClaim" page.
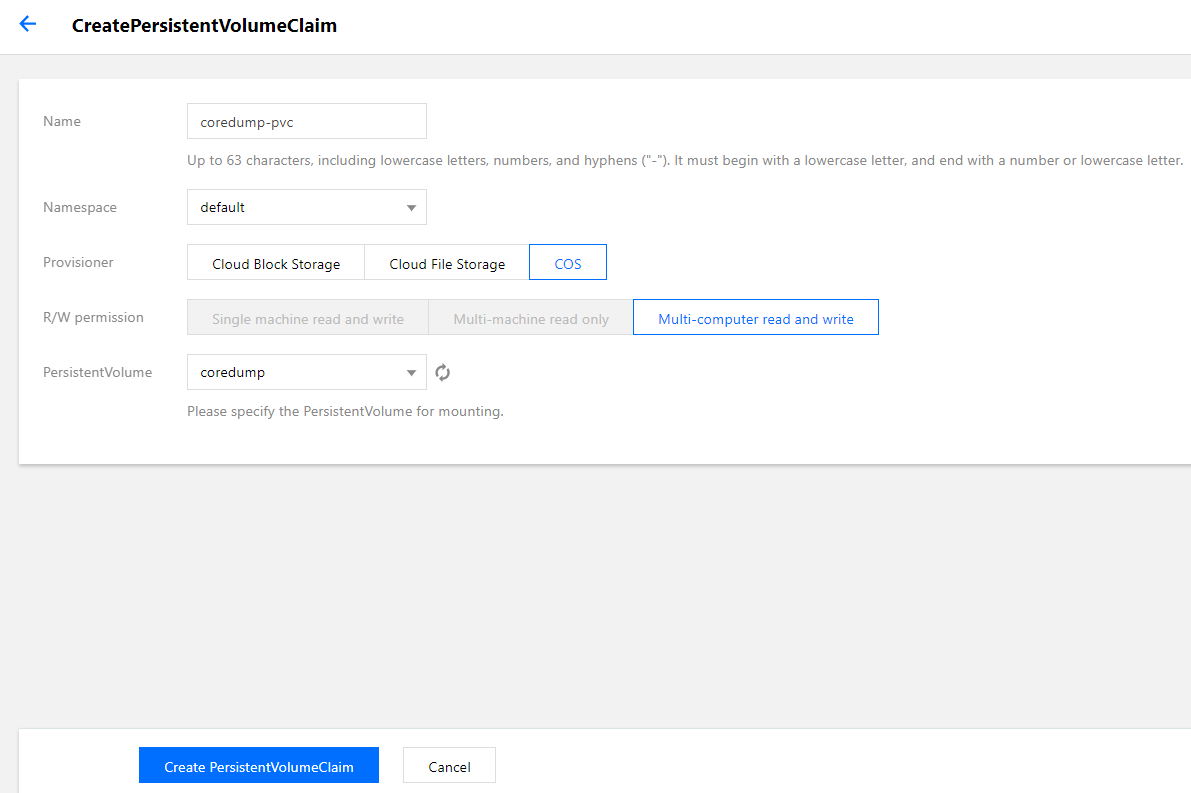
2. Click Create to go to the "Create a PersistentVolumeClaim" page and set the PVC parameters as required, as shown in the figure below:
Main parameters are described as follows: Namespace: the namespace must be the same as the namespace where the container of the PVC for mounting COS belongs. If there are multiple namespaces, you can create multiple pairs of PVs and PVCs.
3. Click Create a PersistentVolumeClaim to complete the process.
Mounting COS
Using the console to create a Pod to use the PVC
Note:
This step creates a Deployment workload as an example.
1. On the details page of the target cluster, choose Workload > Deployment to go to the "Deployment" page.
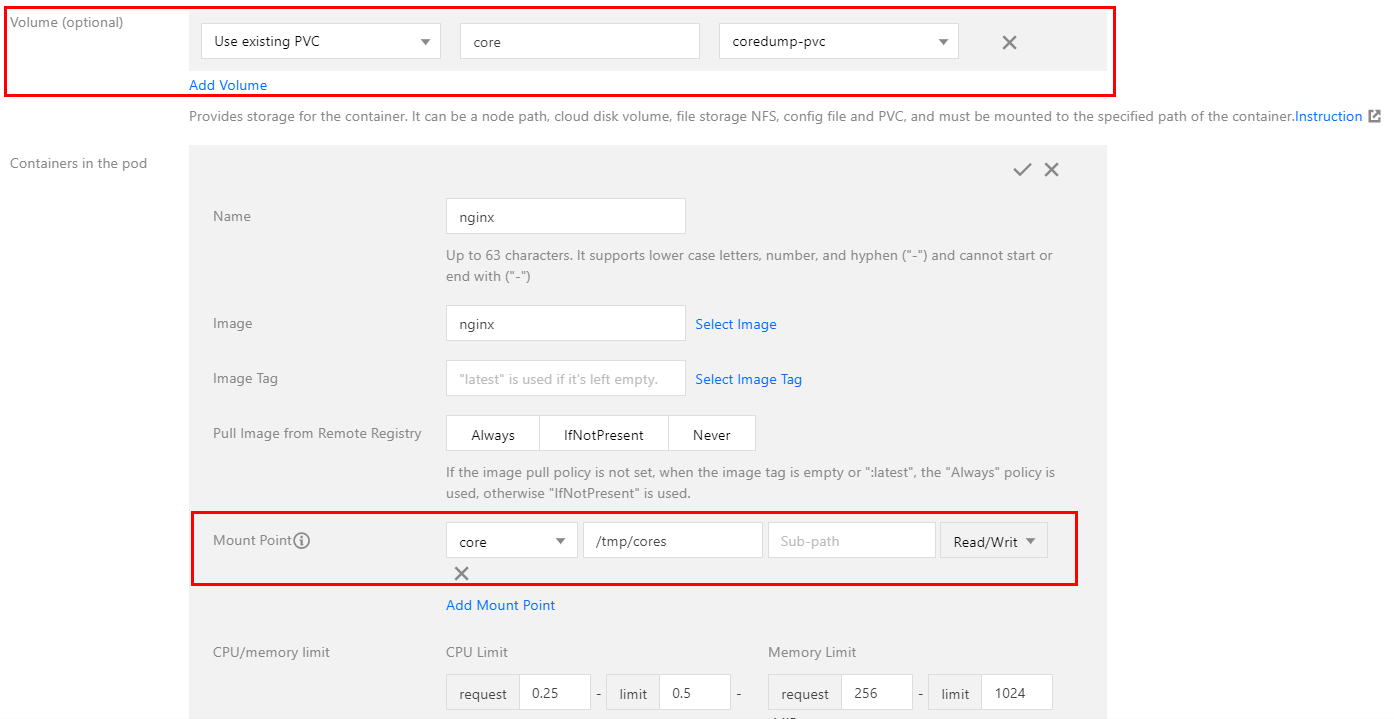
2. Click Create to go to the "Create a Workload" page. For more information, see Creating a Deployment. Then, mount a volume as required, as shown in the figure below:
Main parameters are described as follows: Mount Target: click Add a mount target to set a mount target. Here, select the added volume "core". Import the PVC specified in Volume, and mount it to the destination path. In this document, /tmp/cores is used as an example.
3. Click Create a Workload to complete the process.
Using a YAML file to create a Pod to use the PVC
You can create a Pod by using a YAML file. Below is a sample:
containers:
- name: pod-cos
command: ["tail", "-f", "/etc/hosts"]
image: "centos:latest"
volumeMounts:
- mountPath: /tmp/cores
name: core
volumes:
- name: core
persistentVolumeClaim:
claimName: coredump
Reference