
备份仓库
最后更新时间:2025-09-29 14:37:52
备份仓库
最后更新时间: 2025-09-29 14:37:52
操作场景
腾讯云容器服务 TKE 备份中心为业务应用的备份、恢复与迁移提供了一体化的解决方案,本文介绍如何创建备份仓库来存储备份数据。
前提条件
1. 登录 对象存储控制台 新建 COS 存储桶作为备份仓库的底层存储。容器服务角色采用最小化授权方式访问您的 COS 存储,存储桶的命名必须以 “tke-backup” 开头。具体操作步骤请参见 创建存储桶。
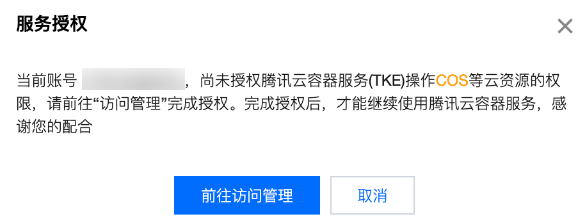
2. 完成对 COS 对象读写操作的授权。在使用备份仓库之前,在控制台根据提示将策略 QcloudAccessForTKERoleInCOSObject 授权给角色 TKE_QCSRole。
说明:
操作步骤
1. 登录 容器服务控制台,在左侧导航栏中选择运维中心 > 备份中心。
2. 进入备份仓库页面,单击创建。
3. 在创建备份仓库页面,填写仓库基本信息,如下图所示:
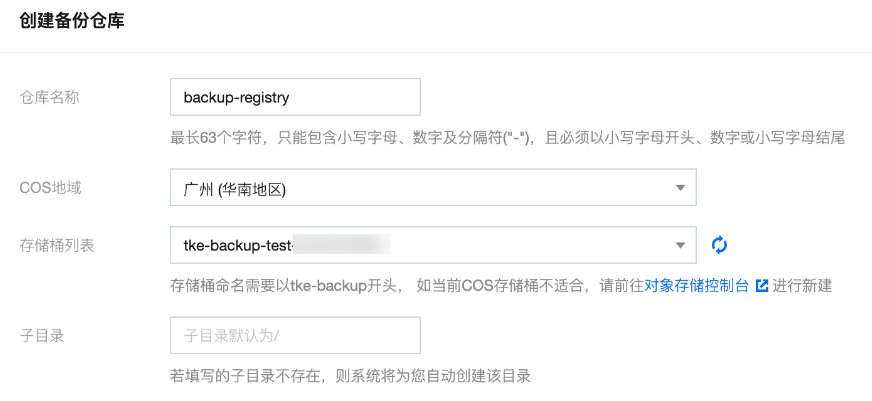
仓库名称:自定义备份仓库的名称
COS 地域:选择对象存储所在地域
存储桶列表:存储桶命名需要以 “tke-backup” 开头, 如当前 COS 存储桶不适合,可前往 对象存储控制台 新建。
4. 单击确定完成创建。
文档反馈