Practices on Dynamic Scheduling of Spark Resources
Download
Mode fokus
Ukuran font
Terakhir diperbarui: 2025-01-03 14:50:17
Preparations for Development
Confirm that you have activated Tencent Cloud and created an EMR cluster. When creating the EMR cluster, you need to select the spark_hadoop component on the software configuration page.
Spark is installed in the /usr/local/service/ path (/usr/local/service/spark) in the CVM instance for the EMR cluster.
Copying JAR Package
You need to copy spark-<version>-yarn-shuffle.jar to the /usr/local/service/hadoop/share/hadoop/yarn/lib directory of all nodes in the cluster.
Method 1. Use the SSH Console
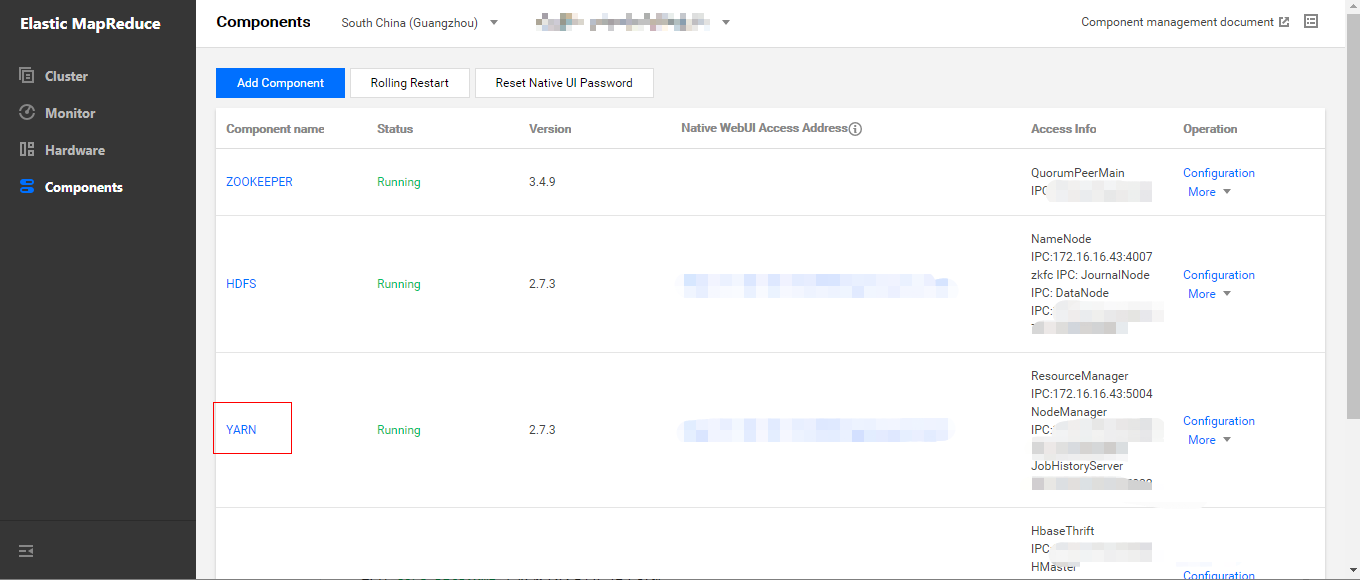
1. In Cluster Service > YARN, select Operation > Role Management and confirm the IP of the node where NodeManager resides.
2. Log in to the nodes where NodeManager resides one by one.
You need to log in to any node (preferably a master one) in the EMR cluster. For more information on how to log in to EMR, please see Logging in to Linux Instance. Here, you can log in by using XShell.
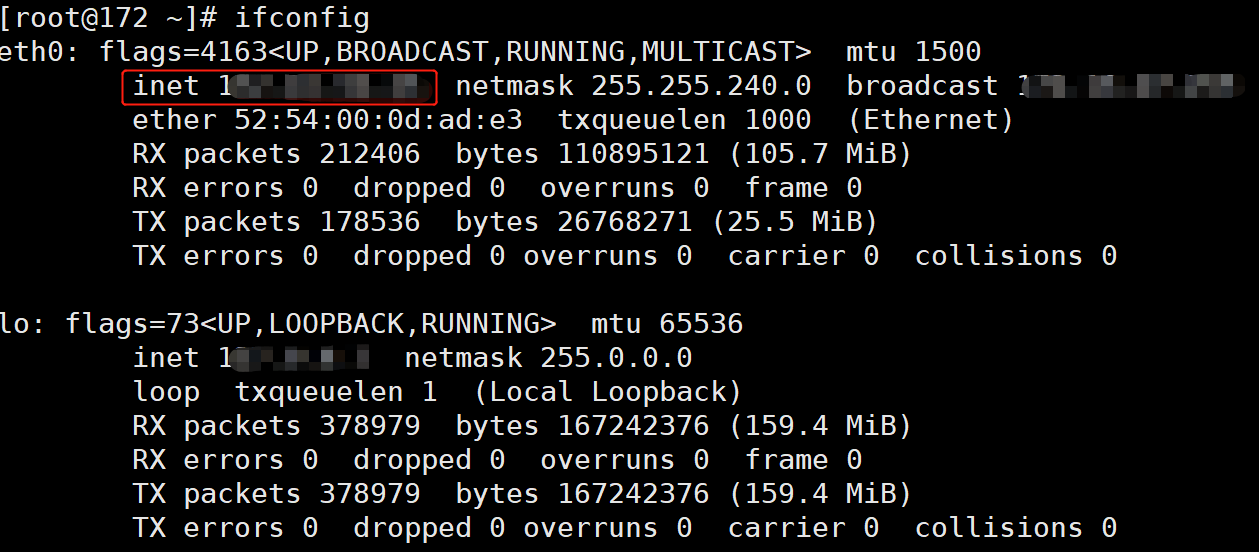
Use SSH to log in to other nodes where NodeManager resides. The used command is ssh $user@$ip, where $user is the login username, and $ip is the remote server IP (i.e., IP address confirmed in step 1).
Verify that the switch is successful.
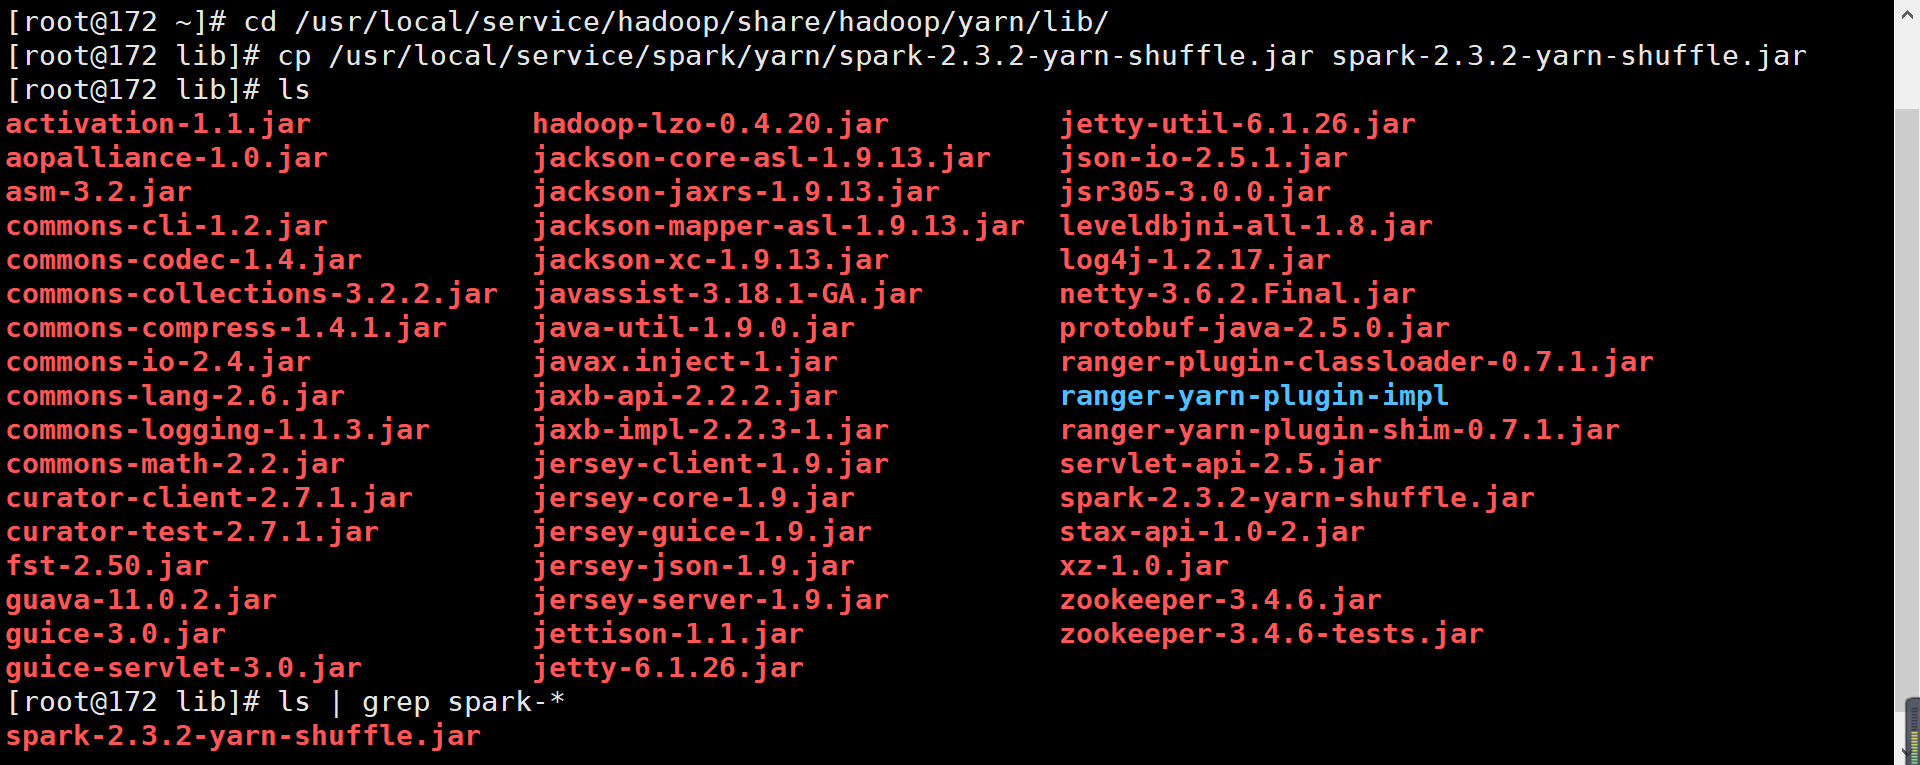
3. Search for the path of the spark-<version>-yarn-shuffle.jar file.
4. Copy spark-<version>-yarn-shuffle.jar to /usr/local/service/hadoop/share/hadoop/yarn/lib.
5. Log out and switch to other nodes.
Method 2. Use batch deployment script
You need to log in to any node (preferably a master one) in the EMR cluster. For more information on how to log in to EMR, please see Logging in to Linux Instance. Here, you can log in by using XShell.
Write the following Shell script for batch file transfer. When there are many nodes in a cluster, to avoid entering the password for multiple times, you can use sshpass for file transfer. sshpass provides password-free transfer to eliminate your need to enter the password repeatedly; however, the password plaintext is prone to disclosure and can be found with the history command.
1. Install sshpass for password-free transfer.
[root@172 ~]# yum install sshpass
Write the following script:
#!/bin/bash
nodes=(ip1 ip2 … ipn)# List of IPs of all nodes in the cluster separated by spaces
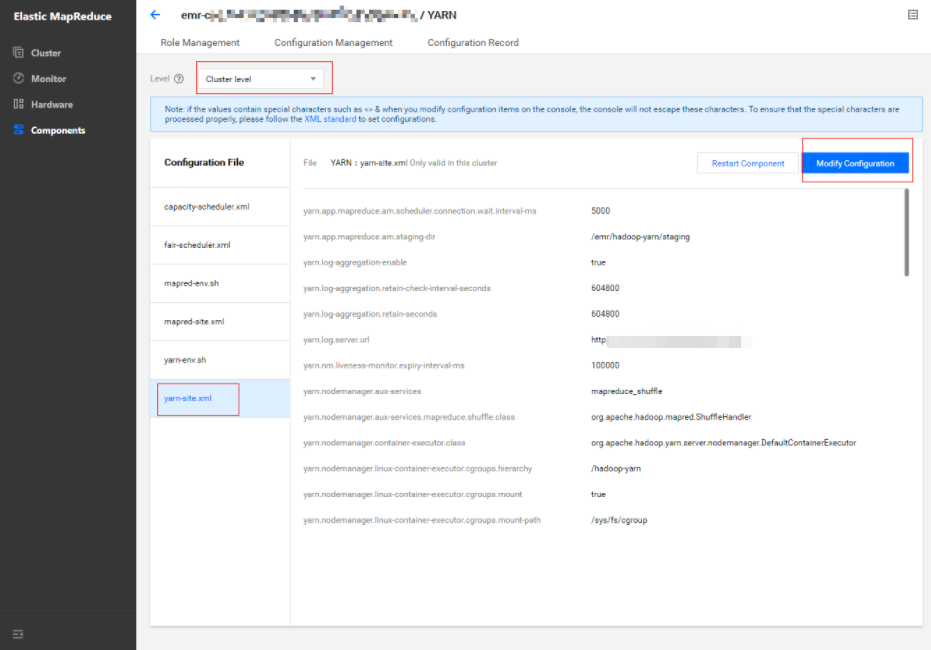
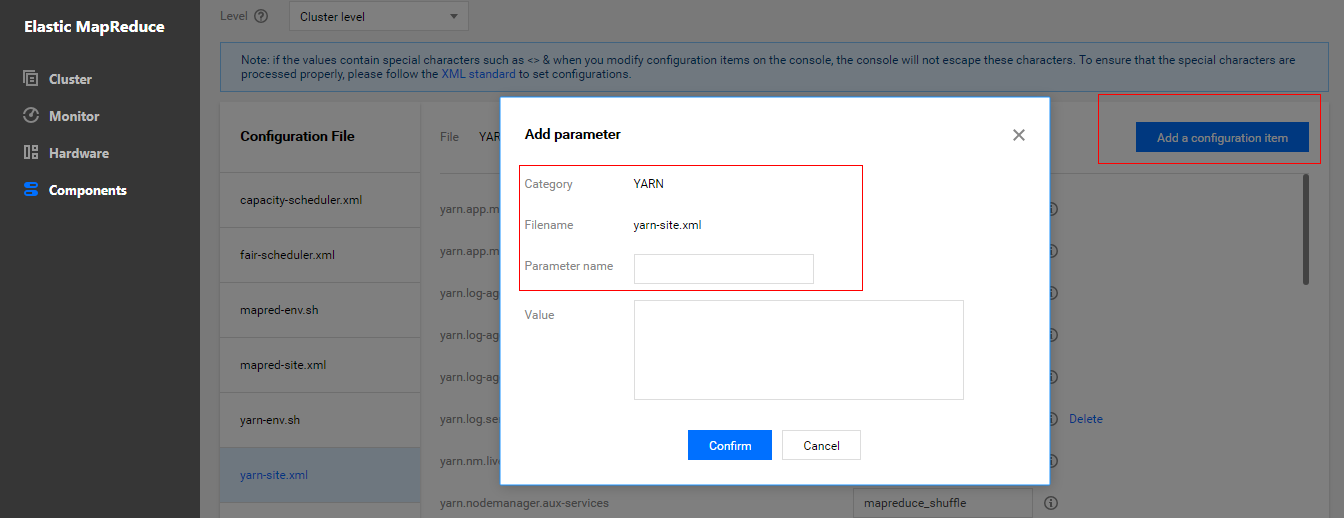
1. In Cluster Service > YARN, select Operation > Configuration Management. Select the configuration file yarn-site.xml and select "cluster level" as the level (modifications of configuration items at the cluster level will be applied to all nodes in the cluster).
2. Modify the yarn.nodemanager.aux-services configuration item and add spark_shuffle.
3. Add the configuration item yarn.nodemanager.aux-services.spark_shuffle.class and set it to org.apache.spark.network.yarn.YarnShuffleService.
4. Add the configuration item spark.yarn.shuffle.stopOnFailure and set it to false.
5. Save and distribute the settings. Restart the YARN component for the configuration to take effect.
Modifying Spark Configuration
1. In Cluster Service > SPARK, select Operation > Configuration Management.
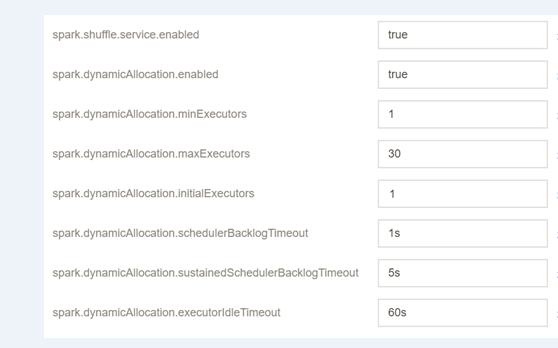
2. Select the configuration file spark-defaults.conf, click Modify Configuration, and create configuration items as shown below:
Configuration Item
Value
Remarks
spark.shuffle.service.enabled
true
It starts the shuffle service.
spark.dynamicAllocation.enabled
true
It starts dynamic resource allocation.
spark.dynamicAllocation.minExecutors
1
It specifies the minimum number of executors allocated for each application.
spark.dynamicAllocation.maxExecutors
30
It specifies the maximum number of executors allocated for each application.
spark.dynamicAllocation.initialExecutors
1
Generally, its value is the same as that of `spark.dynamicAllocation.minExecutors`.
spark.dynamicAllocation.schedulerBacklogTimeout
1s
If there are pending jobs backlogged for more than this duration, new executors will be requested.
If the queue of pending jobs still exists, it will be triggered again once every several seconds. The number of executors requested per round grows exponentially compared to the previous round.
spark.dynamicAllocation.executorIdleTimeout
60s
If an executor has been idle for more than this duration, it will be deleted by the application.
3. Save and distribute the configuration and restart the component.
Testing Dynamic Scheduling of Spark Resources
1. Resource configuration description of the testing environment
In the testing environment, there are two nodes where NodeManager is deployed, and each node has a 4 CPU cores and 8 GB memory. The total resources of the cluster are 8 CPU cores and 16 GB memory.
2. Testing job description
Test 1
In the EMR Console, enter the /usr/local/service/spark directory, switch to the "hadoop" user, and run spark-submit to submit a job. The data needs to be stored in HDFS.
In the "Application" panel of the WebUI of the YARN component, you can view the container and CPU allocation before and after the configuration.
Before dynamic resource scheduling is configured, at most 3 CPUs can be allocated.
After dynamic resource scheduling is configured, up to 5 CPUs can be allocated.
Conclusion: after dynamic resource scheduling is configured, the scheduler will allocate more resources based on the real-time needs of applications.
Test 2
In the EMR Console, enter the /usr/local/service/spark directory, switch to the "hadoop" user, and run spark-sql to start the interactive SparkSQL Console, which is set to use most of the resources in the testing cluster. Configure dynamic resource scheduling and check resource allocation before and after the configuration.
Use the example for calculating the pi that comes with Spark 2.3.0 as the testing job. When submitting the job, set the number of executors to 5, the driver memory to 4 GB, the executor memory to 4 GB, and the number of executor cores to 2.
The resource utilization when only the SparkSQL job is running is 90.3%.
After the SparkPi job is submitted, the resource utilization of SparkSQL becomes 27.8%.
Conclusion: although the SparkSQL job applies for a large amount of resources during submission, no analysis jobs are executed; therefore, there are a lot of idle resources actually. When the idle duration exceeds the limit set by spark.dynamicAllocation.executorIdleTimeout, idle executors will be released, and other jobs will get resources. In this test, the cluster resource utilization of the SparkSQL job decreases from 90% to 28%, and idle resources are allocated to the pi calculation job; therefore, automatic scheduling is effective.
Note:
The value of the configuration item spark.dynamicAllocation.executorIdleTimeout affects the speed of dynamic resource scheduling. In the test, it is found that the resource scheduling duration is basically the same as this value. You are recommended to adjust this value based on your actual needs for optimal performance.