Building a Frontend Single-Page Application with COS's Static Website Feature
Unduh
Mode fokus
Ukuran font
Terakhir diperbarui: 2025-11-04 15:37:02
What Is a Single-Page Application?
A single-page application (SPA), is a model of a web application or website that interacts with the user by dynamically rewriting the current page, instead of the traditional method of reloading entire new pages from the server. This approach avoids interruptions to the user experience by switching between pages and makes the application more like a desktop application. In an SPA, all necessary code (HTML, JavaScript, and CSS) is either retrieved with a single page load or the appropriate resources are dynamically loaded and added to the page as necessary, usually in response to user actions.
At present, in the field of frontend development, common SPA development frameworks include React, Vue, and Angular.
This document uses two popular frameworks to illustrate how to use the static website feature provided by Tencent Cloud's Cloud Object Storage (COS) to quickly build an online available SPA, and provides solutions to some common problems.
Preparations
1. Install the Node.js environment.
2. Sign up for a Tencent Cloud account and verify your identity to ensure that you can log in to the Tencent Cloud COS console.
3. Create a bucket (to facilitate testing, set the bucket permission to Public read & Private write).
1. Run the following command to install the Vue CLI:
npminstall -g @vue/cli
2. Run the following command in the Vue CLI to quickly create a Vue project. For more information, see the official document.
vue create vue-spa
3. Run the following command to install vue-router in the root directory of the project:
npminstall vue-router -S (Vue 2.x)
Or
npminstall vue-router@4 -S (Vue 3.x)
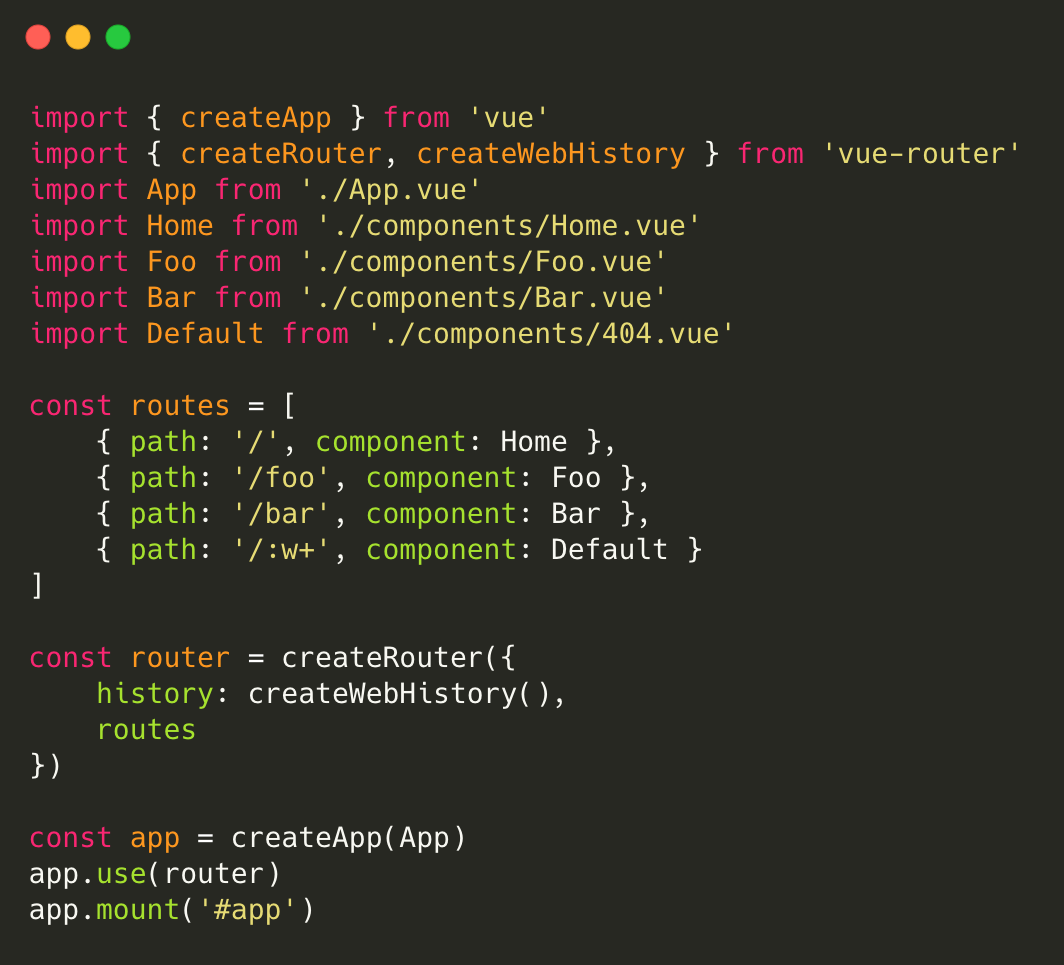
4. Modify the main.js and App.vue files in the project.
Modify main.js as follows:
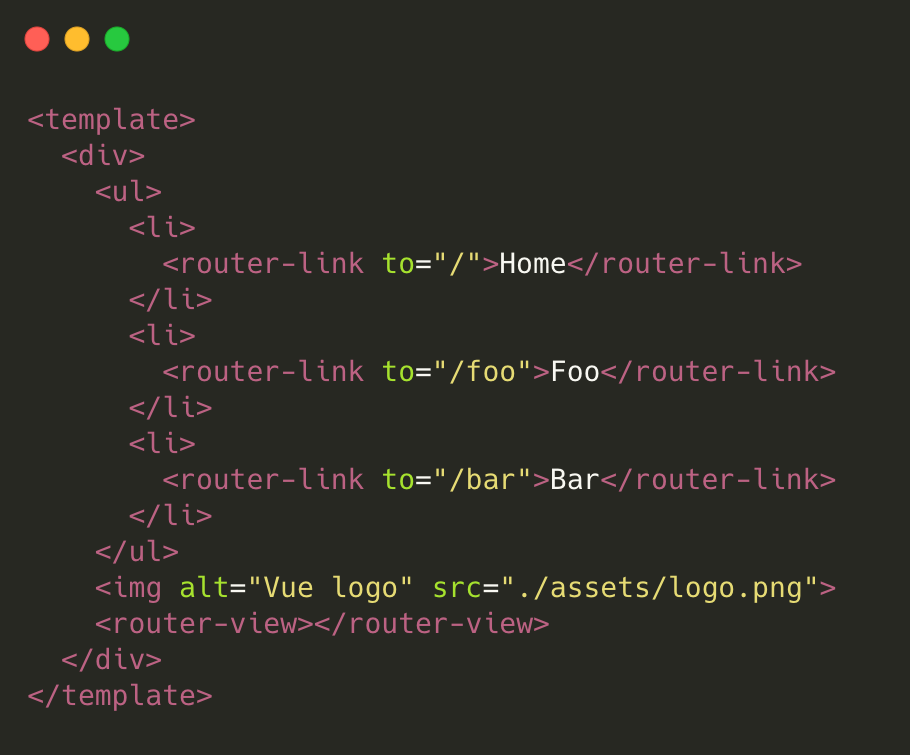
In App.vue, mainly modify the component template. See the figure below.
Note:
For simplicity, only some key code is shown here. For the full code, click here to download.
5. After modifying the code, run the following command for local preview:
npm run serve
6. After debugging and preview check, run the following command to package the production environment code:
npm run build
The dist directory is generated in the root directory of the project, and the Vue program code is ready.
Quickly building an SPA with React
1. Run the following command to install create-react-app:
npminstall -g create-react-app
2. Use create-react-app to quickly create a React project. For more information, please see the official document.
3. Run the following command to install react-router-dom in the root directory of the project:
npminstall react-router-dom -S
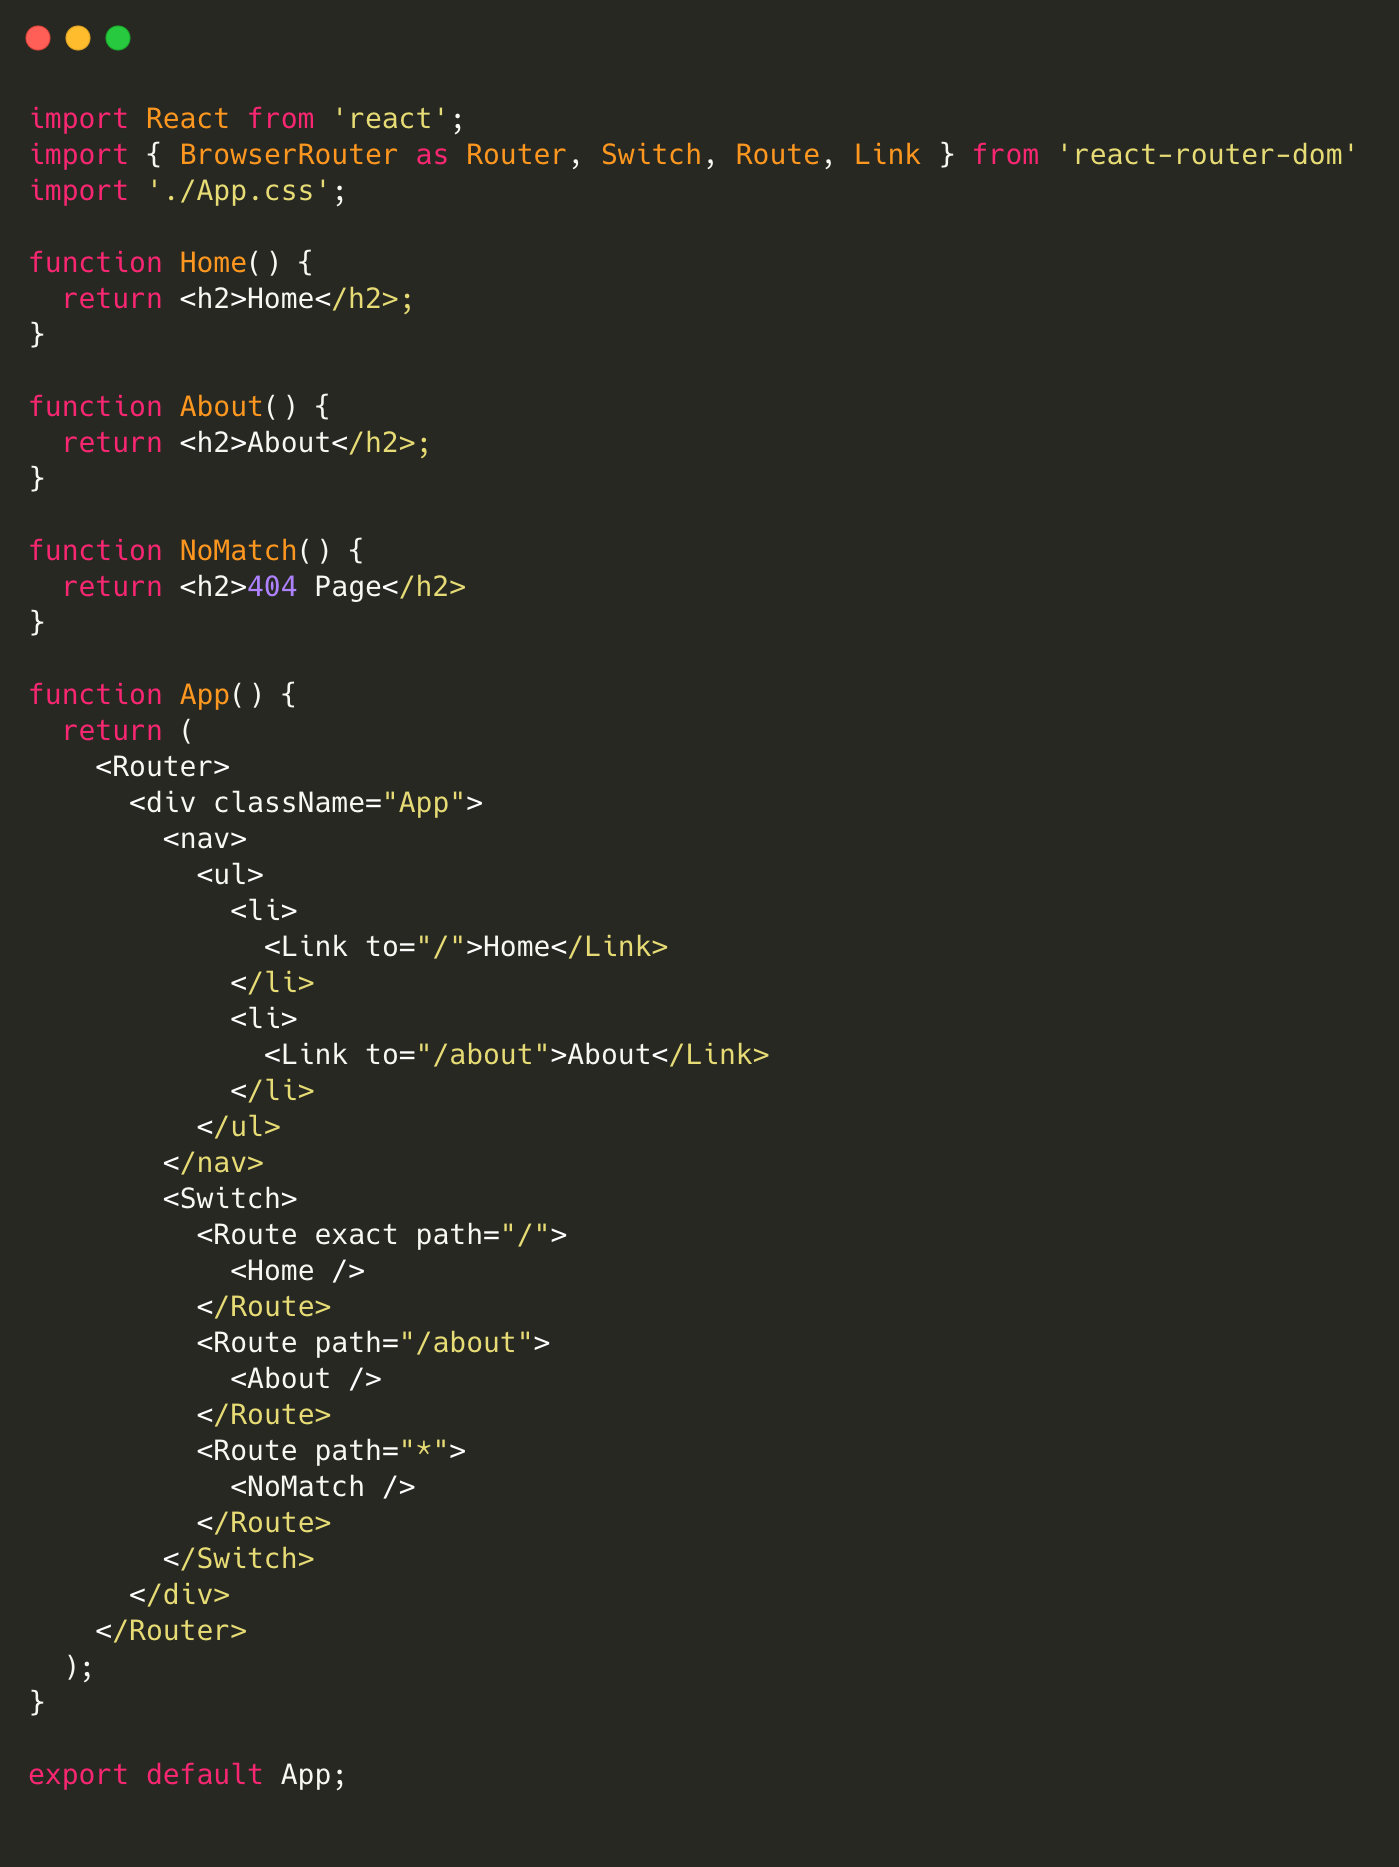
4. Modify the App.js file in the project.
Note:
For simplicity, only some key code is shown here. For the full code, click here to download.
5. After modifying the code, run the following command for local preview:
npm run start
6. After debugging and preview check, run the following command to package the production environment code:
npm run build
The build directory is created in the root directory of the project, and the React program code is ready.
Configuring the Bucket Static Website
1. Go to the details page of the created bucket and choose Basic Configurations > Static Website.
2. On the static website management page, configure information as shown in the figure below. For operation details, please see Setting Up a Static Website.
Deploying the SPA to COS
1. Locate the bucket for which the static website is configured, and go to the corresponding File List page.
2. Upload all files in the compilation directory (default compilation directory: dist for Vue and build for React) to the root directory of the bucket. For operation details, please see Uploading Objects.
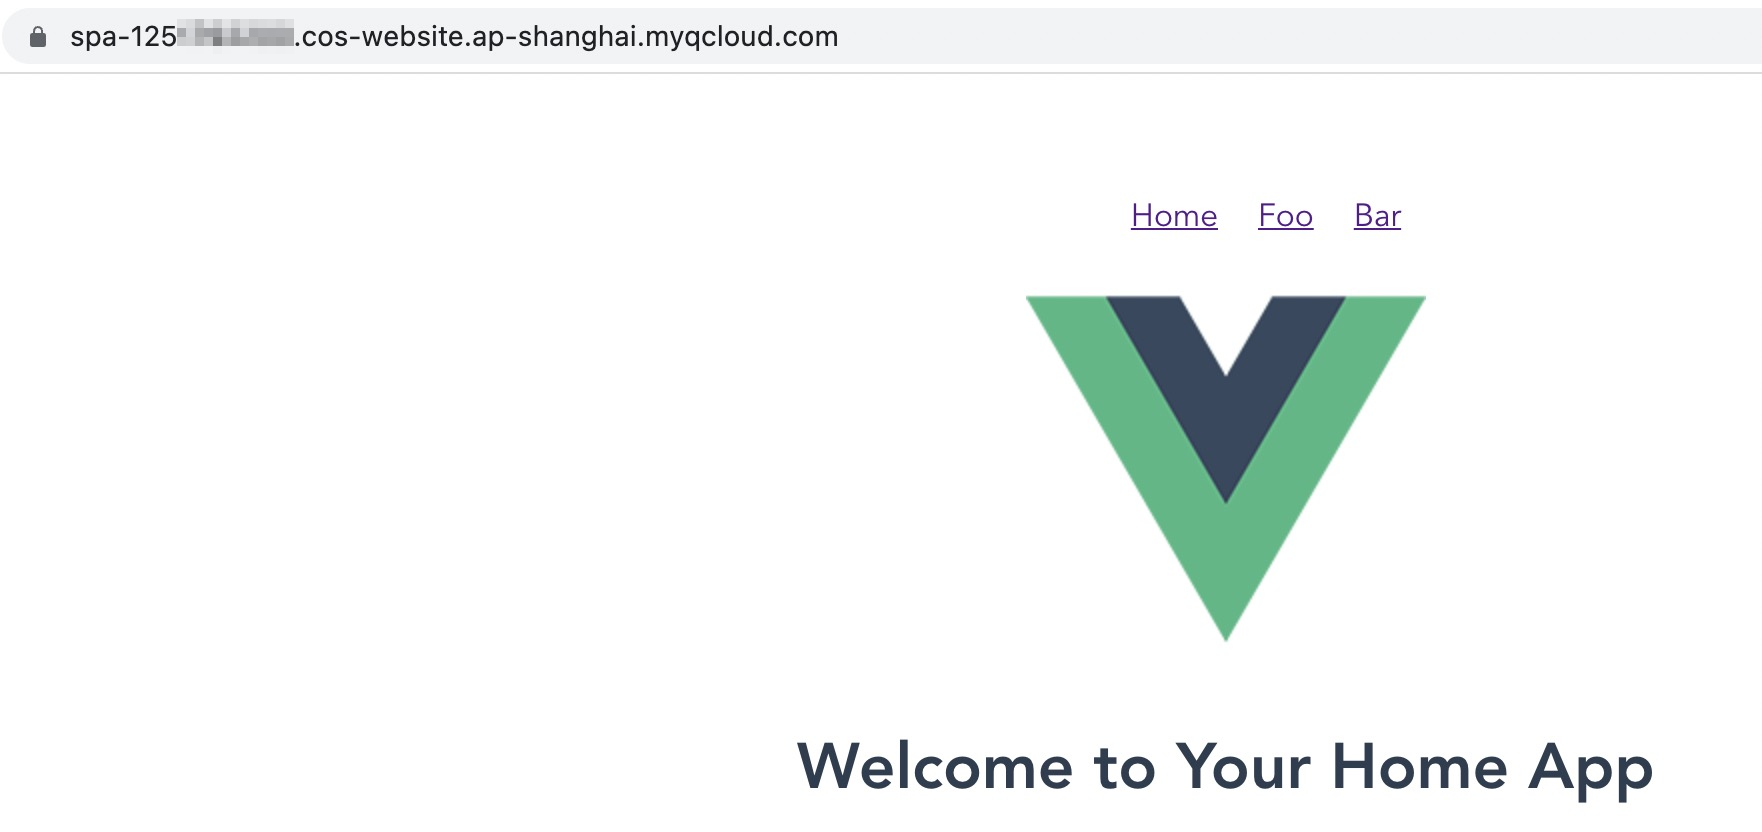
3. Access the bucket's static website domain (the access node shown in the figure below).
Then you can view the homepage of the deployed SPA (the Vue application in this example).
4. Try to switch between routes (Home, Foo, and Bar) and refresh the page to check whether the application works properly (no 404 error is reported upon refreshing under new routes).
FAQs
What if I don't want to use the default domain name of the static website? Can I use my own domain name?
In addition to the default static website endpoint mentioned above, COS also allows you to set the custom CDN acceleration domain name and custom endpoint. For configuration details, see Domain Name Management Overview. After successful configuration, you can use your desired domain name to access the application.
Note that if you choose to configure a CDN acceleration domain name, refer to Node Cache Validity Configuration to get the updated data.
After the application is deployed, rendering is successful after route switching, but the 404 error is reported whenever the page is refreshed. Why is that?
This may be caused by the missing or incorrect configuration of Error Document. As the figure in Configuring the Bucket Static Website shows, Error document and Index Document are both set to index.html.
Due to the nature of single-page applications, we need to ensure that the application entry (typically index.html) can be successfully accessed in any case in order to trigger a set of internal logic for subsequent routing.
After the route is switched, the page is displayed normally, but the HTTP status code is still 404. How do I make the HTTP status code 200?
The reason is that Error Document Response Code is not set during static website configuration. To solve this problem, set Error Document Response Code to 200. See the figure in Configuring the Bucket Static Website.
What should I do to make the application still return the status code 404 for accessing an incorrect path after Error Document is set?
It is recommended to implement 404 logic in the frontend code: configure an underlying matching rule at the bottom layer of the routing configuration to configure the system to render a 404 component if the matching of all the preceding rules fails. The content of the 404 component can be designed and implemented according to your own requirements. For more information, please see the last configuration of the routing configuration in the code demo provided in this document.
Why is the error "403 Access Denied" reported during page access?
The possible cause is that the bucket permission is set to Private (read-write). To solve the problem, change the permission to Public read & Private write.
In addition, if you use the CDN acceleration domain name to access a bucket with the Private (read-write) permission, be sure to enable origin-pull authentication so that you can authorize the CDN service to access COS resources.