Web&H5 (Vue3)
Download
フォーカスモード
フォントサイズ
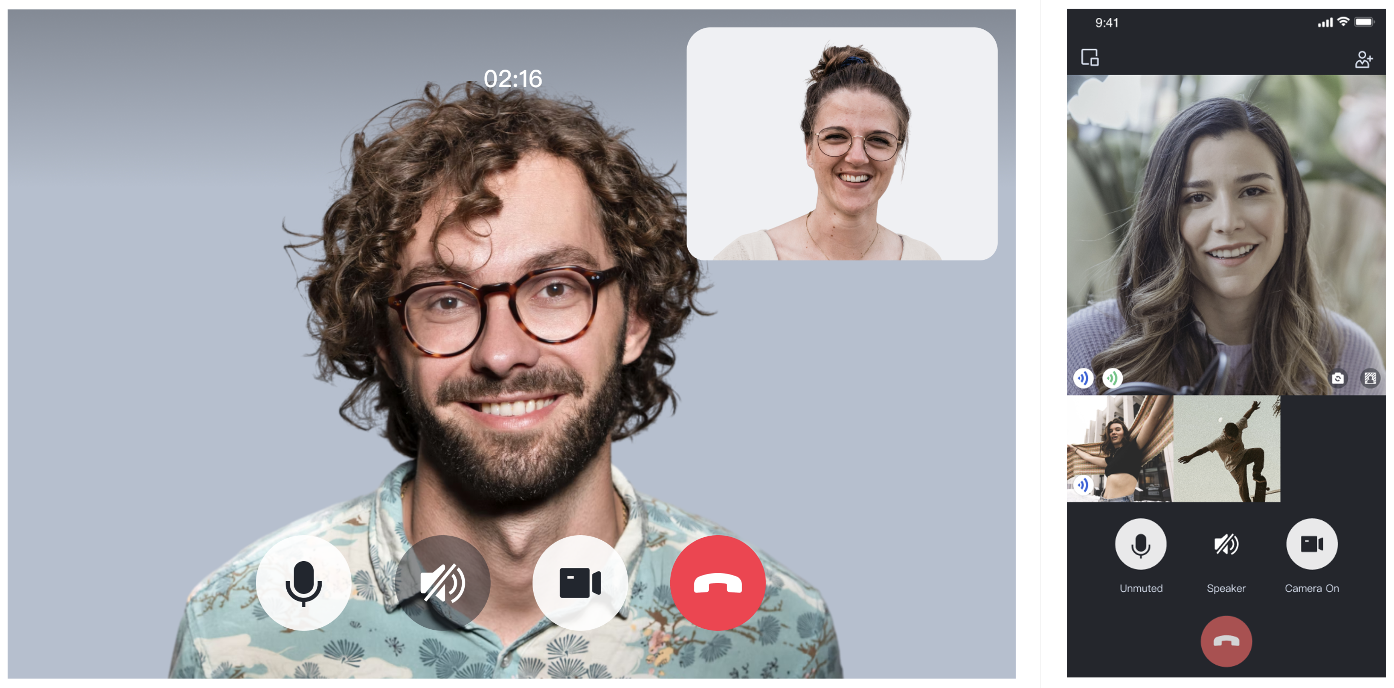
この文章では、TUICallKit コンポーネントを素早く導入する方法を紹介します。10 分以内で以下の重要なステップを完了し、最終的に完全な UI インターフェイスを備えたビデオ通話機能を取得します。
環境準備
Node.js version 16+.
Modern browser, supporting WebRTC APIs.
ステップ 1:サービスをアクティブ化する
ステップ 2:TUICallKit コンポーネントをダウンロードする
1. @tencentcloud/call-uikit-vue コンポーネントをダウンロードします。
npm install @tencentcloud/call-uikit-vue
2. **
debug**ディレクトリをプロジェクトディレクトリ src/debugにコピーします。これは、ローカルで userSig を生成するときに必要です。cp -r node_modules/@tencentcloud/call-uikit-react/debug ./src
xcopy node_modules@tencentcloud\\\\call-uikit-react\\\\debug .\\\\src\\\\debug /i /e
ステップ 3:TUICallKit コンポーネントを初期化する
callkit-demo/src/App.vue ファイルにサンプルコードを導入することができます。サンプルコードは**Composition API** の書き方を使っています。1. <TUICallKit />を導入します。このコンポーネントには通話時の完全な UI インタラクションが含まれています。
<template><span>caller's ID: </span><input type="text" v-model="callerUserID"><button @click="init"> step1. init </button> <br><span> callee's ID: </span><input type="text" v-model="calleeUserID"><button @click="call"> step2. call </button><!--【1】Import the TUICallKit component: Call interface UI --><TUICallKit style="width: 650px; height: 500px " /></template>
2. TUICallKitServer.init API ログインコンポーネントを呼び出すには、コードに
SDKAppID、SDKSecretKeyの2つのパラメータを記入 する必要があります。<script setup>import { ref } from 'vue';import { TUICallKit, TUICallKitServer, TUICallType } from "@tencentcloud/call-uikit-vue";import \\* as GenerateTestUserSig from "./debug/GenerateTestUserSig-es"; // Refer to Step 3const SDKAppID = 0; // TODO: Replace with your SDKAppID (Notice: SDKAppID is of type number)const SDKSecretKey = ''; // TODO: Replace with your SDKSecretKeyconst callerUserID = ref('');const calleeUserID = ref('');//【2】Initialize the TUICallKit componentconst init = async () => {const { userSig } = GenerateTestUserSig.genTestUserSig({userID: callerUserID.value,SDKAppID,SecretKey: SDKSecretKey});await TUICallKitServer.init({userID: callerUserID.value,userSig,SDKAppID,});alert('TUICallKit init succeed');}</script>
パラメータ | タイプ | 説明 |
userID | String | ユーザーの一意の識別子。ユーザーが定義するものであり、大文字と小文字の英字(a-z A-Z)、数字(0~9)、アンダースコアとハイフンのみを含めることができます。 |
SDKAppID | Number | Tencent RTC コンソール で音声・動画アプリケーションの一意の識別子を作成します。 |
SDKSecretKey | String | Tencent RTC コンソール で音声・動画アプリケーションの SDKSecretKey を作成します。 |
userSig | String | ユーザーのログイン認証を行い、ユーザーが真実であることを確認し、悪意のある攻撃者による CVM へのアクセスを阻止するためのセキュリティ保護サイン。 |
userSig の説明:
開発環境:ローカルで Demo をクイックスタートしたり、デバッグ・開発したりしている場合は、debug ファイル内の
genTestUserSig関数(ステップ 3.2を参照)を使用して userSig を生成することができます。この方法の SDKSecretKey は逆コンパイル・逆クラックされやすく、キーが漏洩すると、攻撃者はお客様の Tencent Cloud トラフィックを盗むことができます。本番環境:プロジェクトを立ち上げる場合は、サーバー側で UserSig を生成する 方法を使用してください。
ステップ 4:最初の電話をかける
1. TUICallKitServer.call API を呼び出して電話をかけます。
//【3】Make a 1v1 video callconst call = async () => {await TUICallKitServer.call({userID: calleeUserID.value,type: TUICallType.VIDEO_CALL,});};
2. プロジェクトを実行します。
警告:
ローカル環境では localhost プロトコルでアクセスし、パブリックネットワークでは HTTPS プロトコルでアクセスしてください。詳しくは ネットワークアクセスプロトコルの説明を参照してください。
3. 2 つのブラウザページを開き、異なるuserID(お客様が定義する)を入力します
step1. init をクリックしてログインします(発呼側と着呼側)。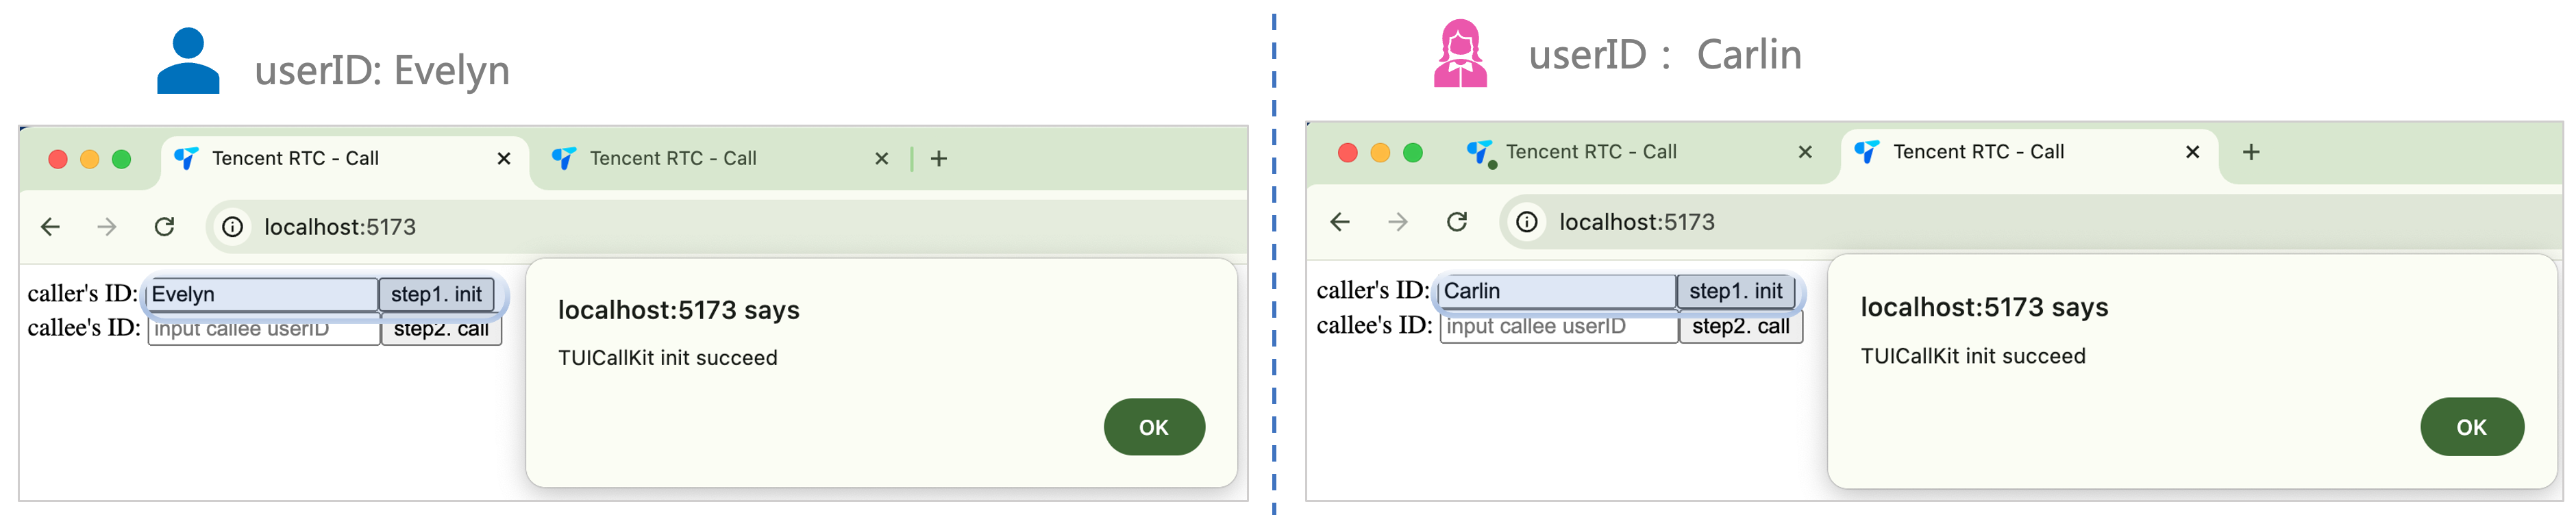
4. 両方の userID が正常にログインしたら、**
step2. call ** をクリックして電話をかけます。通話に問題がある場合は、よくある質問を参照してください。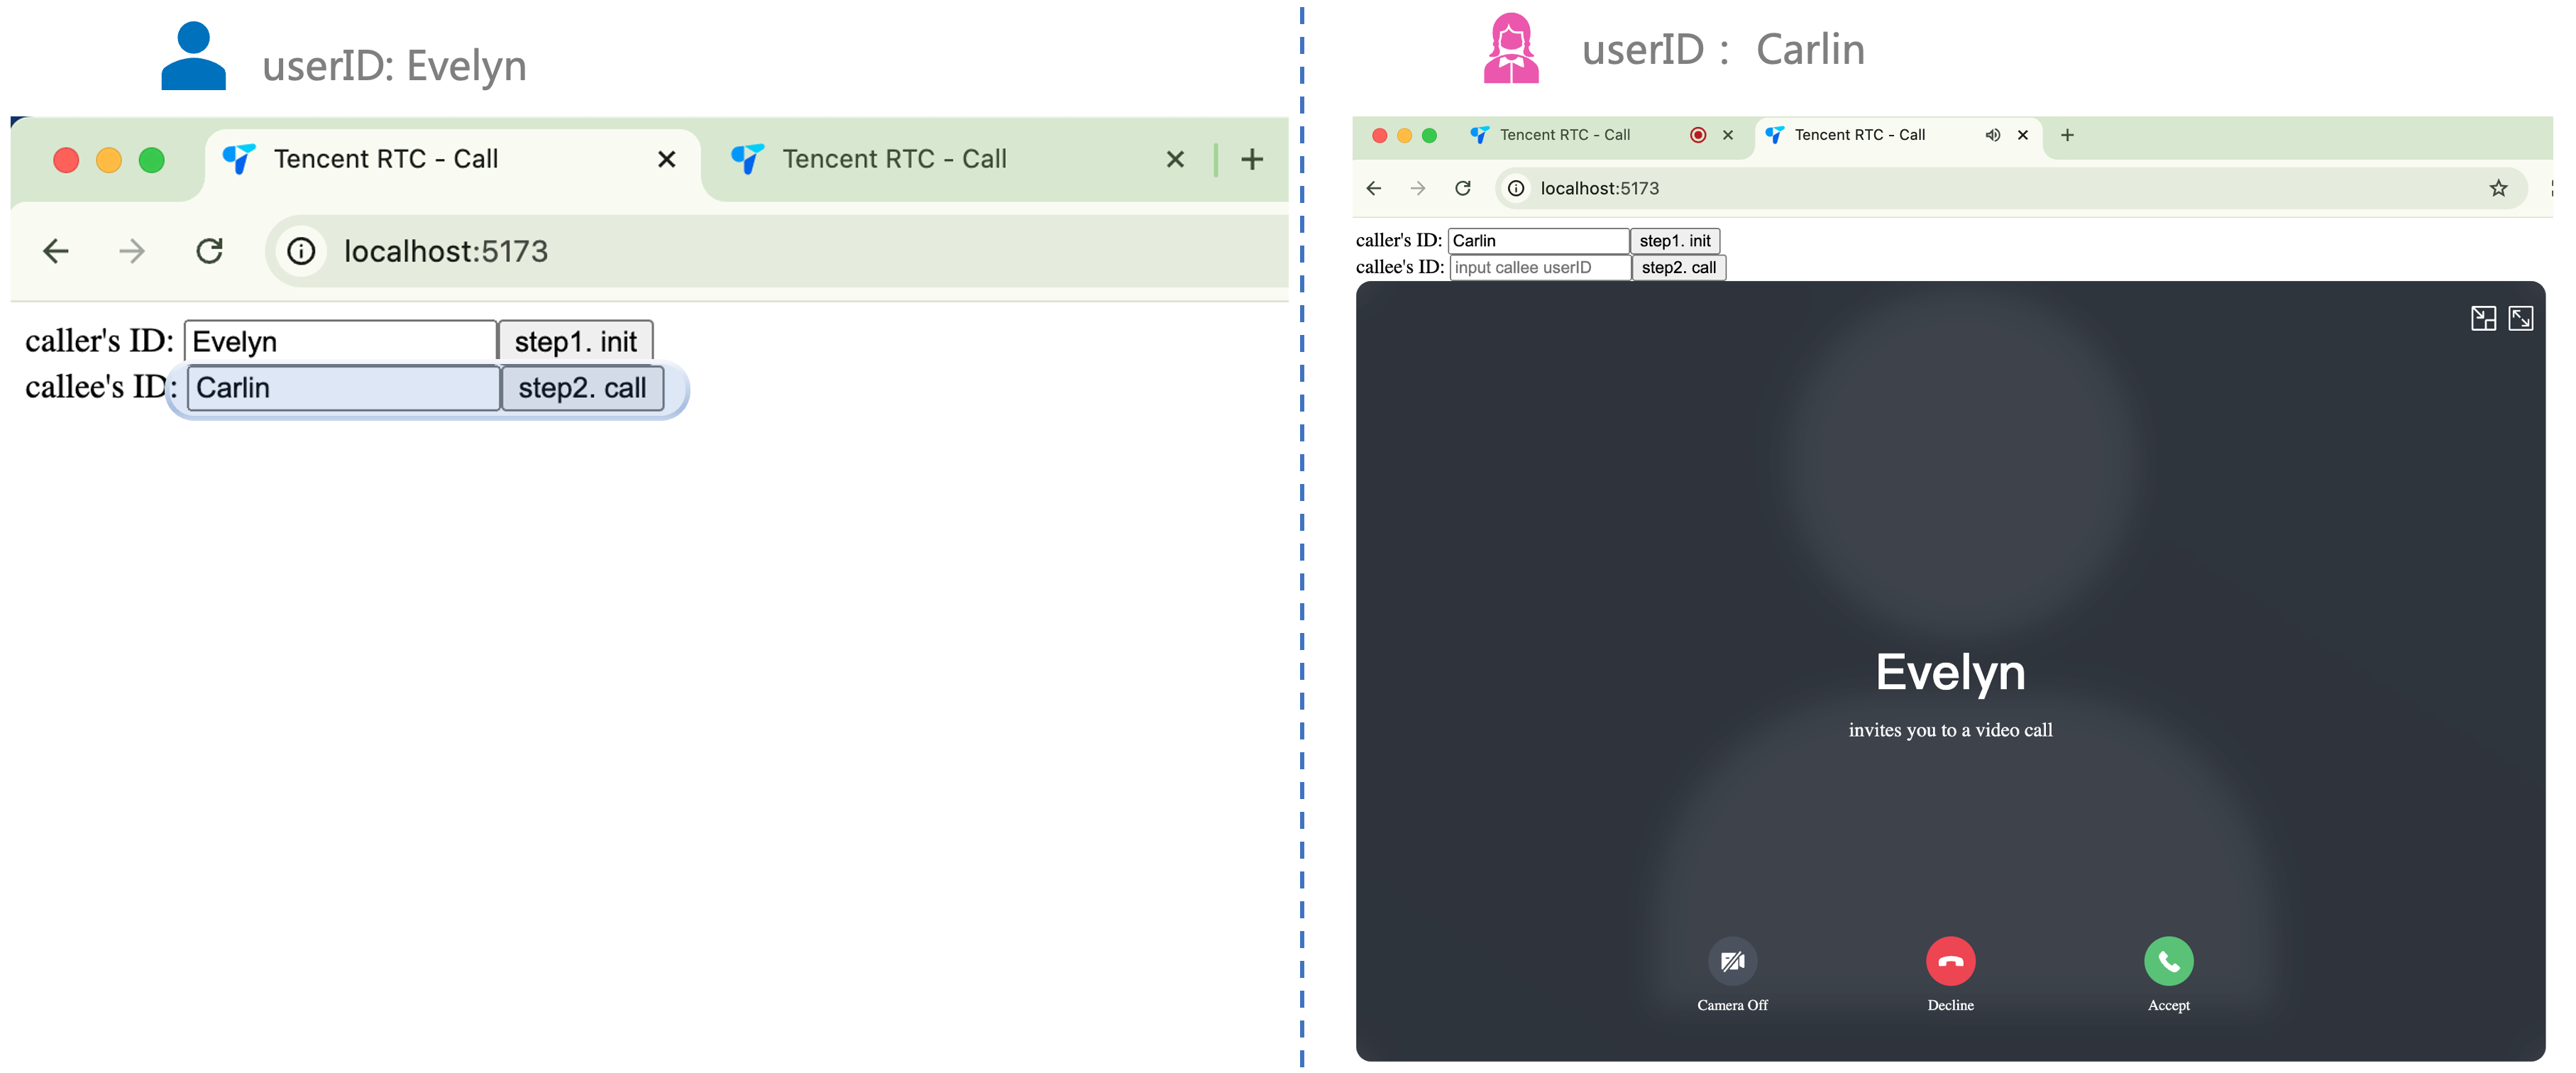
その他の特性
グループ通話
カスタム着信音
よくある質問
アクセスと使用に問題がある場合は よくある質問 を参照してください。
ご要望やご意見がございましたら、info_rtc@tencent.com までお問い合わせください。
フィードバック