HarmonyOS Console Configuration
Step 1: Enabling the Push Service
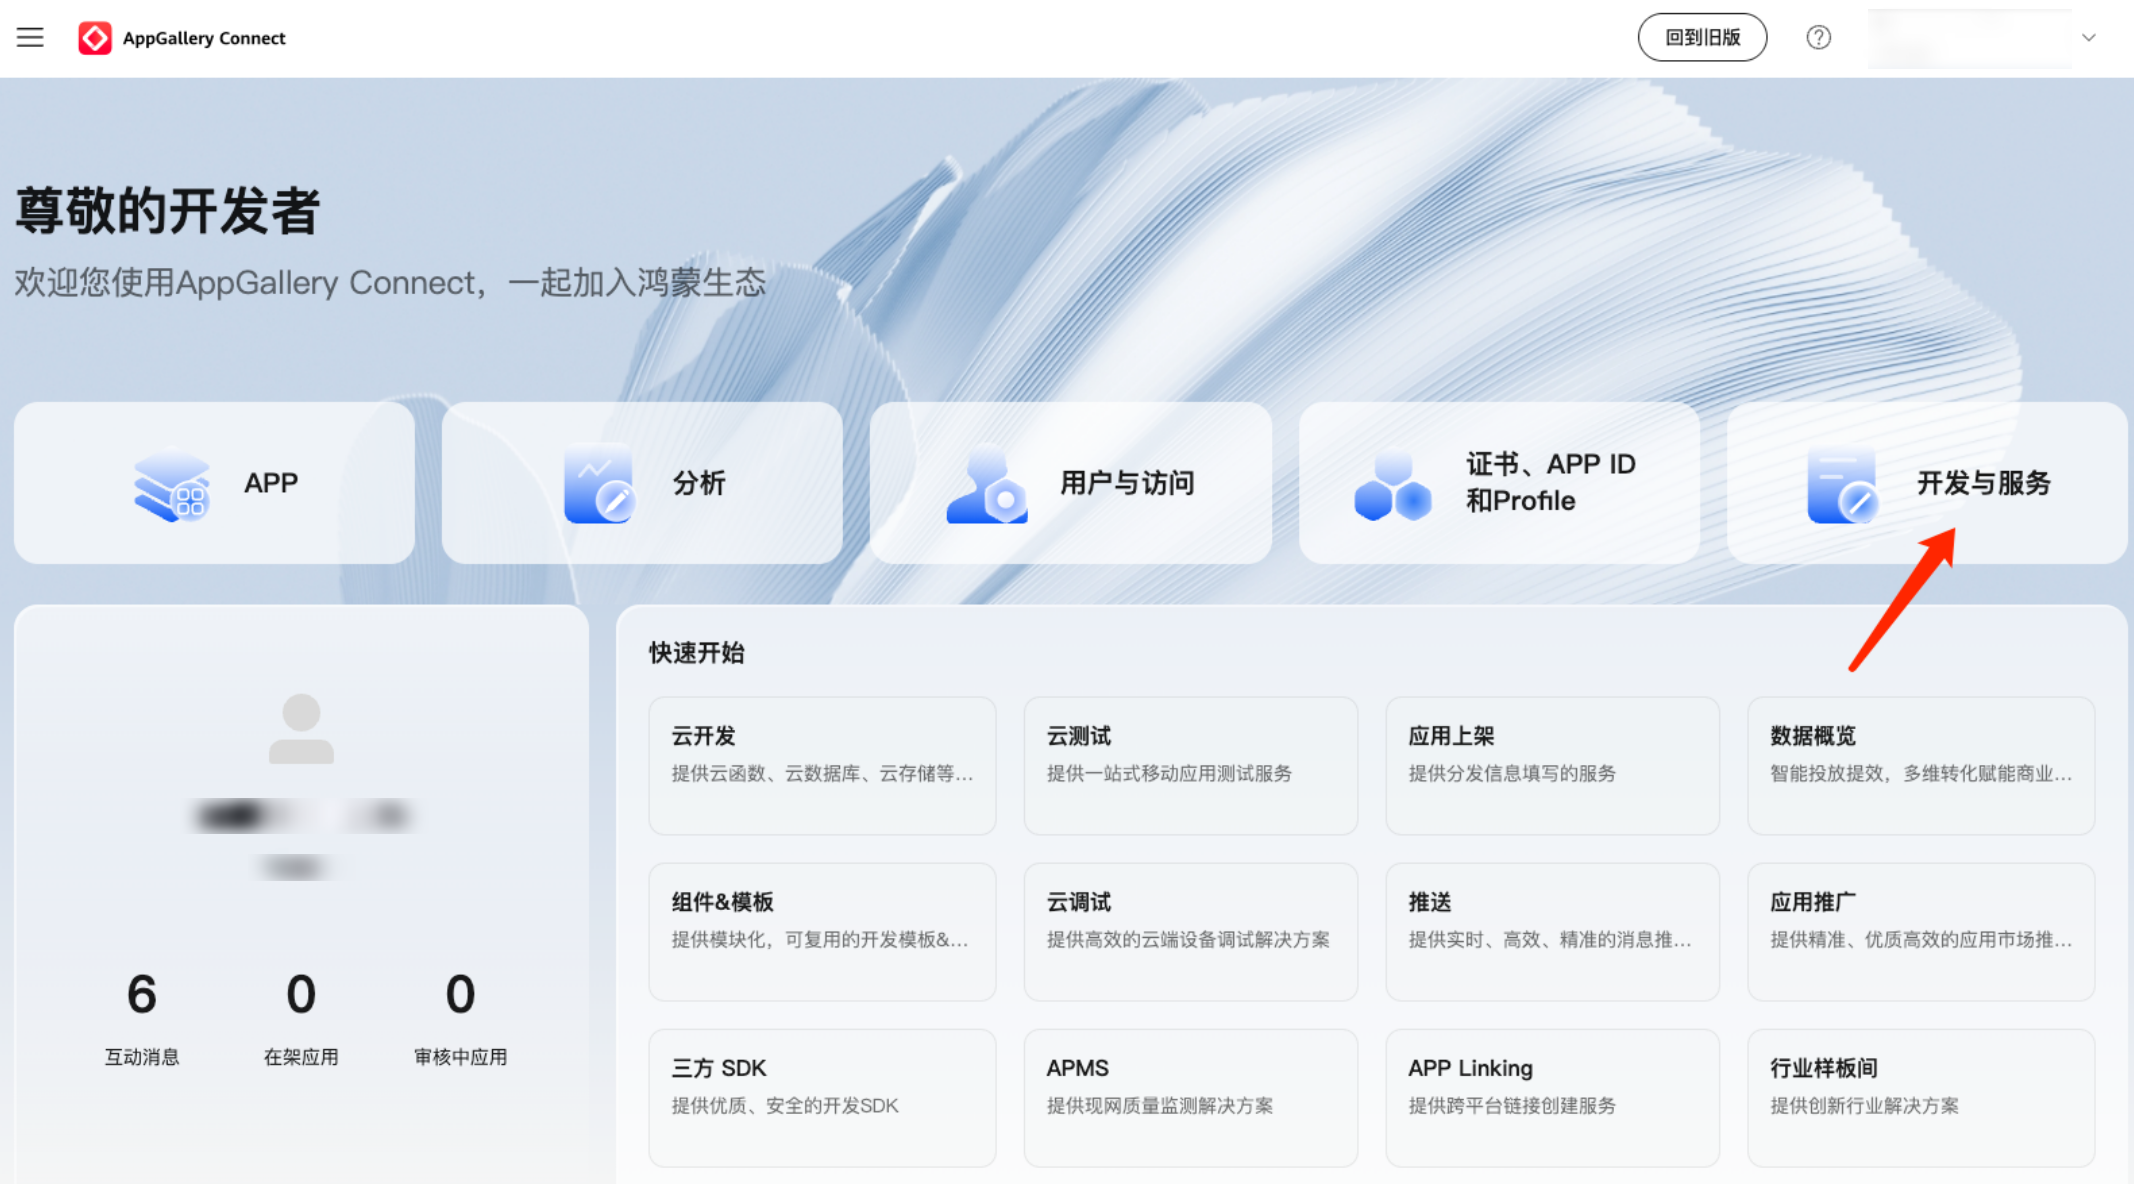
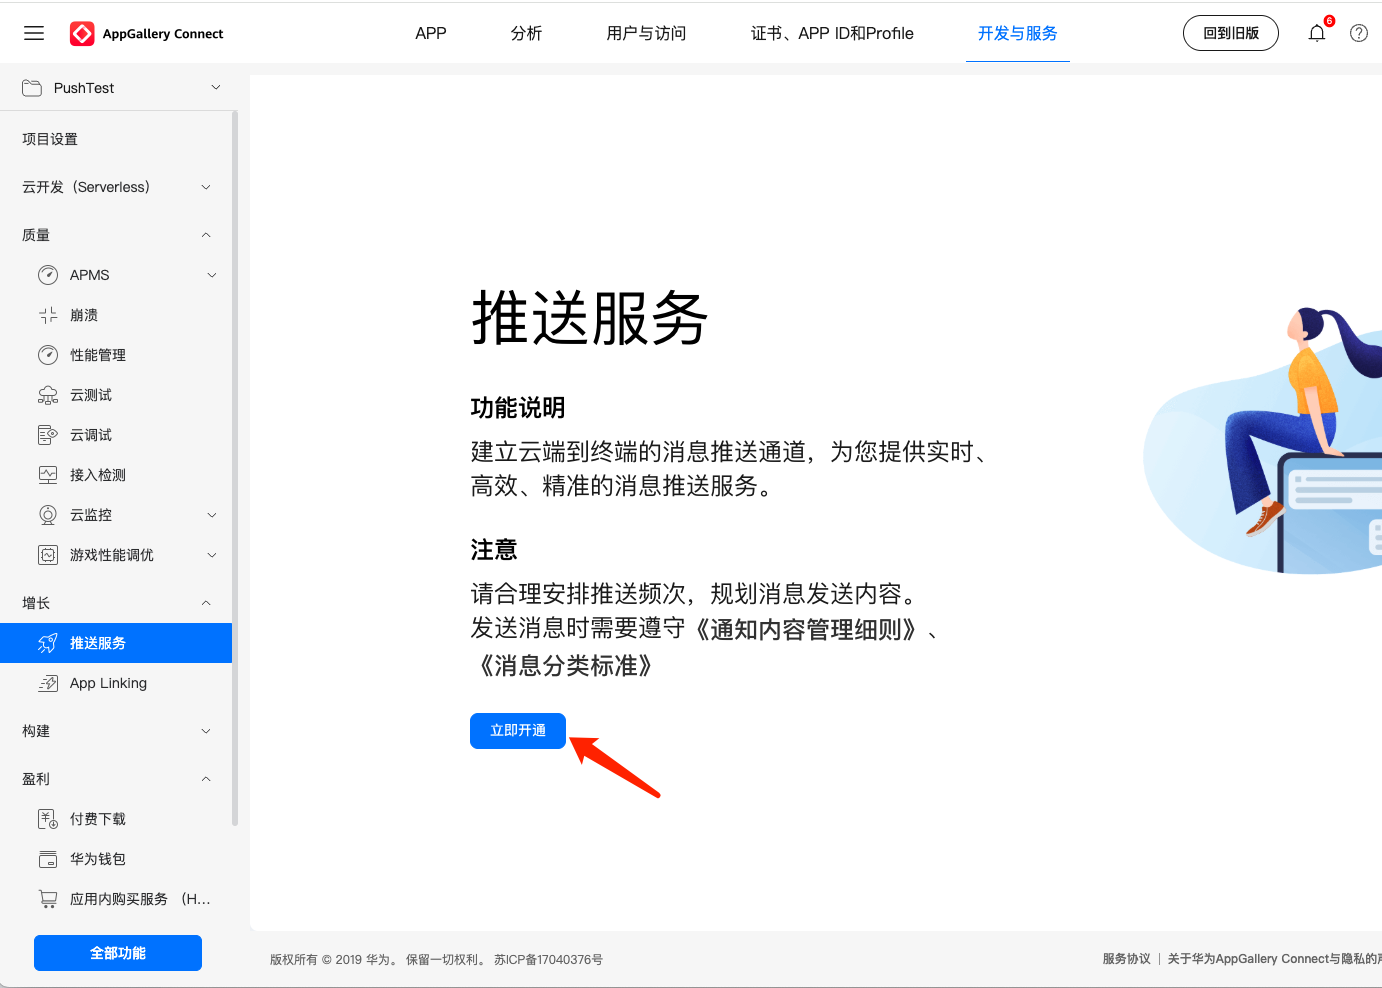
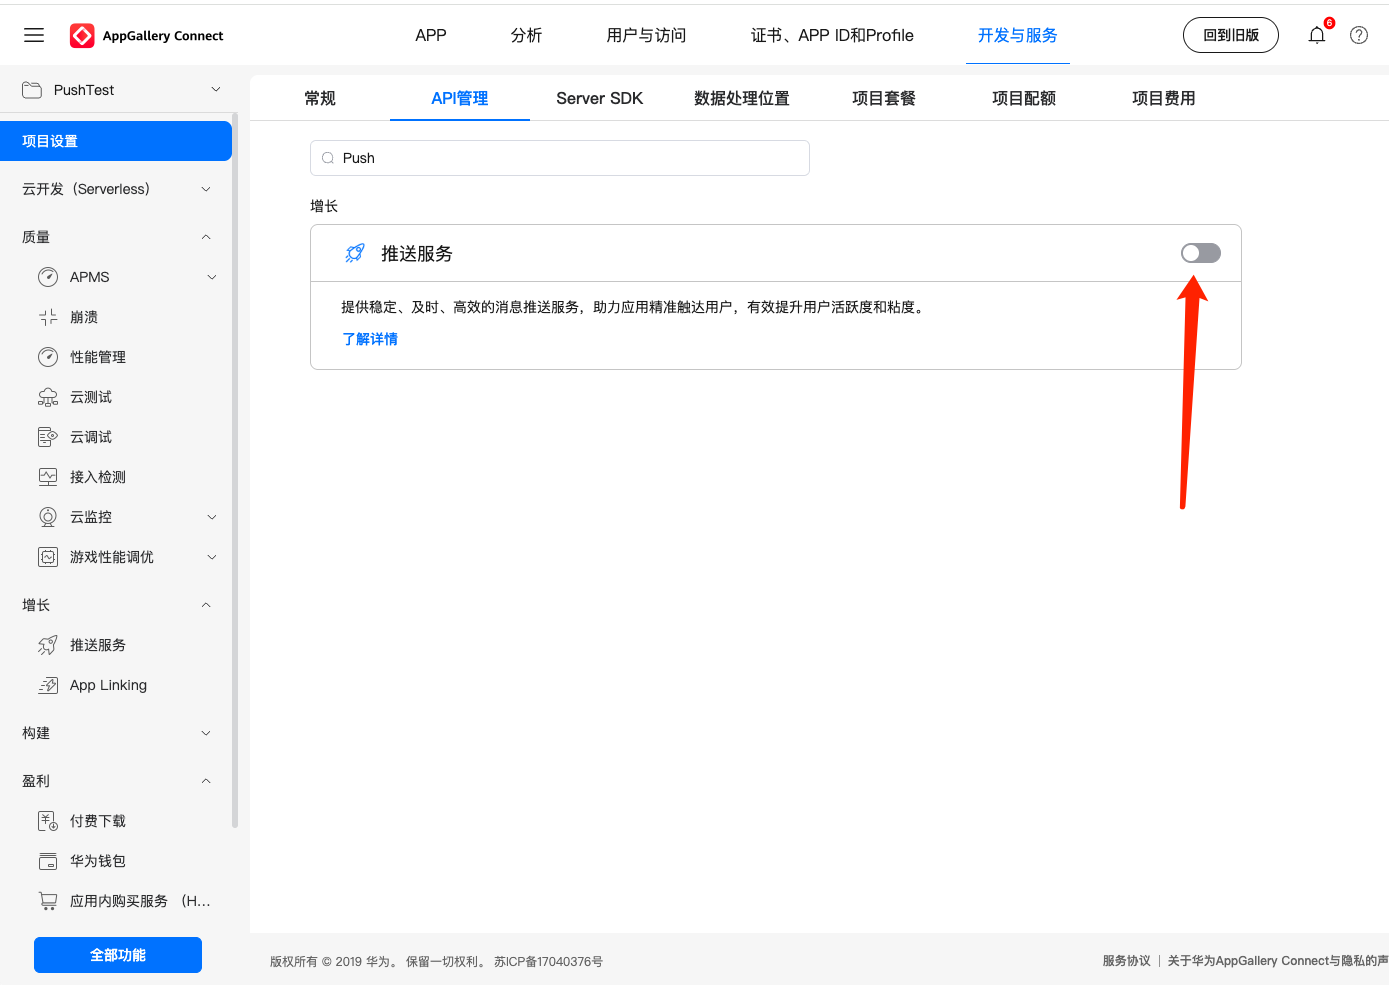
1. Log in to AppGallery Connect, select Develop and Services on the homepage, choose the corresponding project, and click Enable Now to enable the push service. 2. In the project setting, search for "Push" on the API management tab and enable the push service.
Step 2: Certificate and Signature Application
1. Certificate application: You must apply for a debug certificate in the debug stage, and apply for a release certificate in the release stage.
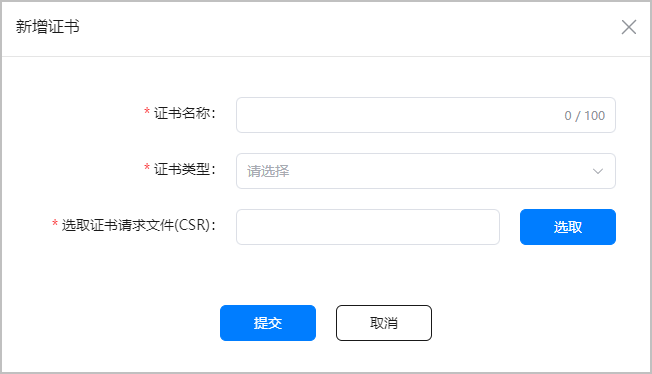
Select Certificates, APP ID and Profile in the left sidebar, choose Certificate, then click Add Certificate on the Certificate page.
In the pop-up "Add Certificate" window, fill in the applied certificate information and click Submit.
After a successful application, the certificate management page displays the certificate name and other information. Click Download to save the generated certificate to your local directory for subsequent debug signature usage.
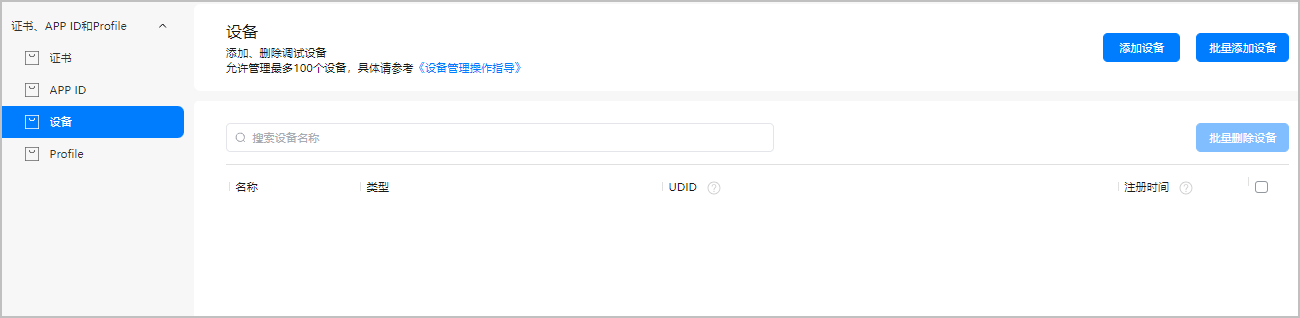
2. Register debug device (required during debug stage only)
Select Certificates, APP ID and Profile in the left sidebar, choose Device, then enter the Device page.
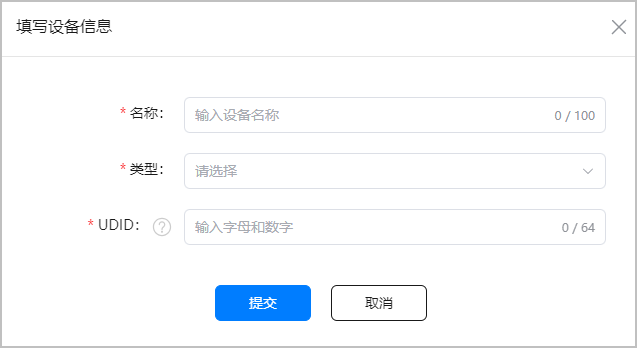
To add a single device, click Add Device in the upper right corner, fill in the device information in the popup window, then click Submit once completed.
3. Profile file application: You must apply for a debug profile file in the debug stage, and apply for a release profile file in the release stage.
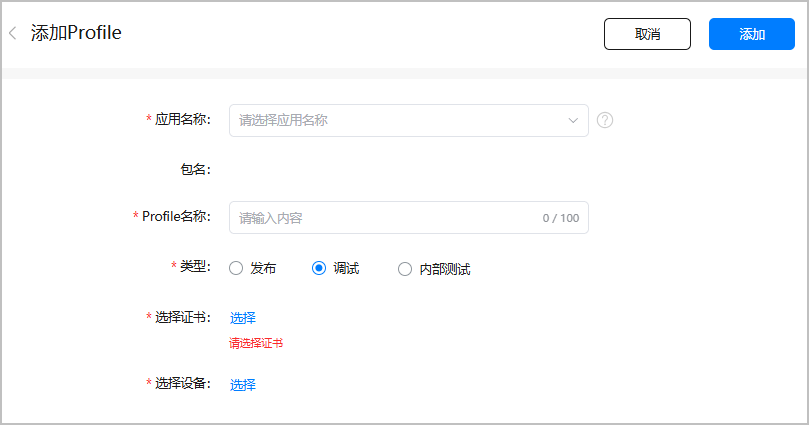
Select Profile in the left sidebar, then click Add.
On the Add Profile page, enter the application name, profile name and other required information, then click Add once all information is provided.
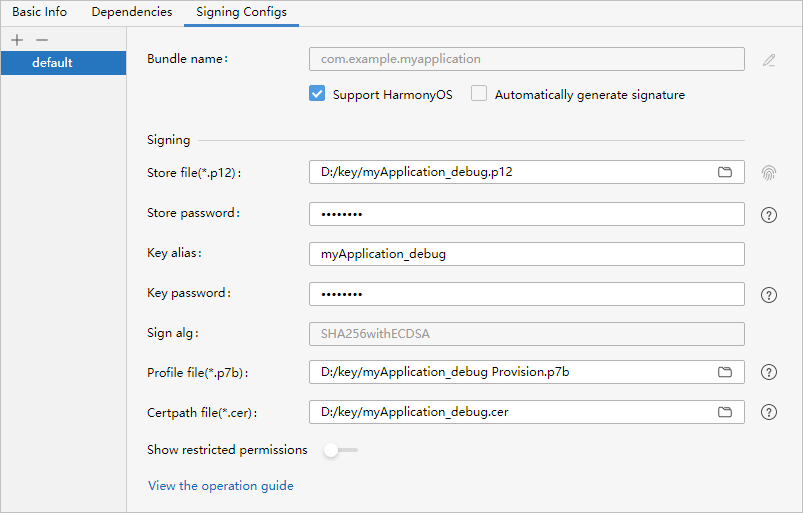
4. Manual signing.
Configure the SecretKey (.p12) file, applied debug certificate (.cer) file, and debug Profile (.p7b) file in DevEco Studio. In the File > Project Structure > Project > Signing Configs window, uncheck "Automatically generate signature" (if it is a HarmonyOS app, check "Support HarmonyOS"), then configure the project's signature information.
Step 3: Create an IM Console Certificate Credential
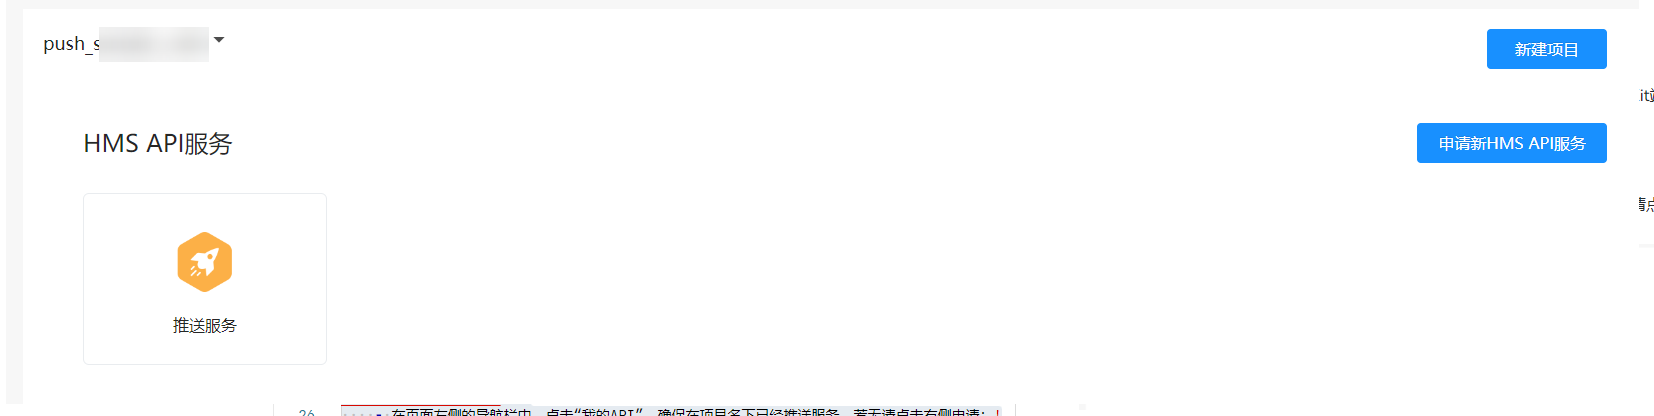
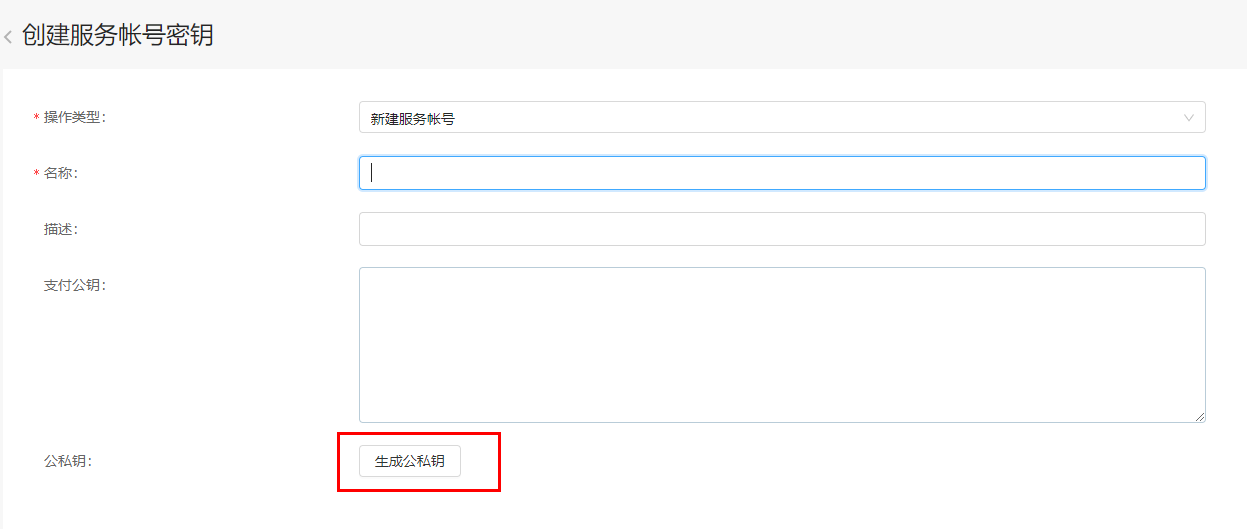
1. Log in to the API Console, click My APIs in the sidebar on the left side of the page. Ensure push service is available under the project name. If not, click Apply for new HMS API service on the right. 2. Click in the left sidebar API service > Credential, then click Create credential under Service account key.
3. Fill in the required fields and click Create public/private key. Create and download the JSON file. The downloaded file is exactly your Service Account credential file.
4. Save the downloaded file for IM Console Configuration usage.
Step 4: Apply for Scenario-Based Rights and Interests
Push Kit supports various scenario-based message types. Among them, certain scenario-based message types require you to apply for special rights and interests for normal sending, such as Chat message type scenarios.
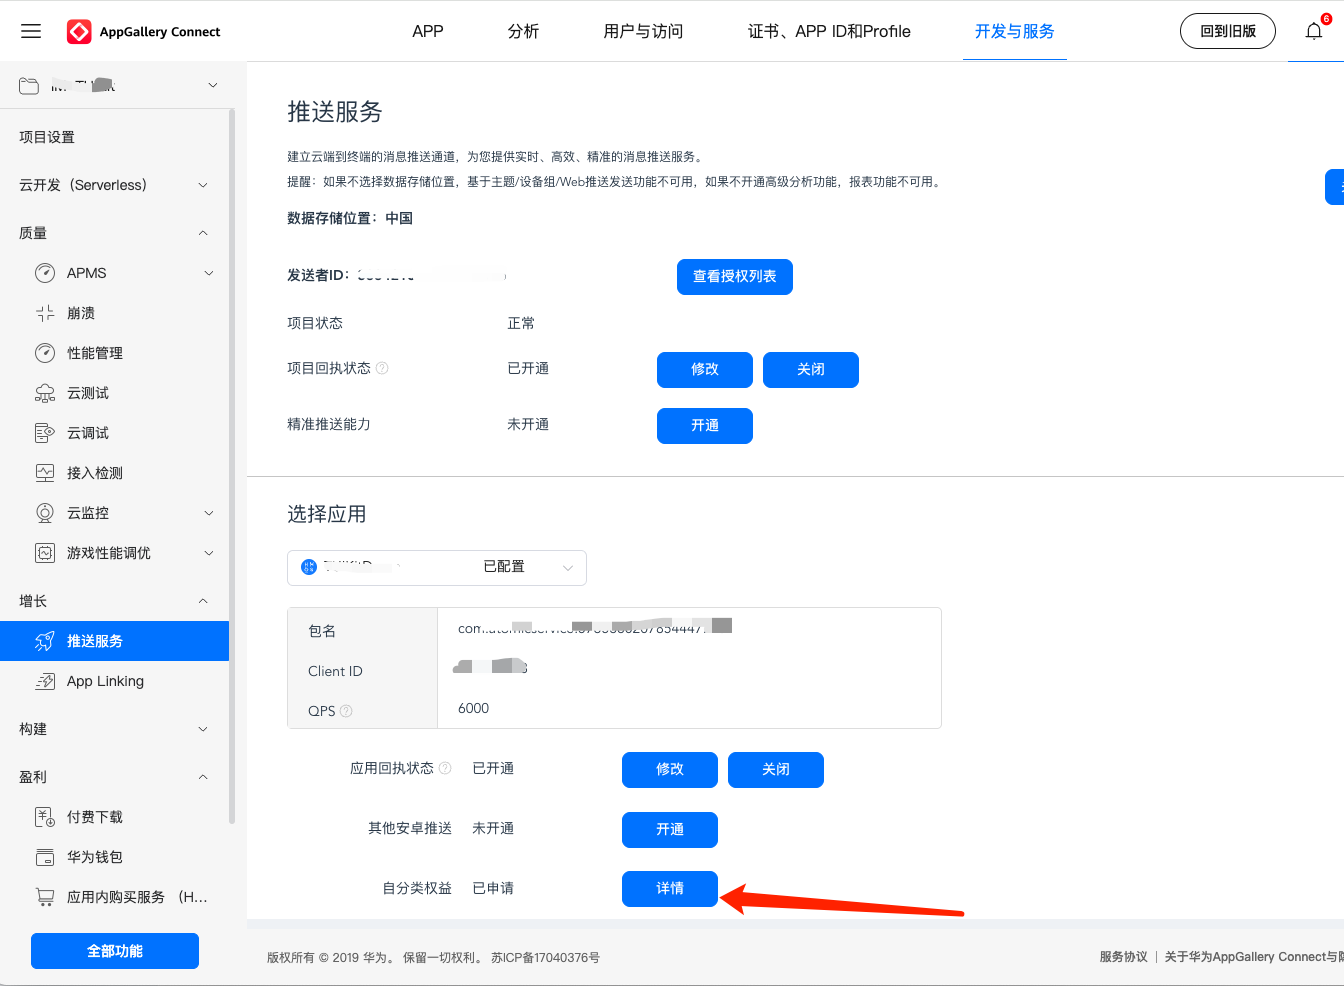
Log in to AppGallery Connect, select Develop and Services, click Push Service, and on the Configuration page, click to apply for self-categorization benefits. Follow the prompts to apply and activate. For detailed introduction, refer to Push Scenario-Based Message Benefits. Chat Console Configuration
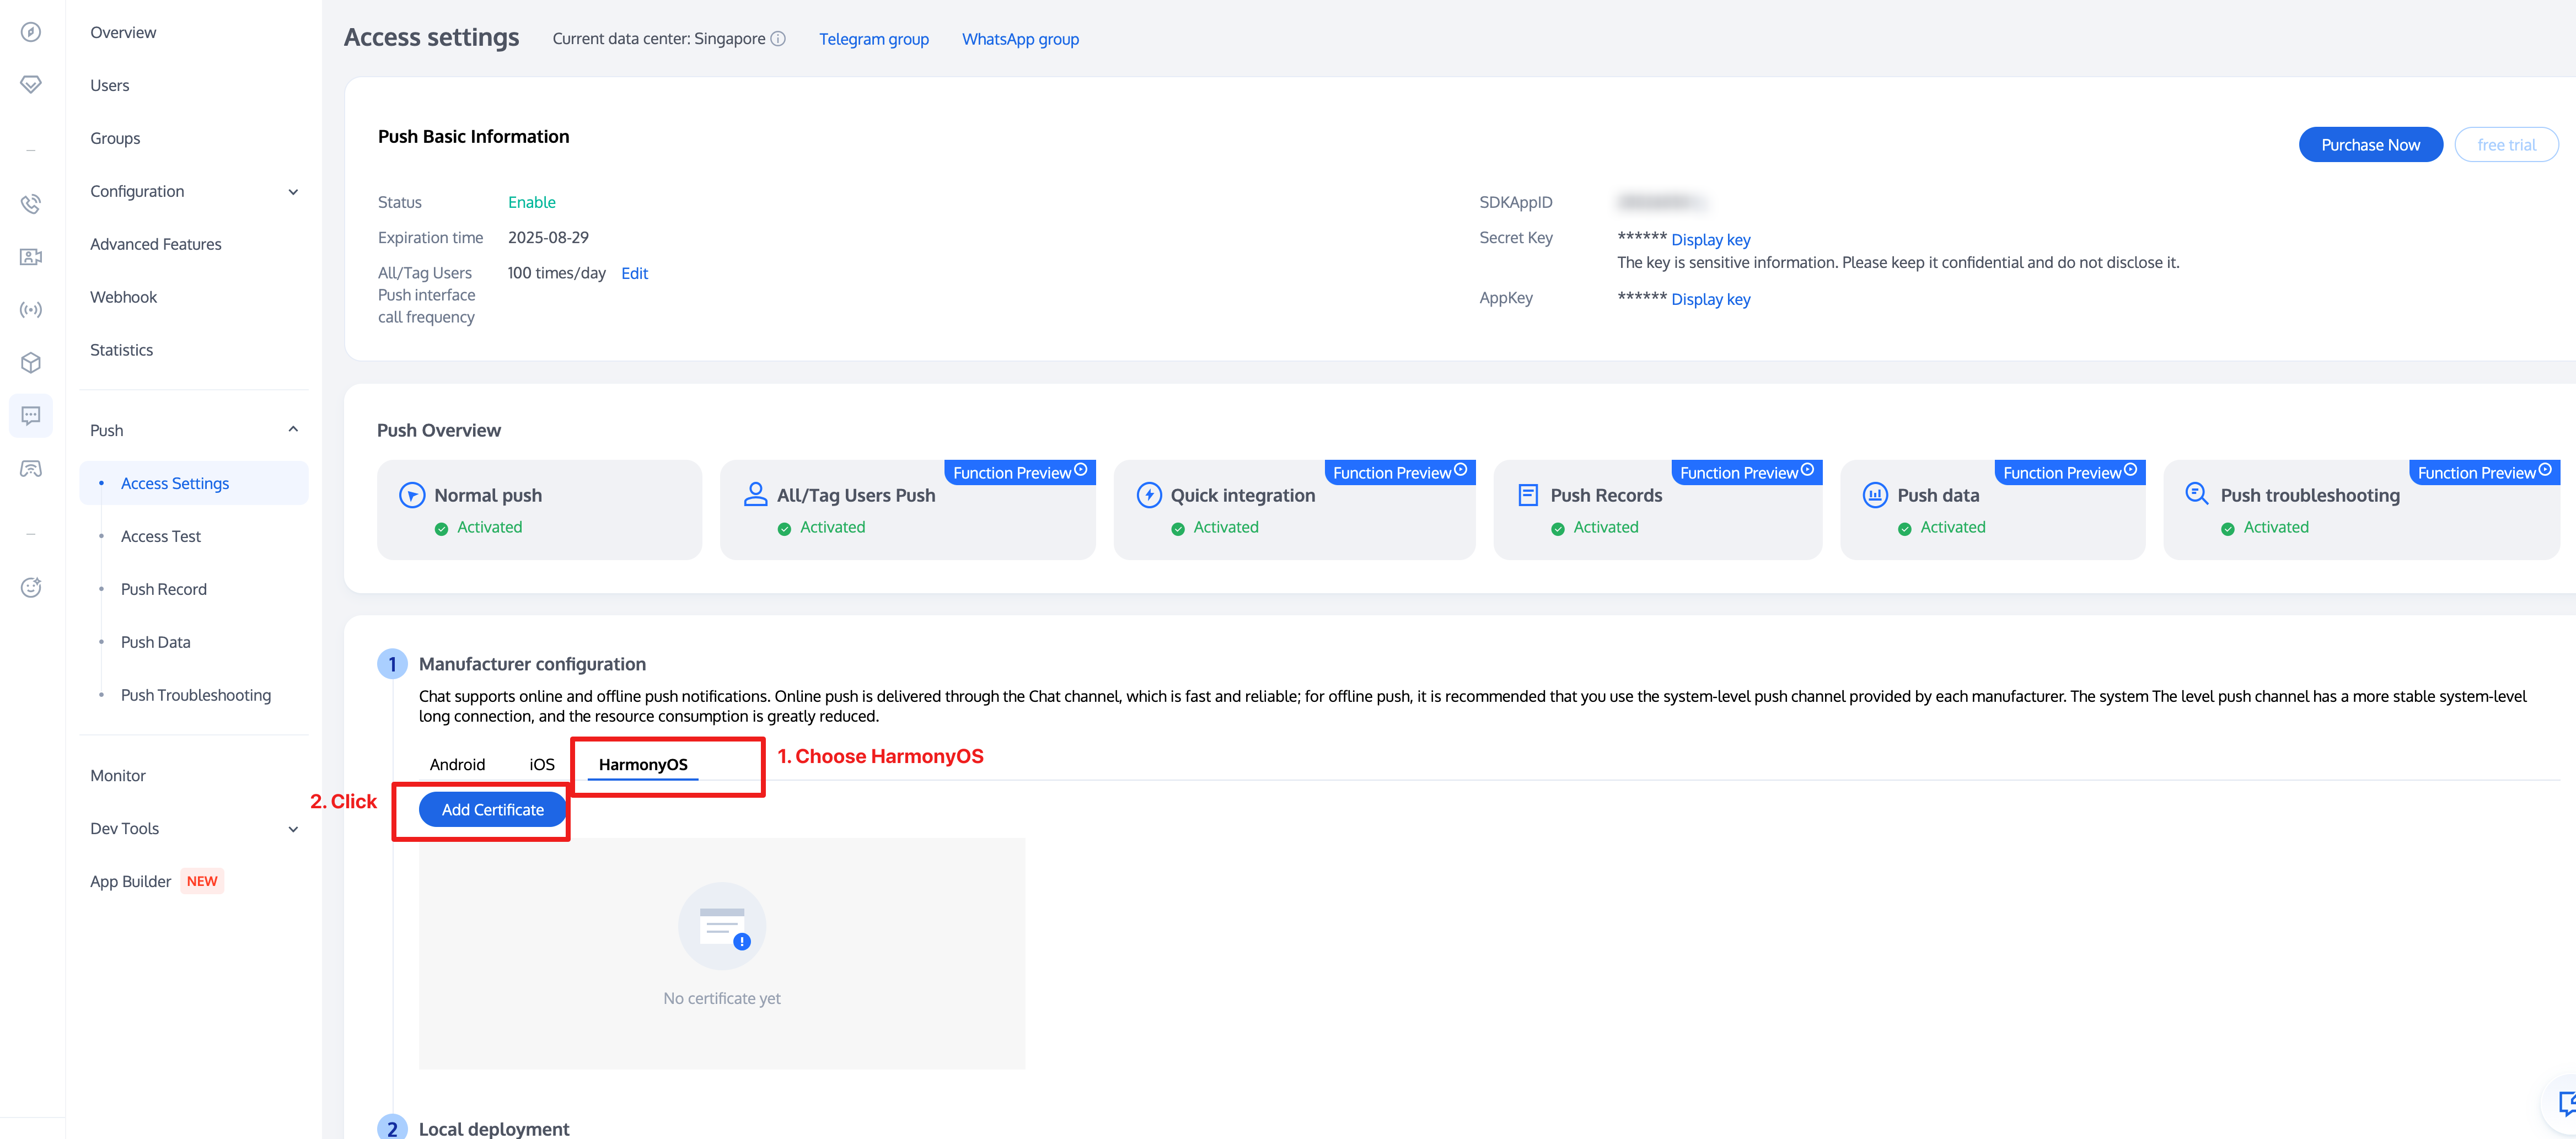
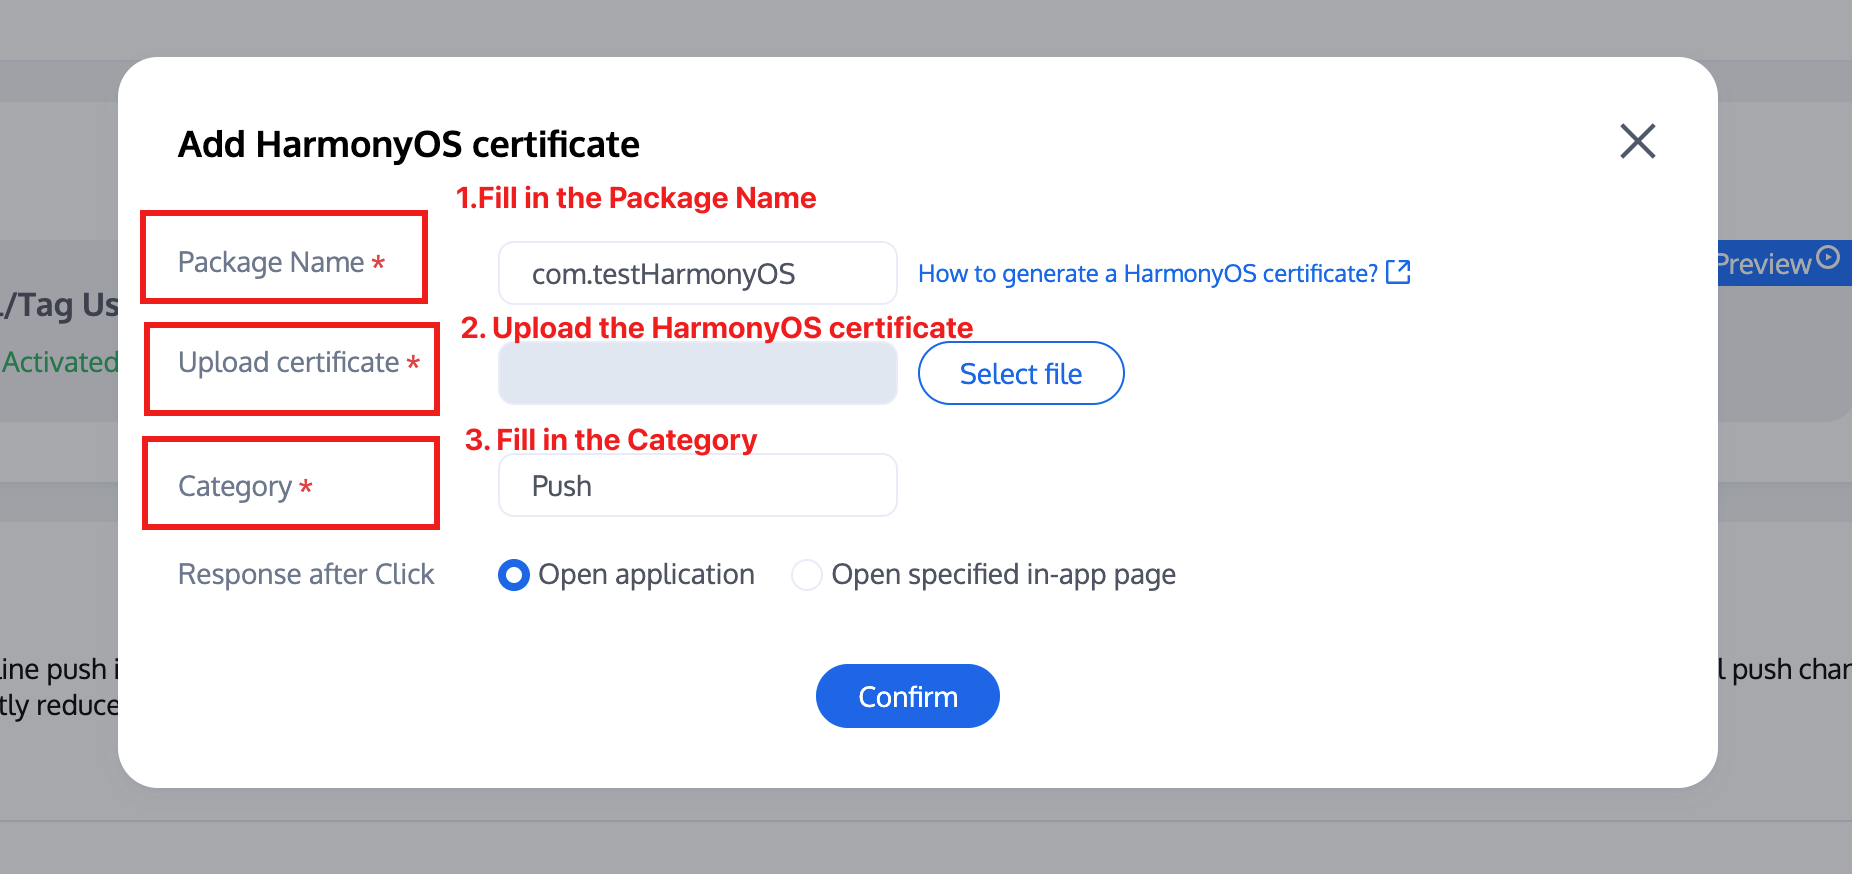
2. Select the certificate credential generated in Procedure 3 above and upload it to the newly added HarmonyOS certificate. 3. Click subsequent actions
Open app: Click the notification bar message to pull up the application homepage by default.
Open specified in-app page: After receiving a push message, click the notification bar. The component will Webhook this click event and offline message pass-through.
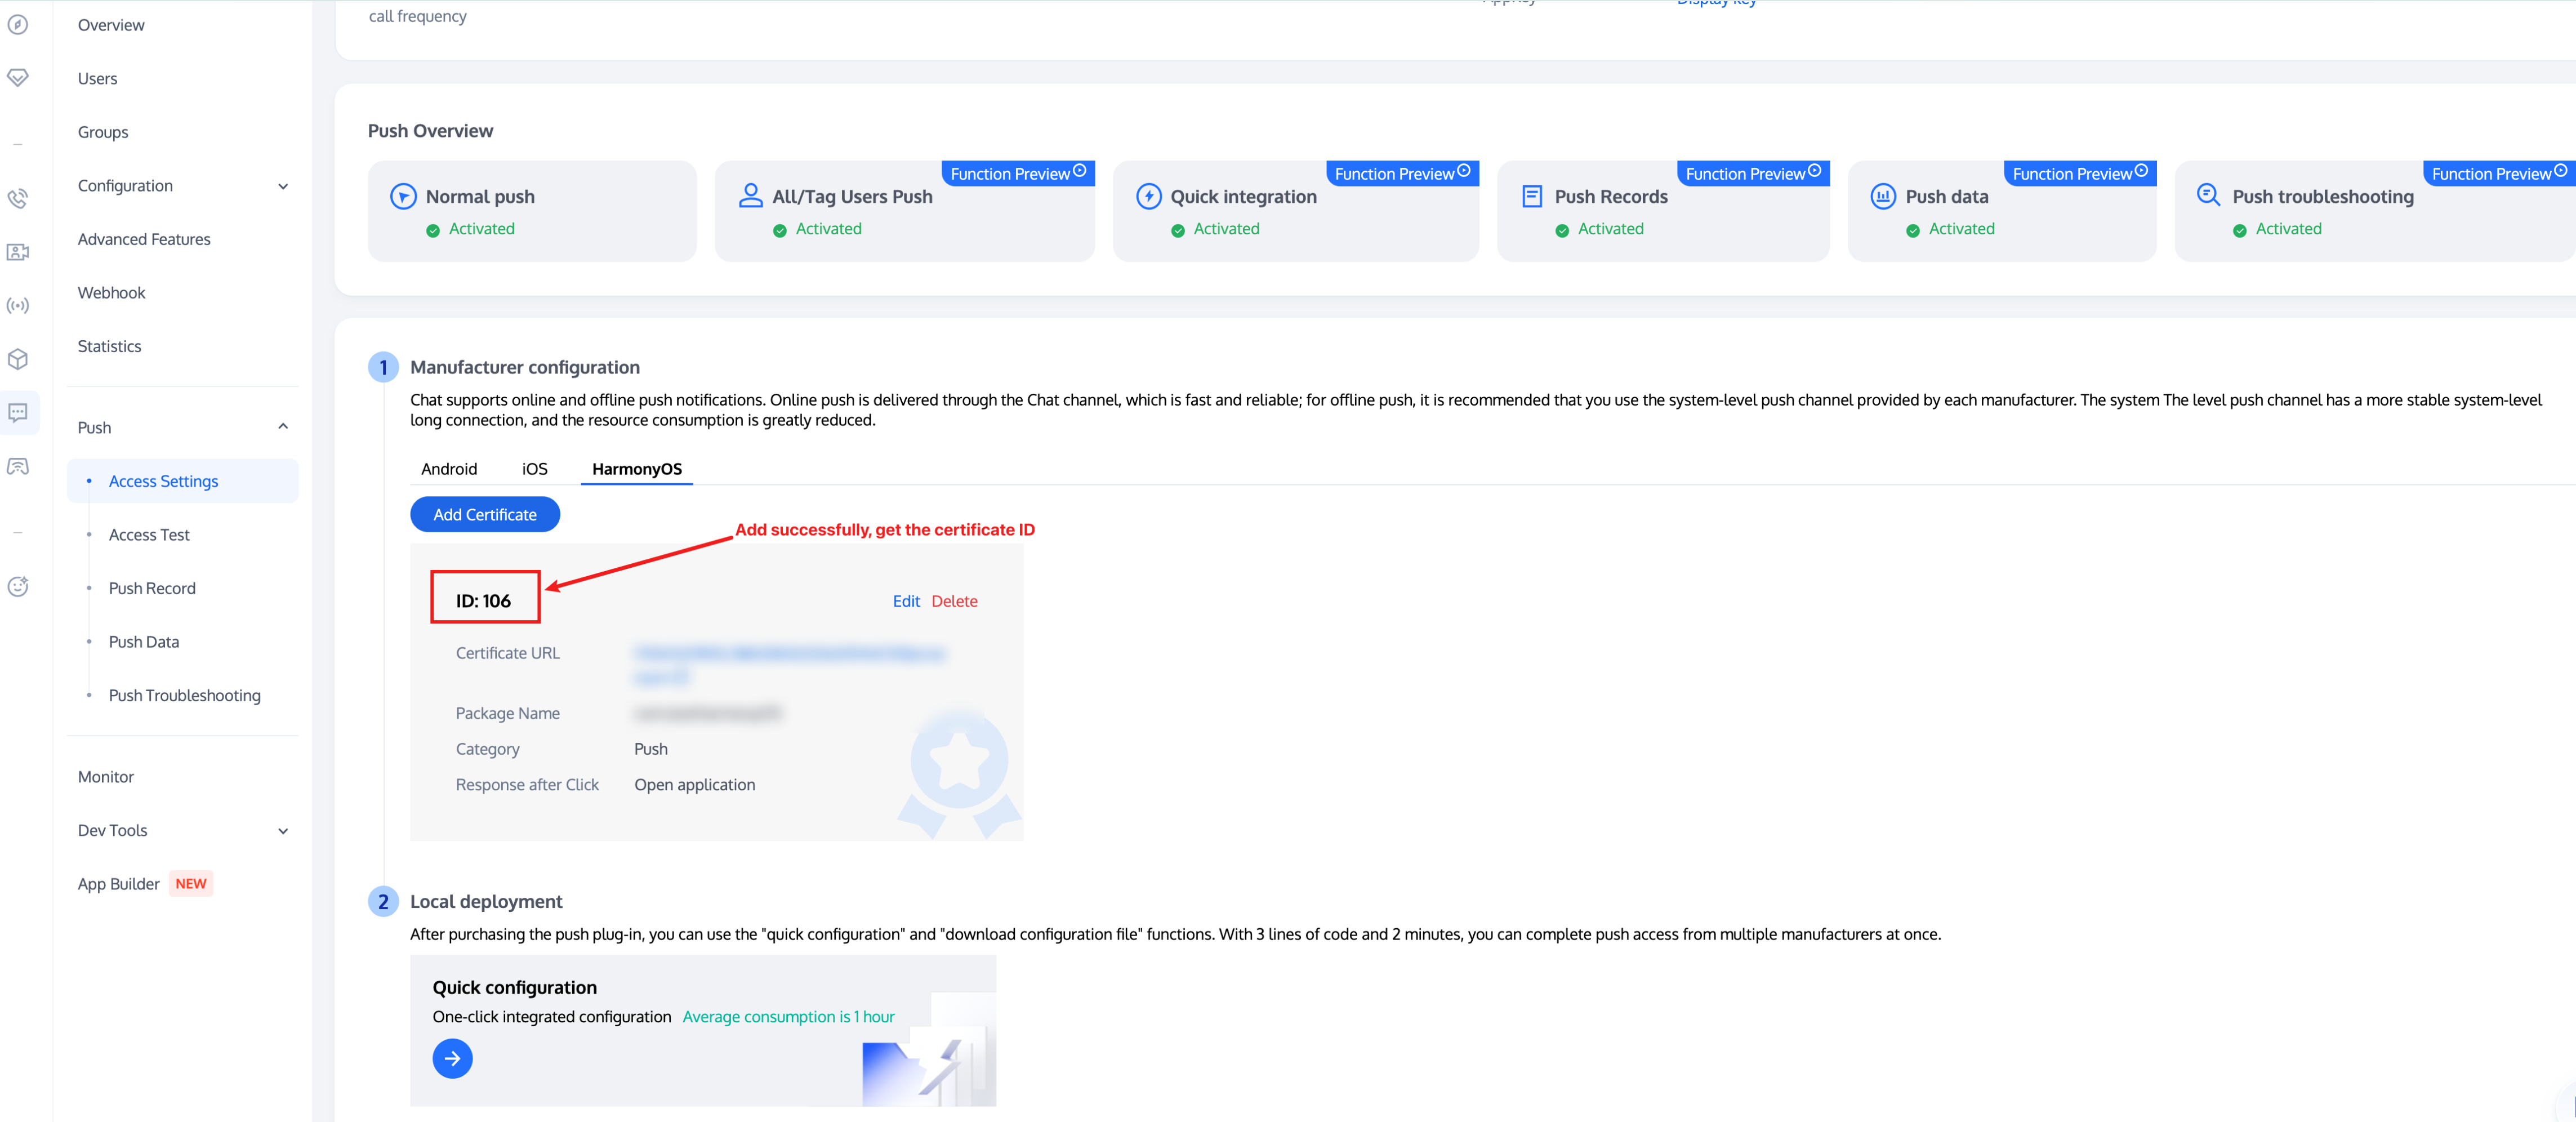
4. After adding a certificate, the IM console will allocate a certificate ID for you to access and use.