Performance testing in simple mode mainly uses an interactive UI to combine requests, such as GET, POST, PUT, PATCH, and DELETE, to create performance testing scenarios. This document introduces its basic usage in details.
Creating a Simple-Mode Performance Testing Scenario
2. In the left sidebar, choose PTS > Test Scenarios.
3. On the testing scenario page, click Create Scenario.
4. On the page for creating a testing scenario, select Simple mode for the performance testing type and click Start to create a performance testing scenario. Once the scenario is created, you can proceed with the following operations.
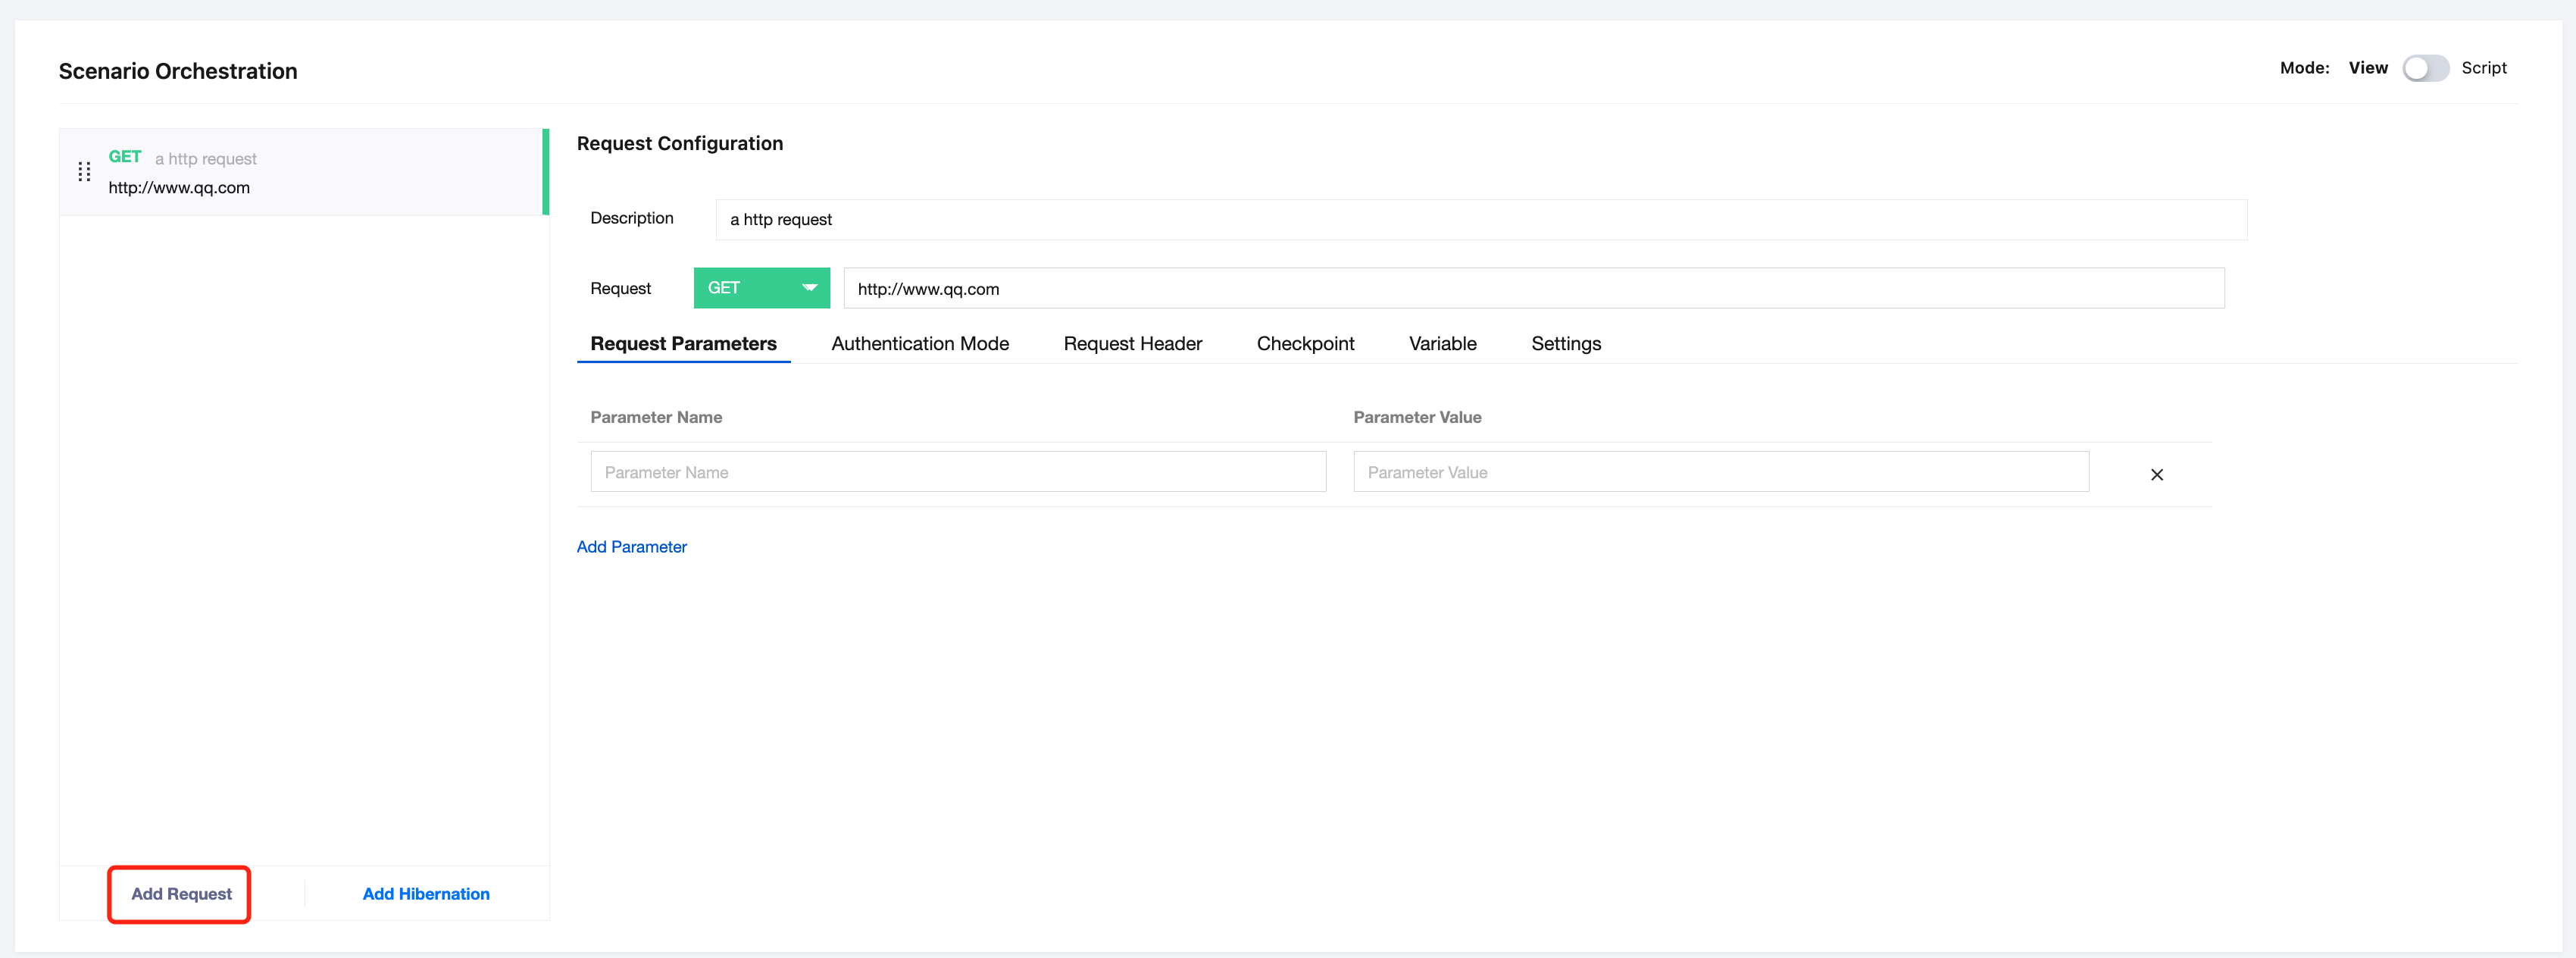
Adding an HTTP Request
In the scenario orchestration module, enter the request description and request address to add an HTTP request.
Constructing an HTTP Request
Basic Information
For example, with an HTTP GET request, you can configure the URL, request parameter (URL query string), authentication method, request header, checkpoint, and other information.
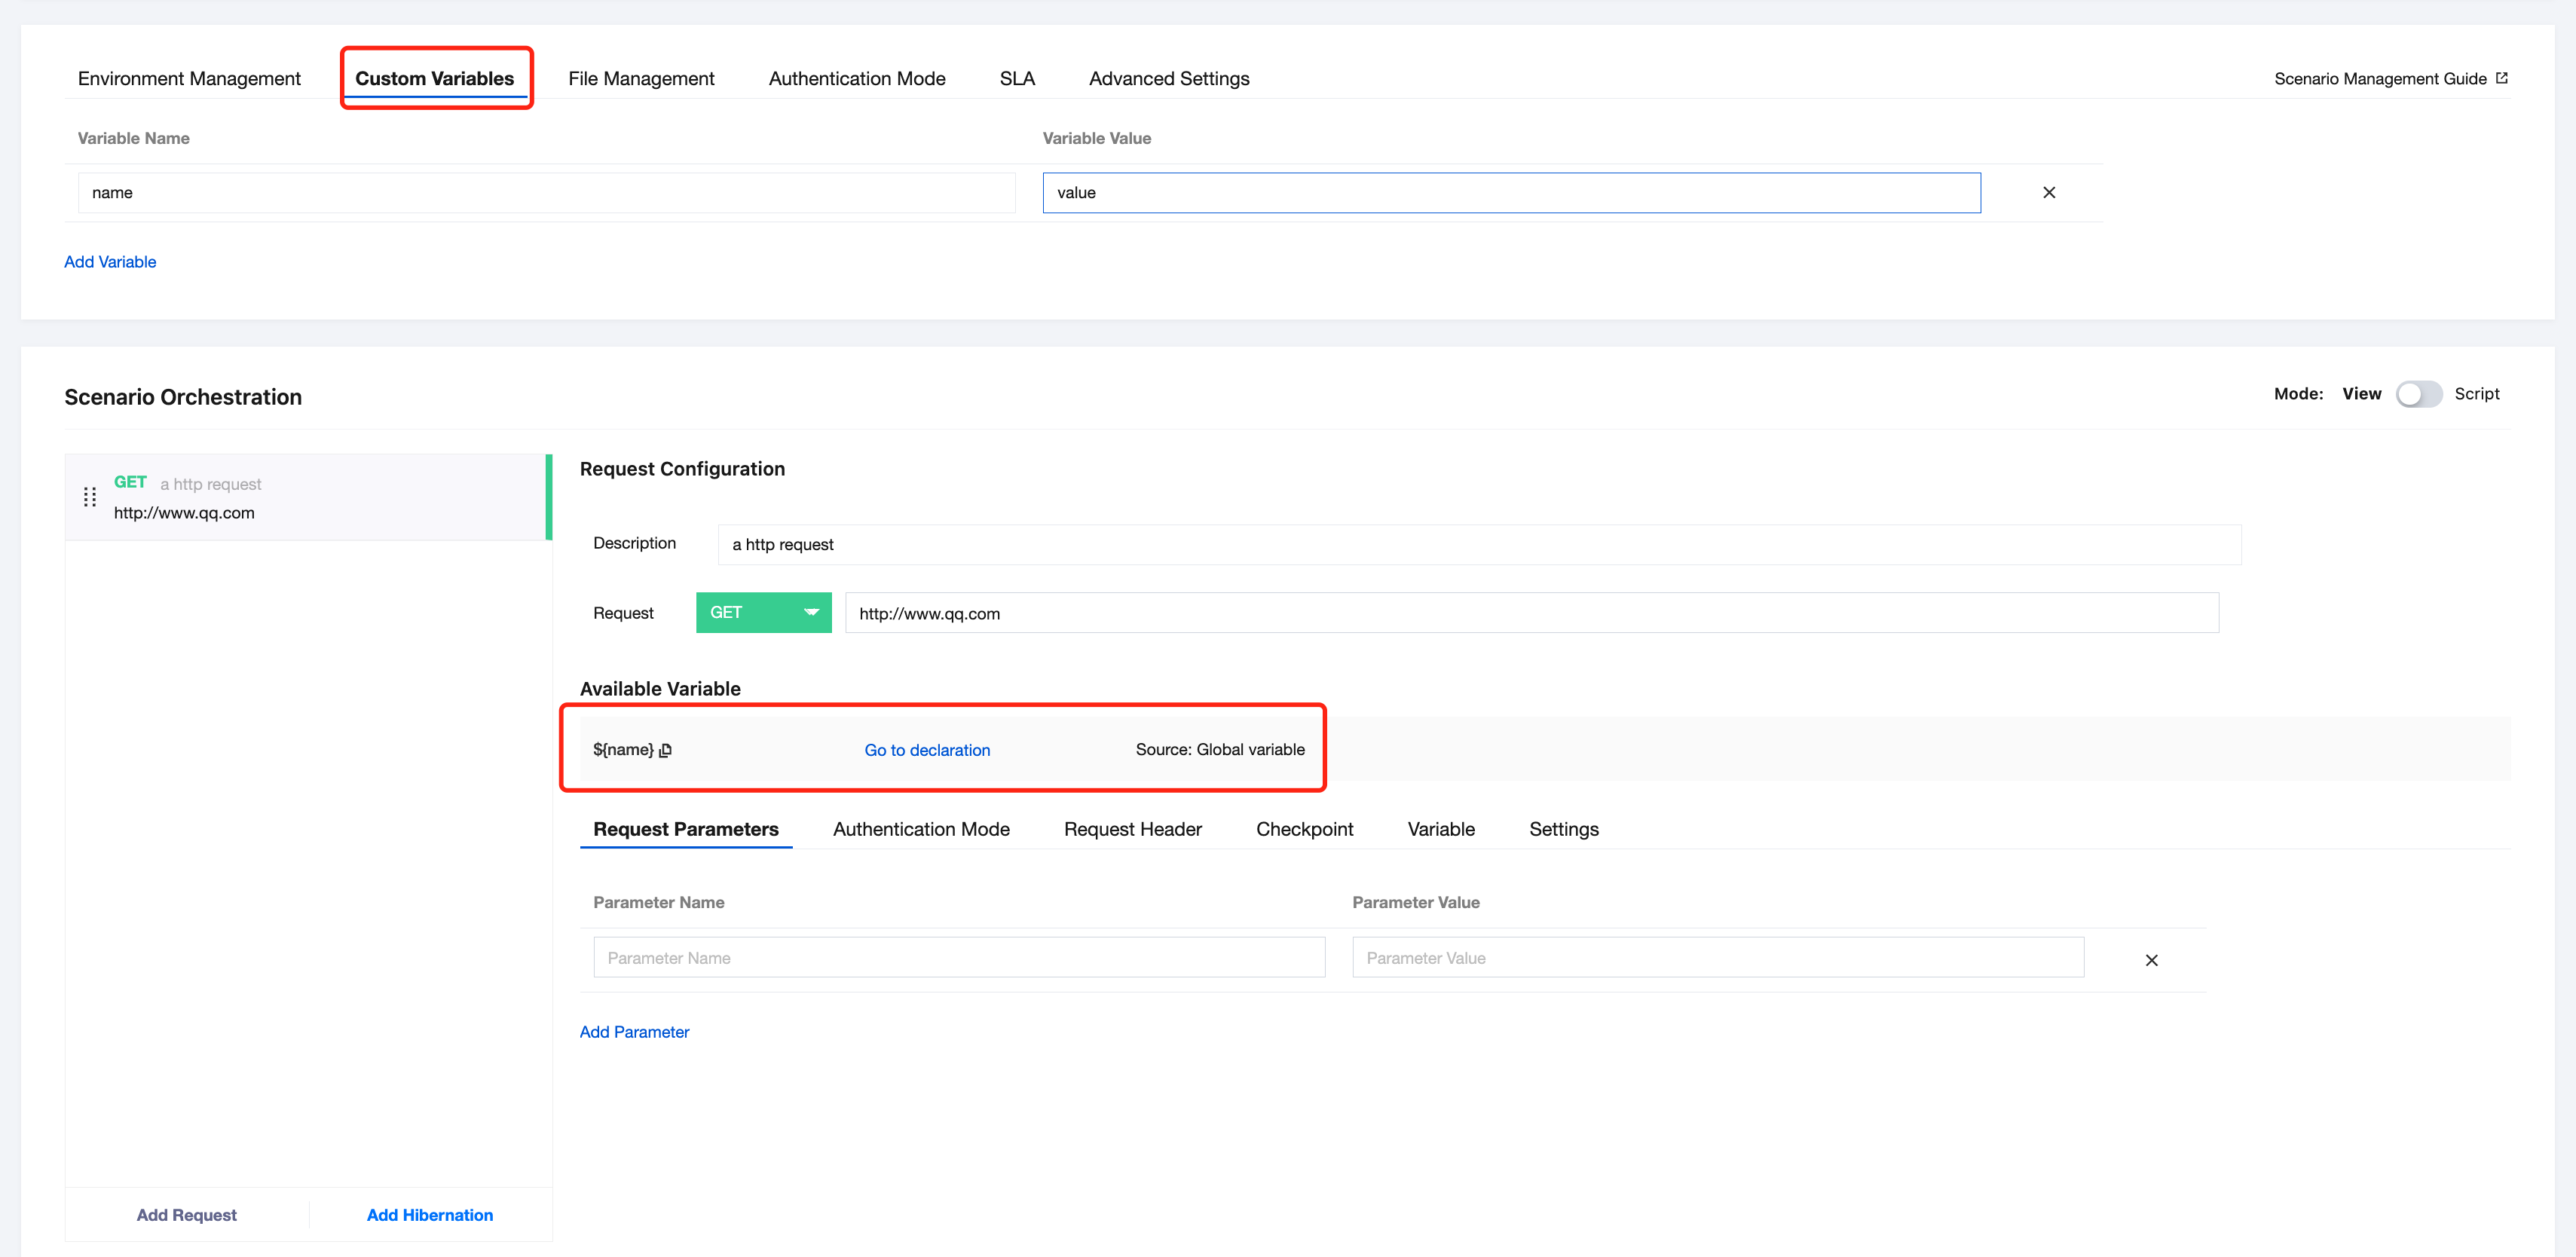
Use of Variables
When constructing a request, you can enter data directly or create available variables first, and then reference these variables in the request.
You can use the following types of variables:
Custom variables: Enter the variable name and value on the Custom Variables tab page of the request. After a request is created, the variable will be displayed in the Available Variables area for reference in the form of ${xx} where parameters are required.
When setting a custom variable value, you can directly enter data or it can be calculated by the function in the form of {{xx}}. Native JavaScript objects and function calls are supported. For details, see JavaScript Standard Built-in Objects. For example, reference Math to generate a random number, as shown below:
Variables obtained from the parameter file: Upload a CSV file and obtain available variables from it for reference in the form of ${xx} where parameters are required. For more information on how to upload and use parameter files, see Using Parameter Files.
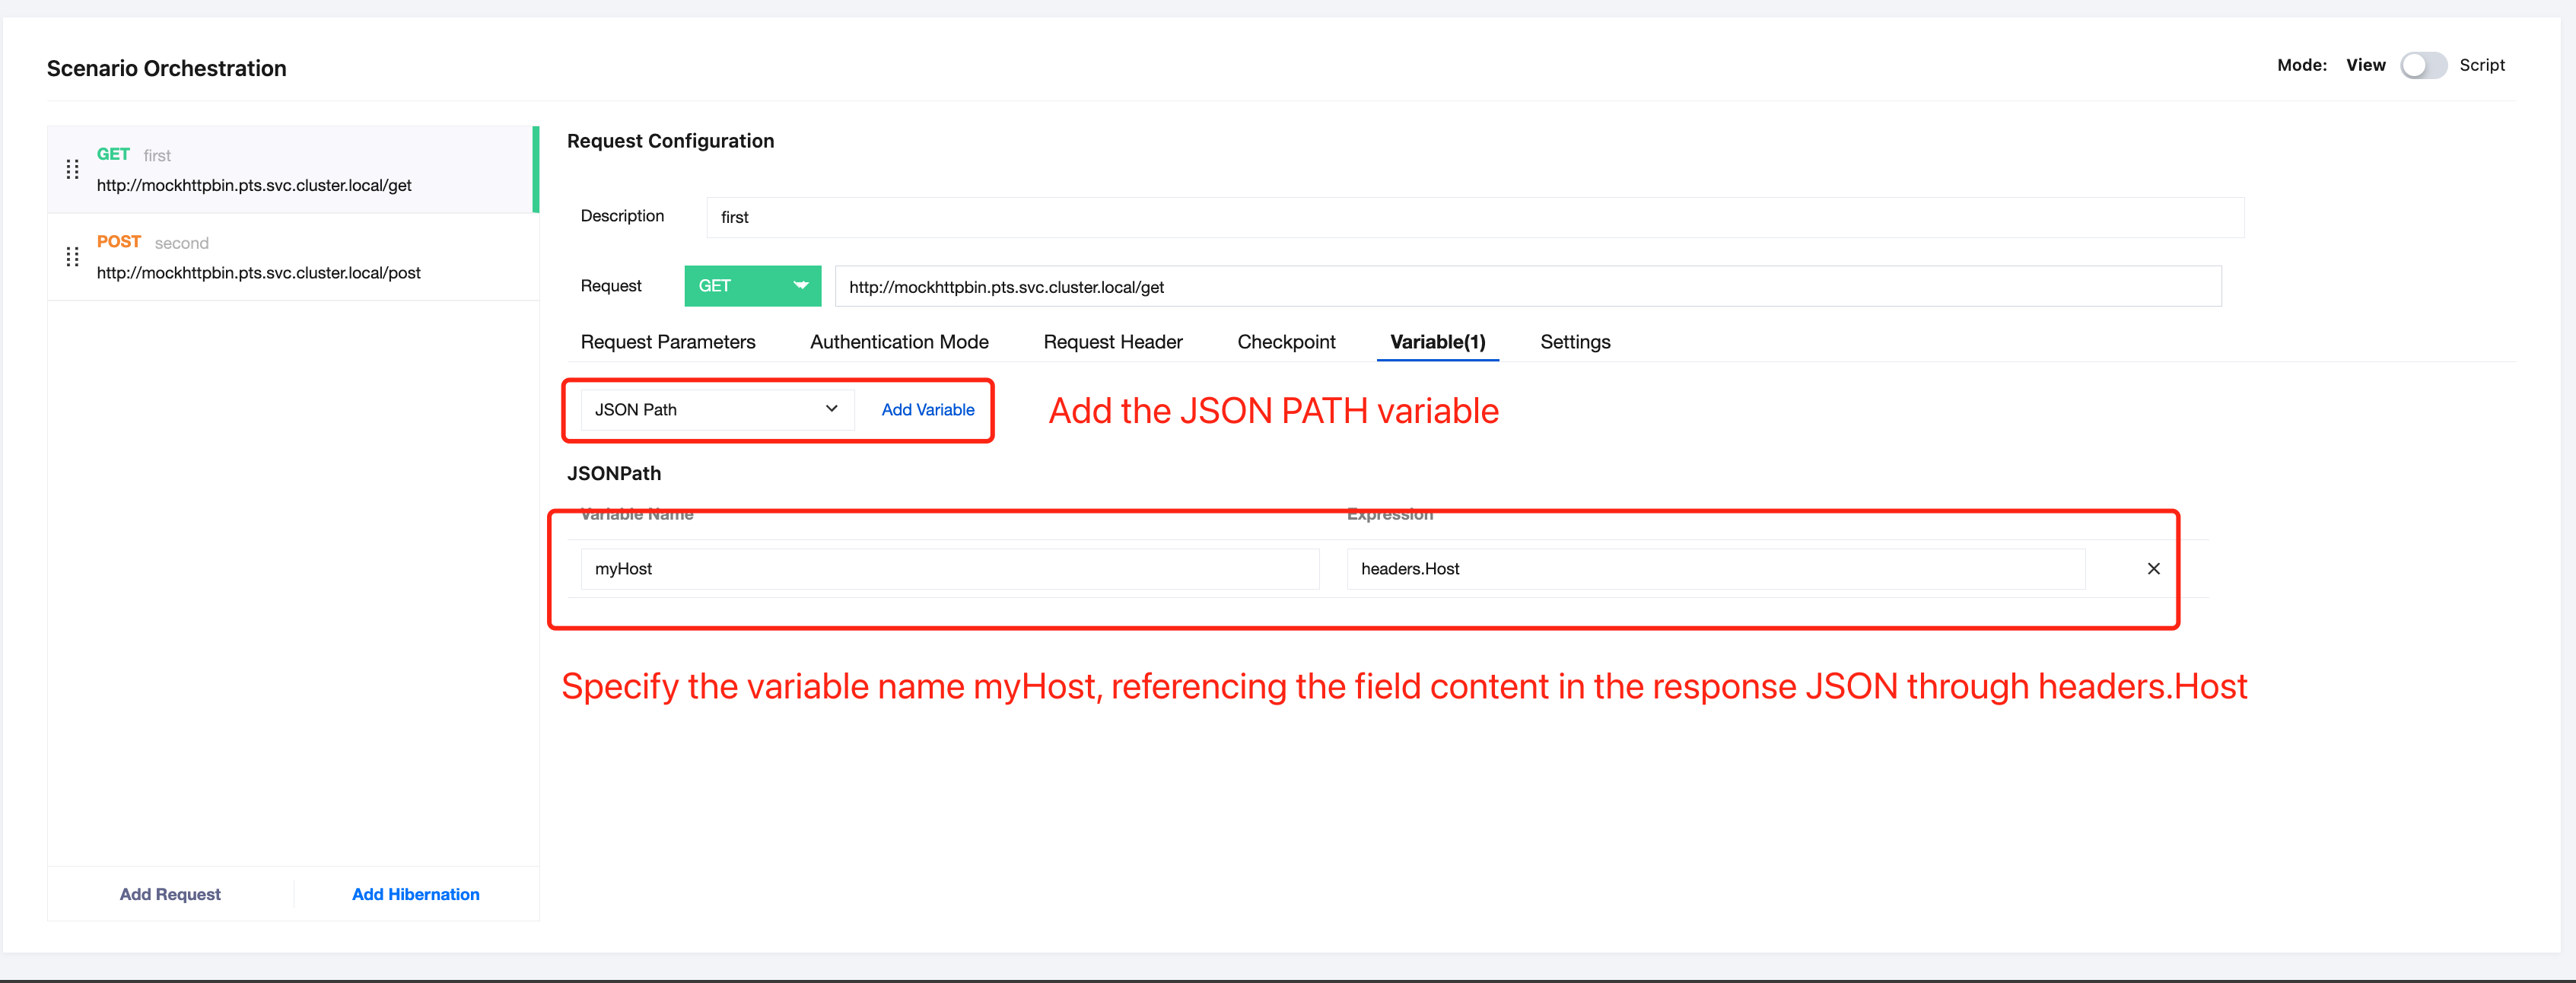
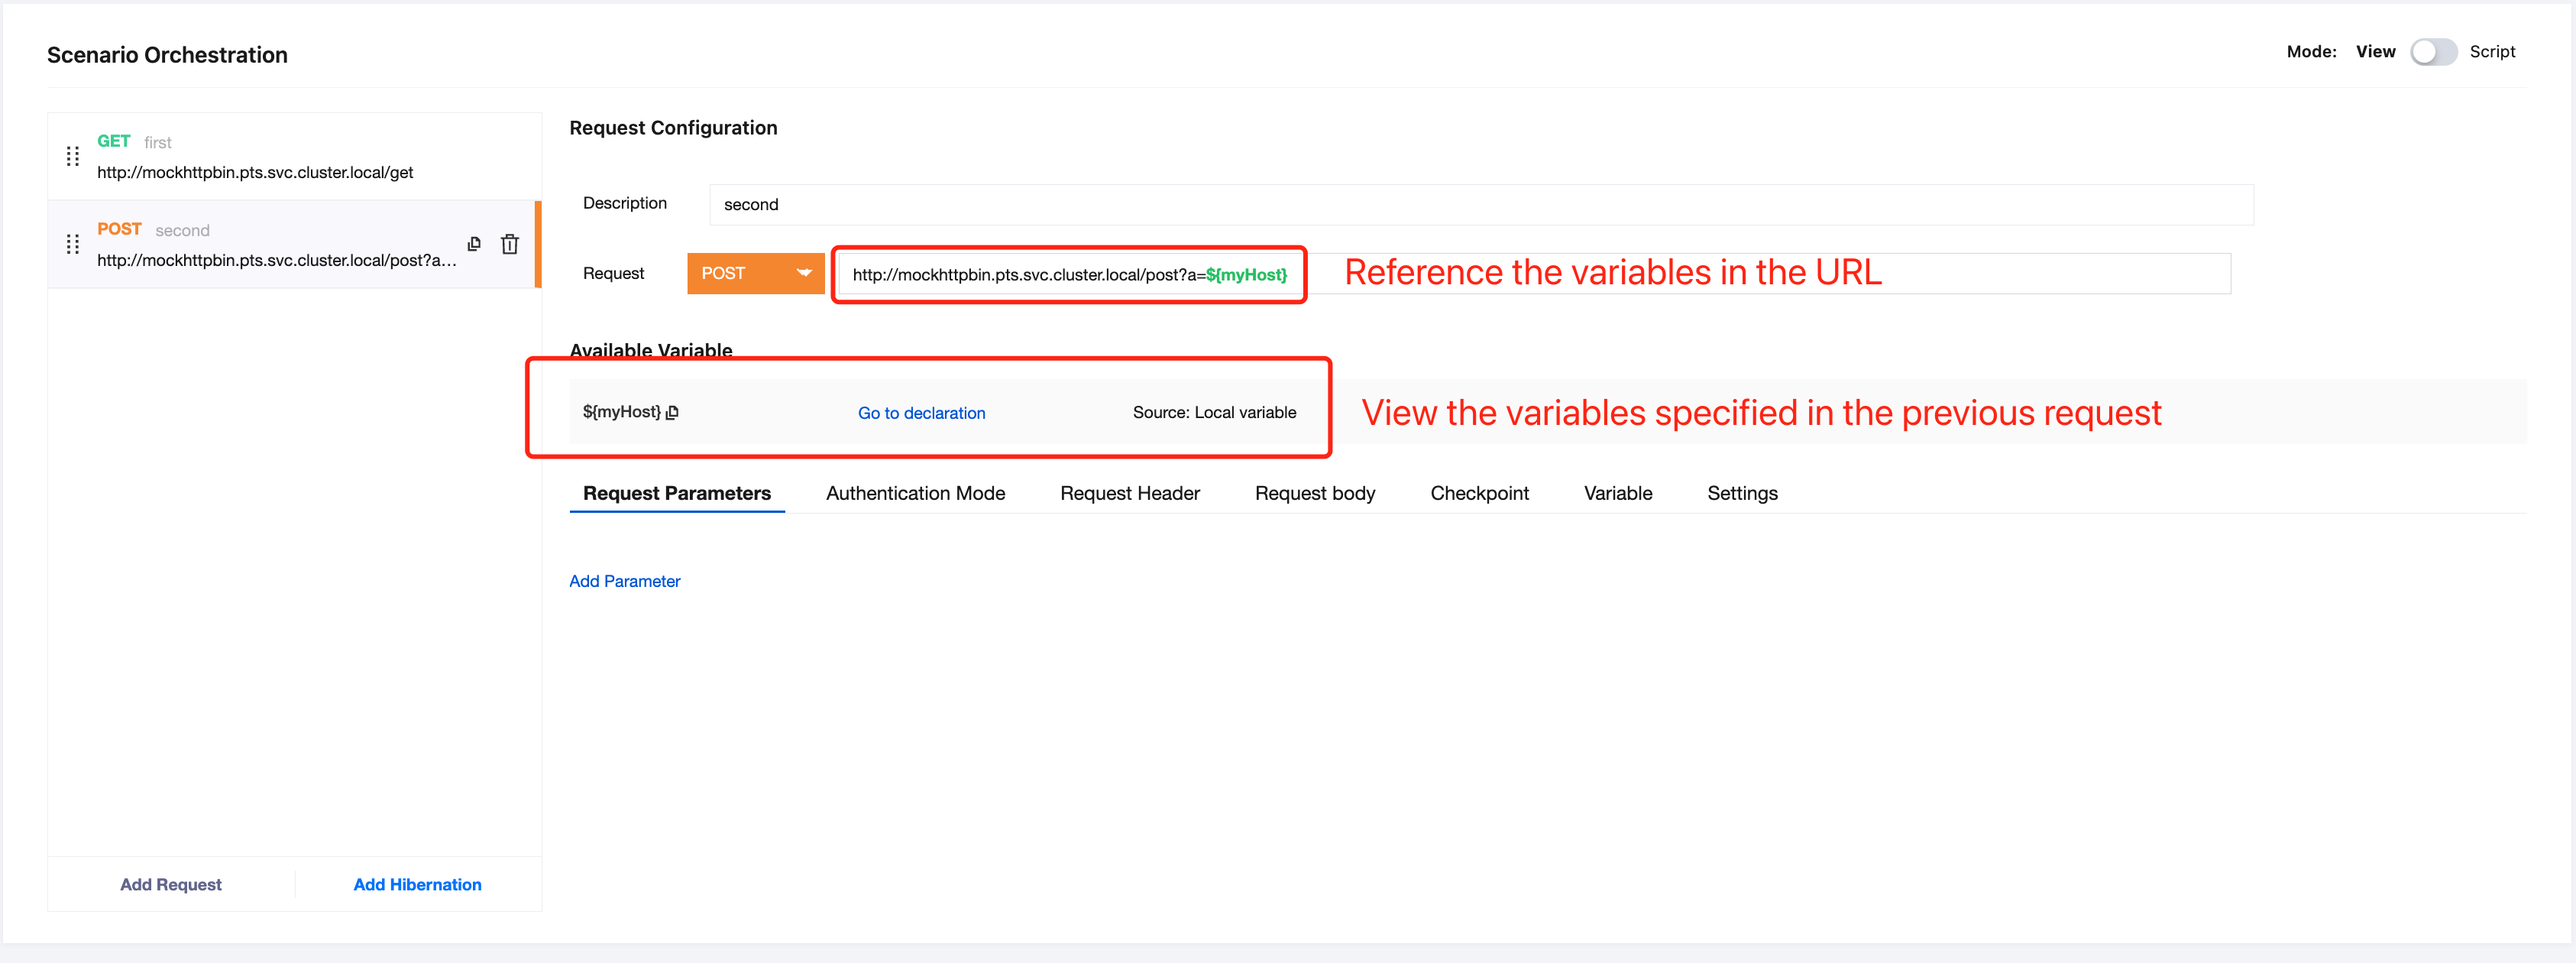
Variables obtained from previous requests: Extract relevant fields from the response of previous requests to generate available variables and reference them in the parameters of subsequent requests.
For example, if the response body of the first request is in JSON format, the response content is as follows:
Extract headers.Host from the response body as a variable named myHost and use it in the next request.
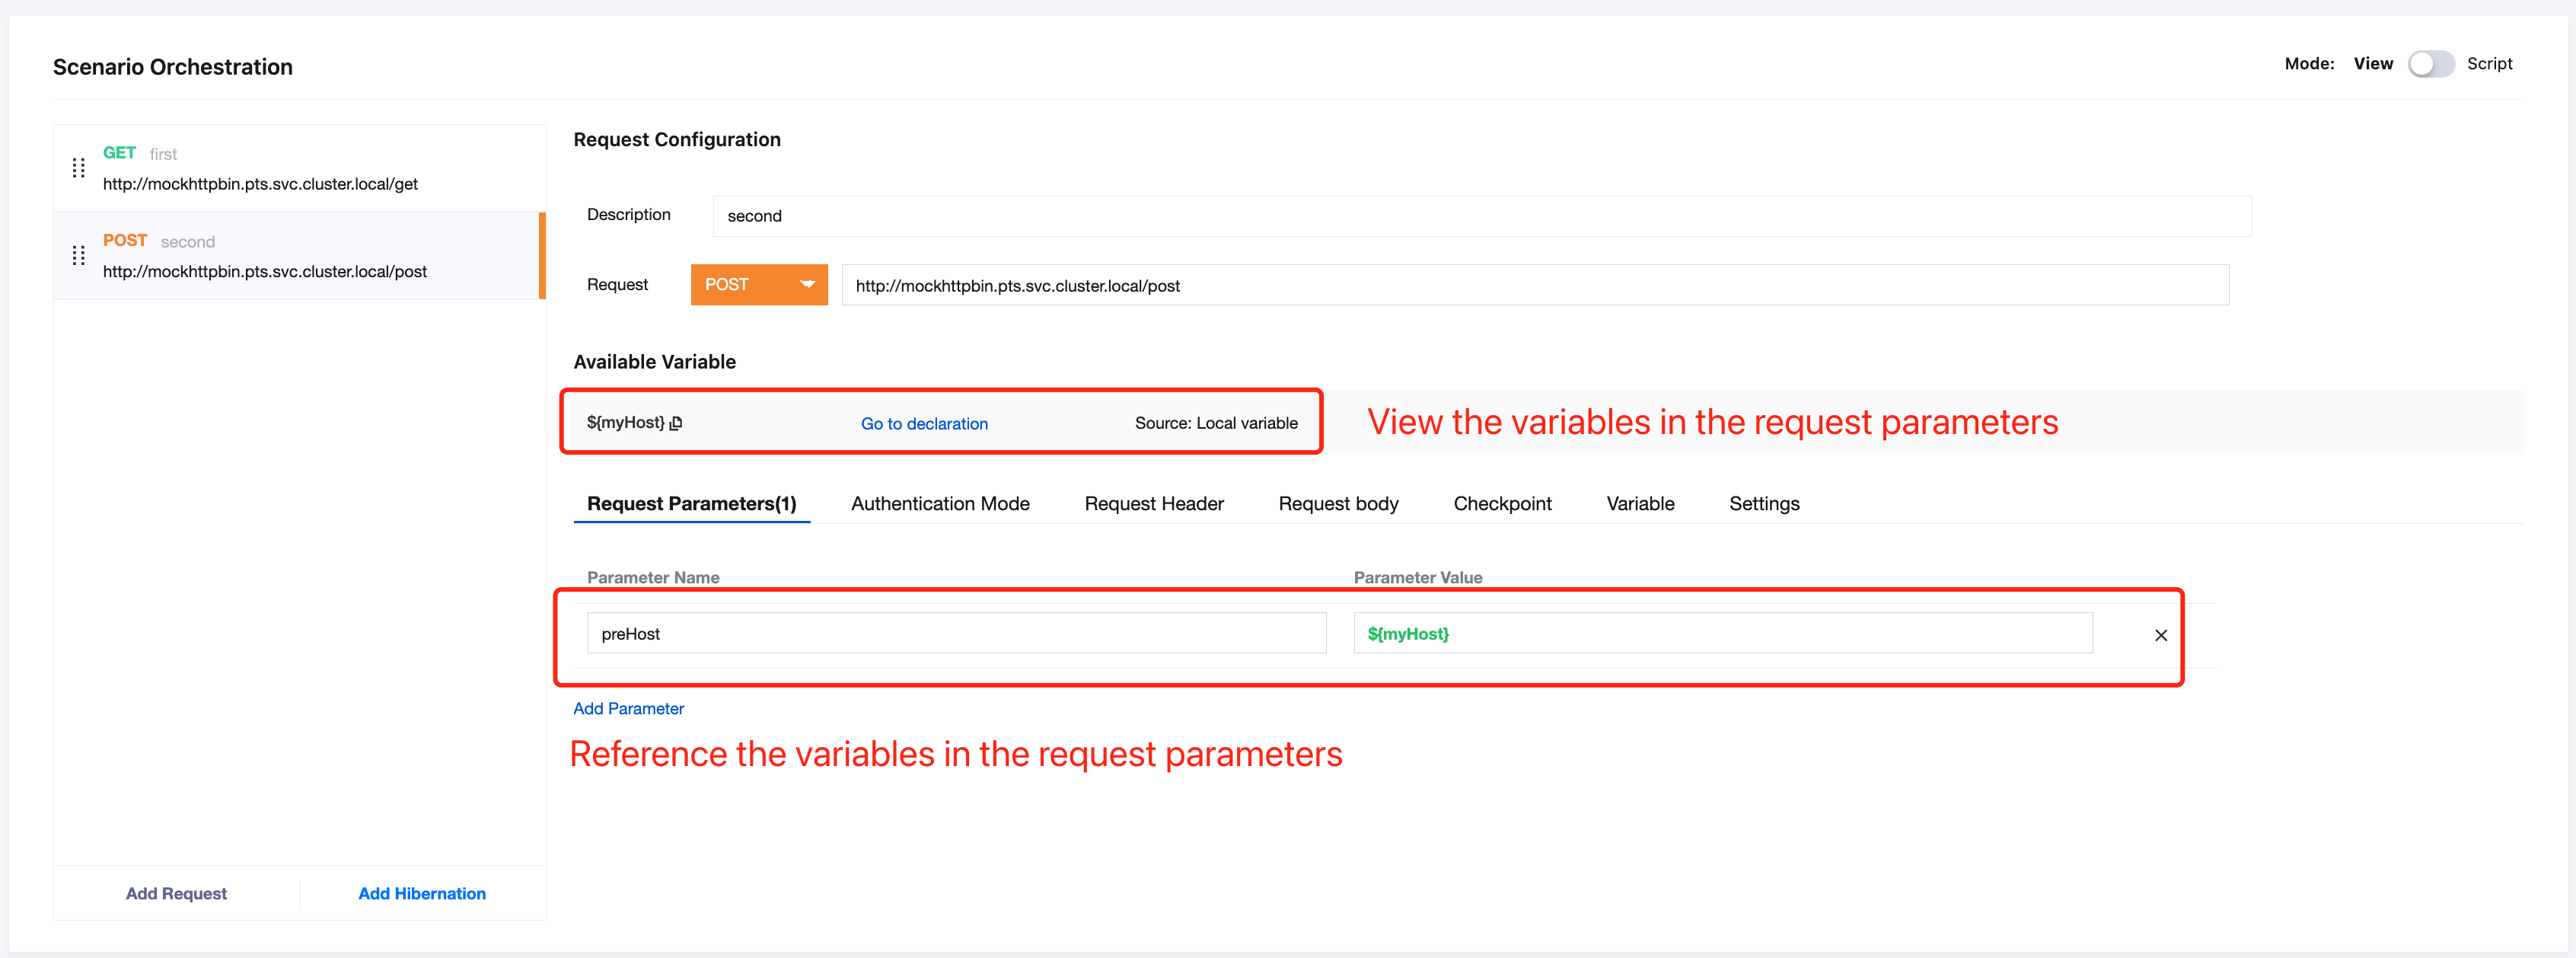
In the subsequent requests, this variable can be referenced anywhere in the request in the form of ${xx}. For example, reference the variable in request parameters and the request URL:
Referencing the variable in request parameters:
Referencing the variable in the request URL:
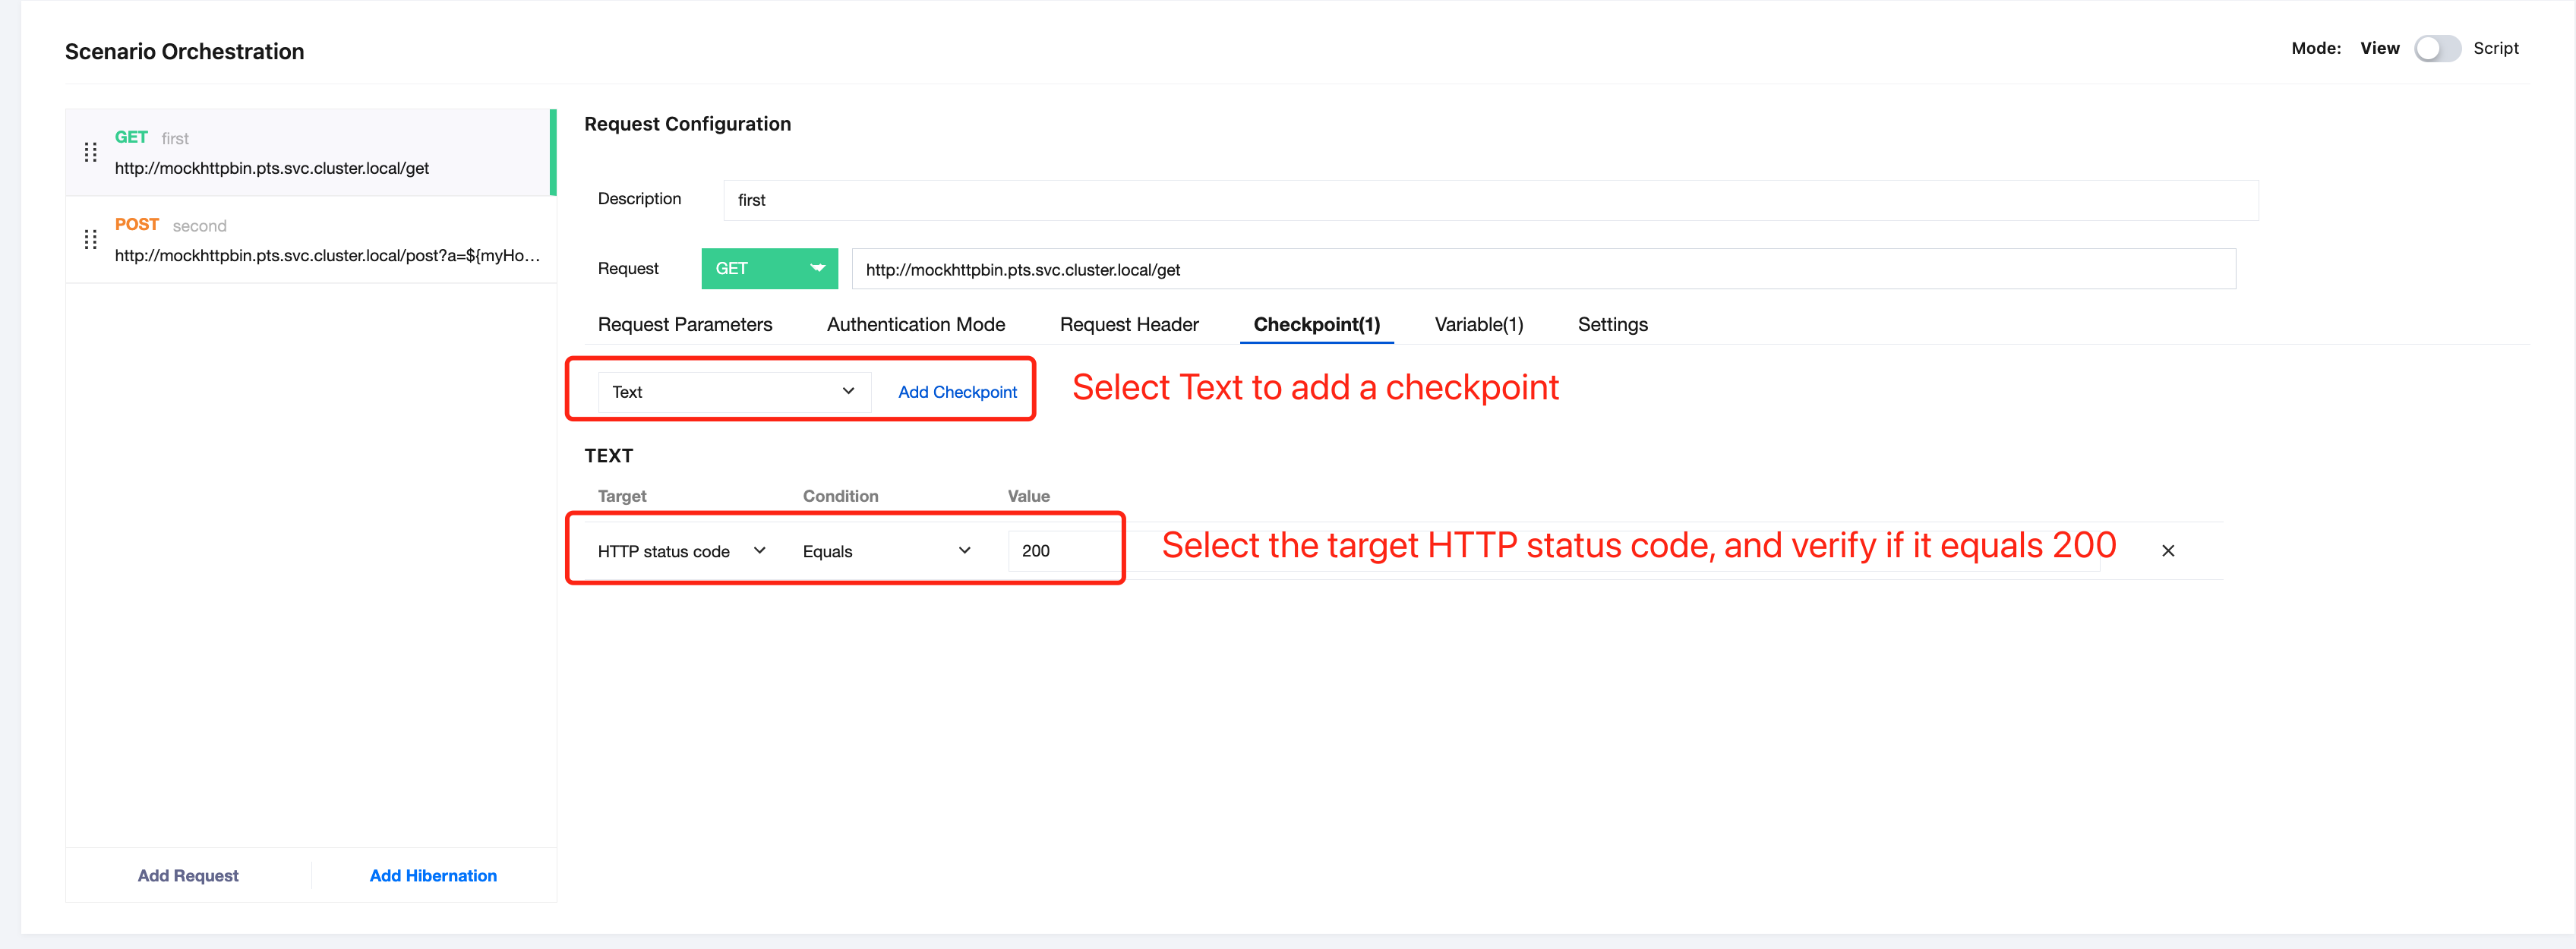
Configuring a Checkpoint
Checkpoints can be used to verify whether the request response content meets expectations. For example, if there is a request with a response status code of 200, the response content is as follows:
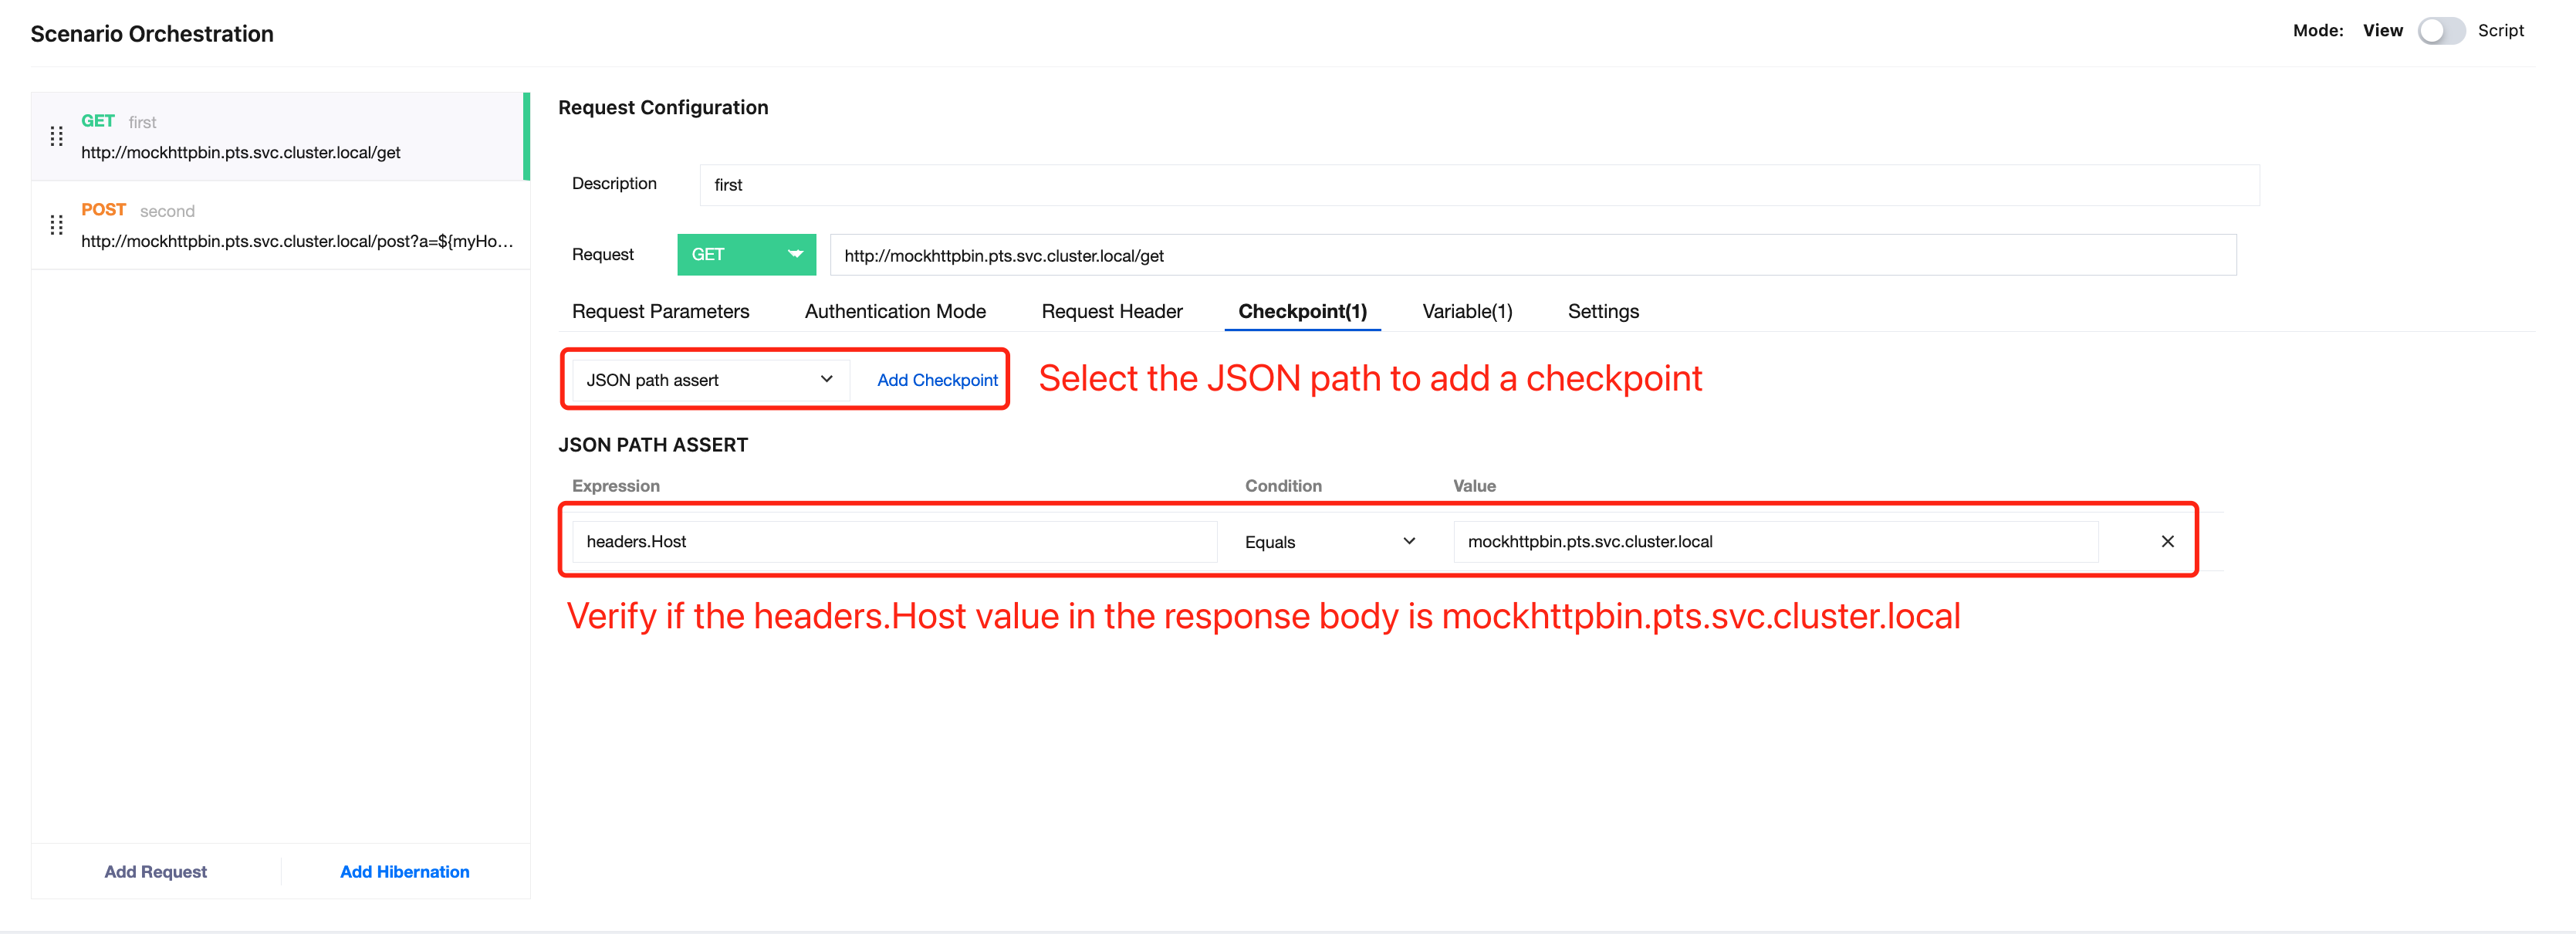
Checking Whether a Specific Field in the Response Body Meets Expectations
If the response body is in JSON format, verify whether the value of the headers.Host field in the response body is mockhttpbin.pts.svc.cluster.local.
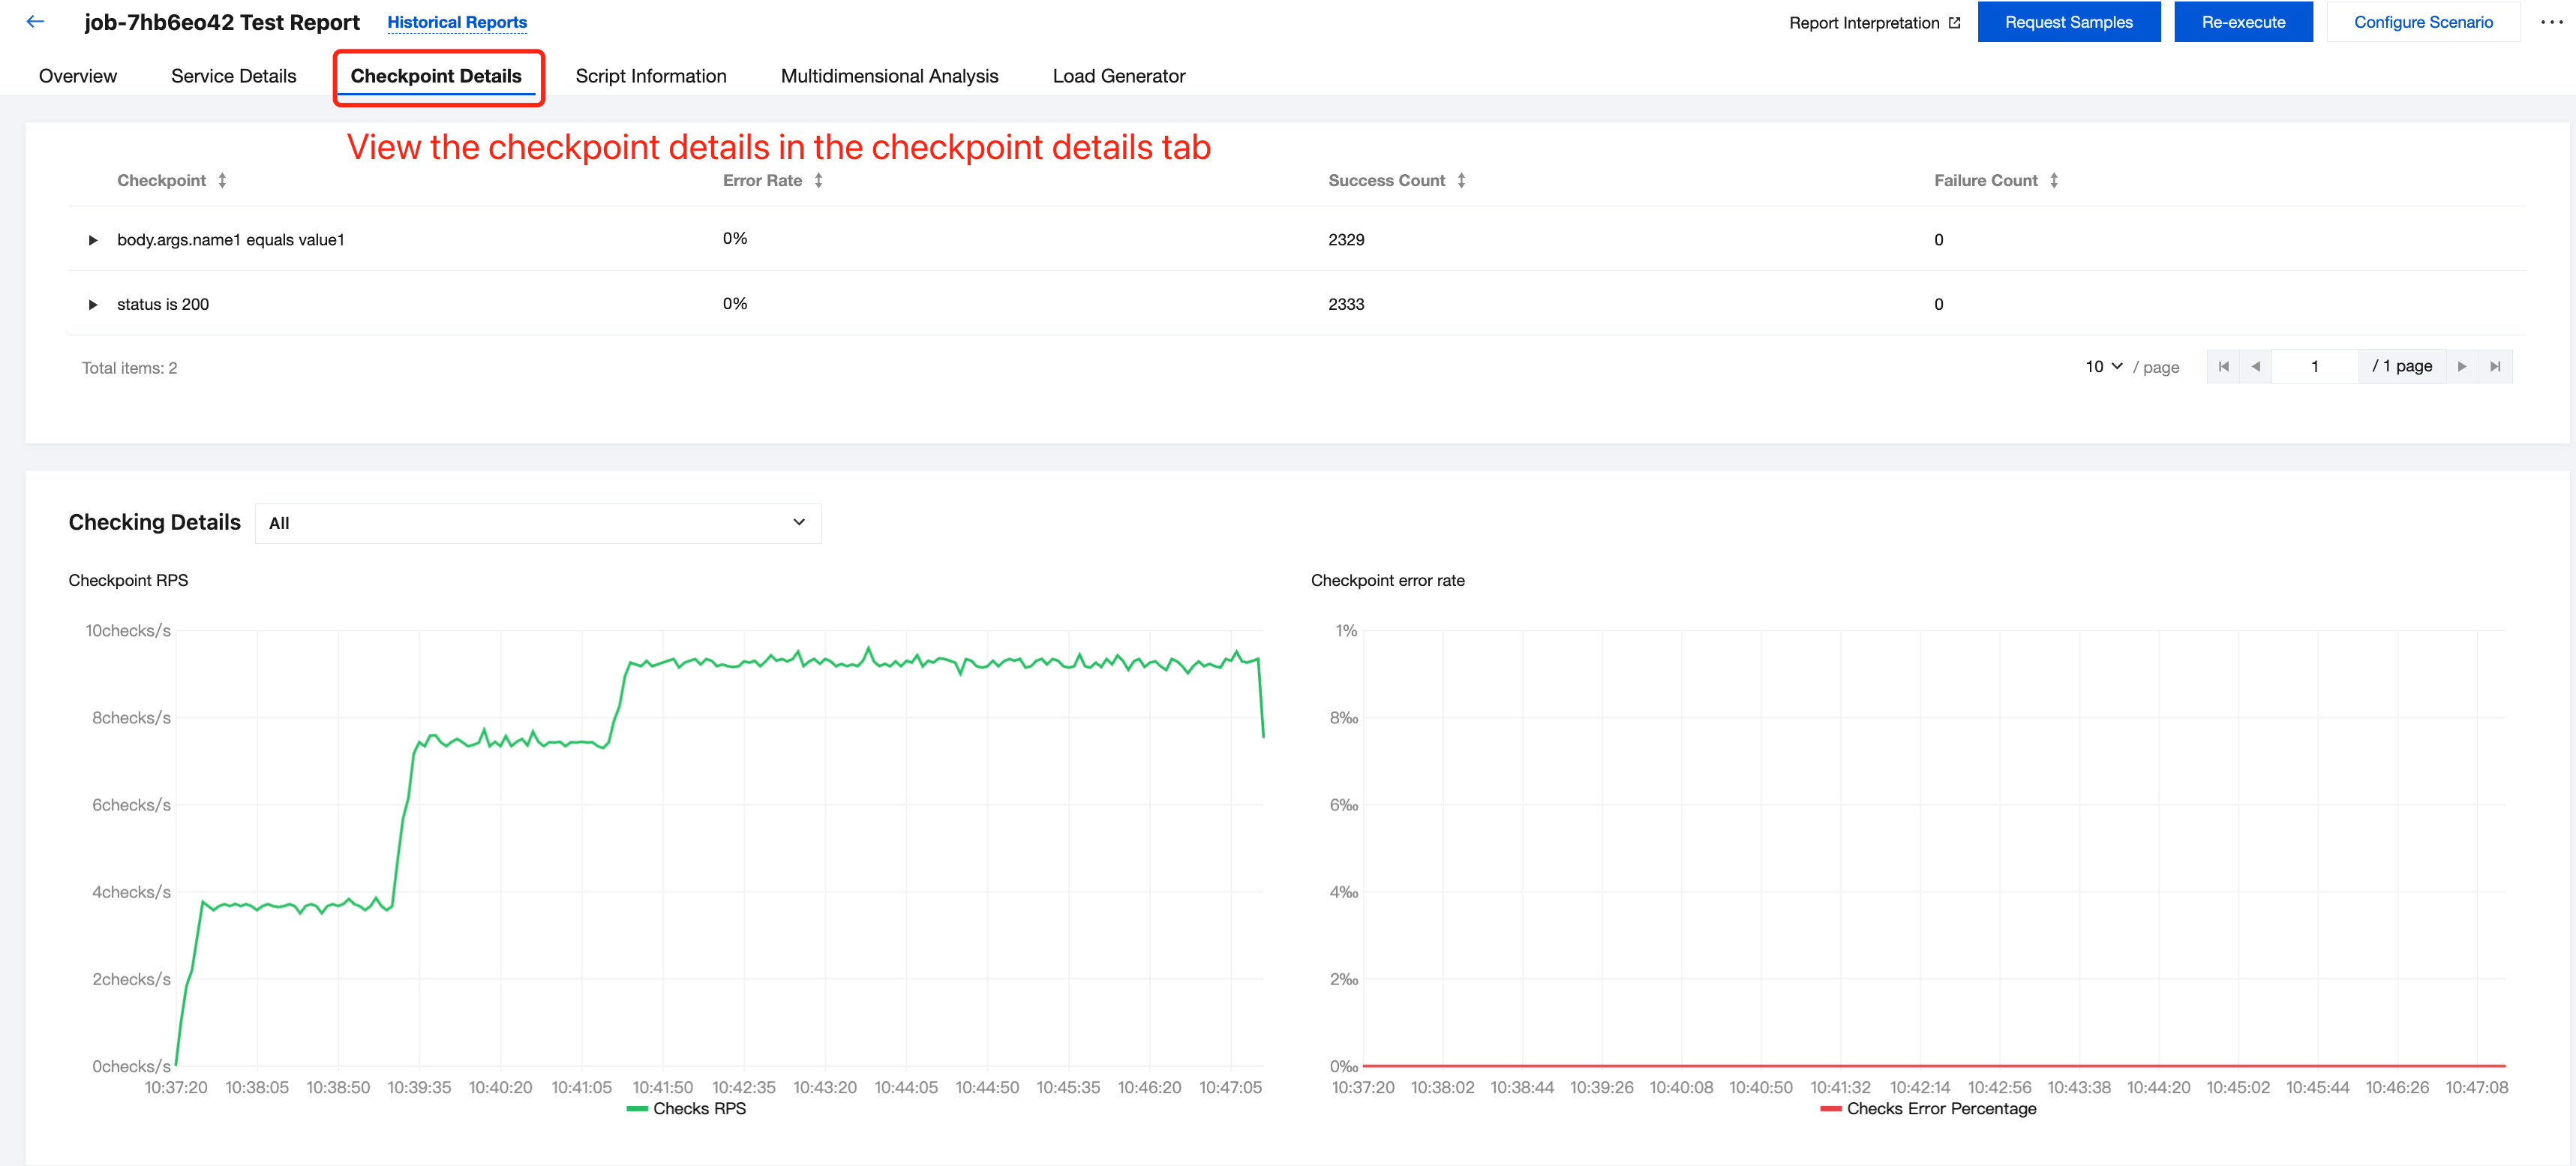
Click Save and Run in the upper right corner to start the performance testing. In the generated historical performance testing report, you can observe the status of the checkpoints.
File Dependency
In the performance testing scenario, you can upload the following types of files to provide status data during the execution of the performance testing task:
Parameter file: It dynamically provides test data in CSV format. That is, when the scenario is executed by each concurrent user (VU), each line of data will be obtained from the parameter file as the test data values for reference by variables in the script. For specific usage, see Using Parameter Files.
Request file: It is required for constructing your request, for example, the file that needs to be uploaded. For specific usage, see Using Request Files.
Protocol file: It is required for request serialization. For specific usage, see Using Protocol Files.
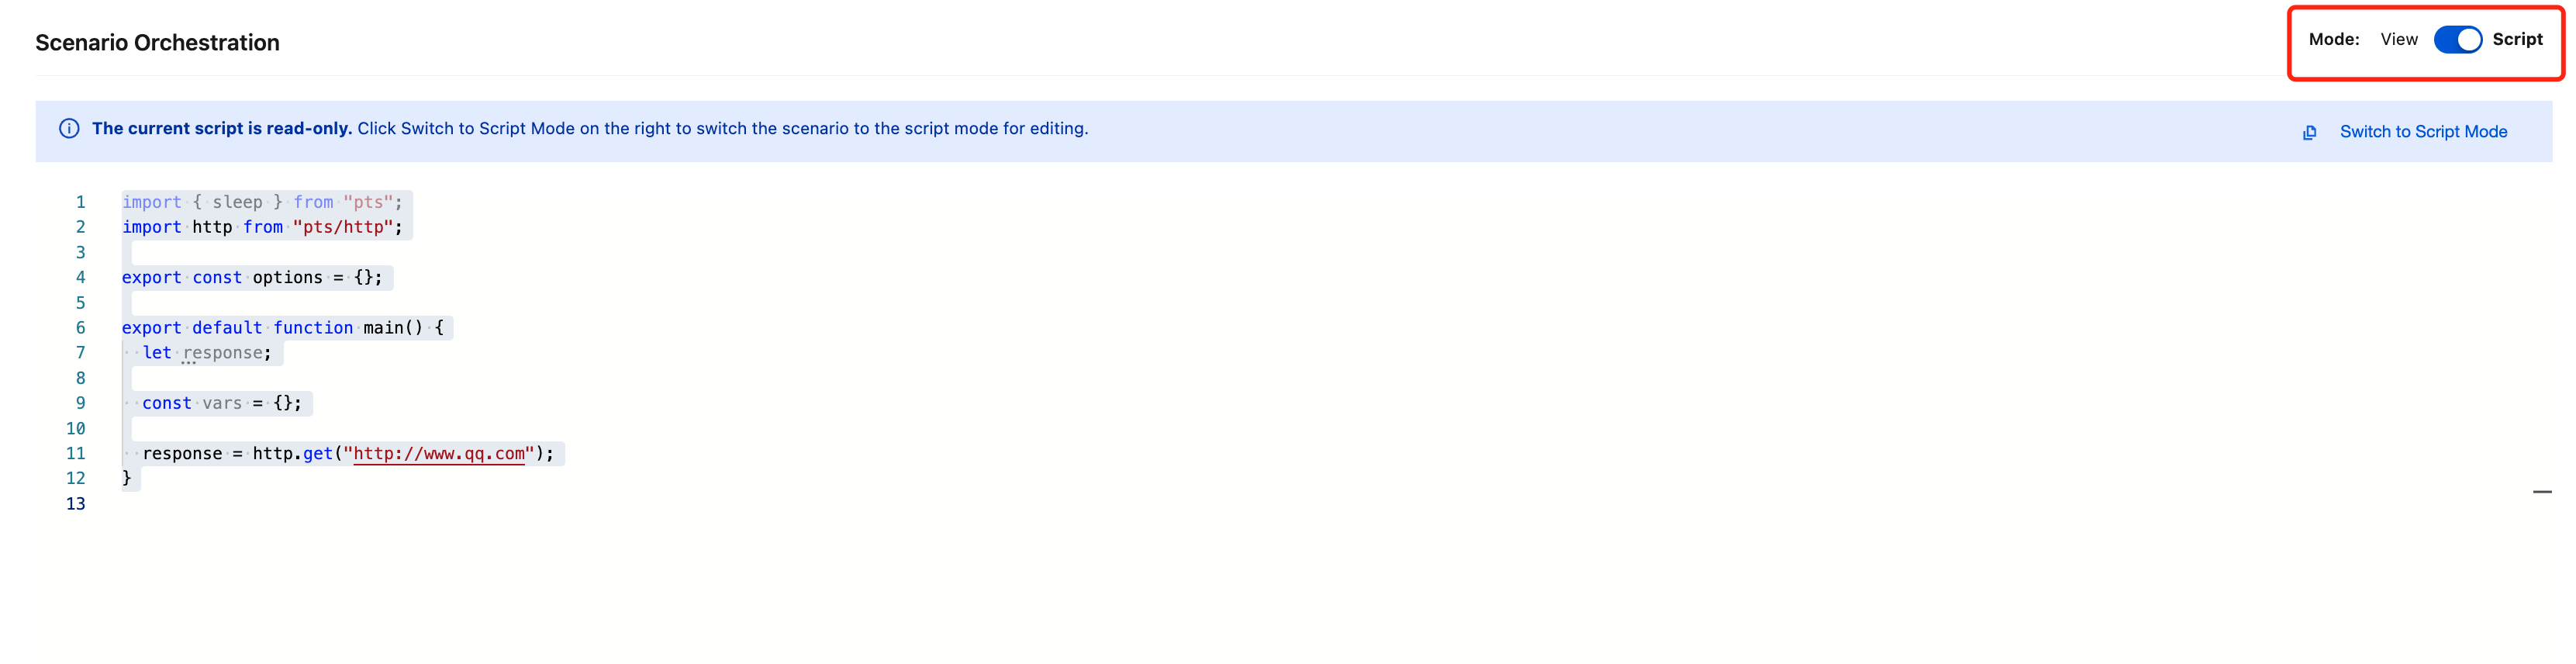
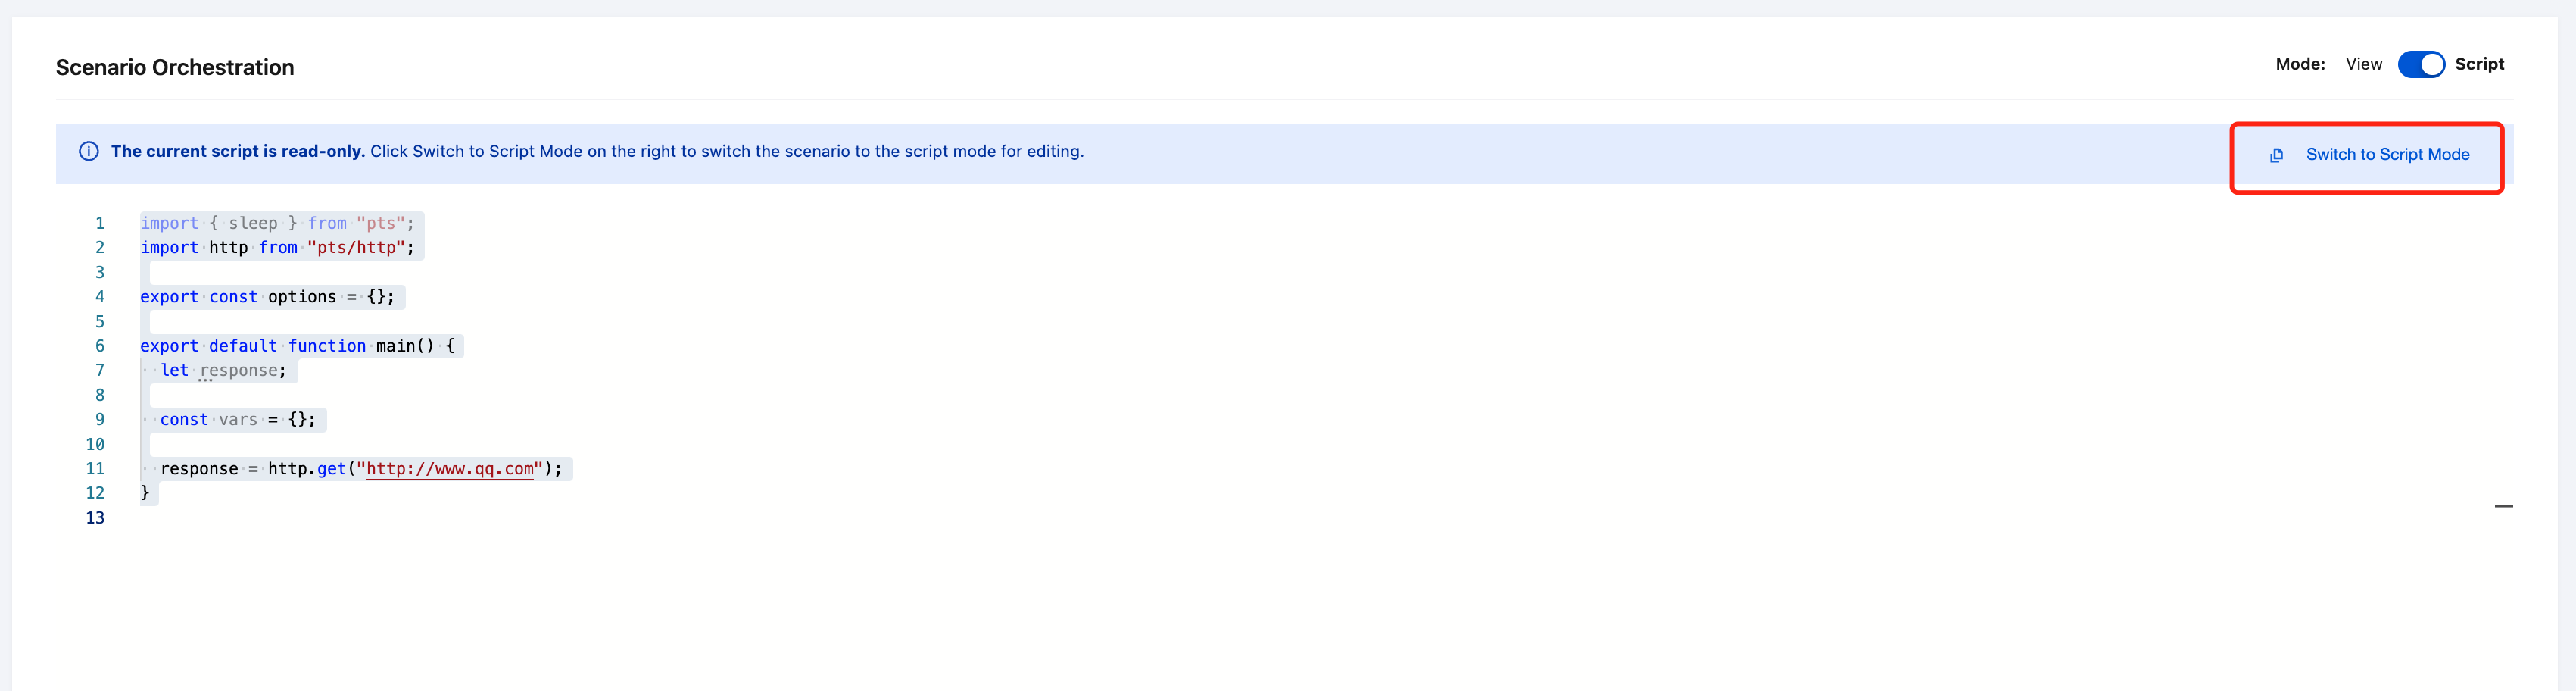
Mode Switching
To view scenario details, switch to the script view with one click. This view is in read-only mode.
To directly modify the script, click Switch to Script Mode to edit the script content.
Note:
After switching to the script mode, you cannot revert to the simple mode.