Orchestration Service
Download
포커스 모드
폰트 크기
Note:
During the orchestration service creation process, the API operations of certain cloud products need to be called to create corresponding resources. Therefore, it is necessary to authorize the service roles used by the platform in advance.
When you click the Workflow menu, the system automatically checks the following service roles and preset policy, and prompts you to perform authorization if required permissions are missing.
Complete authorization for the TKE_QCSRole service role.
Complete authorization for the IPAMDofTKE_QCSRole service role.
Complete authorization for the SCF_QcsRole service role and the QcloudAccessForSCFRolelnWorkFlow policy.
Operation Steps
Creating an Orchestration Service
1. Log in to the Serverless Cloud Function (SCF) console. In the left sidebar, choose Data Engineering > Workflow.
2. On the Workflow page, click Create.
3. On the Create Service page, specify the service information.
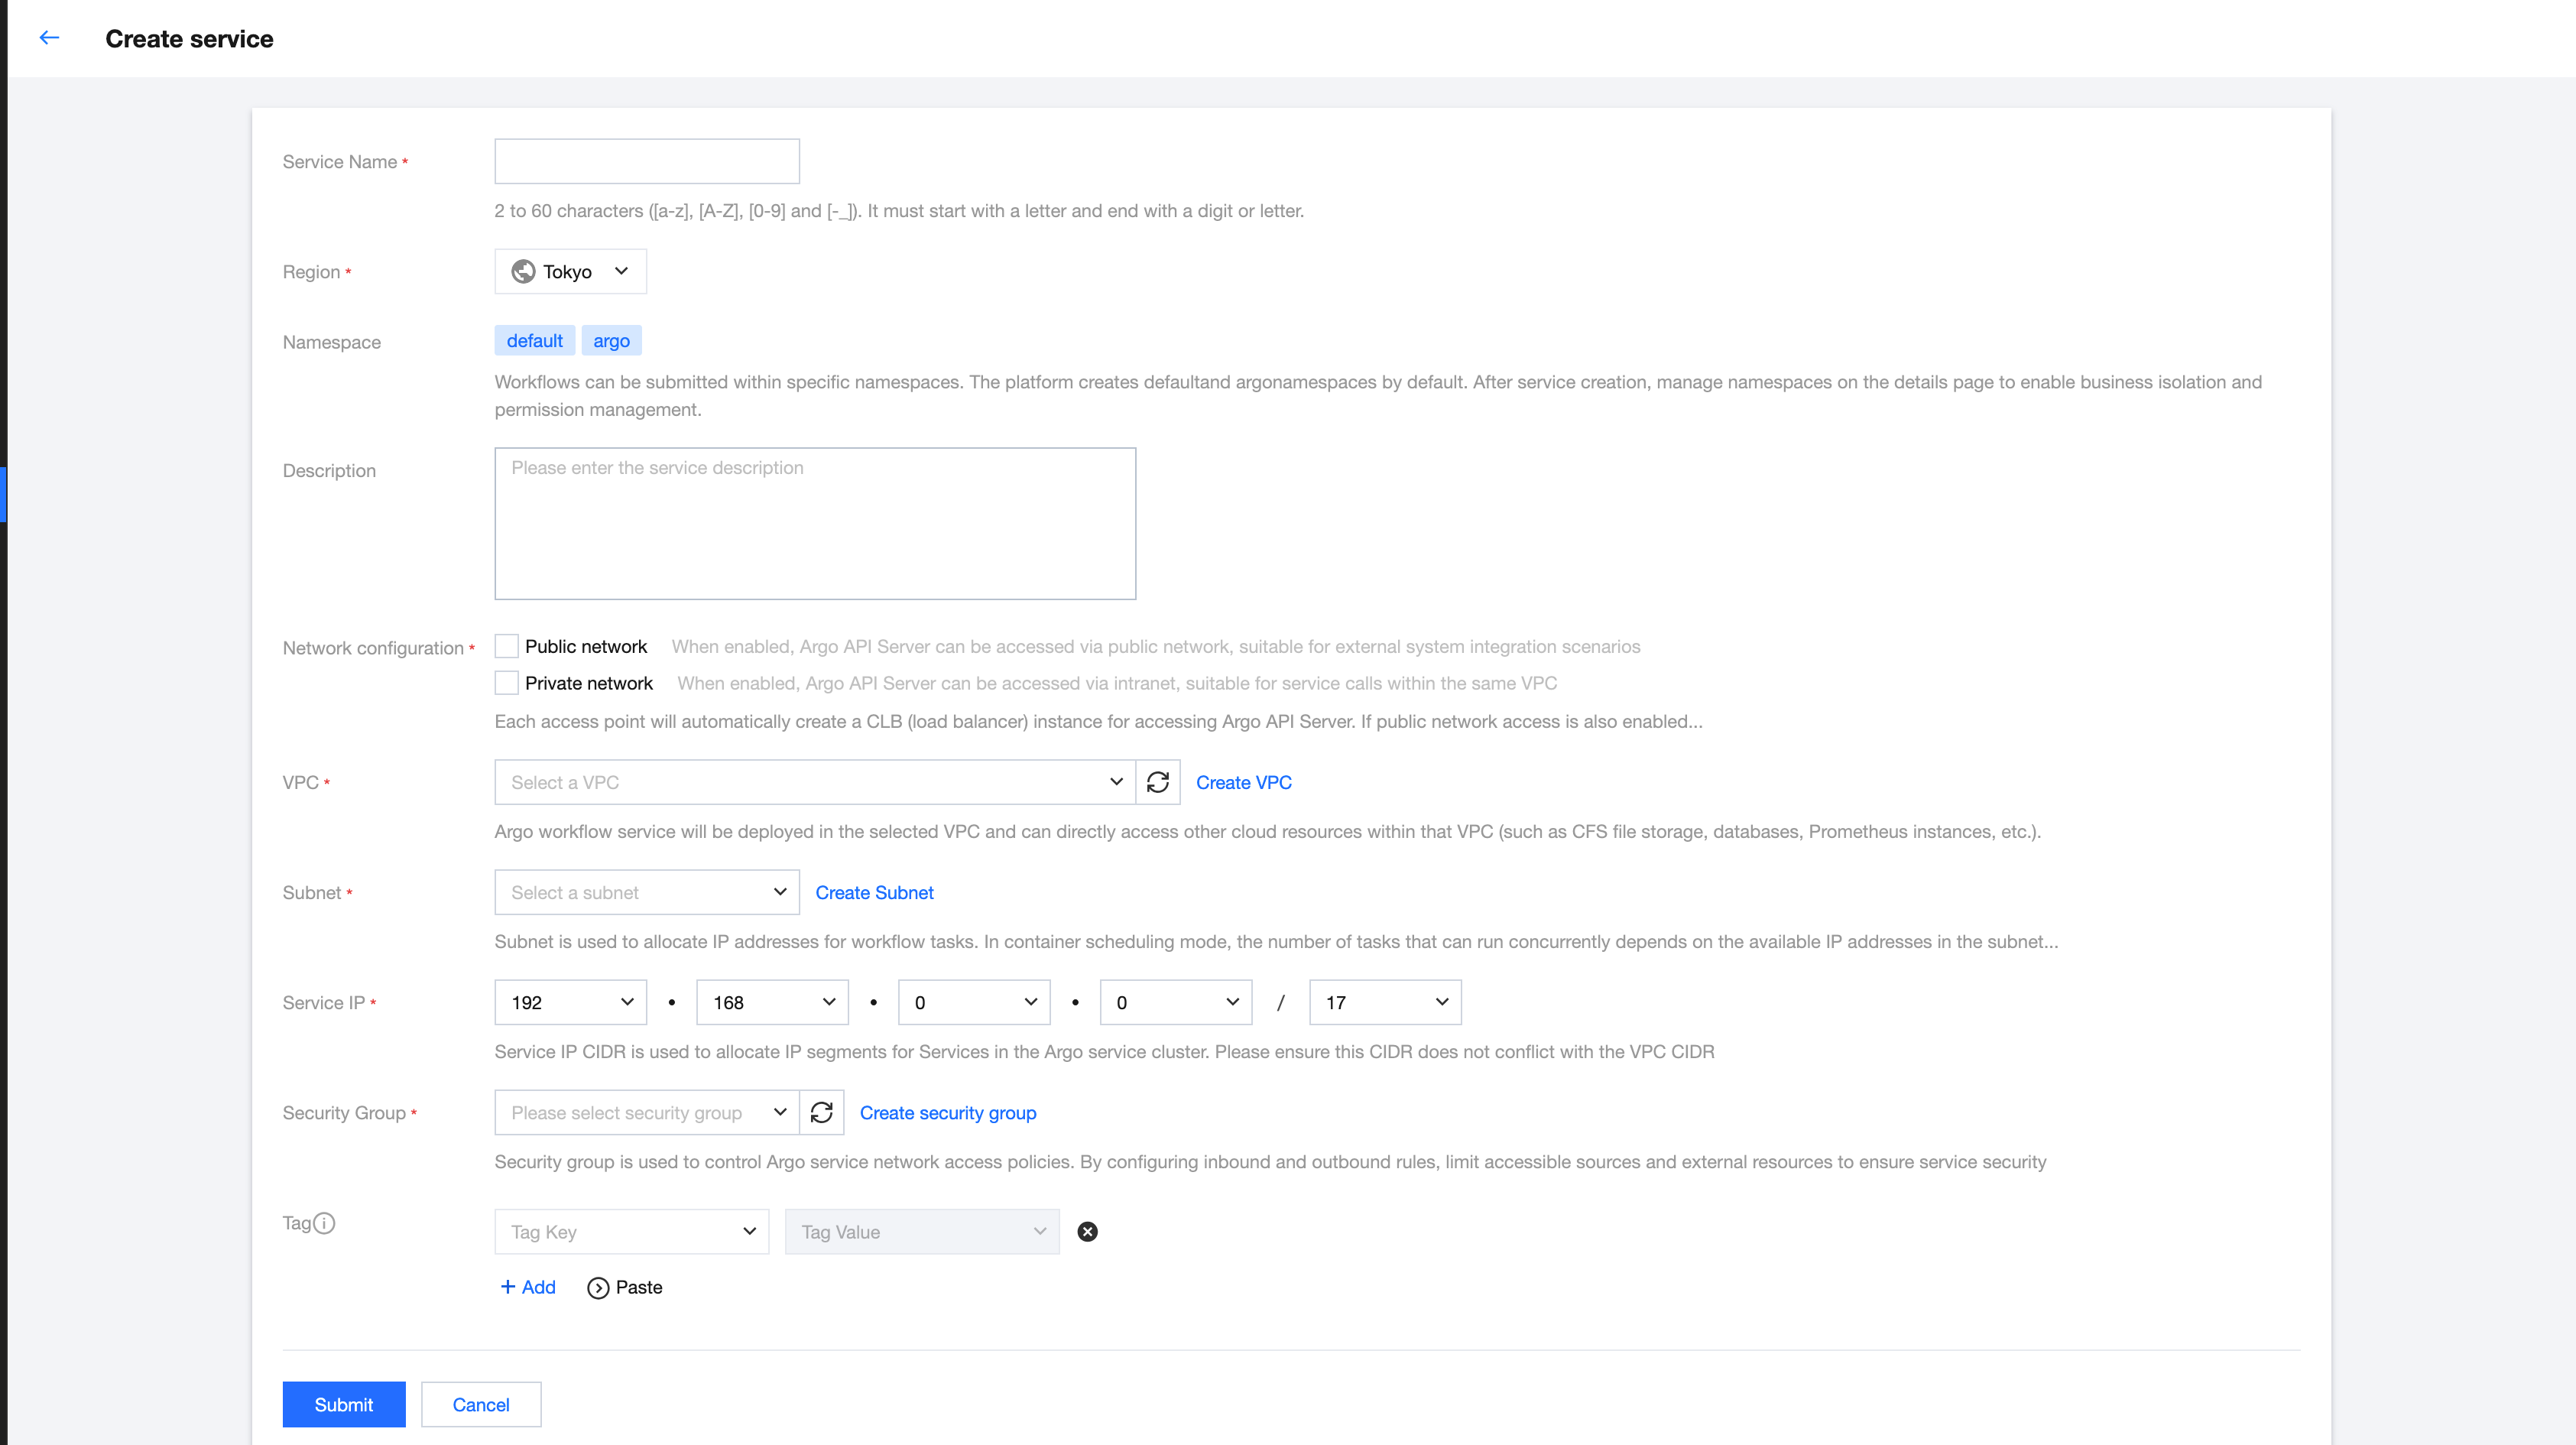
Service name: The name of the orchestration service. It can only contain letters, digits, underscores (_), and hyphens (-). It must start with a letter and end with a digit or letter, and be 2 and 60 characters in length. The service name must be unique within the same region and under the same root account. This document uses
first-argo-test as an example.Region: The region where the orchestration service is created. This document uses Chongqing as an example.
Namespace: Workflow supports submission under specific namespaces. The platform creates default and argo namespaces by default. After the service is created, you can manage namespaces on the details page to facilitate business isolation and permission management.
Network Configuration: The access point information. You can select public network access or private network access, and you should select at least one access method. Each access point will automatically create a Cloud Load Balancer (CLB) instance for accessing the Argo API Server. If both public and private network access are enabled, two CLB instances will be created. CLB instances incur corresponding instance fees and traffic fees. For more information, see CLB Billing Overview.
Public Network Access: When public network access is enabled, the Argo API Server can be accessed over the public network. This is suitable for external system integration scenarios.
Private Network Access: When private network access is enabled, the Argo API Server can be accessed over a private network. This is suitable for service calls within the same Virtual Private Cloud (VPC).
Note:
Clusters in Shanghai Autonomous Driving Zone support only private network access.
Virtual Private Cloud: Select a VPC in the same region. The Argo workflow service will be deployed in the selected VPC and can directly access other cloud resources within the VPC, such as Cloud File Storage (CFS), databases, and Prometheus instances.
Subnet: You can select multiple subnets, with a default upper limit of 5. To increase the upper limit, submit a ticket. Subnets are used to allocate IP addresses for workflow tasks. In container scheduling mode, the number of tasks that can run concurrently depends on the number of available IP addresses in the subnet. In single-function scheduling mode, the number of workflows that can run concurrently depends on the number of available IP addresses in the subnet. Selecting subnets of different AZs enables cross-AZ deployment, improving service high availability and disaster recovery capability.
Service IP: The Service IP range is used to assign an IP range for the service in the cluster where the Argo service resides. Make sure that this IP range does not conflict with the VPC IP range.
Security Group: Select a security group to control the network access policy for the Argo service. Configure inbound and outbound rules to restrict allowed access sources and accessible external resources, ensuring service security. If your created orchestration service cannot be accessed, first check the security group information to confirm that the access source is within the allowed rules of the security group.
Tag: The business tag information of this service, used for business isolation during authentication.
4. Click Submit.
5. Submission succeeded. At this point, the platform requires approximately 10 to 20 minutes to complete tasks such as cluster creation, service deployment, and network configuration resolution.
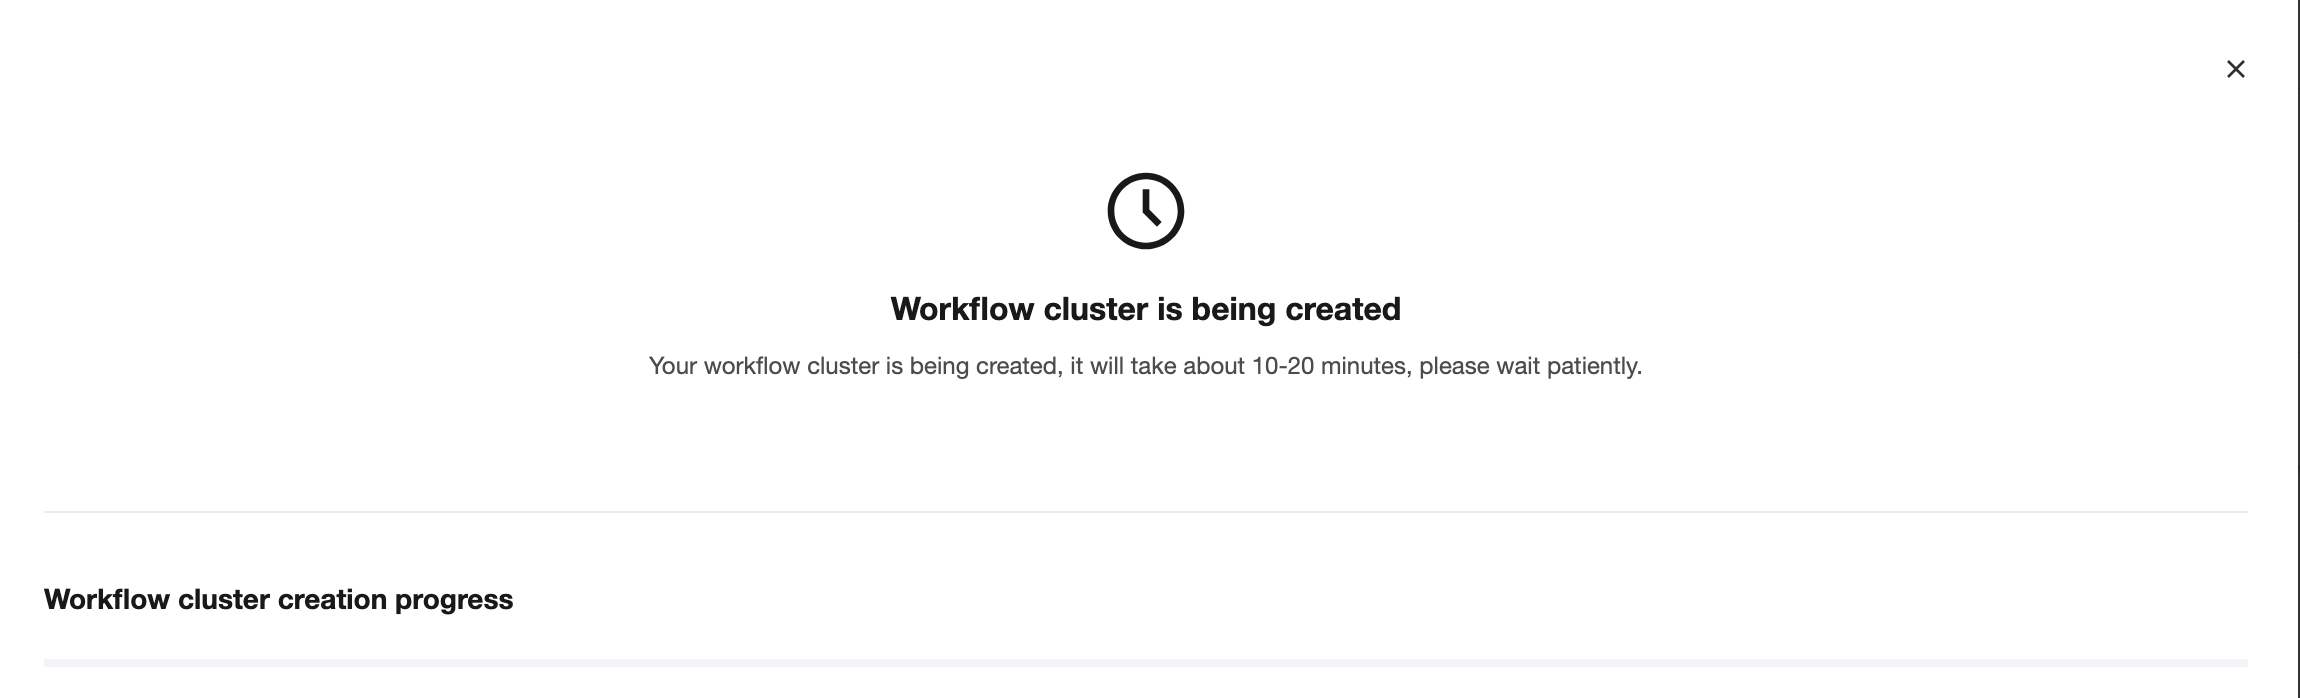
6. For workflow services being created, click View Progress to view the latest creation progress.
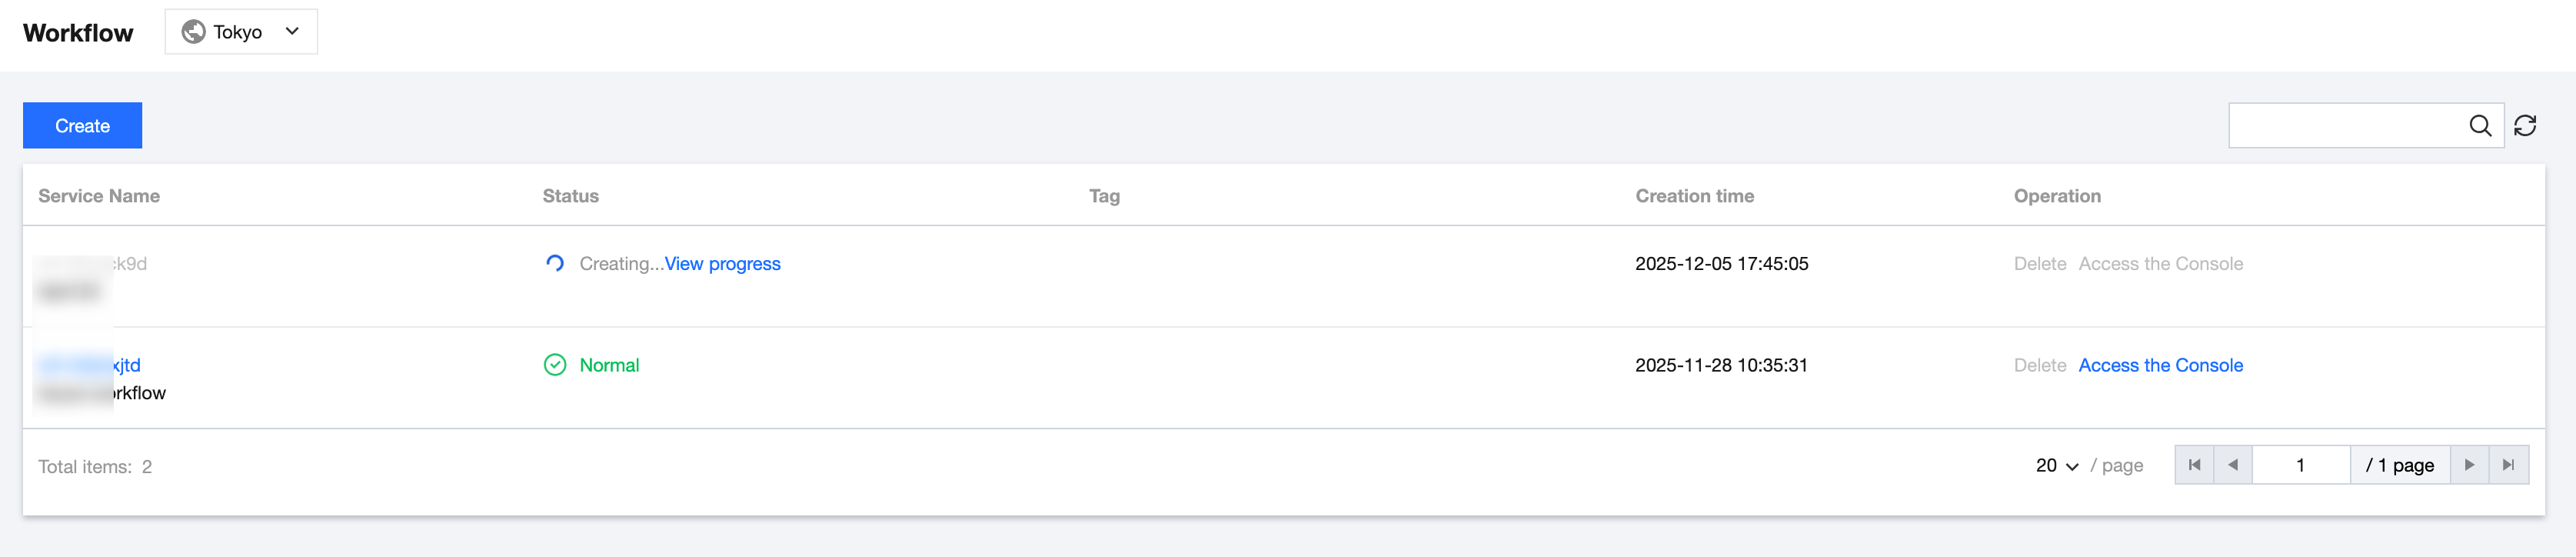
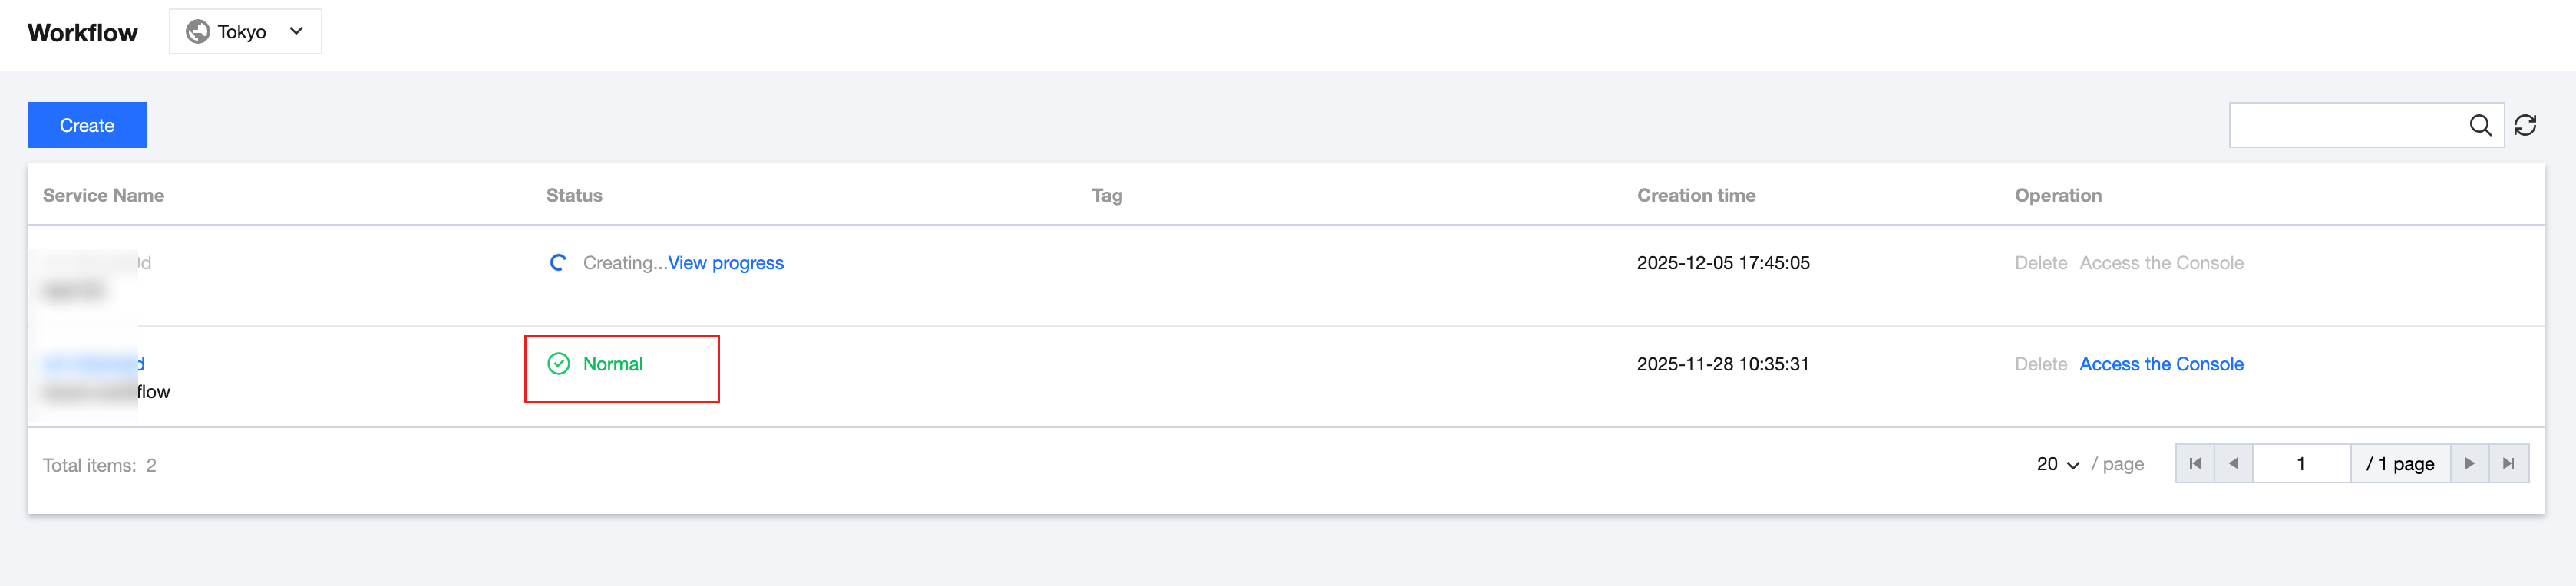
7. After the orchestration service is successfully created, view the latest version status on the Workflow page, as shown in the following figure:
View Service Details
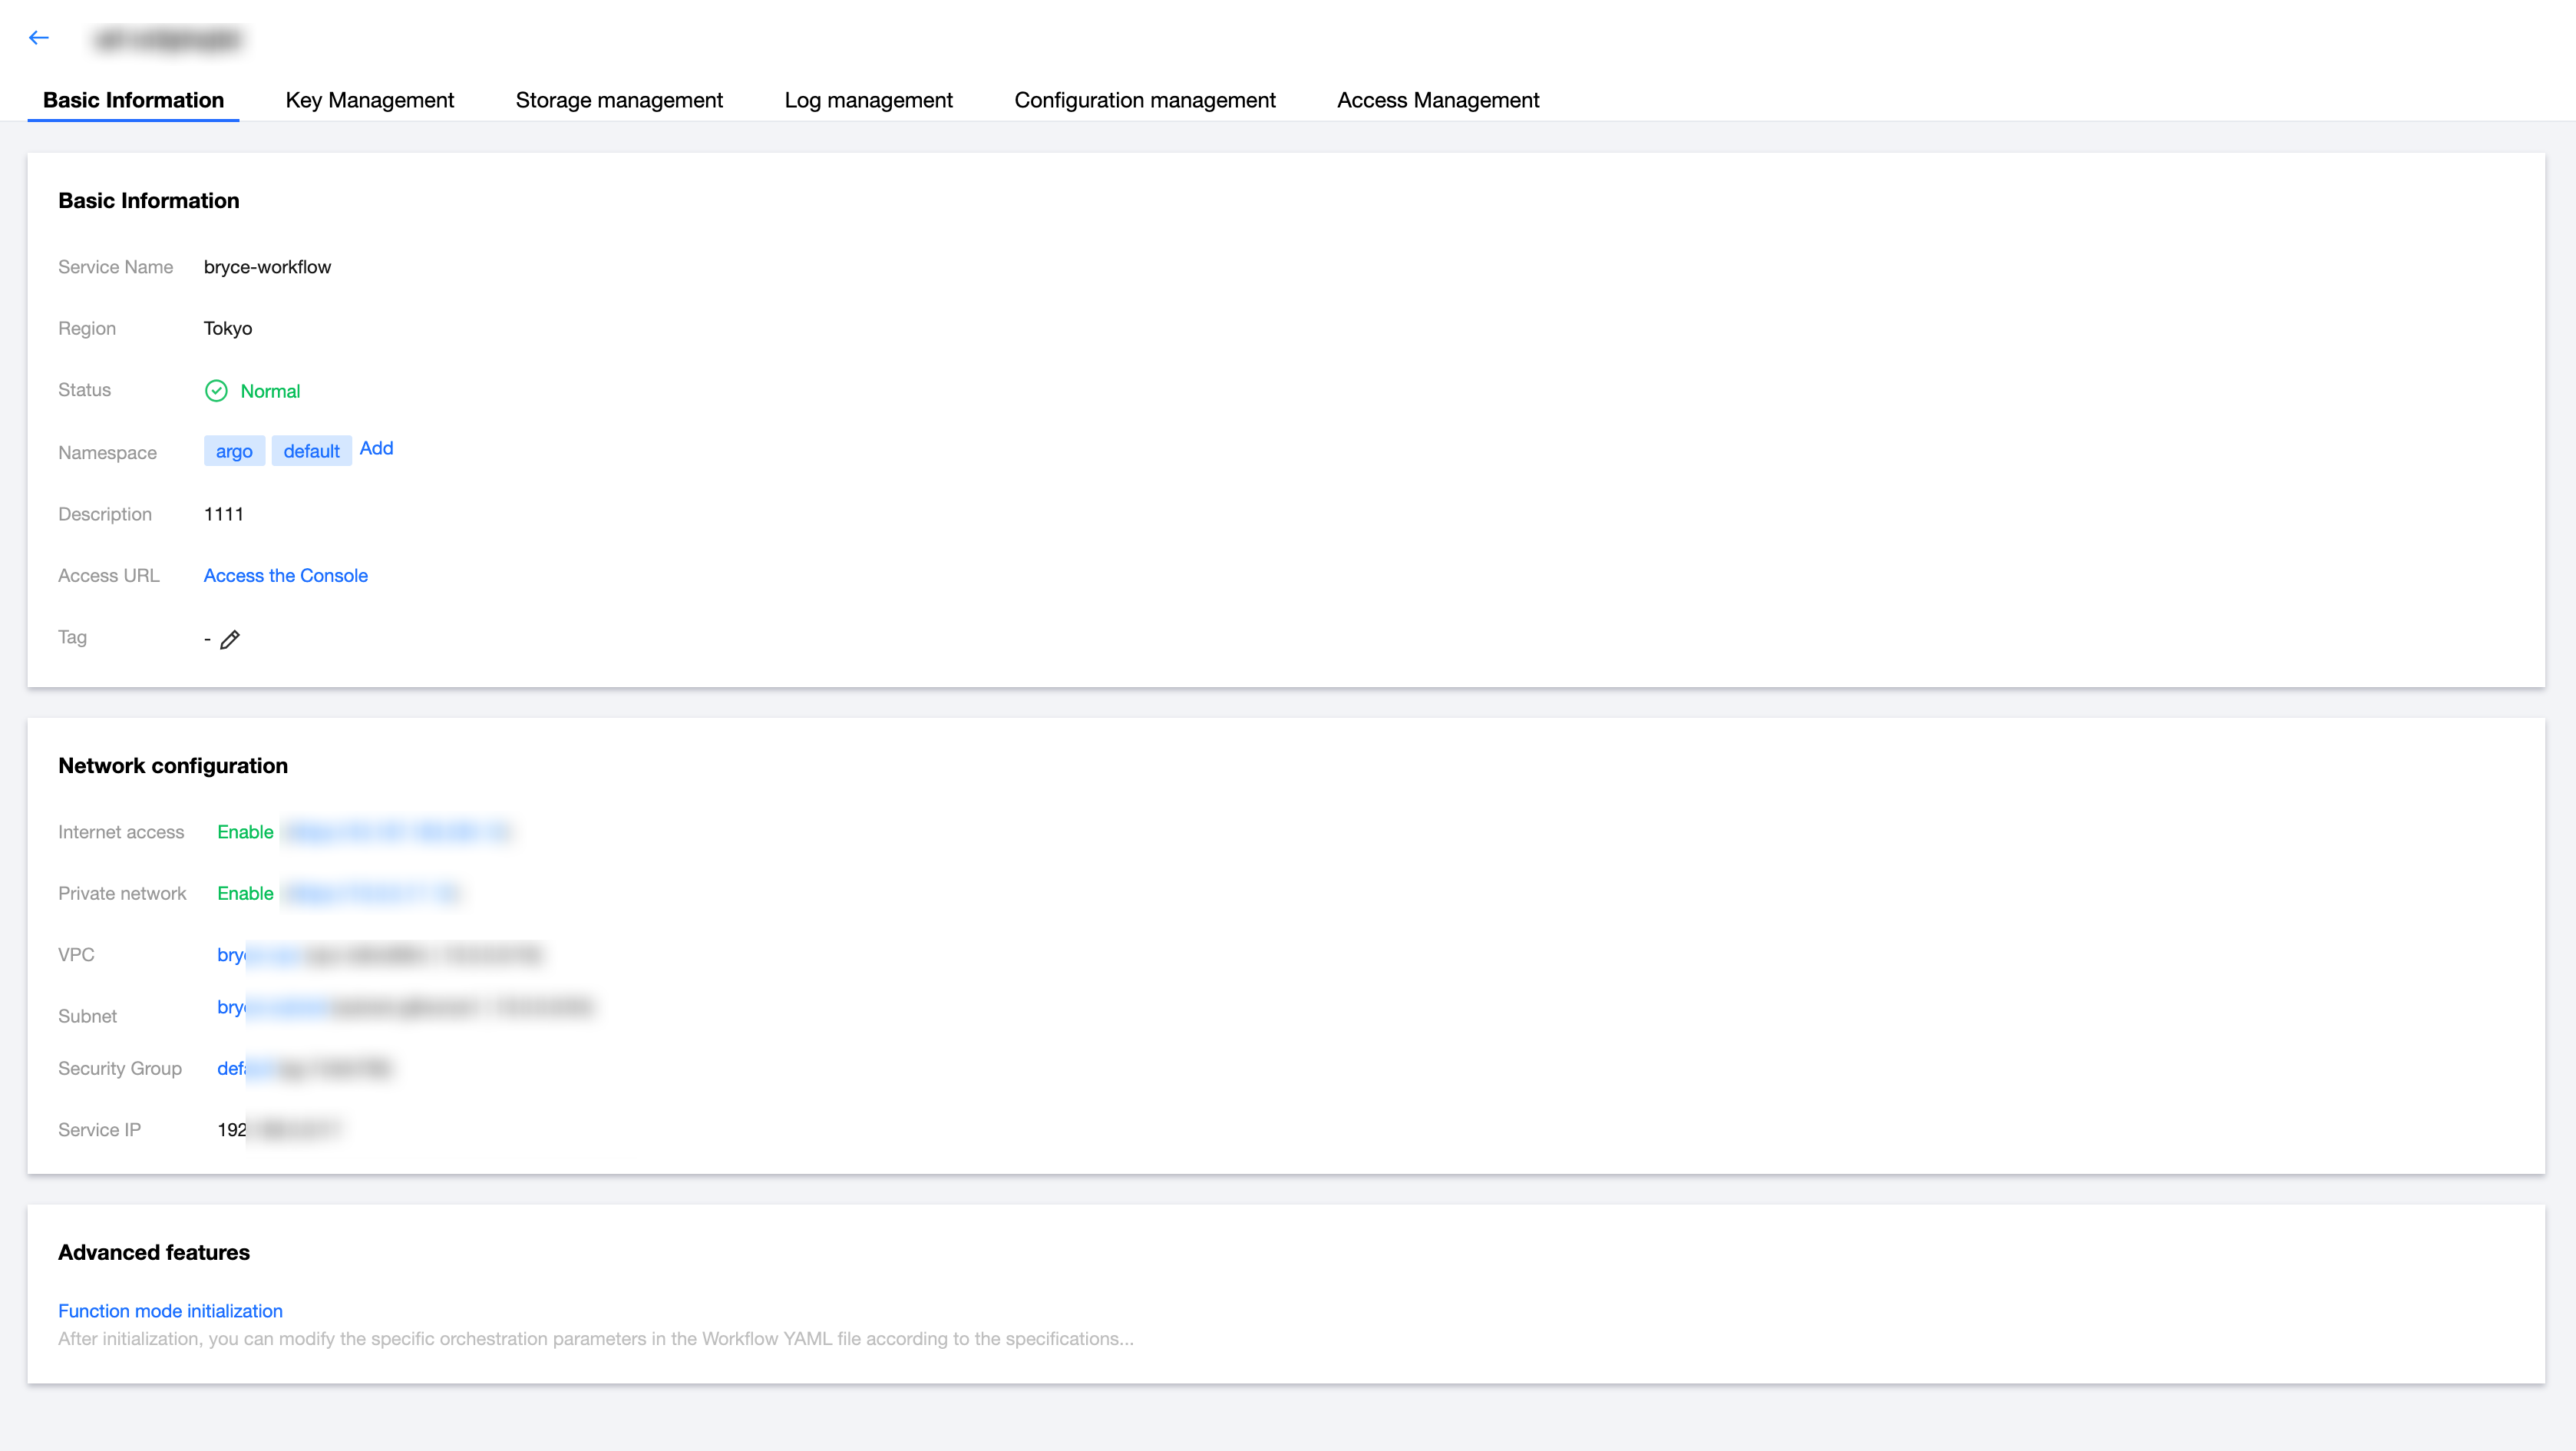
1. Click the service name to go to the service details page, where you can view the basic information, network configuration, and advanced features of this service. You can also update namespaces and service tags, and access the Argo UI address.
2. On the Basic Information tab, click Add on the right of the Namespace field to add a namespace. You can create different namespaces based on actual business isolation requirements.
Namespace: the namespace under the cluster where the Argo workflow service is deployed. It can contain only letters, digits, and hyphens (-). It must start with a letter and end with a digit or letter, be 1 to 63 characters in length, and cannot start with
kube- or prom-.Note:
Namespace deletion is not supported.
Create namespace: Click Add, enter the namespace name, and click OK.

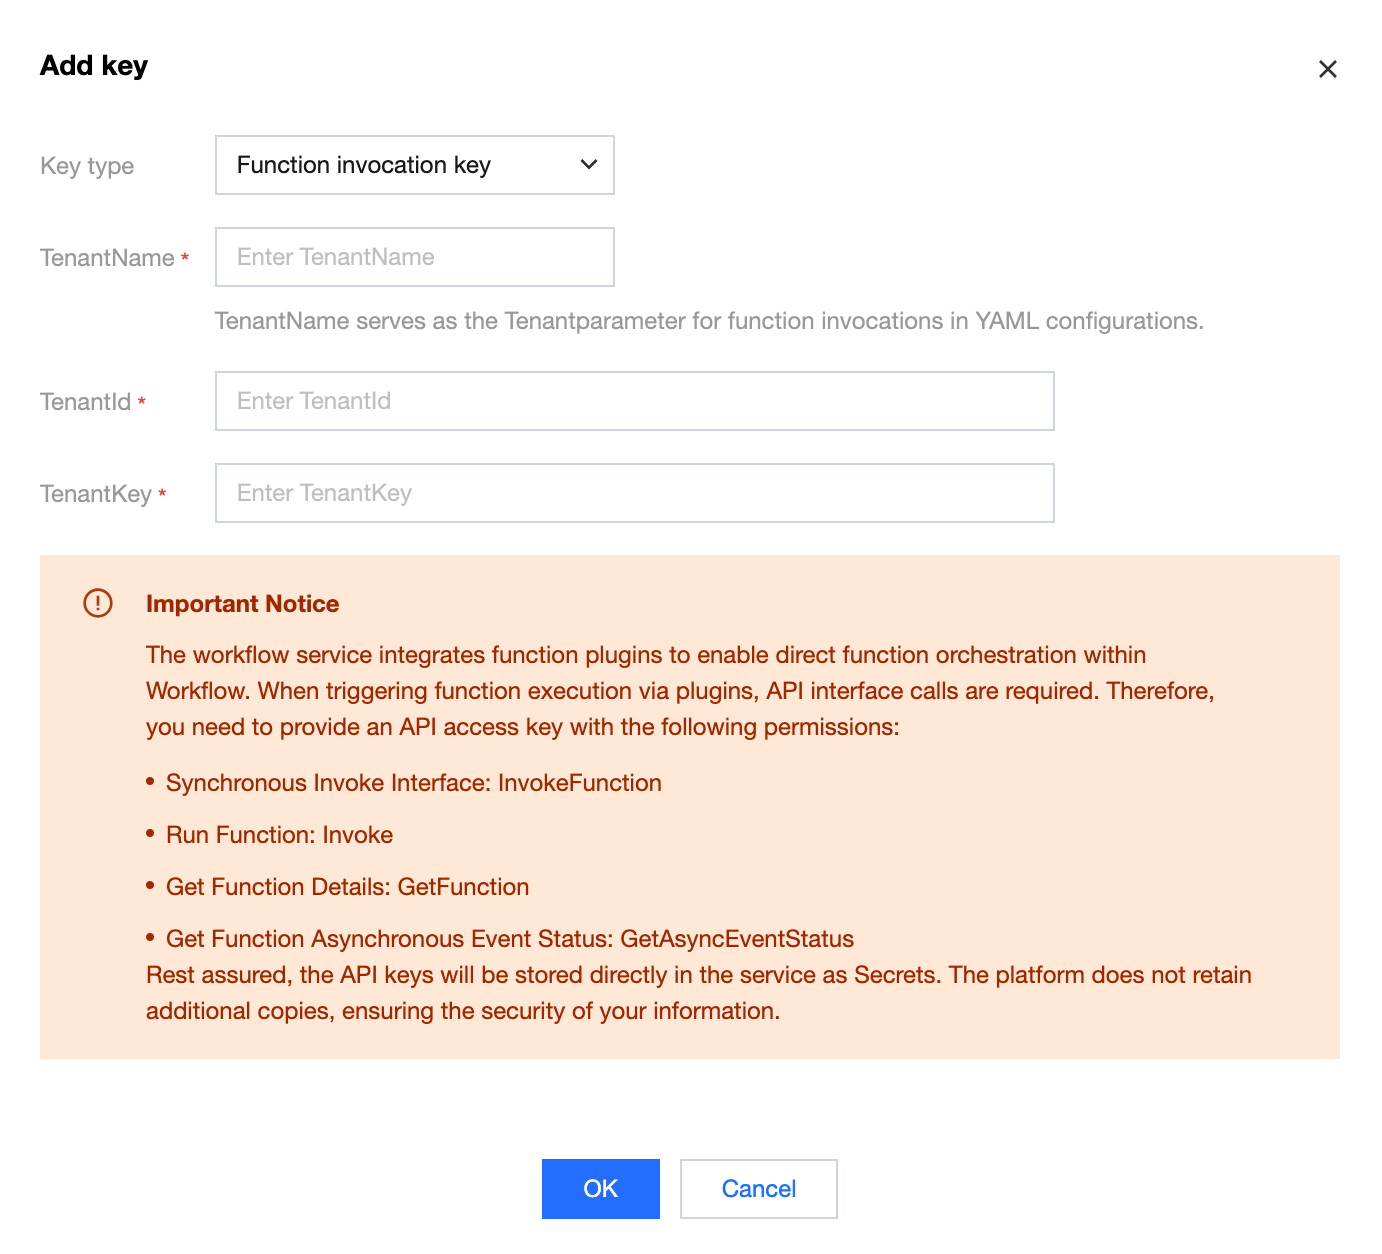
3. Enable the advanced feature "function mode initialization". During initialization, go to the Key Management tab to add a function invocation key. Provide an API access key with the corresponding access permissions as prompted on the page. After the configuration is completed, the initialization process finishes, enabling you to directly orchestrate functions in the workflow YAML file.
TenantName: Key name for accessing SCF. TenantName is used as the Tenant parameter for invoking functions in the YAML file.
TenantId: SecretId.
TenantKey: SecretKey.
피드백