Node.js SDK
Download
포커스 모드
폰트 크기
Overview
This document introduces the directions for using a Node.js client to connect to an elastic Topic of CKafka and send and receive messages.
Prerequisites
Directions
Step 1: Preparing the Environment
Installing the C++ Dependency Database
1. Run the following command to switch to the Yum repository configuration directory
/etc/yum.repos.d/.cd /etc/yum.repos.d/
2. Create the Yum repository configuration file confluent.repo.
[Confluent.dist]name=Confluent repository (dist)baseurl=https://packages.confluent.io/rpm/5.1/7gpgcheck=1gpgkey=https://packages.confluent.io/rpm/5.1/archive.keyenabled=1[Confluent]name=Confluent repositorybaseurl=https://packages.confluent.io/rpm/5.1gpgcheck=1gpgkey=https://packages.confluent.io/rpm/5.1/archive.keyenabled=1
3. Run the following command to install the C++ dependency database.
yum install librdkafka-devel
Installing the Node.js Dependency Database
1. Run the following command to specify the OpenSSL header file path for the preprocessor.
export CPPFLAGS=-I/usr/local/opt/openssl/include
2. Run the following command to specify the OpenSSL database path for the connector.
export LDFLAGS=-L/usr/local/opt/openssl/lib
3. Run the following command to install the Node.js dependency database.
npm install i --unsafe-perm node-rdkafka
Step 2: Creating a Topic and Subscription Relationship
1. On the Elastic Topic list page of the console, create a Topic.

2. Click the ID of the Topic to enter the Basic Information page and obtain the username, password, and address information.
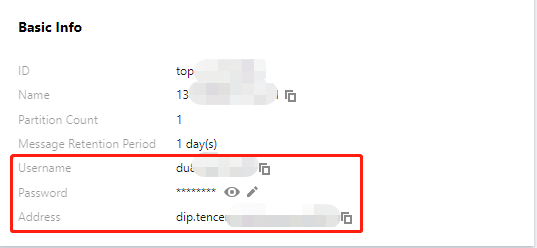
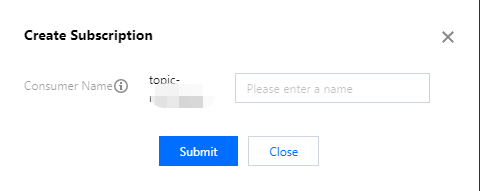
3. In the Subscription Relationships tab, create a subscription relationship (consumption group).
Step 2: Adding the Configuration File
module.exports = {'sasl_plain_username': 'your_user_name','sasl_plain_password': 'your_user_password','bootstrap_servers': ["xxx.xx.xx.xx:port"],'topic_name': 'xxx','group_id': 'xxx'}
Parameter | Description |
bootstrapServers | The connection address. It can be obtained from the basic information page of an elastic Topic in the console. 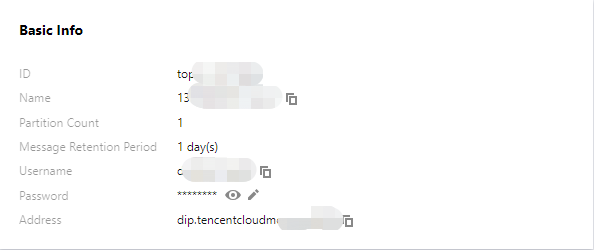 |
sasl_plain_username | The username. It can be obtained from the basic information page of an elastic Topic in the console. |
sasl_plain_password | The user password. It can be obtained from the basic information page of an elastic Topic in the console. |
topic_name | The topic name. It can be obtained from the basic information page of an elastic Topic in the console. |
group.id | The consumption group name. It can be obtained from the subscription relationship list of an elastic Topic in the console.  |
Step 3: Producing Messages
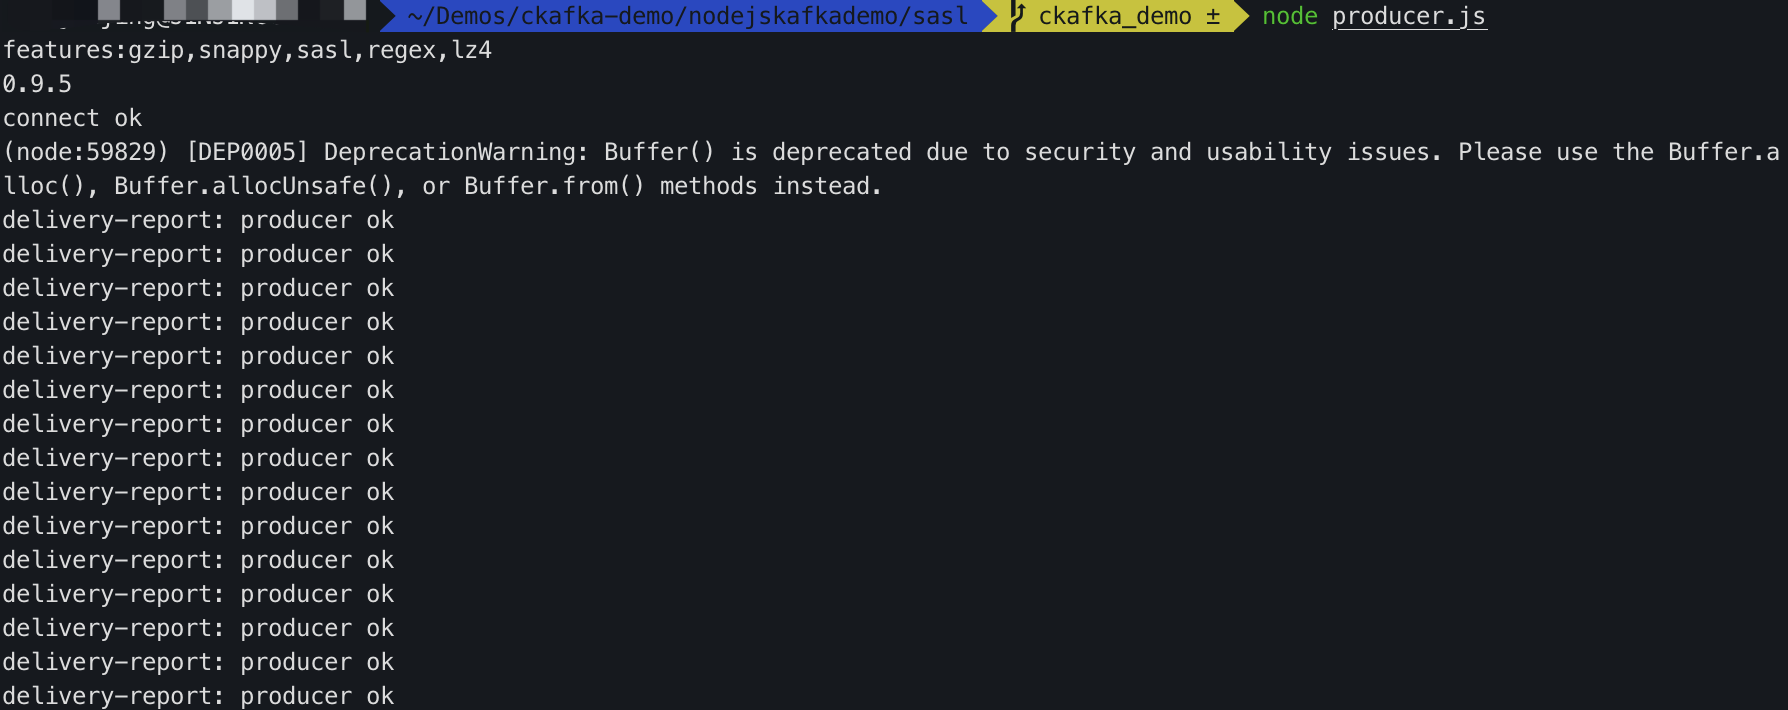
1. Write the message production program producer.js.
const Kafka = require('node-rdkafka');const config = require('./setting');console.log("features:" + Kafka.features);console.log(Kafka.librdkafkaVersion);var producer = new Kafka.Producer({'api.version.request': 'true','bootstrap.servers': config['bootstrap_servers'],'dr_cb': true,'dr_msg_cb': true,'security.protocol' : 'SASL_PLAINTEXT','sasl.mechanisms' : 'PLAIN','sasl.username' : config['sasl_plain_username'],'sasl.password' : config['sasl_plain_password']});var connected = falseproducer.setPollInterval(100);producer.connect();producer.on('ready', function() {connected = trueconsole.log("connect ok")});function produce() {try {producer.produce(config['topic_name'],new Buffer('Hello CKafka SASL'),null,Date.now());} catch (err) {console.error('Error occurred when sending message(s)');console.error(err);}}producer.on("disconnected", function() {connected = false;producer.connect();})producer.on('event.log', function(event) {console.log("event.log", event);});producer.on("error", function(error) {console.log("error:" + error);});producer.on('delivery-report', function(err, report) {console.log("delivery-report: producer ok");});// Any errors we encounter, including connection errorsproducer.on('event.error', function(err) {console.error('event.error:' + err);})setInterval(produce,1000,"Interval");
2. Run the following command to send the message.
node producer.js
3. View the execution result.
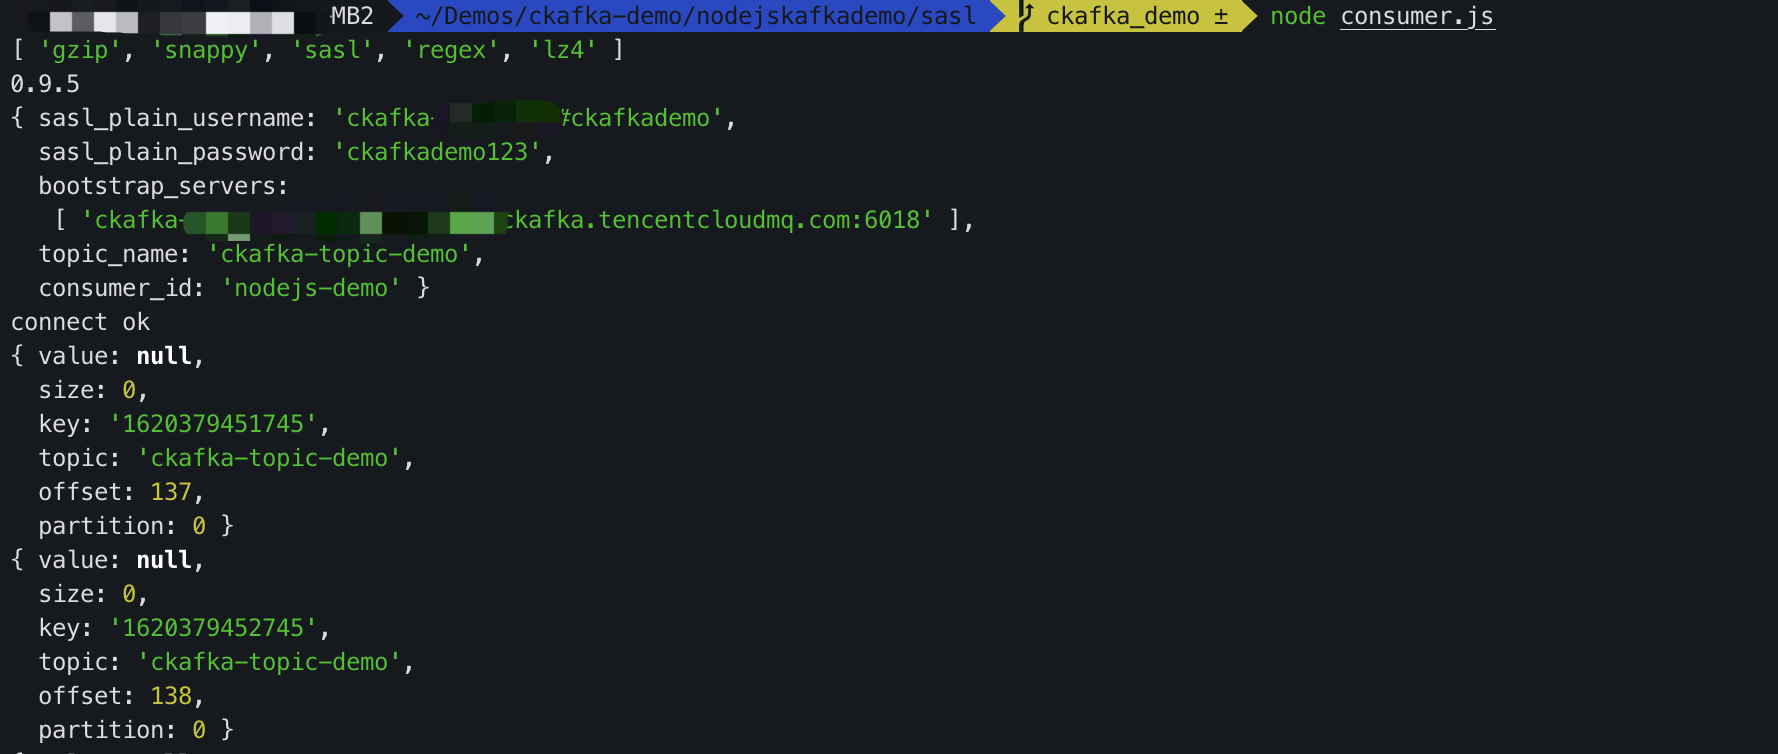
Step 4: Consuming Messages
1. Create the message consumption program consumer.js.
consumer.on('event.log', function(event) {console.log("event.log", event);});consumer.on('error', function(error) {console.log("error:" + error);});consumer.on('event', function(event) {console.log("event:" + event);});const Kafka = require('node-rdkafka');const config = require('./setting');console.log(Kafka.features);console.log(Kafka.librdkafkaVersion);console.log(config)var consumer = new Kafka.KafkaConsumer({'api.version.request': 'true','bootstrap.servers': config['bootstrap_servers'],'security.protocol' : 'SASL_PLAINTEXT','sasl.mechanisms' : 'PLAIN','message.max.bytes': 32000,'fetch.message.max.bytes': 32000,'max.partition.fetch.bytes': 32000,'sasl.username' : config['sasl_plain_username'],'sasl.password' : config['sasl_plain_password'],'group.id' : config['group_id']});consumer.connect();consumer.on('ready', function() {console.log("connect ok");consumer.subscribe([config['topic_name']]);consumer.consume();})consumer.on('data', function(data) {console.log(data);});consumer.on('event.log', function(event) {console.log("event.log", event);});consumer.on('error', function(error) {console.log("error:" + error);});consumer.on('event', function(event) {console.log("event:" + event);});
2. Run the following command to consume the message.
node consumer.js
3. View the execution result.
피드백