This document offers examples of single sign-on (SSO login) between Keycloak and the Identity Center.
Note:
This document uses Keycloak 26.3.4 as an example.
Preparations
Before configuring SSO login, you need to complete user creation: create a same-name user in the identity center. Upon creation, the username in the identity center must be consistent with the username in Keycloak. For detailed operations, please refer to User Management.
Configuration in Identity Center
Step 1: Enable SSO Login
1. Log in to Tencent Cloud Organization > Identity Center Management > User Management > Settings page.
2. In the SSO Login section, click
, then click Enable in the popup window to enable SSO login.
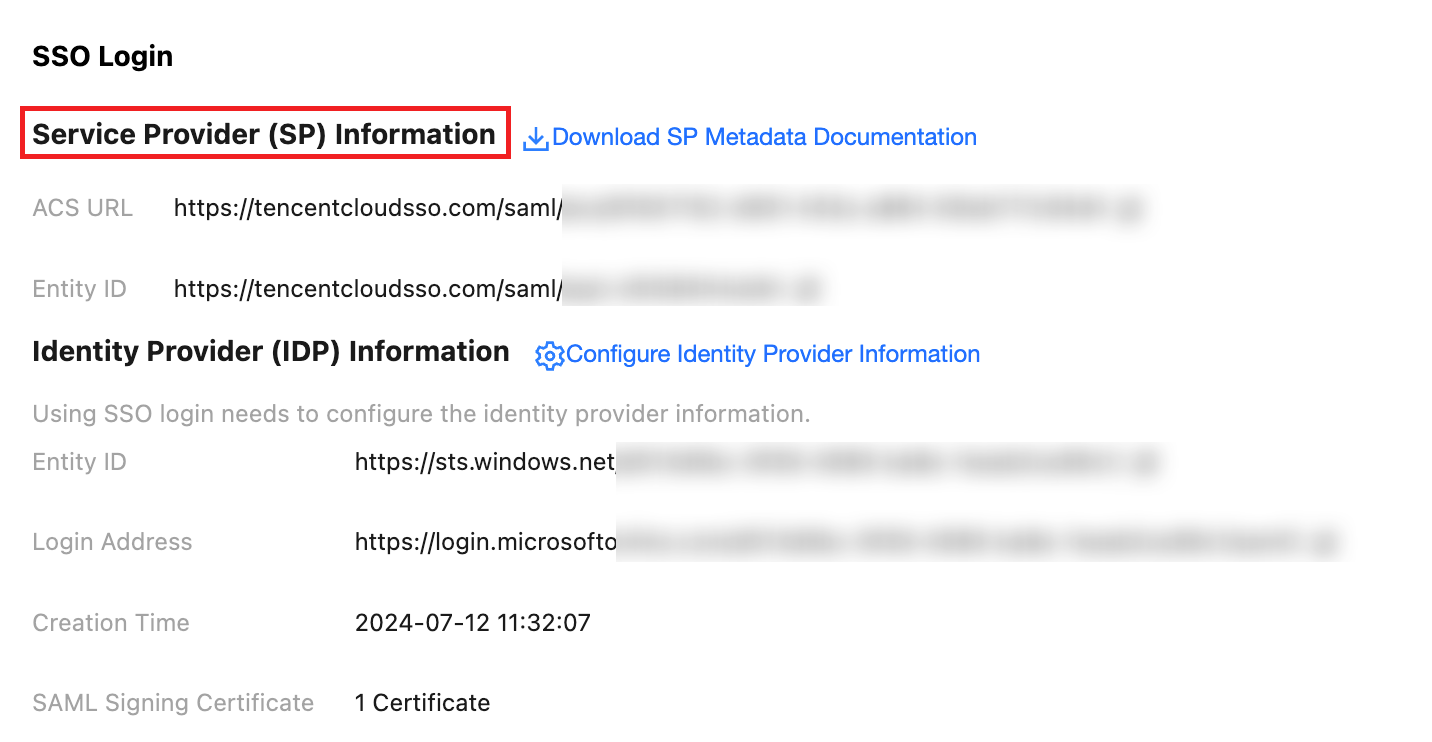
Step 2: Copy Service Provider (SP) Info
In the SP Information section, view and copy the ACS URL and Entity ID for manual configuration of the external IdP.
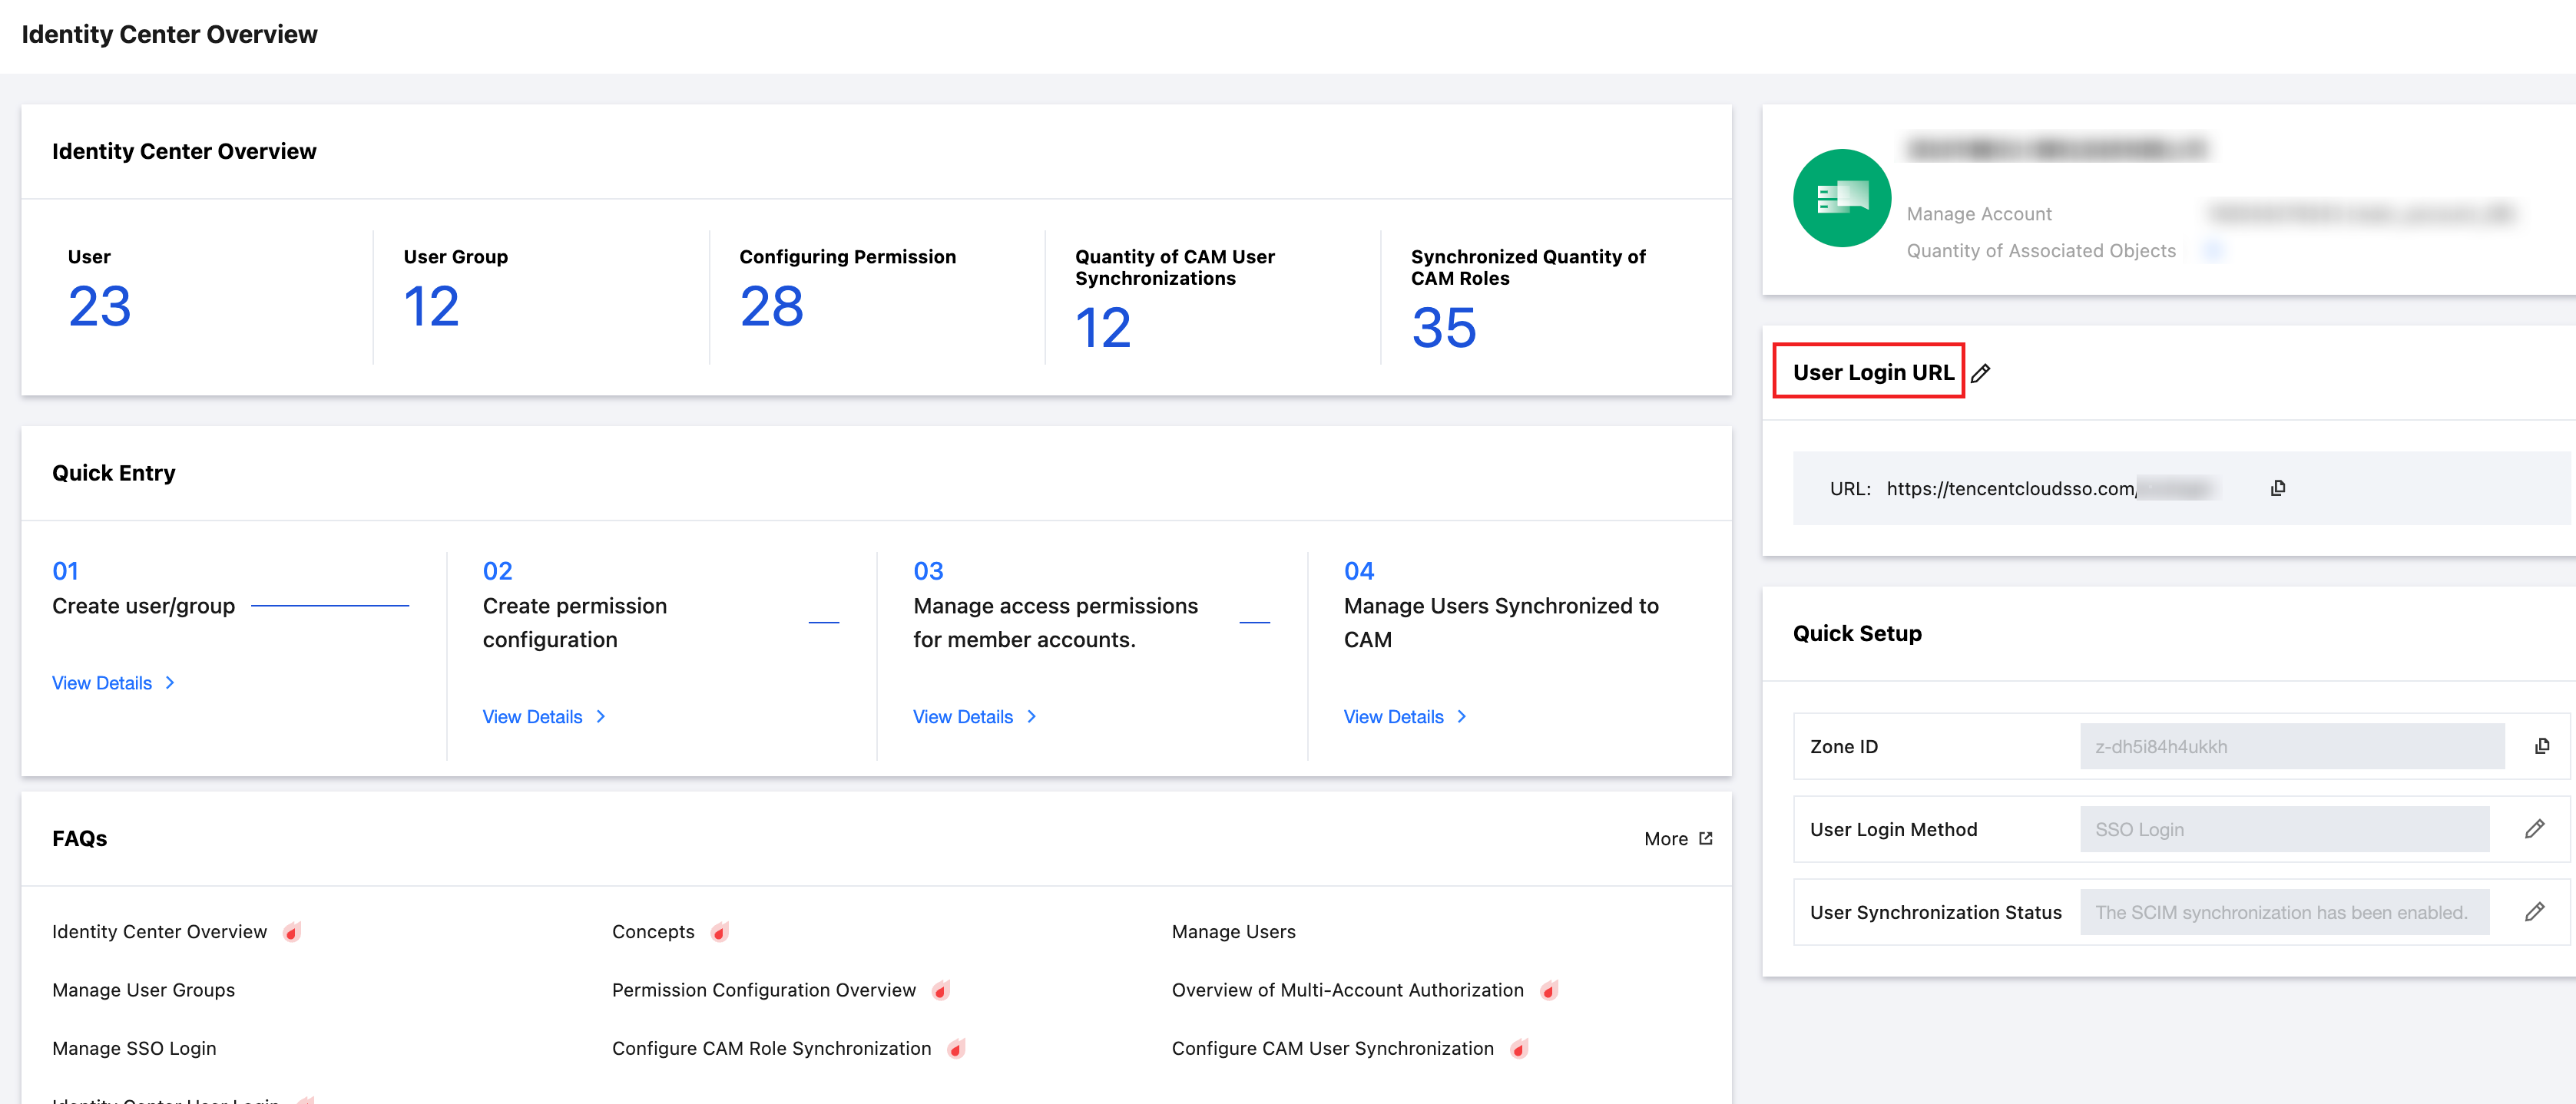
Step 3: Get User Login URL
On the Cloud Organization > Identity Center Overview webpage, view and copy the User Login URL for manual configuration of the external IdP.
Configuring in Keycloak
Step 1: Create a Client in Keycloak
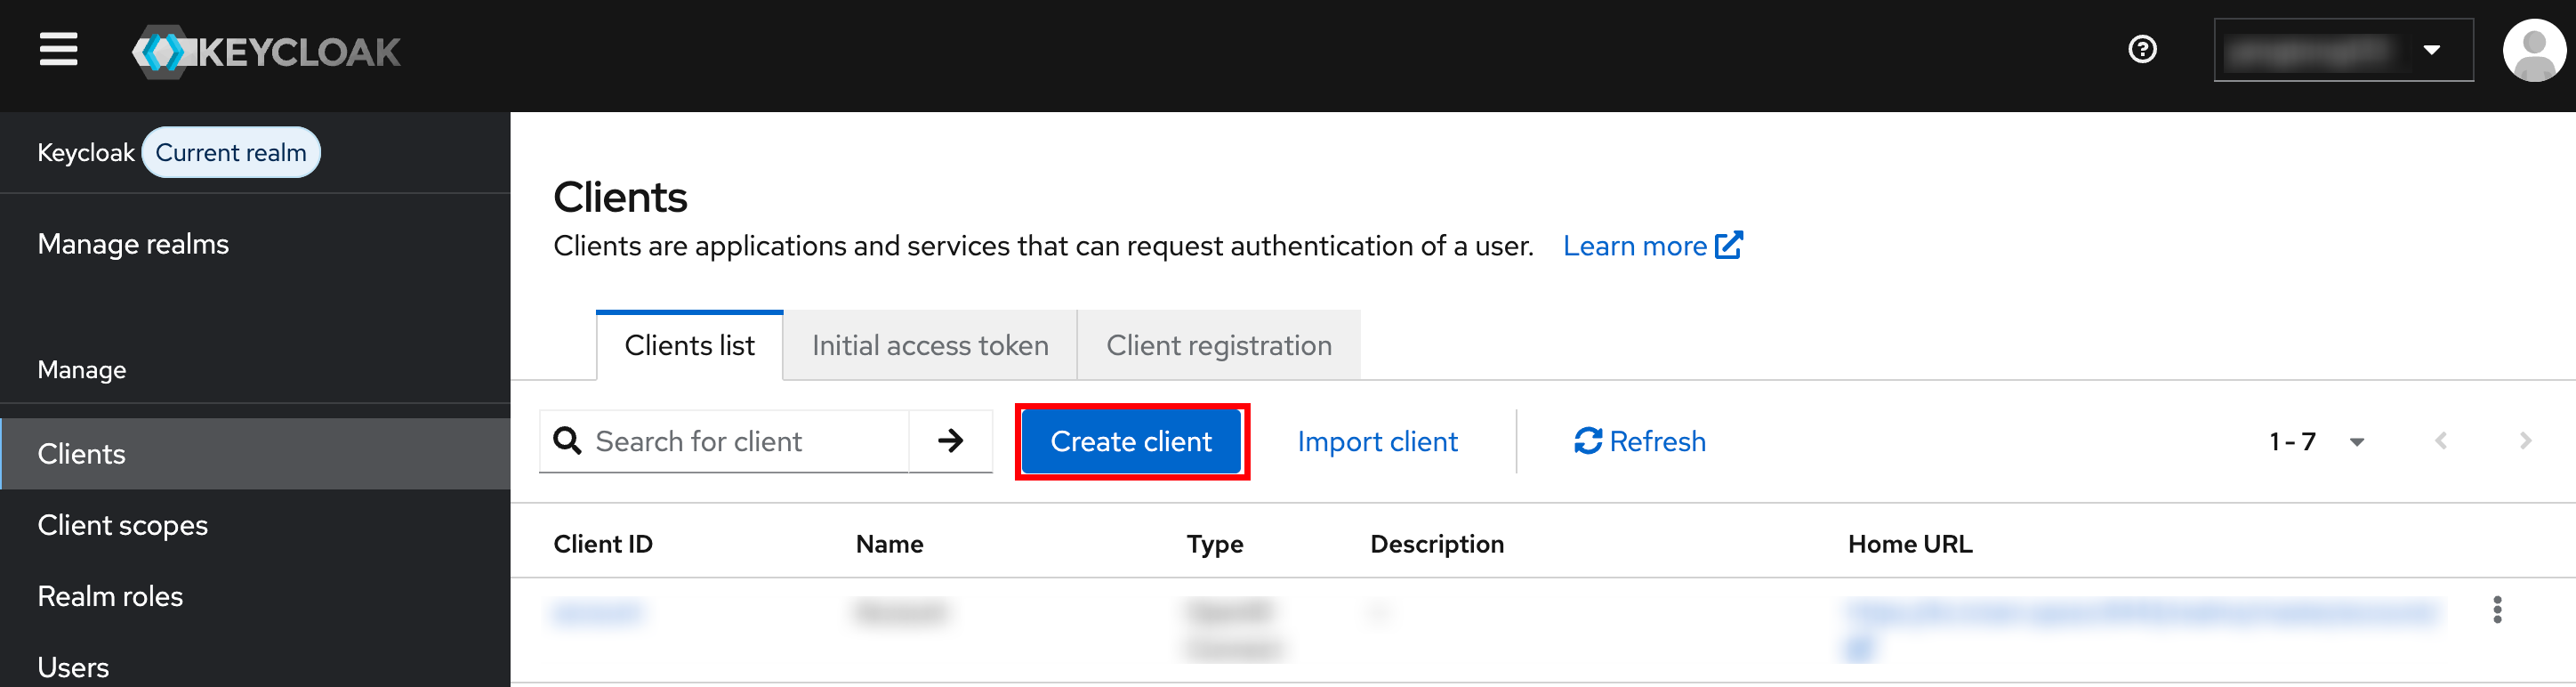
1. Log in to Keycloak as an administrator, go to the Manage > Clients page, click Create client, and proceed to the configuration page.
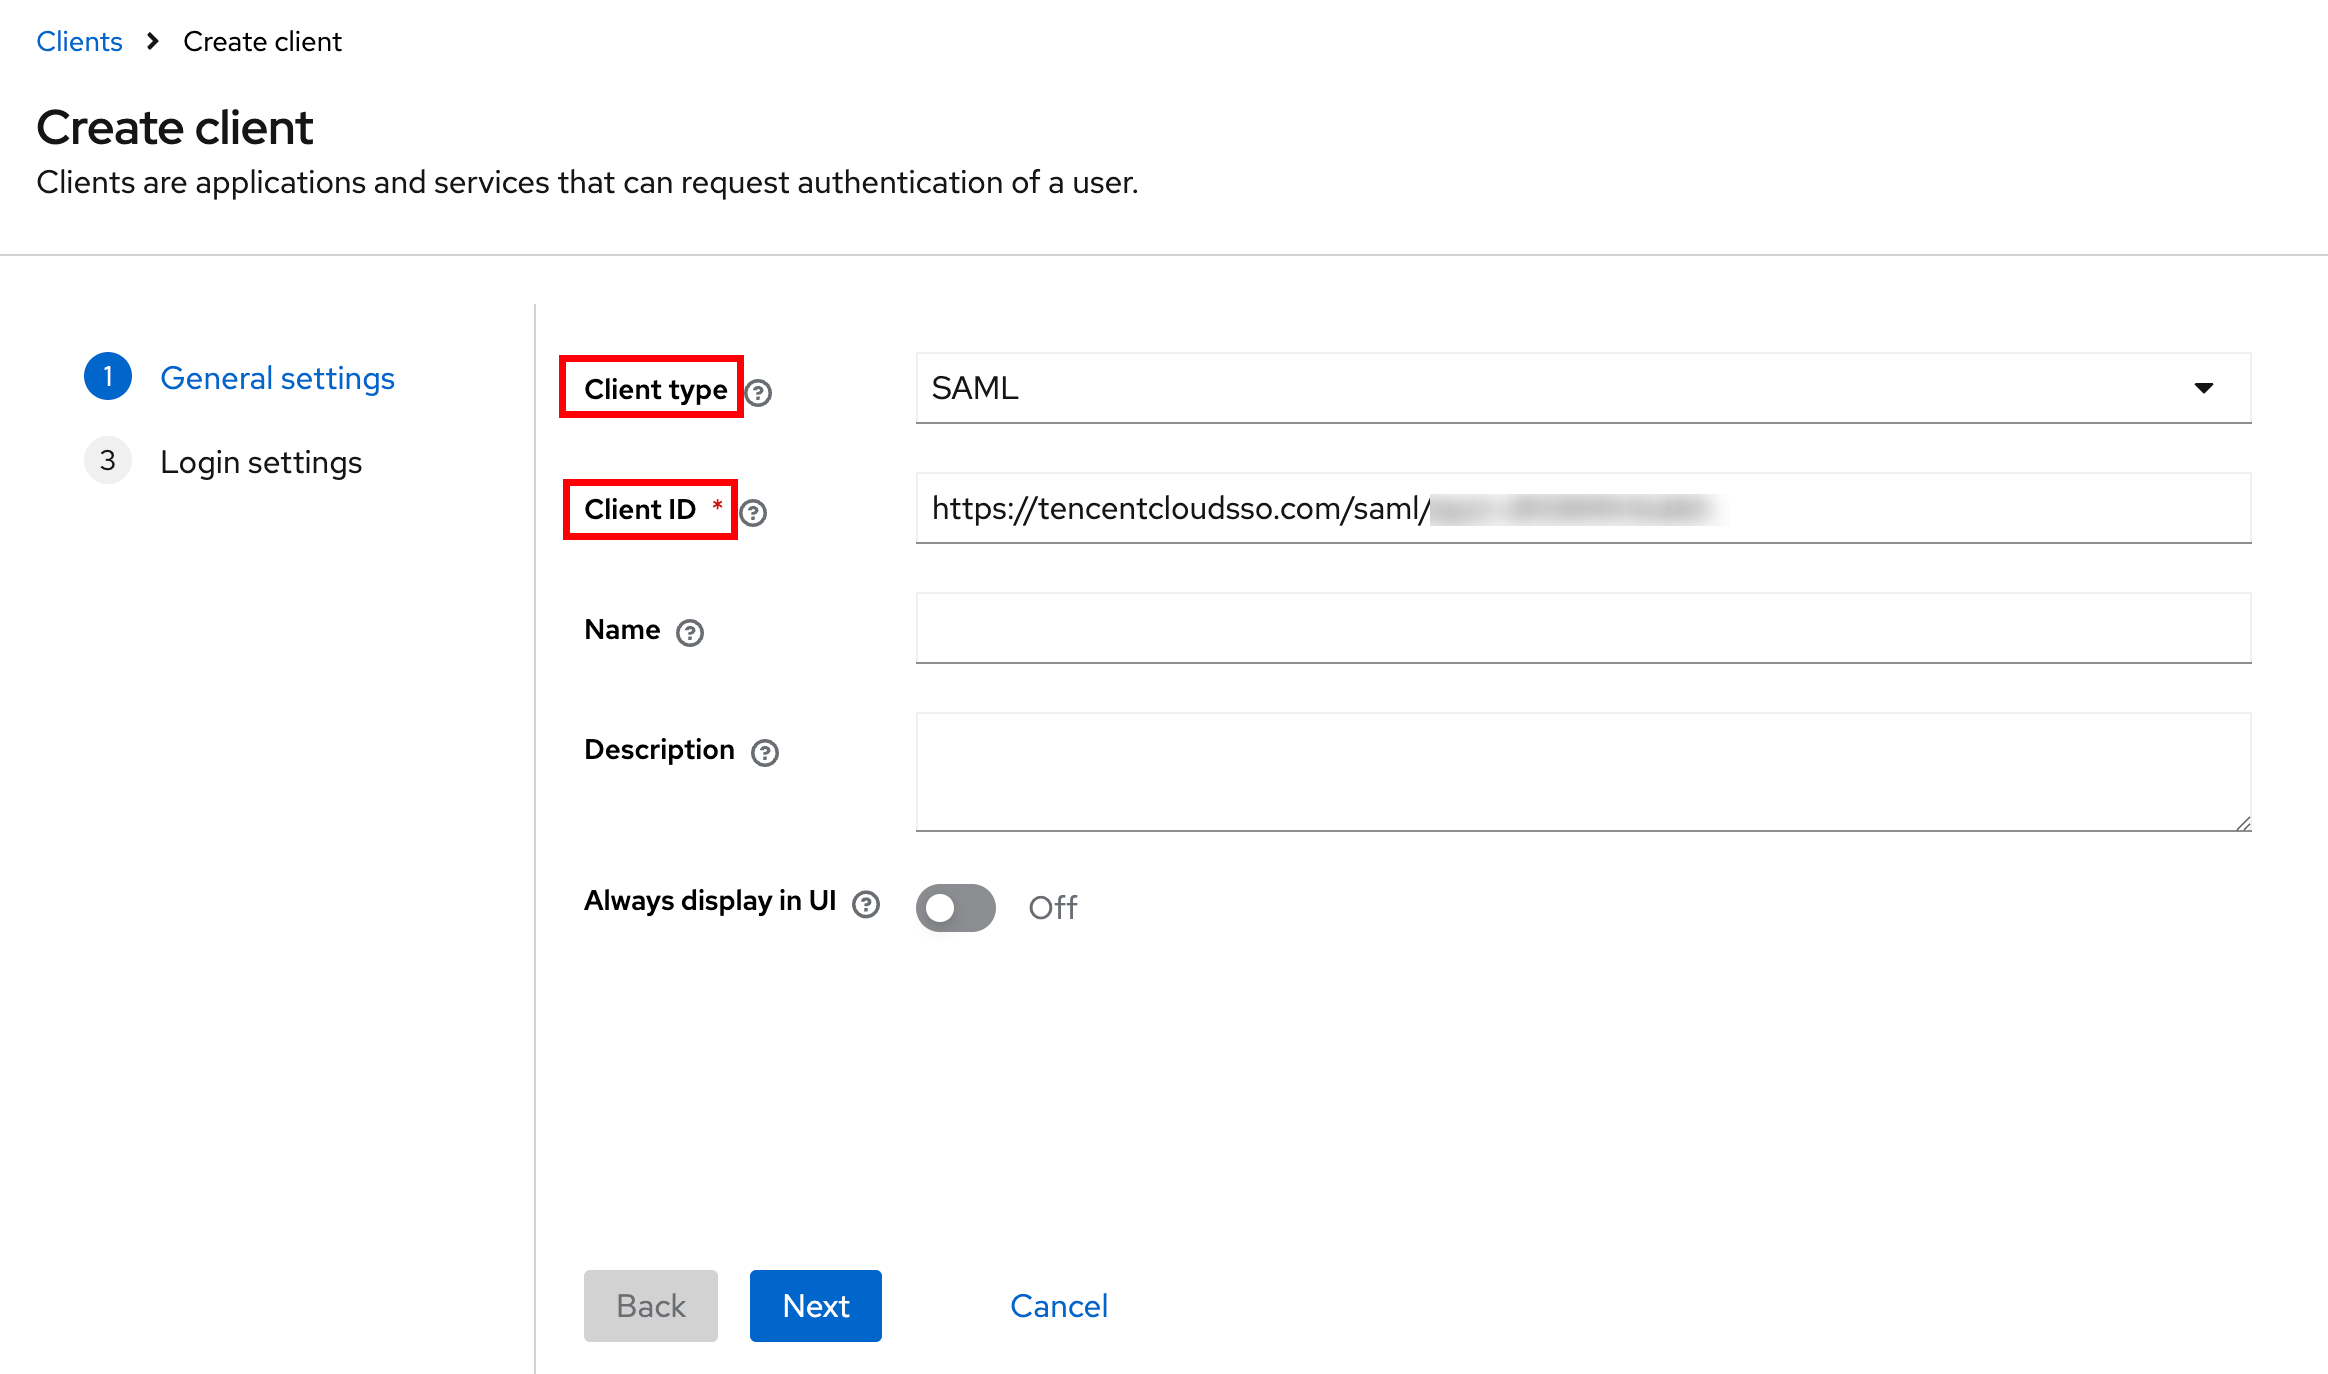
2. On the General settings page, select SAML for Client type, enter the Entity ID obtained from the identity center in step two for Client ID, and click Next.
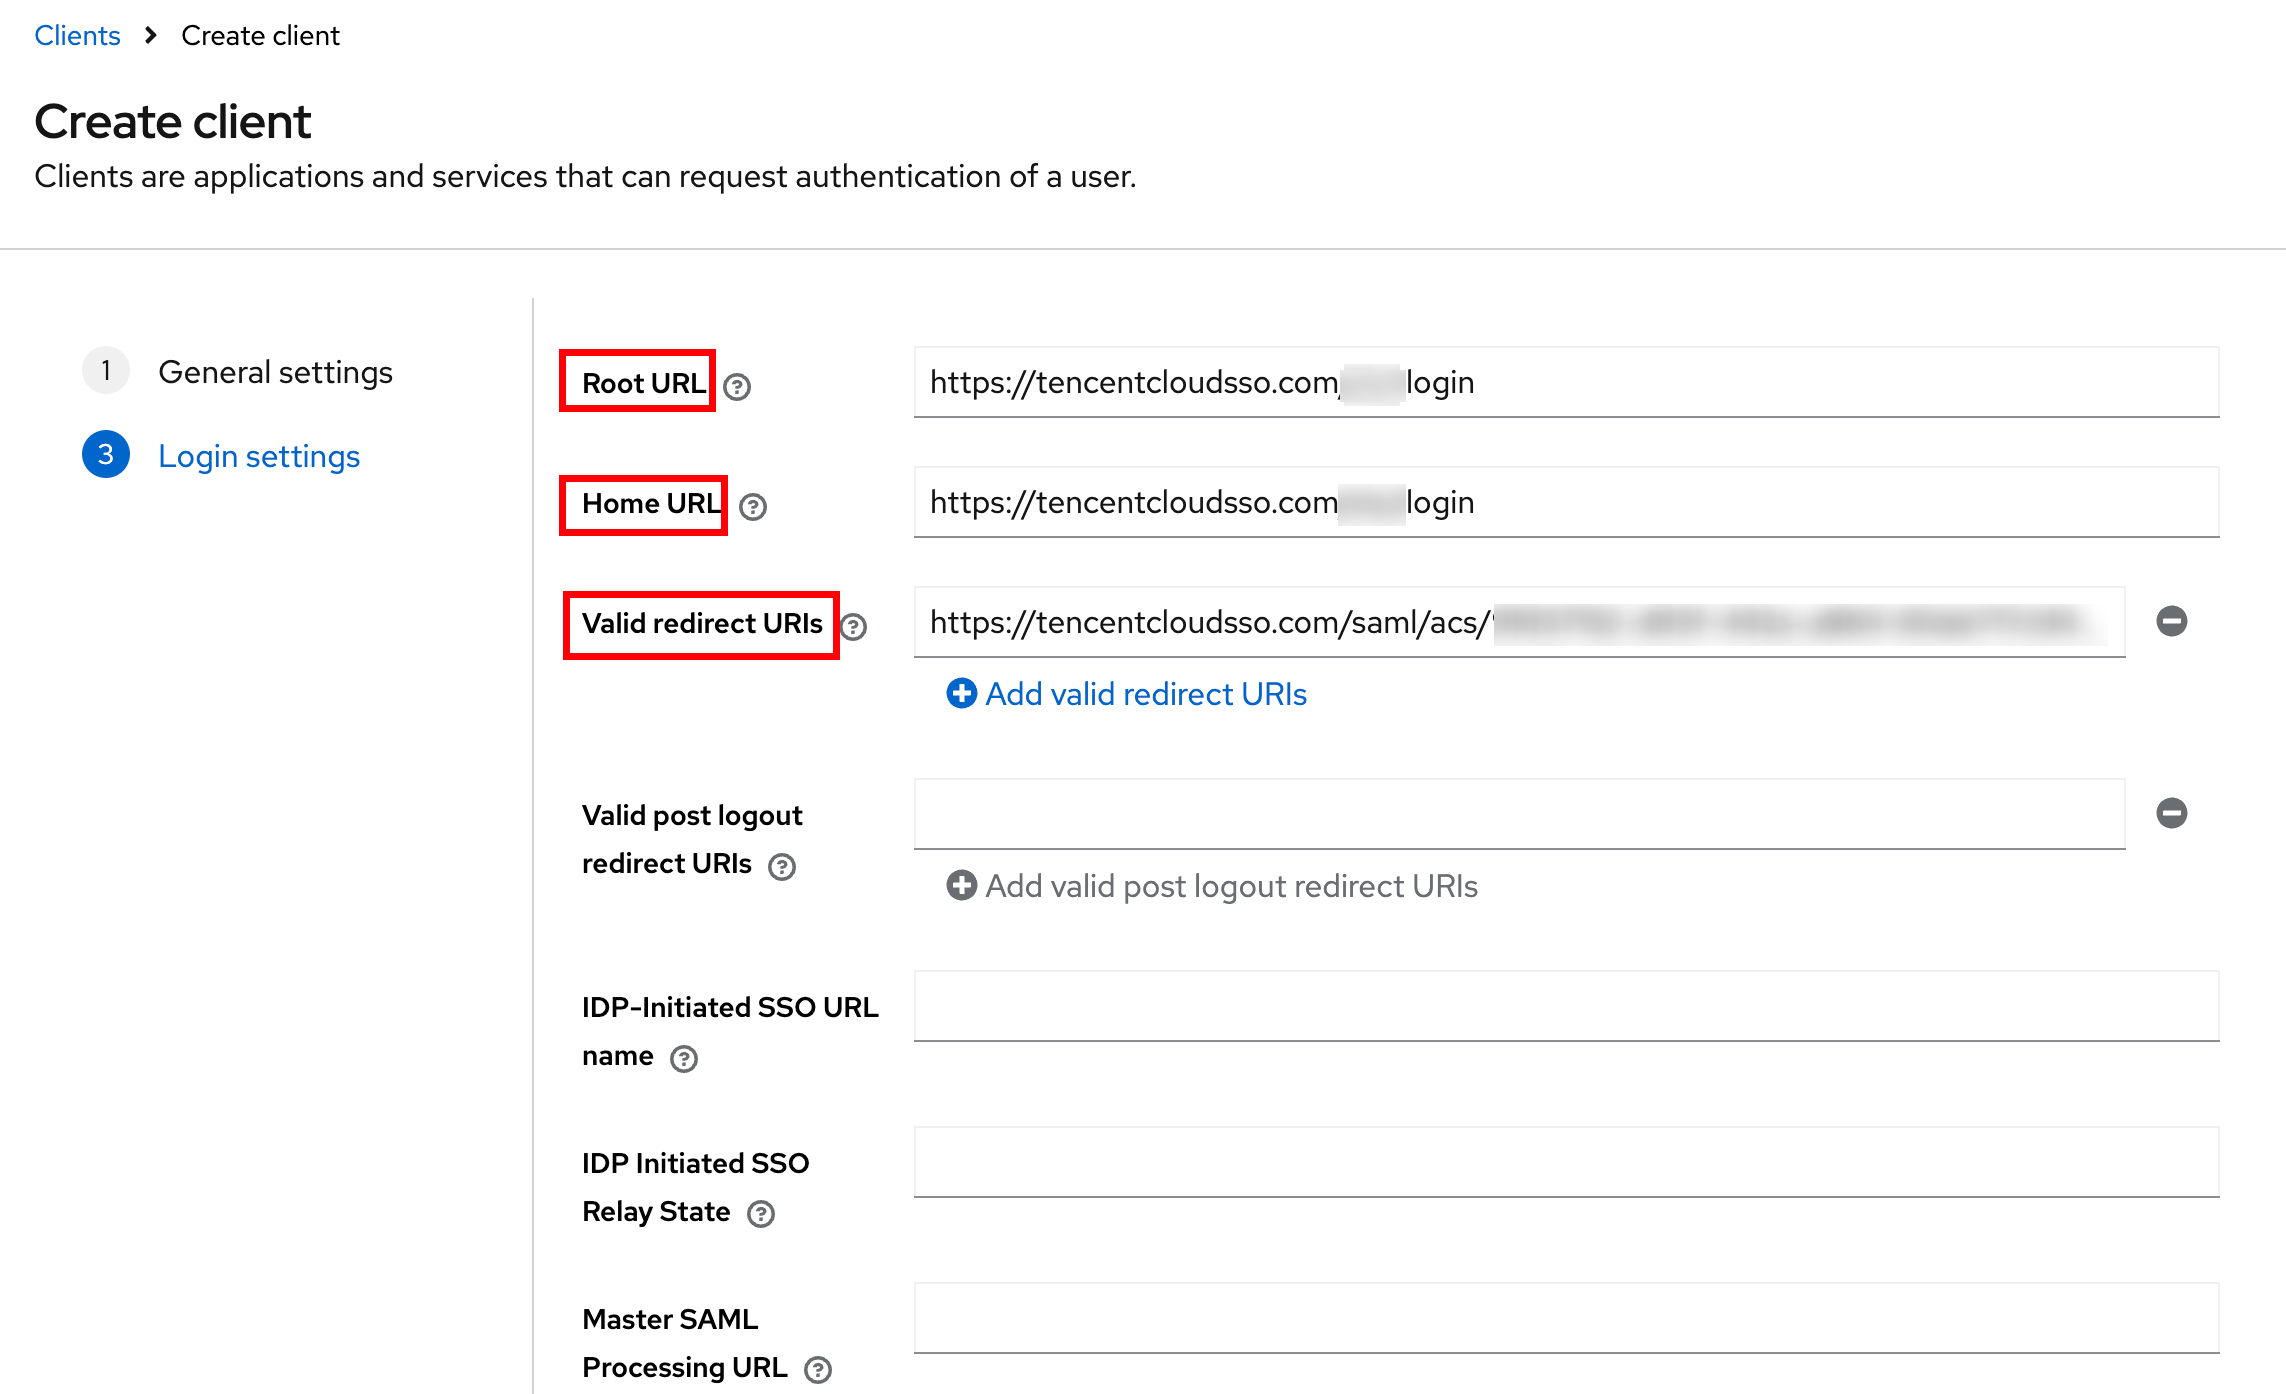
3. On the Login settings page, fill in the following information, click Save to complete the configuration in Keycloak.
Root URL and Home URL fill in the User Login URL obtained from the identity center in step 3.
Valid redirect URIs fill in the ACS URL obtained in step two.
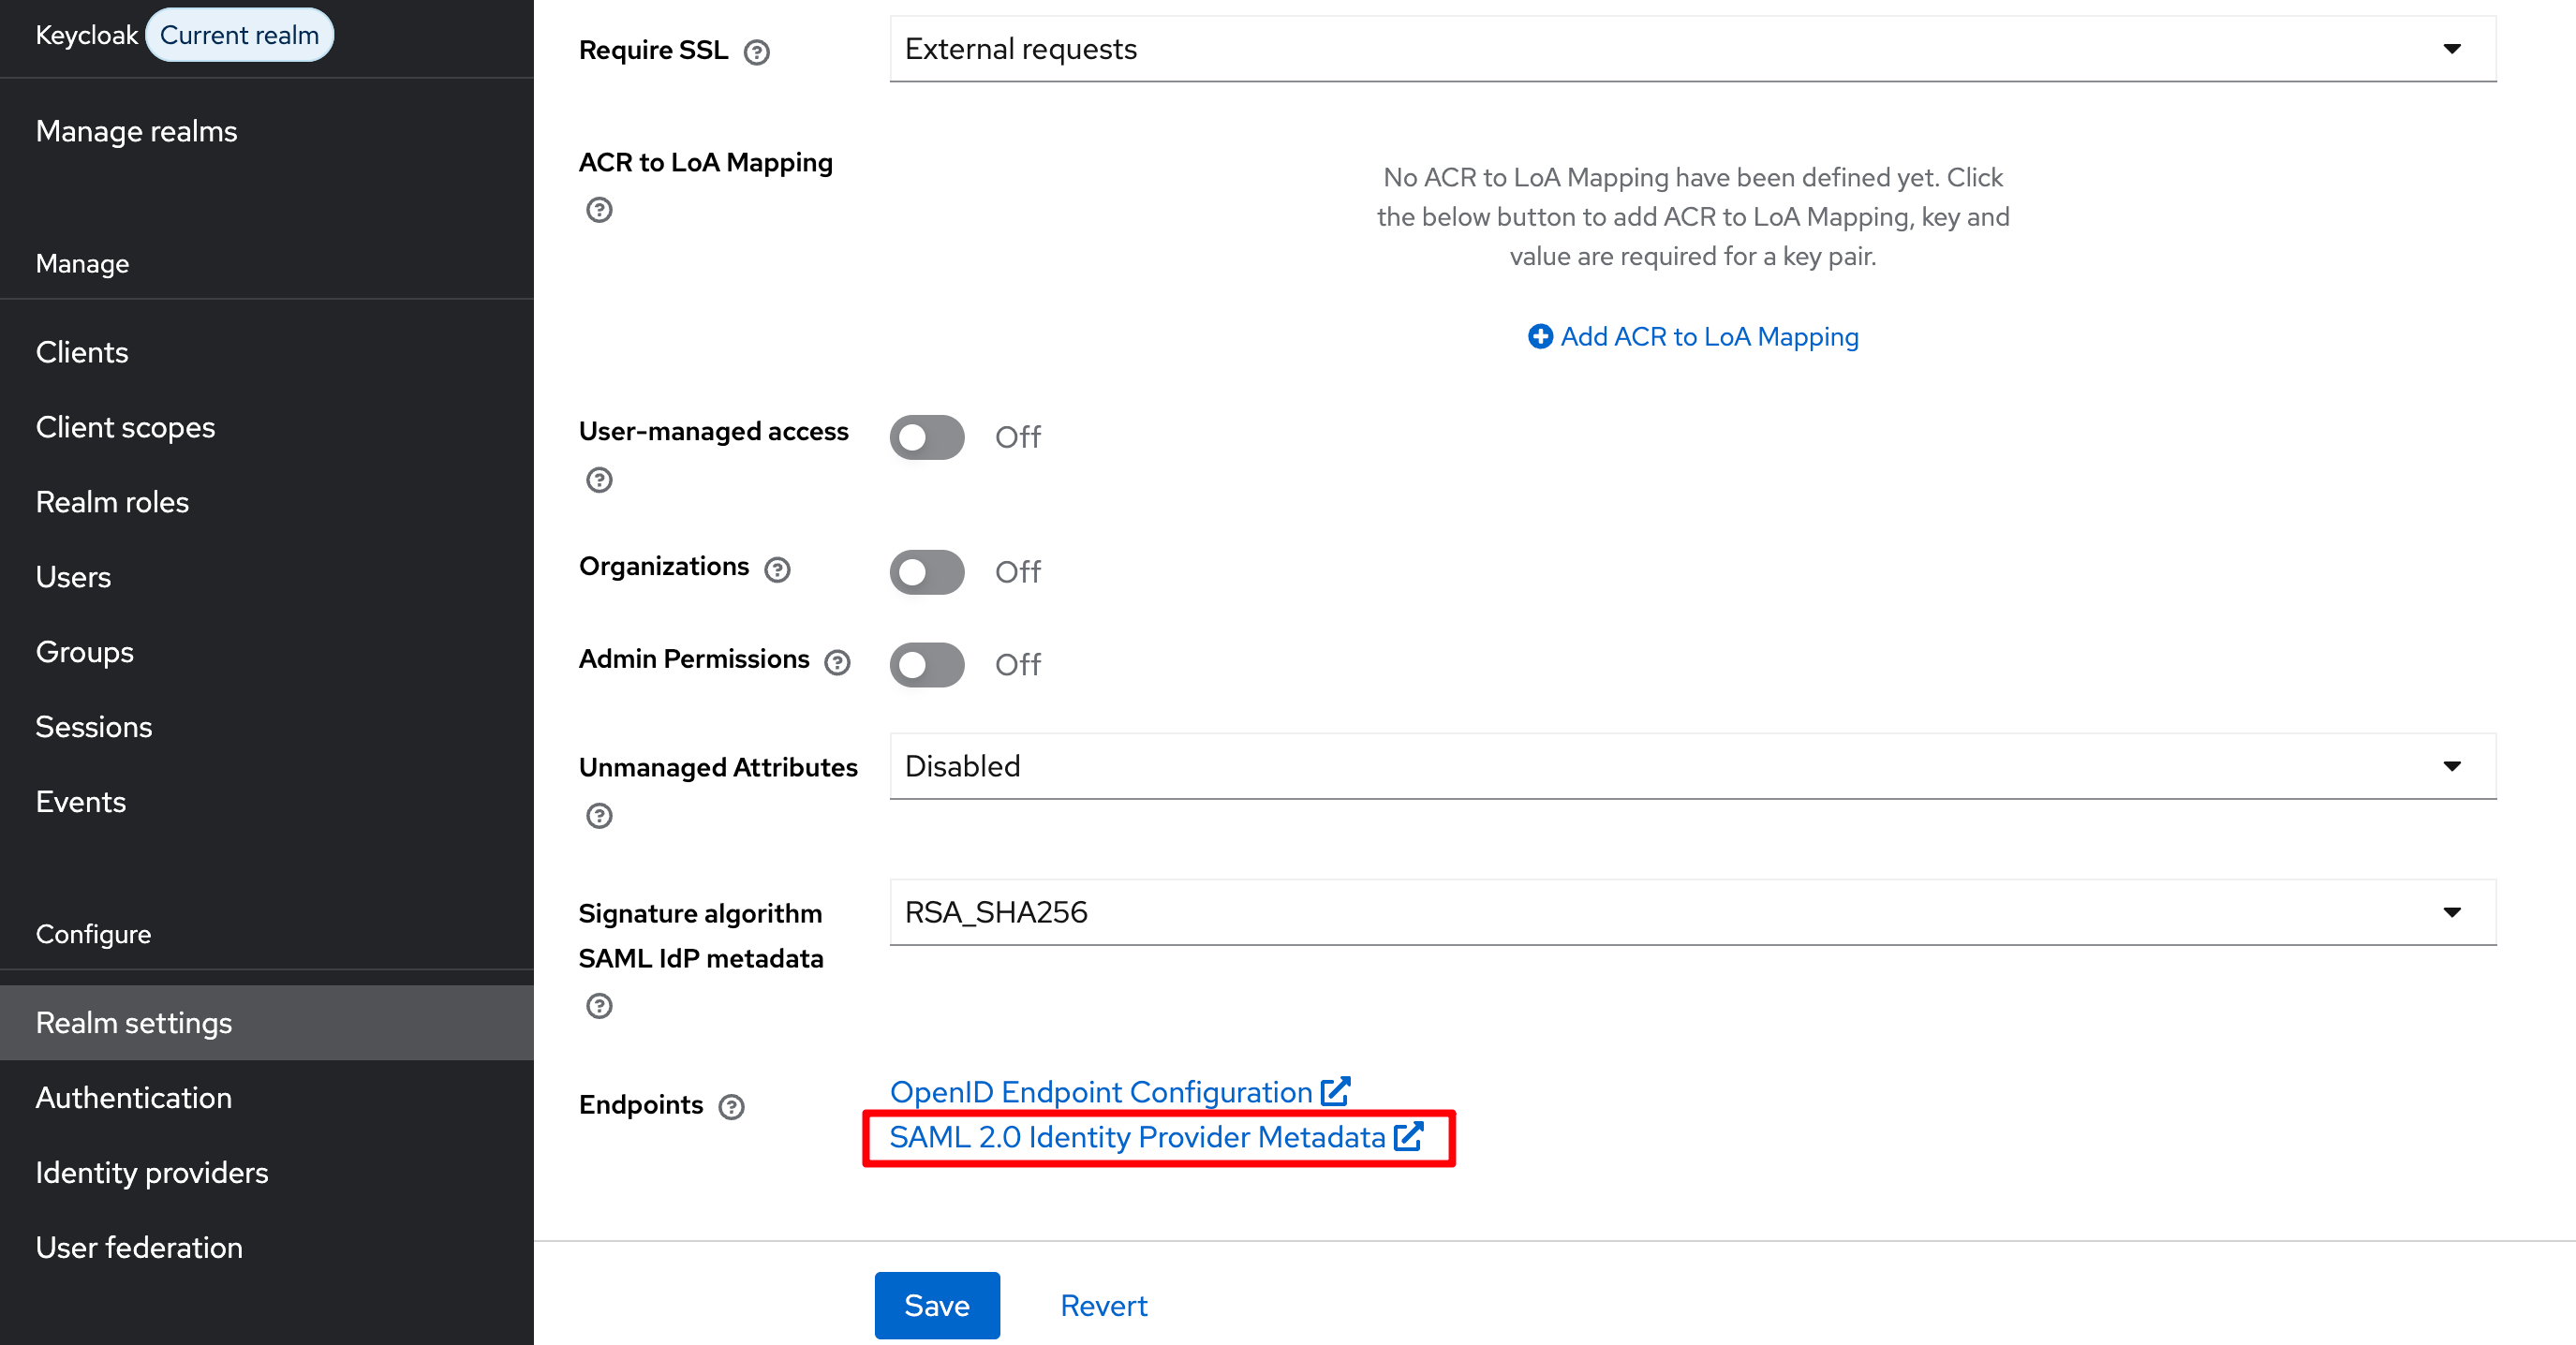
Step 2: Download Metadata Document in Keycloak
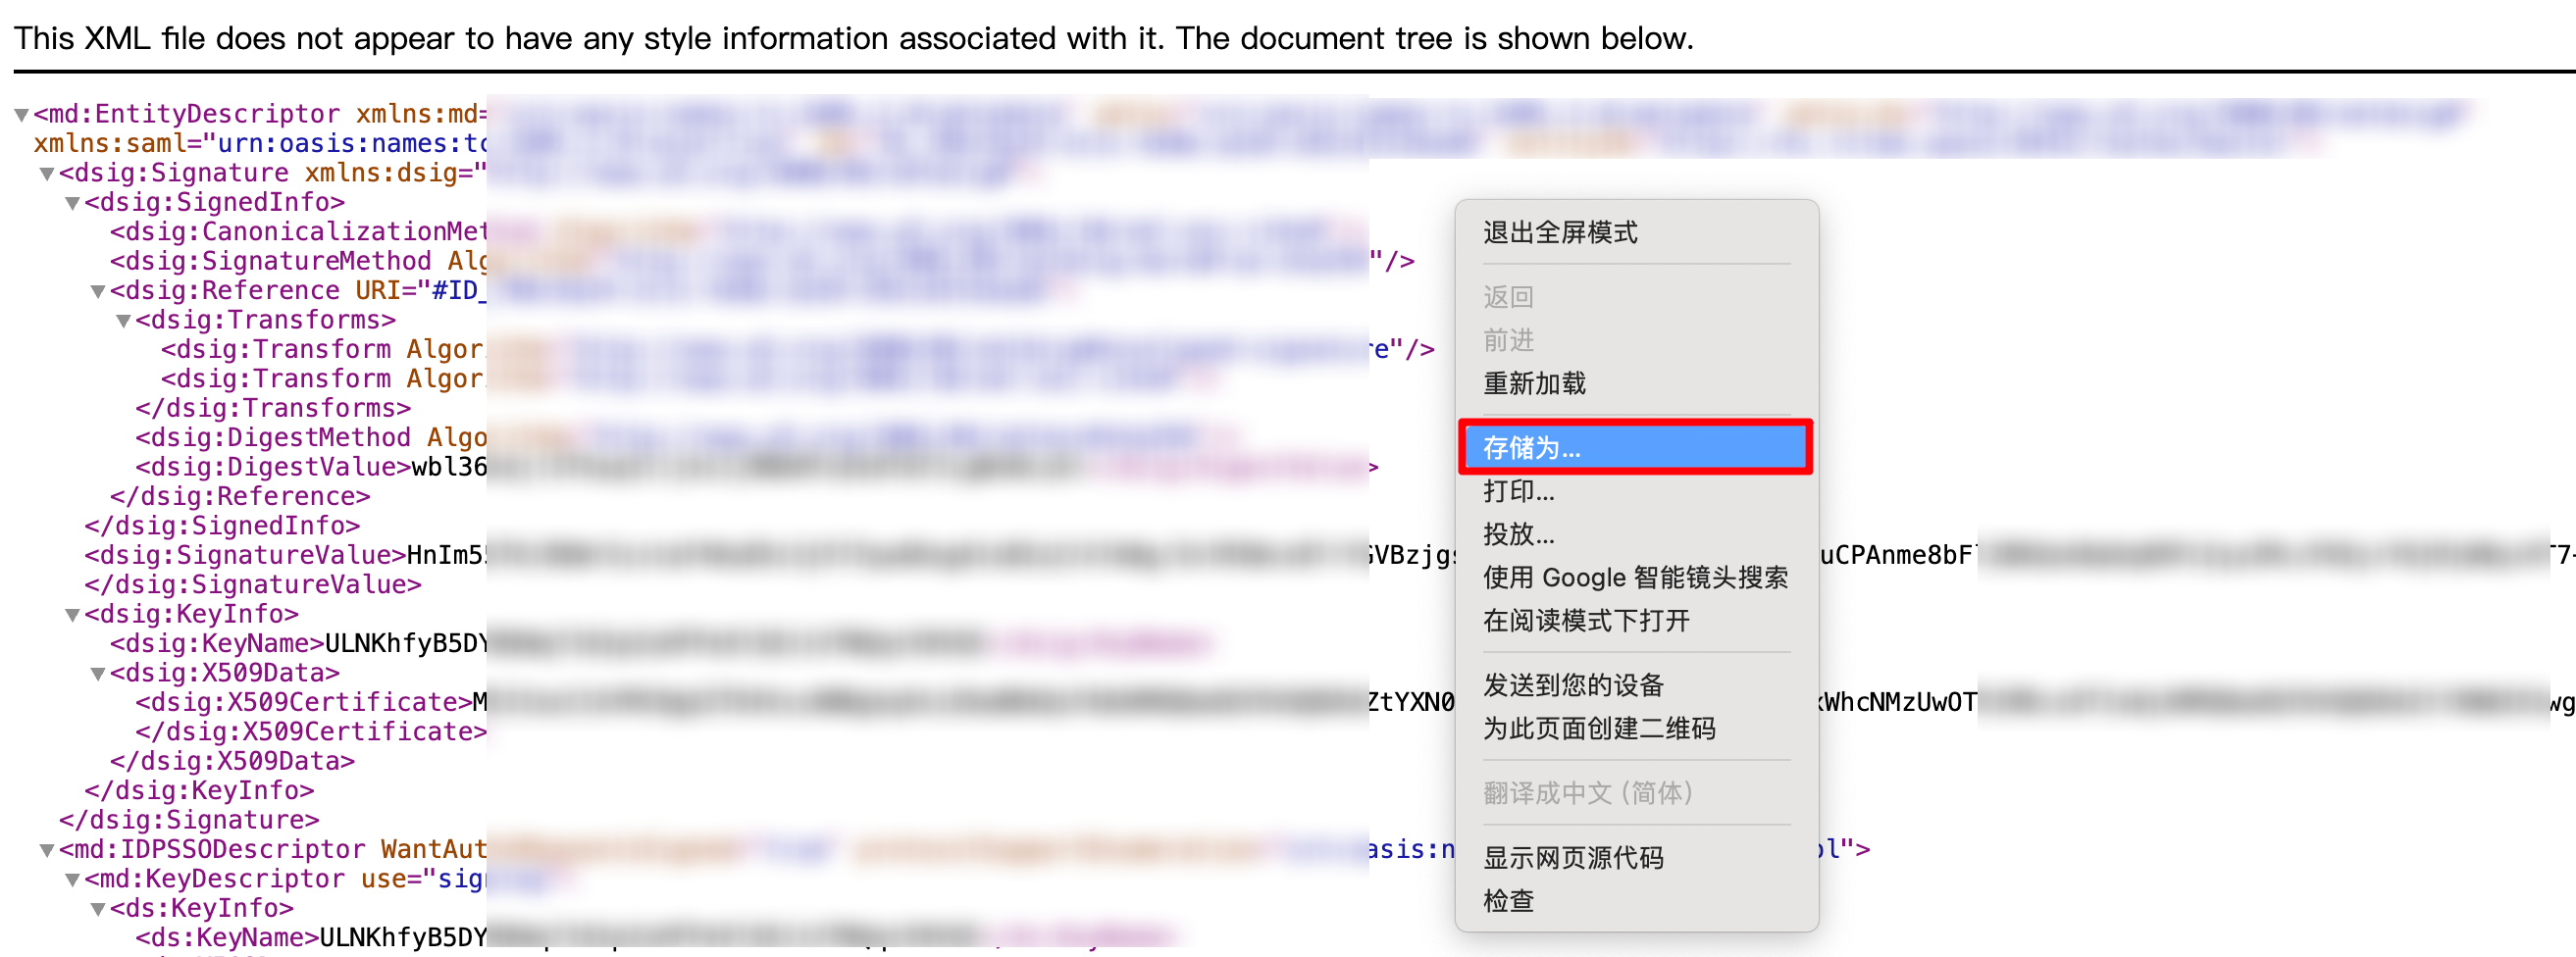
1. On the Configure > Realm settings page, open the SAML 2.0 Identity Provider Metadata link from the webpage.
2. In the opened web page, right-click Save as to store it as a local file, obtaining the metadata XML document.
Note: Do not copy-paste web page data and save it, as the format is incompatible.
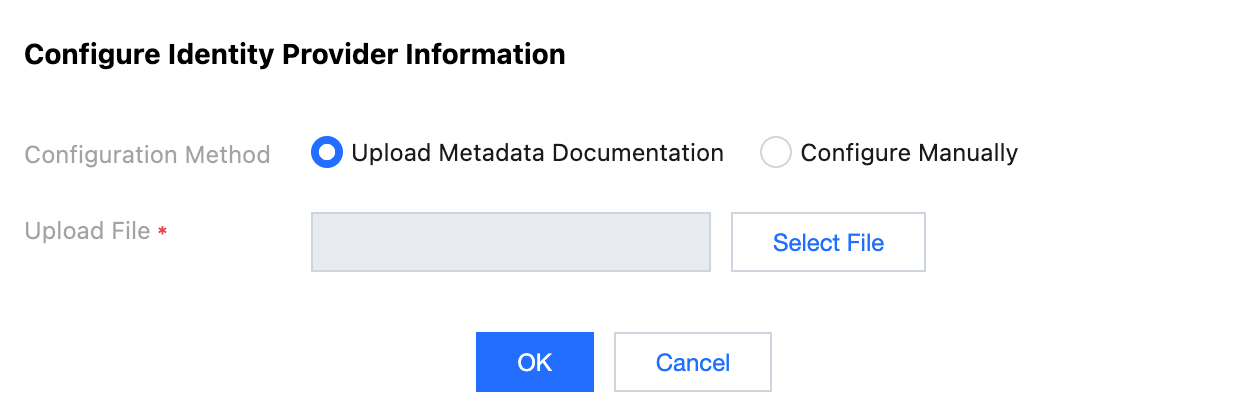
Step 3: Upload Federation Metadata XML in Identity Center
1. In Organization Account Management > Identity Center Management >Settings>SSO Login, in the Identity Provider (IDP) Information section, click Configure Identity Provider Information.
2. Click Select File, upload the metadata XML document downloaded from Keycloak to complete the configuration.
Result Verification
After completing the SSO login configuration, you can initiate SSO login from Tencent Cloud.
Premise: In the identity center, you need to create a user with the same name as Keycloak. Enter Organization Account Management > Identity Center Management > User to create it.
Login Process:
1. Identity Center administrators enter Organization Account Management > Identity Center Management > Identity Center Overview page, and view and copy the User Login URL on the right.
2. Click to access the User Login URL, then click Login.
3. Redirect to the Keycloak login page, select an account and log in with password.
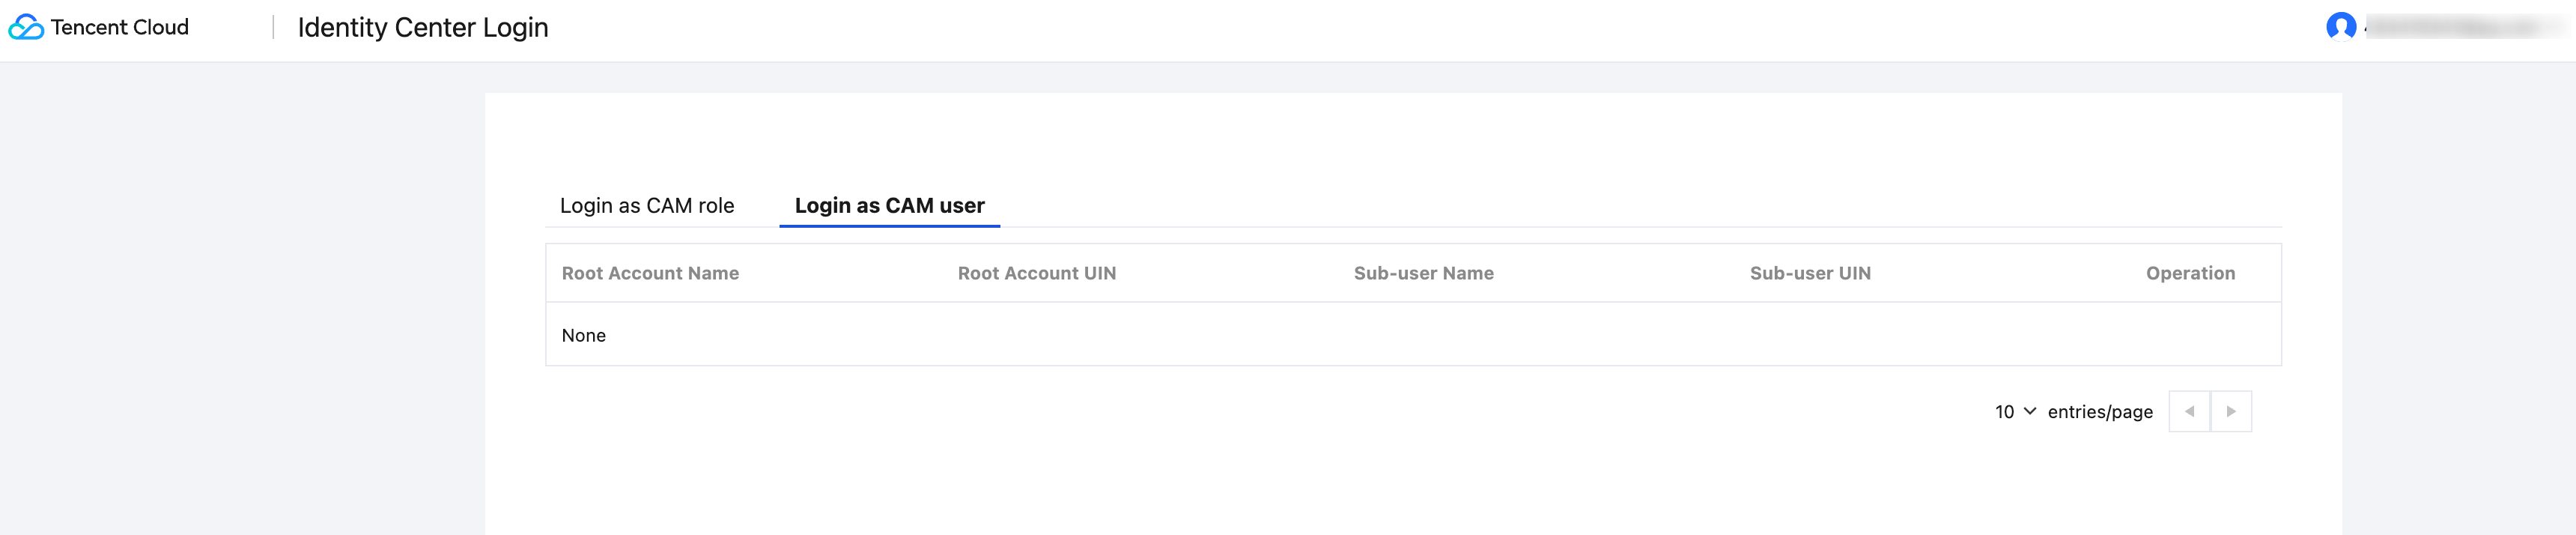
4. Login successful, enter the Identity Center account list page.