Security Management
Baixar
Modo Foco
Tamanho da Fonte
Introduction
Cloud Object Storage (COS) console provides a security management feature to help users identify, assess and control bucket configuration risks, thereby ensuring data security and compliance. Through risk detection, evaluation reports and control measures, it can effectively reduce potential security risks caused by improper bucket configurations, such as data leakage and traffic theft.
Note:
COS provides security management service based on Tencent Cloud Smart Advisor (TSA). For first-time use, activate the cloud advisor service and authorize the service role first.
To ensure data security, the sub-account must have bucket list access permissions to use security management normally. If there is no permission to view, contact the root account to assign the corresponding permission. For details, see add preset policy QcloudCOSGetServiceAccess.
Security management feature can be used for free.
Initiating Assessment
1. Log in to the COS Console.
2. In the left navigation bar, select Ops Center > Security Management to access the Security Management page.
3. In the overview area, click reassess to display security assessment in progress, which means initiating an assessment task.
Note:
After first-time activation, the system will initiate an assessment task by default. Besides, a daily assessment task is automatically initiated in the morning. For details, see Latest Evaluation Time.
Note: After the assessment task is initiated, it takes some time. Wait patiently. You may close the page after initiating the assessment task and enter the page for viewing the assessment result later.

Risk Overview
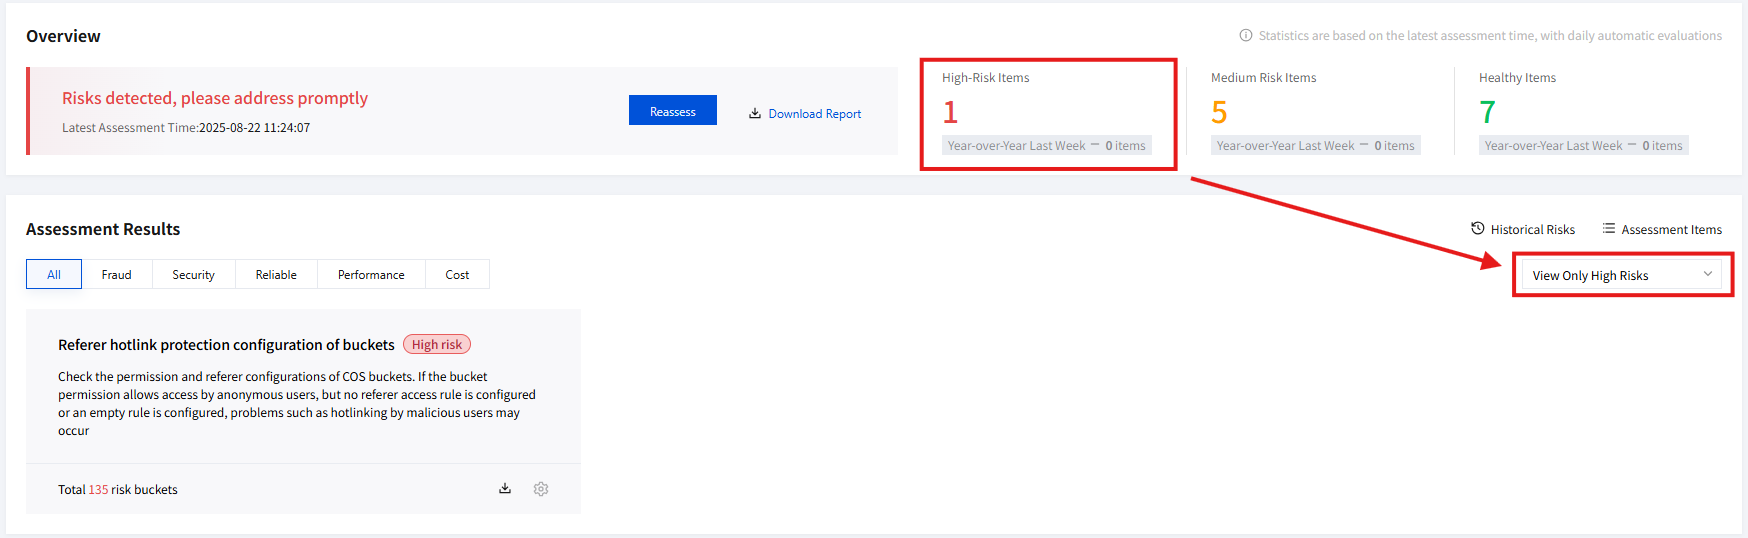
The Risk Overview module mainly shows the overall risk situation of bucket configurations. This includes the number of evaluation items under three levels: high-risk items, mid-risk items, and Healthy items. It also supports viewing week-on-week comparisons for each risk level. Directions for viewing the assessment overview:
1. Access the Security Management page. After task completion, view the overall risk situation on the right side of the Overview section. The assessment result is based on the latest evaluation time statistics. If no manual initiation is performed on the current day, the result of the automatic assessment from that morning will be shown. For more details, please refer to Initiating Assessment.

2. Click a certain risk level area to automatically filter the risk assessment results under the current risk level.
Risk Management
Risk management mainly includes five modules: risk assessment result, result detail and manage, report download, assessment item settings, and historical risk, making it convenient for users to evaluate and fix detected risk configuration items.
Risk Assessment Result
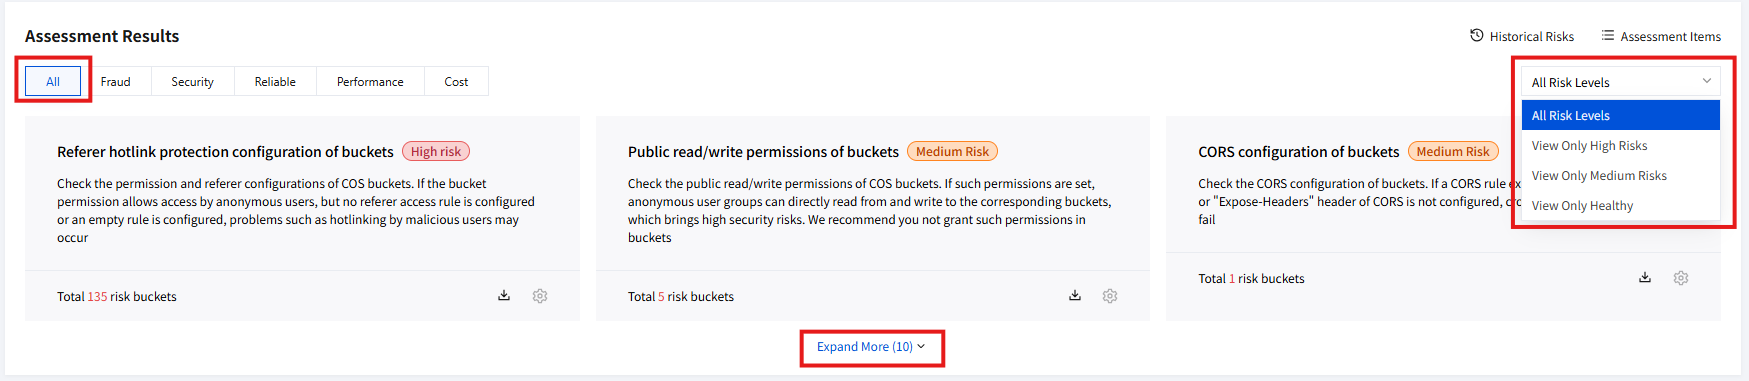
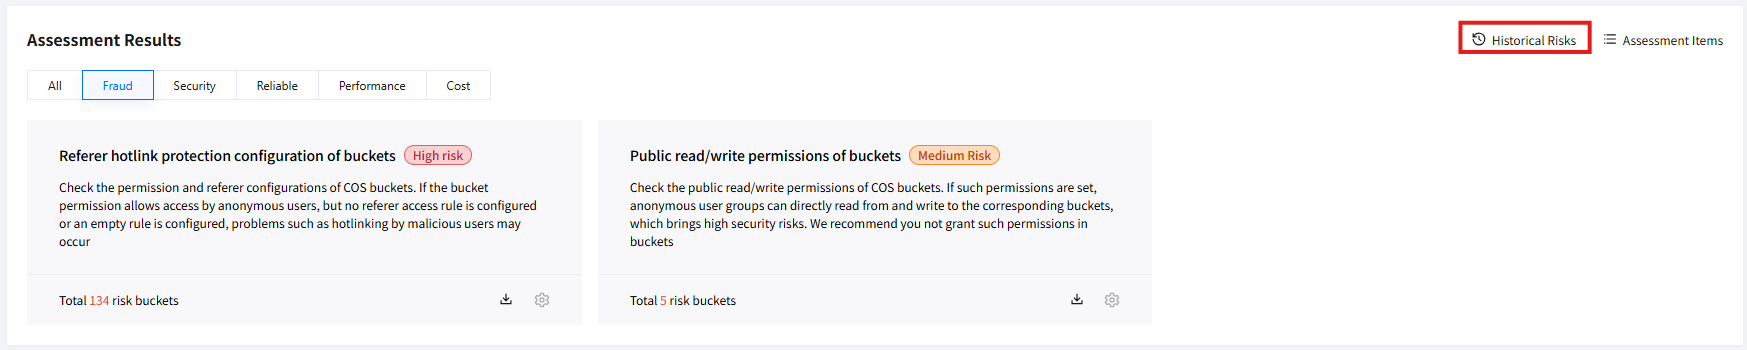
Risk assessment results are mainly divided into five categories based on bucket configuration attributes: hotlinking, security, reliability, performance, and cost. You can intuitively view assessment results under different categories, including assessment item name, description, and the number of risk buckets under each item. Directions for viewing risk assessment results:
1. Access the Security Management page and view the assessment result section.
2. By default, all assessment results are displayed, i.e., the evaluation results of all detected bucket configuration items. Three are shown by default. Click expand more to view other assessment results.
3. To filter all assessment results, click on the right filtering box to perform dropdown selection.
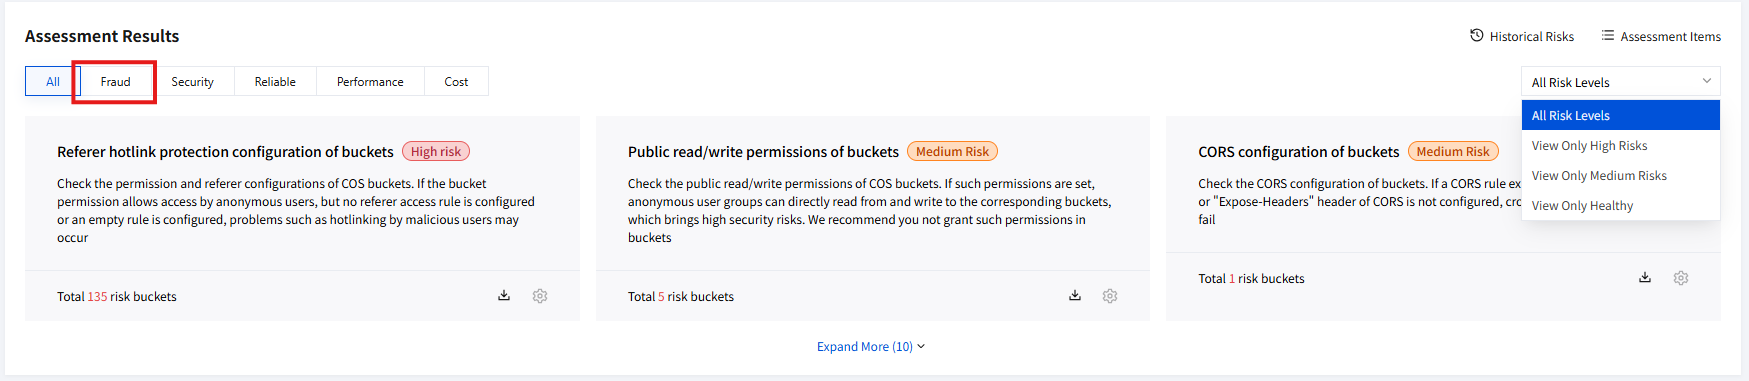
4. You can also click to switch at the top Tab bar to view assessment results under different categories, such as results under the hotlinking category.
Result Details and Manage
In the assessment result section, you can view the bucket list with existing risks under each assessment item, learn about the trigger rule, and additionally obtain appropriate optimization suggestions for quick management. Directions:
1. Access the Security Management page and view the assessment result section.
2. Click a certain assessment item card, and the result details and management page will automatically pop up on the right.
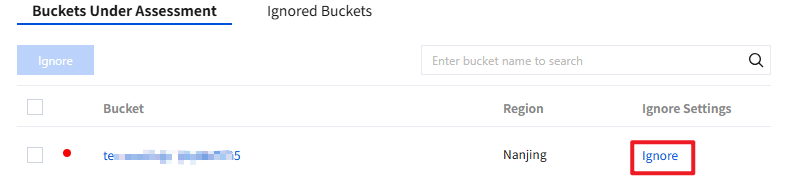
3. The assessment item name, assessment item description, number of buckets at risk, and trigger rule, as well as optimization suggestions, are shown at the top of the page. The list of buckets under evaluation and ignored is displayed at the bottom.
4. You can operate on the designated bucket as per the optimization suggestion. Click the bucket in the list to quickly go to configuration.
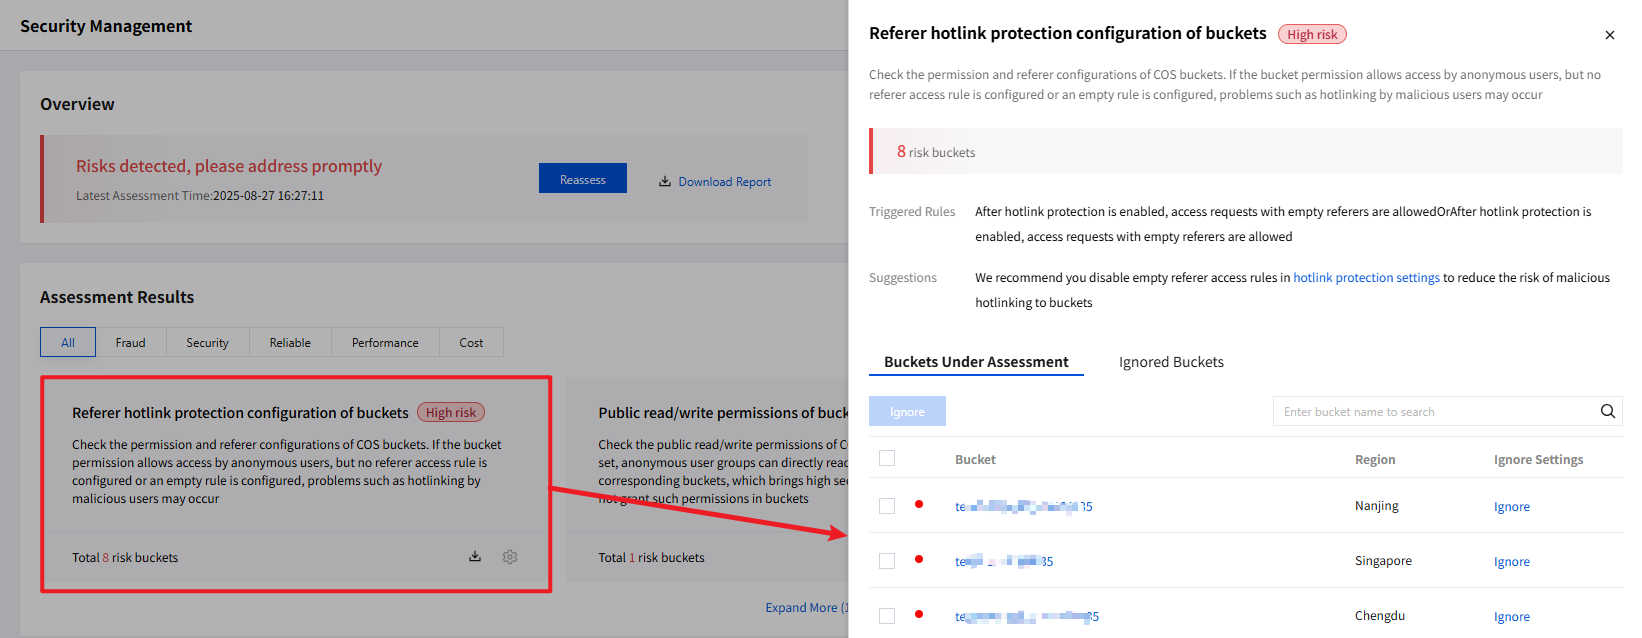
5. Under the buckets under evaluation list, you can ignore the bucket by clicking on the right side of the list. The bucket will be added to the ignored buckets list and will not be detected during evaluation.
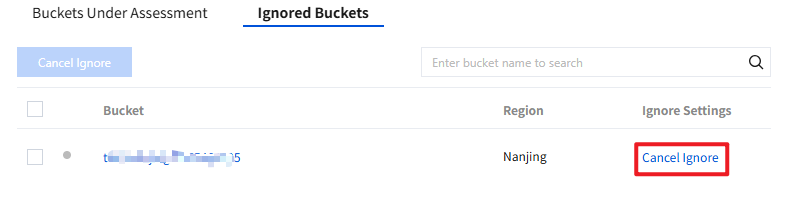
6. Under the ignored buckets list, you can unignore the bucket by clicking on the right side of the list. The bucket will be added to the buckets under evaluation list and will continue detection during evaluation.
Download Reports
You can download the security reports for all assessment items and each assessment item. Directions:
Note:
This report only shows assessment items with existing risks and detailed information of related risk buckets. Risk-free items will not be reflected in the report.
All Assessment Items
1. Access the Security Management page and view the overview section.
2. Click Download Report to download and view the security report for all assessment items.

Single Assessment Item
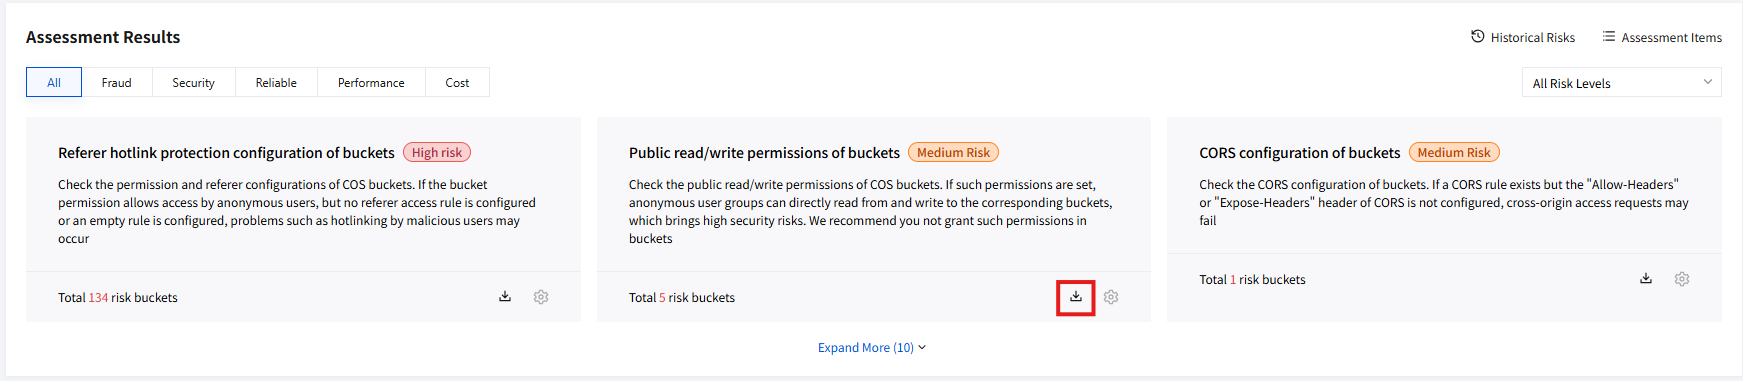
1. Access the Security Management page and view the assessment result section.
2. Locate the assessment item card you need to download, click the download icon to download and view its security report.
Assessment Item Settings
You can enable or disable an assessment item and adjust its rule as needed. Directions:
Enable or Disable the Assessment Item
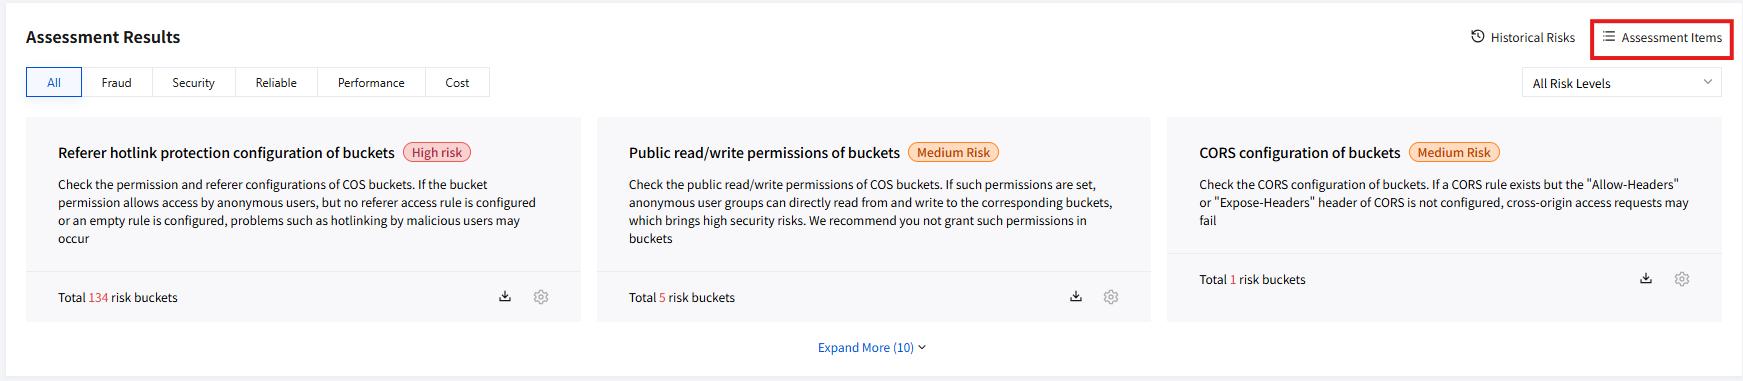
1. Access the Security Management page and view the assessment result section.
2. Click Assessment Item List, navigate to Tencent Cloud Smart Advisor and turn on or off the assessment item switch. For more details, please refer to Enable or Disable Inspection Assessment Items.
Note:
Note: If you disable an assessment item in the Tencent Cloud Smart Advisor console, the inspection item will no longer be included in the next risk assessment and will show as a risk-free bucket by default.
Adjusting Assessment Item Rules
1. Access the Security Management page and view the assessment result section.
2. Click Assessment Item List, navigate to Tencent Cloud Smart Advisor and click Modify Rules. For more details, please refer to Adjusting Inspection Assessment Item Custom Rules.
3. At the same time, you can also click the settings icon on a certain assessment item card to quickly redirect to Tencent Cloud Smart Advisor and perform rule adjustment.
Note:
Quick redirect link is applicable only to assessment items that support rule adjustment.

Historical Risk
You can query the risk trend change and view the historical risk details. The operation details are as follows.
1. Access the Security Management page and view the assessment result section.
2. Click Historical Risk, navigate to TSA to view risk trend changes and historical risk details. You can choose risk level and time range as needed to retrieve more detailed trend information. For more details, please refer to Query Risk Trend and Query Historical Risk Details.
Fraudulent Ban Bucket Query
COS supports the traffic anti-fraud feature. The system will intelligently detect abnormal traffic, automatically block abnormal buckets, and send notifications. If a bucket is banned due to traffic theft, you can view the blocking record details in this region, including the bucket name, region, and blocking time.
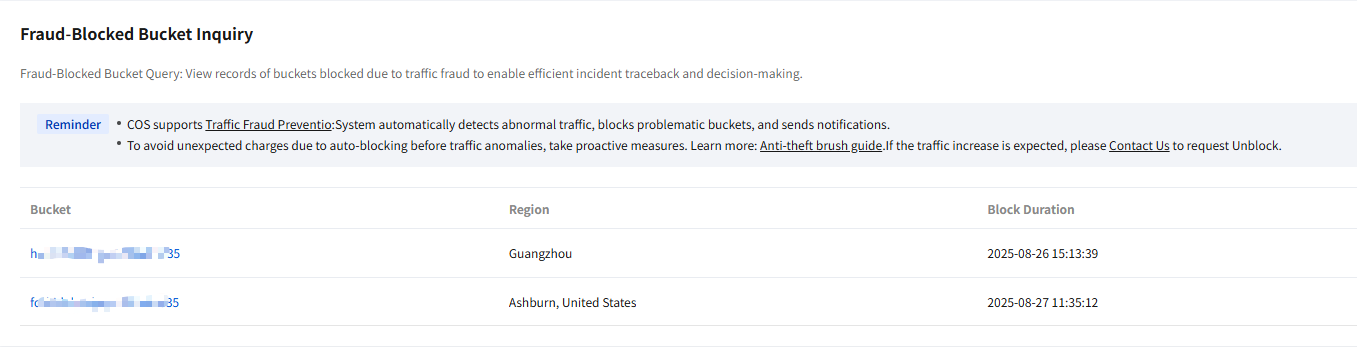
Bucket name: Show banned bucket names.
Region: Show the region where the bucket is located.
Blocking time: Show the specific time when the bucket was banned.
Note:
To avoid high costs caused by abnormal traffic before automatic blocking, take security measures as needed. For more information, check anti-fraud guidelines.
If the traffic growth is expected, contact us to apply for unblocking.
Ajuda e Suporte
Esta página foi útil?
Você também pode entrar em contato com a Equipe de vendas ou Enviar um tíquete em caso de ajuda.
comentários