A Deployment declares the Pod template and Pod running policies. It is used to deploy stateless applications. You can specify the number of replicas, scheduling policy, and update policy for Pods running in the Deployment as needed.
Operation Guide for Deployments in the Console
Creating a Deployment
1. Log in to the TKE console and select Cluster in the left sidebar.
2. Click the ID of the cluster where Deployment needs to be created to enter the cluster management page. See the figure below:
3. Click Create to go to the Create Deployment page and set deployment parameters as needed. Key parameters are described as follows:
Workload: enter the customized name.
Label: a key-value pair, which is used for classified management of resources. For more information, see Querying Resources by Tag.
Namespace: select a namespace based on your requirements.
Volume (optional): provides storage for the container. It can be a temp path, CVM path, CBS volume, file storage NFS, configuration file and PVC, and it must be mounted to the specified path of the container.
Containers in the Pod: set one or more different containers for a Pod of the Deployment based on actual needs.
Name: custom.
Image: select as needed.
Image Tag: fill as needed.
Image Pull Policy: the following three policies are available. Select as needed.
If you do not set any image pull policy and Image Tag is left empty or set to latest, the Always policy is used. Otherwise, the IfNotPresent policy is used.
Always: always pull the image from the remote end.
IfNotPresent: a local image is used by default. If no local image is available, the image is pulled remotely.
Never: only use a local image. If no local image is available, an exception occurs.
Environment Variable: set the container variables.
CPU/Memory Limit: set the CPU and memory limit according to Kubernetes' resource limits to improve the robustness of the business.
GPU Resource: you can configure the least GPU resource used by the workload.
Advanced Settings: parameters such as "working directory", "run commands", "run parameters", "container health check", and "privilege level" can be set.
Image Access Credential: a container image is private by default. You need to select the image access credential for the TCR instance when creating a workload.
Number of Pods: select the adjustment method and set the number of Pods based on actual needs.
Manual Adjustment: set the number of Pods. You can adjust it by clicking + or -.
Auto Adjustment: automatically adjust the number of Pods if any of the set conditions are met. For details, see Automatic Scaling Basic Operations.
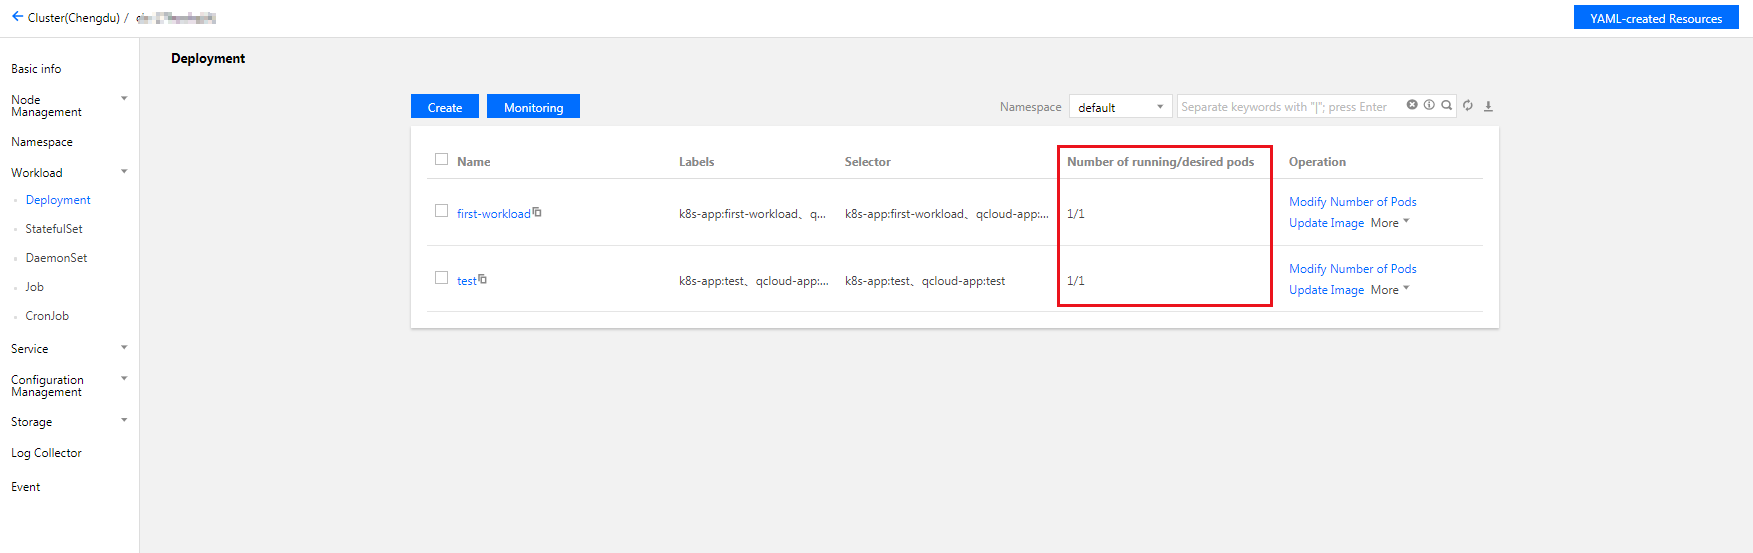
4. Click Create Workload to complete the creation. See the figure below:
When the running quantity is equal to the expected quantity, all Pods under the Deployment have been created.
Updating a Deployment
Updating YAML
1. Log in to the TKE console and select Cluster in the left sidebar.
2. Click the ID of the cluster for which to update the Deployment to go to the management page of the cluster.
3. In the row of the Deployment for which YAML should be updated, click More > Edit YAML to go to the Deployment updating page.
4. On the Update a Deployment page, edit the YAML and click Done to update the YAML.
Updating Pod configuration
1. On the cluster management page, click the ID of the cluster for which Pod configuration should be updated to go to the management page of the cluster.
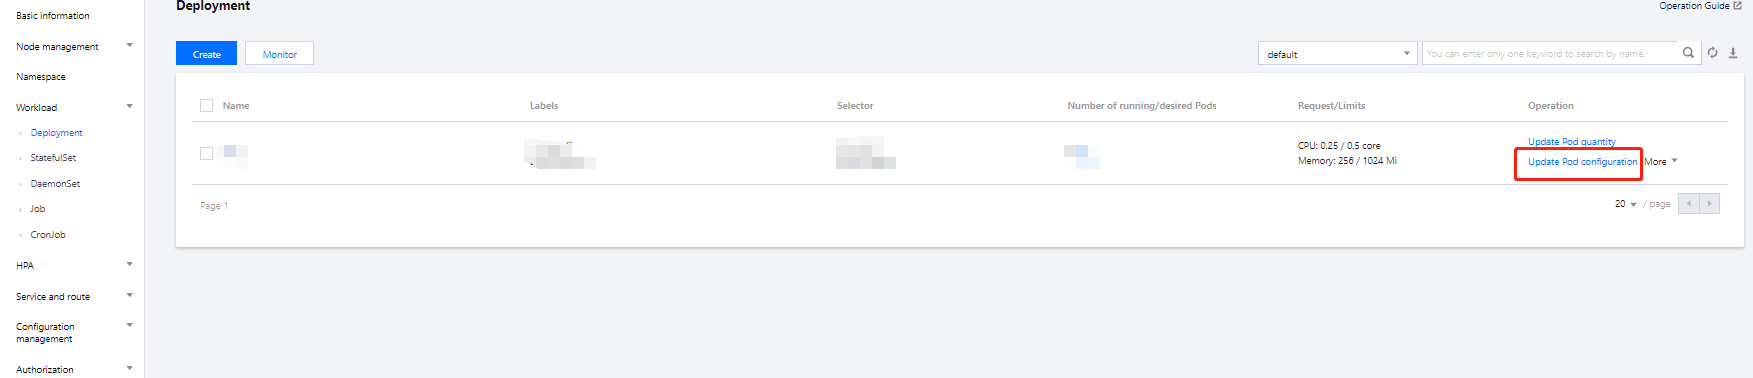
2. In the Deployment row for which Pod configuration needs to be updated, click Update Pod Configuration, as shown below:
3. On the Update Pod Configuration page, modify the updating method and set parameters as needed.
4. Click Update Pod Configuration.
Rolling back a Deployment
1. Log in to the TKE console and select Cluster in the left sidebar.
2. Click the ID of the cluster for which to roll back the Deployment to go to the management page of the cluster.
3. Click the name of the Deployment to be rolled back to go to the Deployment information page.
4. Select the Modification History tab, and click Rollback in the row of the version for which rollback is needed, as shown below:
5. Click OK in the Rollback Resources prompt box to complete the process.
Adjusting Pod quantity
1. Log in to the TKE console and select Cluster in the left sidebar.
2. Click the ID of the cluster for which to adjust the Pod quantity to go to the management page of the cluster.
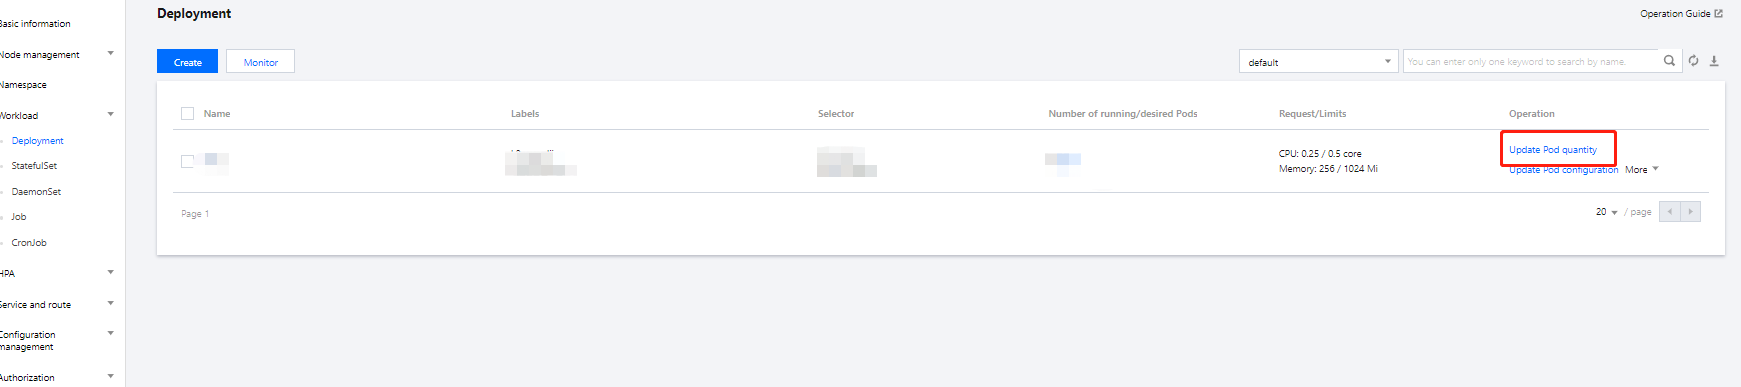
3. In the row of the Deployment for which the Pod quantity should be adjusted, click Update Pod Quantity to go to the Pod quantity updating page, as shown below:
4. Adjust the Pod quantity based on actual needs and click Update Number of Instance to complete the adjustment.
Using kubectl to Manipulate Deployments
YAML sample
apiVersion: apps/v1beta2
kind: Deployment
metadata:
name: nginx-deployment
namespace: default
labels:
app: nginx-deployment
spec:
replicas: 3
selector:
matchLabels:
app: nginx-deployment
template:
metadata:
labels:
app: nginx-deployment
spec:
containers:
- name: nginx
image: nginx:latest
ports:
- containerPort: 80
kind: this identifies the Deployment resource type.
metadata: basic information such as Deployment name, Namespace, and Label.
metadata.annotations: an additional description of the Deployment. You can set additional enhancements to TKE through this parameter.
spec.replicas: the number of Pods managed by the Deployment.
spec.selector: the label of the Pod selected by the selector managed by the Deployment.
spec.template: detailed template configuration of the Pod managed by the Deployment.
1. See the YAML sample to prepare the Deployment YAML file.
2. Install kubectl and connect to a cluster. For detailed operations, see Connecting to a Cluster.
3. Run the following command to create the Deployment YAML file.
kubectl create -f Deployment YAML filename
For example, to create a Deployment YAML file named nginx.yaml, run the following command:
kubectl create -f nginx.yaml
4. Run the following command to check whether the Job is successfully created.
kubectl get deployments
If a message similar to the following is returned, the creation is successful.
NAME DESIRED CURRENT UP-TO-DATE AVAILABLE AGE
first-workload 1110 6h
ng 1111 42m
Using kubectl to update a Deployment
You can update the Deployment through Kubectl in three ways. The method 1 and method 2 support both Recreate and RollingUpdate update policies.
The Recreate update policy is to first terminate all Pods and then recreate the Deployment.
The RollingUpdate is the rolling update policy, which is used to update the Pods of the Deployment one by one on a rolling basis.
Method 1
Method 2
Method 3
Run the following command to update a Deployment.
kubectl edit deployment/[name]
This method applies to simple debugging verification. It is not recommended to use it in production environments. You can update any Deployment parameters in this way.
Run the following command to update the image of the specified container.
kubectl set image deployment/[name][containerName]=[image:tag]
For updates, we recommend that you change none of the Deployment parameters but the one for container's image.
Run the following command to roll update the specified resource.
kubectl rolling-update [NAME] -f FILE
Using kubectl to rollback a Deployment
1. Run the following command to view the update history of the Deployment.
kubectl rollout history deployment/[name]
2. Run the following command to view the details of the specified version.
kubectl rollout history deployment/[name] --revision=[REVISION]
3. Run the following command to roll back to the earlier version.
kubectl rollout undo deployment/[name]
To specify the rollback version, run the following command.