How to Update the OpenClaw Application Version on Your Server
Note: The OpenClaw community edition is currently evolving rapidly, and the Tencent Cloud Lighthouse team is actively rolling out support for newer OpenClaw versions and more plugin capabilities. If you haven’t deployed OpenClaw yet, start with Tencent Cloud OpenClaw first. You can launch your OpenClaw instance in seconds with one click, then come back to this guide to explore more advanced use cases.
If you want to experience the latest OpenClaw deployment and configuration experience on Lighthouse, we recommend following this guide to upgrade to the latest version we provide.
How to Tell Whether You Need an Update
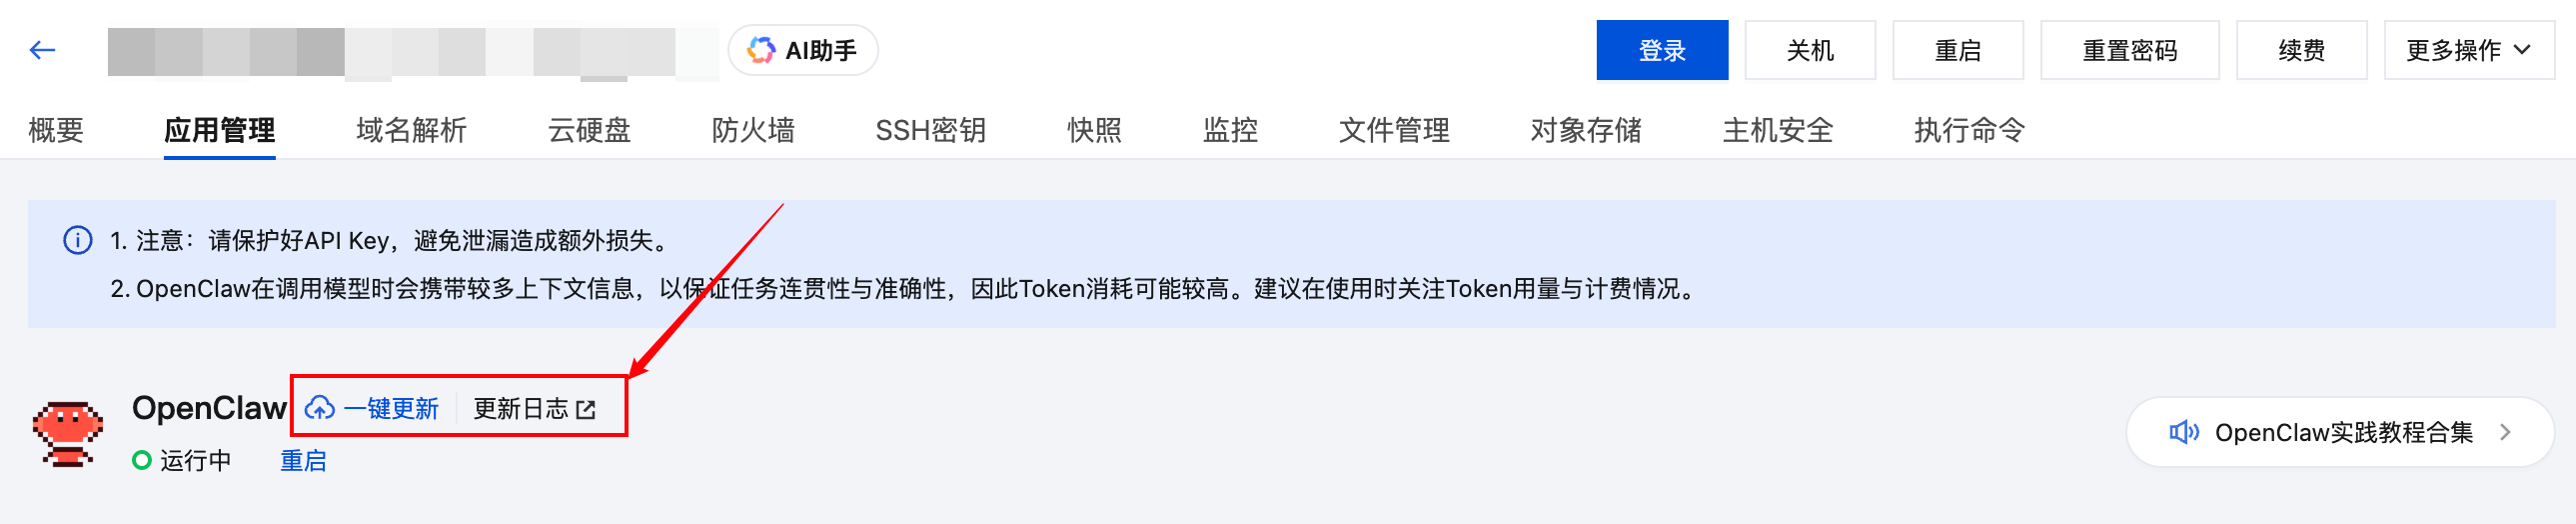
Method 1: Check Whether the “One-Click Update” Button Appears in the Configuration Panel
The OpenClaw application management panel in the Lighthouse console supports a one-click update feature. If your current application template needs to be updated, this button will be displayed:
Method 2: Judge by the Server Creation or Reinstallation Time
If your OpenClaw server was created, or last reinstalled, earlier than February 27, 2026, we recommend updating the application version first by following this guide.
Update the OpenClaw Application Template
Because the OpenClaw open-source community updates very frequently, and the plugins used to connect QQ, WeCom, Feishu, and DingTalk are also continuously updated, you can update the OpenClaw application template in either of the following two ways.
Method 1: One-Click Update
⚠️ Note: A one-click update will clear the channel configuration. After the update is complete, you will need to configure the channels again.
Run a One-Click Update in the Console
Log in to the Lighthouse Console and go to the details page of your OpenClaw instance. If the page shows the One-Click Update button, it means your current application template can be updated.
If the configuration panel does not show the one-click update button, the current version does not need an update yet.
Click One-Click Update, review the notes in the popup window, and then click Confirm to begin:
⚠️ Note: A one-click update will clear the channel configuration. After the update, you will need to configure the channels again. Models, Skills, and memories will not be lost. The update process usually takes about 5 to 10 minutes, so please be patient while it runs.

After the update begins, you can move your mouse to the position shown in the image below to view the progress:
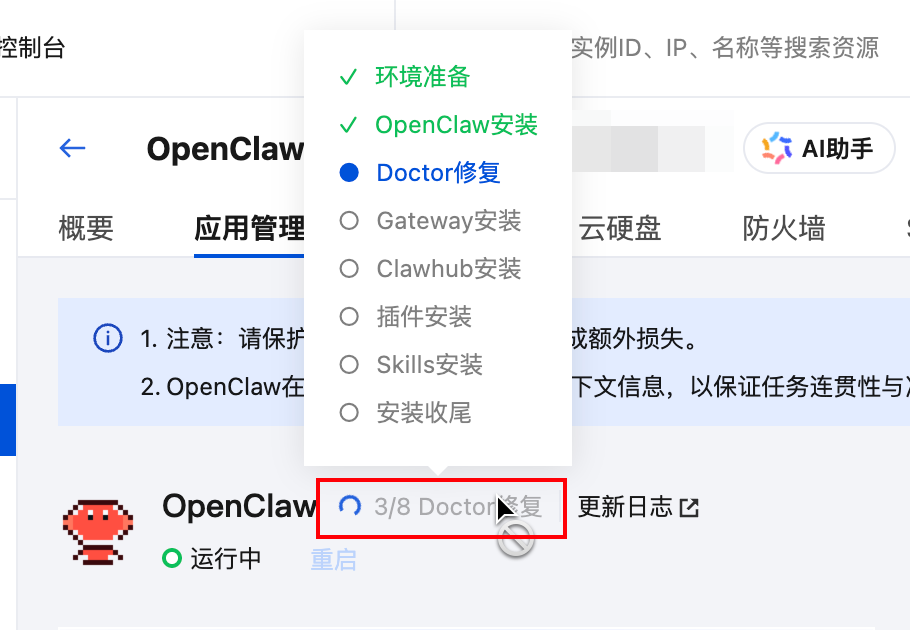
When the update is complete, the One-Click Update button will disappear from the configuration panel. At that point, you can continue with the next steps.
Reconfigure the Channels
After the one-click update is complete, you need to refer to Mastering OpenClaw | One-Click, Seconds-Level Deployment Guide for OpenClaw (Clawdbot) on the Cloud and complete the Channel configuration again before you can start using the latest version of OpenClaw.
Method 2: Manual Update
You can also update the OpenClaw application template deployed in Tencent Cloud Lighthouse by reinstalling the system. However, note that reinstalling the system will erase all data on the server disk. Therefore, before reinstalling, make sure to back up data such as OpenClaw memories so that you can restore them afterward.
Step 1: Download OpenClaw Memories to Your Local Device
Note: If you believe the current OpenClaw memories do not need to be preserved, you can skip this step and go directly to reinstalling the system.
OpenClaw memories are a bit like save files in a game: some can be cleared at any time, while others are very valuable. That is why we recommend saving them before reinstallation and injecting them again after the reinstall so the memories can be “reborn” in the new environment.
In most cases, OpenClaw stores valuable memories in two locations:
- Daily records:
memory/YYYY-MM-DD.md - Long-term memory:
MEMORY.md(if present)
These files, along with Skills and other content, are stored in the instance’s workspace folder. So before reinstalling, the goal is to download the entire workspace folder locally through Lighthouse File Management.
Note: If your workspace is larger than 500 MB, we recommend referring to the File Transfer Guide and using a method that is better suited for large files.
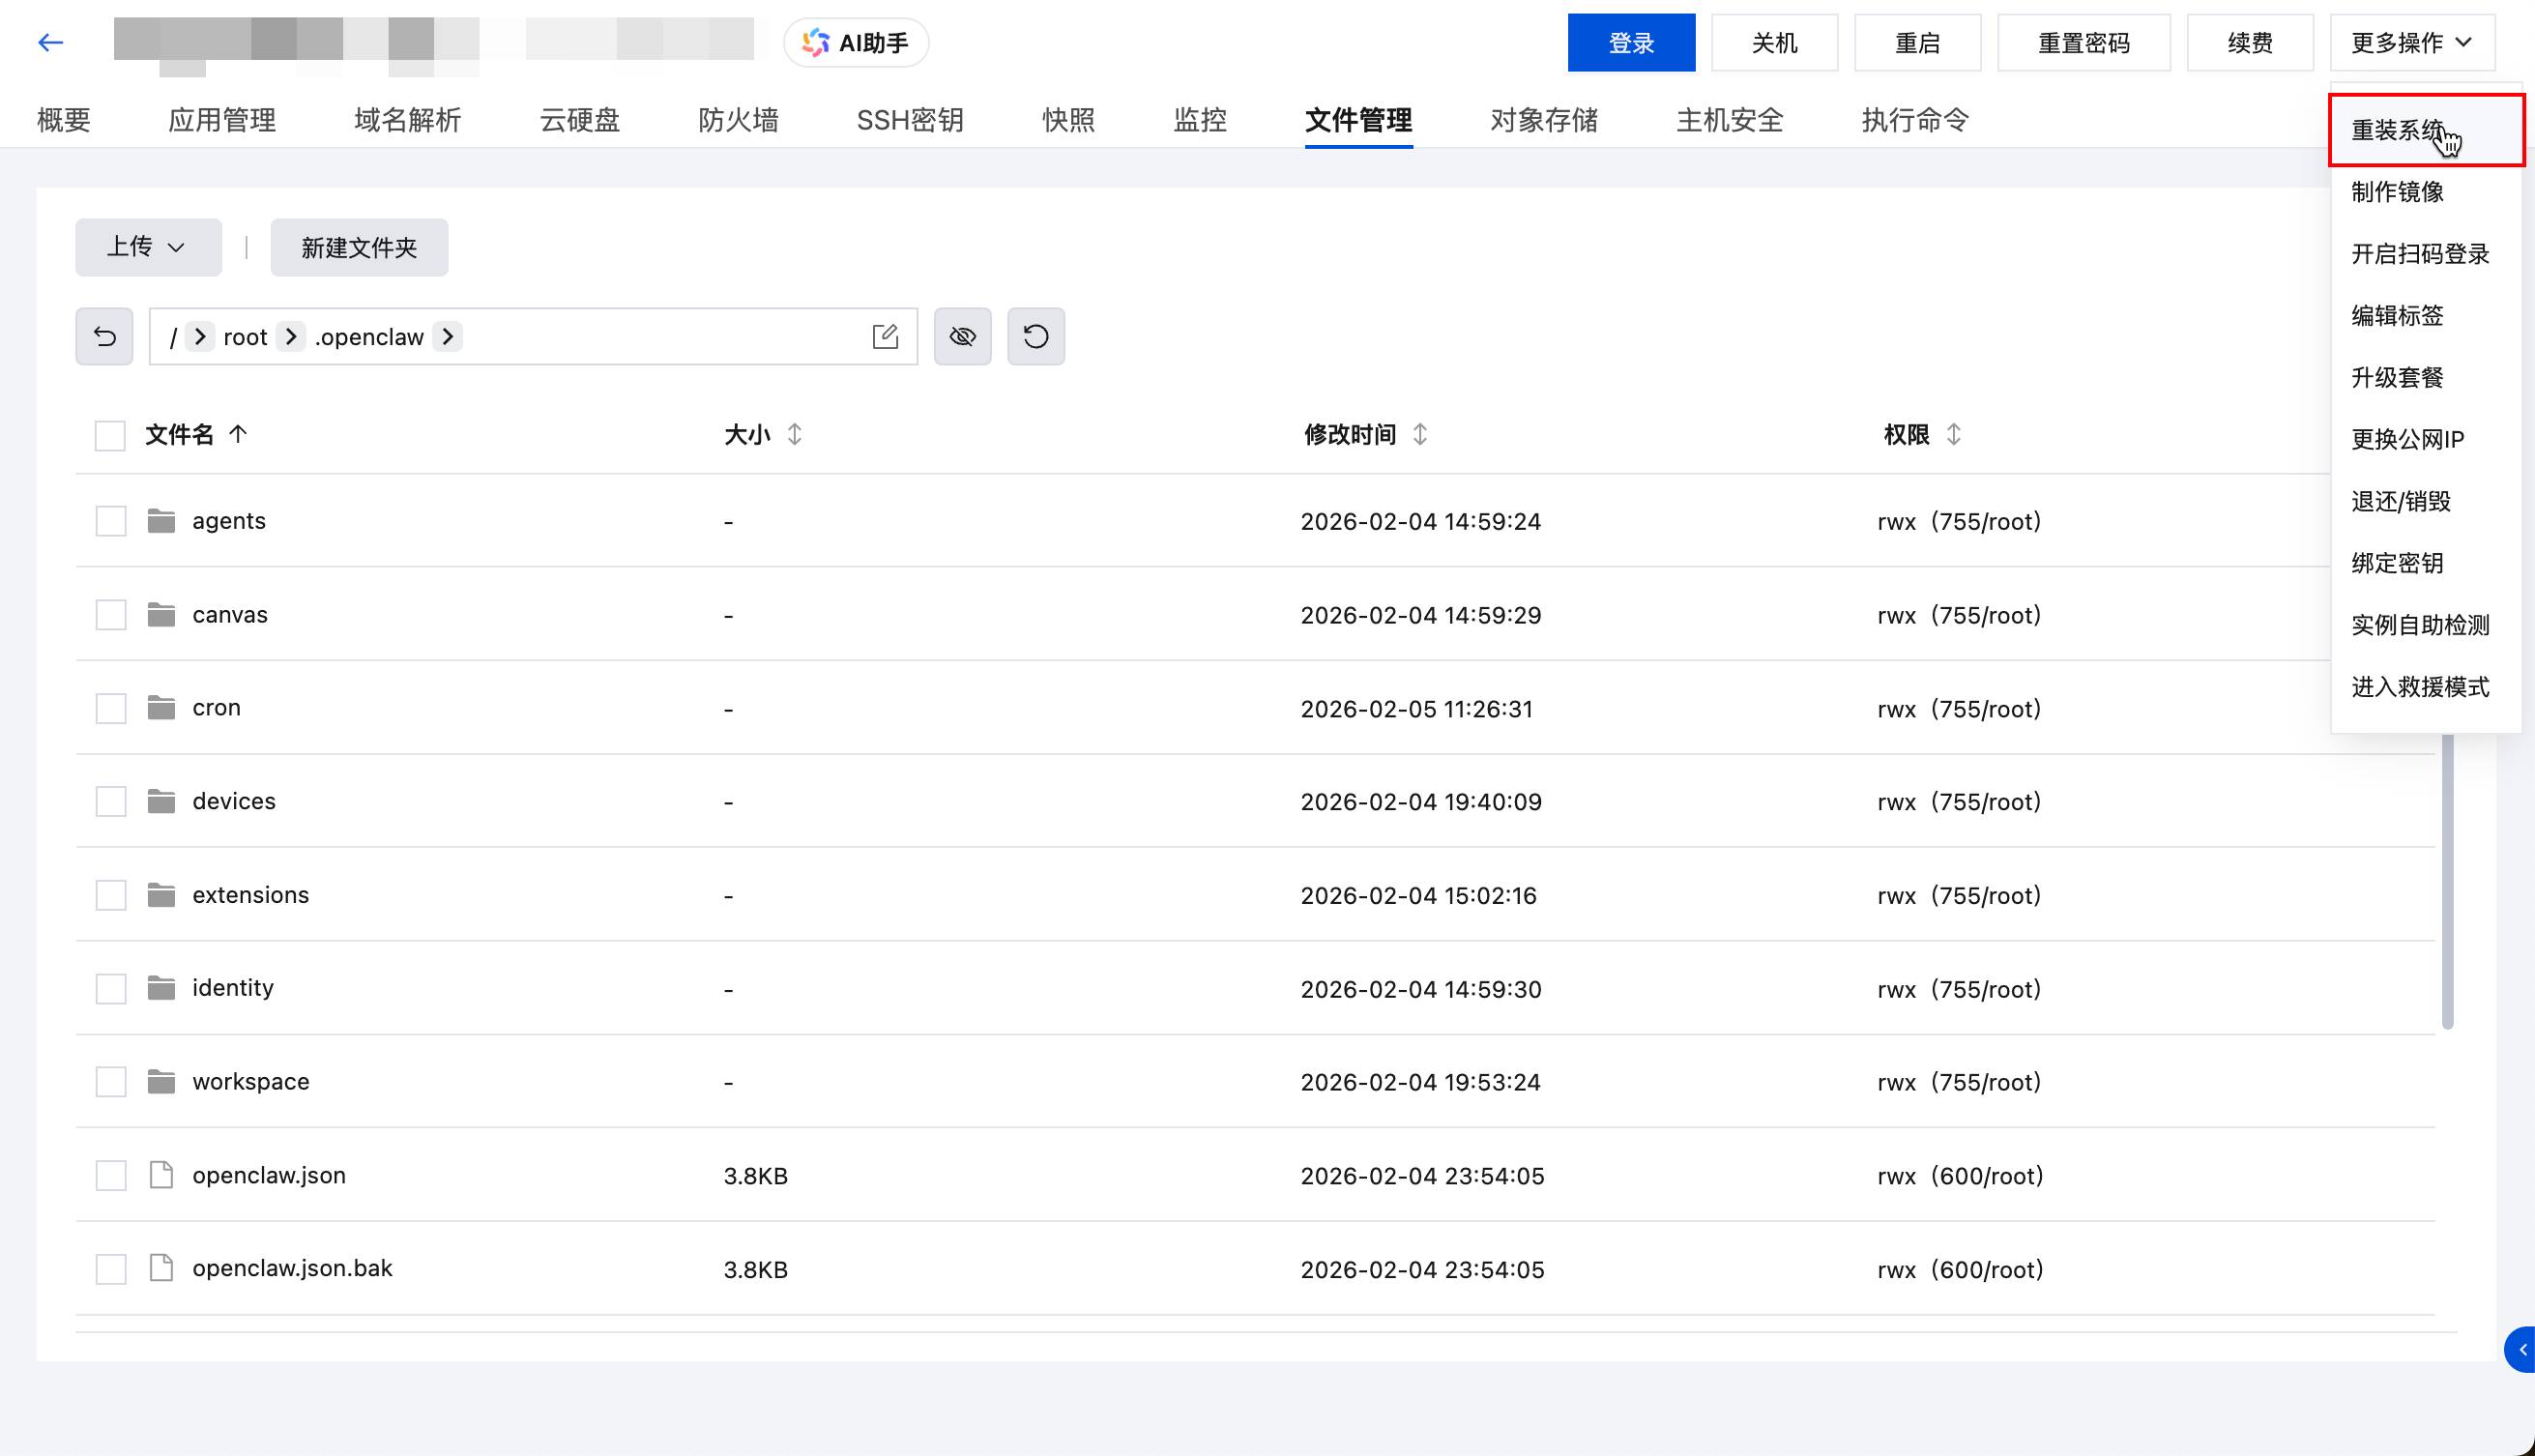
- Log in to the Lighthouse console and open the details page of your OpenClaw instance.
- Find and open the File Management page:
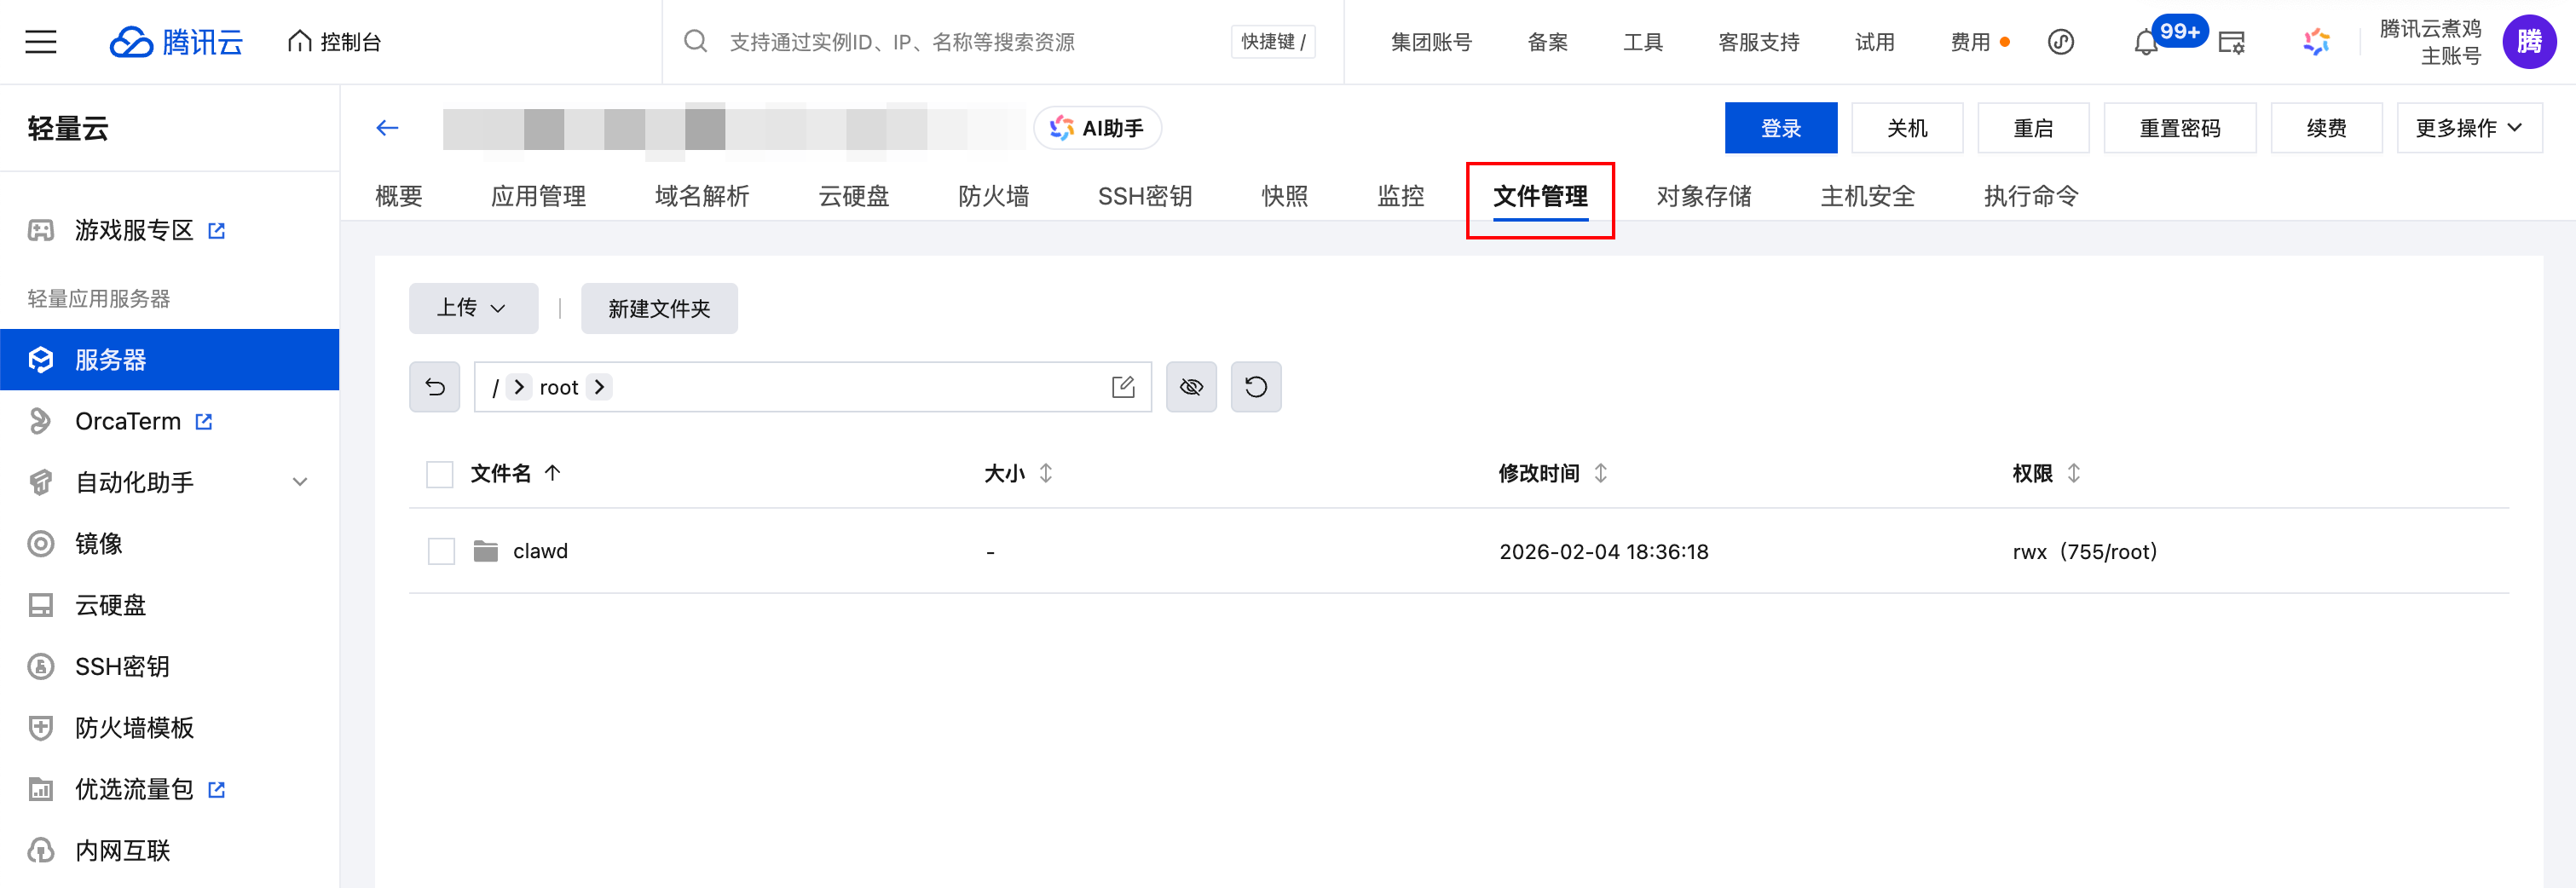
- In the path input box at the top of the page, paste the following path and press Enter:
/root/.openclaw/
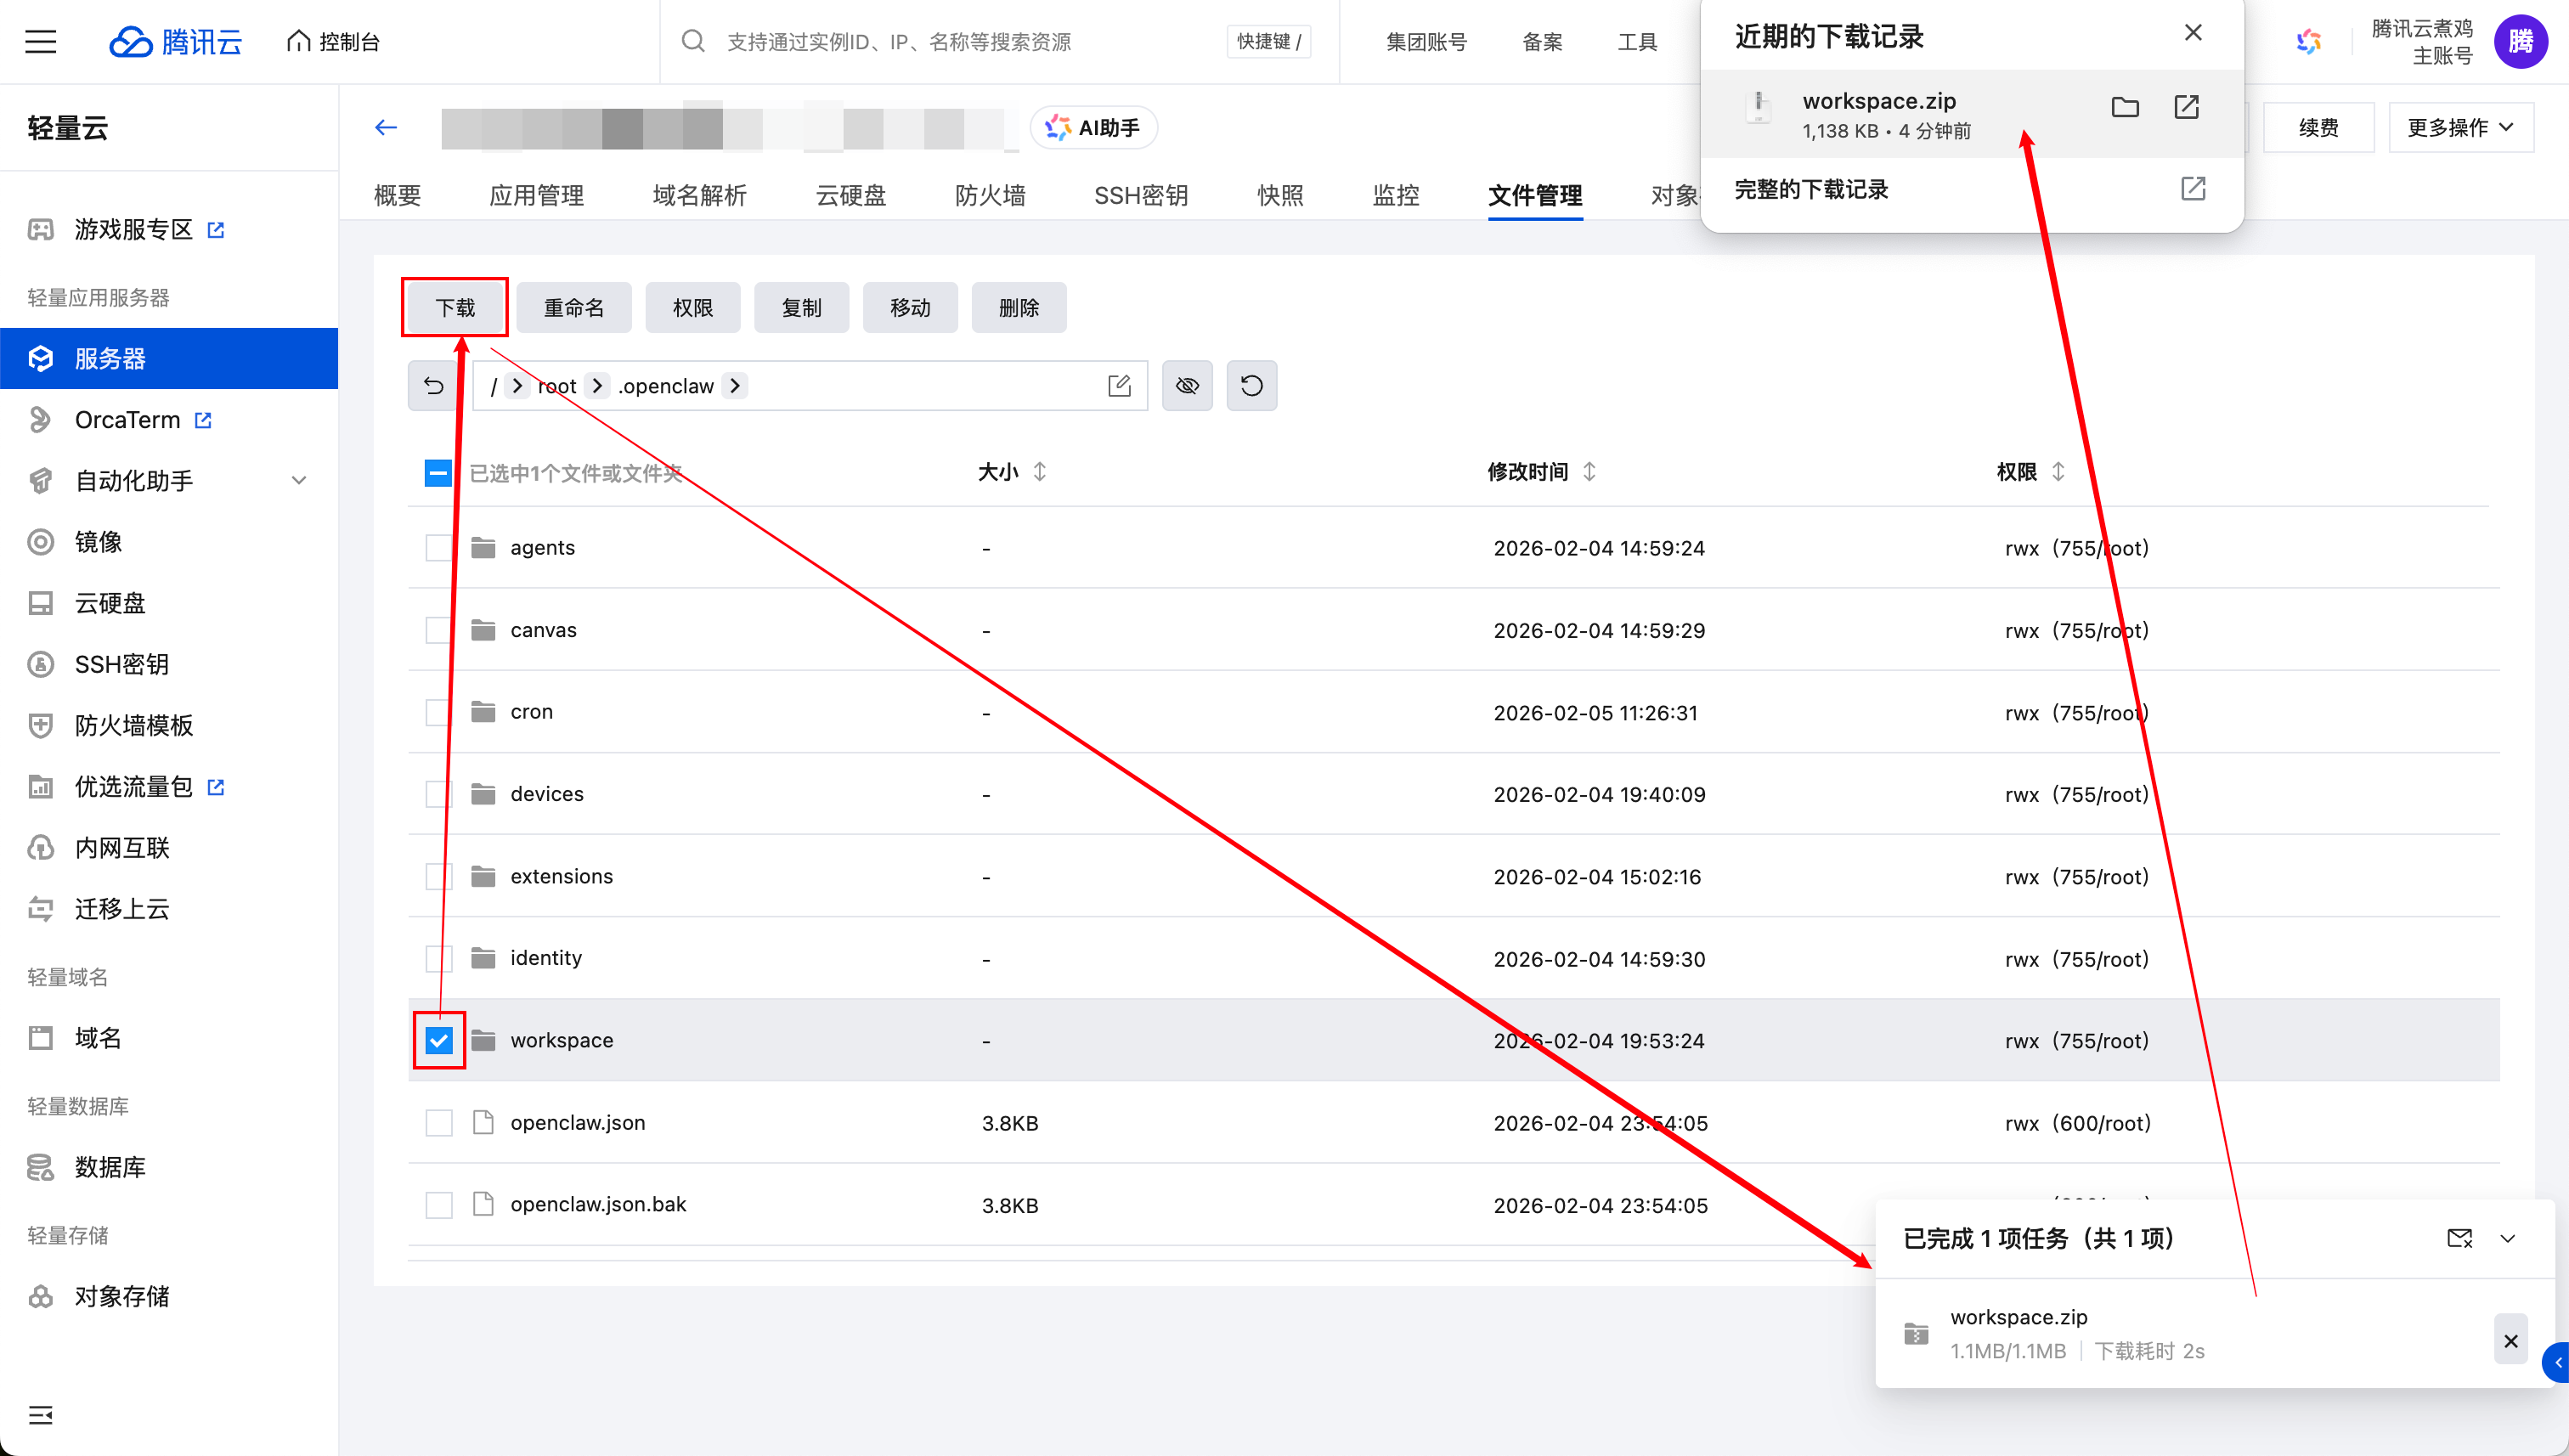
- Select the
workspacefolder and click Download in the File Management page. Lighthouse will automatically compress theworkspacefolder and download it to your local computer through the browser. Keep this archive safe, because you will need it later when restoring memories.
Step 2: Upgrade the Application Template by Reinstalling the System
This section walks you through using Lighthouse Reinstall System to upgrade the OpenClaw application template.
⚠️ Note: The instance will be forcibly shut down during reinstallation. After the reinstall is complete, all data on the system disk will be erased and restored to the initial state. This action cannot be undone, so proceed with caution.
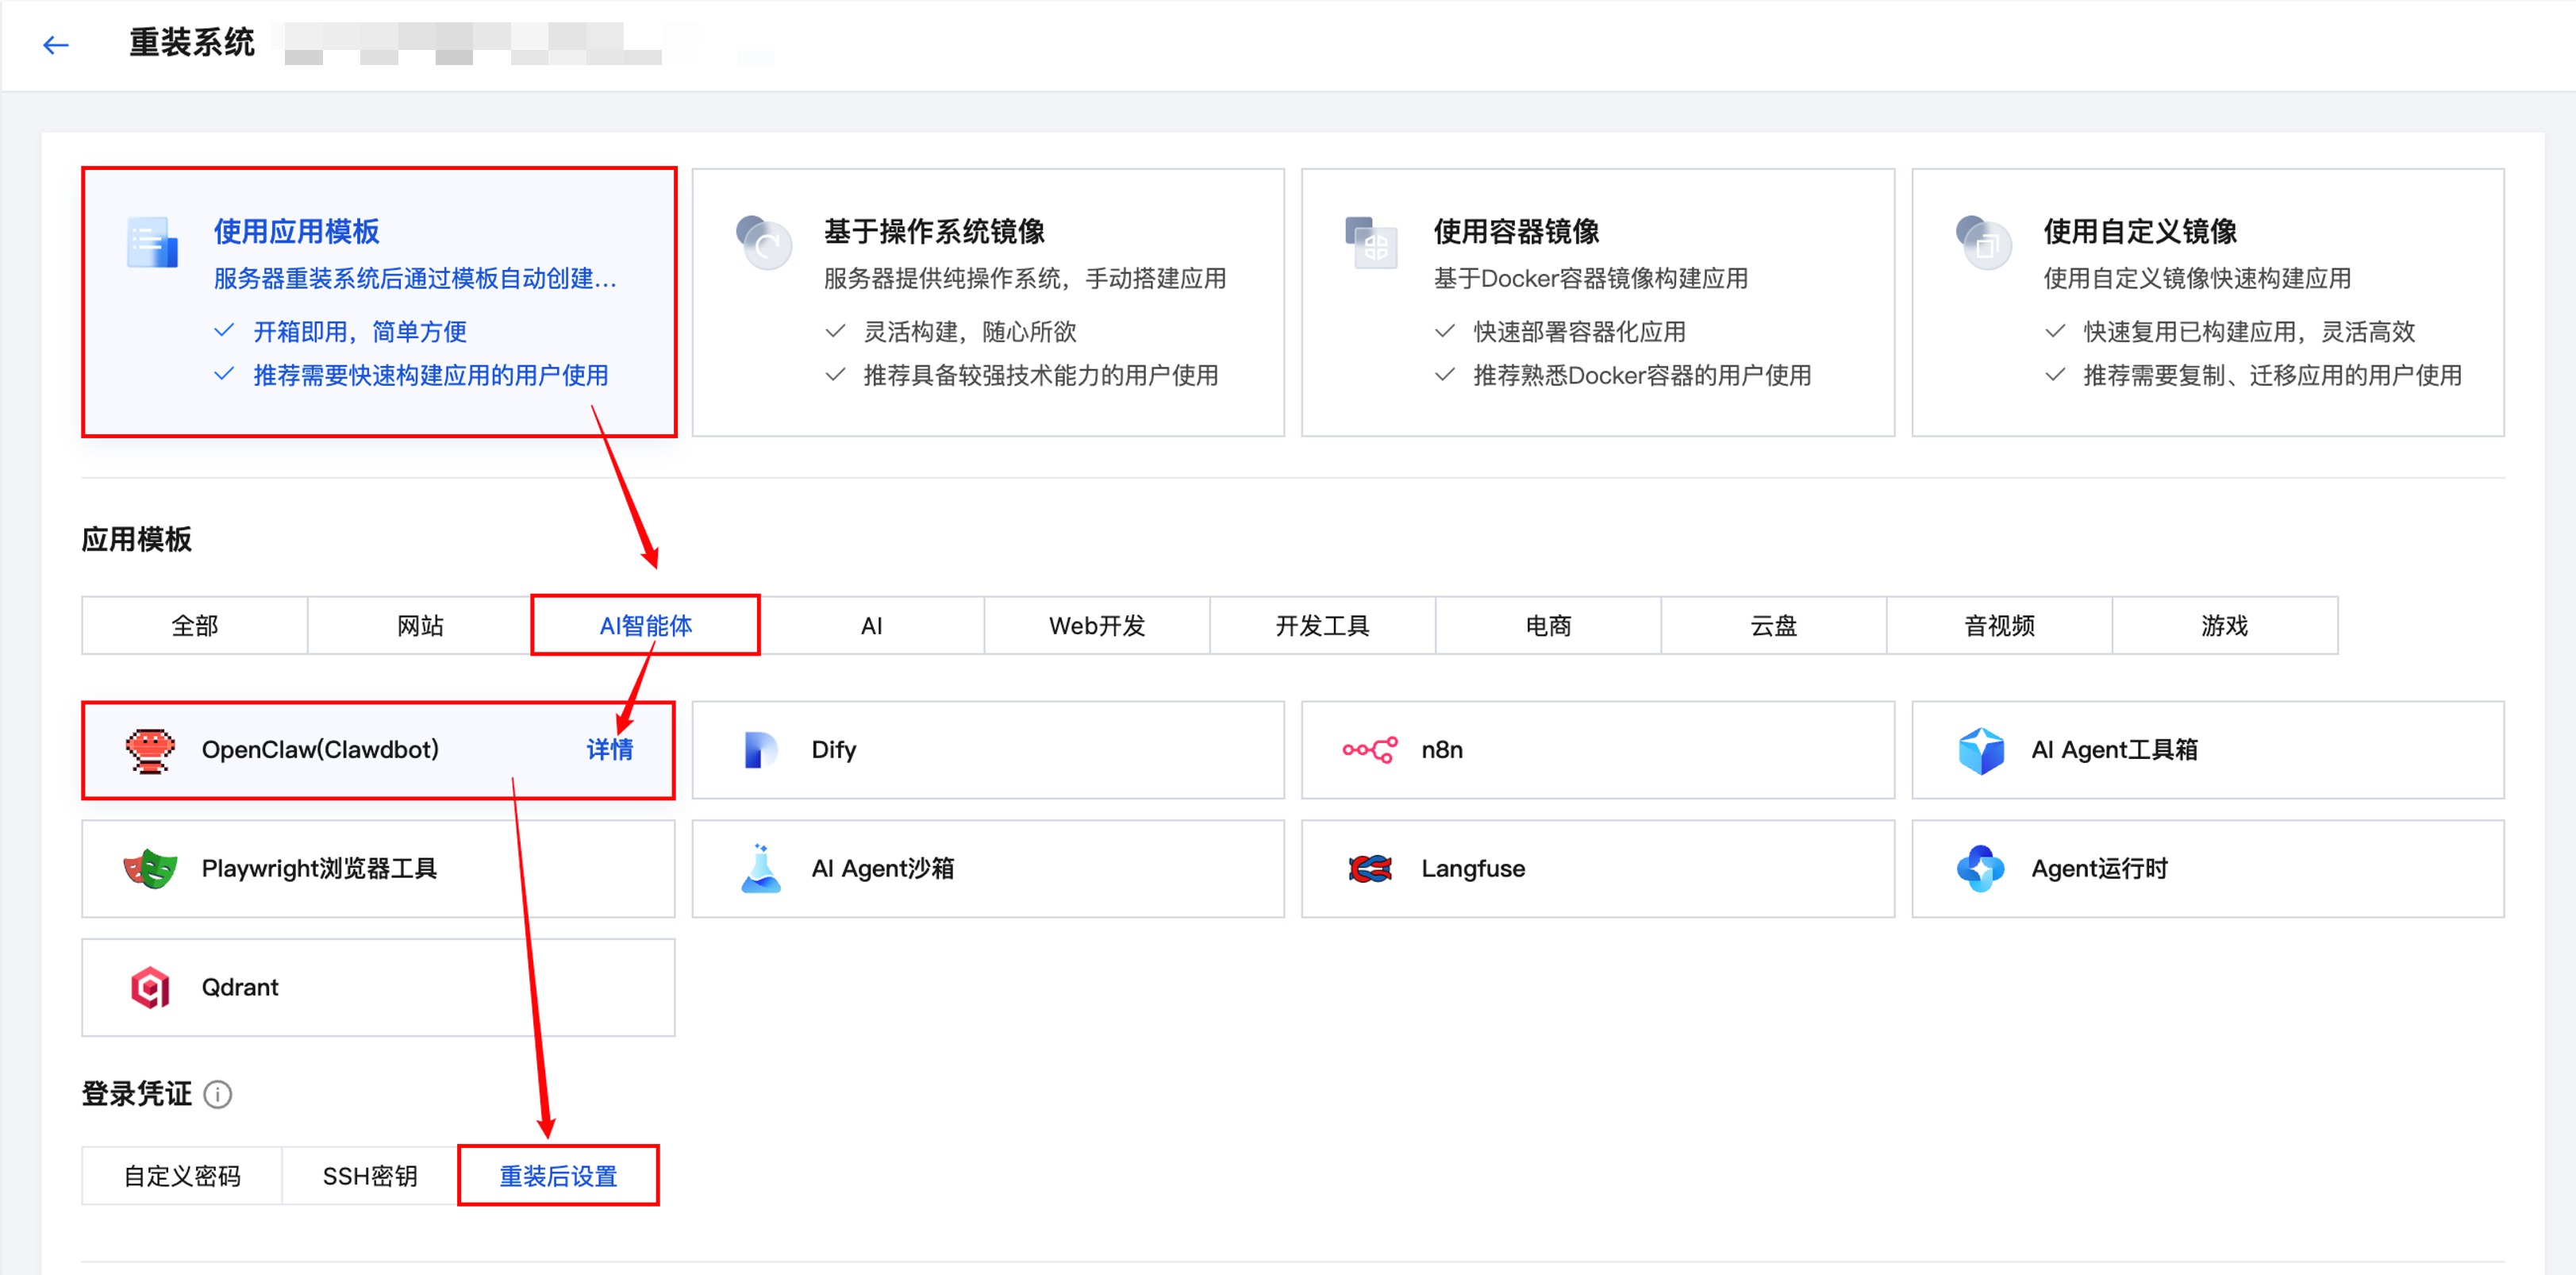
- In the Lighthouse instance list or on the instance details page, click Reinstall System from the “···” menu or More Actions to enter the reinstall page:
- On the reinstall page, choose Application Template > AI Agent > OpenClaw in sequence. For the login credential, you can temporarily choose Set after reinstall.
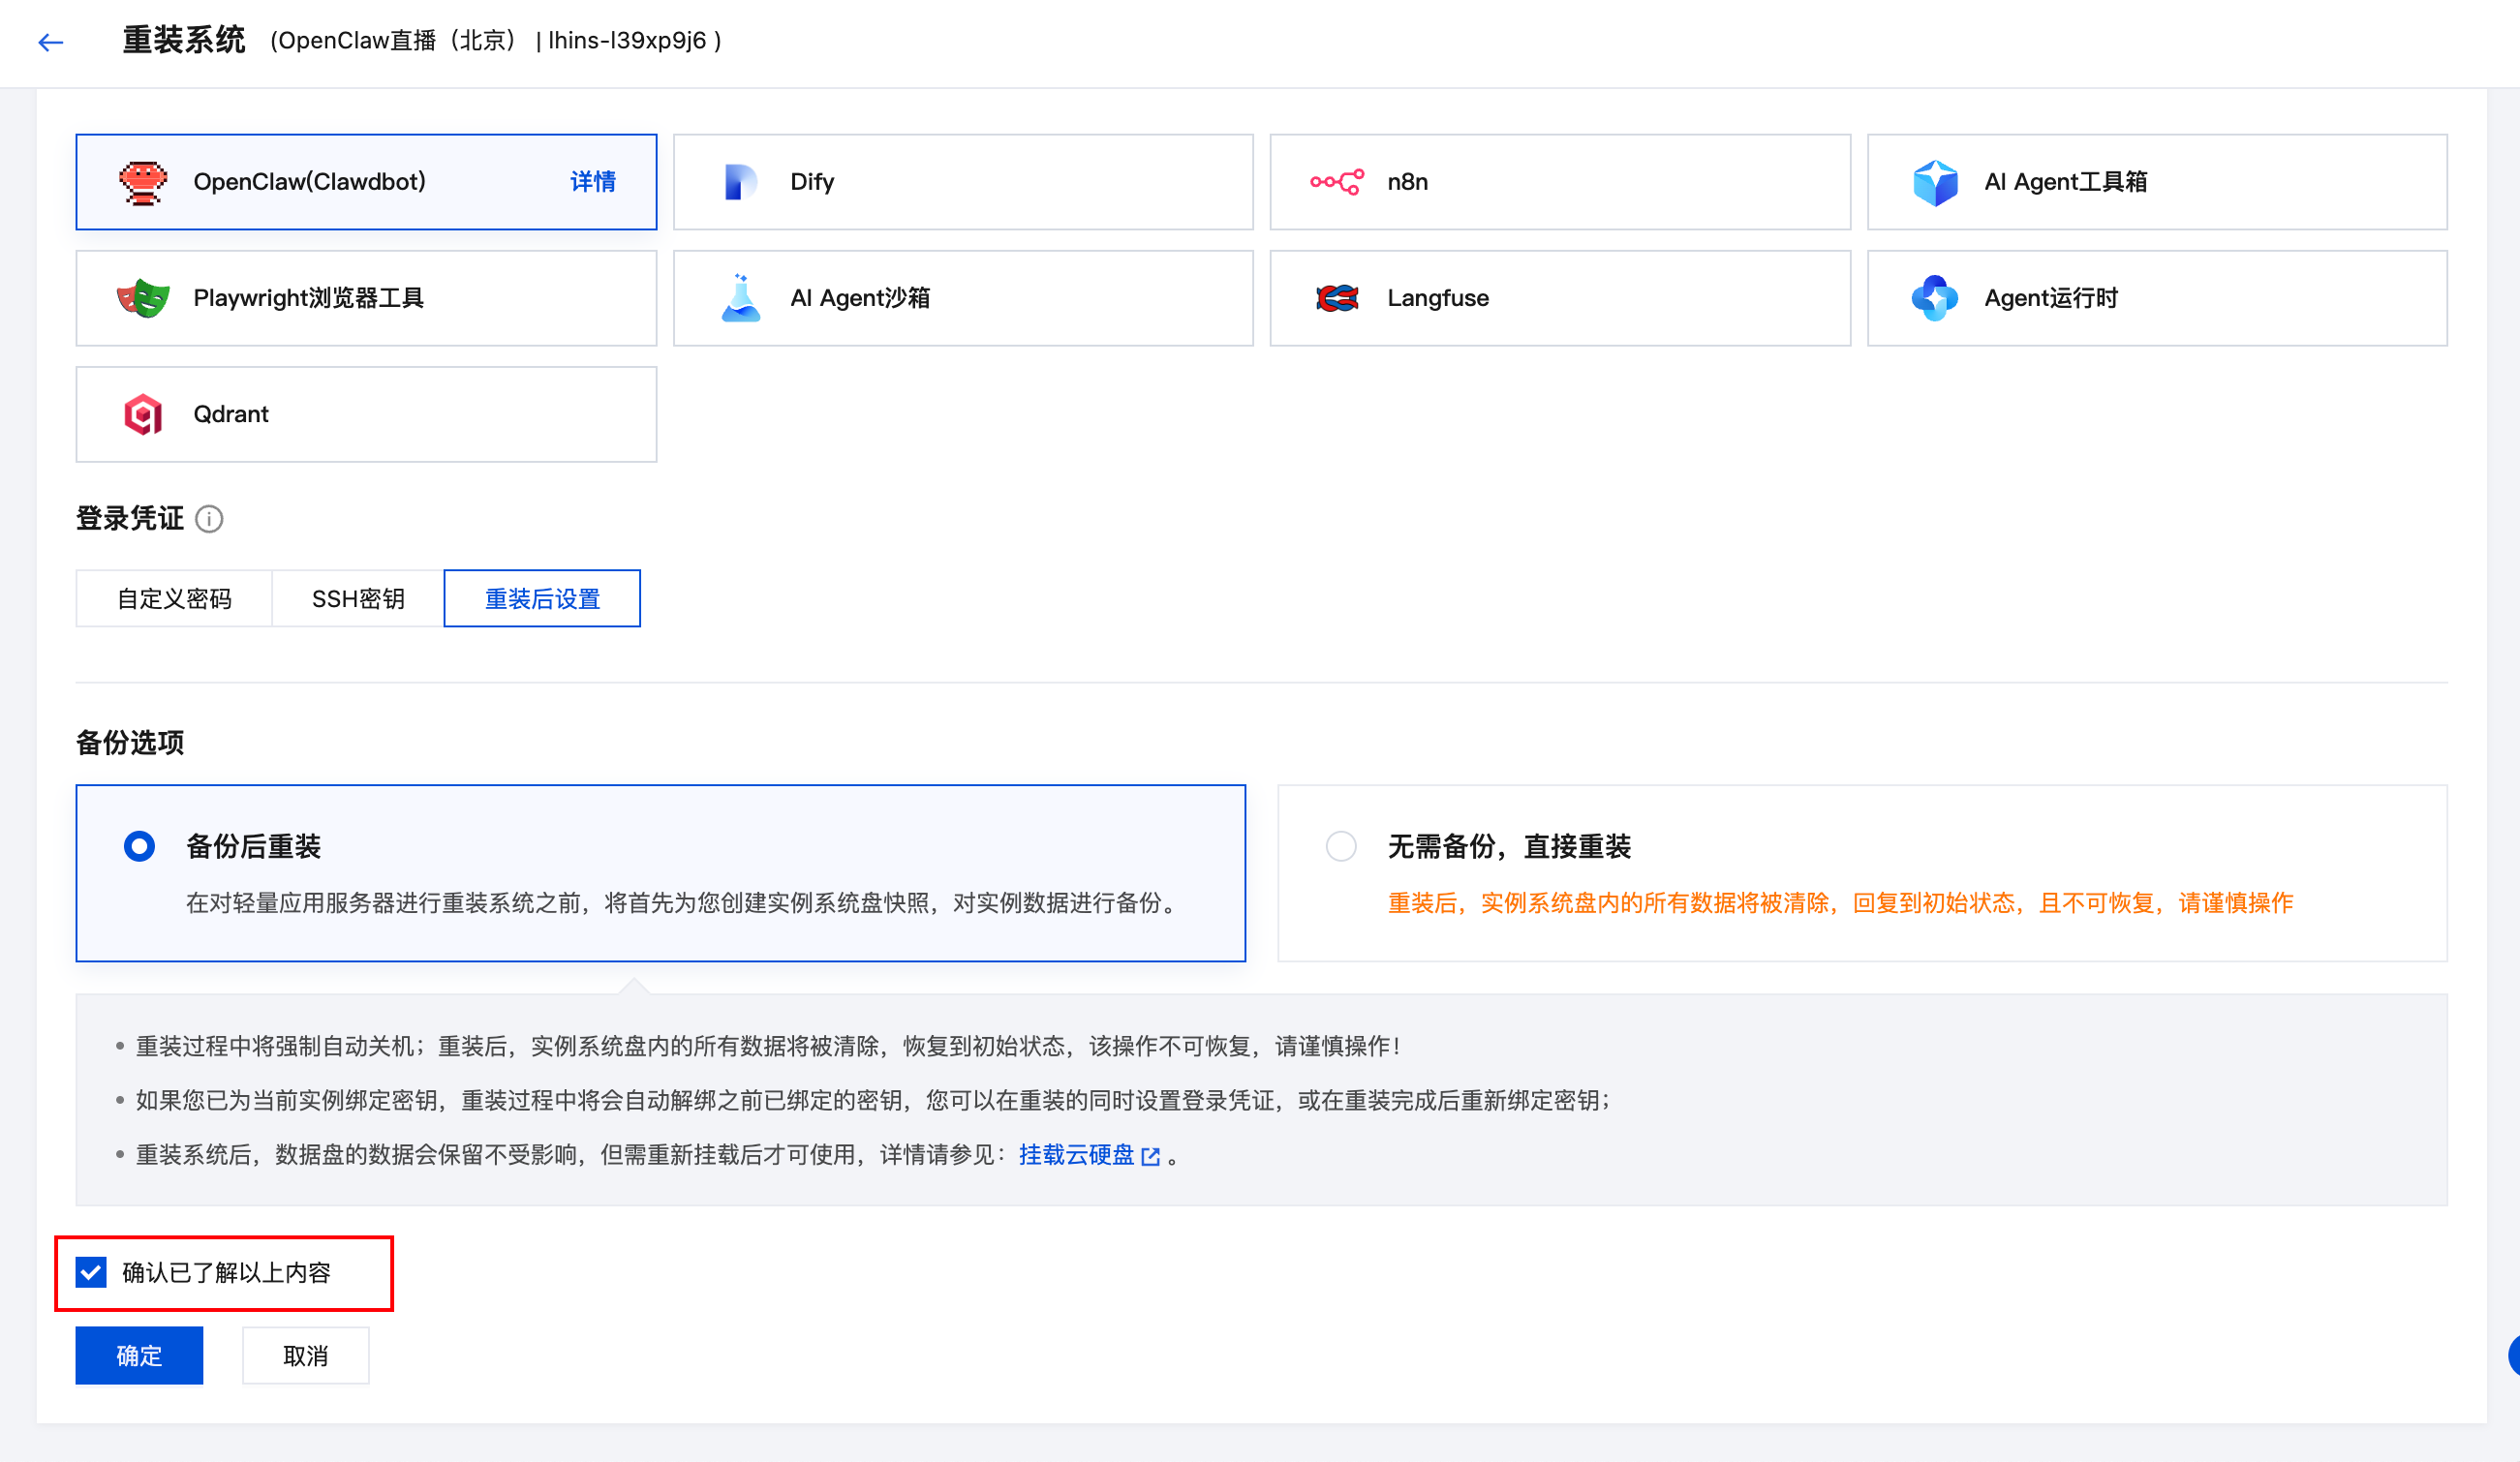
- Scroll down and choose a backup option according to your situation:
ℹ️ Note: The backup here is based on the Lighthouse snapshot capability. It preserves all data on the instance system disk at a specific point in time. If you need to restore later, the instance will be rolled back to the state captured in that snapshot.
In most cases, we recommend choosing Back up and then reinstall to maximize recoverability of the current instance data. If you are certain the current data can be discarded completely, you can also choose Reinstall directly without backup.
- At the bottom of the page, check I have understood the above content, and click Confirm. Wait a moment. When the instance status returns to Running, the reinstall has finished.
After the reinstall is complete, go to the instance Firewall page and check whether port 18789 is open.
Step 3: Restore OpenClaw Memories
Note: If your workspace is larger than 500 MB, we recommend referring to the File Transfer Guide and using a method that is better suited for large file uploads.
After the reinstall, you should first refer to Mastering OpenClaw | One-Click, Seconds-Level Deployment Guide for OpenClaw (Clawdbot) on the Cloud to reconfigure the Model and Channel settings. Once the core capabilities in the new environment are working, proceed to restore memories.
- Log in to the Lighthouse Console, open the File Management tab of the server details page, and enter the following path in the path box:
/root/.openclaw/
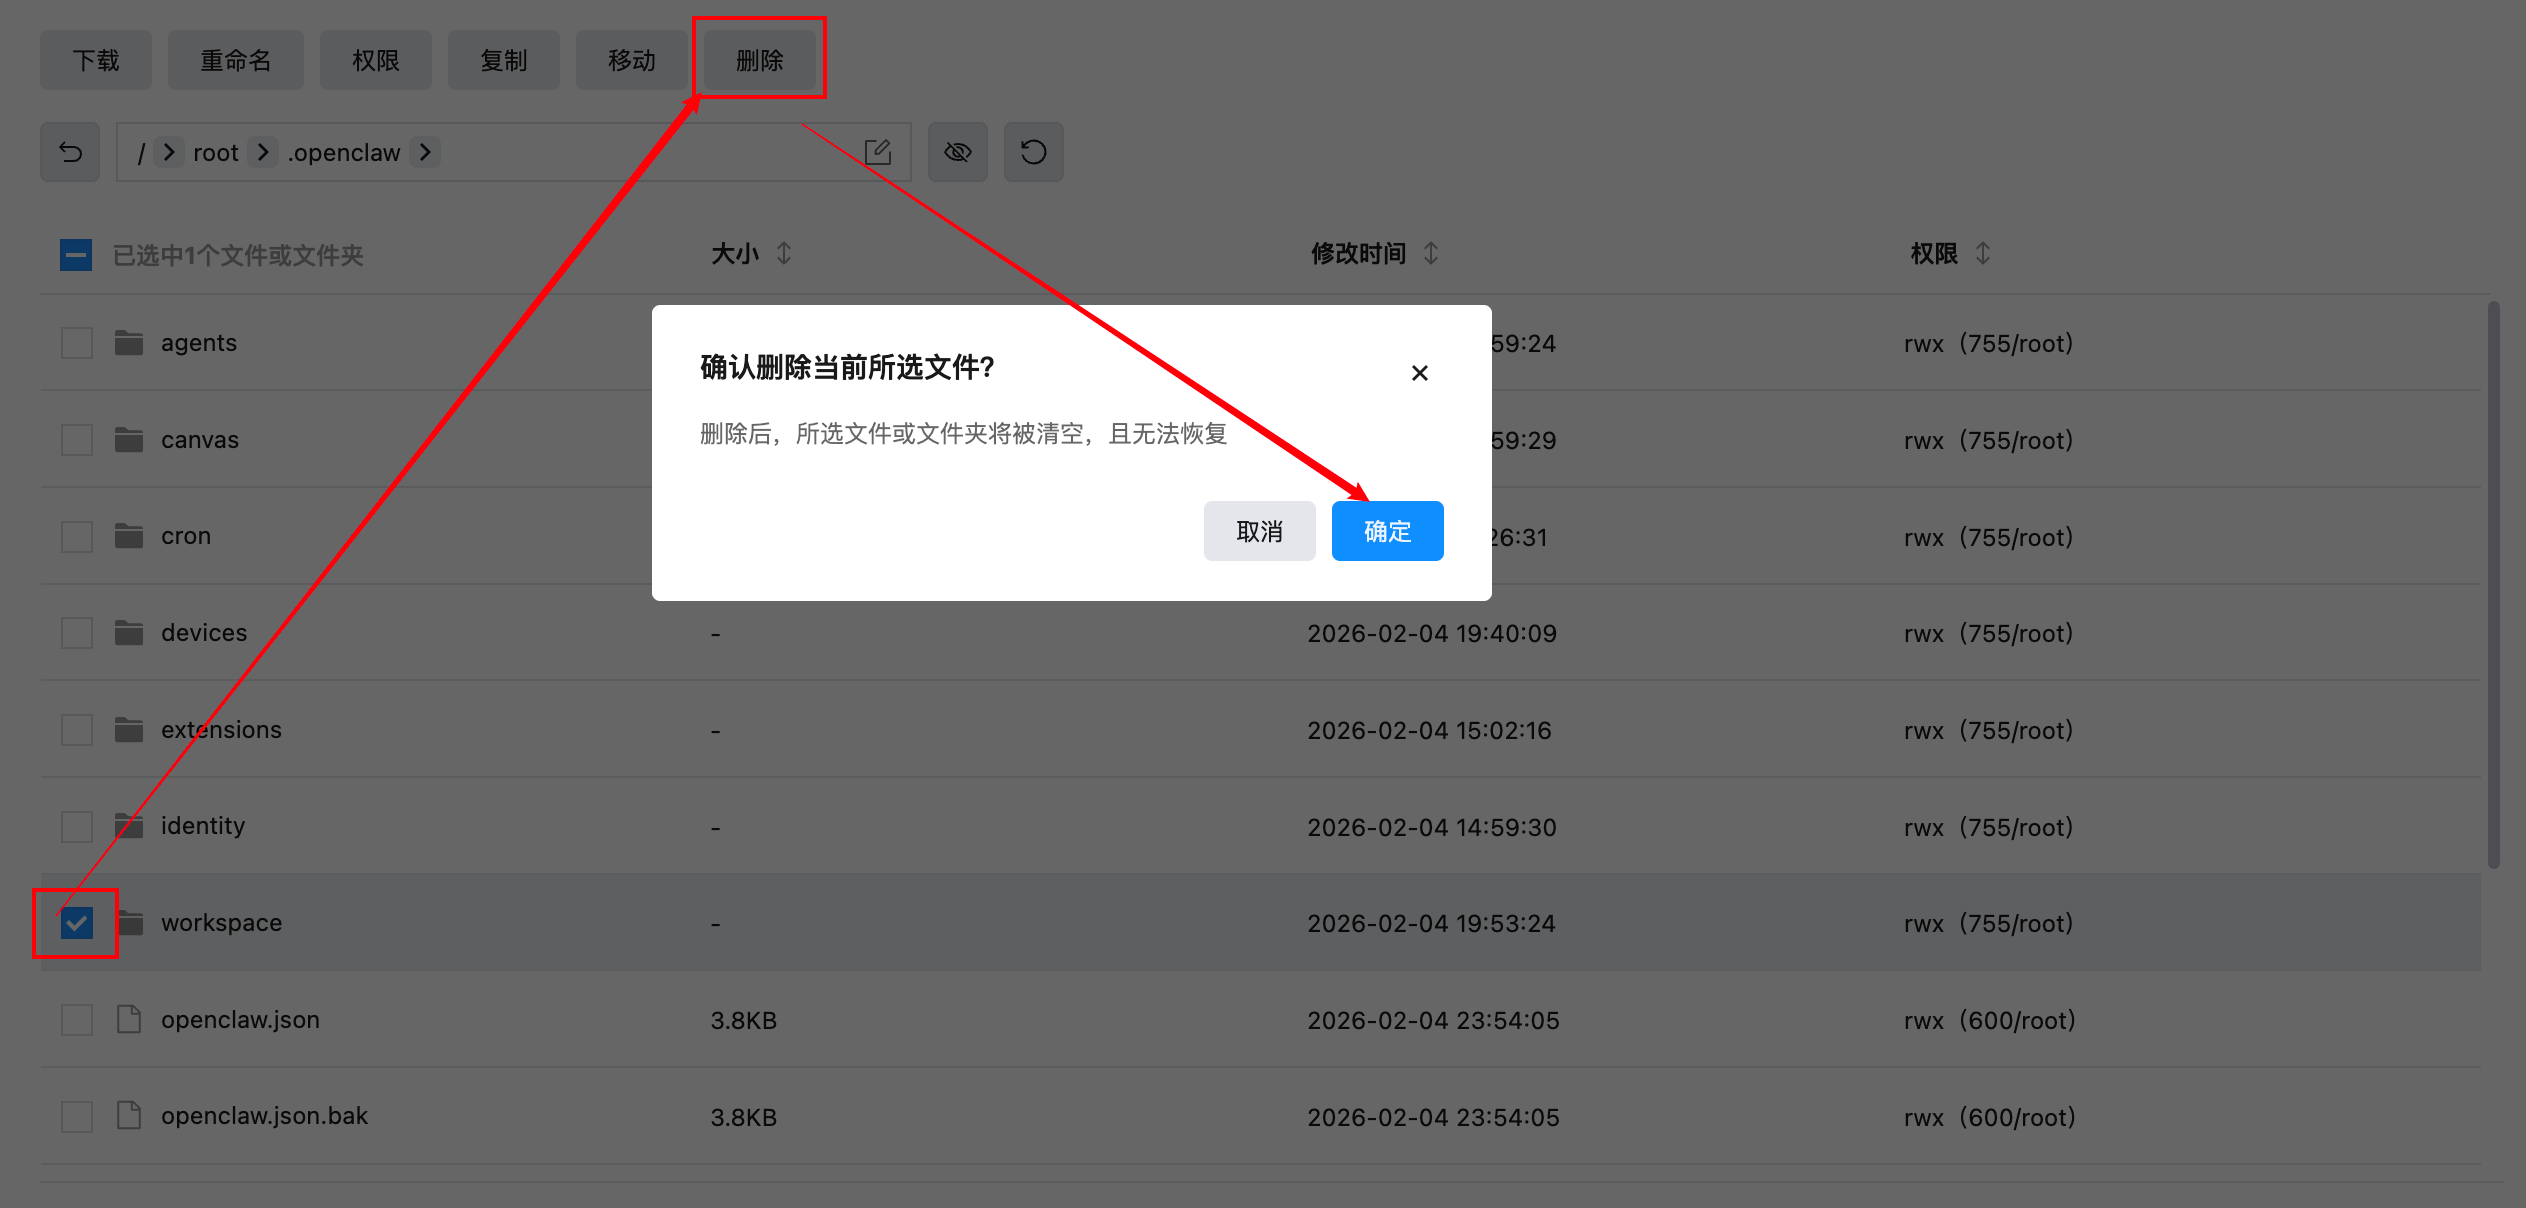
- Locate the
workspacefolder, select it, and click Delete to remove the current blank or default workspace:
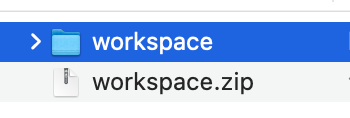
- On your local computer, extract the
workspacearchive you saved earlier in the “Download OpenClaw Memories to Your Local Device” step:
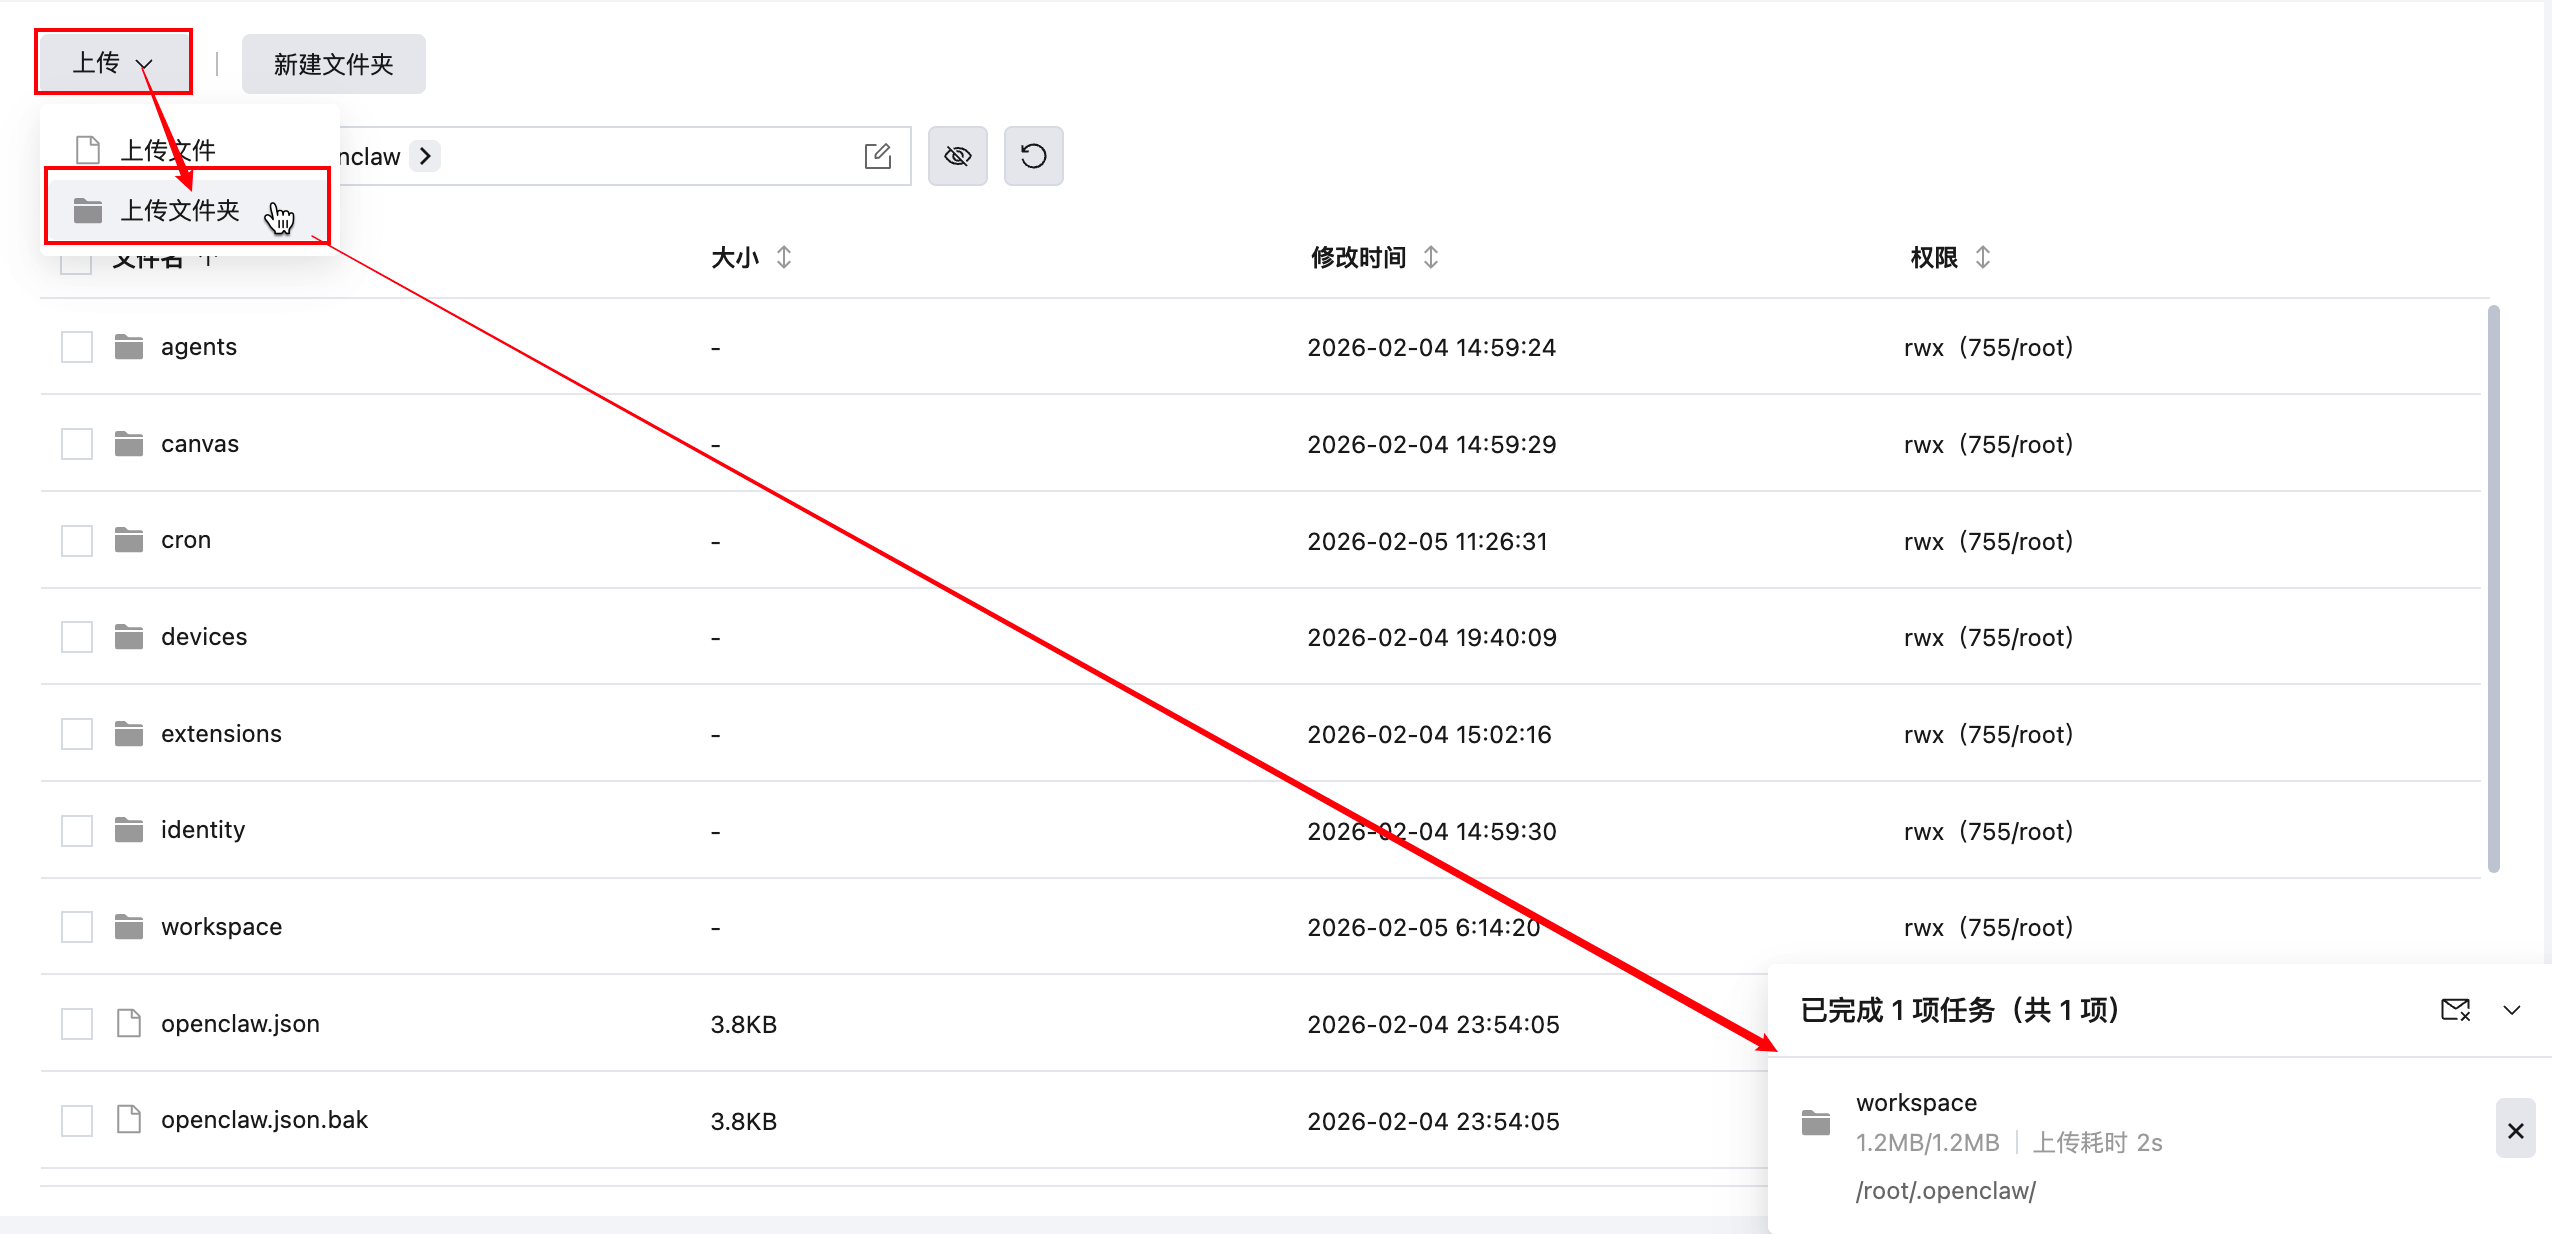
- Return to the Lighthouse File Management page, choose Upload > Upload Folder, and upload the extracted
workspacefolder to/root/.openclaw/:
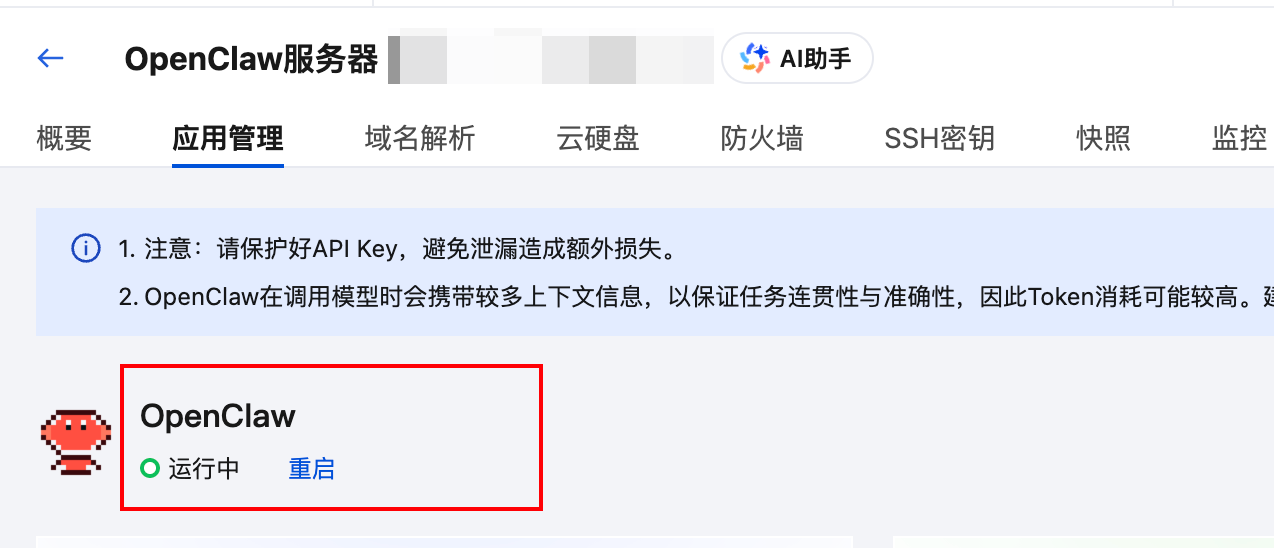
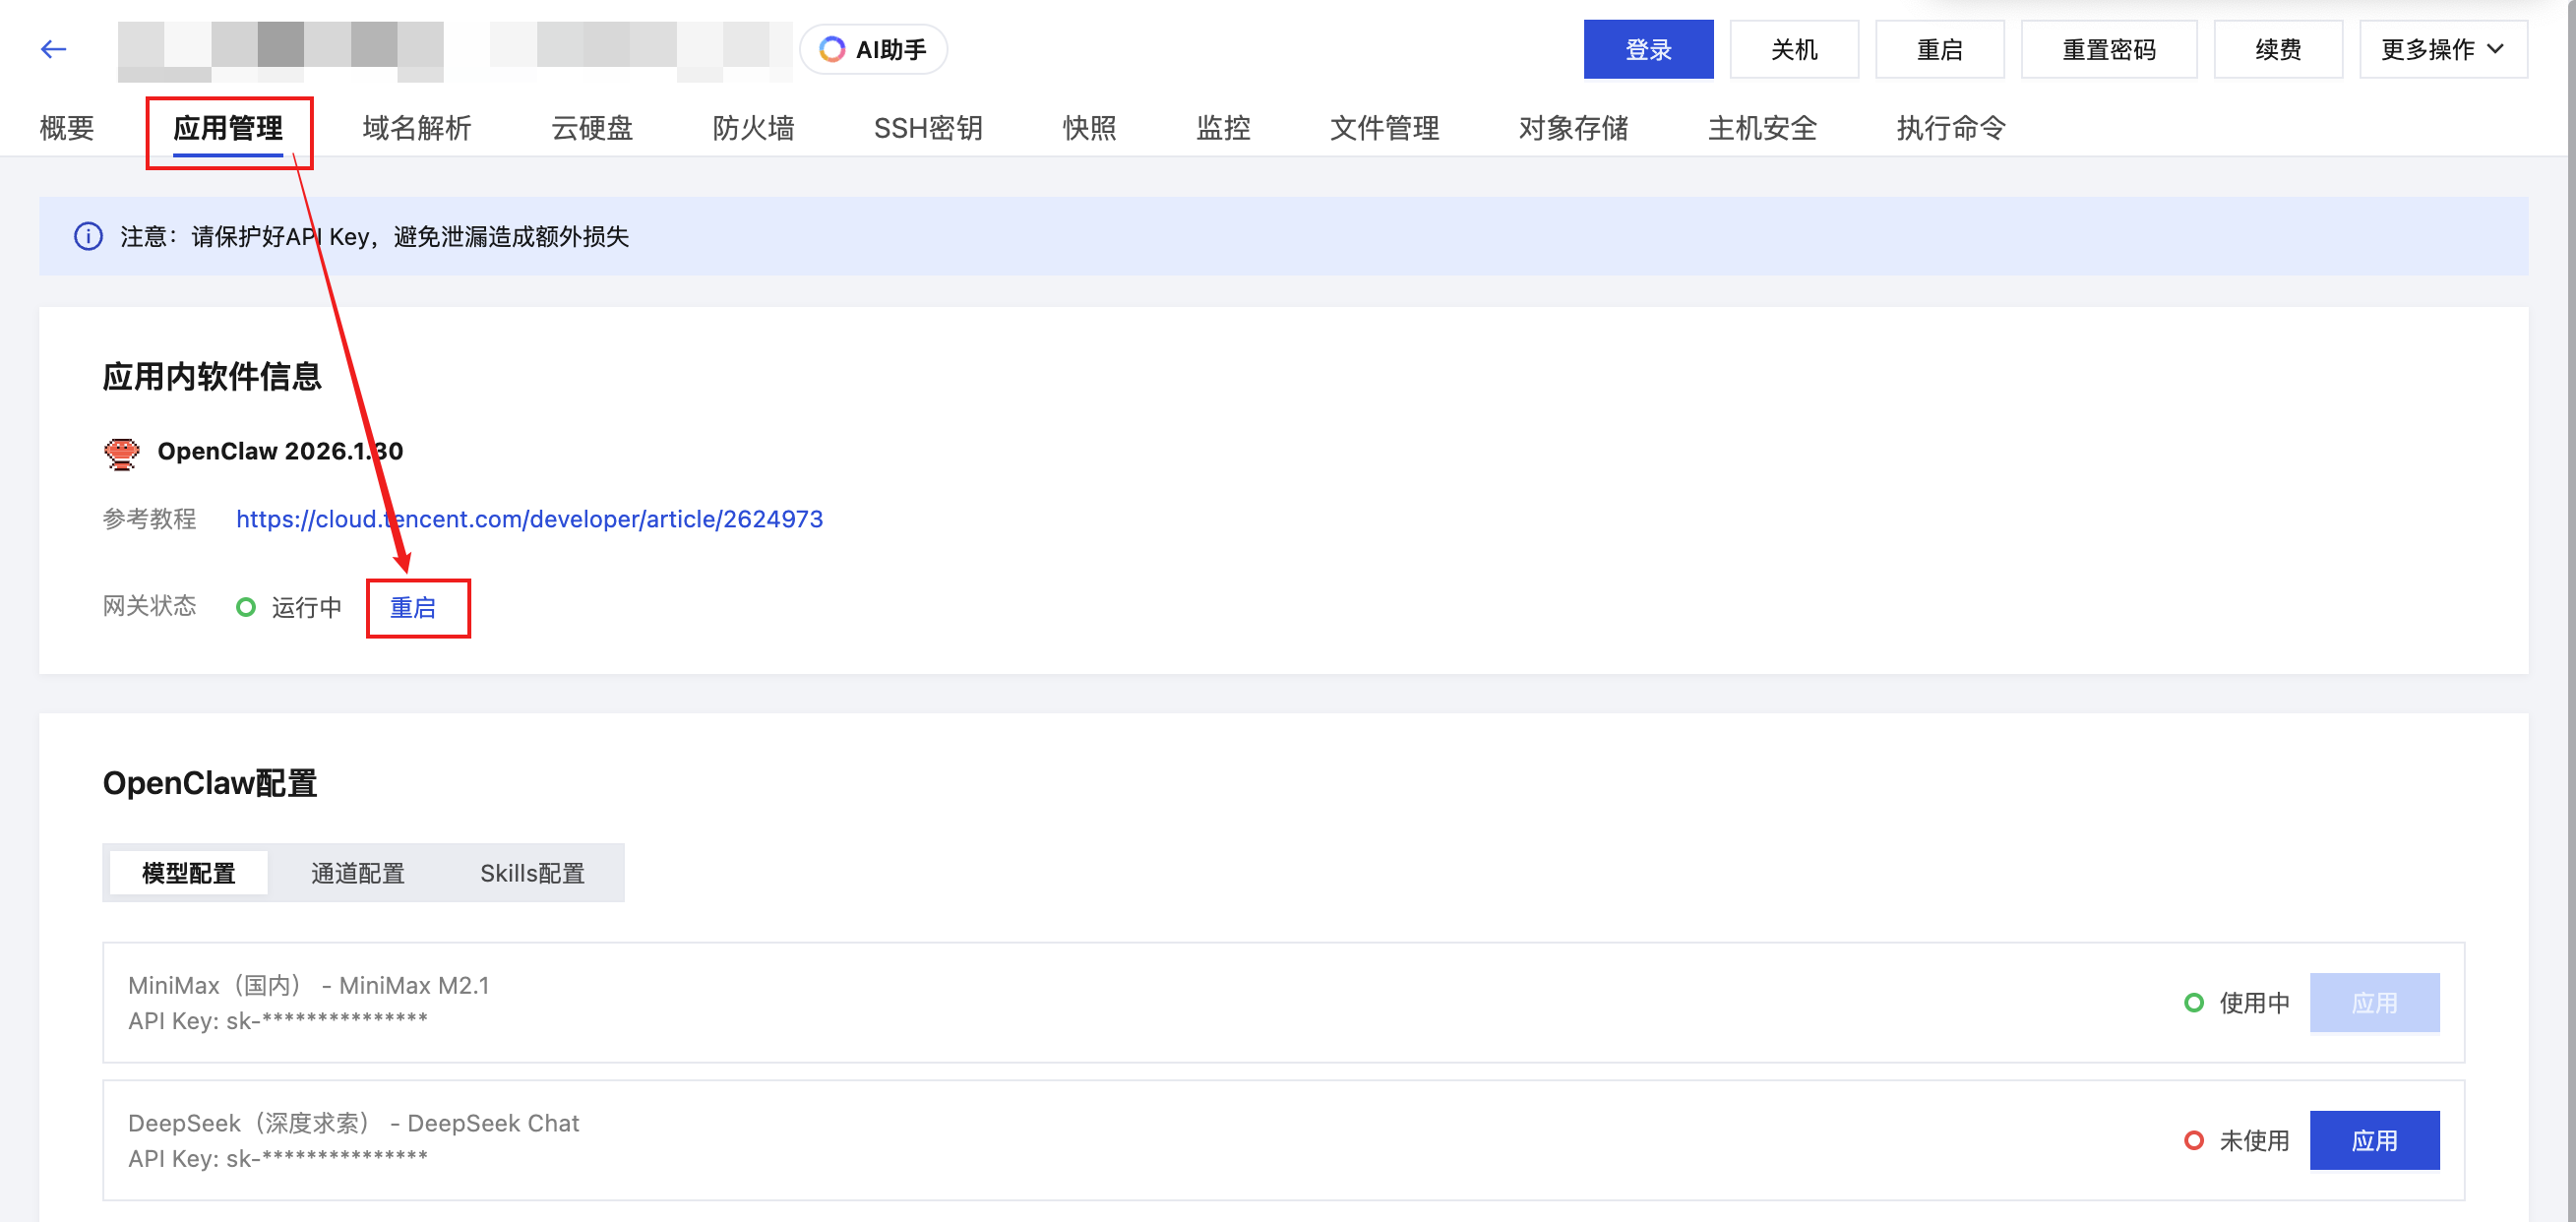
- After the upload is complete, go to the OpenClaw application management page and click Restart so the gateway reloads the workspace:
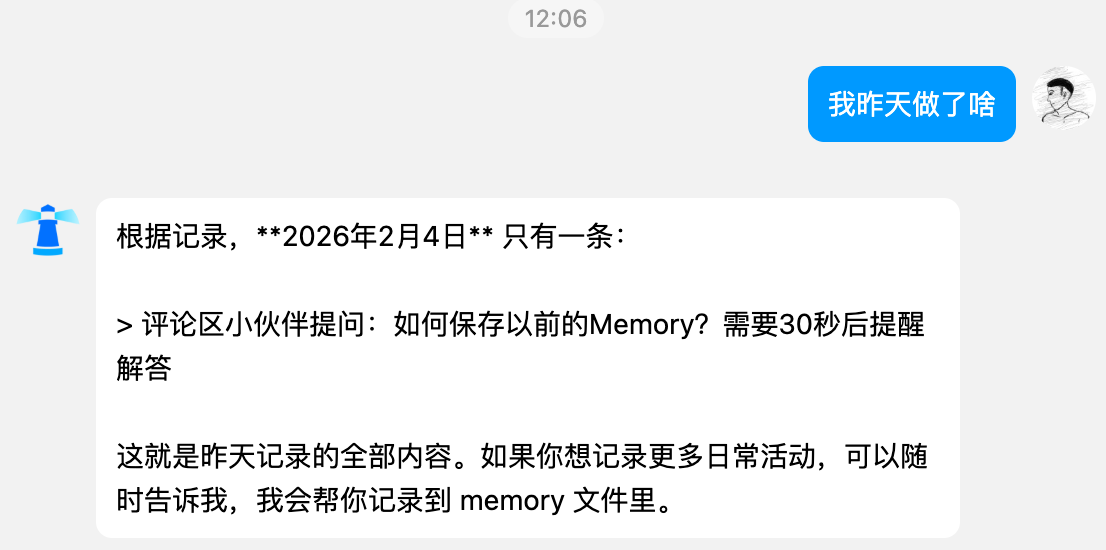
Step 4: Verify That the Memories Have Been Restored
After completing the above operations, you can return to the actual conversation window you use in practice, ask a question related to memory, and verify whether the reinstalled OpenClaw has successfully “inherited” the previous memories. The example below uses a QQ Bot.
🚀 Developer Community & Support
1️⃣ OpenClaw Developer Community
Unlock advanced tips on Discord
Click to join the community
Note: After joining, you can get the latest plugin templates and deployment playbooks
2️⃣ Dedicated Support
Join WhatsApp / WeCom for dedicated technical support
| Channel | Scan / Click to join |
|---|---|
| WhatsApp Channel |

|
| WeCom (Enterprise WeChat) |

|
Learn more on the official page: Tencent Cloud OpenClaw