How to Quickly Get Started with Large Language Models: OpenAI Codex (OAuth) Configuration Tutorial
Want to quickly connect your OpenClaw to OpenAI's large language model? This tutorial will guide you step by step through configuring OpenAI Codex via OAuth authorization. The entire process takes only 1 minute!
1. Prerequisites
Before starting the configuration, make sure you meet the following requirements:
| Requirement | Description |
|---|---|
| OpenClaw System | Deployed and running properly (version 2026.4.8 or above recommended) |
| OpenAI Account | A valid ChatGPT account (Free or Plus plan) |
| Network Environment | Able to access the OpenAI official website |
💡 Tip: The OpenAI Codex (OAuth) method does not require manually obtaining an API Key — simply authorize with your ChatGPT account. It's perfect for beginners to get started quickly!
2. Detailed Configuration Steps
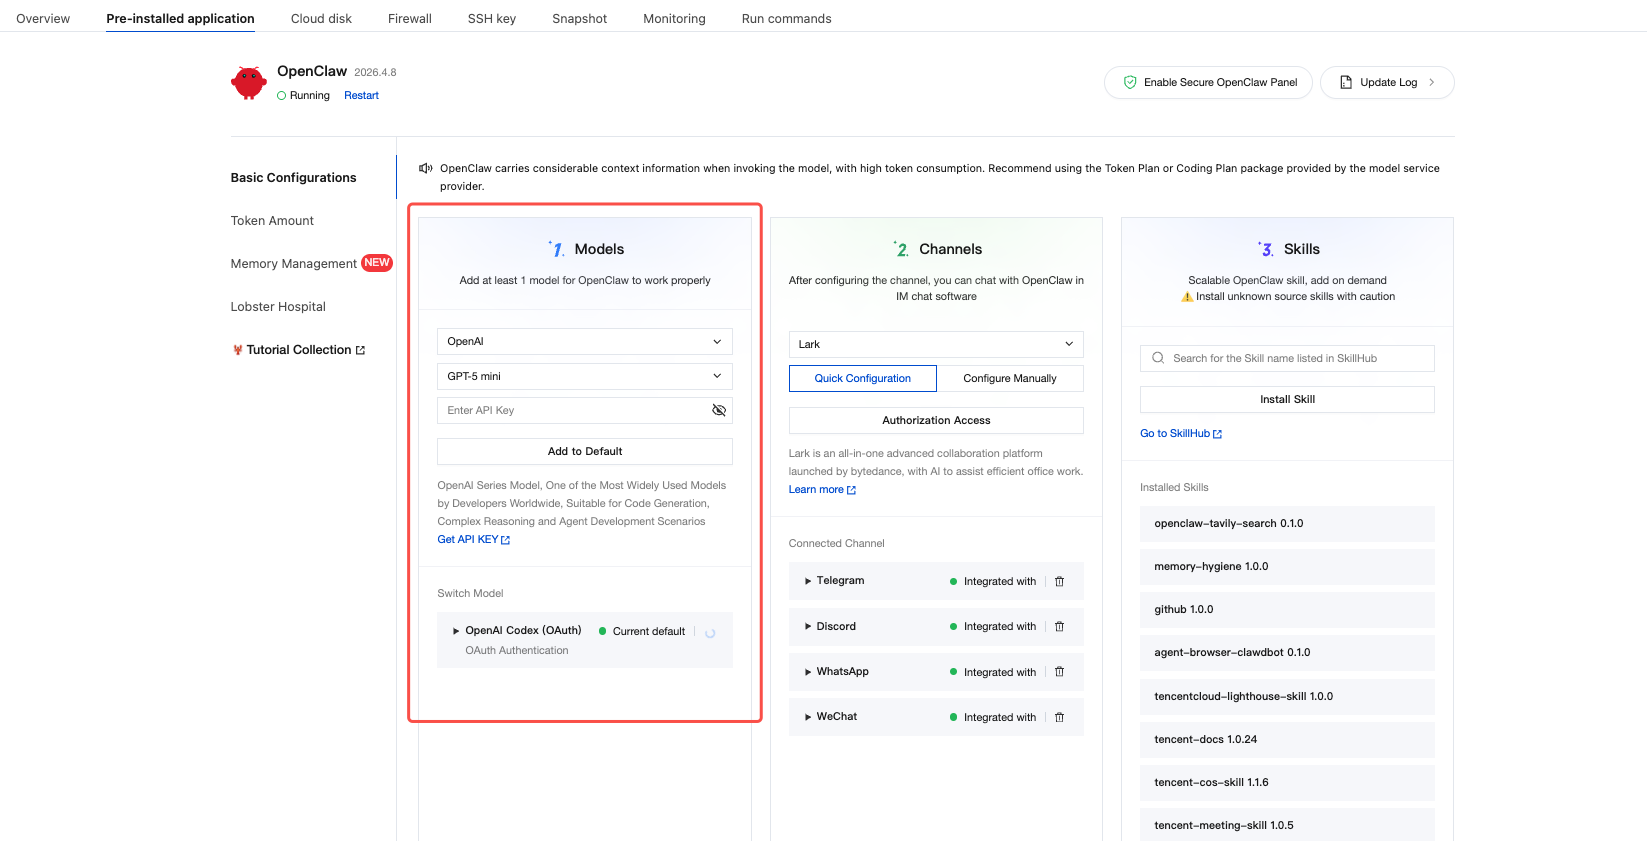
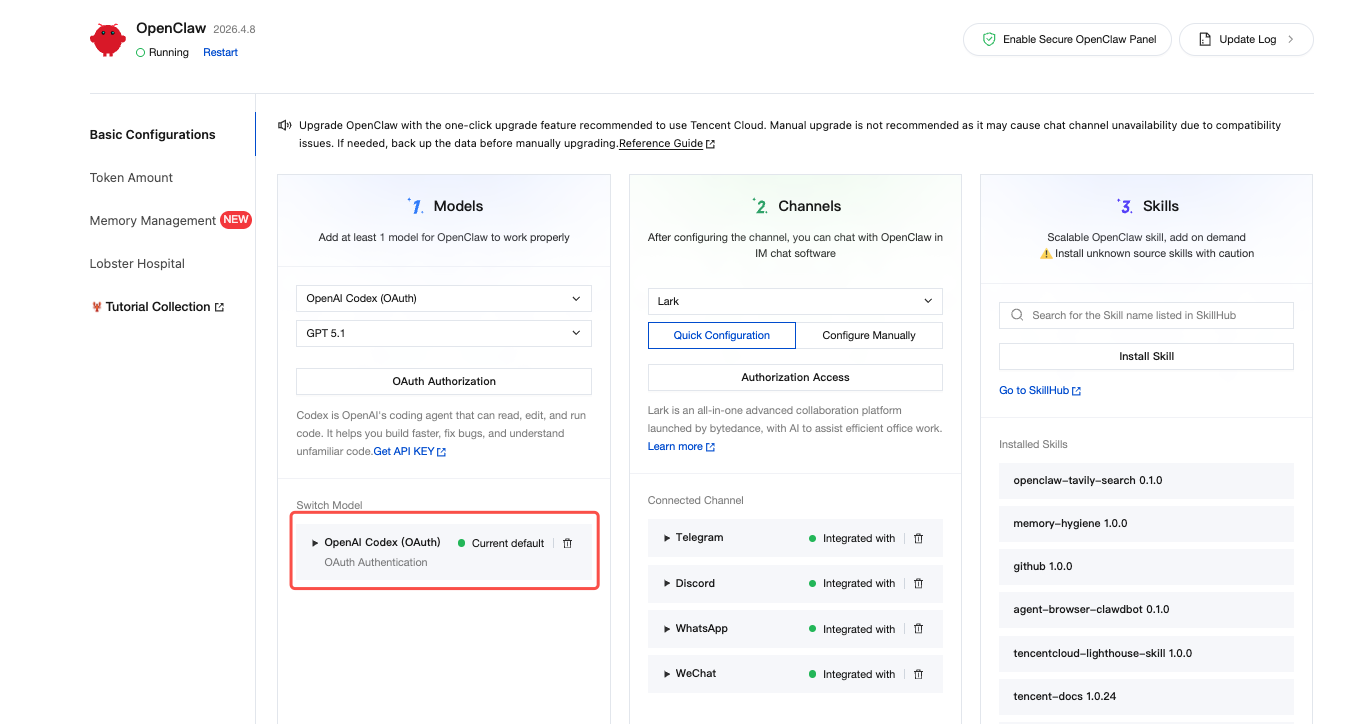
2.1 Step 1: Go to Basic Configuration and Select a Model
- Log in and navigate to the Lighthouse OpenClaw management panel
- Click on "Basic Configuration" in the left sidebar menu
- Locate the first step — the "Models" configuration area
- Click the model selection dropdown to expand the menu
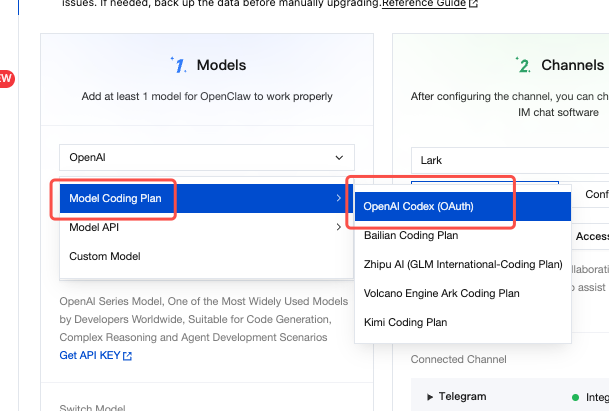
- Select "Model Coding Plan" → "OpenAI Codex (OAuth)"
⚠️ Note: The dropdown menu also includes other options such as Bailian, Zhipu AI, Volcengine, Kimi, etc. This tutorial uses OpenAI Codex as an example.
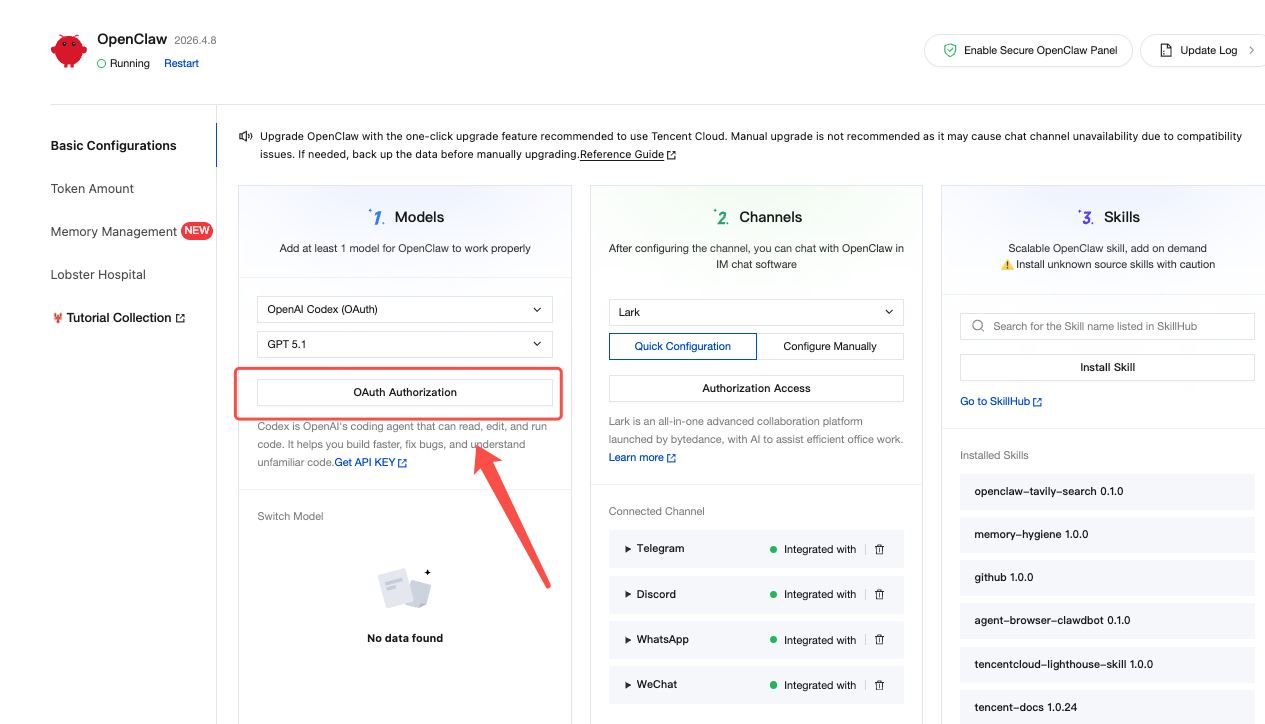
2.2 Step 2: Initiate the OAuth Authorization Request
After selecting the model, the system will automatically display a "Waiting for OAuth Authorization" window.
-
Confirm the model provider is displayed as "OpenAI Codex (OAuth)"
-
Click the blue link "Click to authorize" — your browser will automatically redirect to the OpenAI website
💡 Tip: Do not close the OpenClaw authorization window at this point — you will need to return to it later to paste the verification link.
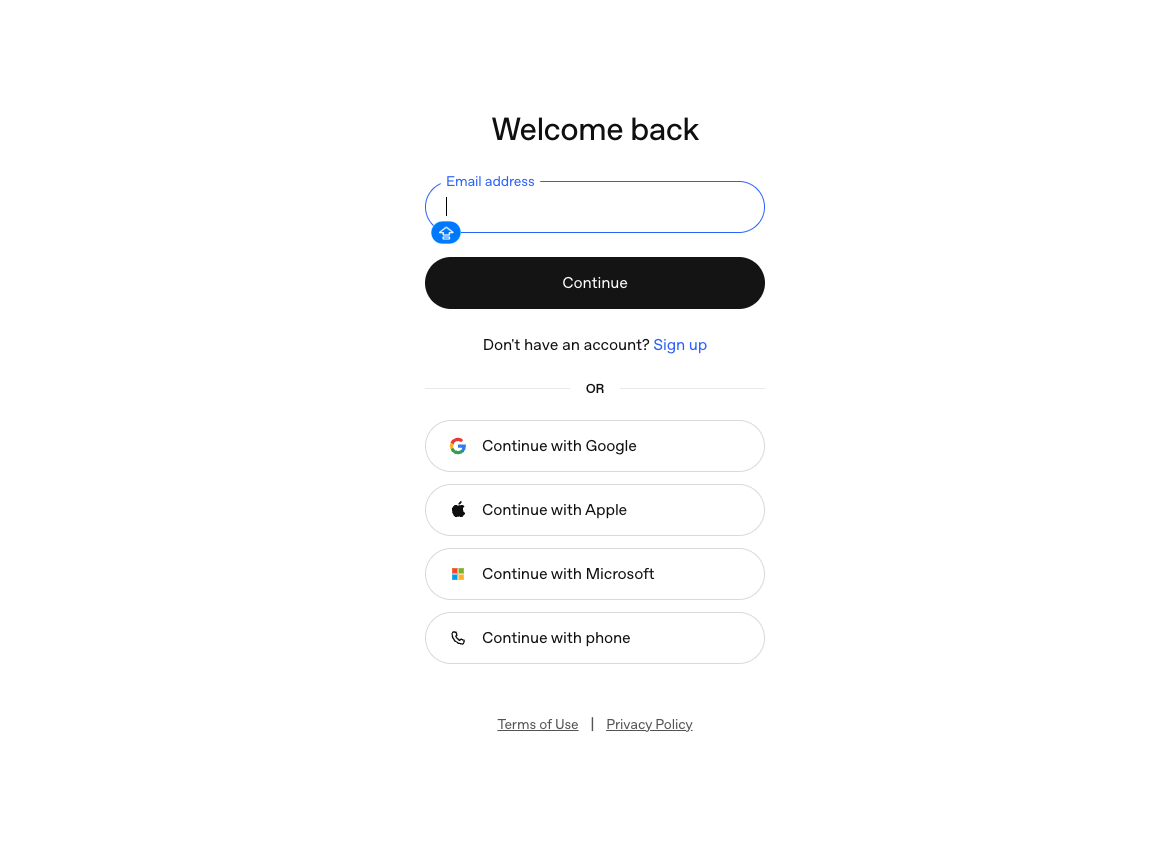
2.3 Step 3: Log in to Your OpenAI Account
After being redirected to the OpenAI website, you will see the "Welcome back" login page.
Choose any of the following login methods:
| Login Method | Instructions |
|---|---|
| Email Login | Enter your registered email and click "Continue" |
| Google Account | Click "Continue with Google" |
| Apple Account | Click "Continue with Apple" |
| Microsoft Account | Click "Continue with Microsoft" |
| Phone Number | Click "Continue with phone" |
2.4 Step 4: Confirm Codex Access Authorization
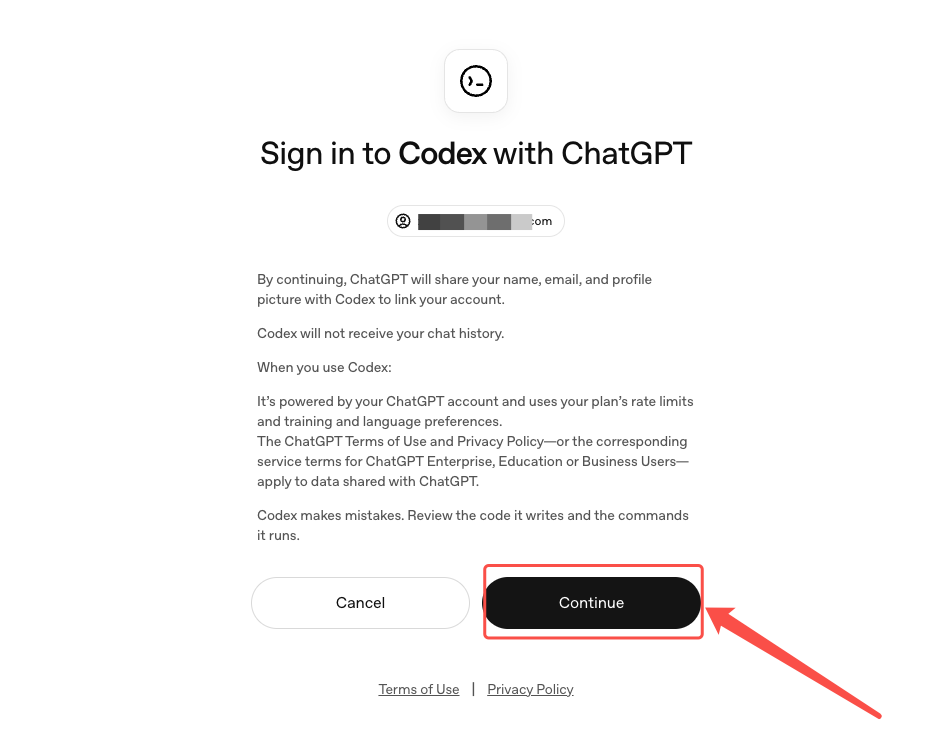
After successfully logging in, you will see the "Sign in to Codex with ChatGPT" authorization confirmation page.
Please read the authorization details carefully:
- ✅ ChatGPT will share your name, email, and profile picture with Codex
- ✅ Codex will use the rate limits of your ChatGPT plan
- ✅ Codex will not access your chat history
Once confirmed, click the blue "Continue" button on the right to complete the authorization.
2.5 Step 5: Copy the Authorization Callback Link
After successful authorization, the browser will redirect to a new page. Pay attention to the browser address bar:
- Find the complete URL in the address bar (it usually contains parameters such as
scope,state,openid,profile, etc.) - Select and copy the entire URL
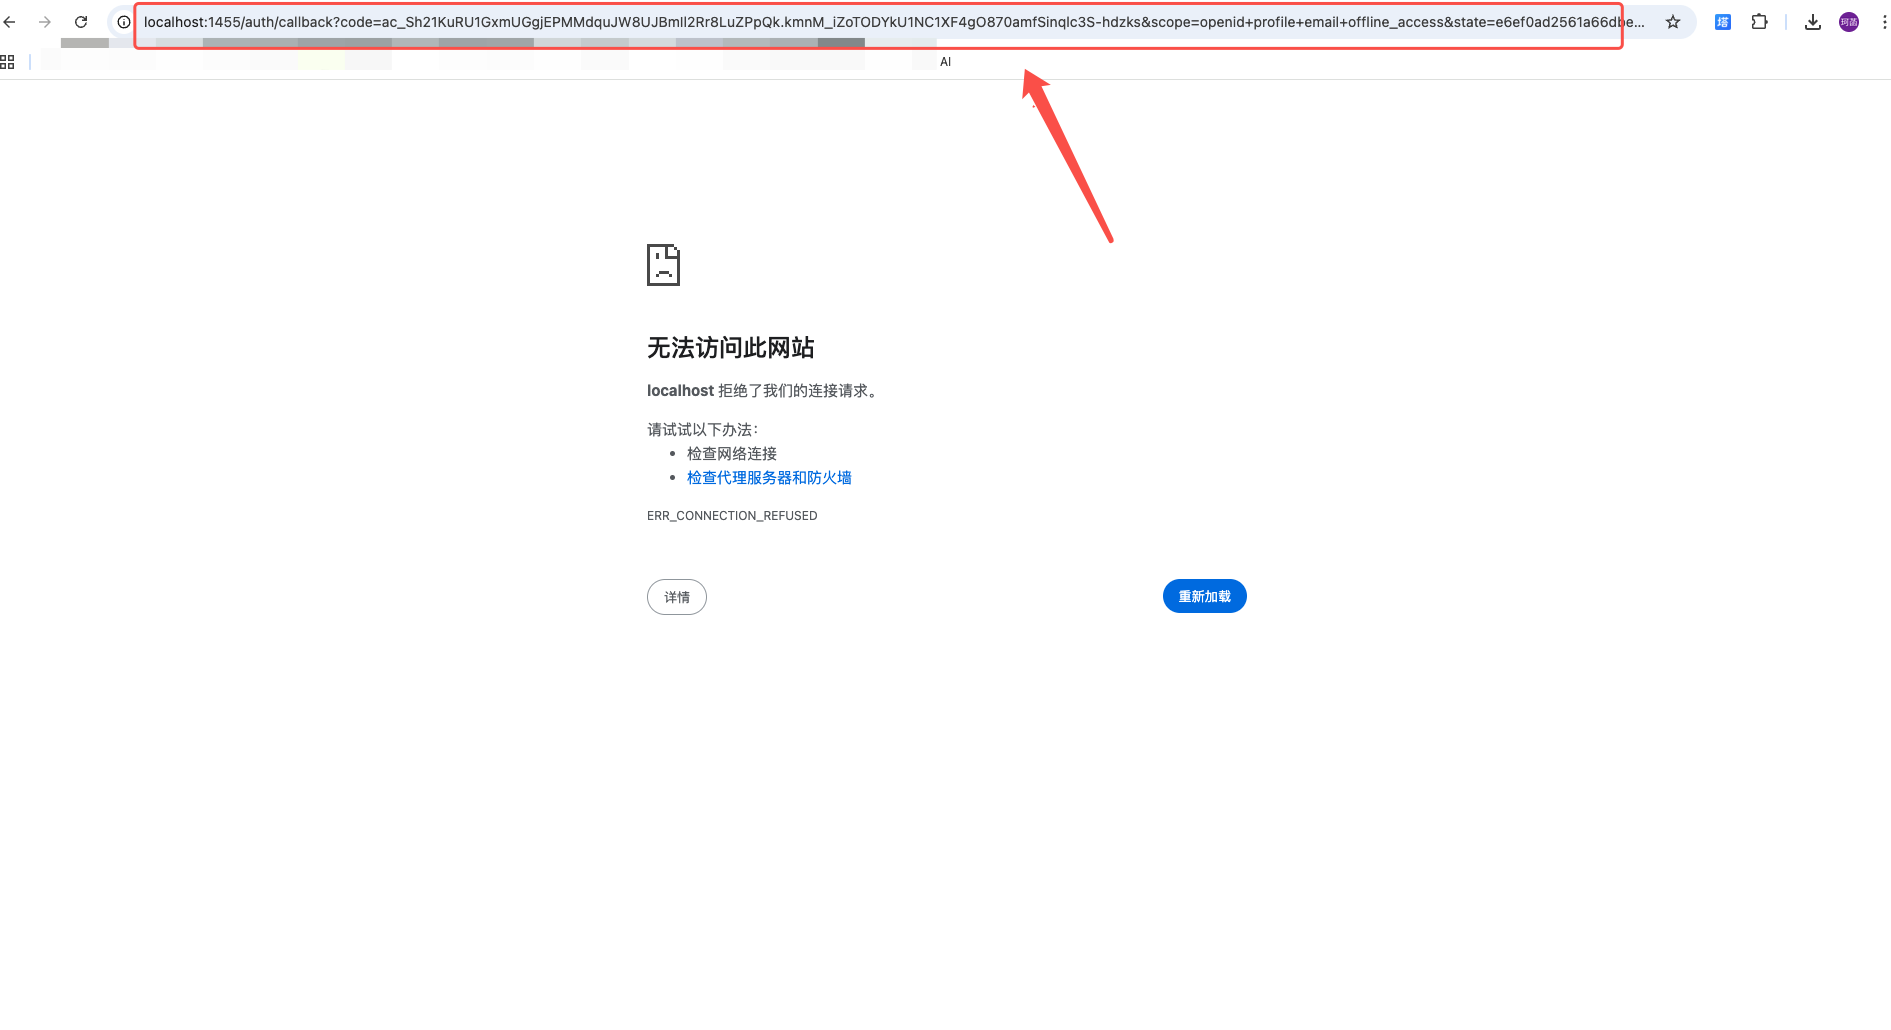
🔥 Important: This callback link is one-time use only. Make sure to copy it completely without missing any characters!
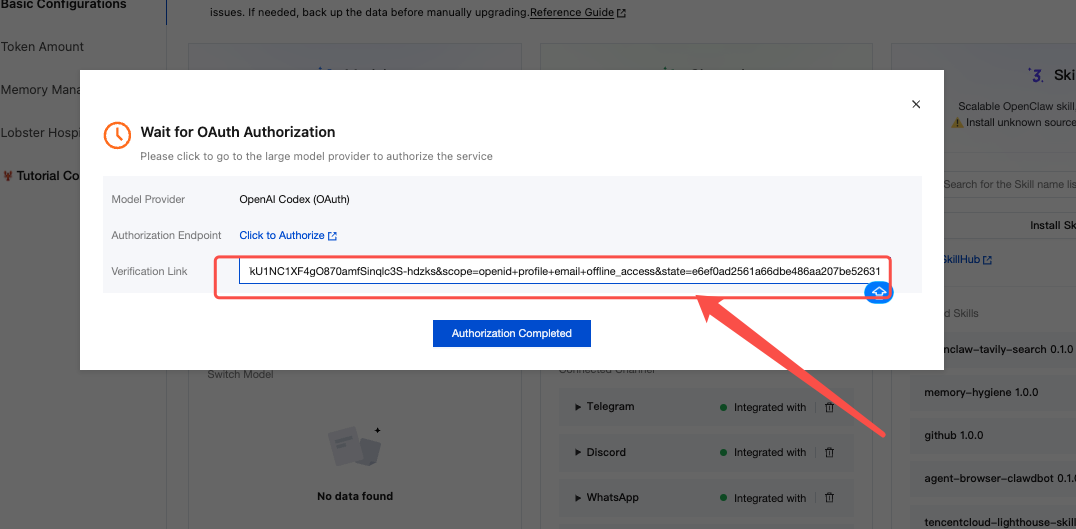
2.6 Step 6: Paste the Verification Link
Now return to the OpenClaw authorization waiting window:
- Find the "Verification Link" input field (highlighted with a red border)
- Paste the complete callback URL you just copied
- Click the blue submit icon on the right side of the input field
2.7 Step 7: Complete the Configuration
Final step:
Click the blue button "I have completed authorization" at the bottom 🎉
The system will automatically verify your authorization information. If everything is correct, the model status will change to "Connected", and you can start using it right away!
3. Post-Configuration Verification
After successful configuration, you can verify through the following:
| Verification Item | Expected Result |
|---|---|
| Model Status | Displays "Connected" or a green checkmark ✅ |
| Telegram Test | Send a code-related question and receive a reply |
4. Frequently Asked Questions (FAQ)
❓ Q1: What if the page doesn't load after clicking "Go to authorize"?
Check whether your network environment can access the OpenAI official website. If you encounter network issues, try switching networks and retrying.
❓ Q2: What if the pasted link shows a verification failure?
Please ensure:
- The link was copied completely (including all parameters)
- The link has not expired (complete the operation promptly after authorization)
- There are no extra spaces or line breaks
❓ Q3: Authorization succeeded but the model doesn't work?
Try clicking the "Restart" button in the OpenClaw panel to restart the service, then test again.
❓ Q4: Will OAuth authorization consume my ChatGPT quota?
Yes, Codex uses the rate limits of your ChatGPT account plan. If you are using a free account, there may be call frequency limitations.
❓ Q5: Can I configure multiple models at the same time?
Yes! You can add multiple model providers in the "Models" area. The current setup will automatically use the most recently added one.
🚀 Congratulations on completing the configuration! Go ahead and experience the power of AI-assisted coding! If you have more questions, feel free to check the "Tutorial Collection" or visit the community for discussions.
More Tutorials
For more practical tutorials on OpenClaw in the cloud
Such as one-click deployment of OpenClaw, integration with QQ/WeChat/DingTalk/Lark/Discord/Telegram/WhatsApp, installation and use of Skills, please see:Mastering OpenClaw | One-click, second-level deployment guide for OpenClaw (Clawdbot) in the cloud.
Welcome to join the discussion!
A Discord has been created, and everyone is welcome to join and explore advanced ways to use Moltbot (Clawdbot) together!
More Tutorials
For more practical tutorials on OpenClaw in the cloud, such as one-click deployment of OpenClaw, integration with QQ/WeChat/DingTalk/Lark/Discord/Telegram/WhatsApp, installation and use of Skills, please see Mastering OpenClaw | One-click, second-level deployment guide for OpenClaw (Clawdbot) in the cloud.
🚀 Developer Community & Support
1️⃣ OpenClaw Developer Community
Unlock advanced tips on Discord
Click to join the community
Note: After joining, you can get the latest plugin templates and deployment playbooks
2️⃣ Dedicated Support
Join WhatsApp / WeCom for dedicated technical support
| Channel | Scan / Click to join |
|---|---|
| WhatsApp Channel |

|
| WeCom (Enterprise WeChat) |

|
Learn more on the official page: Tencent Cloud OpenClaw