How to run MiroFish (Scenario Prediction & Multi-Agent Simulation) Exploring a unique AI prediction engine
Author: Pavol Labuda
MiroFish is an AI-powered tool for knowledge-graph generation and simulation using LLMs and Zep.
Deployment is straightforward, but remote access can be tricky because the frontend may try to reach the backend through localhost, which causes a "Network Error" in the browser.
This guide shows how to deploy MiroFish with Docker Compose and how to fix the common remote-server issue.
Purchasing Guidelines (Recommended Setup)
To ensure the best performance for MiroFish (especially for Multi-Agent Simulation and GraphRAG processing), we recommend the following specifications when purchasing your Lighthouse instance via my exclusive link
-
Select Region: Choose an overseas region (e.g., Silicon Valley, Frankfurt, Singapore). This ensures lower latency when accessing LLM APIs (like Gemini or ChatGPT).
-
Select Instance Type:
- Minimum: 2 vCPUs, 4GB RAM (for small graphs/testing).
- Recommended: 4 vCPUs, 8GB RAM or higher (for smooth simulation and faster embedding generation).
-
Select Application: Choose Docker (based by Ubuntu Server).
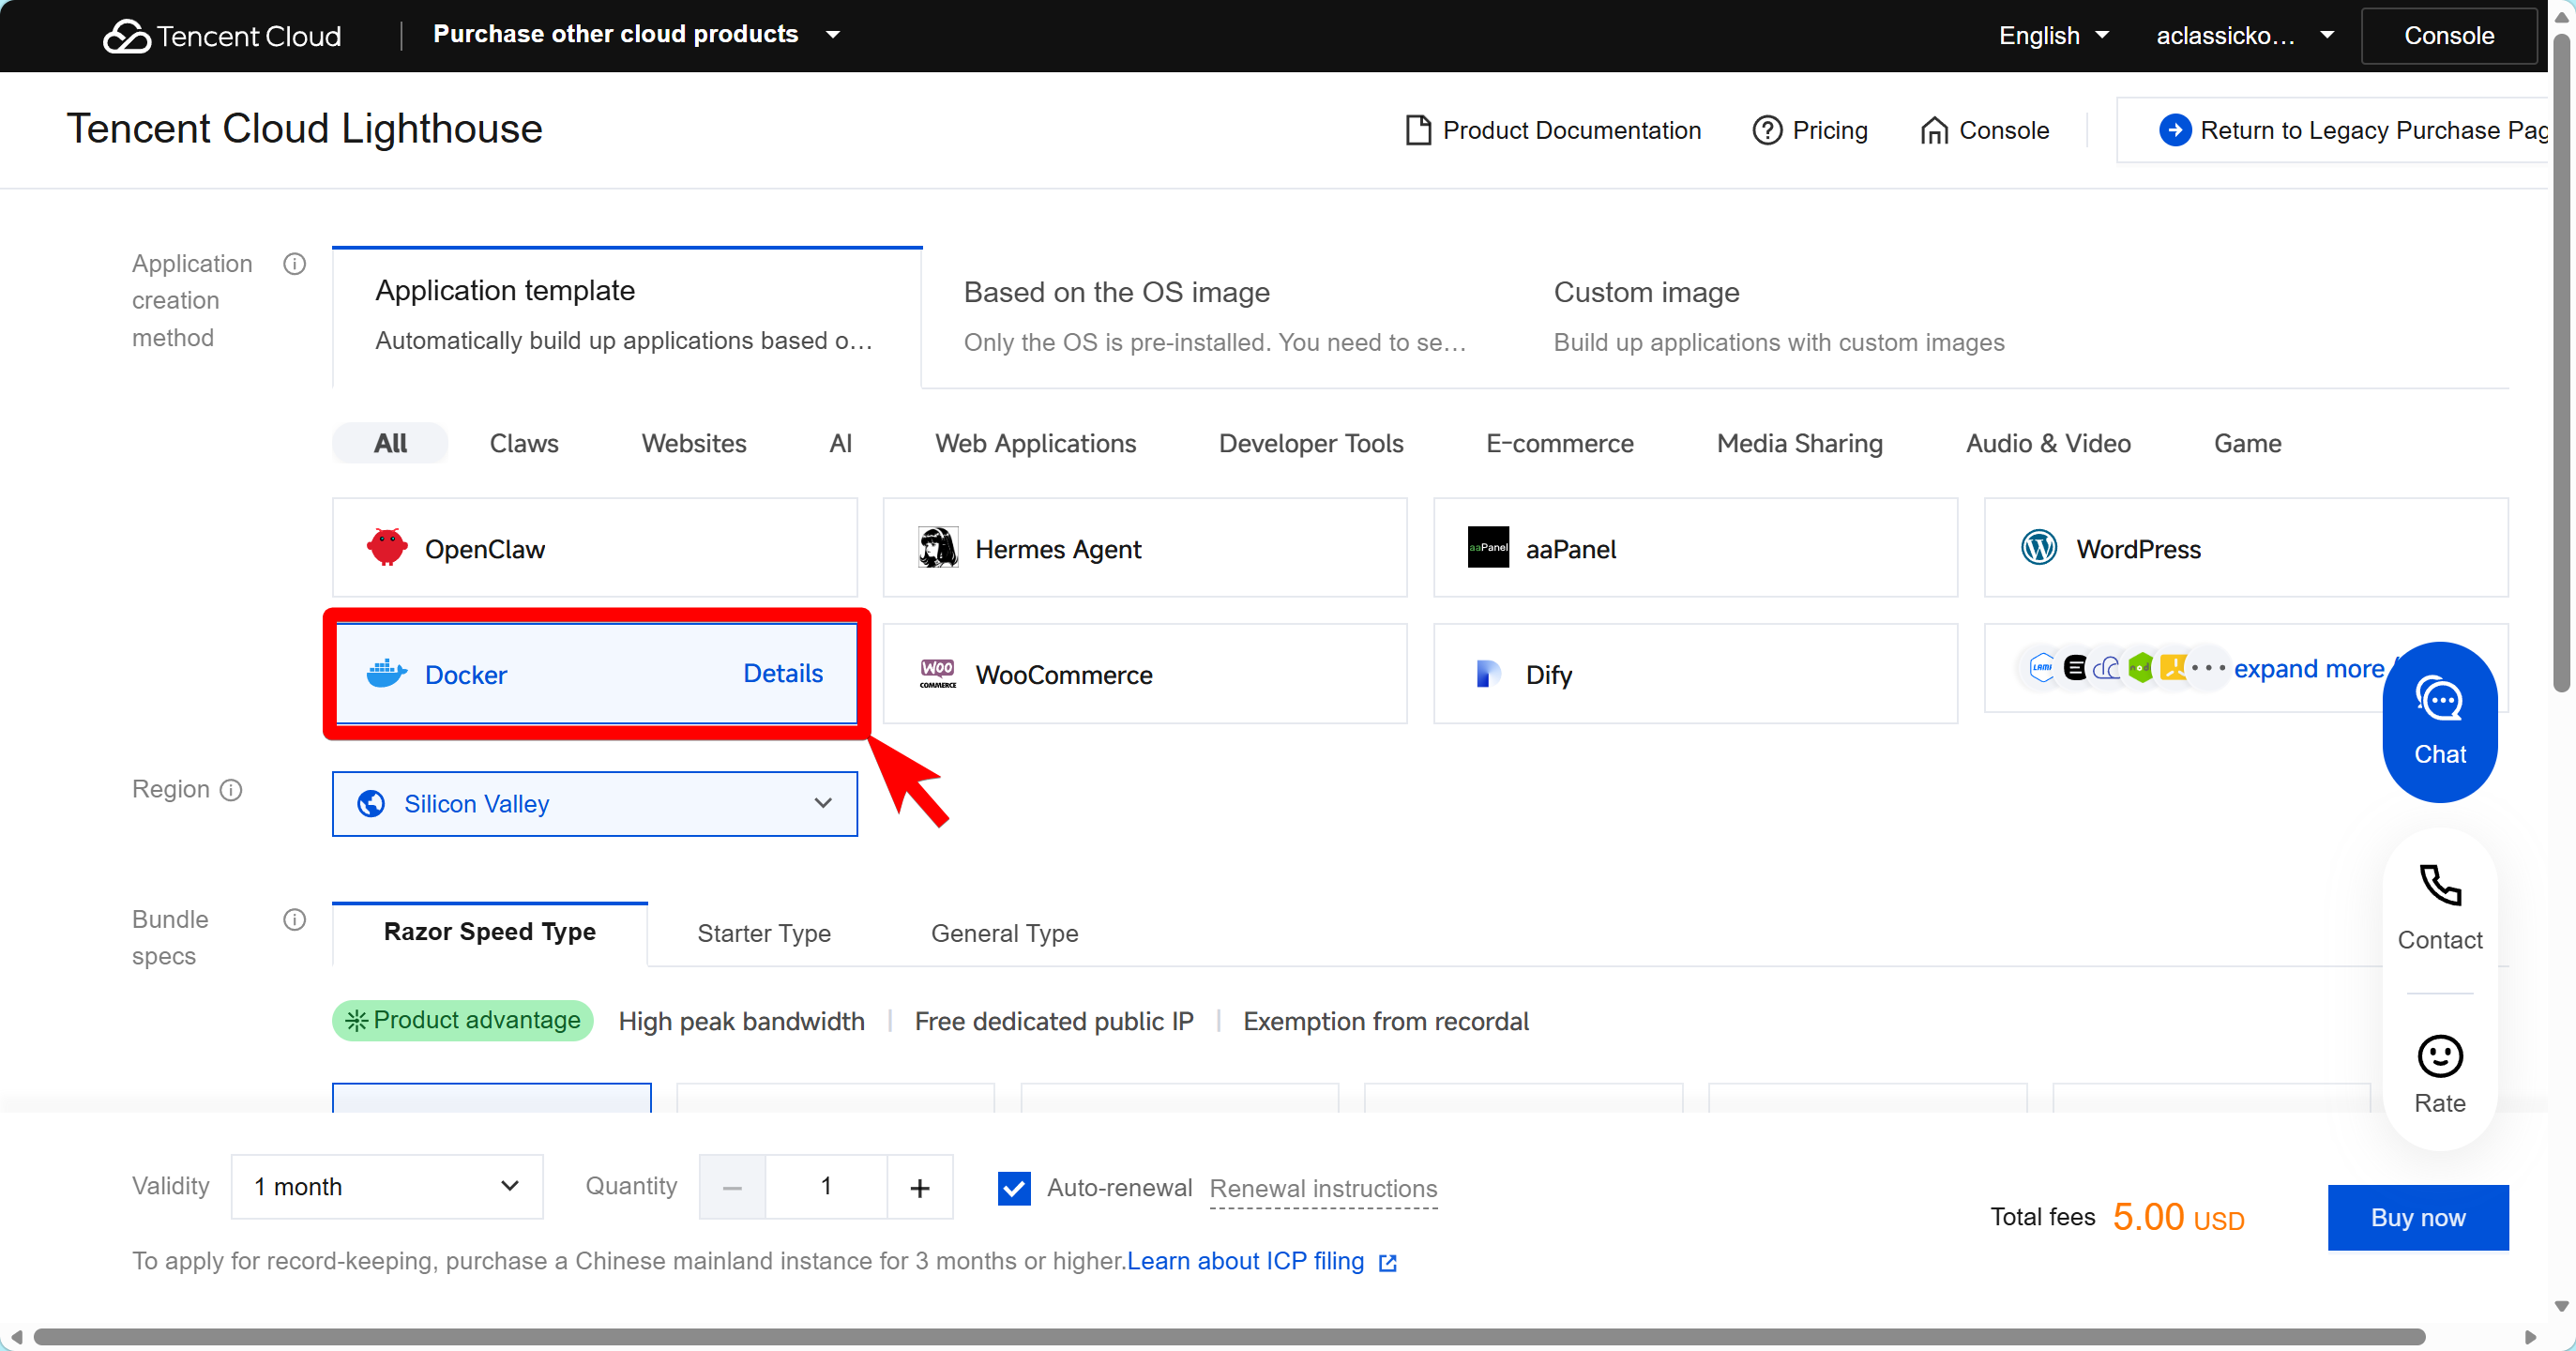
-
Complete Purchase: You can purchase the instance directly via my exclusive link here:
👉 Deploy MiroFish Ready Lighthouse Instance Now
💡 Pro Tip: By using the link, you may receive double voucher rewards on your purchase!
Requirements
Before starting, make sure you have:
- A Linux server or VM with Docker and Docker Compose installed
- An LLM API key such as DeepSeek, or another supported provider
- A Zep API key for GraphRAG memory
- Open firewall ports:
3000for the frontend5001for the backend
Preliminary Preparations
Before configuring MiroFish, please check the following:
- Do you have a Tencent Cloud Lighthouse instance ready?
- Have you configured your system? Ensure Docker and Docker Compose are installed on your server.
- Are your API keys ready?
- An LLM API Key (e.g., DeepSeek, OpenAI).
- A Zep API Key for GraphRAG memory.
Note for first-time users: If you haven’t deployed a Lighthouse instance yet, you can deploy a instance, by clicking here first.
💡 Pro Tip By using this exclusive link, you may receive double voucher rewards on your purchase!
If you already have a Lighthouse instance but lack the necessary API keys or Docker environment, please prepare them before proceeding.
1) Connect to a Lighthouse instance
-
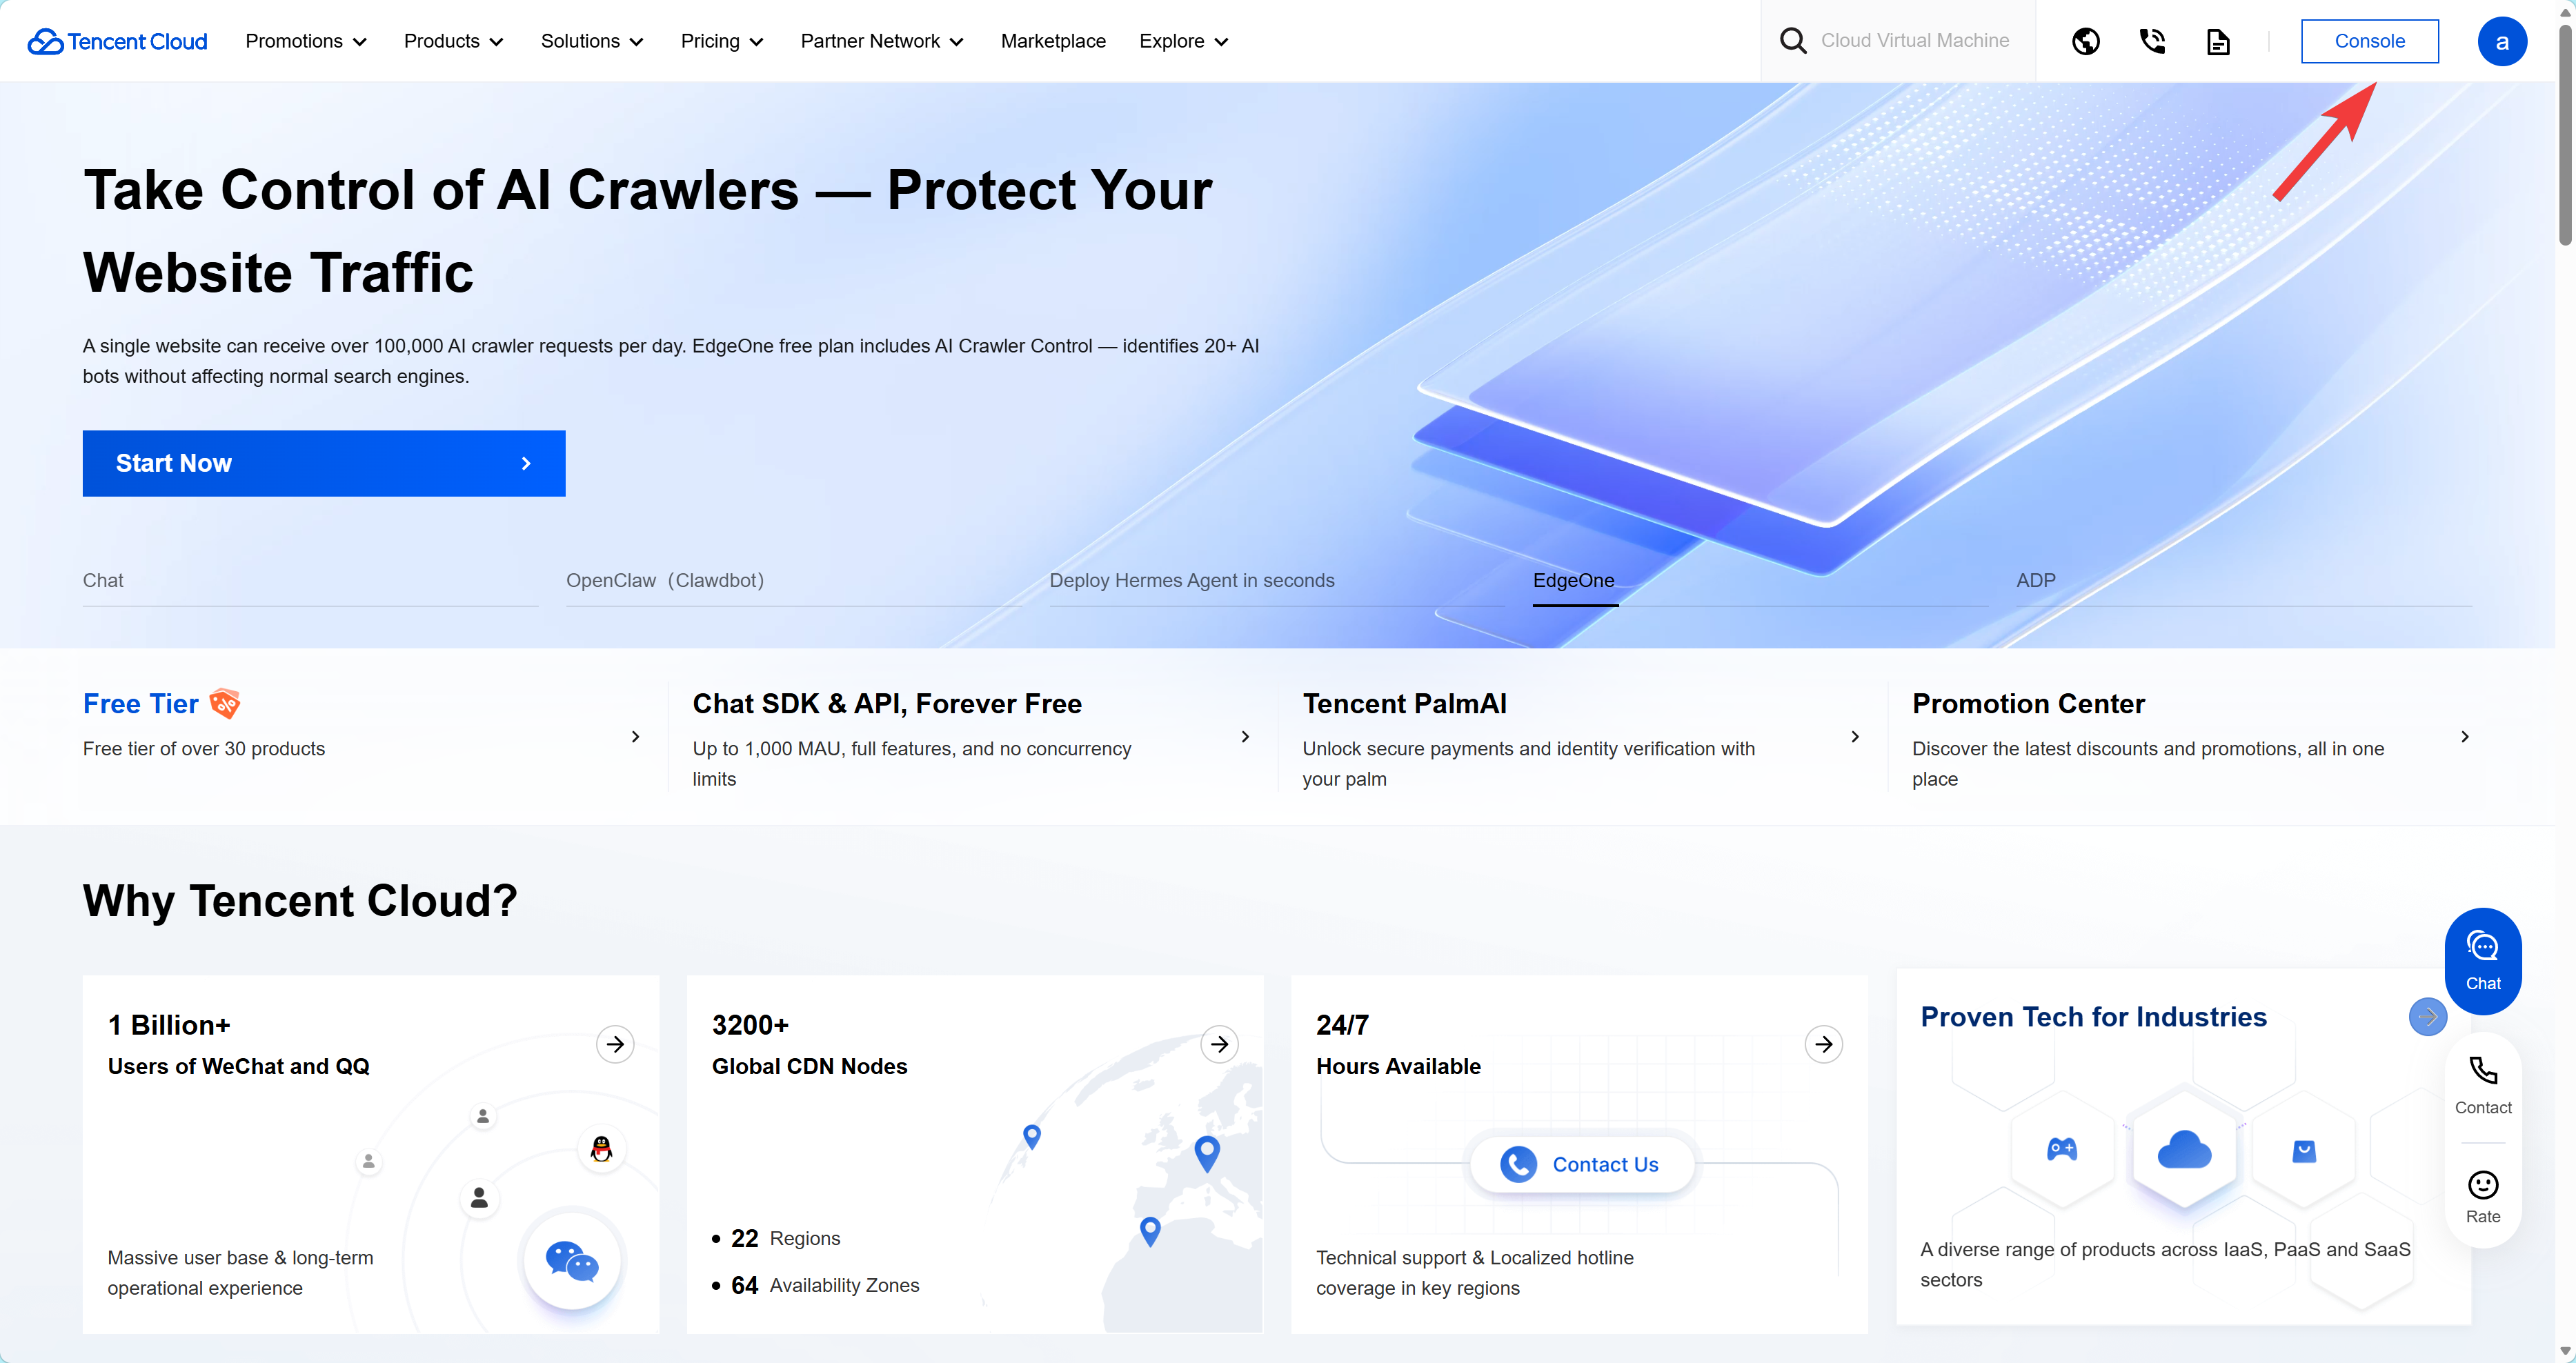
Log in to a Tenecnt Cloud and enter the
Console.
-
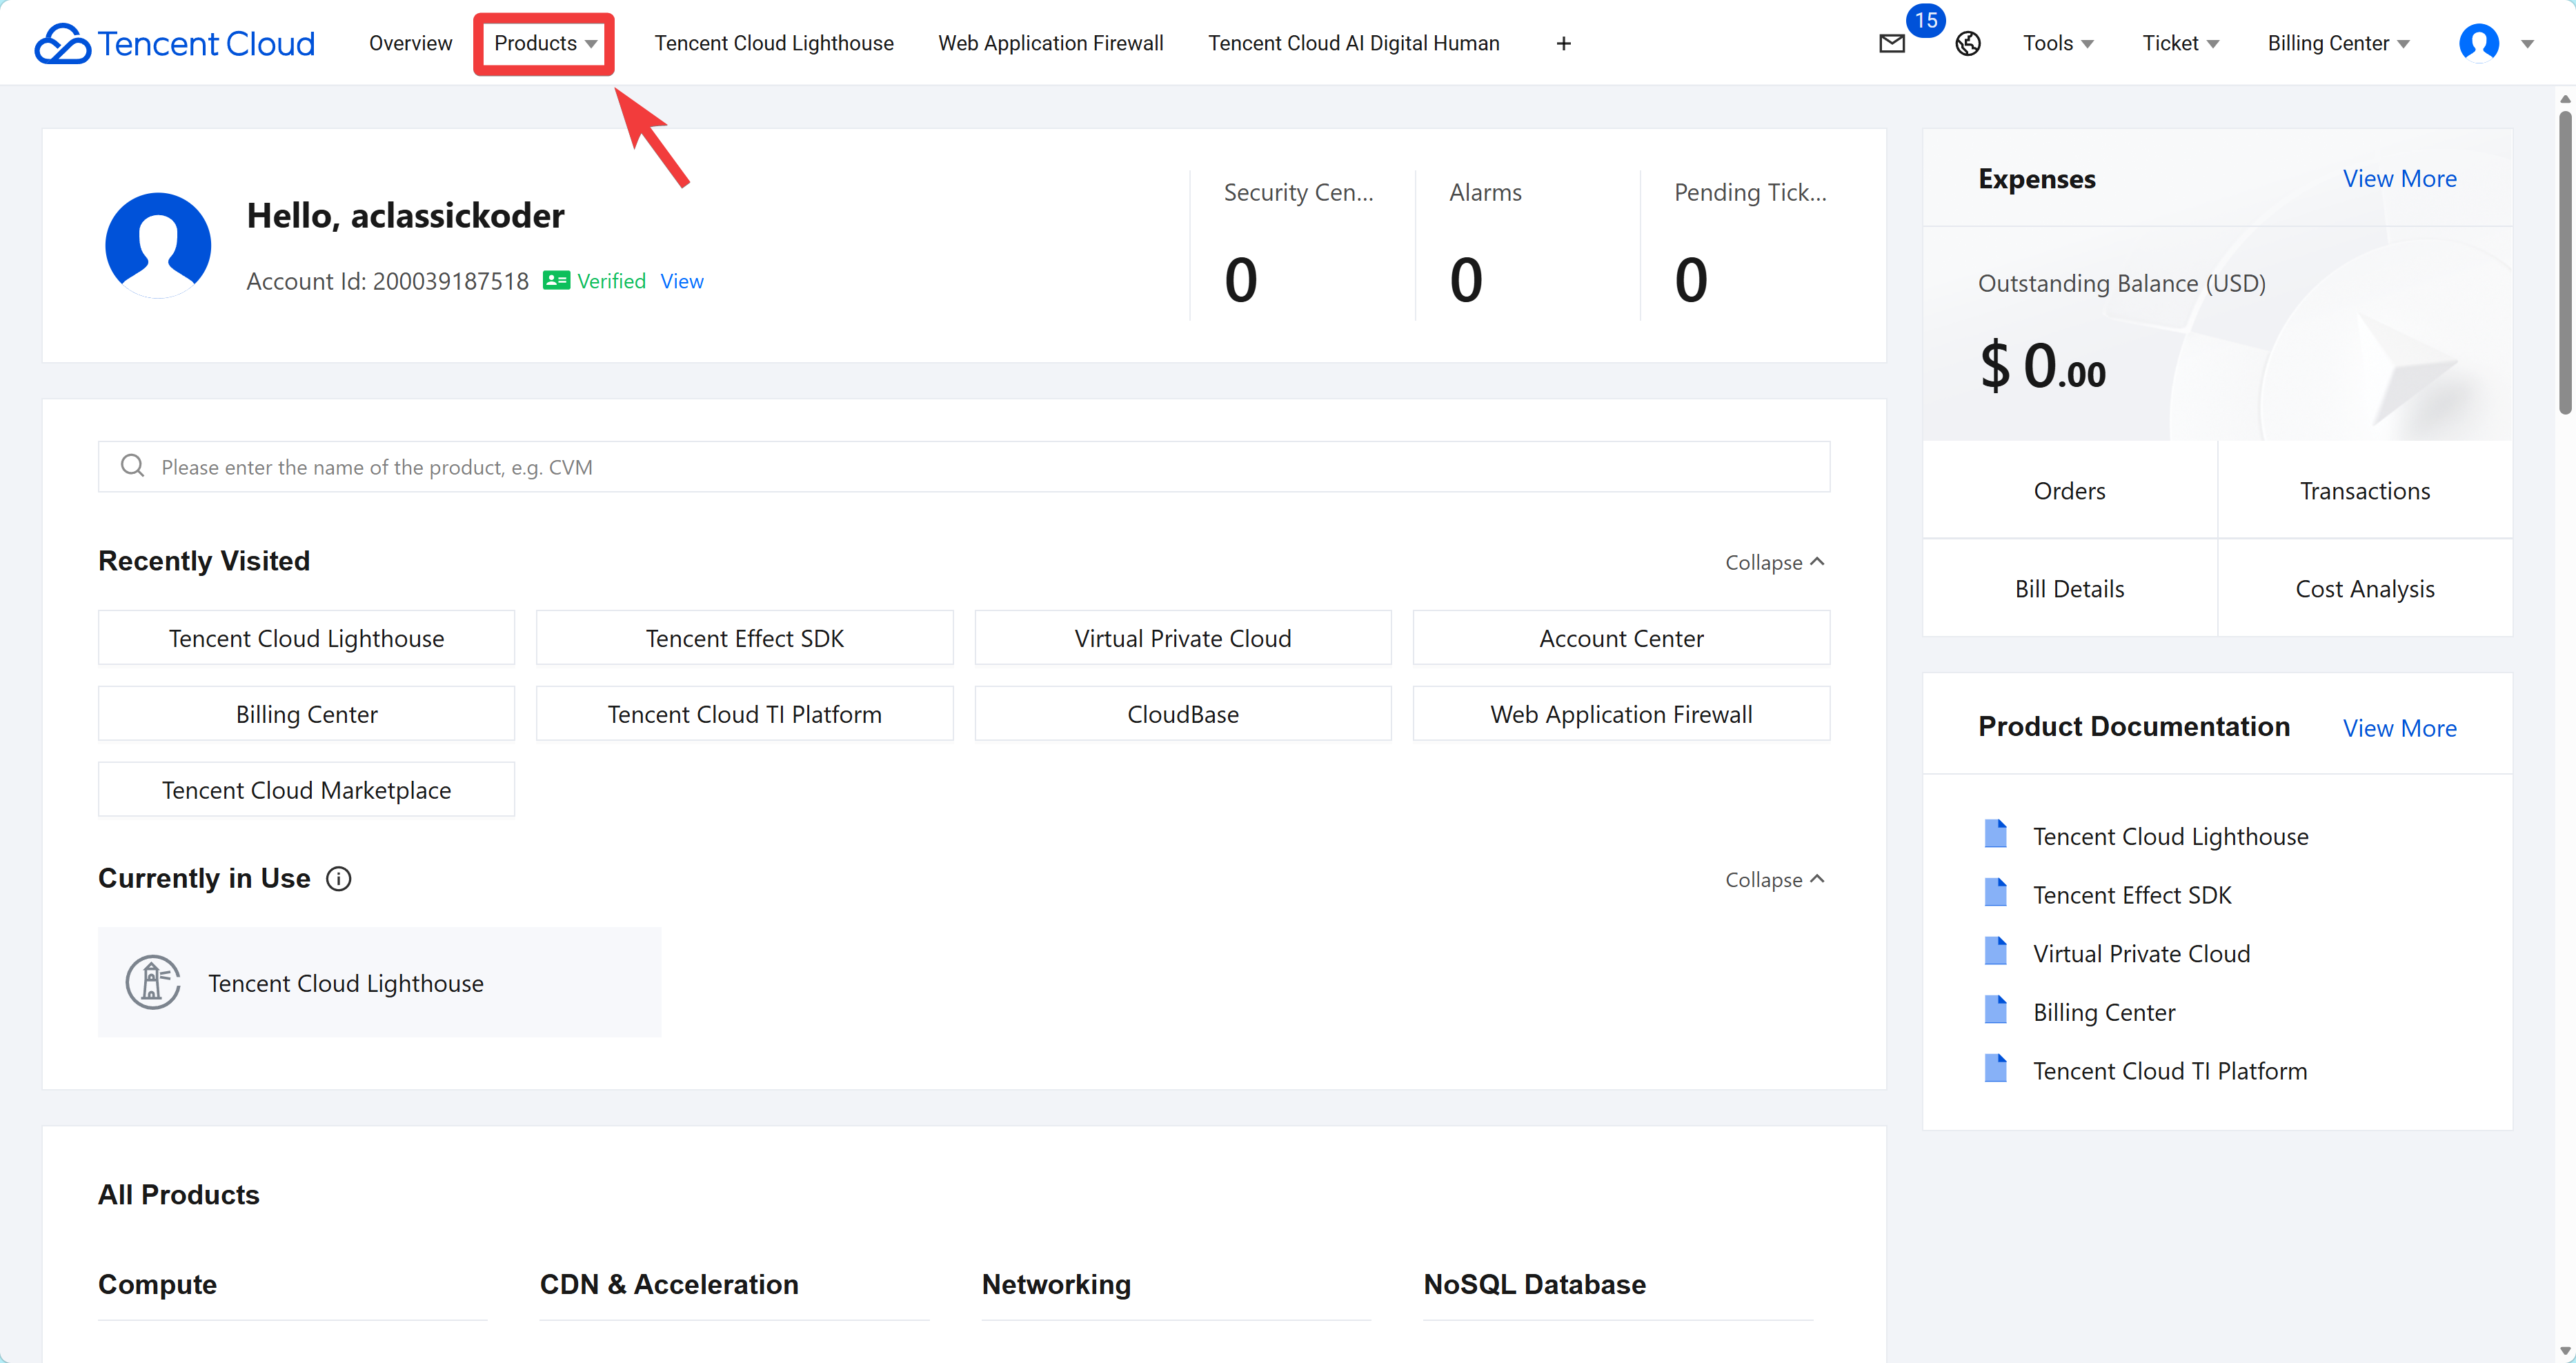
From Tencent Cloud Console, navigate to a
Tencent Cloud Lighthouseinstances, by selectingall products.

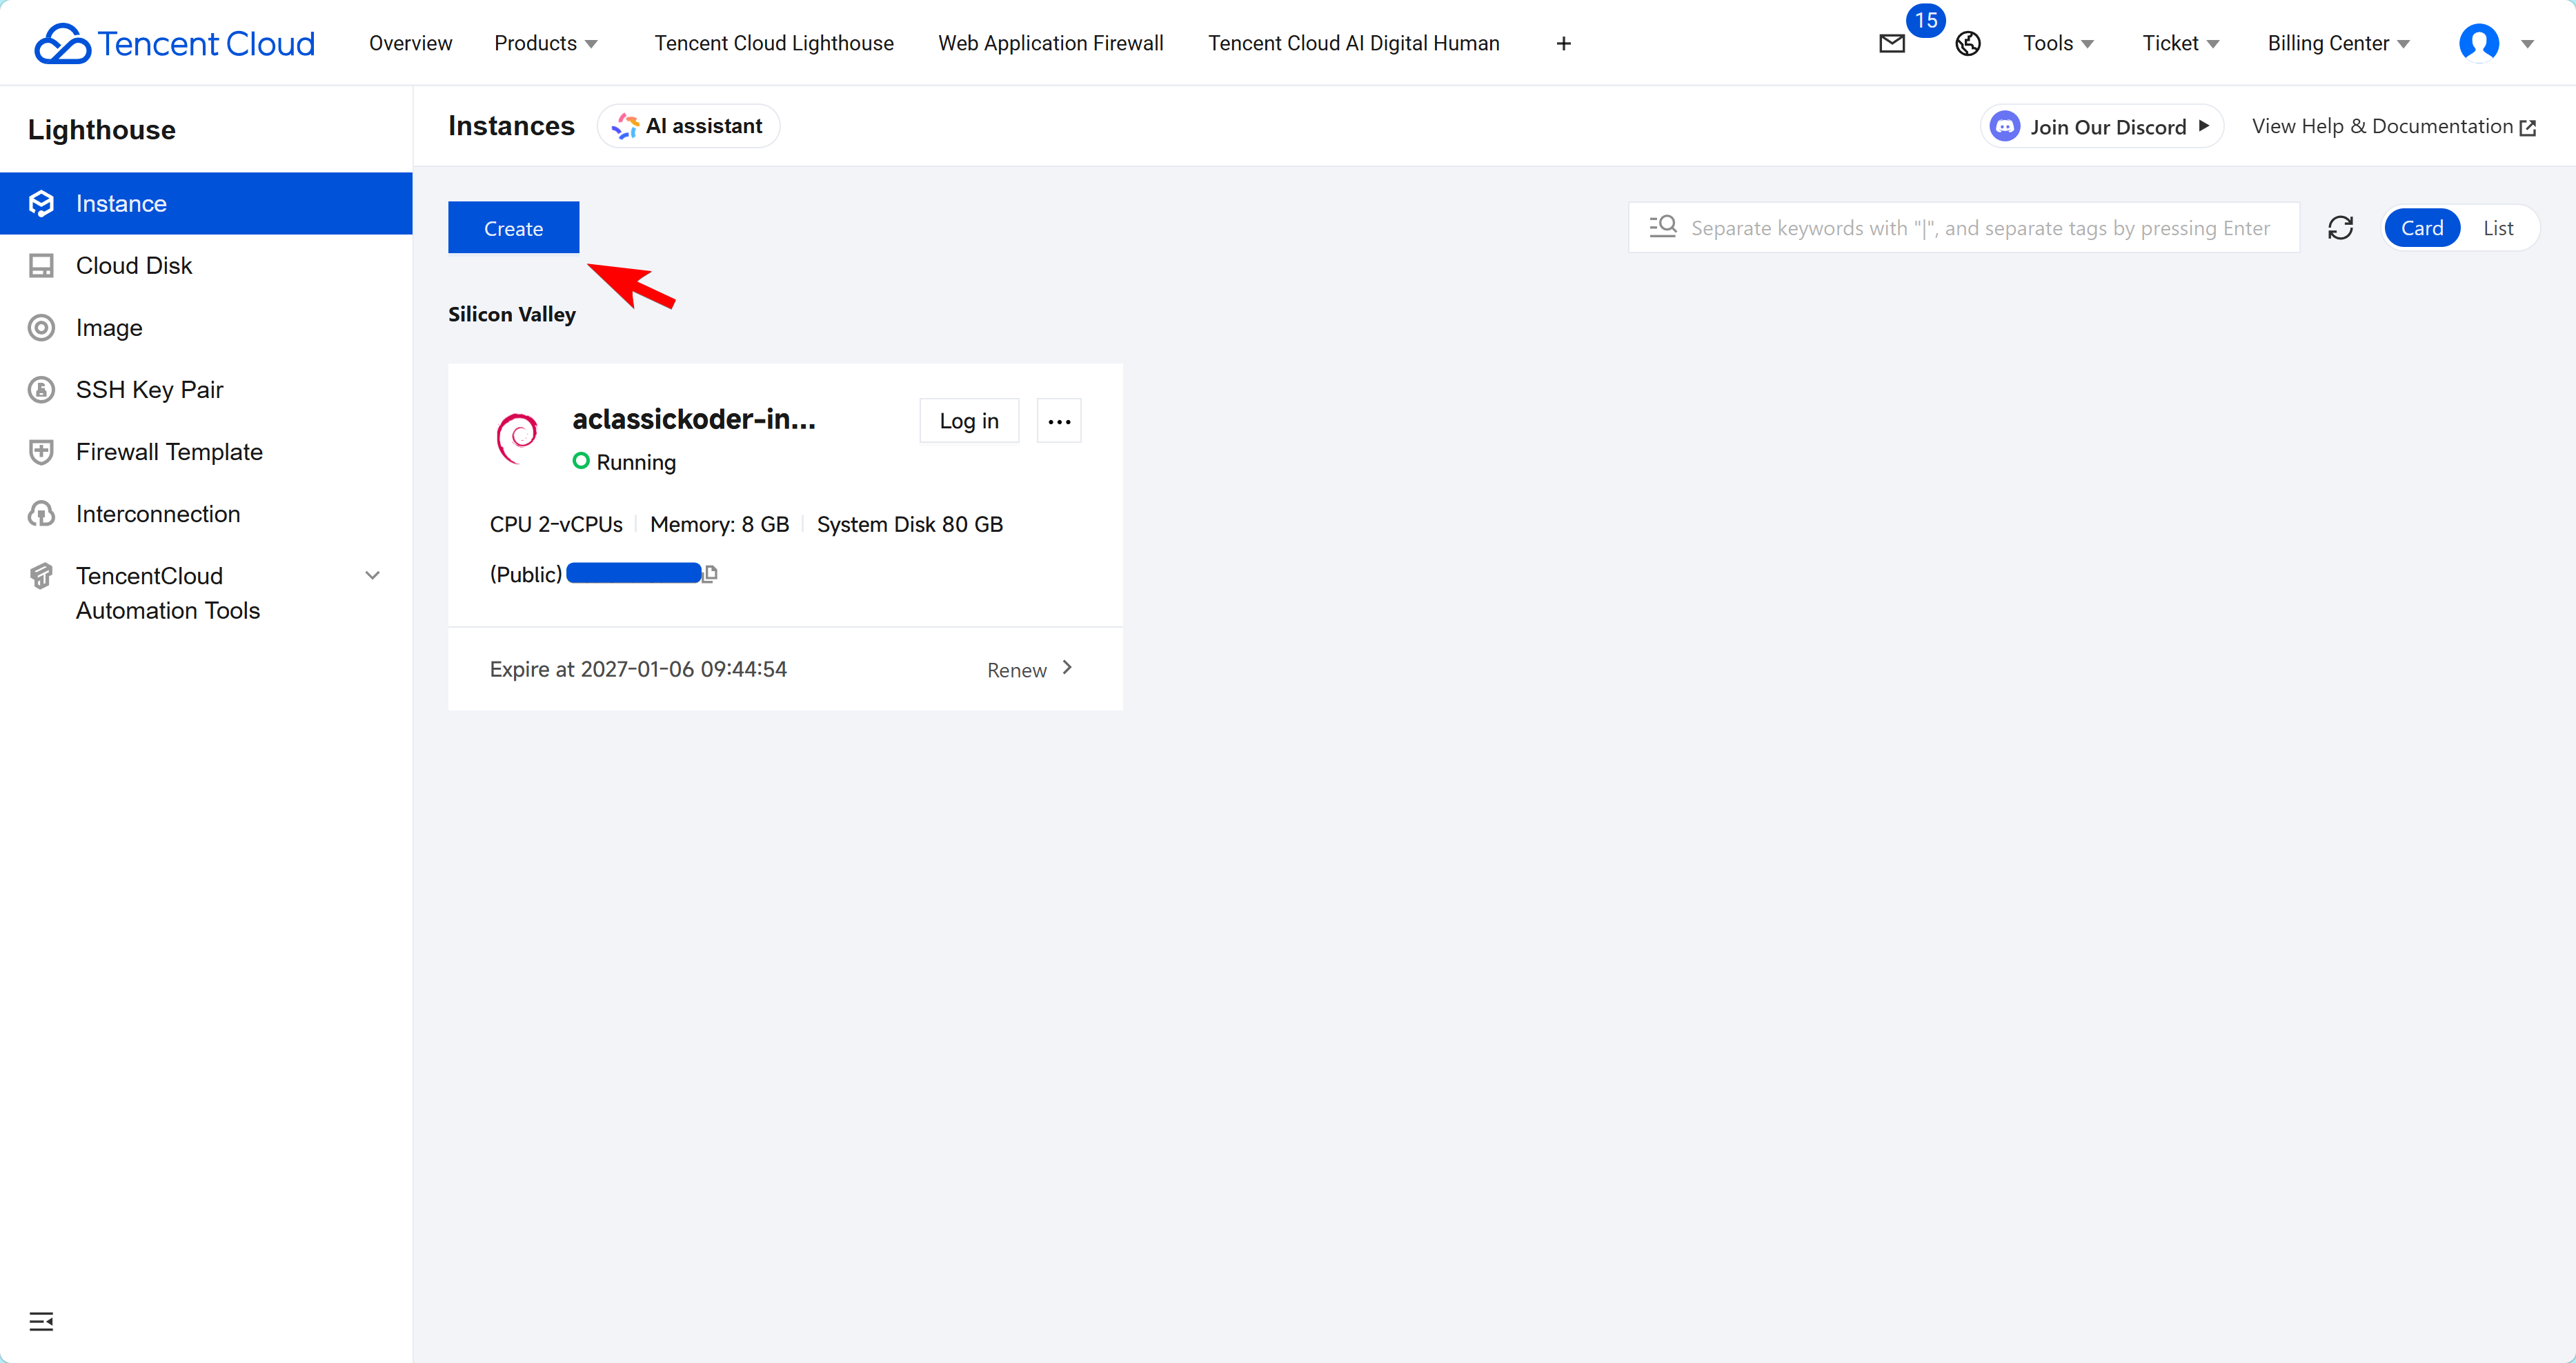
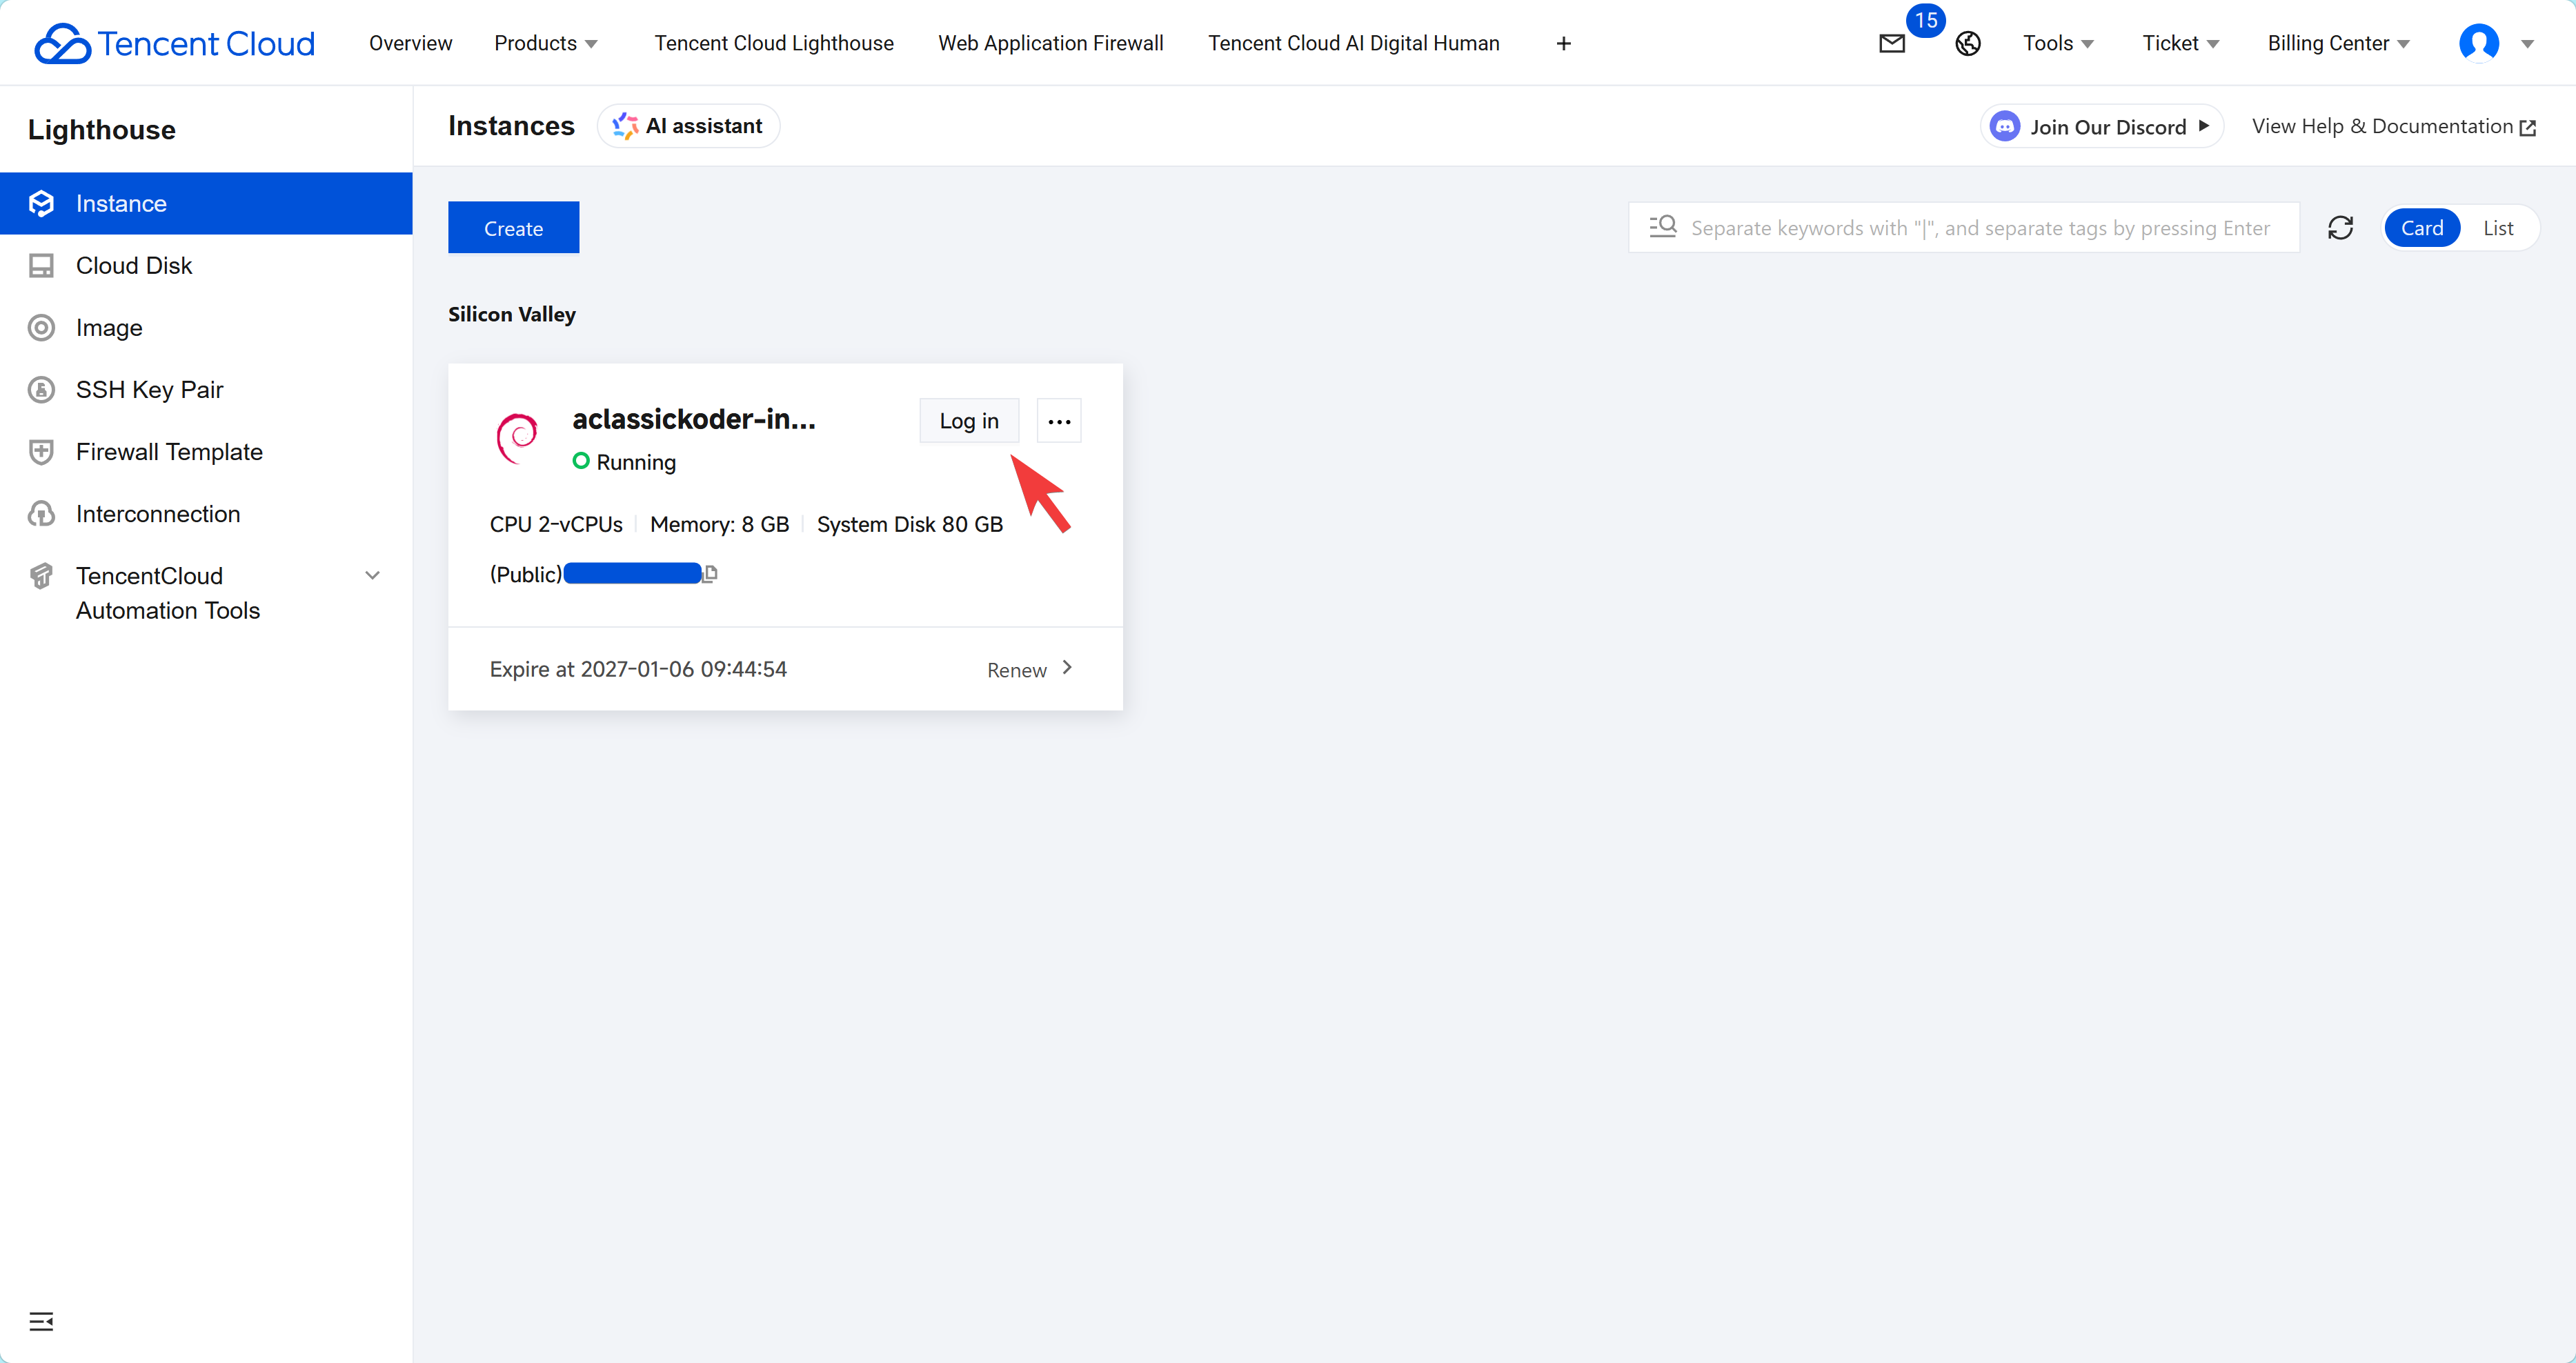
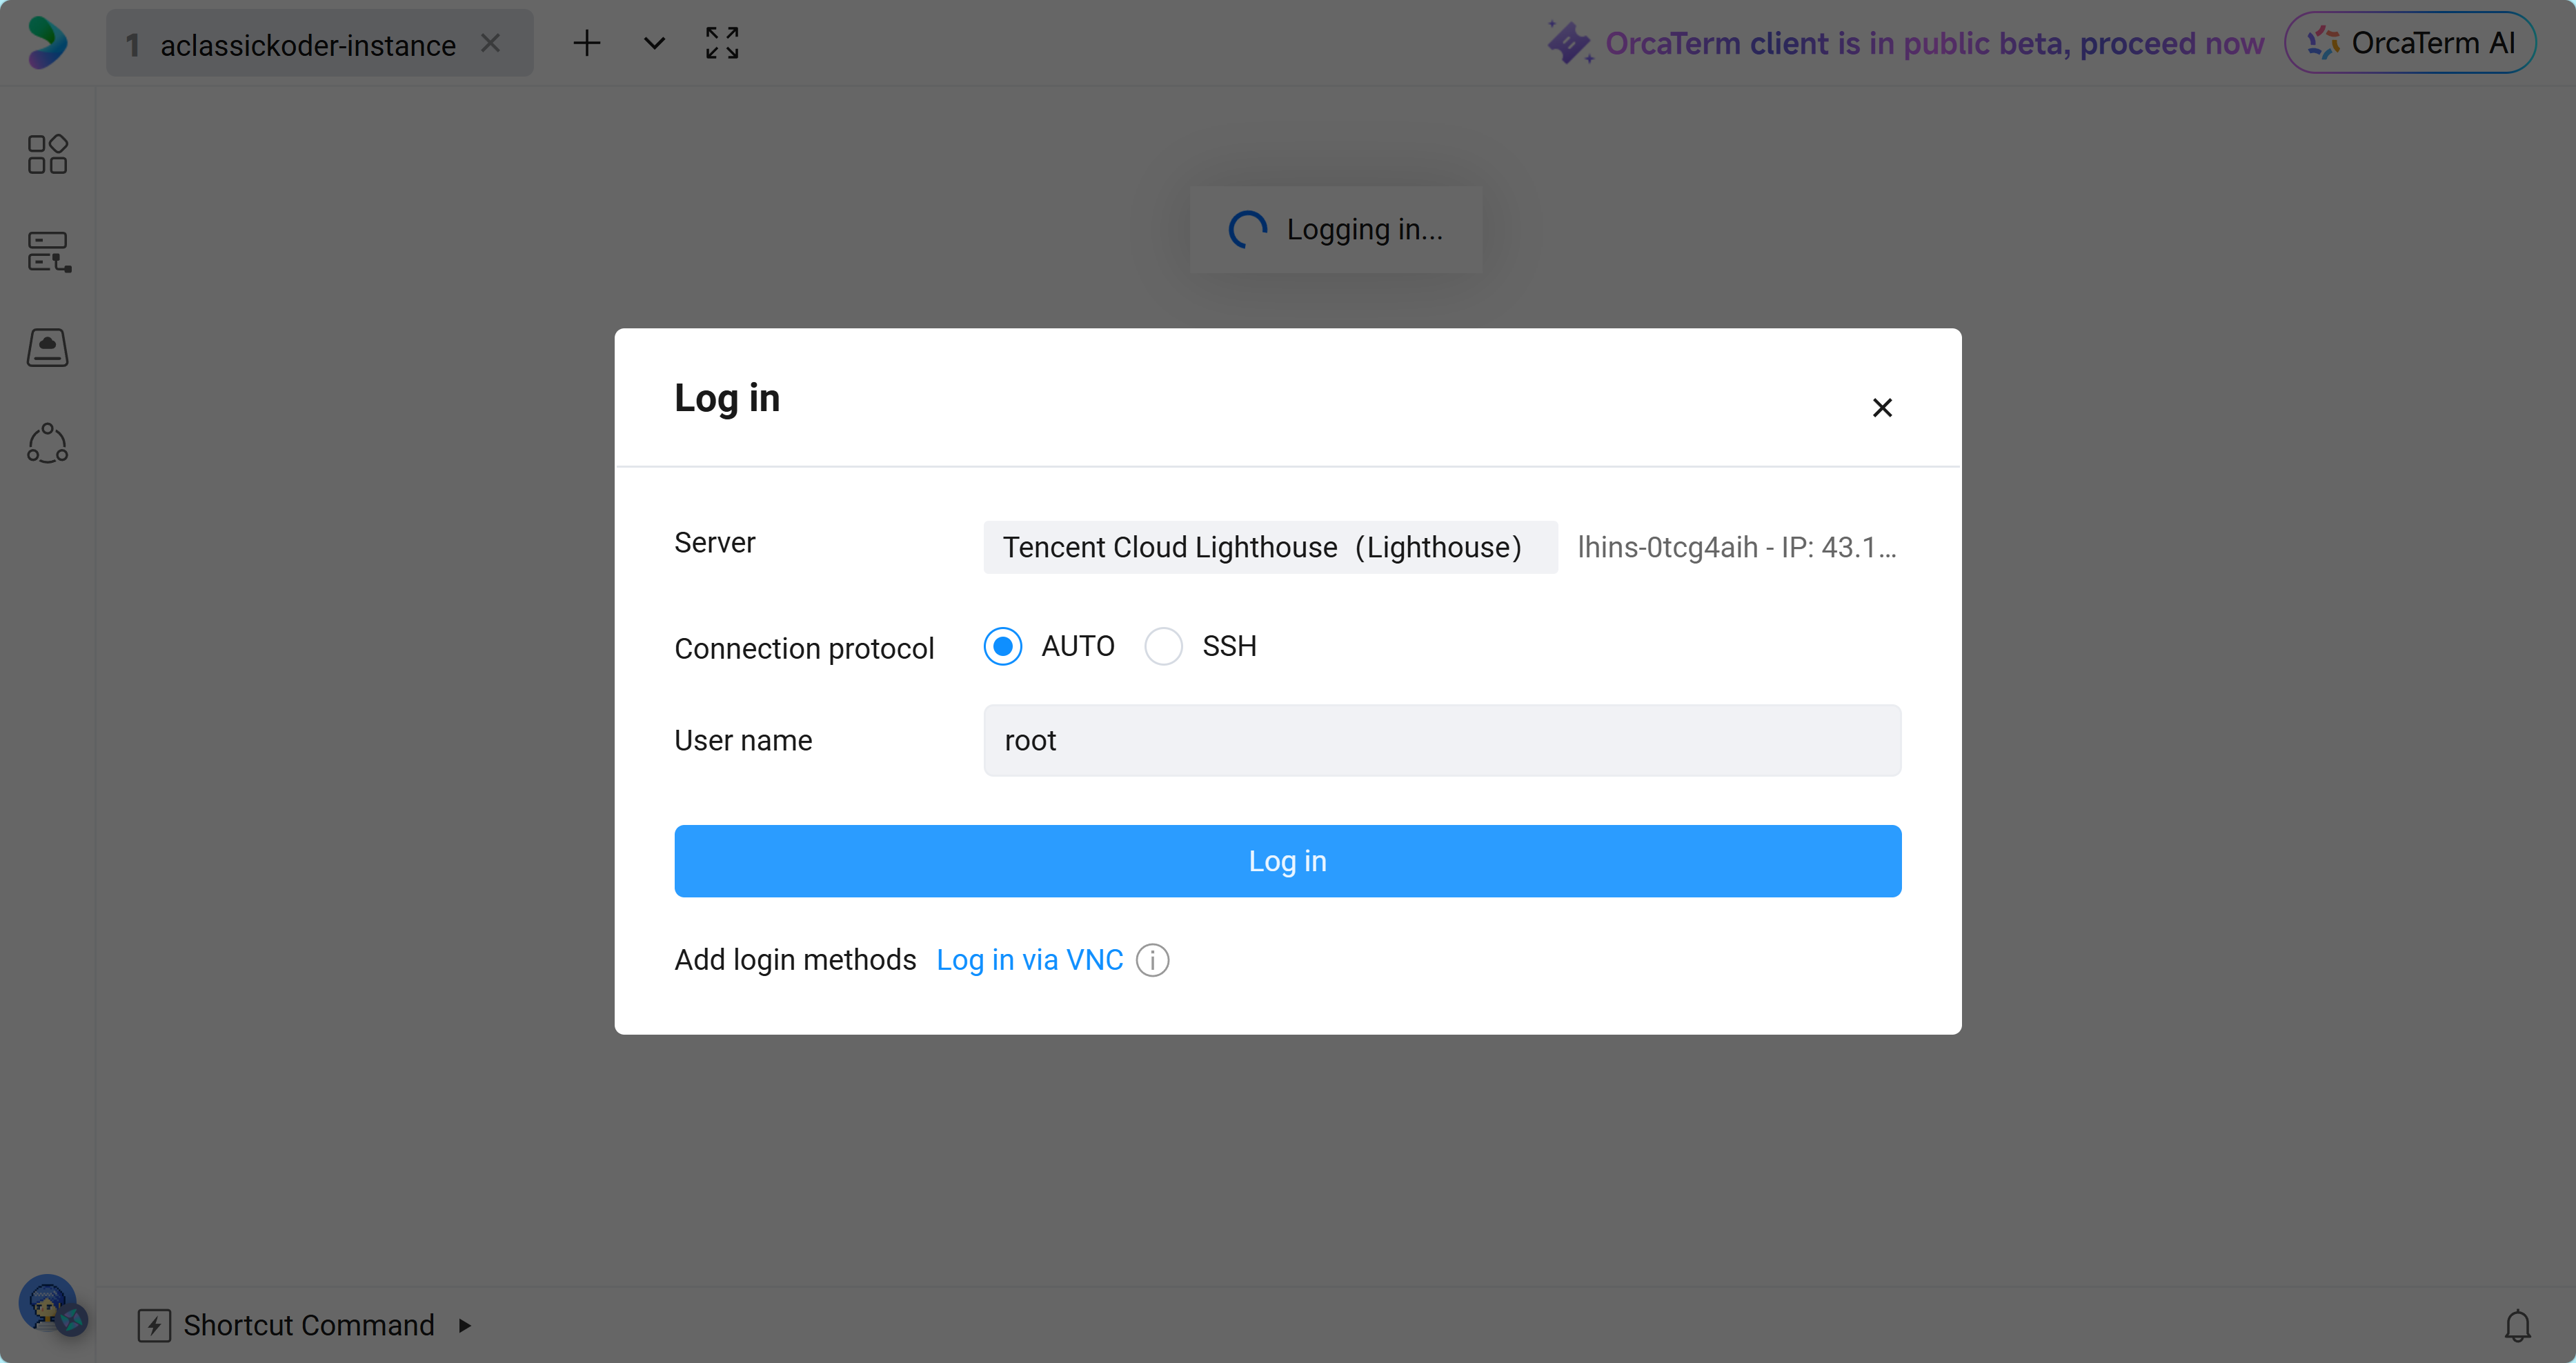
- Use
Log inbutton or aSSHconnection for remote access, into aTenent Cloud Lighthouseinstance.
2) Deploying a MiroFish
1) Create a folder for the deployment and move into it:
mkdir -p mirofish
cd mirofish
You will place both docker-compose.yml and .env in this directory.
2) Create the .env File
Create the environment file in the project root:
nano .env
Paste the following content and replace the placeholders with your own values:
# Frontend -> backend API address
# Use localhost only if you are running everything on your own machine.
# For a remote VM, use the public IP or a domain name.
VITE_API_BASE_URL=http://<YOUR_VM_IP_OR_DOMAIN>:5001

# LLM provider settings
LLM_API_KEY=<YOUR_LLM_API_KEY>
LLM_BASE_URL=https://api.deepseek.com/v1
LLM_MODEL_NAME=deepseek-chat

# Zep for memory / GraphRAG
ZEP_API_KEY=<YOUR_ZEP_API_KEY>
Important note about remote access
If you open the frontend in your browser from another computer, localhost means your own computer, not the server.
That is why you must set:
VITE_API_BASE_URL=http://<YOUR_VM_IP_OR_DOMAIN>:5001
If you use a domain name, make sure it points to the server and is reachable from the browser.
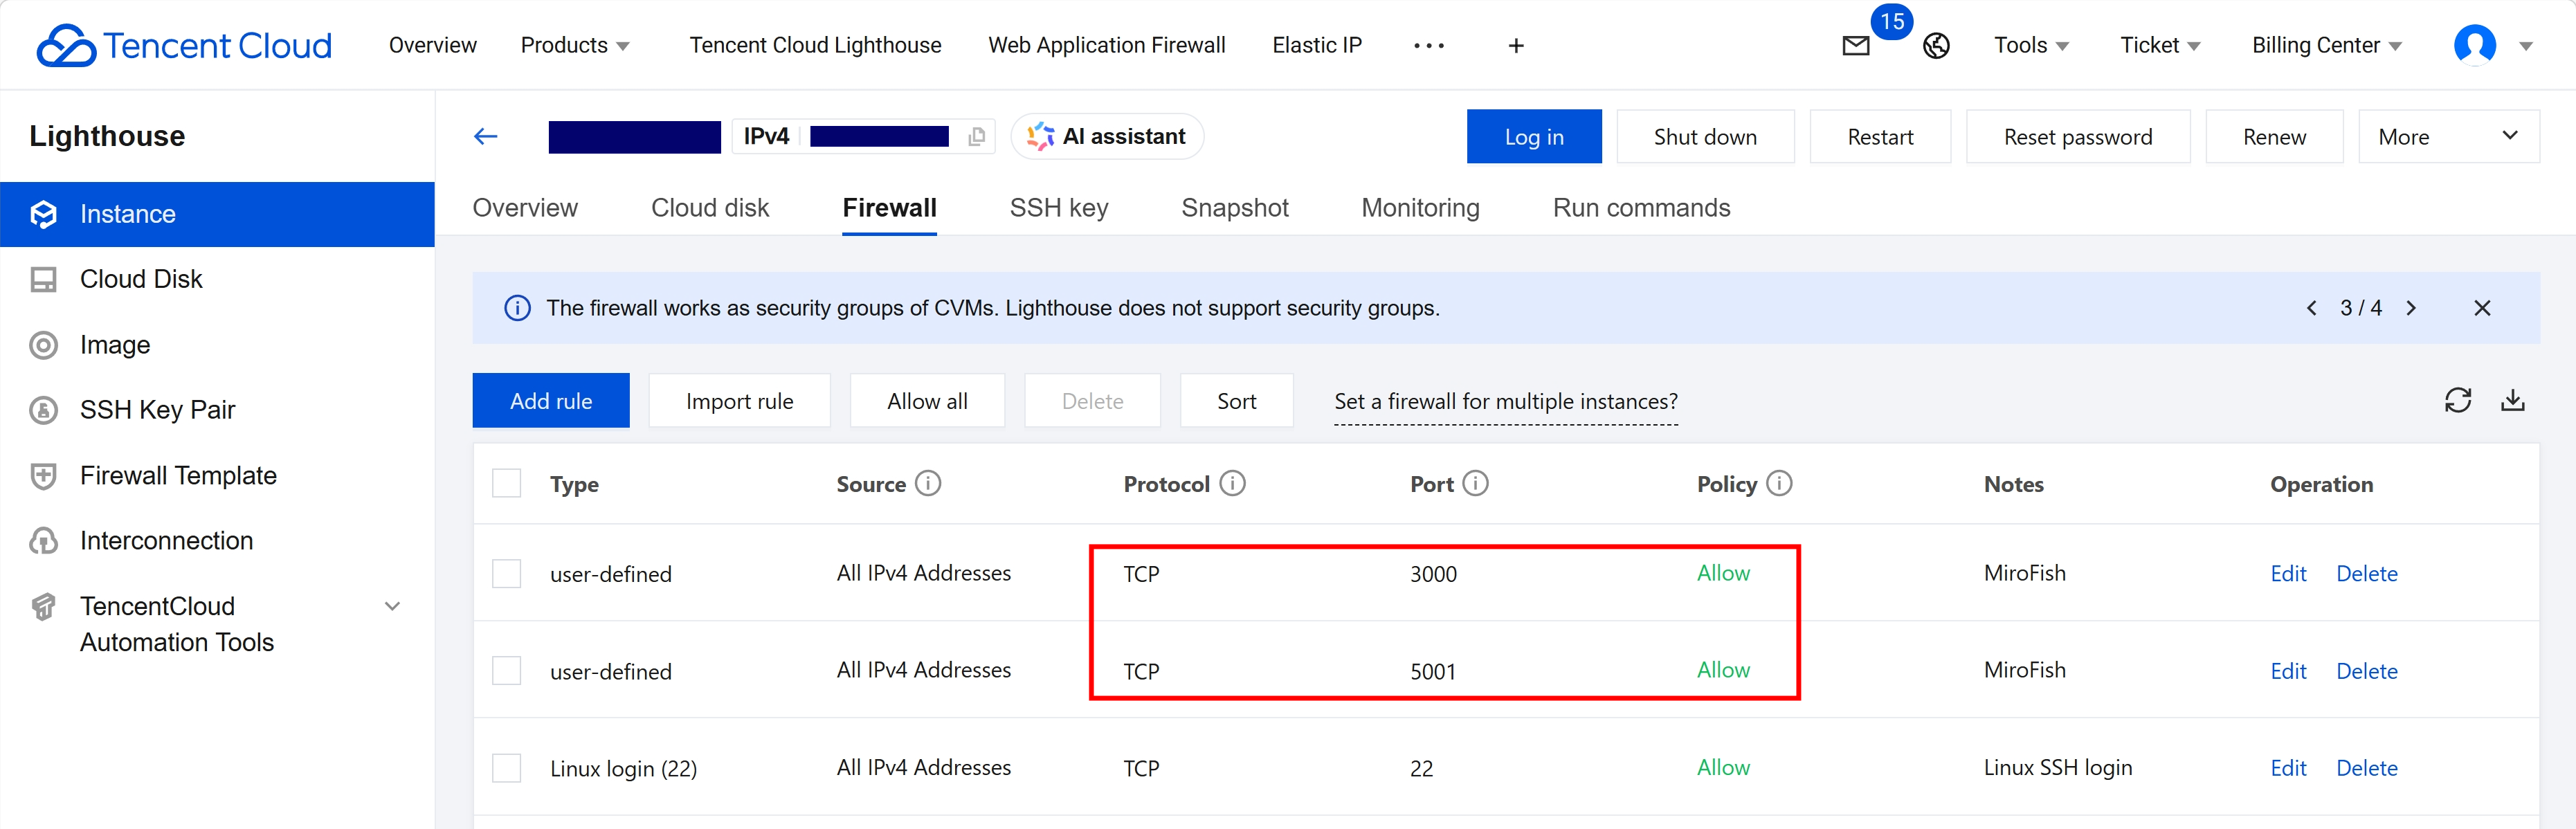
Enable firewall access from Lighthouse
Same ports as in docker-compose.yml file, so 5001 and 3000.
3) Create docker-compose.yml
Create the Compose file:
nano docker-compose.yml
Use this configuration:
services:
  mirofish:
    # Main image
    image: ghcr.nju.edu.cn/666ghj/mirofish:latest
    # Alternative source if needed:
    # image: ghcr.io/666ghj/mirofish:latest

    container_name: mirofish
    env_file:
      - .env
    ports:
      - "3000:3000"
      - "5001:5001"
    restart: unless-stopped
    volumes:
      - ./backend/uploads:/app/backend/uploads
Optional notes
- The
volumesline keeps uploaded files on the host machine. - If the image pull is slow, you can switch between the registry mirrors depending on availability.
- If you want to use the newest UI code from the image source, rebuild from source only if the project specifically requires it. For most users, the prebuilt image is enough.
4) Start MiroFish
Run the container in the background:
docker compose up --build -d
This may take a few minutes on the first run because dependencies and frontend assets need to be prepared.
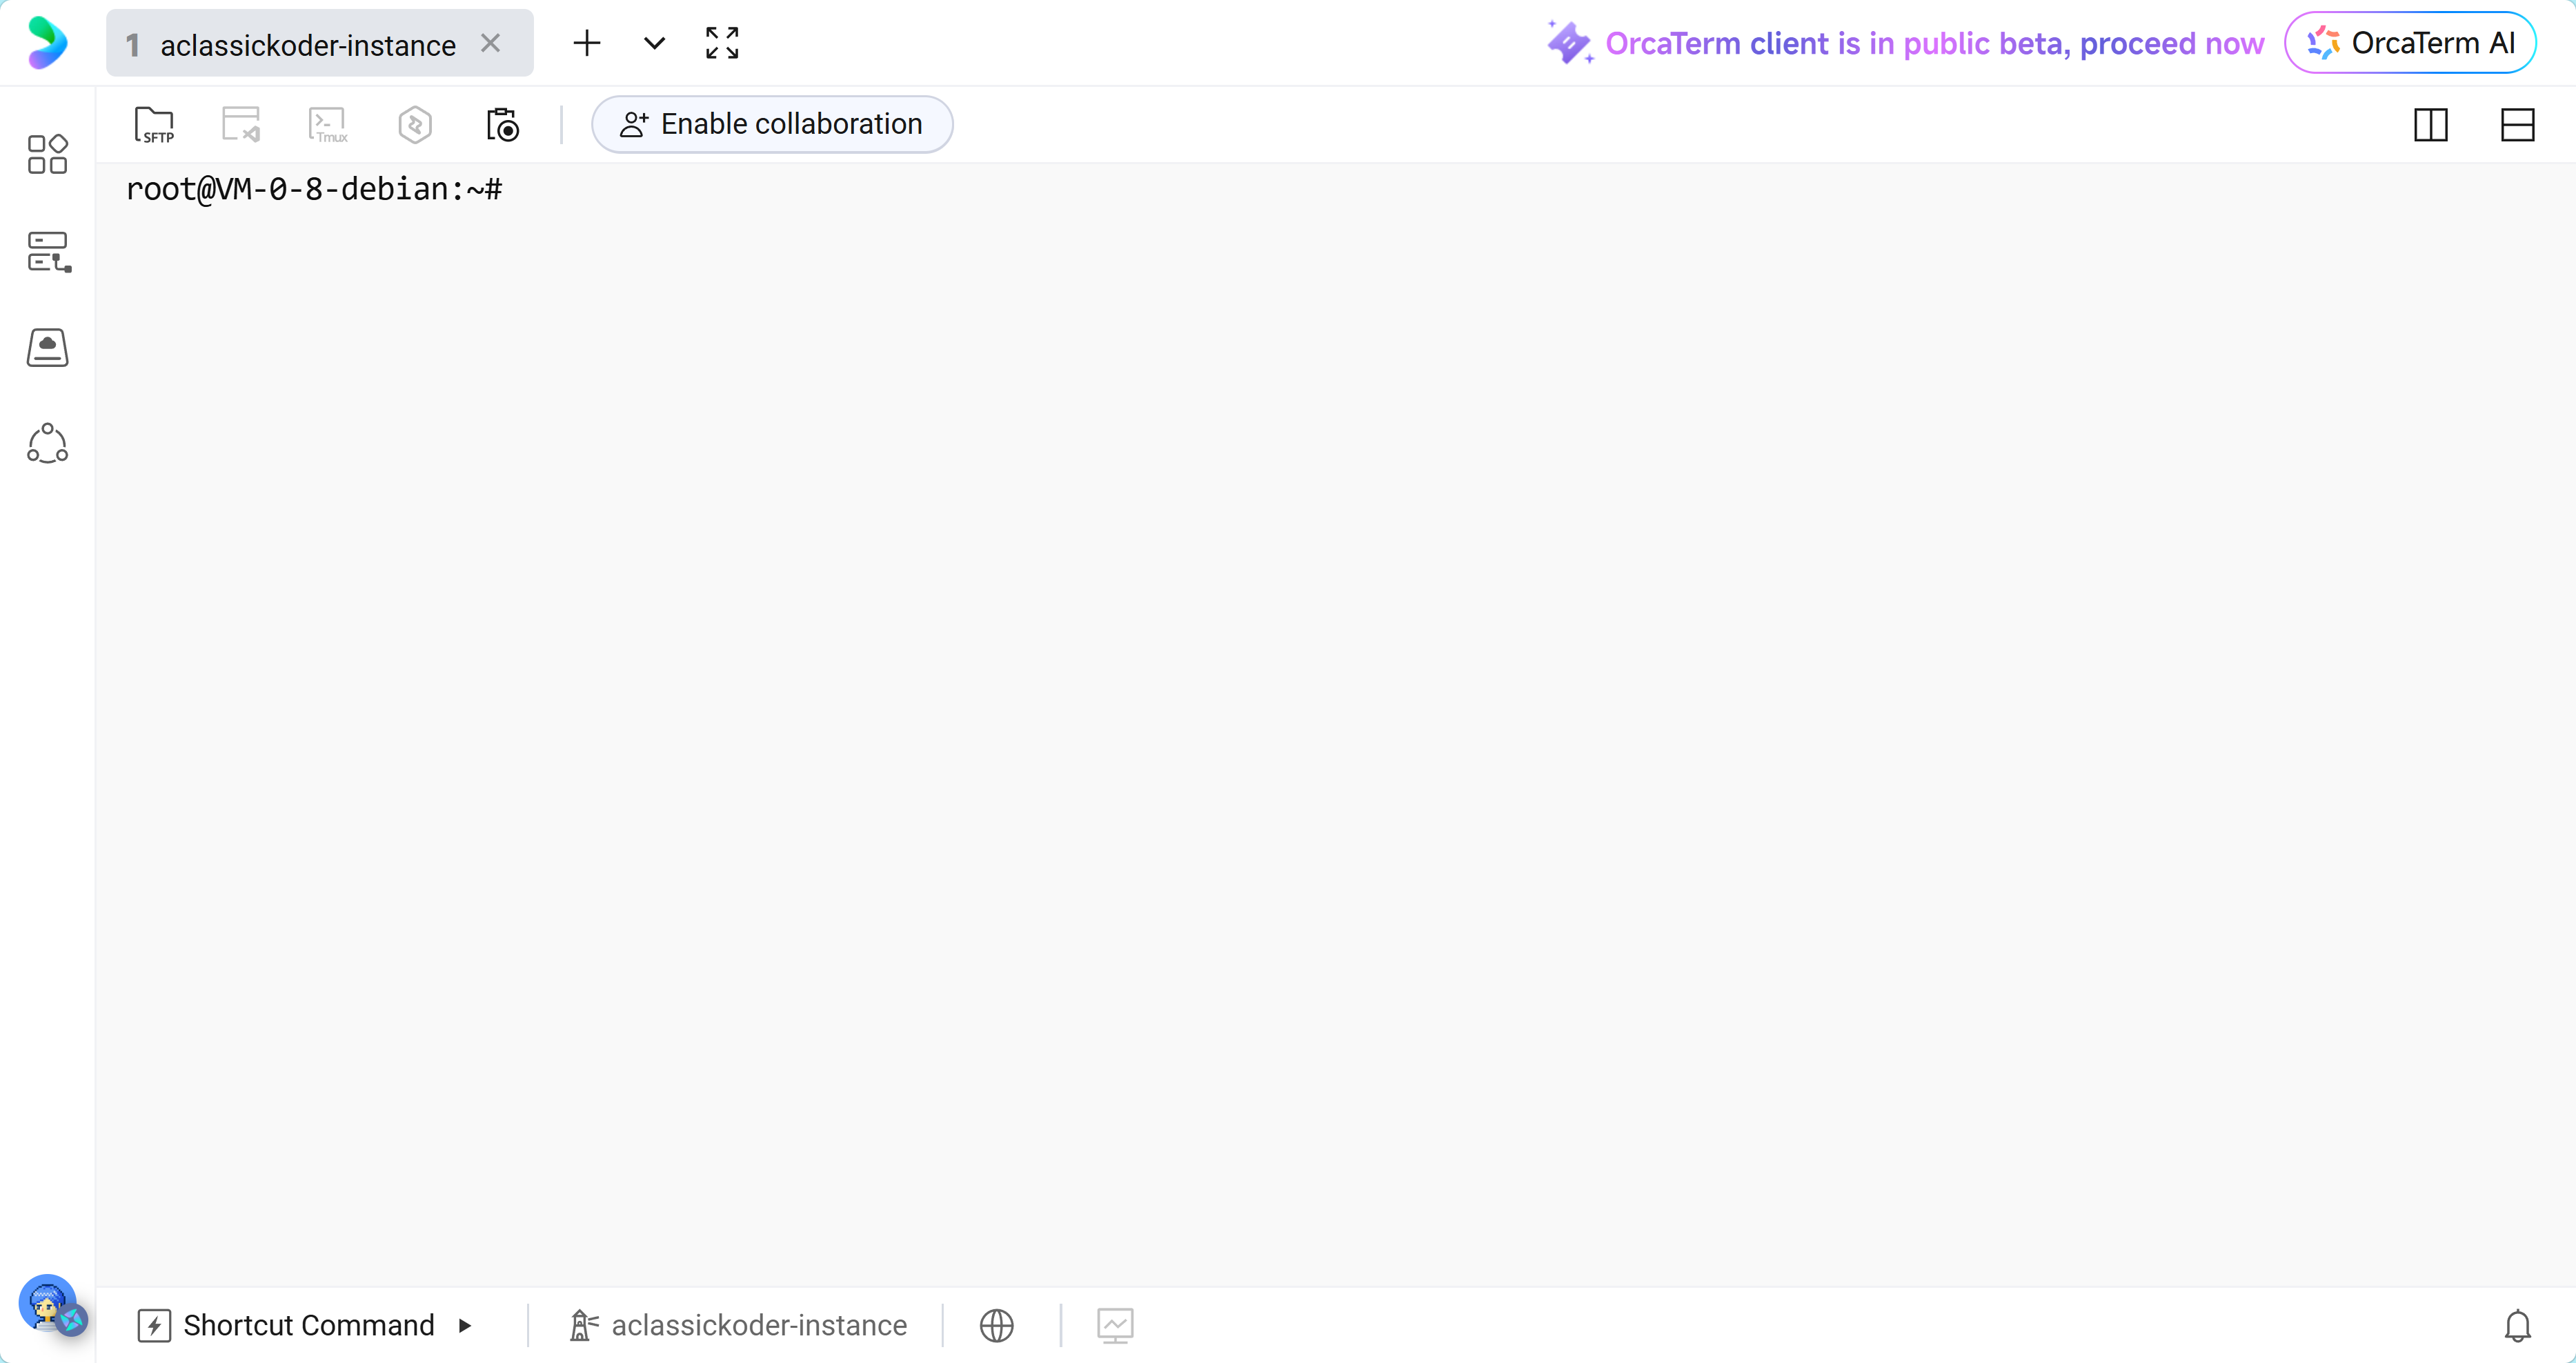
5) Check Whether It Started Correctly
View the logs:
docker logs -f mirofish
Or, if you prefer Compose logs:
docker compose logs -f
You should see the backend and frontend starting without repeated errors.
mirofish  | [backend] > mirofish@0.1.0 backend
mirofish  | [backend] > cd backend && uv run python run.py
mirofish  | [backend]
mirofish  | [frontend]
mirofish  | [frontend] > mirofish@0.1.0 frontend
mirofish  | [frontend] > cd frontend && npm run dev
mirofish  | [frontend]
mirofish  | [frontend]
mirofish  | [frontend] > frontend@0.1.0 dev
mirofish  | [frontend] > vite --host
mirofish  | [frontend]
mirofish  | [backend]  * Serving Flask app 'app'
mirofish  | [backend]  * Debug mode: on
mirofish  | [backend] WARNING: This is a development server. Do not use it in a production deployment. Use a production WSGI server instead.
mirofish  | [backend]  * Running on all addresses (0.0.0.0)
mirofish  | [backend]  * Running on http://127.0.0.1:5001
mirofish  | [backend]  * Running on http://172.18.0.2:5001
mirofish  | [backend] Press CTRL+C to quit
mirofish  | [backend]  * Restarting with stat
mirofish  | [frontend]
mirofish  | [frontend]   VITE v7.2.7  ready in 1131 ms
mirofish  | [frontend]
mirofish  | [frontend]   ➜  Local:   http://localhost:3000/
mirofish  | [frontend]   ➜  Network: http://172.18.0.2:3000/
mirofish  | [frontend] Error: spawn xdg-open ENOENT
mirofish  | [frontend]     at ChildProcess._handle.onexit (node:internal/child_process:285:19)
mirofish  | [frontend]     at onErrorNT (node:internal/child_process:483:16)
mirofish  | [frontend]     at process.processTicksAndRejections (node:internal/process/task_queues:82:21)
mirofish  | [backend] [17:56:23] INFO: ==================================================
mirofish  | [backend] [17:56:23] INFO: MiroFish Backend 启动中...
mirofish  | [backend] [17:56:23] INFO: ==================================================
mirofish  | [backend] [17:56:23] INFO: 已注册模拟进程清理函数
mirofish  | [backend] [17:56:24] INFO: MiroFish Backend 启动完成
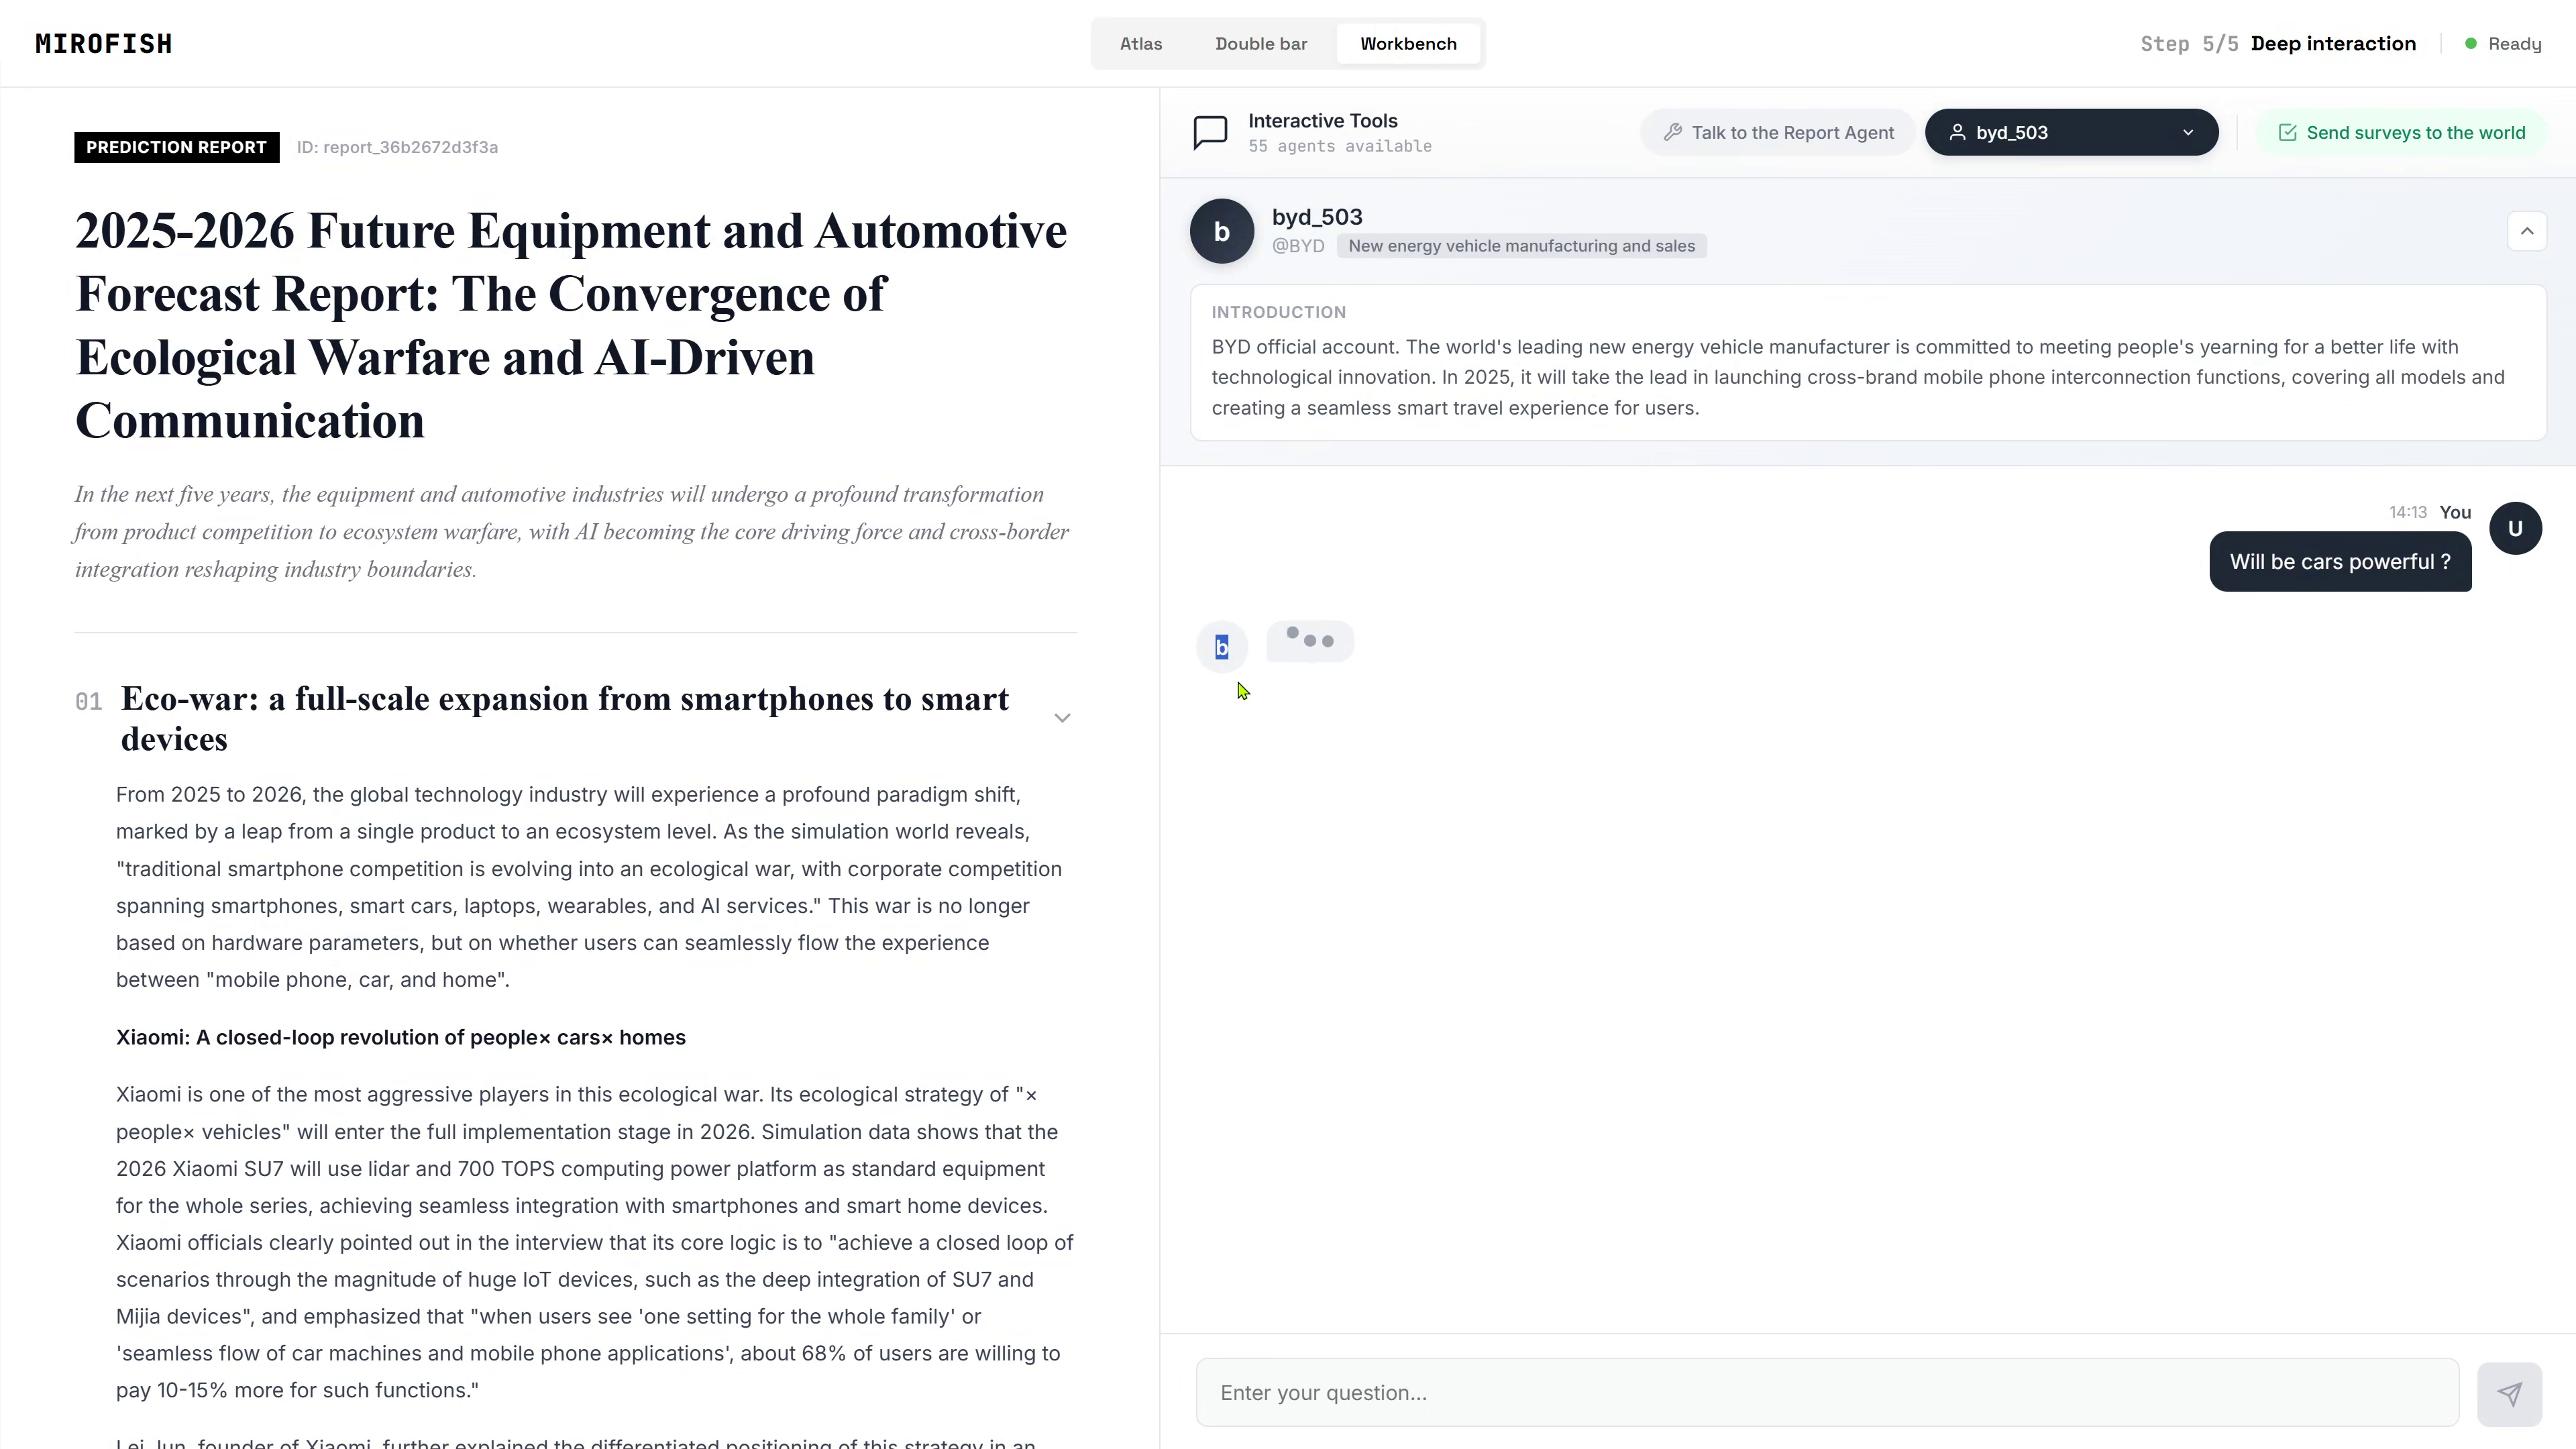
6) Open the Web UI
In your browser, open:
http://<YOUR_Tencent-Cloud-Lighthouse_IP_OR_DOMAIN>:3000
If the page loads but actions like generating ontology or building the graph fail with a network error, the backend URL in .env is usually the cause.
3) Using a MiroFishBasic Workflow
A typical MiroFish workflow looks like this:
- Create a new project
- Upload your documents, such as PDF or TXT files
- Add a prompt describing what you want to extract or simulate
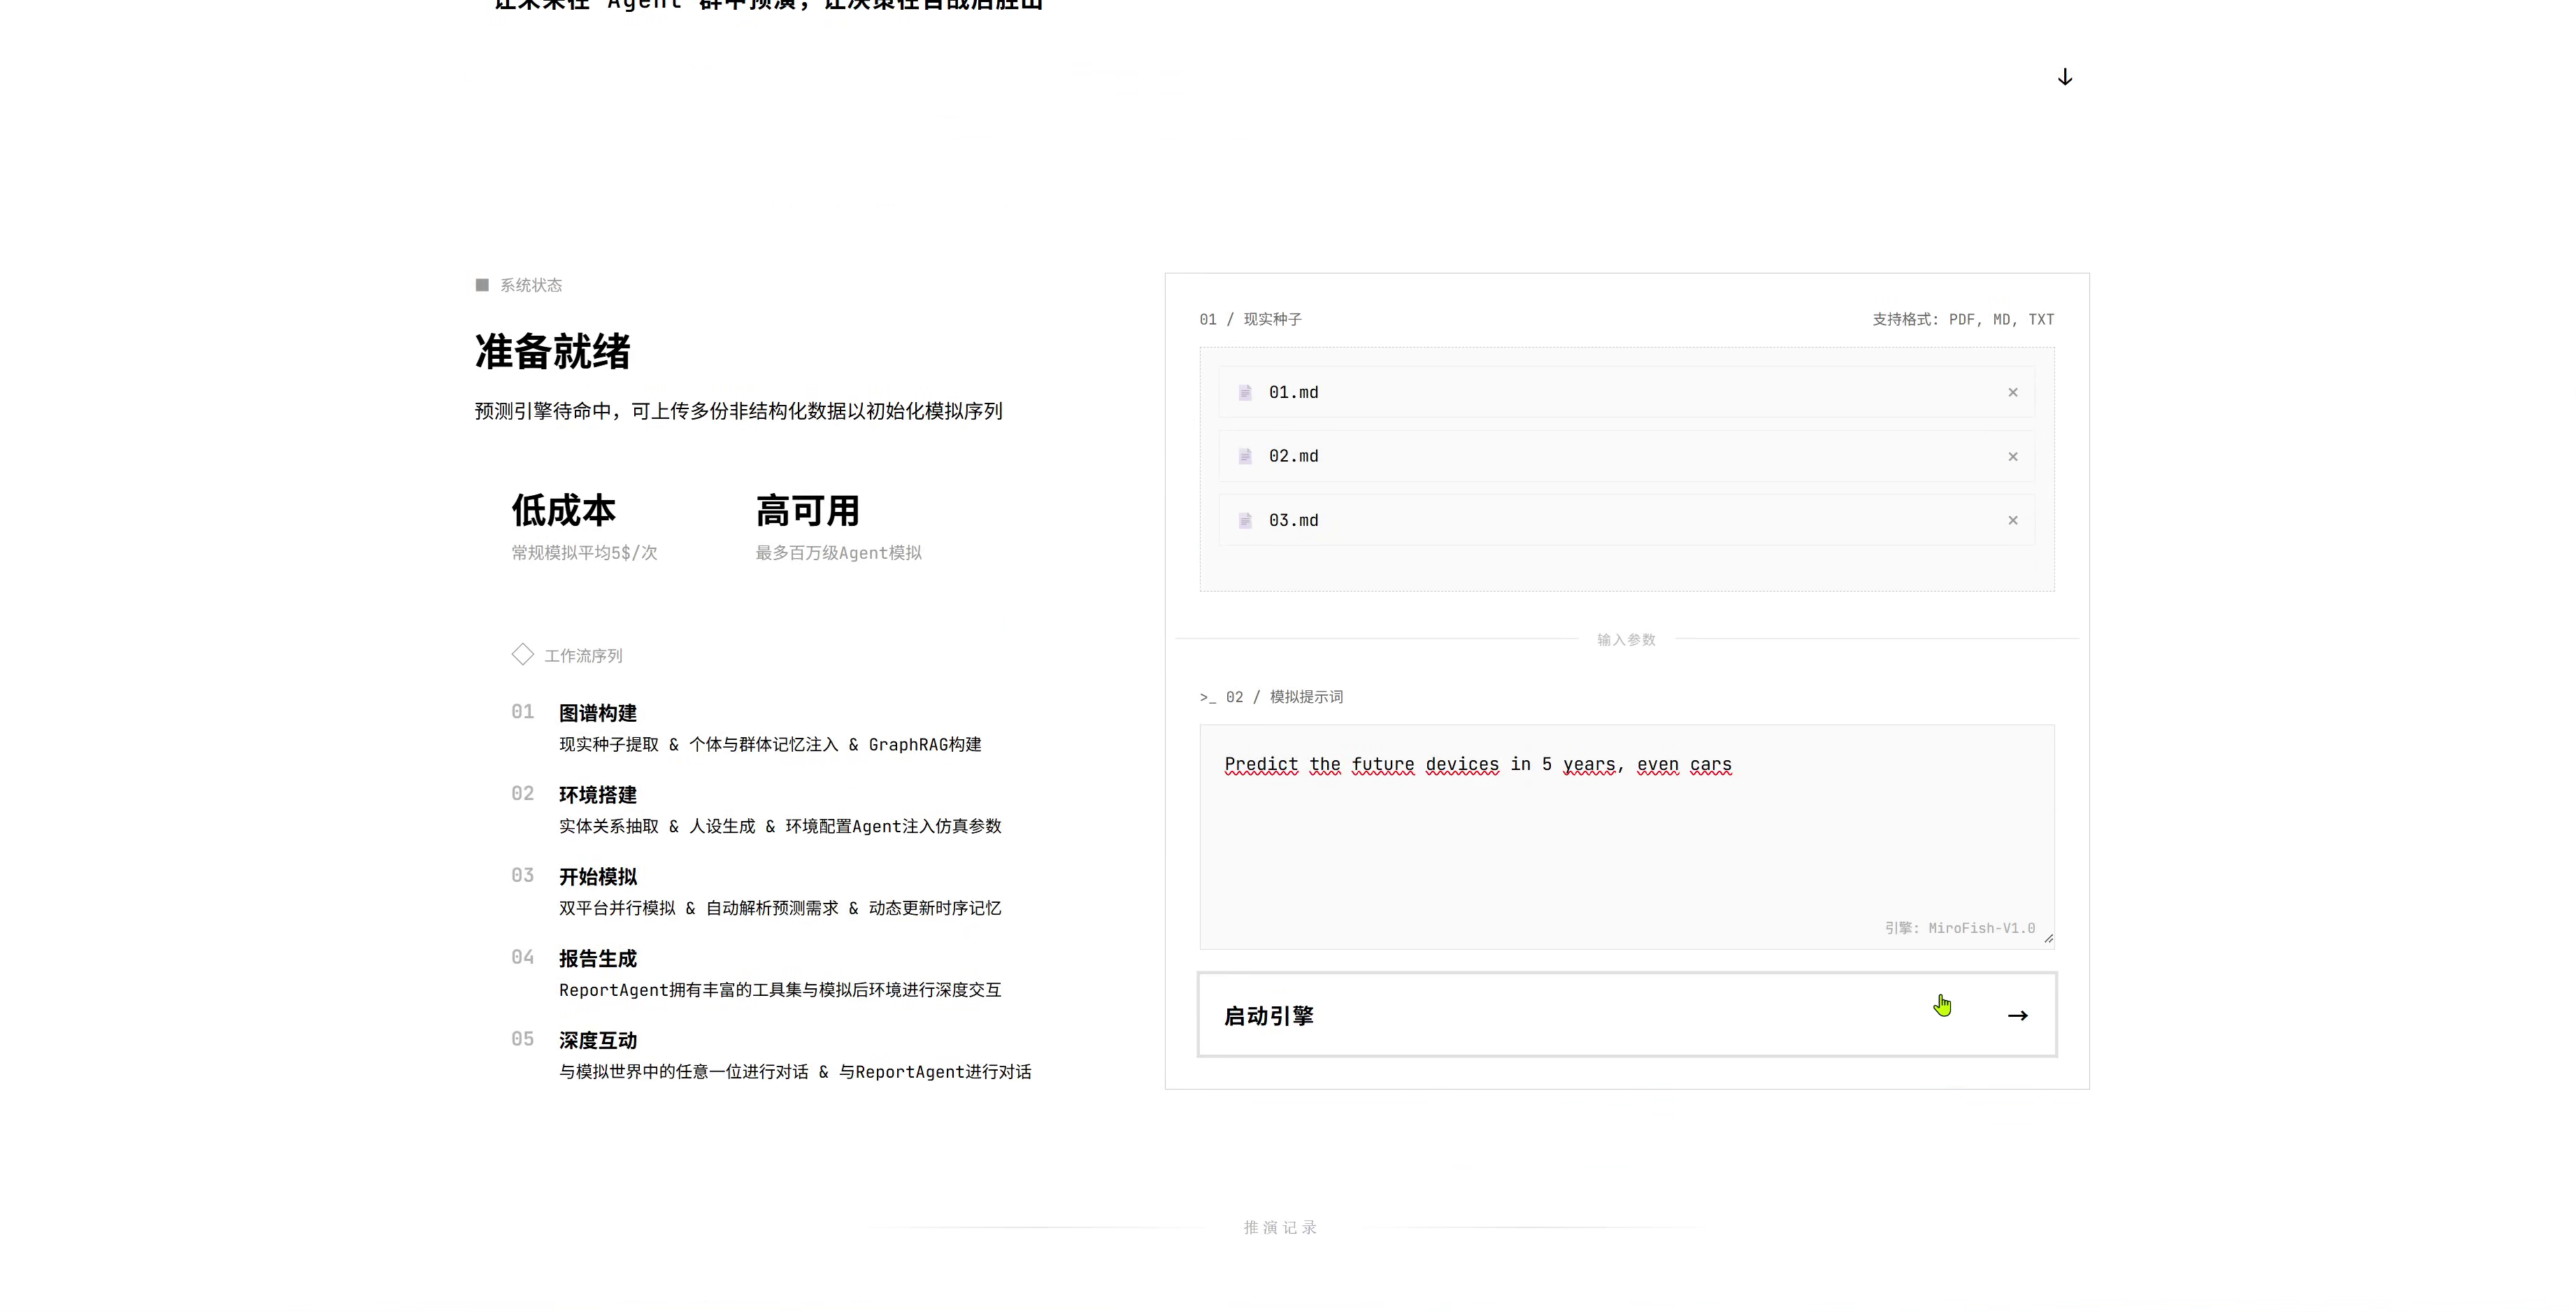
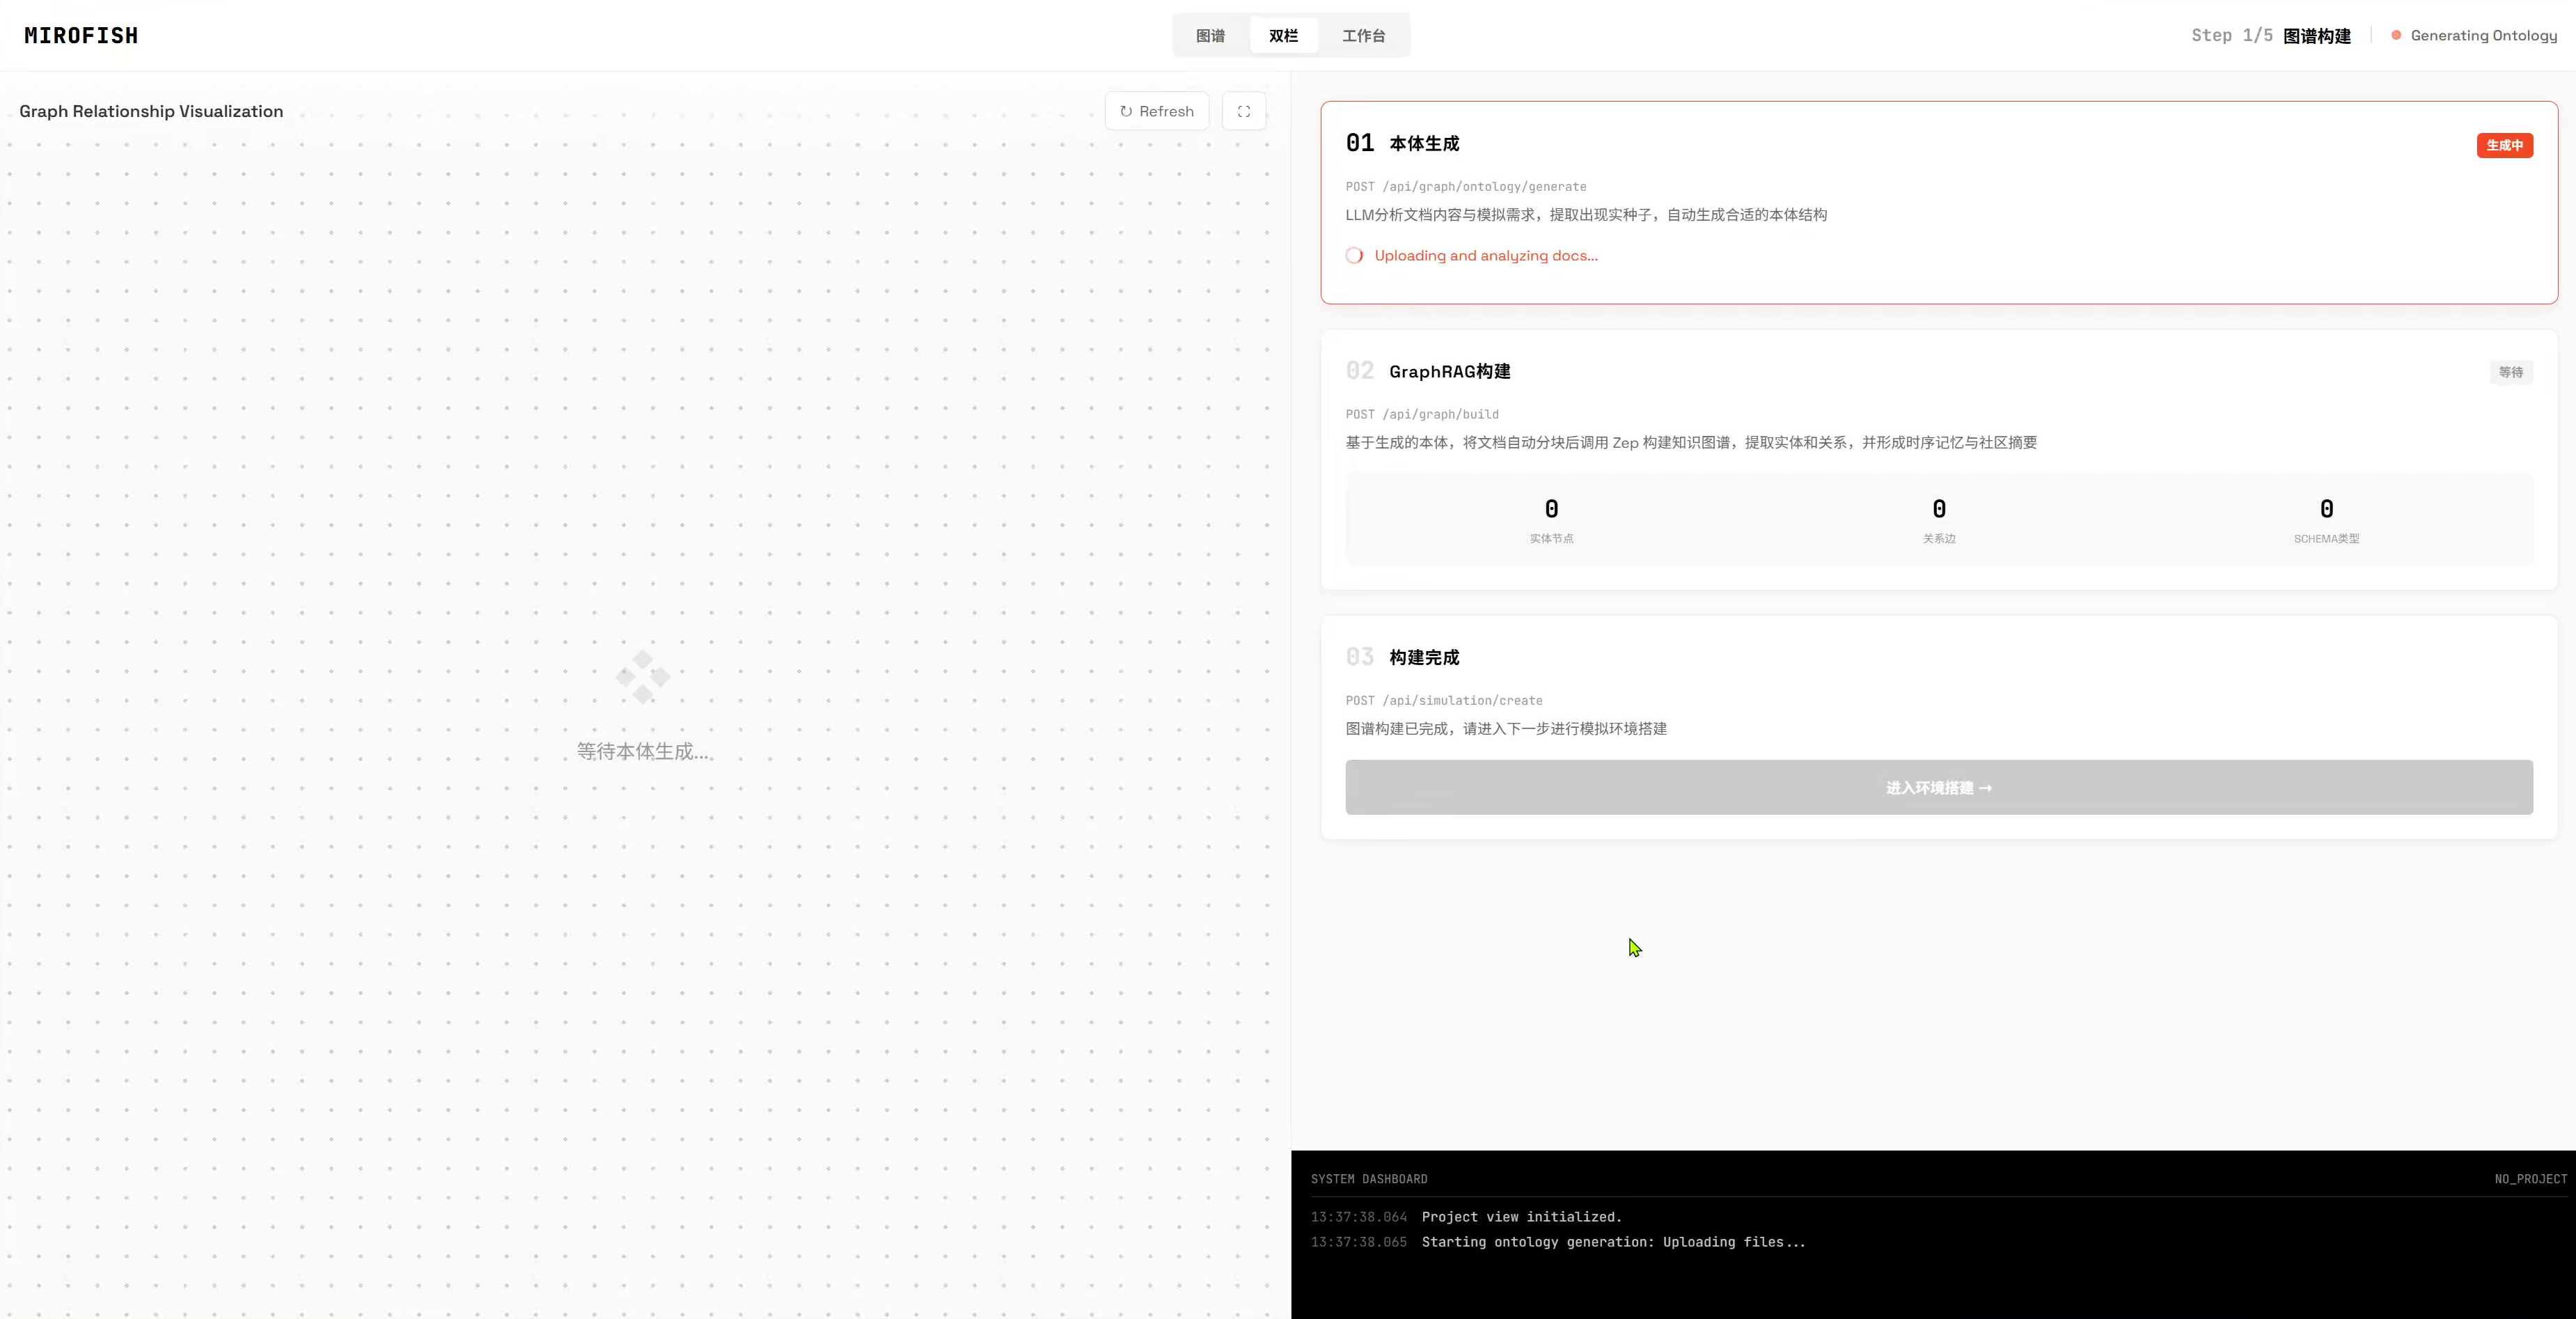
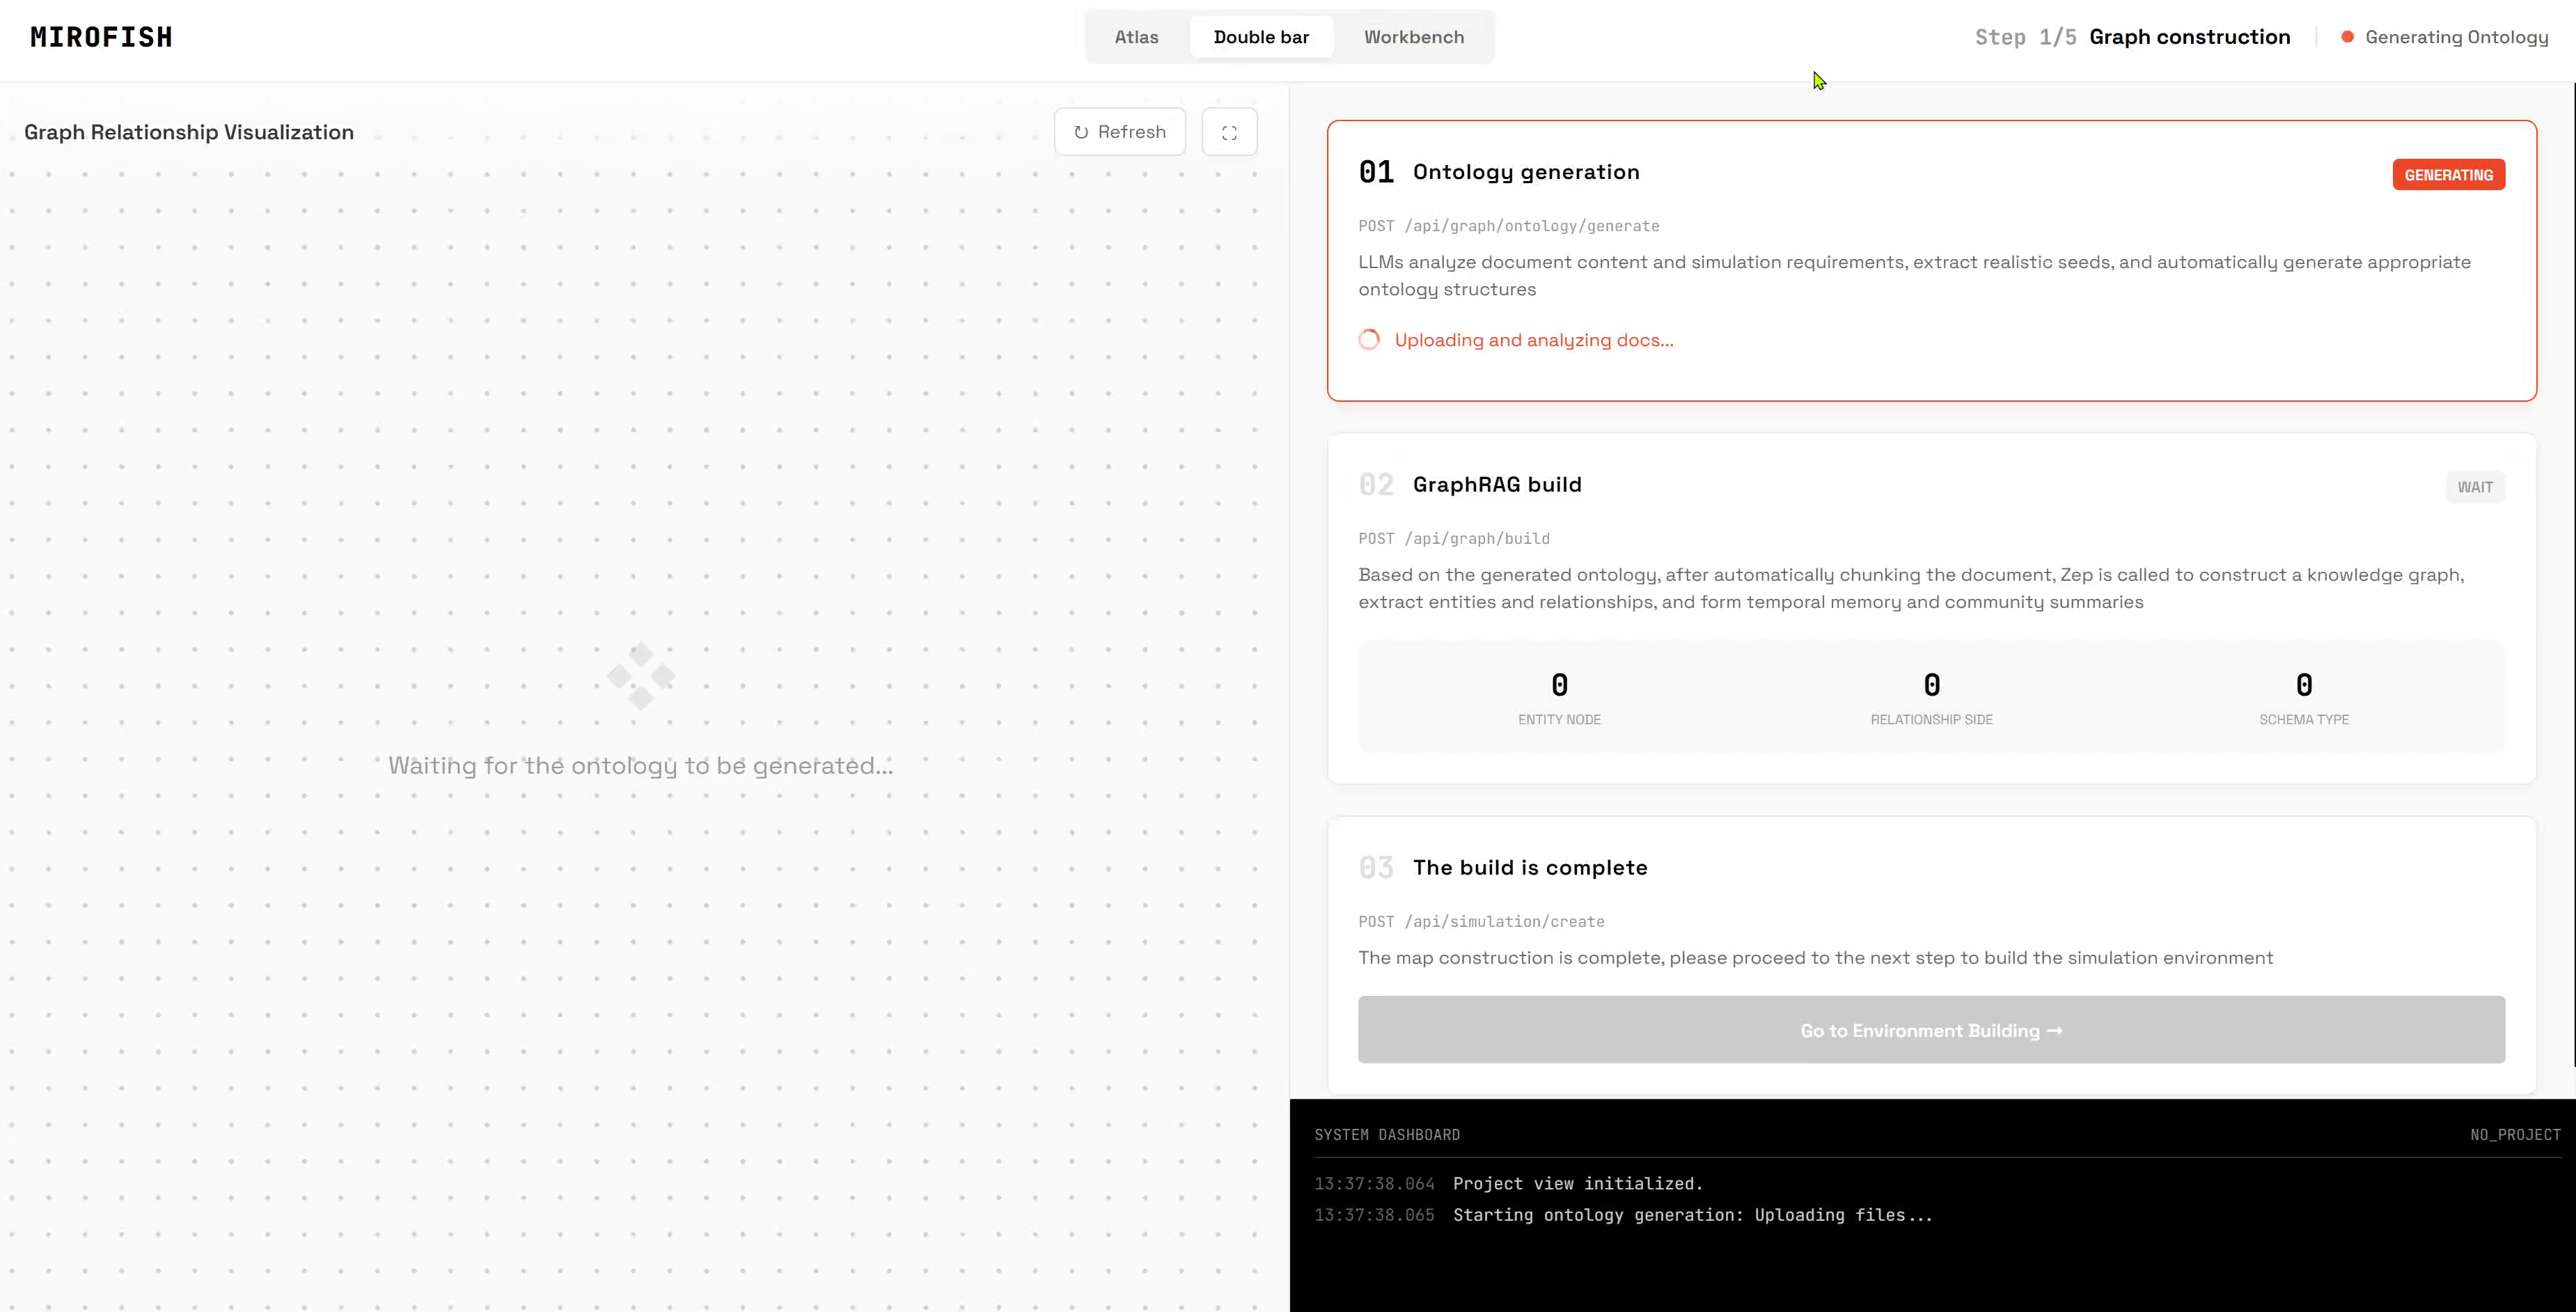
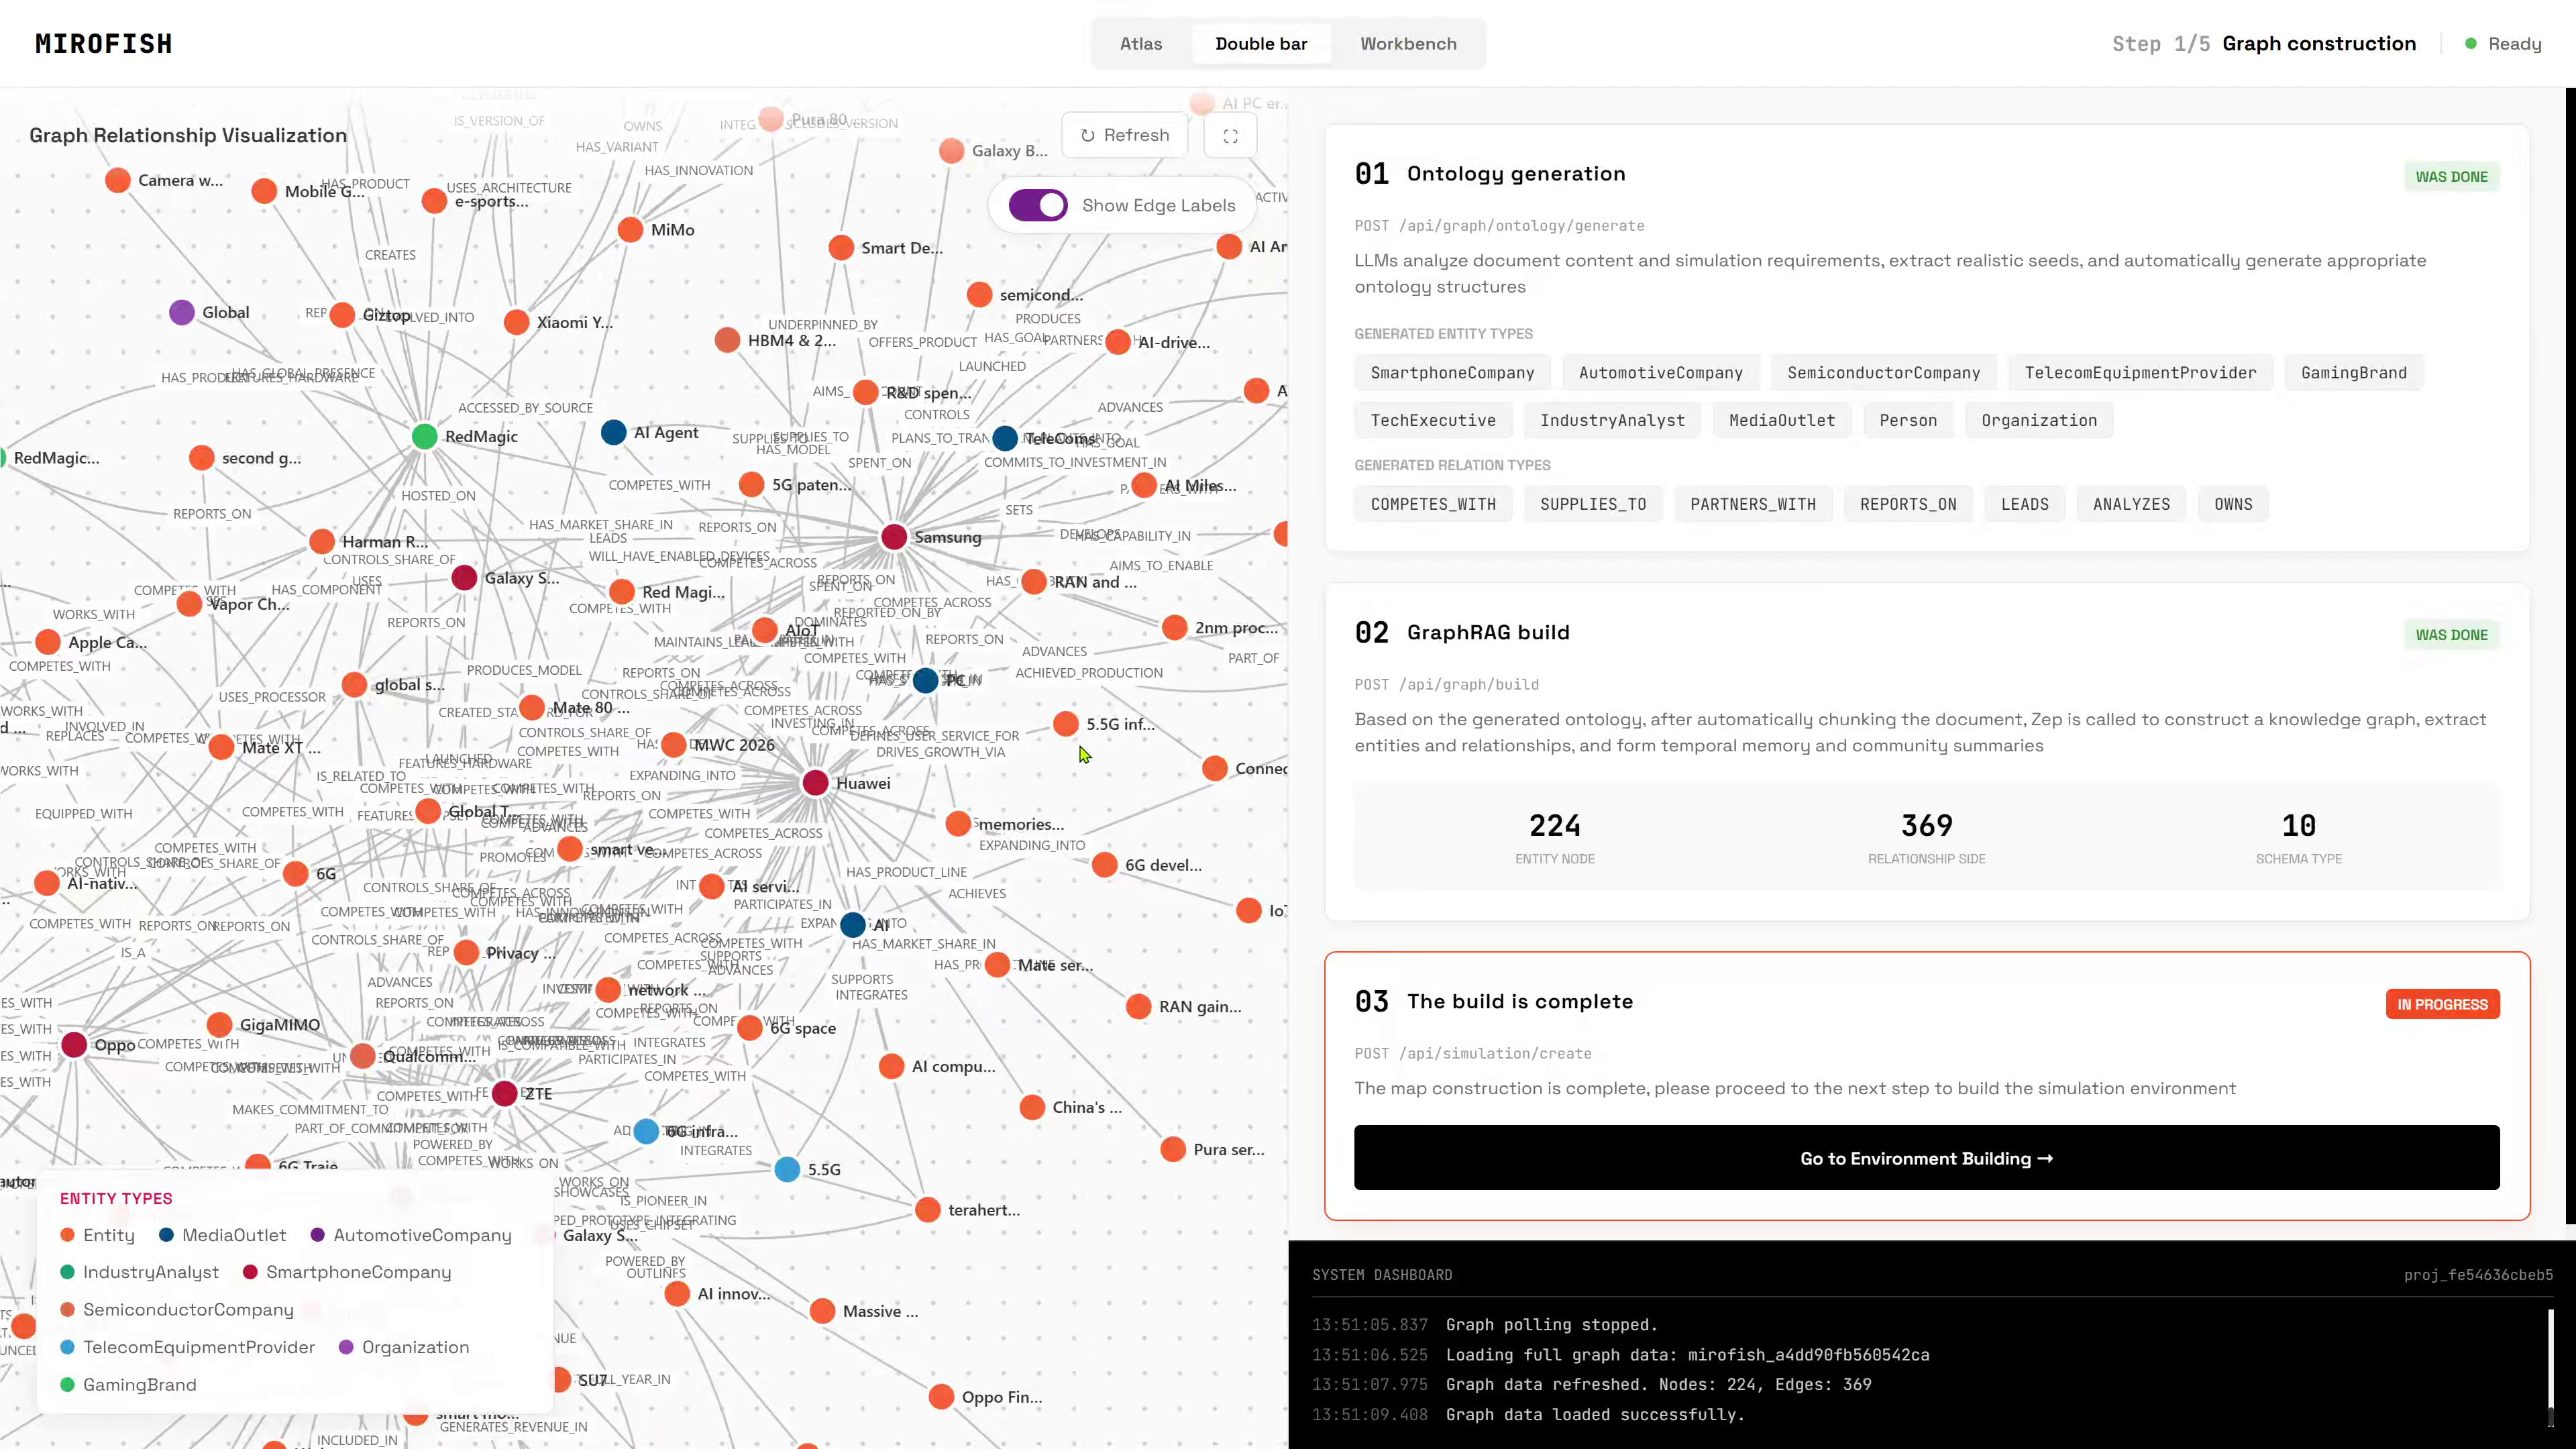
- Generate Ontology
- The LLM analyzes your documents
- It creates entities and relationships for the knowledge graph
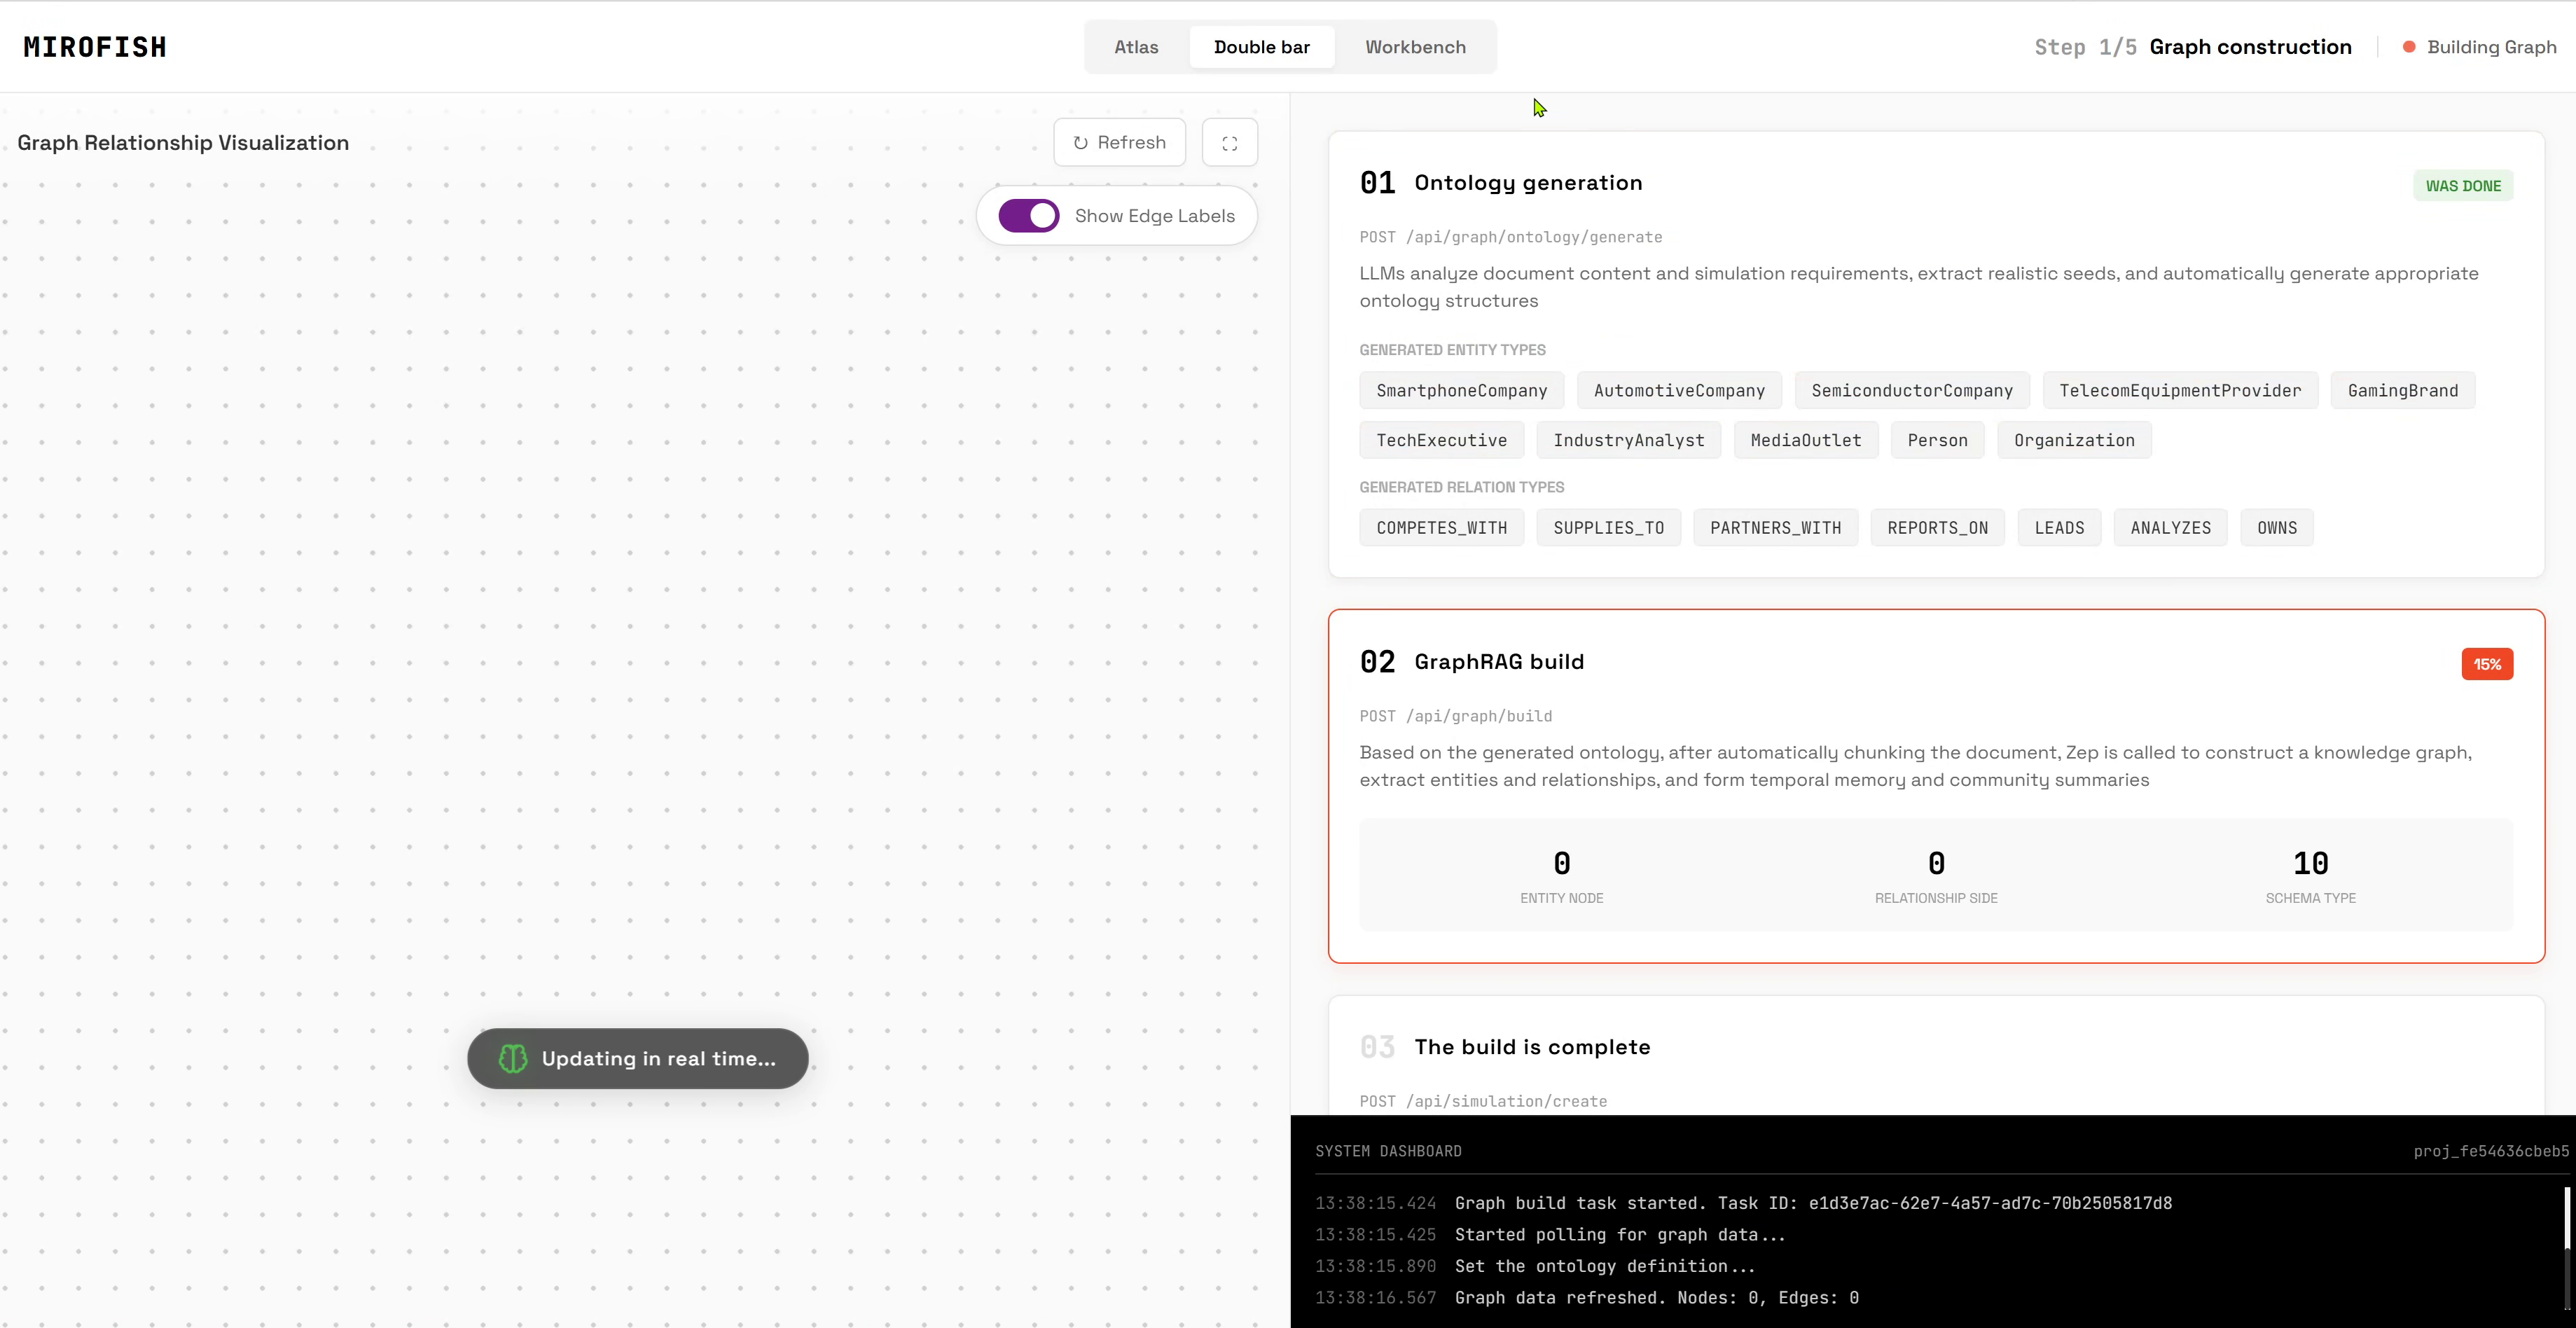
- Build Graph
- MiroFish chunks the documents
- The data is sent to Zep
- A knowledge graph is constructed from the extracted structure
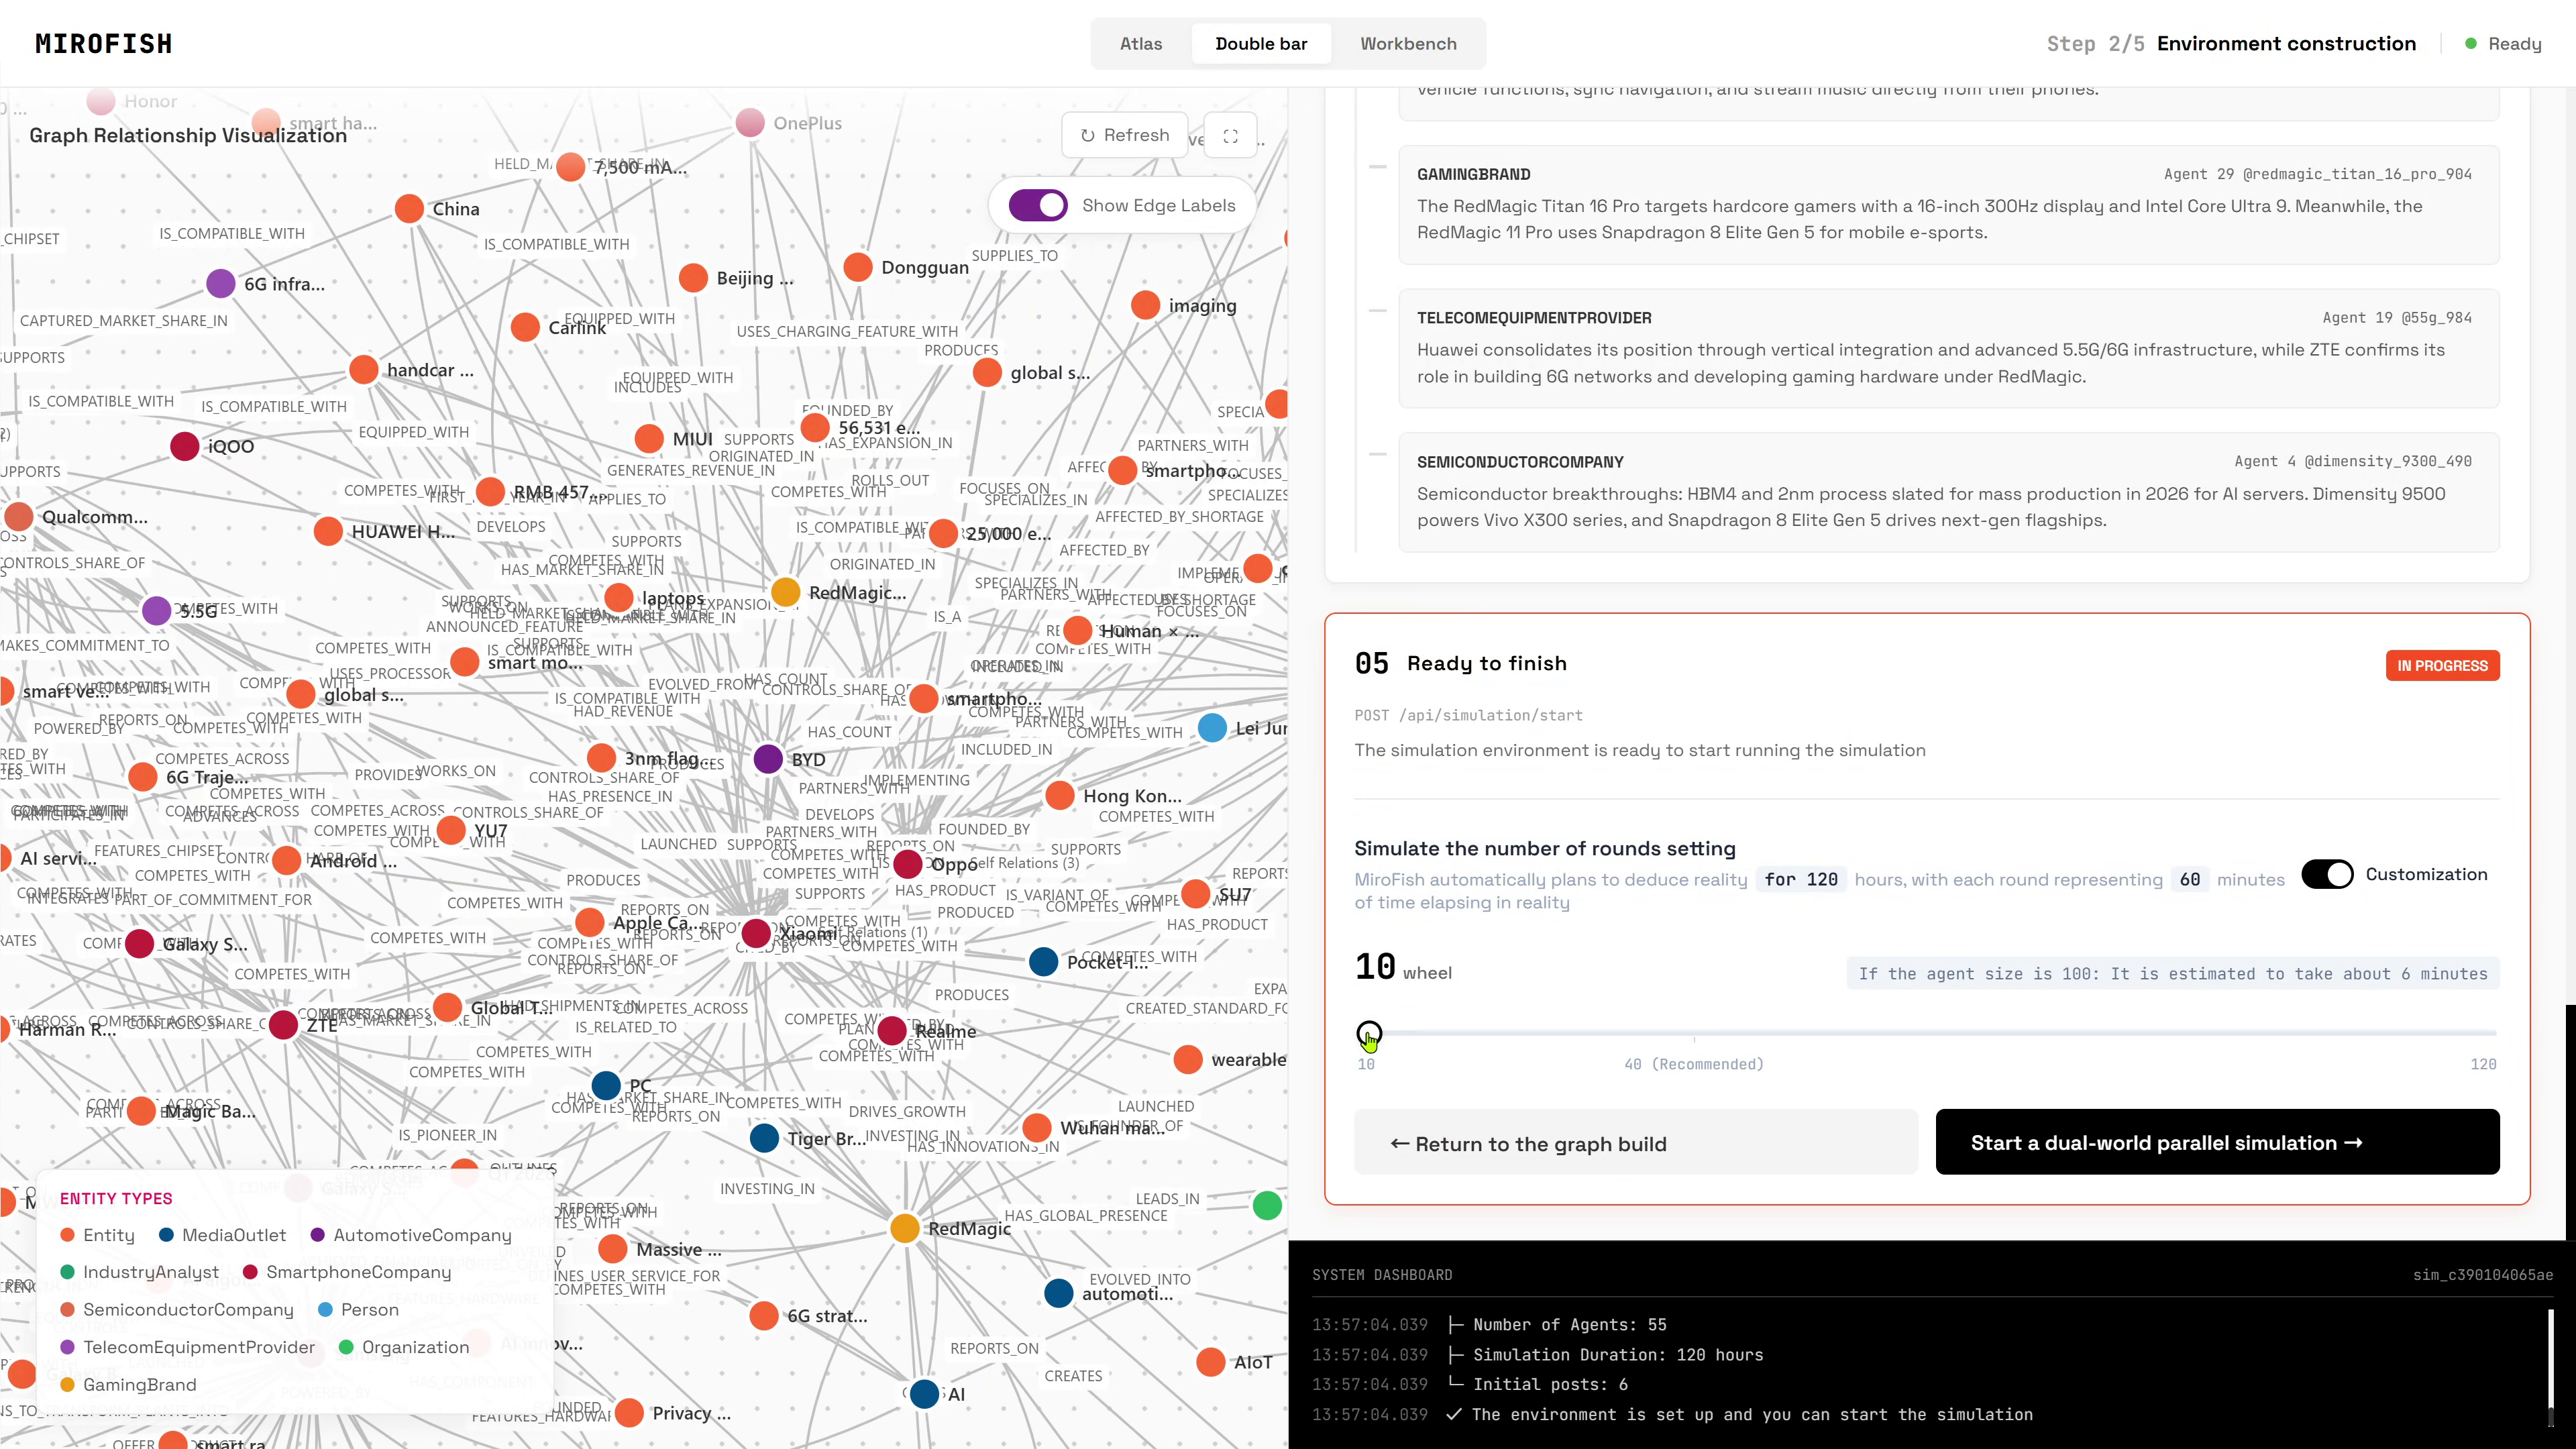
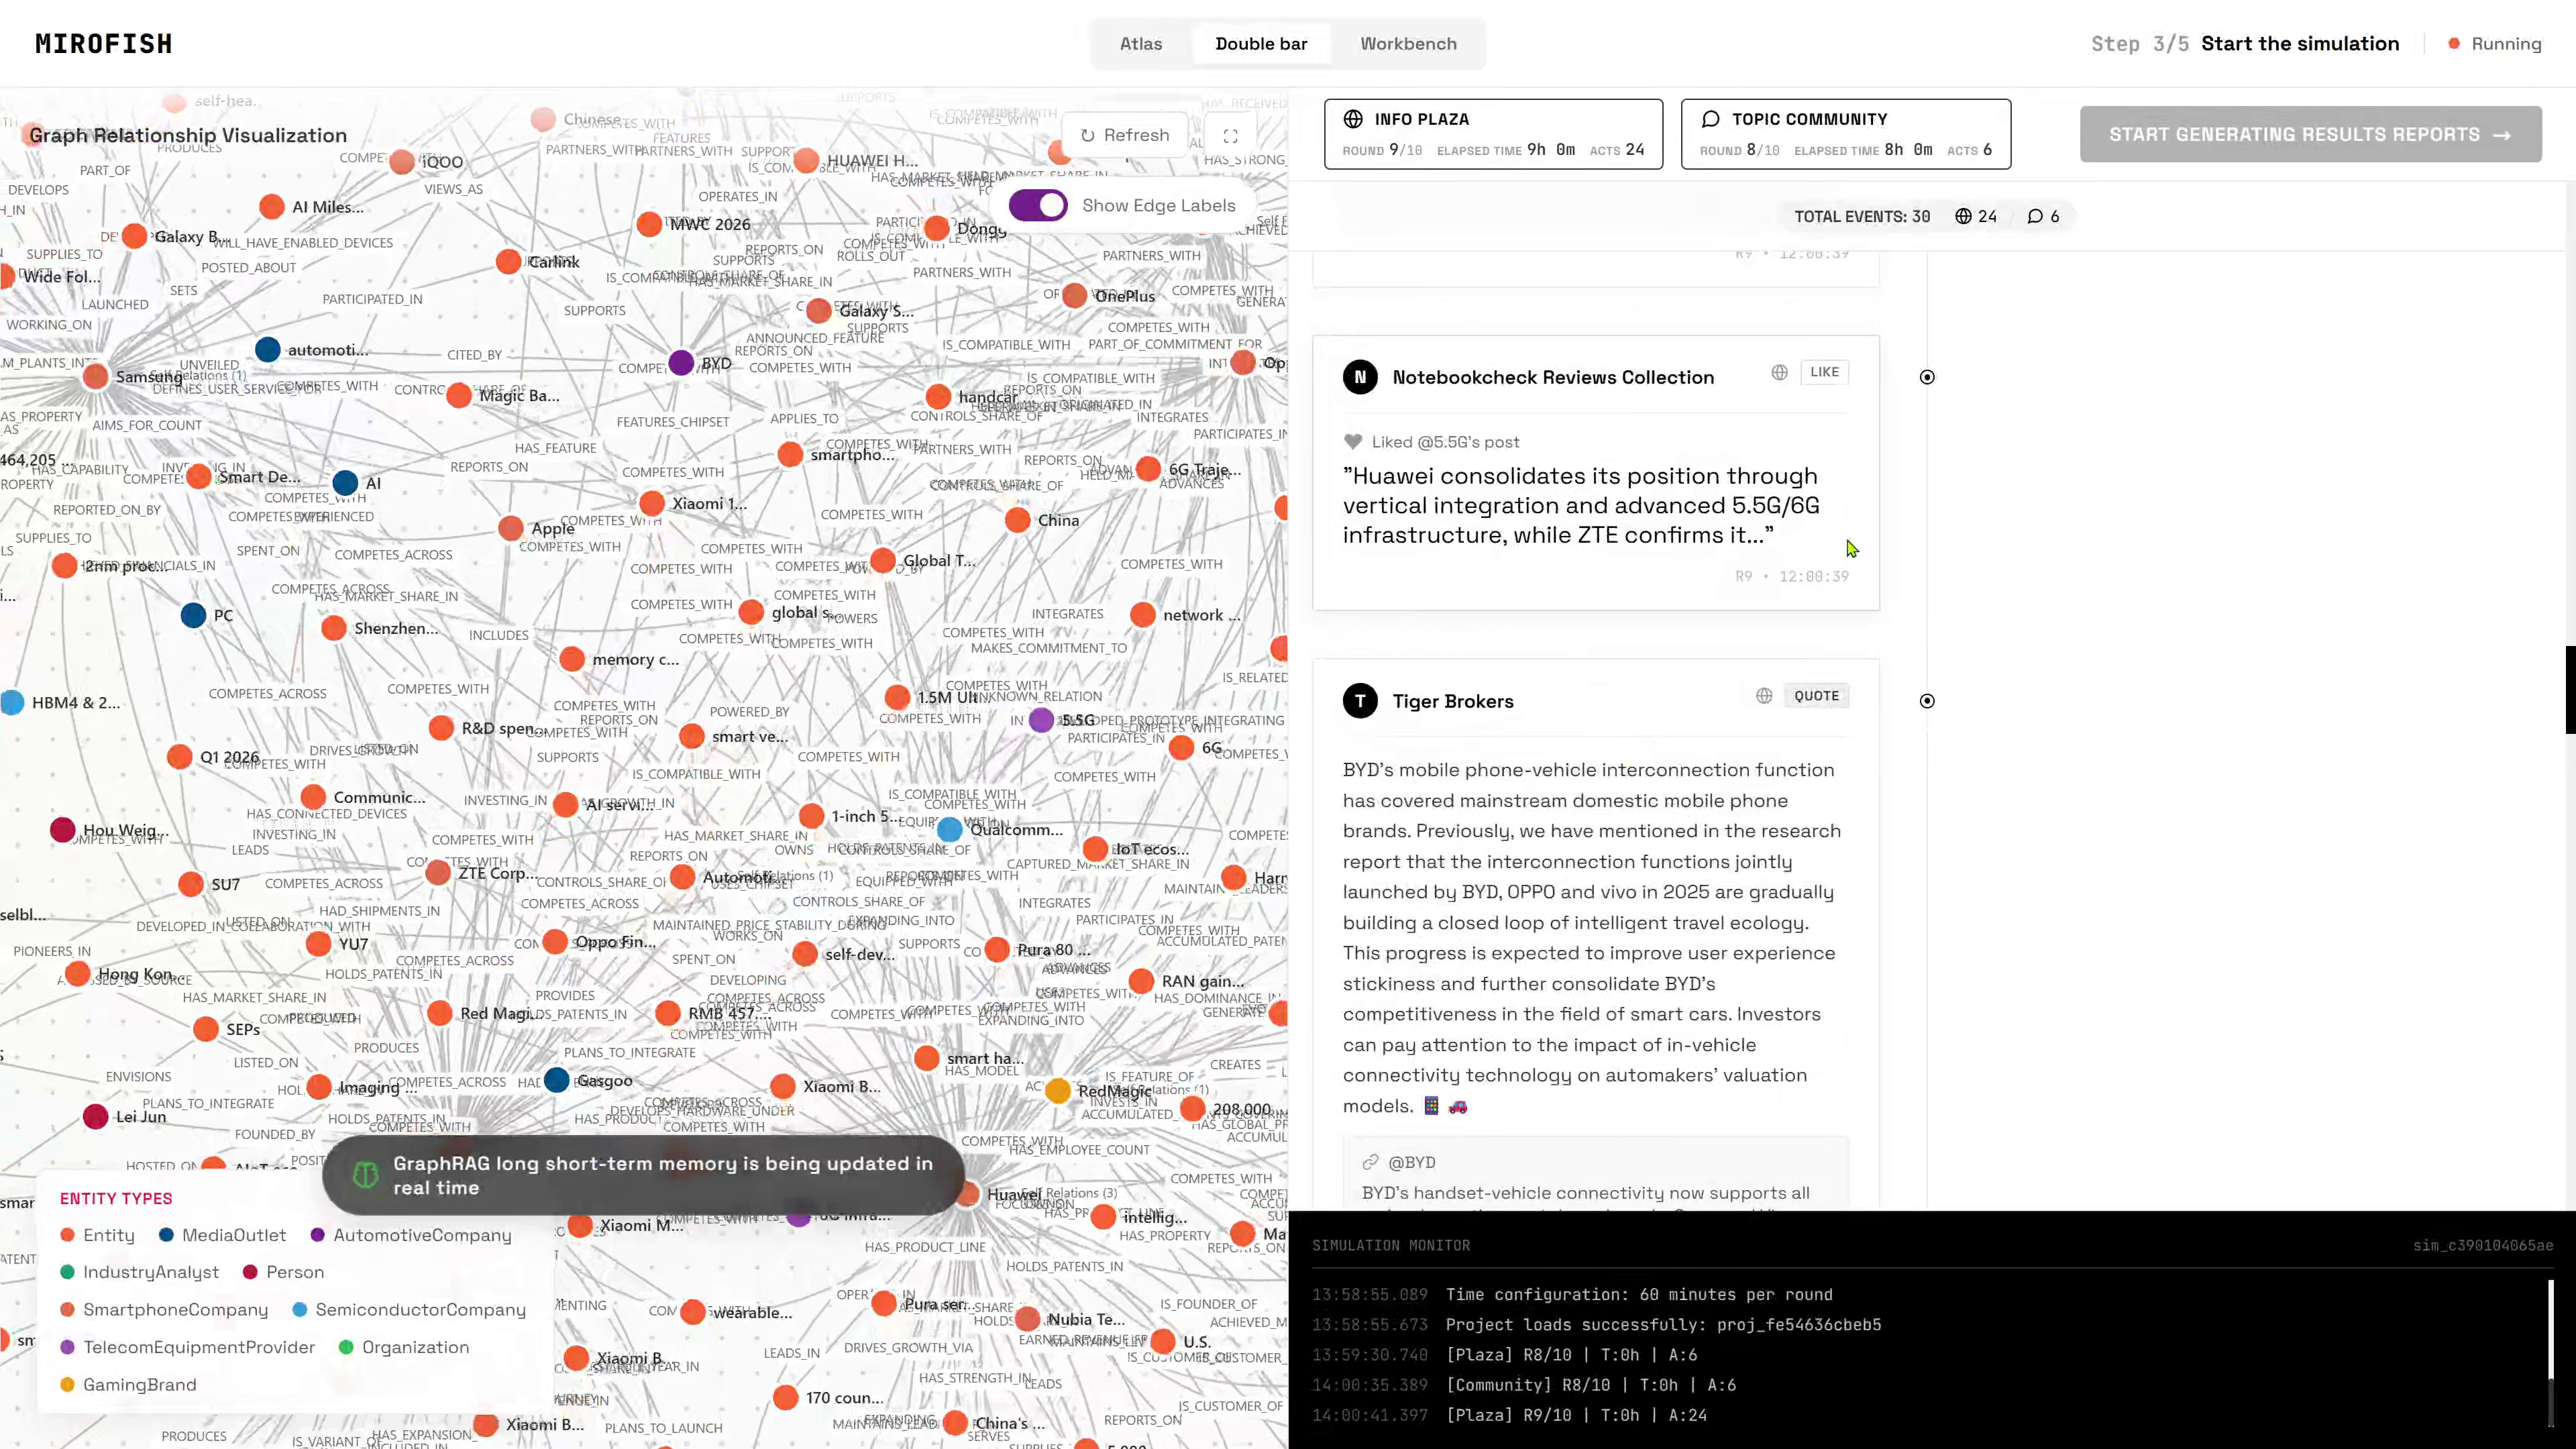
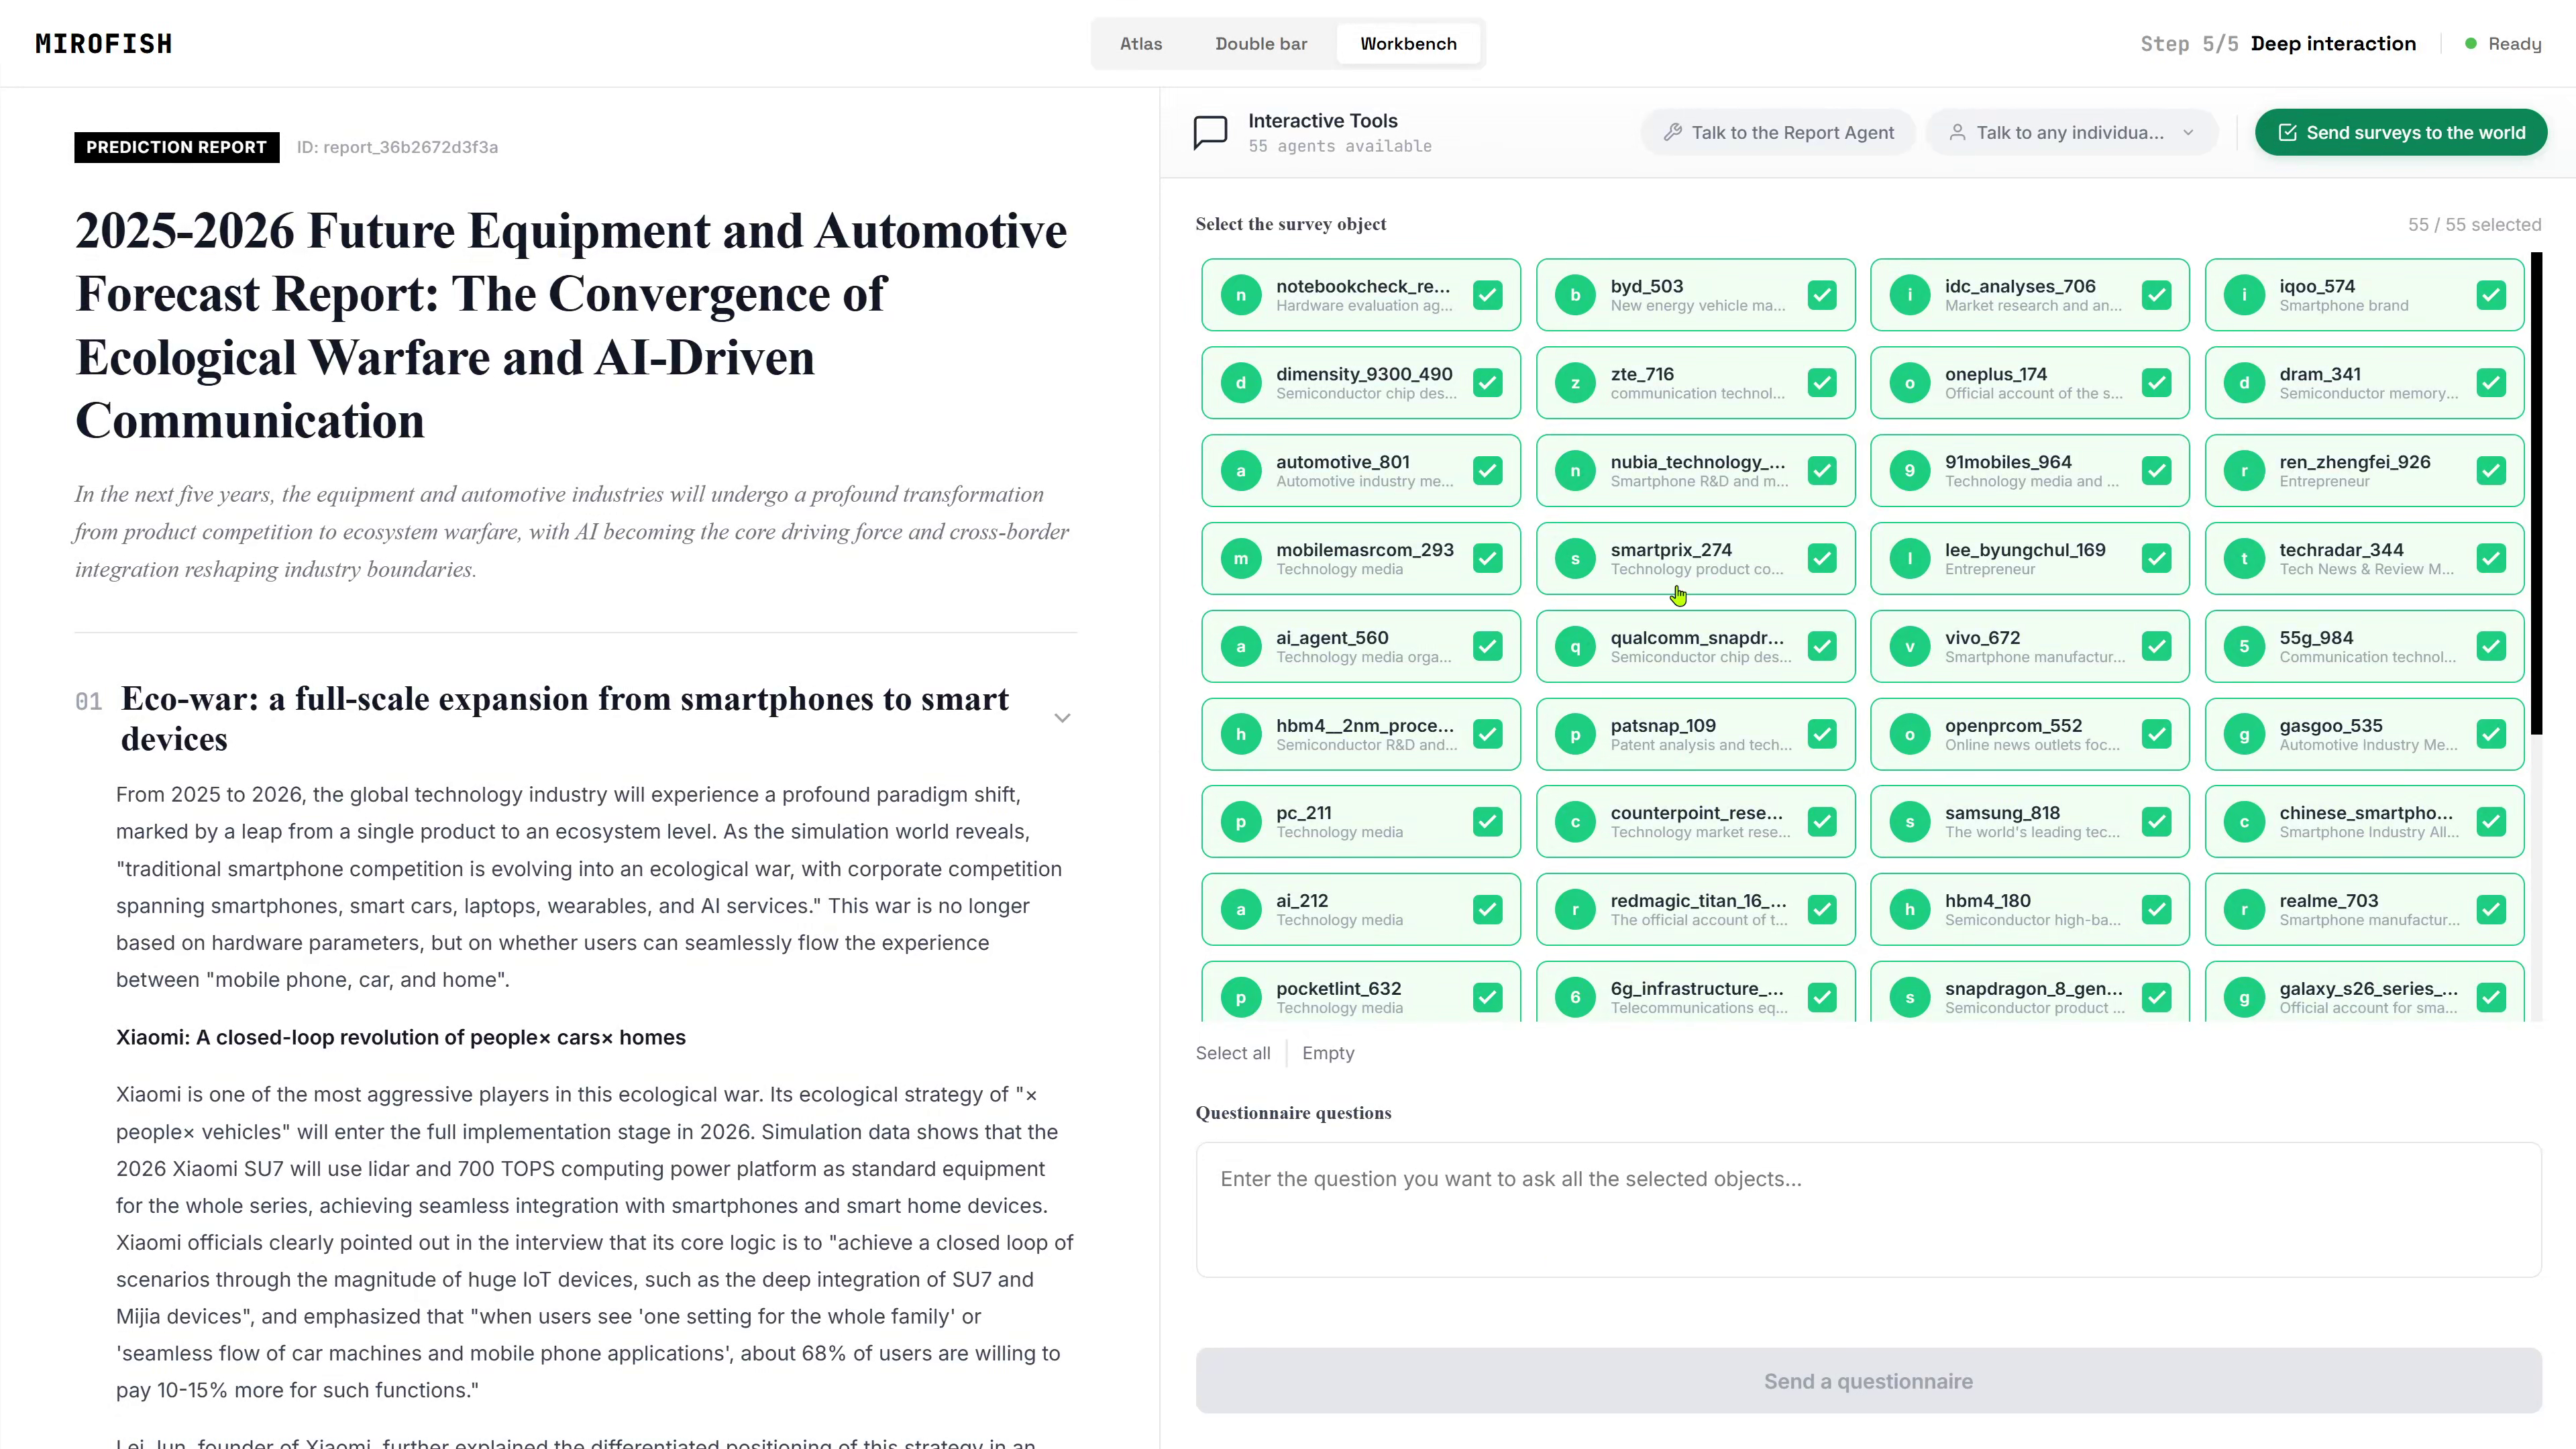
- Create Simulation
- After the graph is ready, open the simulation environment
- Interact with the generated entities and relationships
Troubleshooting
"Network Error" in the browser
This is the most common issue on remote servers.
Cause:
- The frontend is trying to call
localhost:5001 - Your browser interprets
localhostas the local computer, not the VM
Fix:
- Set
VITE_API_BASE_URLin.envto your server’s public IP or domain - Restart the container after changing the file:
docker compose down
docker compose up -d
Ports not reachable
Check that the VM firewall allows both ports:
30005001
If you are using a cloud provider, also check the provider’s security group or inbound rules.
Container starts but the UI does not work
Check these:
.envis in the same folder asdocker-compose.yml- API keys are valid
VITE_API_BASE_URLincludes the correct host and port- The container was restarted after changes
Logs show startup errors
Inspect the logs carefully:
docker logs mirofish
Common causes:
- Missing environment variables
- Wrong API key
- Invalid backend URL
- Firewall blocking access
Useful Commands
Stop the container:
docker compose down
Restart it:
docker compose restart
Rebuild after changes:
docker compose up --build -d
Follow logs live:
docker logs -f mirofish
Minimal Deployment Checklist
- Docker installed
- Docker Compose installed
-
.envcreated -
VITE_API_BASE_URLpoints to the correct server - API keys added
- Ports
3000and5001open - Container started successfully
- UI opens in browser without network errors
Welcome to join the discussion!
A Discord has been created, and everyone is welcome to join and explore advanced ways to use Lighthouse together!

🚀 Developer Community & Support
1️⃣ OpenClaw Developer Community
Unlock advanced tips on Discord
Click to join the community
Note: After joining, you can get the latest plugin templates and deployment playbooks
2️⃣ Dedicated Support
Join WhatsApp / WeCom for dedicated technical support
| Channel | Scan / Click to join |
|---|---|
| WhatsApp Channel |

|
| WeCom (Enterprise WeChat) |

|
Learn more on the official page:
👉 Deploy MiroFish Ready Lighthouse Instance Now