How to Deploy and Use Hermes Agent in a Modern Self-Hosted Web Interface
Introduction
Modern AI agents are becoming increasingly useful for automation,
development workflows, system administration, and research tasks. While
many hosted AI platforms provide convenience, self-hosting an AI agent
gives you significantly more control over privacy, customization,
security, API integrations, and infrastructure management.
In this guide, we will deploy Hermes Agent together with Hermes WebUI on
an Ubuntu-based cloud server. The web interface allows users to interact
with Hermes Agent through a modern browser-based UI while supporting
multiple LLM providers and local model integrations.
Why Self-Host Hermes Agent?
Self-hosting Hermes Agent provides more flexibility and control compared
to relying entirely on third-party hosted AI services.
A self-hosted deployment gives you:
- Full control over your AI environment
- Better privacy for prompts and conversations
- The ability to integrate custom APIs and tools
- Persistent workspaces and sessions
- Easier integration with local infrastructure
- The ability to use either cloud LLMs or local models
- Long-running autonomous workflows
This setup is especially useful for:
- Developers
- System administrators
- AI researchers
- Automation engineers
- Homelab users
Unlike running an AI agent directly on your personal computer, deploying
it on a cloud server allows 24/7 access from anywhere while maintaining
persistent sessions and storage.
What You Need
Before starting, prepare the following:
Requirement Details
Cloud server Tencent Cloud Lighthouse
Operating system Ubuntu 24.04 LTS
CPU 2 vCPU or higher
RAM 4 GB or higher
Storage 30 GB or higher
Domain name Optional but recommended
API key OpenRouter, OpenAI, Anthropic, or other provider
Why Choose Tencent Cloud Lighthouse?
Tencent Cloud Lighthouse is suitable for lightweight and medium-scale
self-hosted deployments such as AI tools, web applications, bots,
automation platforms, development environments, and AI agents. Hermes
Agent and Hermes WebUI are good candidates for Lighthouse because the
platform provides simple cloud server management, stable networking, and
flexible global region options.
For a Hermes Agent deployment, Tencent Cloud Lighthouse is a good fit
because:
- It provides a public IPv4 address.
- It can run AI services continuously 24/7.
- Firewall rules can be managed directly from the Tencent Cloud
console. - You can choose a server region close to your users.
- It can host both Hermes WebUI and additional AI-related services on
the same server.
For best responsiveness, choose a Lighthouse region close to your
primary users or your preferred AI provider region. For example, if most
users are located in Southeast Asia, selecting a nearby Asia-Pacific
region usually provides lower latency compared to deploying in Europe or
North America.
Step 1: Installing Ubuntu 24.04 LTS on Tencent
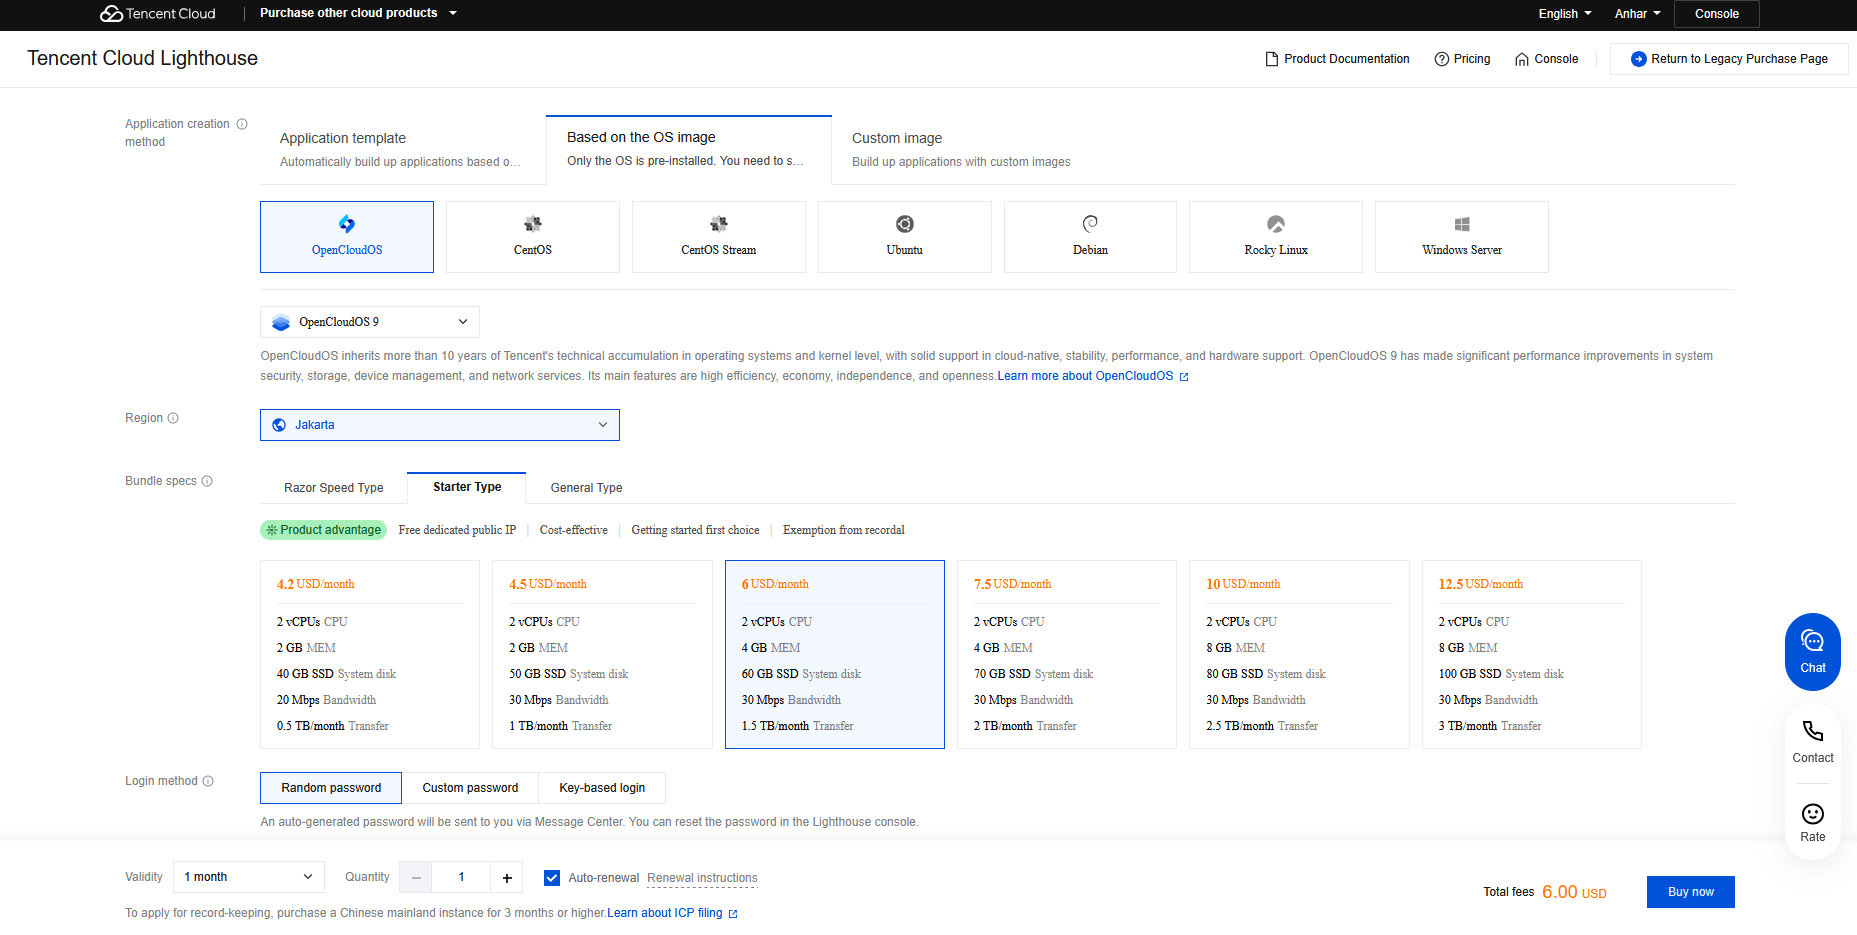
Go to the Tencent Cloud Lighthouse product
https://www.tencentcloud.com/products/lighthouse?from_qcintl=topnav&lang=en&pg=&referral_code=78XT025C
to purchase a server. Recommended configuration:
- Image: Ubuntu 24.04 LTS
- Region: Pick the location closest to most of your users.
- Package Configuration: Starter type 2 vCPU / 4 GB RAM
Click Buy Now, follow the page guidance to complete payment, and wait
about 30 seconds to complete server creation.
Step 2: Login to the server
Open the Tencent Cloud Console and find your Lighthouse instance.
You can log in using either:
- Tencent Cloud web terminal
- SSH from your local computer
Example SSH command:
ssh root@your-server-ip
After logging in, update the system packages:
sudo apt update && sudo apt upgrade -y
Install required tools:
sudo apt install curl git -y
Step 3: Install Hermes Agent
Move to your preferred directory. In this guide, I will use the home
user directory. The commands used in the following steps may need to be
adjusted depending on which directory you choose.
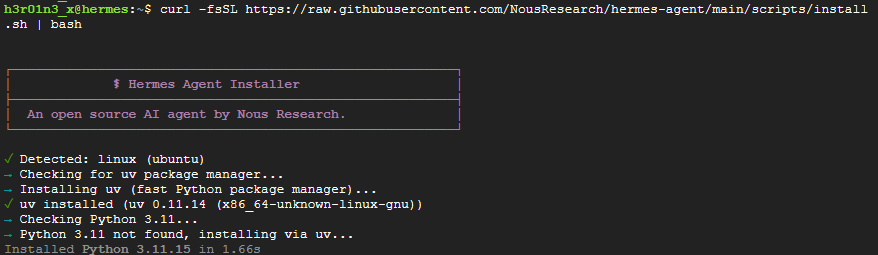
cd ~
Run the one-line installer:
curl -fsSL https://raw.githubusercontent.com/NousResearch/hermes-agent/main/scripts/install.sh | bash
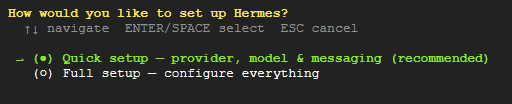
Use the up and down arrow keys to navigate through the installation
options, then press Enter to confirm your selection. For this setup,
choose Quick setup
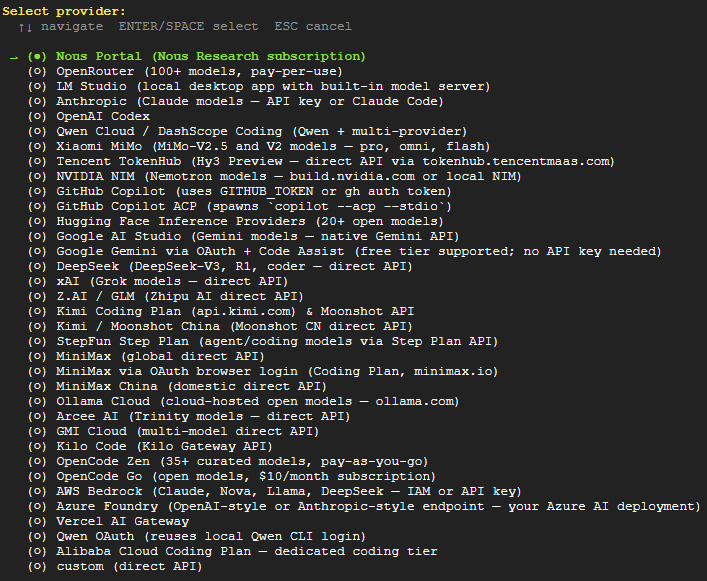
After that, choose the provider and model based on the API key or
platform you want to use.
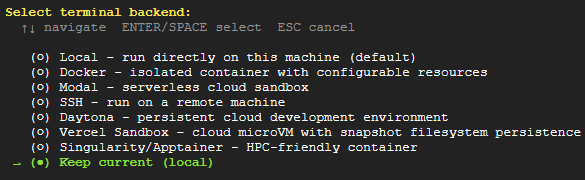
After choosing the provider and model, select the terminal backend that
Hermes Agent will use. In this tutorial, I will use the default local
backend
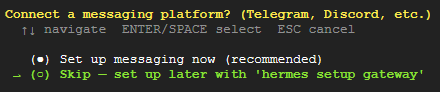
For this tutorial, skip the messaging platform setup by selecting Skip
--- set up later with hermes setup gateway. You can configure Telegram,
Discord, or other messaging integrations later if needed.
After the installation is complete, reload your shell to apply the new
environment changes and command configurations.
source ~/.bashrc
Step 4: Install Hermes Gateway
After successfully installing Hermes Agent, continue by installing
Hermes Gateway to enable external integrations and web-based
communication features.
hermes gateway install
After installing the Hermes Gateway, start the service using the
following command:
hermes gateway start
Make sure the Hermes Gateway is running properly by using the following
command:
hermes gateway status
If the service status shows active (running) and enabled, it means the
Hermes Gateway has been successfully installed and started correctly

Step 5: Install Hermes WebUI
After successfully installing Hermes Agent and Hermes Gateway, we will
now install the Hermes WebUI. First, clone the repository using the
following command:
git clone https://github.com/nesquena/hermes-webui.git hermes-webui
Move into the cloned repository directory using the following command:
cd hermes-webui
Create a new .env file to store the environment variables and
configuration settings:
sudo nano .env
Fill the .env file with the variables below, and set the password you
want to use for logging into the WebUI.
HERMES_WEBUI_PASSWORD=change-me-to-something-strong
Step 6: Create a Systemd Service for Hermes WebUI
To make the service start automatically after a system reboot, create a
systemd service.
sudo nano /etc/systemd/system/hermes-webui.service
Fill the file with the configuration below, then change the User,
WorkingDirectory and ExecStart values based on your Linux username and
the location where you cloned the repository.
[Unit]
Description=Hermes WebUI
After=network.target

[Service]
Type=simple

# Change this to your Linux username
User=your_username

# Change this to the directory where you cloned hermes-webui
WorkingDirectory=/path/to/hermes-webui

# Change this to the location of your start.sh file
ExecStart=/path/to/hermes-webui/start.sh

Restart=always
RestartSec=5

[Install]
WantedBy=multi-user.target
After saving the configuration, reload the systemd daemon, enable the
service to start automatically at boot, and then start the service using
the following commands:
sudo systemctl daemon-reload
sudo systemctl enable hermes-webui
sudo systemctl start hermes-webui
Check whether the service is running and enabled by using the following
command:
sudo systemctl status hermes-webui
If the service status shows running and enabled, it means the service is
running correctly.

Step 7: Configure Nginx Reverse Proxy and HTTPS with Certbot
At this point, you should be able to access the Hermes WebUI through:
http://your-server-ip:8787
However, for better security and a more professional deployment, it is
strongly recommended to configure a reverse proxy using Nginx and enable
SSL certificates for secure HTTPS connections. This setup helps protect
login credentials, encrypt web traffic, and allows access through a
domain name instead of directly exposing port 8787 to the internet.
Install Nginx:
sudo apt install nginx -y
Create a new configuration file:
sudo nano /etc/nginx/sites-available/hermes-webui
Paste the following configuration and change the server_name based on
you domain name:
server {
    listen 80;
    server_name ai.yourdomain.com;

    client_max_body_size 500M;

    location / {
        proxy_pass http://127.0.0.1:8787;

        proxy_http_version 1.1;

        proxy_set_header Host $host;
        proxy_set_header X-Real-IP $remote_addr;
        proxy_set_header X-Forwarded-For $proxy_add_x_forwarded_for;
        proxy_set_header X-Forwarded-Proto $scheme;

        proxy_set_header Upgrade $http_upgrade;
        proxy_set_header Connection "upgrade";
    }
}
Enable the site:
sudo ln -s /etc/nginx/sites-available/hermes-webui /etc/nginx/sites-enabled/
Install Certbot:
sudo apt install certbot python3-certbot-nginx -y
Generate SSL certificate and follow the prompts.:
sudo certbot --nginx -d ai.yourdomain.com
Test configuration:
sudo nginx -t
Restart Nginx:
sudo systemctl restart nginx
Step 8: Using Hermes Agent WebUI
Once deployed, Hermes Agent can be used directly from the browser
through the domain name you configured in the Nginx reverse proxy setup.
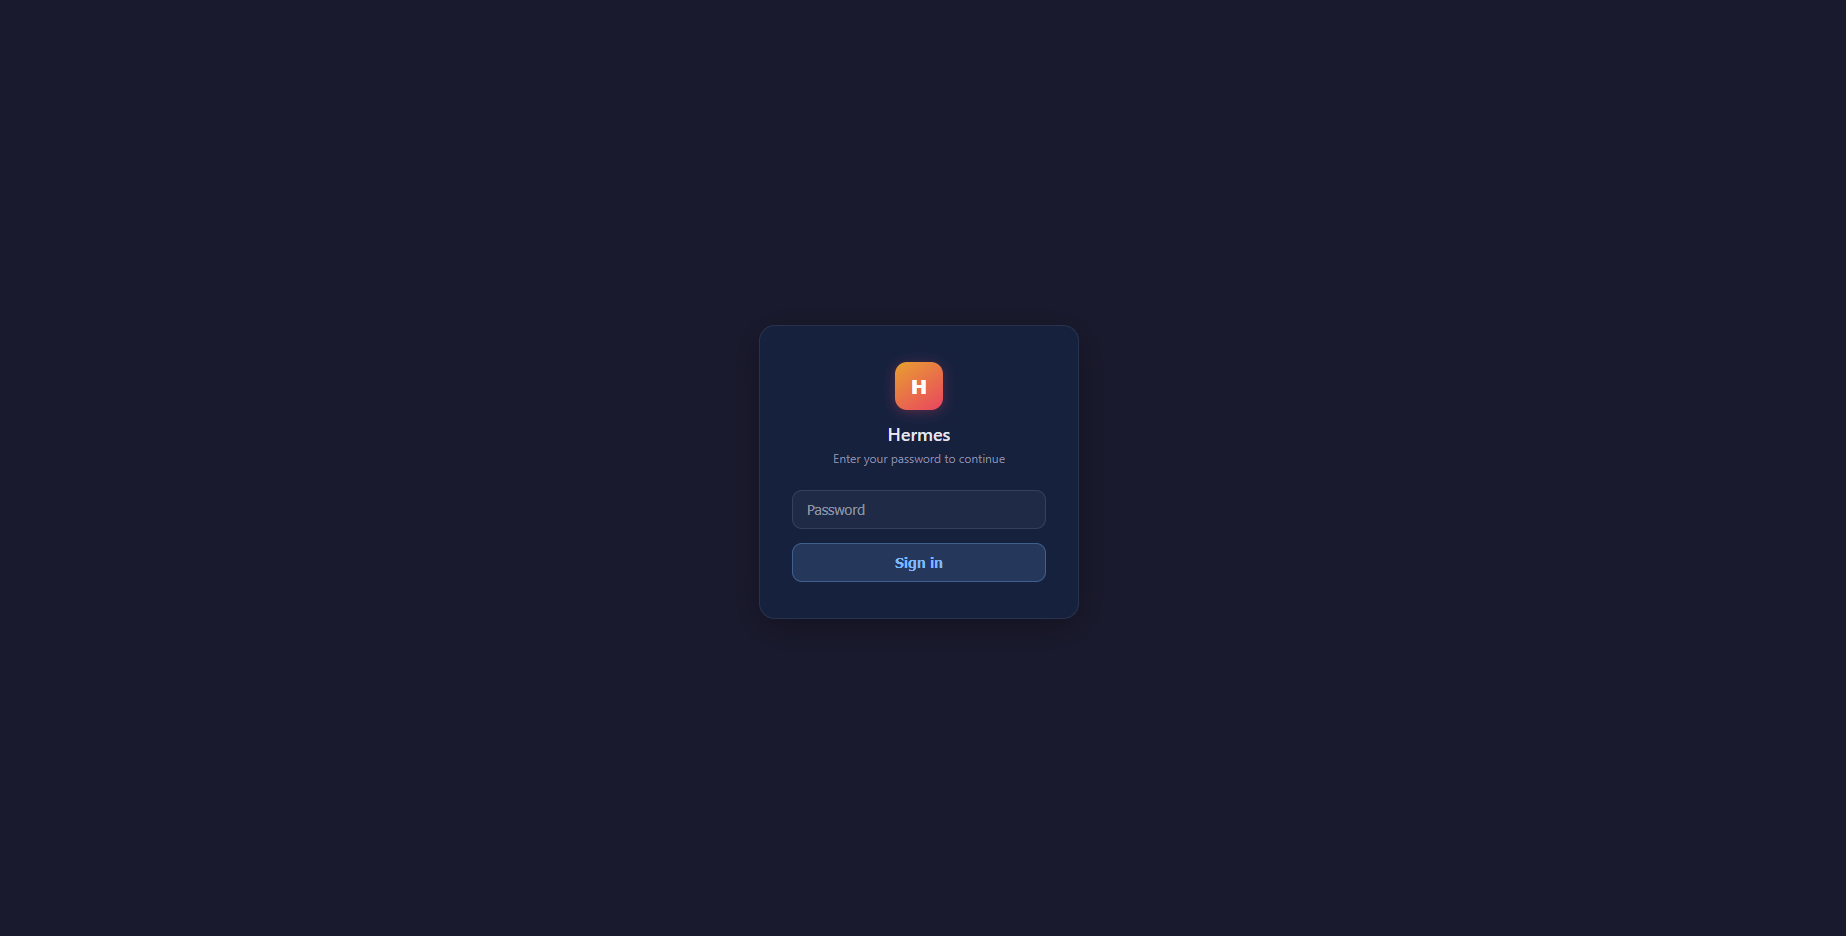
When accessing the WebUI for the first time, you will be prompted to
enter a password to continue. Use the password you configured in the
.env file during Step 5 to log in to the Hermes WebUI.
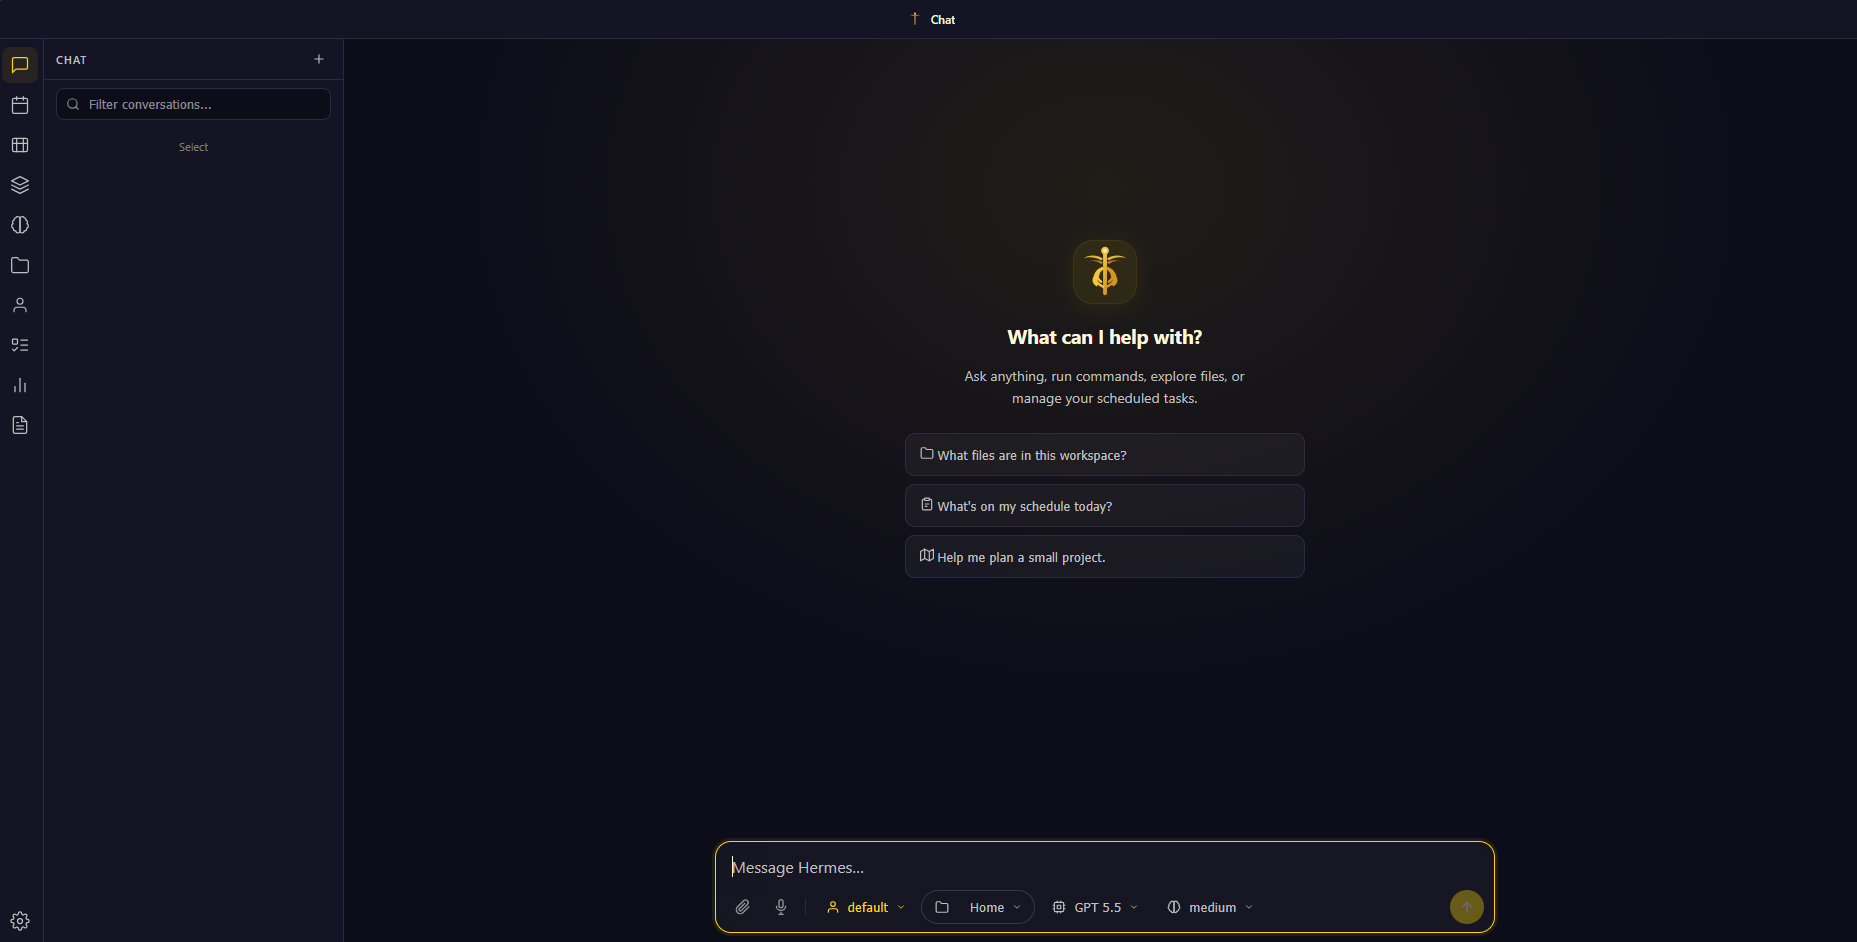
After entering the password, you will be able to access the Hermes WebUI
dashboard. From here, you can interact directly with Hermes Agent
through a modern browser-based interface.
Inside the Hermes WebUI, you can perform various tasks such as:
- Chat with AI models using a conversational interface
- Run autonomous AI agent workflows
- Execute terminal and shell commands
- Manage files and workspaces
- Generate, edit, and debug code
- Create and manage multiple chat sessions
- Connect to different AI providers and models
- Use coding-focused models such as GPT-5.5, Claude, Gemini, DeepSeek,
and others - Access persistent conversation history
- Manage scheduled tasks and automation workflows
- Interact with local or cloud-based AI models
- Upload and analyze files
- Use integrated development and productivity tools
- Configure agent behavior and execution settings
- Switch between different models and reasoning levels
- Use workspace-aware AI assistance for development projects
- Execute multi-step reasoning and automation tasks
- Work with Docker, Linux administration, and server management tasks
directly from the browser
The Hermes WebUI is designed to provide a modern self-hosted AI
assistant experience while giving you full control over your
infrastructure, models, and workflows.
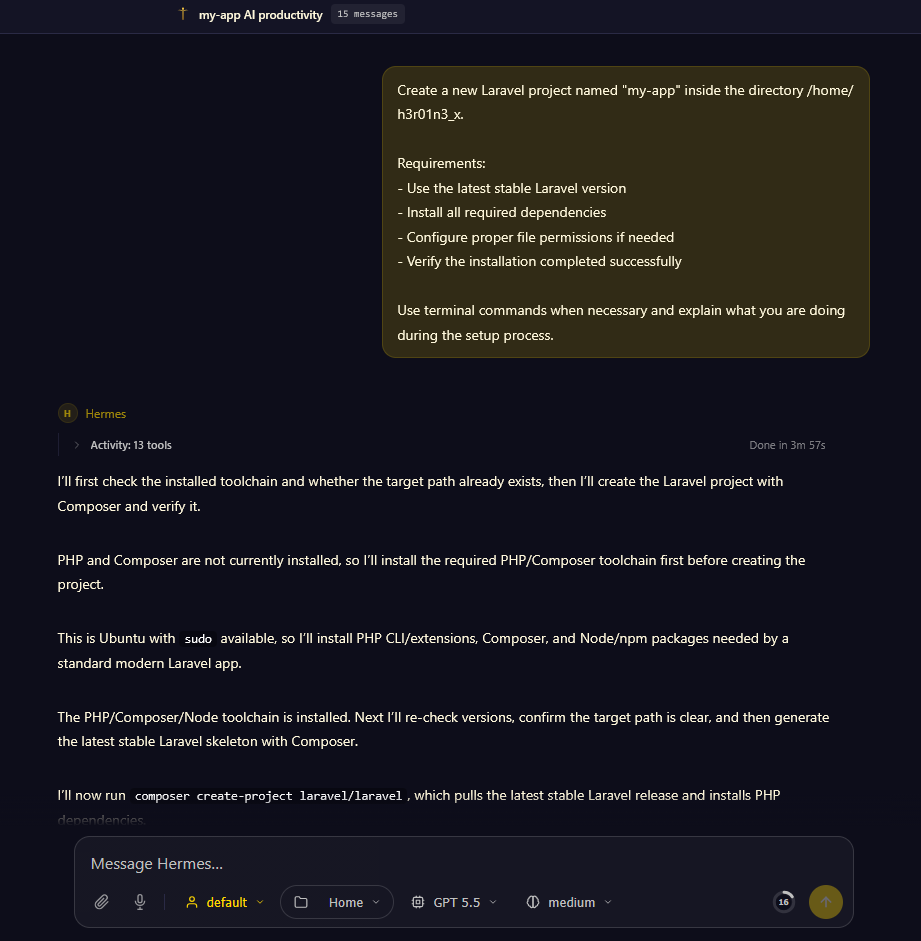
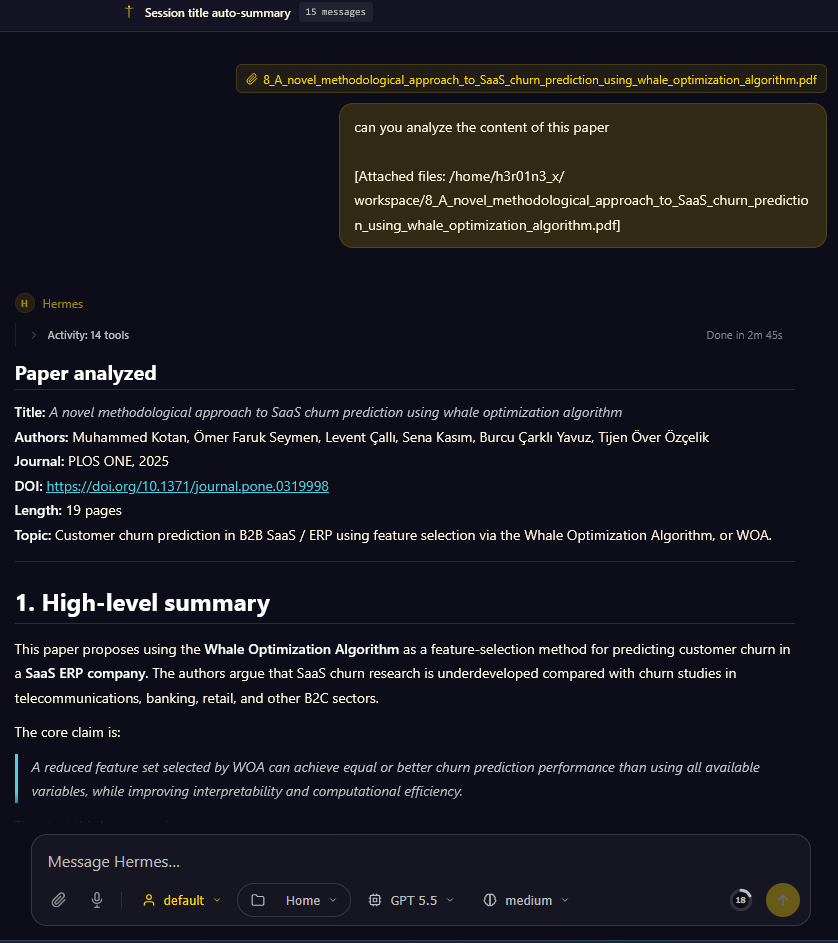
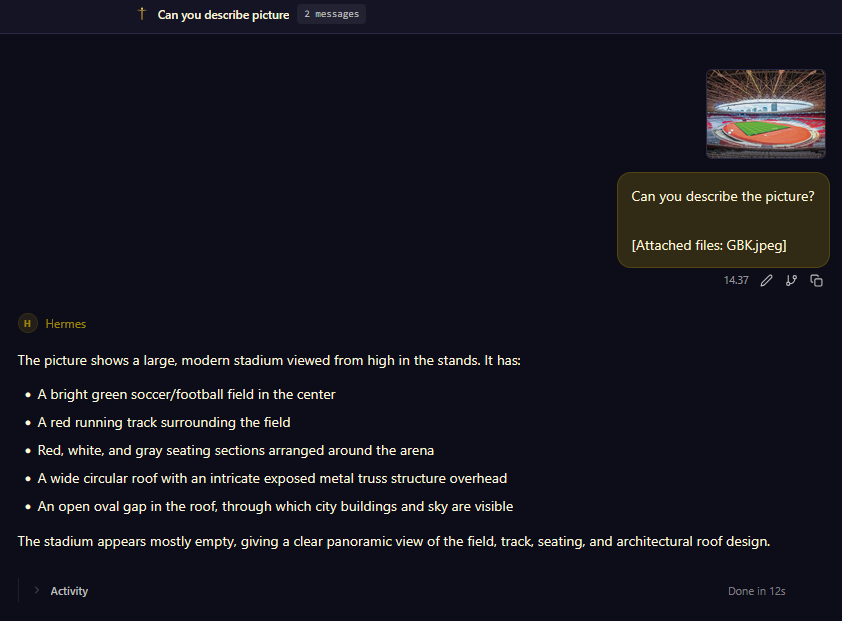
Here are some examples of using Hermes WebUI in real-world workflows,
such as building a Laravel application, analyzing the content of a
research paper, and describing an image using AI capabilities.
Building Laravel Application
Analyzing the content of a research paper
describing an image
Honest Assessment After Deployment
Hermes Agent together with Hermes WebUI provides a powerful self-hosted
AI environment suitable for developers, researchers, and automation
workflows.
What works well:
- Modern browser-based interface
- Easy AI provider integration
- Workspace and session management
- Terminal and coding capabilities
- Reverse proxy and HTTPS support
- Flexible deployment options
- Suitable for self-hosted environments
What you should know:
- Large AI models may increase API costs
- Some workflows consume high amounts of tokens
- Public deployments require proper security configuration
- Local AI models may require powerful hardware
- Agent permissions should be configured carefully
- Reverse proxy and SSL setup require basic Linux knowledge
For developers and homelab users, Hermes WebUI is a practical solution
for building a private and customizable AI assistant environment.
Troubleshooting
Issue Likely Cause Fix
Hermes Gateway not Gateway service failed Run hermes gateway
running to start status and restart the
gateway
Login page does not Wrong .env Verify
accept password configuration HERMES_WEBUI_PASSWORD
value
AI model cannot respond Invalid API key or Reconfigure the
provider configuration provider API key
WebUI not accessible Nginx configuration Check Nginx config and
through domain issue restart the service
Hermes cannot access Workspace path issue Verify mounted
local files directories and
workspace settings
Slow response from AI Large model or high Use a faster or smaller
latency provider model
Service fails after Systemd service not Run sudo systemctl
reboot enabled enable hermes-webui
Permission denied Incorrect file Verify User,
errors ownership or user WorkingDirectory, and
configuration file permissions
Frequently Asked Questions
How much server RAM is recommended?
Recommended minimum 4 GB RAM
Is GPU required?
No. GPU is not required when using cloud AI providers such as
OpenRouter, OpenAI, Anthropic, Gemini, or DeepSeek APIs. GPU is only
recommended for running local AI models.
Can I use local models?
Yes. Hermes Agent supports local model providers such as Ollama.
Does Hermes WebUI support mobile browsers?
Yes. The interface can be accessed from desktop and mobile web browsers.
Can I upload files to Hermes WebUI?
Yes. Hermes WebUI supports file uploads for AI analysis and workspace
management.
Can I expose Hermes WebUI directly to the internet?
Technically yes, but using HTTPS, reverse proxy protection, and
authentication is strongly recommended.