HY3D Step-by-Step Guide
HY3D Step-by-Step Guide for AI Hacker Garage
Welcome. This guide walks you through everything you need in the HY 3D Garage: run the skill → walk the full pipeline → build something real.
Step 1: Run the Skill 🛠️
First things first, get the HY3D Skill running on your machine via Lighthouse. This is your hands-on intro to what the API can do.
View full setup & operation guide → https://clawhub.ai/neck-cn/hy-3d-generation
Quick Start
| # | What | How |
|---|---|---|
| 1 | Lighthouse + OpenClaw running | Confirm both services are up |
| 2 | Tencent Cloud API credentials | Get SecretId / SecretKey from API Key Management |
| 3 | Install & run | openclaw skills install hy-3d-generation — one command, ready to call |
Your takeaway: Experience the HY3D generation API end-to-end locally — from input (text or image) to 3D model output. This is the foundation everything else builds on.
Step 2: Walk the Full Pipeline 🎬
Your goal: go from zero to a fully animated 3D character using Tencent HY 3D Studio. This is the complete asset pipeline — geometry generation → texturing → rigging → animation.
Enter the Studio → https://3d.hunyuanglobal.com/studio/creation/role/geo
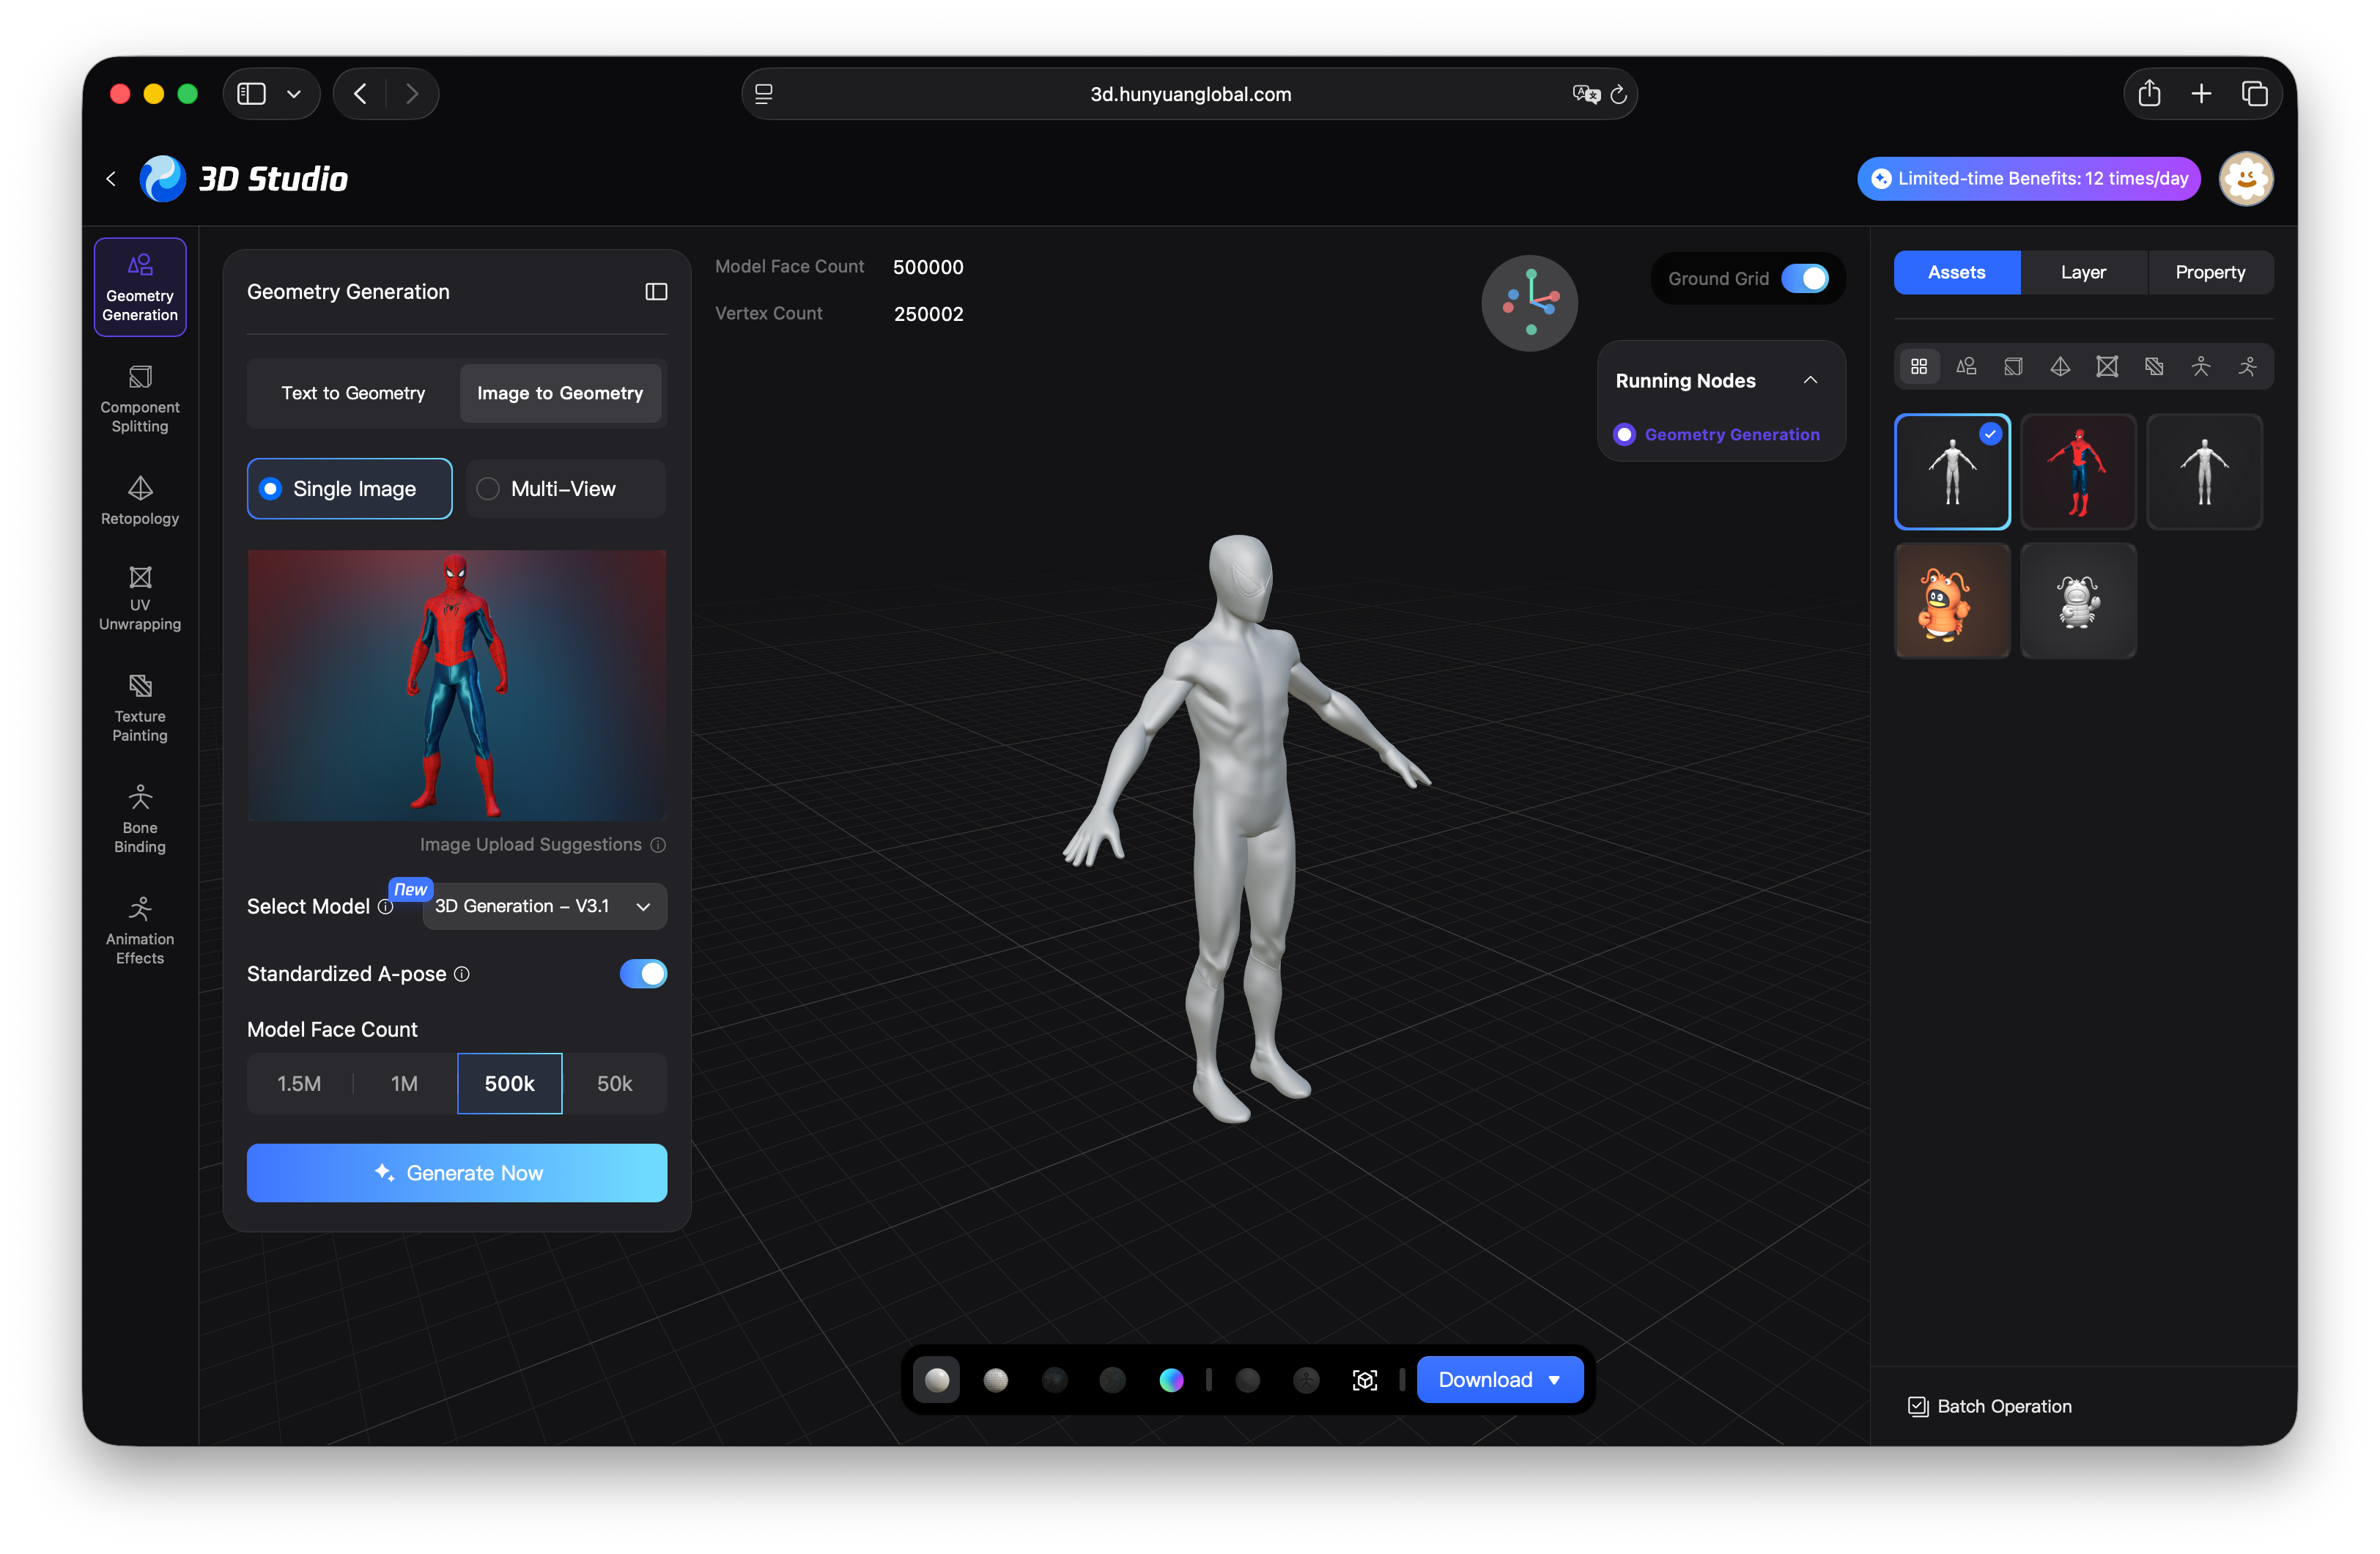
① Generate Geometry
Go to Geometry Generation. Pick your input:
| Input Mode | What to Do |
|---|---|
| Text to Geometry | Type a description of the character you want |
| Image to Geometry | Upload a reference photo |
Recommended settings:
| Parameter | Value | Why |
|---|---|---|
| Select Model | 3DGeneration-V3.1 | Latest model, best quality |
| Face count | 500k | Good detail-to-performance balance |
| Standardized A-pose | ✅ ON | Critical — enables auto bone binding & animation downstream |
Image tips for best results:
- Full-body front-facing shot
- Limbs unobstructed
- No bags / weapons / props
- Hair not covering shoulders
- Fitted clothing preferred over loose robes or complex costumes
Click generate → get your base 3D mesh.
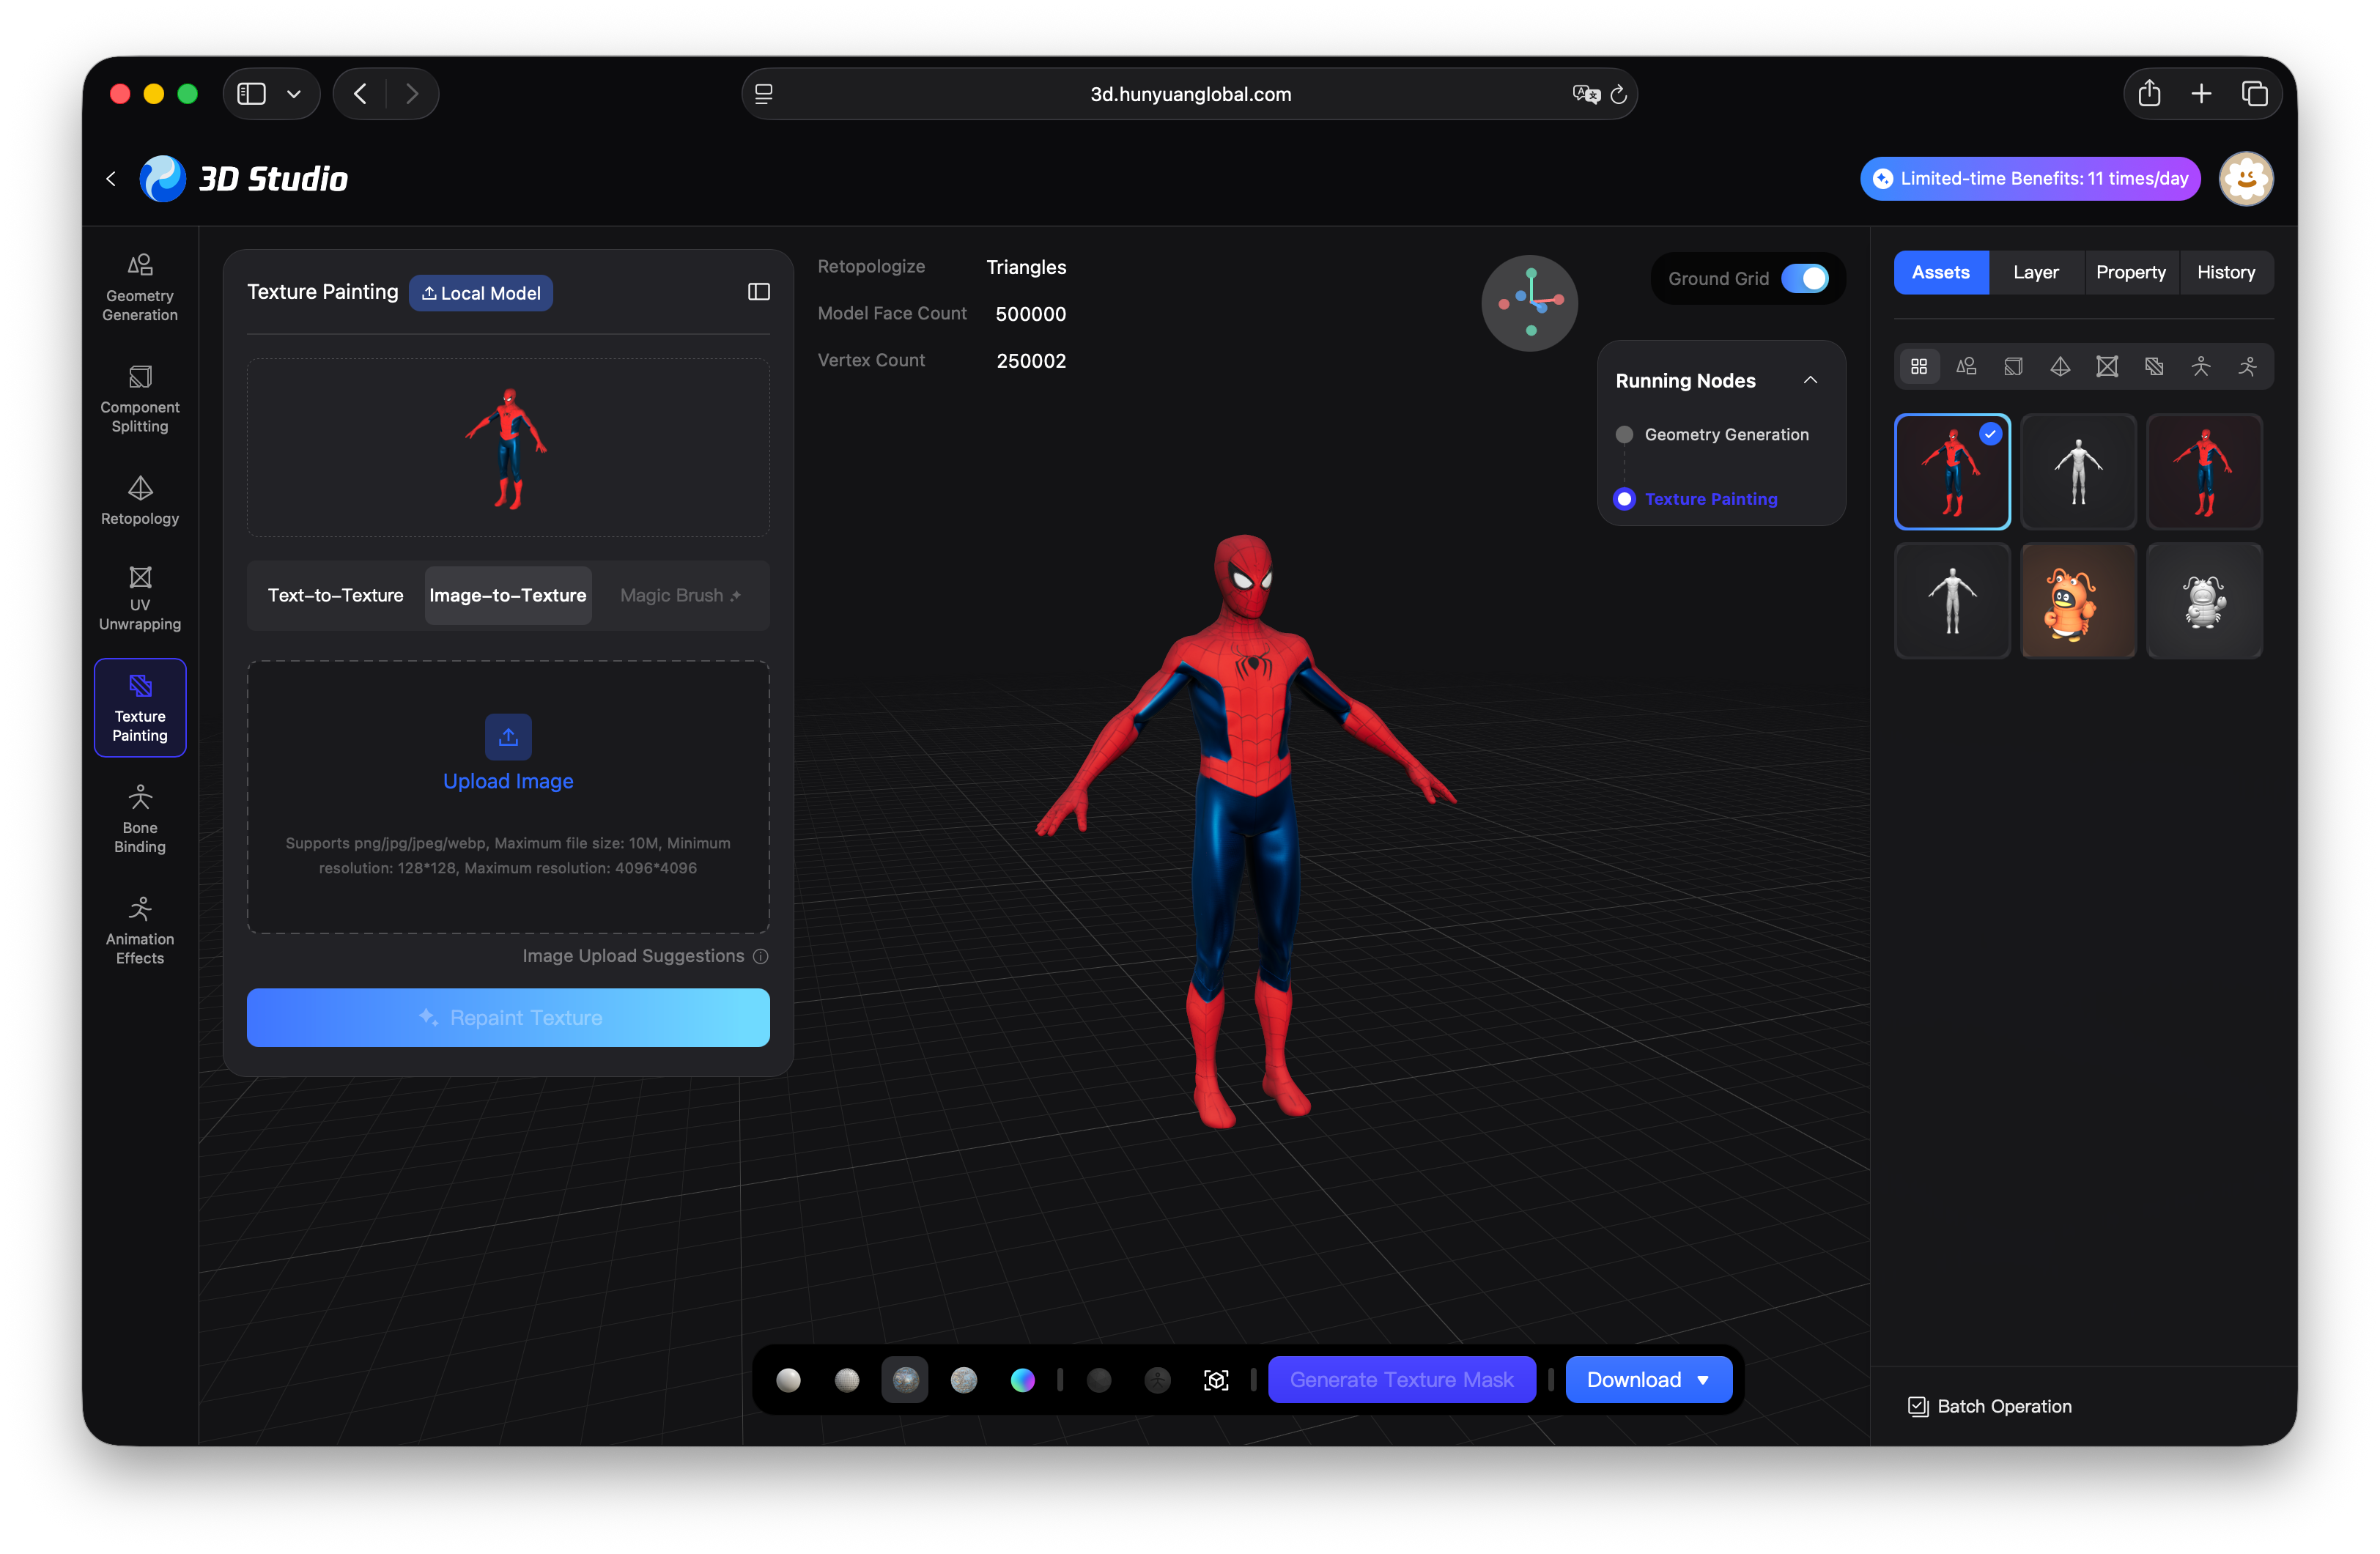
② Texture Painting
Switch to Texture Painting. Give your model its look:
- Text to Texture — describe material, color, style in words (e.g. "leather jacket, dark red, cyberpunk")
- Image to Texture — upload a reference image to match a specific visual style
Review surface details, colors, and overall feel before moving on.
③ Auto Rig (Bone Binding)
Enter Bone Binding. The system automatically predicts skeleton and skin weights for your character.
Checklist before proceeding:
- ✅ Bones match the body structure (limbs, torso, head)
- ✅ All body parts are properly skinned
- ✅ Model is animation-ready
If something looks off, regenerate or adjust — this step determines whether your character can actually move.
④ Apply Animation
Enter Animation Effects. Pick an action template and watch your character come alive.
⚠️ Requires A-pose or T-pose humanoid models (that's why we enabled Standardized A-pose in step ①).
Select your rigged model → apply motion template → preview the result.
✅ Pipeline Complete!
Show a staff member:
- ✅ Generated 3D model
- ✅ Textured result
- ✅ Bone binding result
- ✅ Animation preview
🎁 Bonus Round (if time allows)
Explore Component Splitting, Retopology, and UV Unwrapping in the Studio. Not required, but gives you the full picture of HY 3D's asset processing power.
Step 3: Build & Ship a 3D Agent 🔥
Turn what you just experienced into a real product prototype. This is the only tier eligible for judging and prizes — make it count.
Choose Your Track
| Gaming 🎮 | 3D Printing 🖨️ | E-commerce 🛍️ | Open Track 🚀 | |
|---|---|---|---|---|
| The problem | Game studios need high-quality 3D assets fast. Manual pipeline is slow and expensive. | Converting ideas into printable 3D files requires technical skill most creators don't have. | Product pages with static photos don't convert. Interactive 3D does — but it's hard to produce at scale. | You define the problem. Any industry where 3D generation, processing, animation, or export creates real value. |
| Build this | Text prompt → auto-generate character → auto-rig + animate → export game-ready asset | Text or image input → generate 3D model → structural check → output print-ready file | Upload product photos → generate 360° interactive 3D model → export for product page / marketing | Anything that uses HY 3D's generation, processing, animation, or export APIs to solve a real problem. |
| Example flow | "cyberpunk rogue, female, neon armor" → rigged + animated FBX ready for Unity/Unreal | Upload figurine sketch → watertight mesh → wall thickness check → STL export | Sneaker photos → rotatable 3D viewer embed + marketing renders from all angles | Your call. |
Your Dev Kit
Pick these up from on-site staff before you start coding: https://www.tencentcloud.com/document/product/1284/75540
| Resource | What It Gives You |
|---|---|
| API Key | Access to all HY 3D APIs |
| SDK + Docs | Integration guides, API reference, code samples |
| Workflow Templates | Ready-made pipeline patterns to fork |
| Free Credits | Cloud resource quota for the hackathon |
No Tencent Cloud account yet? Sign up here — takes 2 minutes.
Submit
When you're ready, submit one of the following:
| Option | What It Is | Best For |
|---|---|---|
| A) Working Demo | Functional prototype with live HY 3D integration | Showing the full user journey end-to-end |
| B) PRD + Wireframes | Product spec + visual mockups with clear API integration plan | Teams that went deep on product design and architecture |
Both valid. Pick the format that best represents what you built today. Solo or duo — both welcome.
🚀 Run → Experience → Build → Ship.
Let's see what you create.